Week 14 — Interface and Application Programming
Assignment
Individual: Write an application that interfaces a user with an input and/or output device that you made.
Here is my plan for the week.
Group Assignment
For the group assignment this week we tested three different interface tools and compared how each one communicates with a microcontroller. We used our custom XIAO ESP32-C3 board as the hardware for all three tests.
First we tested Processing which is a Java based creative coding environment. We uploaded a simple sketch to the ESP32 that sends data over USB Serial and wrote a Processing sketch on the computer to read it and display it live on screen. It was the fastest to get working out of the three — within about 10 minutes we had data showing up!
Then we tested p5.js which is basically Processing but it runs entirely in the browser with zero installation. It uses the Web Serial API in Chrome to talk to the ESP32 over USB. We kept the same ESP32 sketch and just wrote a new p5.js sketch in the online editor at editor.p5js.org. We did run into one issue where p5.js kept throwing an infinite loop error because of how we wrote the async read function but we fixed it by switching to a recursive promise pattern instead.
The last one was Node-RED which was the most involved setup but also the coolest for wireless work. Instead of USB it uses MQTT over WiFi so the ESP32 does not need to be plugged into the computer at all. We installed Node.js, Node-RED, a dashboard plugin, and a Mosquitto MQTT broker, configured the firewall, and built a drag and drop flow that showed live ESP32 data on a browser dashboard. Once everything was running it was really solid!
For more details check out our full Group Assignment Page.
What I Built
This week I built two things for my individual assignment. The first one is a gesture monitor where a flex sensor on a XIAO ESP32-C3 detects whether my hand is open or closed and streams that data live to a Python Tkinter app on my laptop over WiFi. The second one is a servo controller app where I can type in a degree value or drag a slider and a servo motor connected to the ESP32 moves to that exact angle almost instantly. I used raw TCP sockets over WiFi for both which turned out to be so much faster and less annoying than HTTP.
Project 1 — Gesture Monitor
The Idea
The whole idea behind this project connects directly to my final project Vision Voice which is a wearable glove that translates ASL hand gestures into text and speech. So this week I wanted to build a working prototype of the core idea, a flex sensor that detects whether the hand is open or closed and sends that gesture data to an app on my laptop in real time.
Components
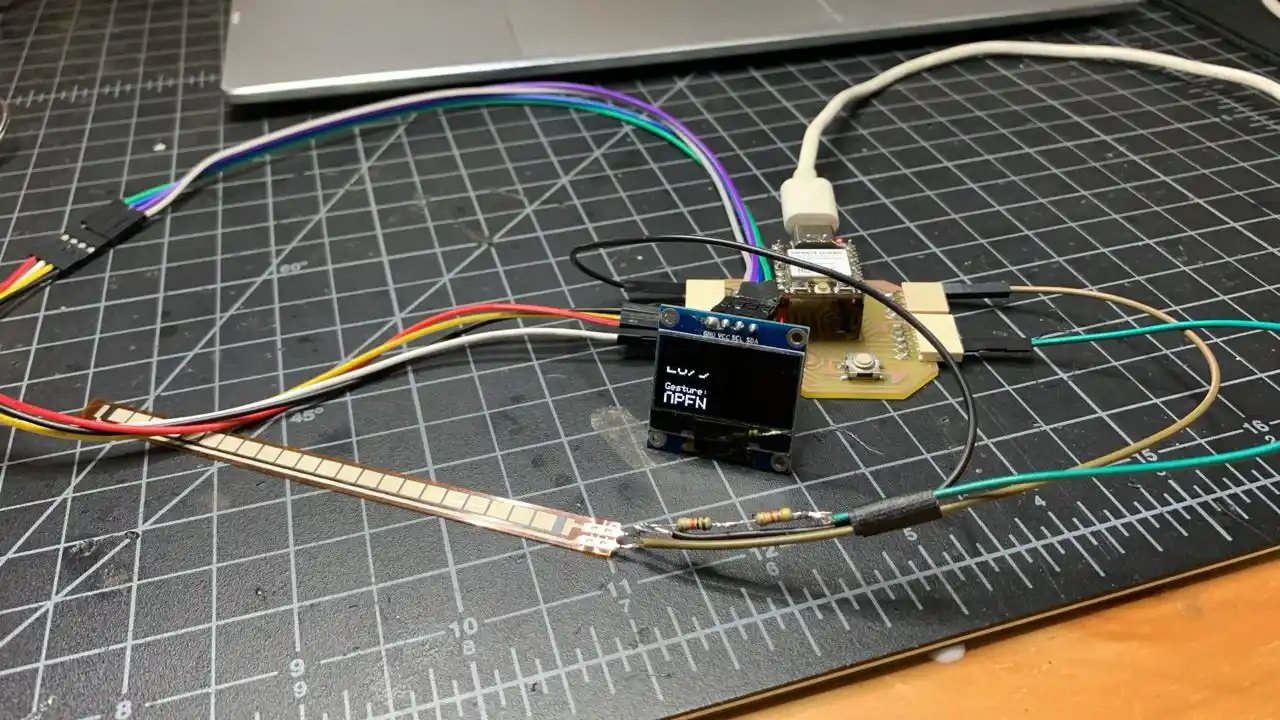
For this project I used a XIAO ESP32-C3, a flex sensor, a 14.67kΩ resistor, and an OLED SSD1306 display. The flex sensor and resistor form a voltage divider on pin A0 and the OLED connects over I2C on D4 and D5.
Step 1 — Testing the Flex Sensor First
Before doing anything else I wanted to make sure the flex sensor was giving me good consistent values with the 14.67kΩ resistor I had. So I started with the simplest possible sketch, just reading the analog value from A0 and printing it to Serial Monitor.
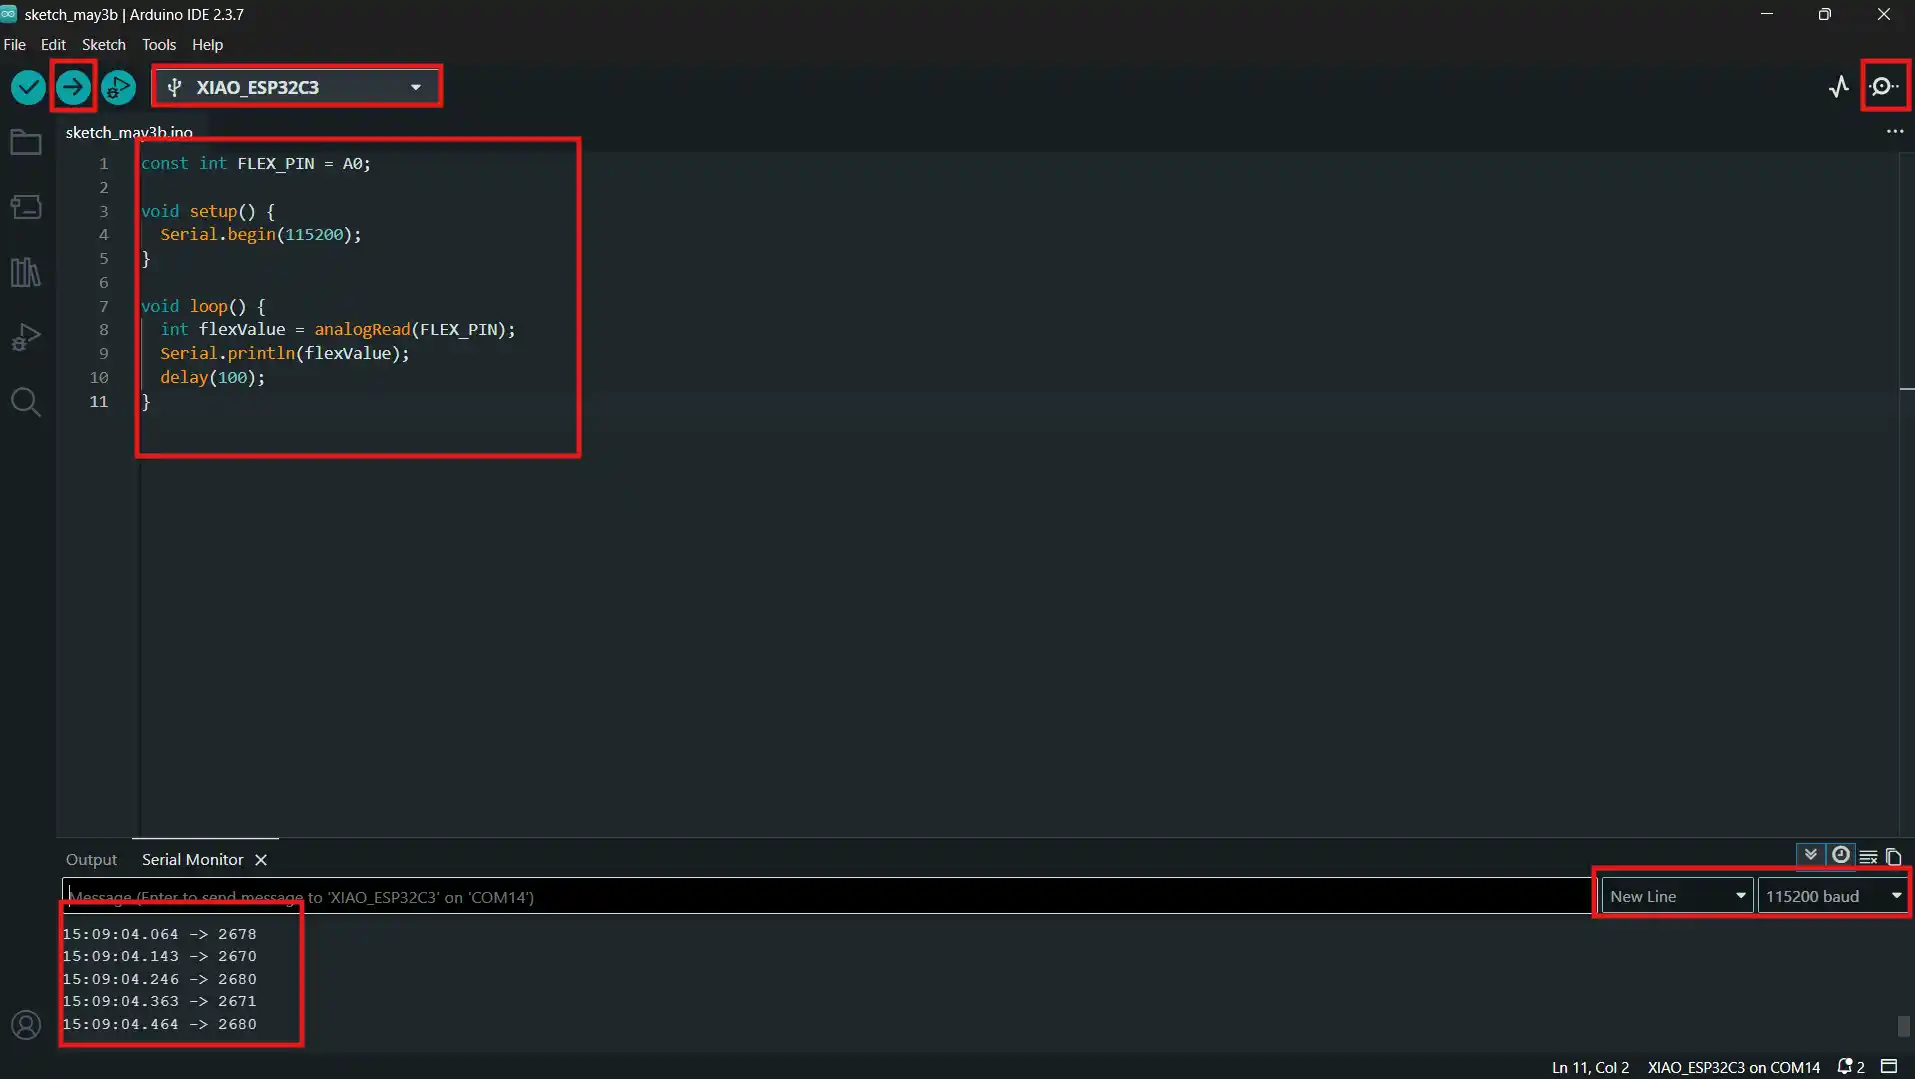
The flat resting value was sitting around 2684 to 2700 and when I fully bent the sensor it dropped all the way down to around 1130 to 1180. That is a difference of about 1500 points which is a huge range and honestly more than I expected! The 14.67kΩ resistor worked really well so I kept it. Based on those readings I settled on these thresholds for gesture detection:
The gap between 1500 and 2000 acts as a buffer zone so the gesture does not flicker between states when the sensor is in the middle position.
Step 2 — Installing the OLED Libraries
Once the flex sensor was working I added the OLED. The first thing I ran into was a compilation error because the Adafruit libraries were not installed yet. I went to Tools → Manage Libraries and searched for and installed both of these:
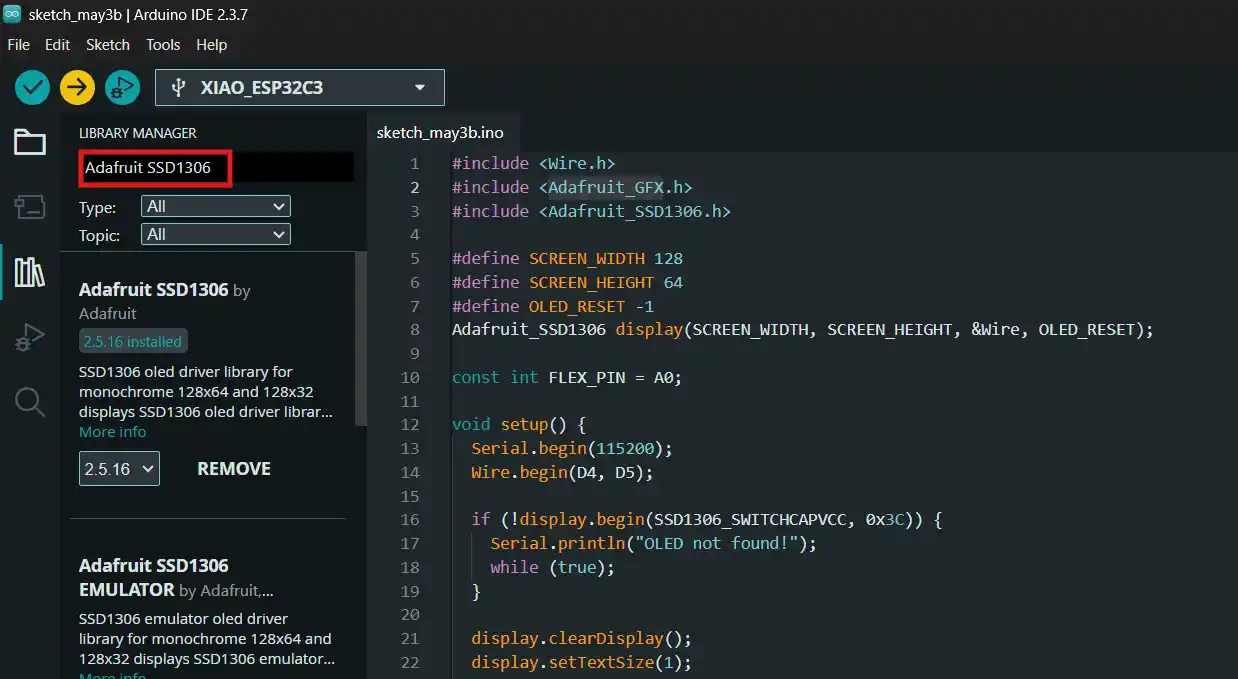
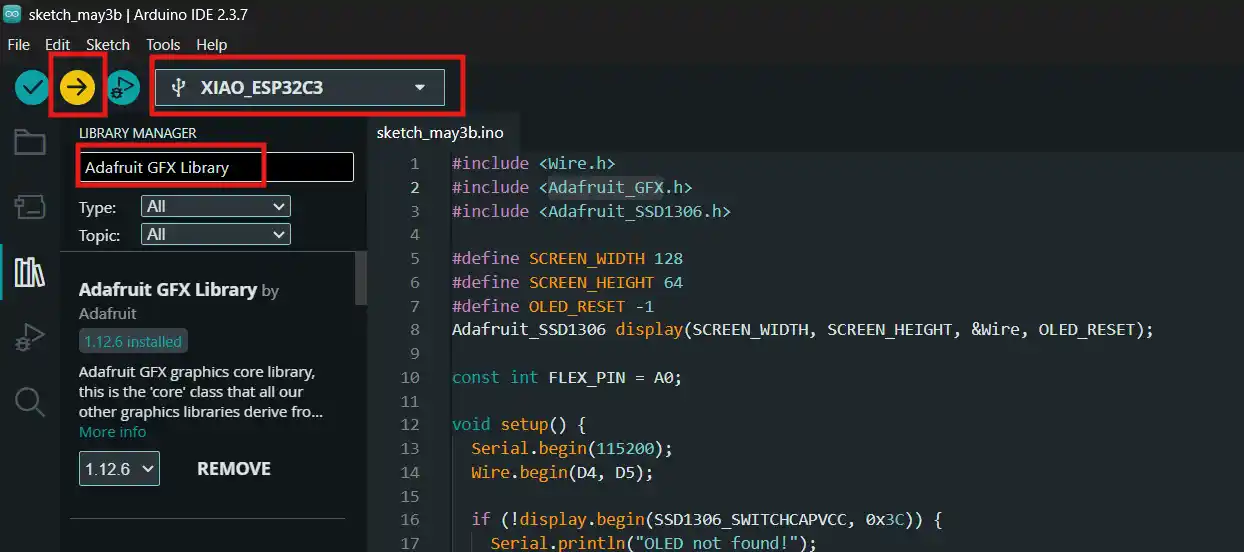
When it asked to install all dependencies I clicked Install All. After that the code compiled and uploaded without any issues.
Step 3 — Adding WiFi and the TCP Server
After getting the OLED working I added WiFi and a TCP server so my laptop could connect and receive the gesture data. I used raw TCP sockets instead of HTTP because honestly HTTP was causing so many timeouts and delays during testing and switching to raw TCP just fixed everything instantly. The ESP32 connects to the DGI network, starts a server on port 8080, and once a client connects it just keeps pushing data every 100ms in the format gesture,flexValue.
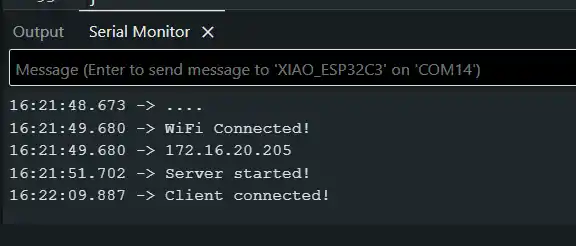
After uploading I opened Serial Monitor and saw the IP address come up as 172.16.20.205.
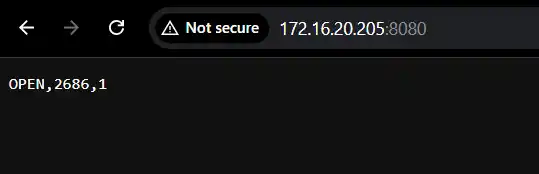
I also did a quick test by opening the browser and going to 172.16.20.205:8080 and it returned OPEN,2686,1 which confirmed everything was working on the ESP32 side before I even touched the Python app!
Step 4 — Building the Python Tkinter App
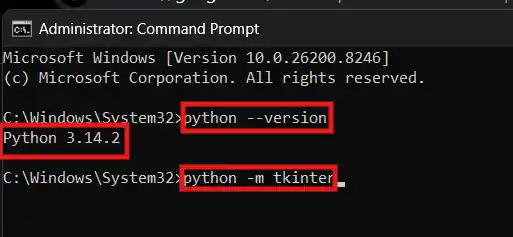
Before I started building the app I checked if my laptop had Python installed by running python --version in the terminal and it showed Python 3.14.2 was already there.
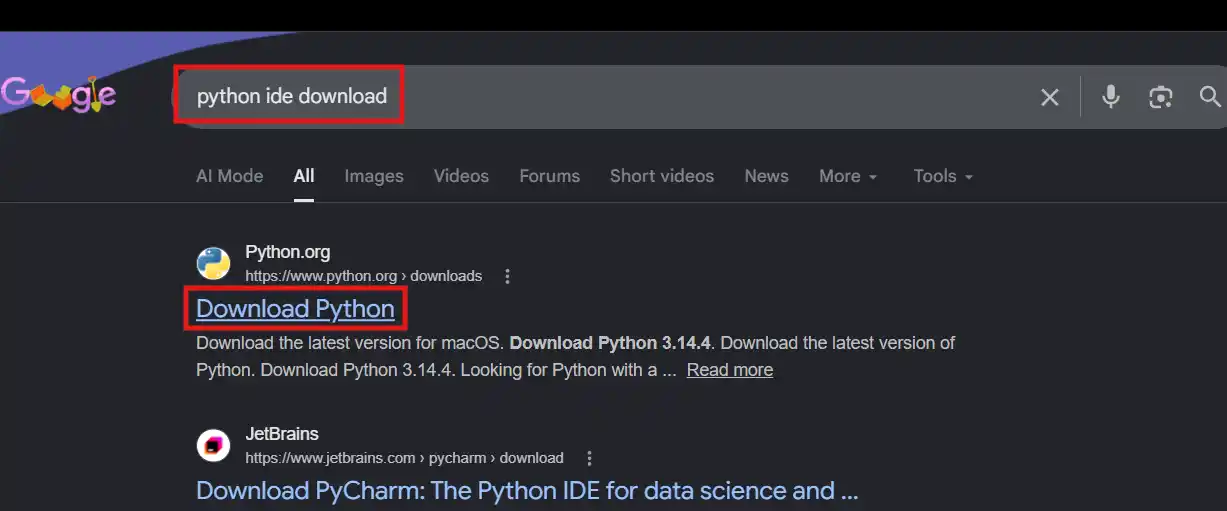
If Python is not installed on your machine you can download it from the official website here: Link
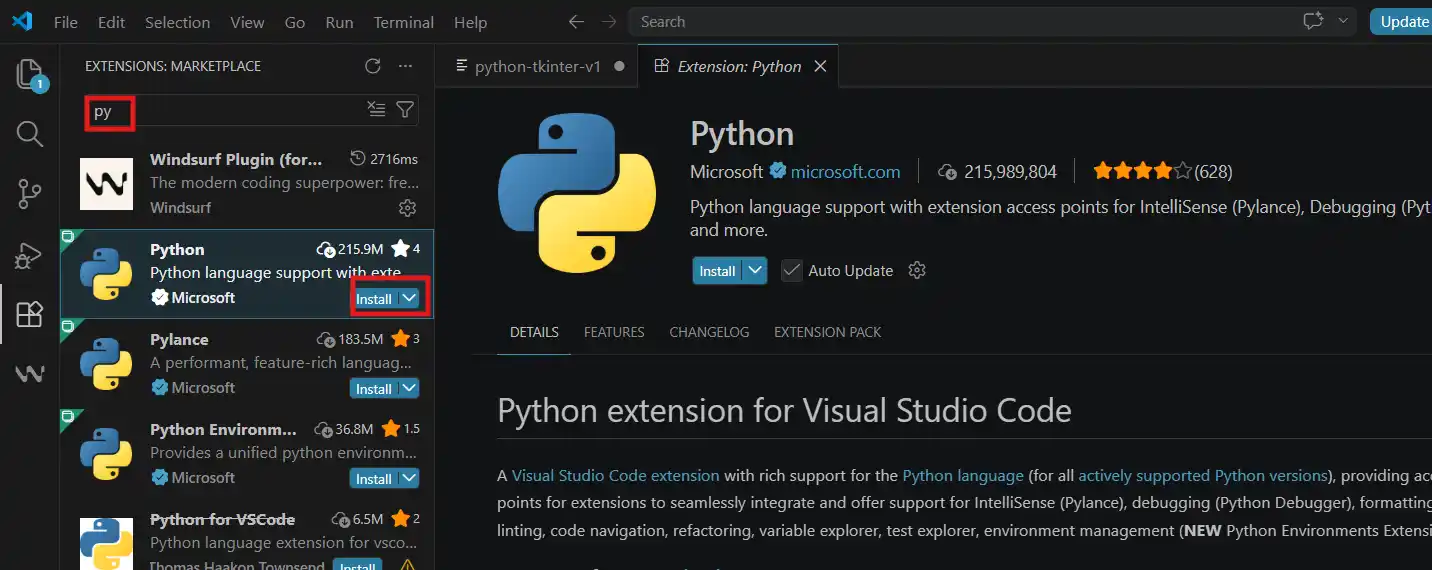
Then I opened VS Code and installed the Python extension from Microsoft so I could run the script directly from the editor.
For the app I used Python with Tkinter for the UI and the built-in socket library for the TCP connection. I created the file gesture_app.py on my Desktop. The app just keeps listening for data from the ESP32 and updates the labels on screen whenever something new comes in. I used threading so the whole thing stays responsive and does not freeze up while waiting for data.
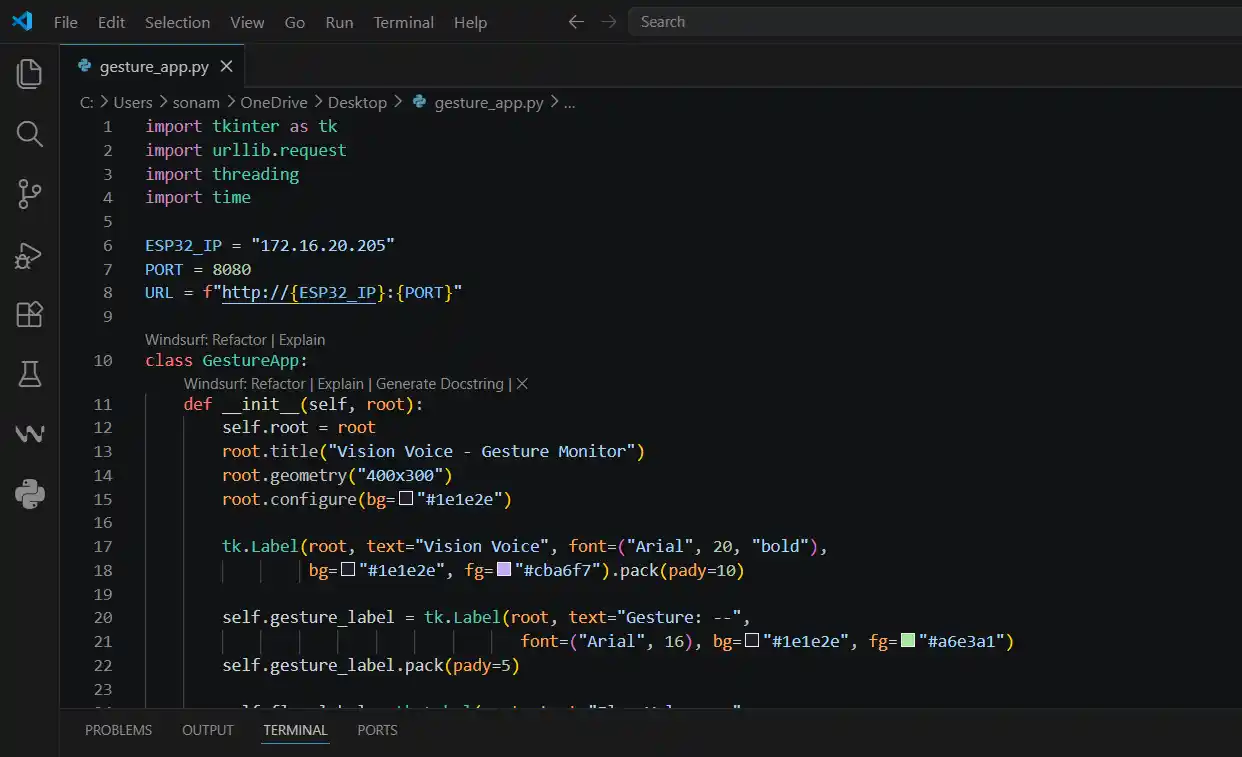
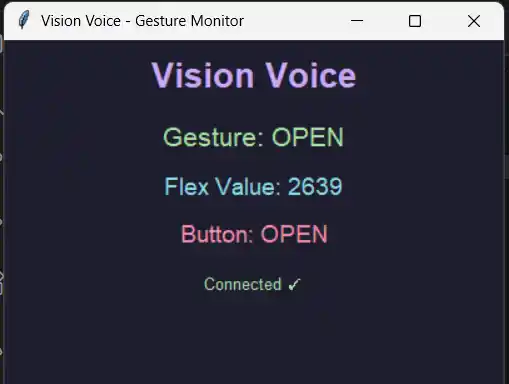
Here is the app running and showing live data from the flex sensor!
How the Data Communication Works
To make sure I fully understood how the hardware talks to the software, here is a breakdown of the exact code responsible for the data stream.
On the Xiao ESP32 C3 (Hardware) Side, once a connection is active, the ESP32 bundles the gesture state, the flex sensor value, and the button state into a single comma-separated string, ending it with a newline character:
if (client && client.connected()) {
  client.println(gesture + "," + String(flexValue) + "," + String(btnState));
}
data = sock.recv(128).decode("utf-8", errors="ignore")
# ... buffering logic ...
parts = line.split(",")
if len(parts) == 3:
    gesture, flex, btn = parts
My Understanding: Instead of standard HTTP web protocols which require heavy packet headers and overhead, raw TCP sockets let the hardware and interface open a direct pipeline. The ESP32 continuously acts as a data fountain, shooting a clean string of text every 100 milliseconds. The Python application captures this raw data packet, parses out the commas to separate the variables, and renders them to the UI seamlessly without lag.
Demo
The Code
The full Arduino and Python code for the gesture monitor is in the separate code file linked at the bottom of this page.
Project 2 — Servo Controller
The Idea
After finishing the gesture monitor I wanted to push things a little further and build something where the interface controls physical hardware in real time. So I made a servo controller where I can type a degree value into a Python app or drag a slider and a servo motor connected to the ESP32 moves to that exact angle almost instantly with basically zero delay.
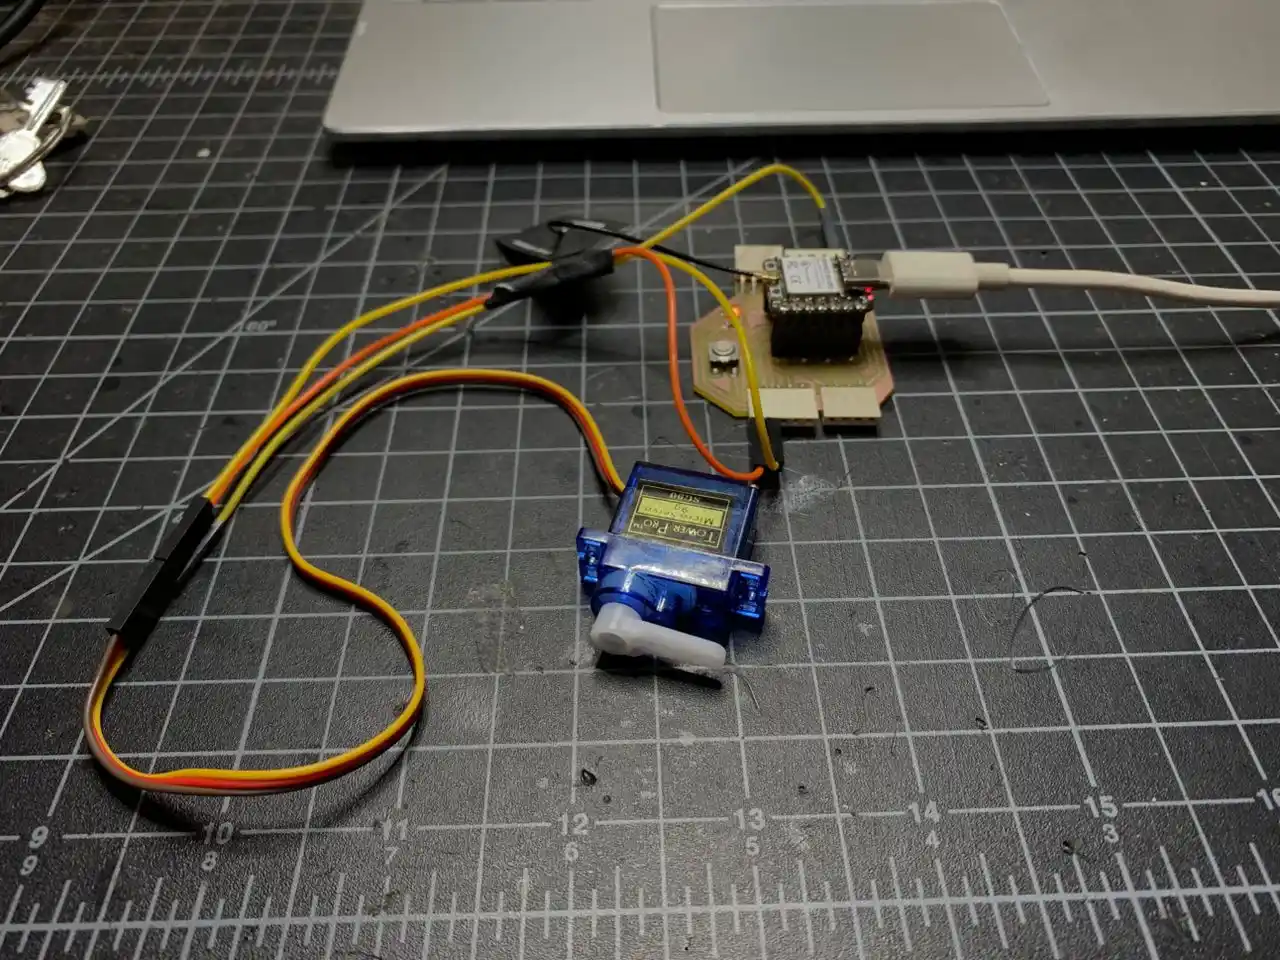
Components
For this one I used a XIAO ESP32-C3 and a Tower Pro SG90 micro servo connected to pin D0. The communication is the same raw TCP socket approach on port 8888.
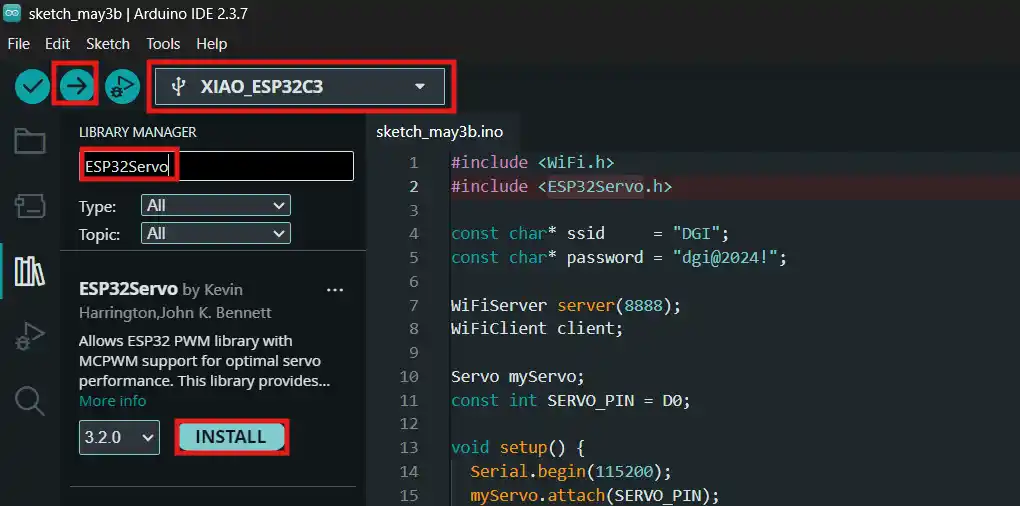
Installing the ESP32Servo Library
Since the standard Servo library does not work well with the ESP32 I had to install the ESP32Servo library. I went to Tools → Manage Libraries and searched for ESP32Servo and installed it.
How It Works
The ESP32 connects to WiFi and starts listening on port 8888. When the Python app sends a number like 90 the ESP32 gets it, checks that it is somewhere between 0 and 180, and just moves the servo there. On the Python side you can either type the degree and hit Enter or just drag the slider and the servo follows it in real time which is really satisfying to watch!
How the Control Communication Works
For this setup, the communication flows in the opposite direction from the previous project—the software interface drives and instructs the physical hardware.
On the Python (Interface) Side
When a slider movement or text entry fires an event, the program extracts the value, formats it as a string with an explicit newline termination flag (\n), encodes it into transmission bytes, and sends it down the socket pipeline:
On the Arduino (Hardware) Side
The microcontroller listens intently on port 8888. The second it reads incoming bytes from the client buffer, it processes the text stream precisely until it reaches that newline marker, sanitizes the data, evaluates it, and commands the servo hardware:
if (client && client.connected() && client.available()) {
  String line = client.readStringUntil('\n');
  line.trim();
  int degree = line.toInt();
  if (degree >= 0 && degree <= 180) {
    myServo.write(degree);
  }
}
Demo
The Code
The full Arduino and Python code for the servo controller is in the separate code file linked at the bottom of this page.
What I Learned
This week made a lot of things click for me. I started off trying to use HTTP and it kept timing out and dropping the connection which was really frustrating. Once I switched to raw TCP it just worked and I finally understood why protocol choice actually matters in practice. Threading in Python was also new for me and honestly I was scared of it at first but once I got it working and saw the UI staying smooth while data kept coming in it made a lot of sense. The servo controller was my favorite part of the week because seeing the motor physically respond to something I typed on my laptop felt like magic the first time it worked! Both projects are also directly useful for Vision Voice so this week did not feel like just a class assignment at all. ^-^