Interface and Application Programming Week
For this week’s group assignment, we sat down and tested as many interface tools as we could. The goal was to compare different tools we could use to build interfaces that communicate with a microcontroller and understand what each one is good for.
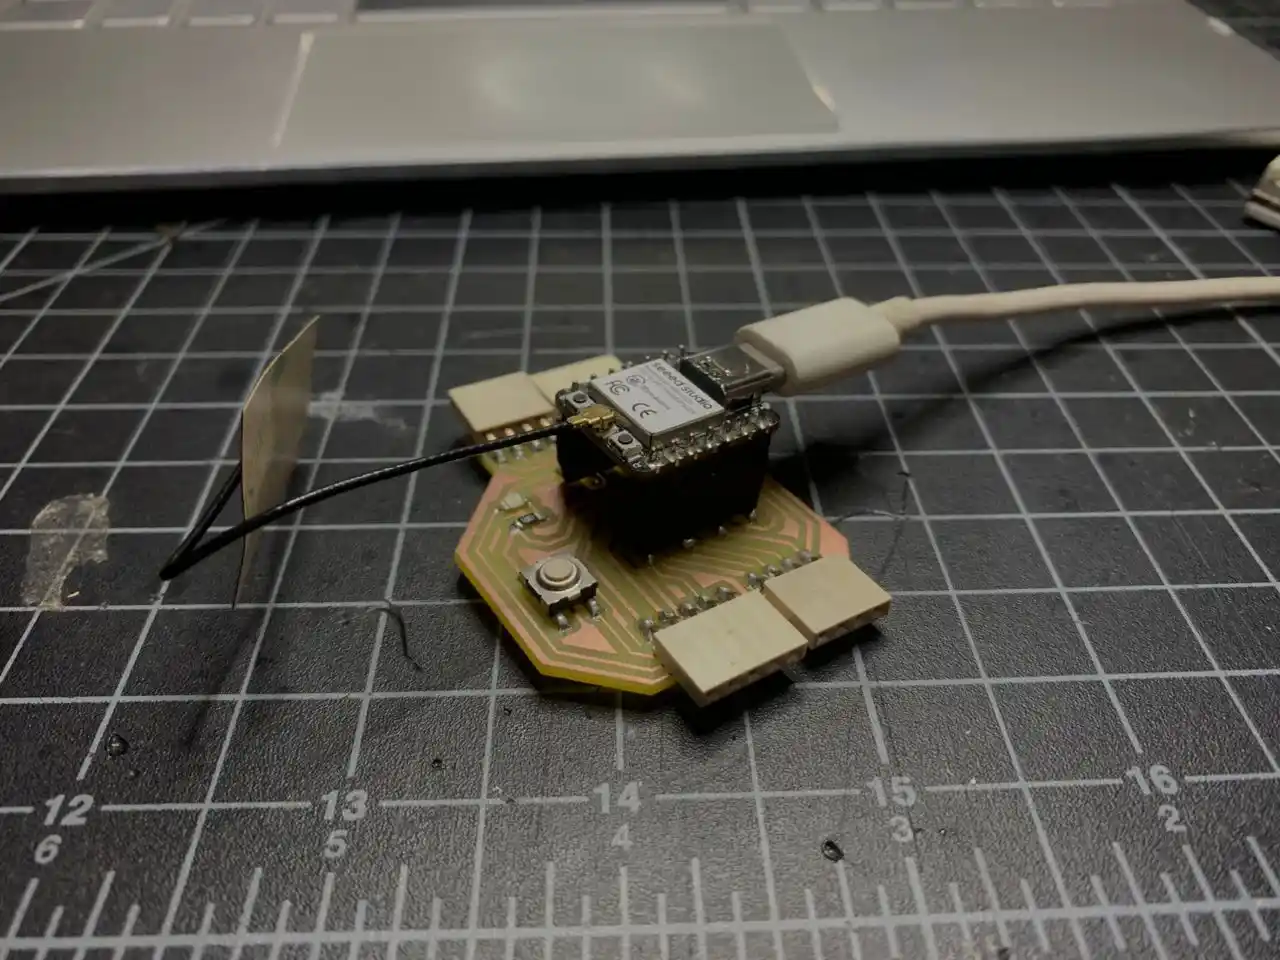
We used a custom XIAO ESP32-C3 development board made in earlier weeks as the hardware for testing. For each tool, the idea was the same — get the ESP32 to send data and display it somewhere on the computer. What changes each time is how the data travels and where it ends up. That’s the whole comparison!
[ESP32-C3 Hardware] ←→ [Communication Protocol] ←→ [Interface on screen]
We tested three tools: Processing, p5.js, and Node-RED
Tool 1 — Processing
What is Processing?
Processing is a Java-based creative coding environment that has been around since 2001. It is one of the most popular tools in the maker and electronics world for building visual interfaces that talk to hardware over USB Serial. When your microcontroller sends data through the USB cable, Processing reads it through a COM port and you can display it visually however you want.
The communication flow looks like this:
ESP32-C3 → USB cable → COM port → Processing Serial library → screen
This is called UART Serial communication — the oldest and simplest way for a microcontroller to talk to a computer.
Setup
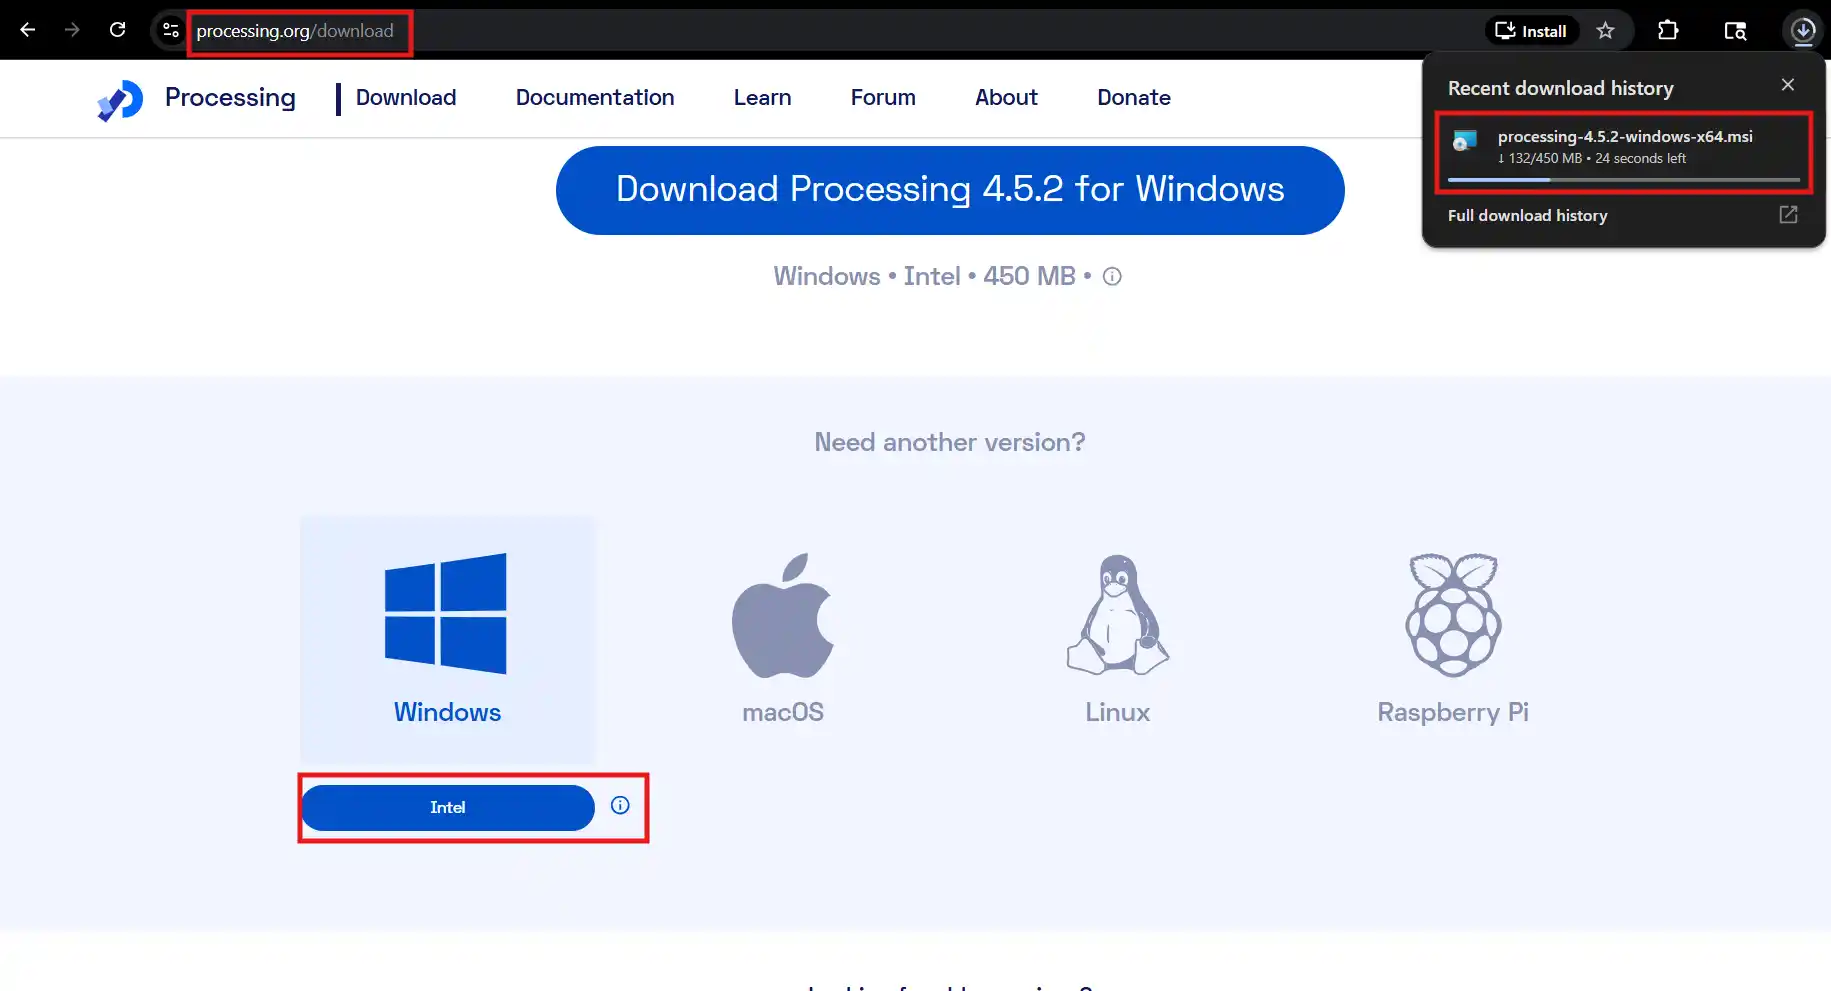
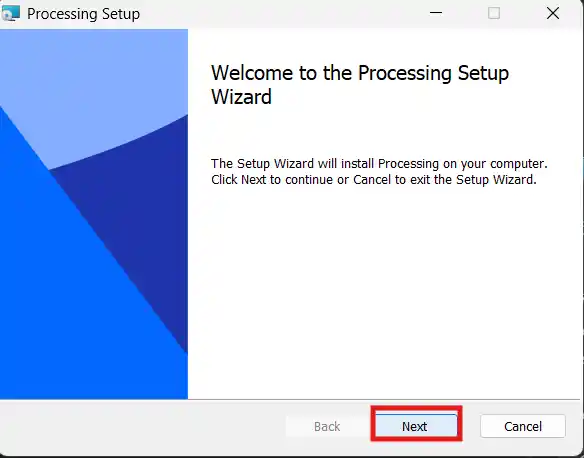
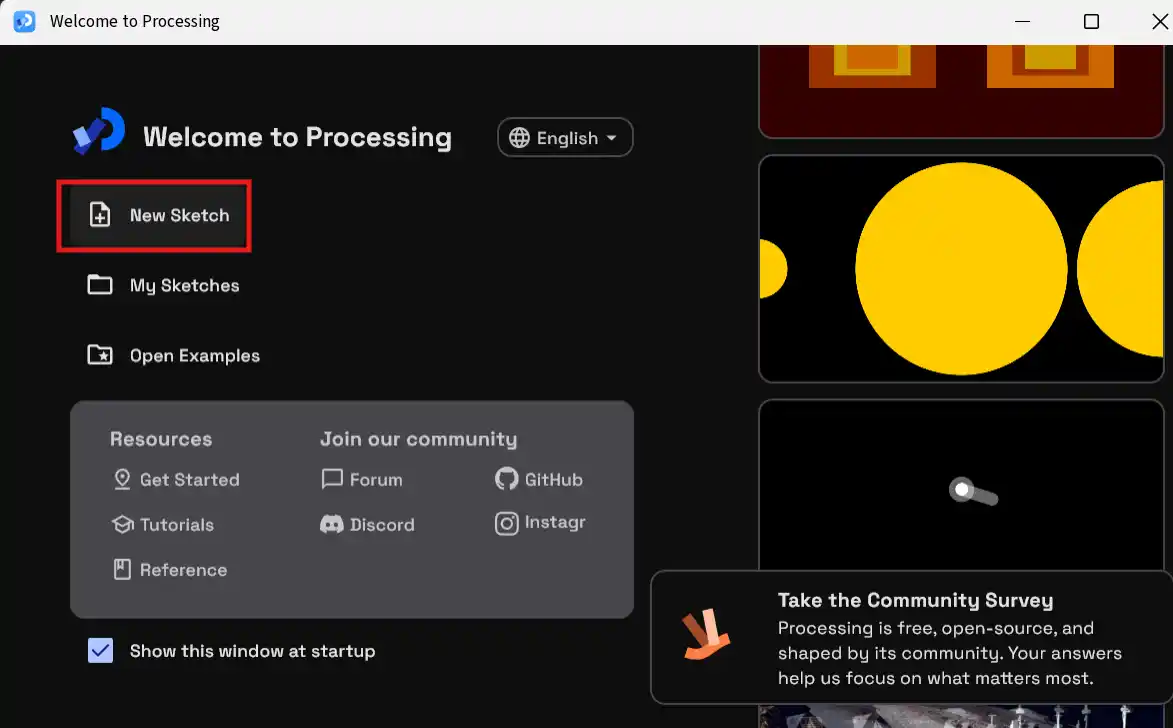
We downloaded Processing from processing.org — it is a zip file for Windows so no installer needed, just extract and run processing.exe.
ESP32 Sketch
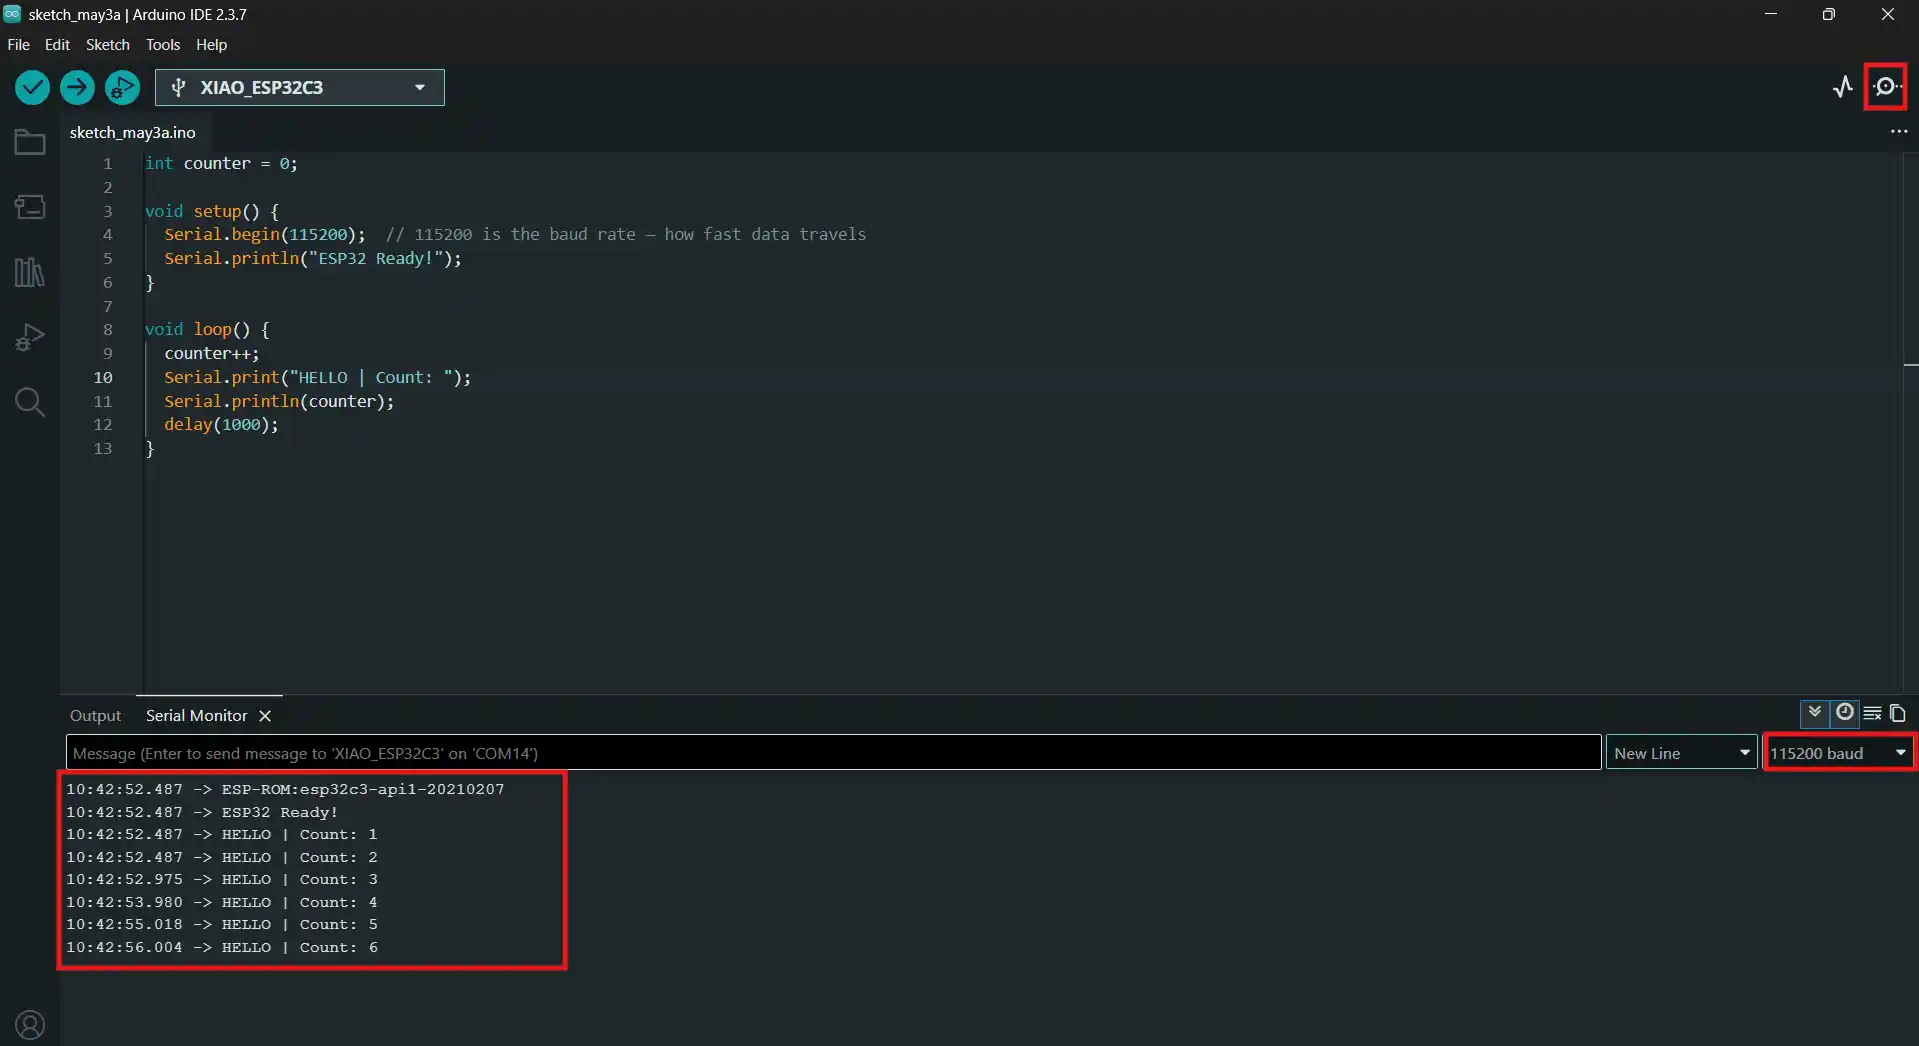
First we uploaded a simple sketch to the ESP32-C3 that sends data over Serial. This is the sketch we used:
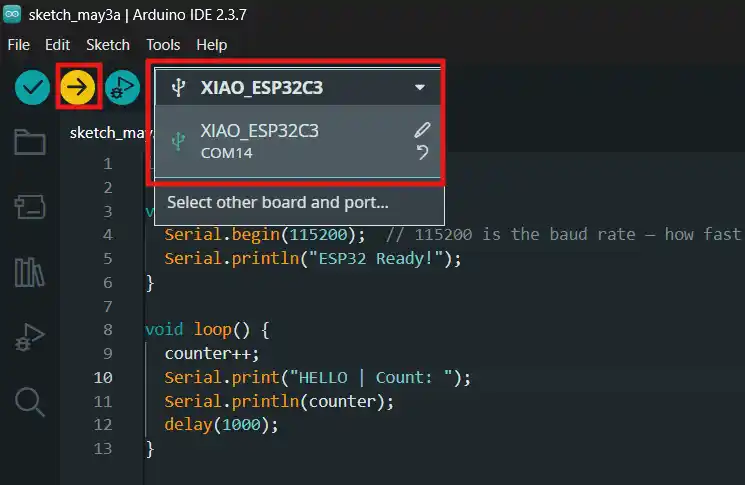
We opened Serial Monitor at 115200 baud to confirm the data was printing correctly, then closed it before running Processing — Processing needs the COM port free!
Processing Sketch
We opened a new sketch in Processing and wrote the interface code to read the incoming Serial data and display it on screen.
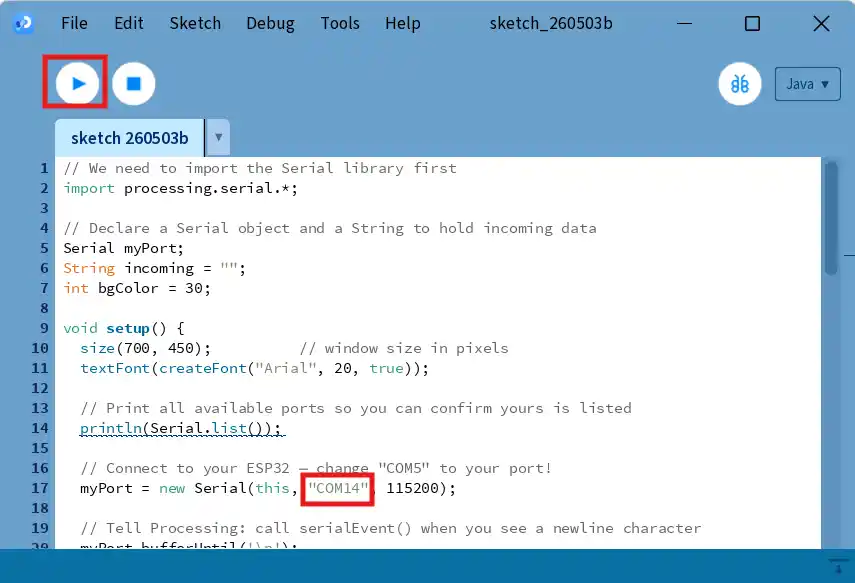
Once we hit the Play button, the window popped up and started showing the live data from the ESP32 updating every second.

What we thought
Processing was genuinely easy to get working — within about 10 minutes of opening it we had data showing on screen. The Serial communication just worked once we had the right COM port. The visual output is very customizable too. The only annoying part was figuring out the correct COM port number, and the error messages are a bit confusing sometimes since it’s Java under the hood.
Tool 2 — p5.js
What is p5.js?
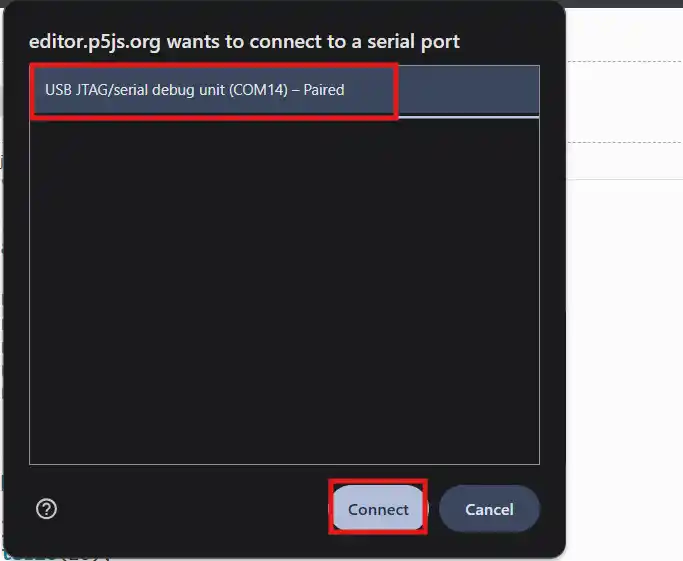
p5.js is basically Processing reimagined for the browser, written in JavaScript. It was created in 2013 and runs entirely in Chrome with zero installation needed — you just open the web editor and start coding. Instead of a COM port, it uses the Web Serial API, a modern browser feature that lets JavaScript talk to USB devices directly with your permission. This is why you have to click a button to connect every time — the browser forces you to explicitly approve hardware access.
The communication flow looks like this:
ESP32-C3 → USB → COM port → Chrome Web Serial API → JavaScript → canvas on screen
Setup
No installation needed at all! We opened editor.p5js.org in Chrome and created a free account to save the sketch. It only works in Chrome or Edge — Firefox does not support Web Serial yet.
Running the sketch
We kept the same ESP32 sketch running from Tool 1 since the hardware side does not change. We pasted the p5.js sketch into the editor, hit Play, and then clicked the Connect button which triggers the browser permission popup to select the ESP32 port.
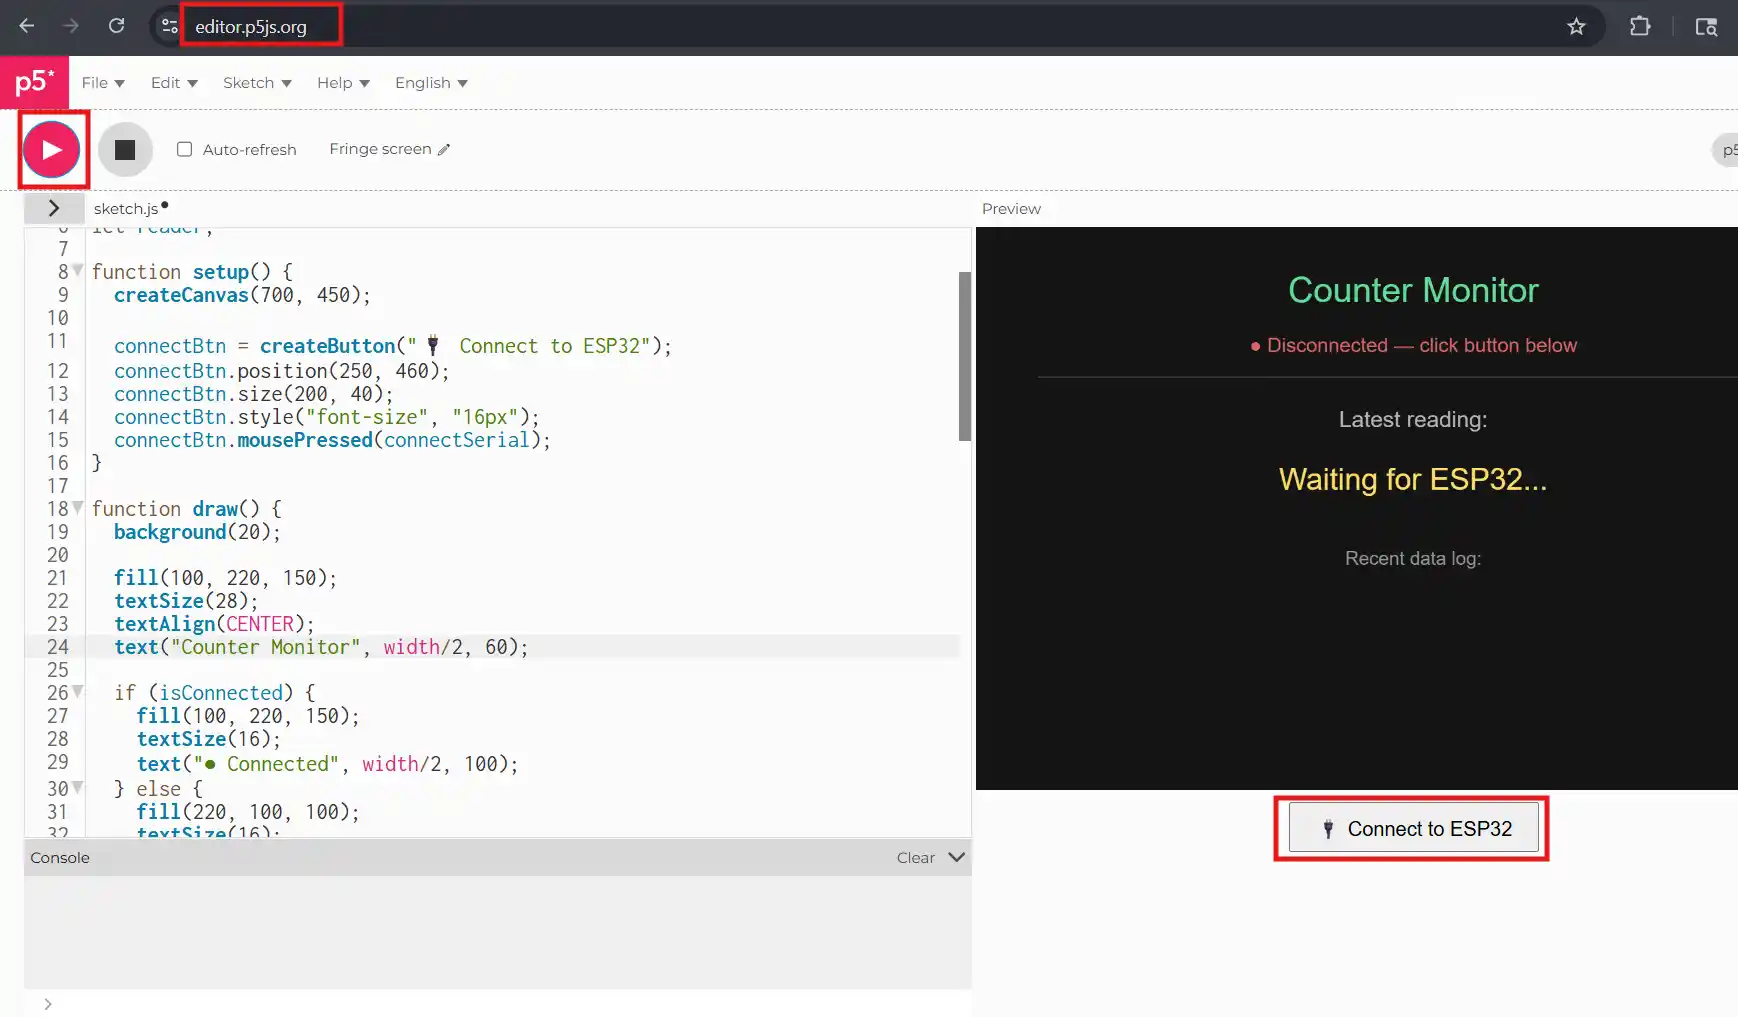
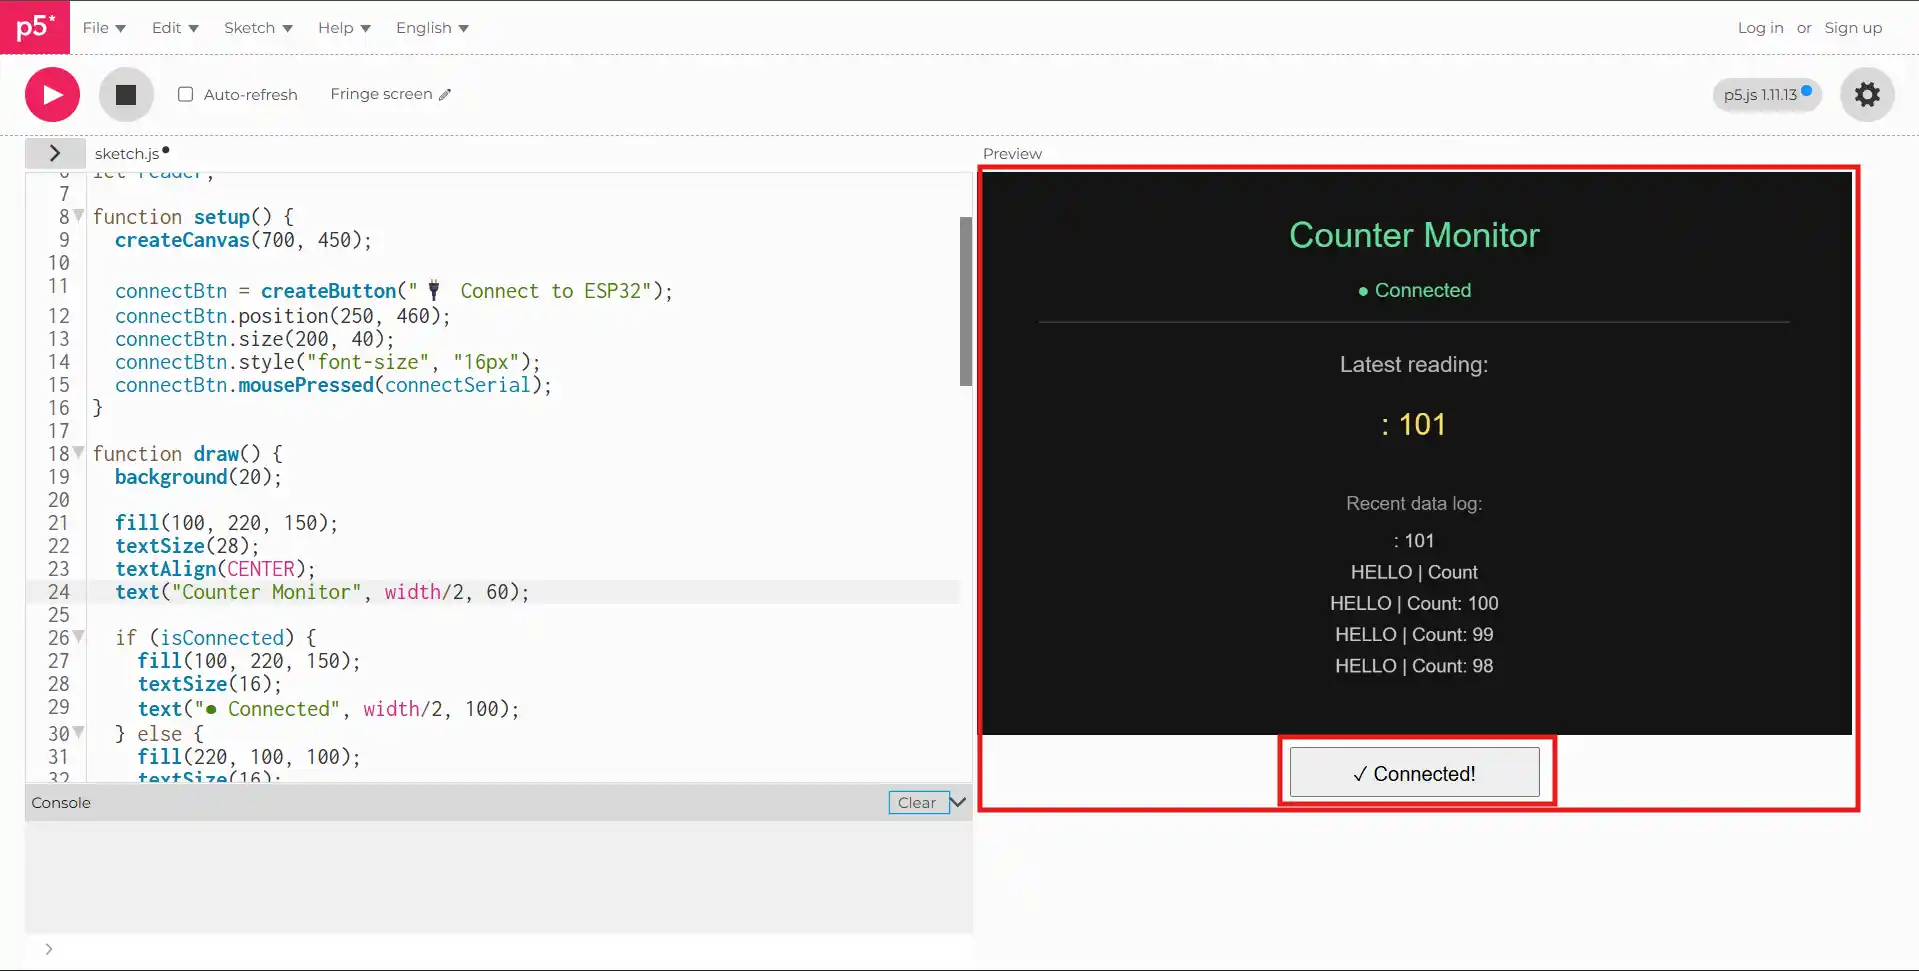
Once connected the canvas updated with live data from the ESP32!
What we thought
Running in the browser is genuinely great — no installation, and you could share your interface as a link which is really useful for demos and collaboration. The syntax is almost identical to Processing so switching between the two felt natural. One thing we ran into was a p5.js infinite loop detection error on our first try because the while(true) loop inside the async read function triggered p5.js’s loop guard. We fixed it by switching to a recursive promise pattern instead, which reads one chunk at a time and calls itself again rather than looping forever. After that fix it worked perfectly.
Tool 3 — Node-RED
What is Node-RED?
Node-RED is a flow-based visual programming tool originally built by IBM for IoT projects. Instead of writing code, you drag and drop nodes onto a canvas and connect them with wires. Data flows from left to right through your diagram. It uses MQTT protocol which works over WiFi, meaning the ESP32 does not need to be plugged in — it communicates wirelessly!
ESP32-C3 (WiFi) → publishes to MQTT topic → Mosquitto broker (PC) → Node-RED subscribes → dashboard
MQTT works like a post office. The ESP32 drops off a message to a topic (like a mailing address). The broker (Mosquitto, which runs on your computer) holds it. Node-RED picks it up. They never talk directly to each other — the broker handles everything in the middle.
Step 1 — Installing Node.js
Node-RED runs on Node.js so that has to be installed first. We downloaded the LTS version from nodejs.org for Windows.
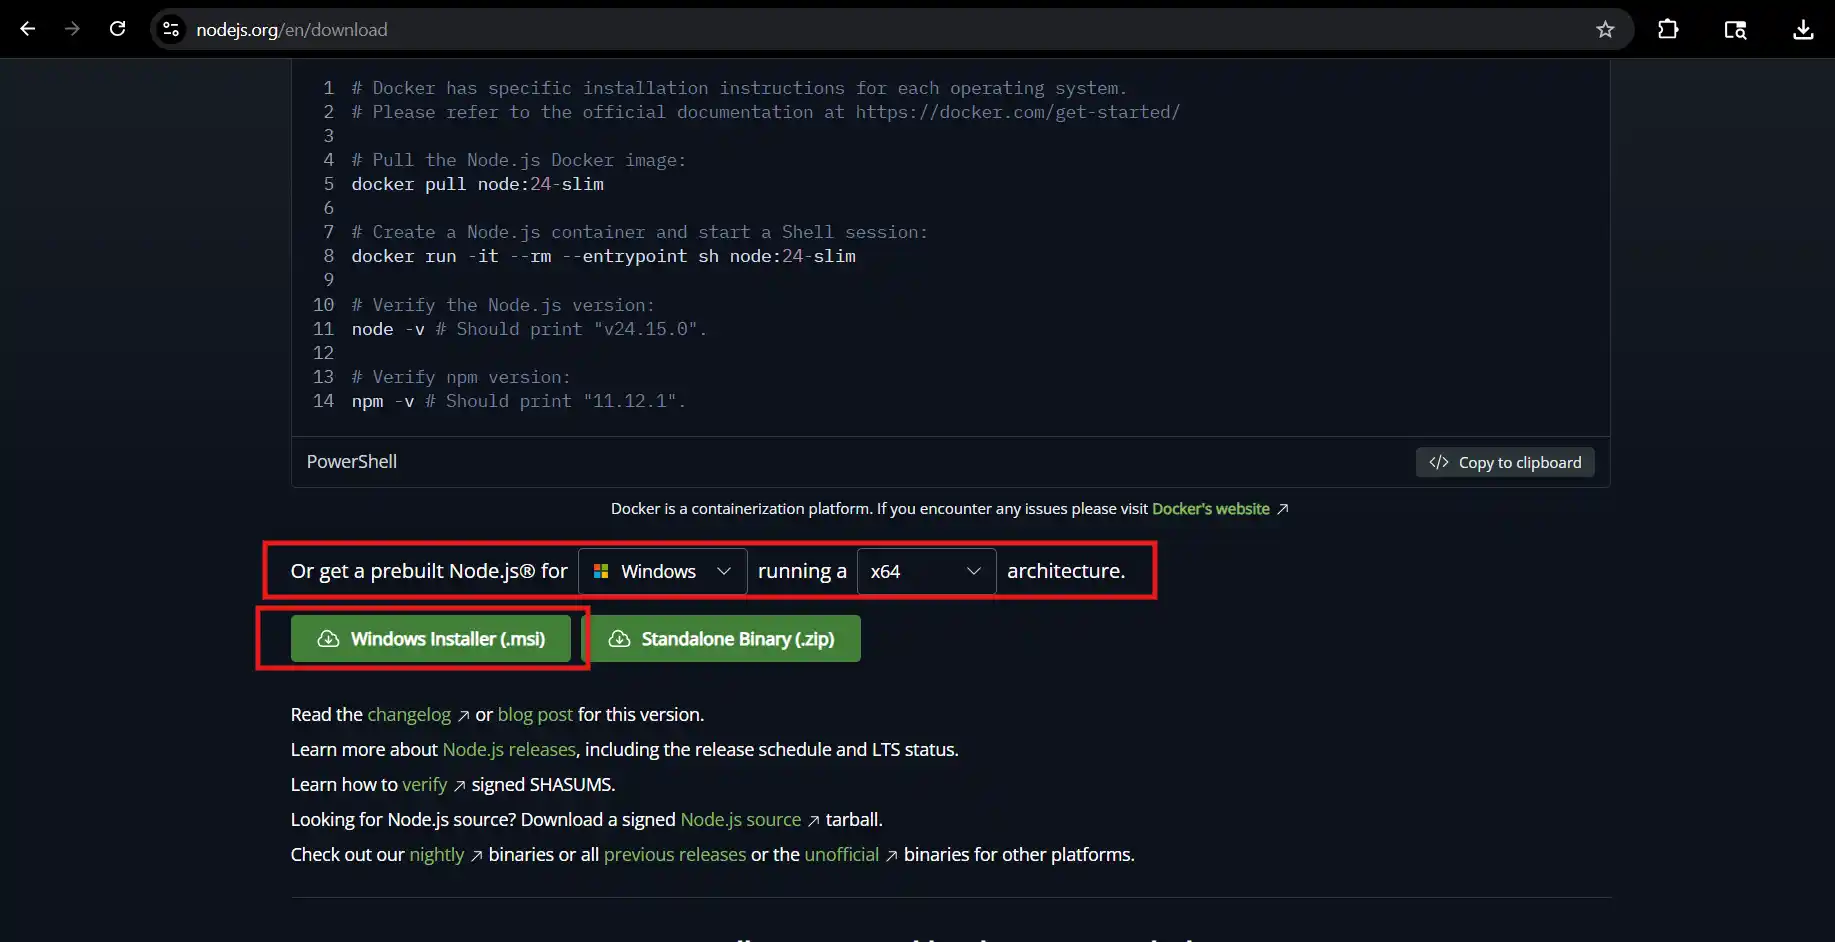
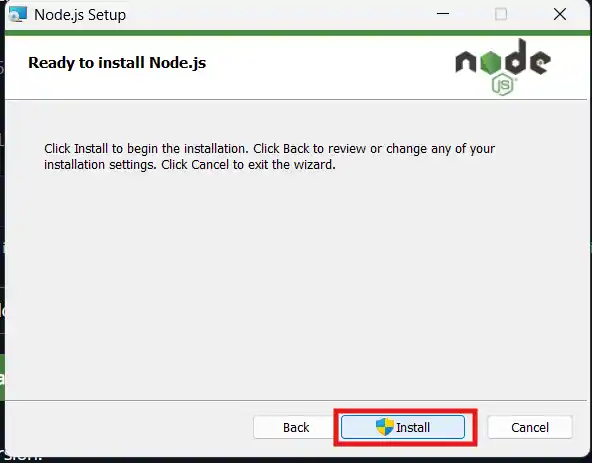
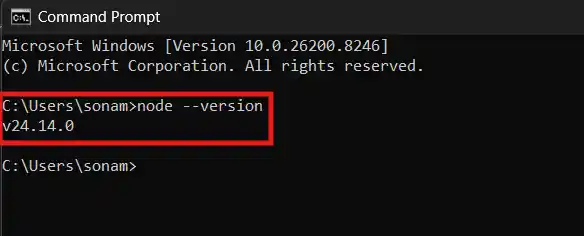
After installation we confirmed it worked by checking the version in Command Prompt.
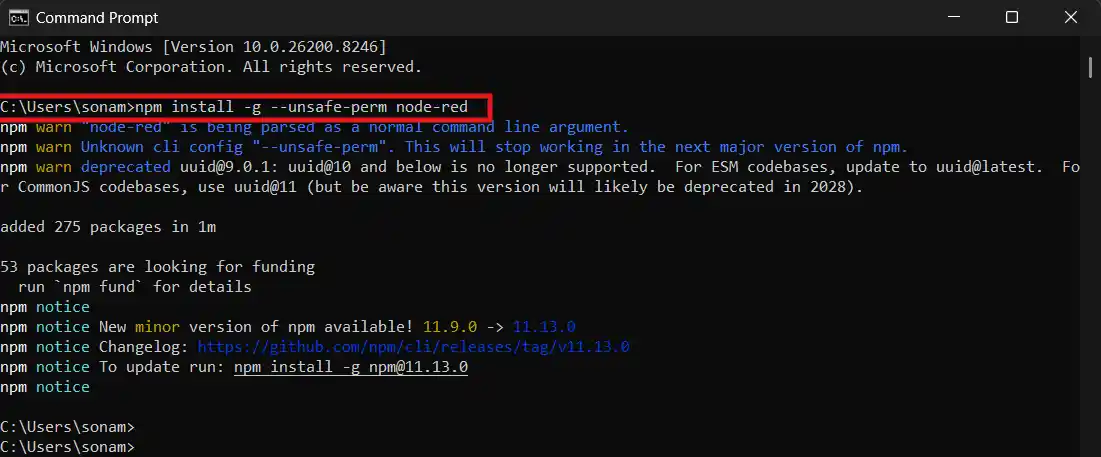
Step 2 — Installing Node-RED
We ran this in Command Prompt:
npm install -g --unsafe-perm node-red
We then started it with node-red and opened http://127.0.0.1:1880 in the browser.

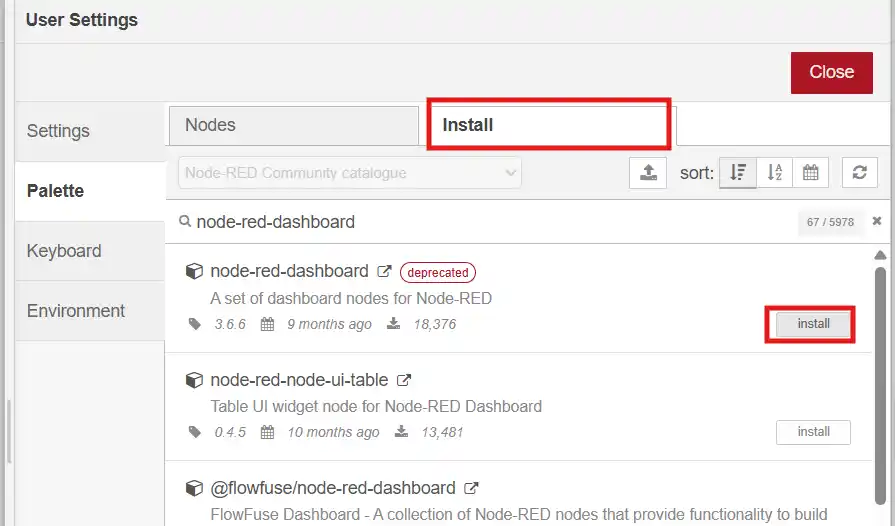
Step 3 — Installing the Dashboard plugin
Inside Node-RED we went to the menu → Manage Palette → Install and searched for node-red-dashboard to get the UI nodes.
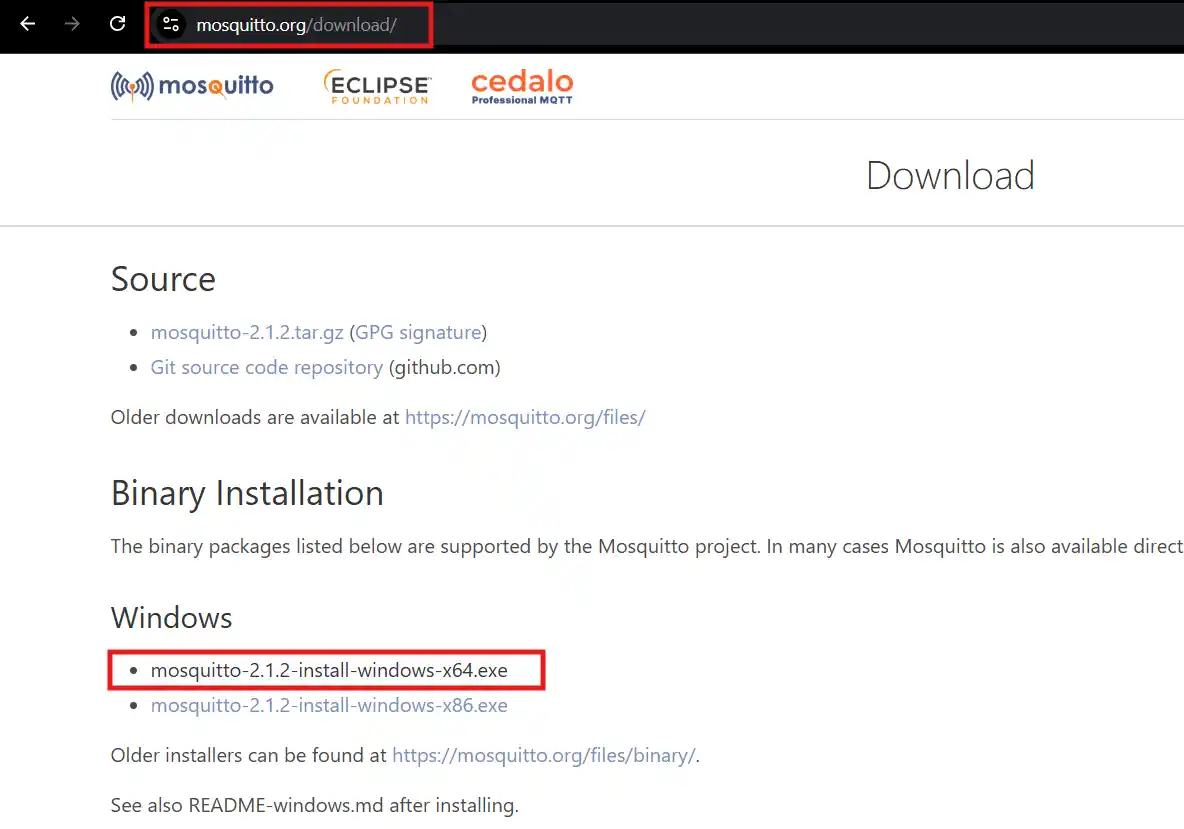
Step 4 — Installing Mosquitto MQTT Broker
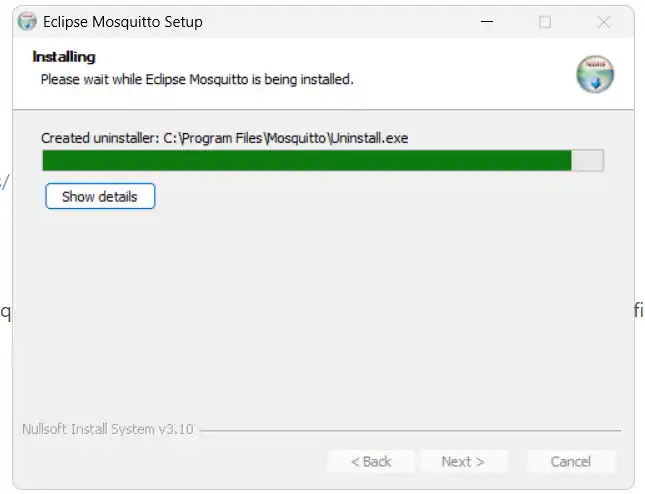
We downloaded Mosquitto from mosquitto.org for Windows and installed it.
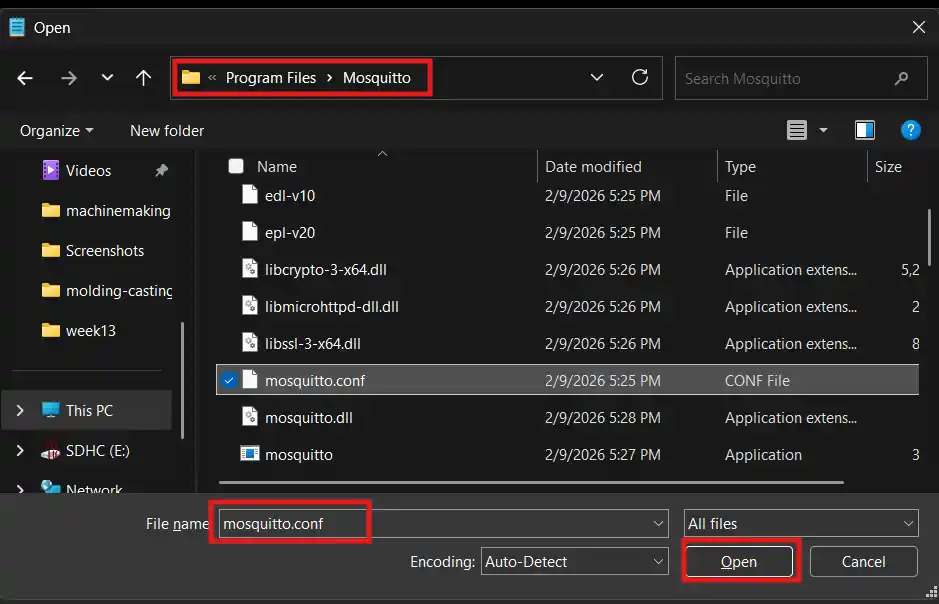
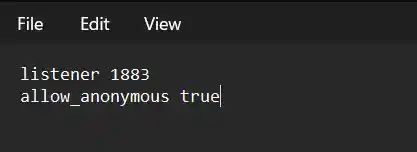
After installing, we opened the mosquitto.conf file in Notepad as Administrator and added two lines to allow external connections.
We then restarted the Mosquitto service using Command Prompt as Administrator so the config changes would take effect. We also added a Windows firewall rule to allow connections on port 1883 so the ESP32 could reach the broker over WiFi.
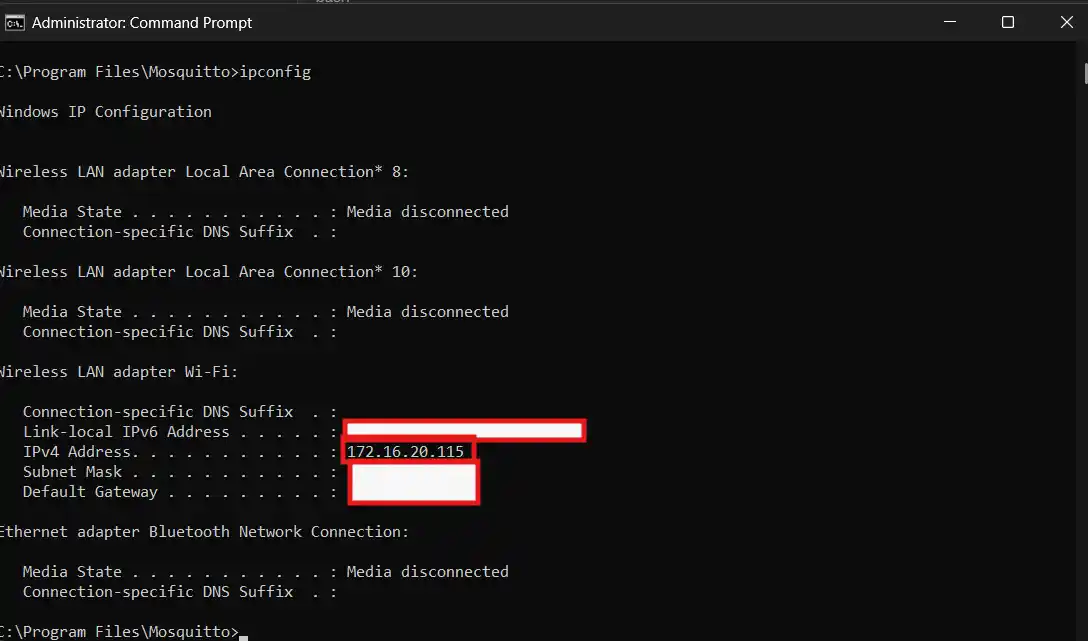
Step 5 — Finding the computer’s IP address
We ran ipconfig in Command Prompt to find the computer’s IPv4 address on the WiFi network. The ESP32 needs this address to know where to send its MQTT messages.
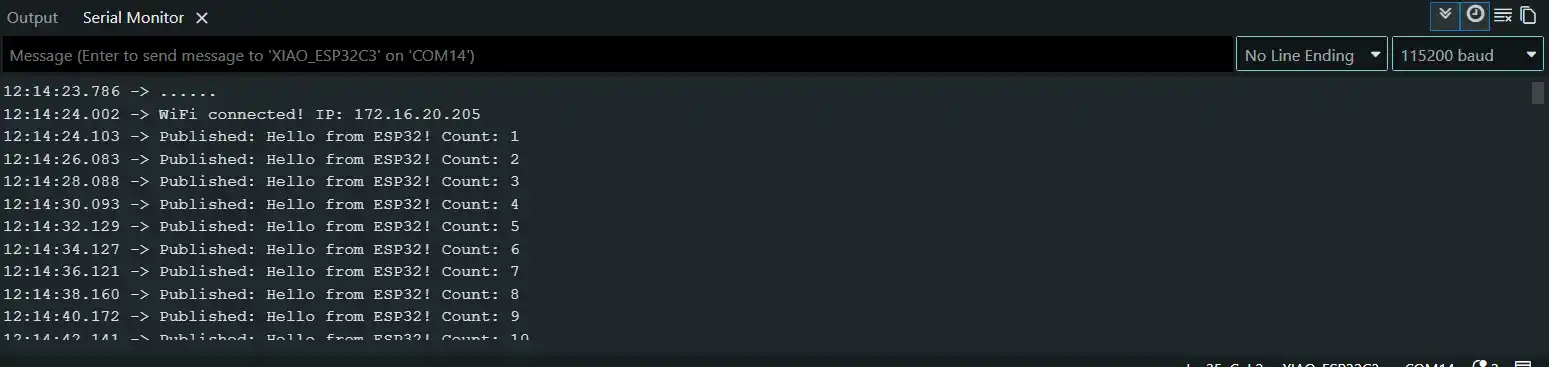
Step 6 — Uploading the WiFi and MQTT sketch
We installed the PubSubClient library in Arduino IDE first, then uploaded a sketch that connects the ESP32 to WiFi and publishes a test message to the MQTT topic test/message every 2 seconds.

Step 7 — Building the Node-RED flow
In the Node-RED editor we dragged an mqtt in node and a text dashboard node onto the canvas and wired them together.
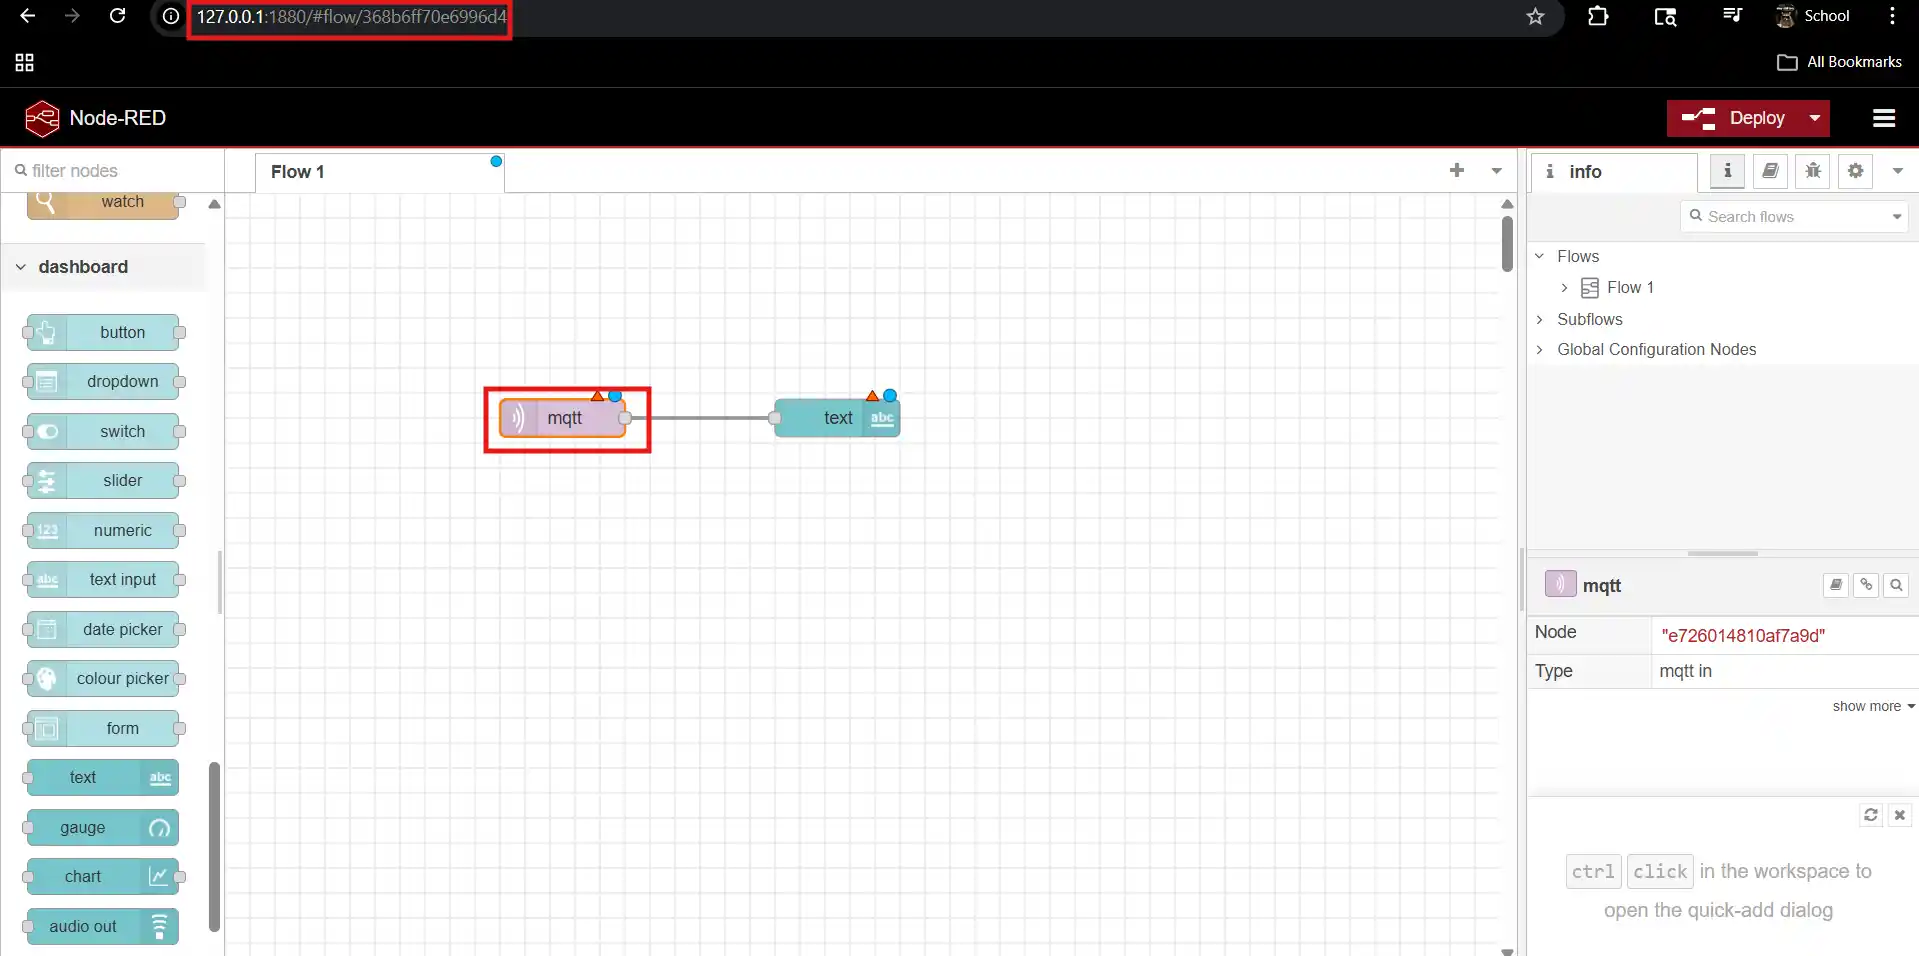
We configured the mqtt in node with the server set to localhost:1883 and the topic set to test/message.

We also added a debug node alongside the text node to verify messages were arriving correctly.
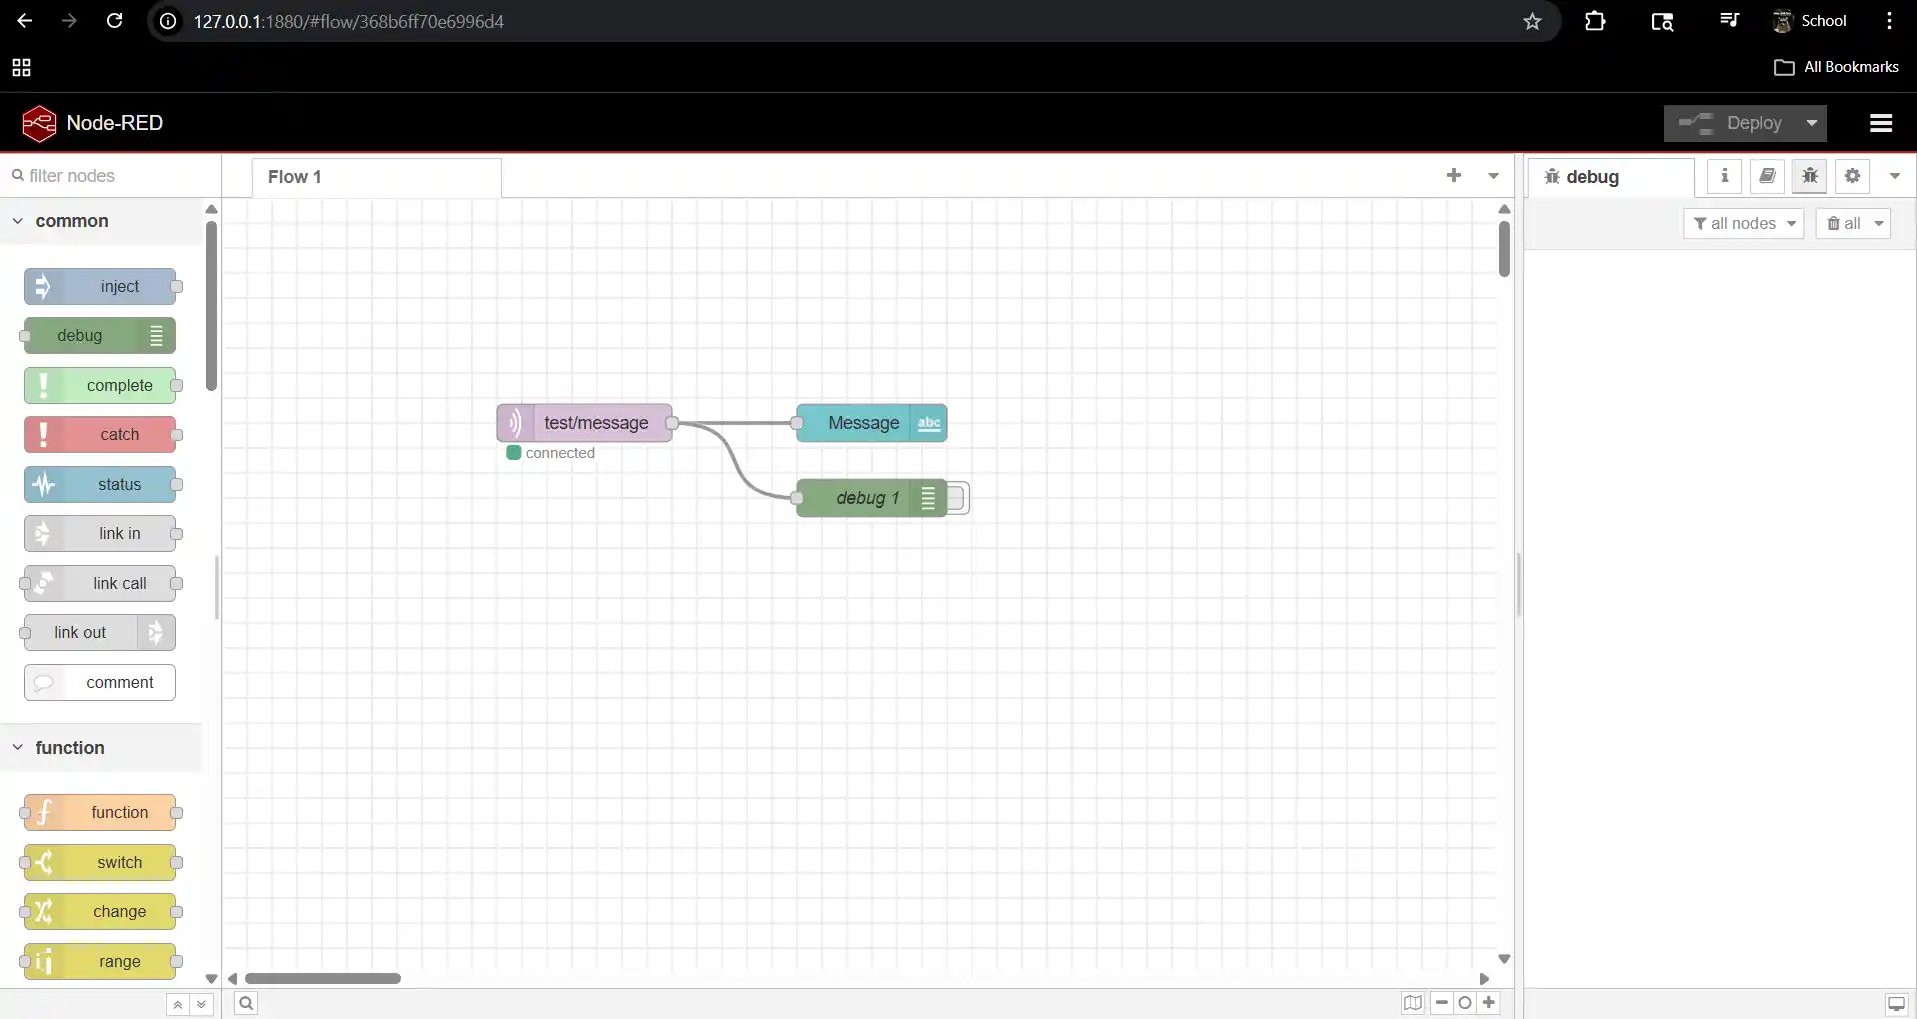
We then configured the text node with a new dashboard group called “ESP32 Data”.

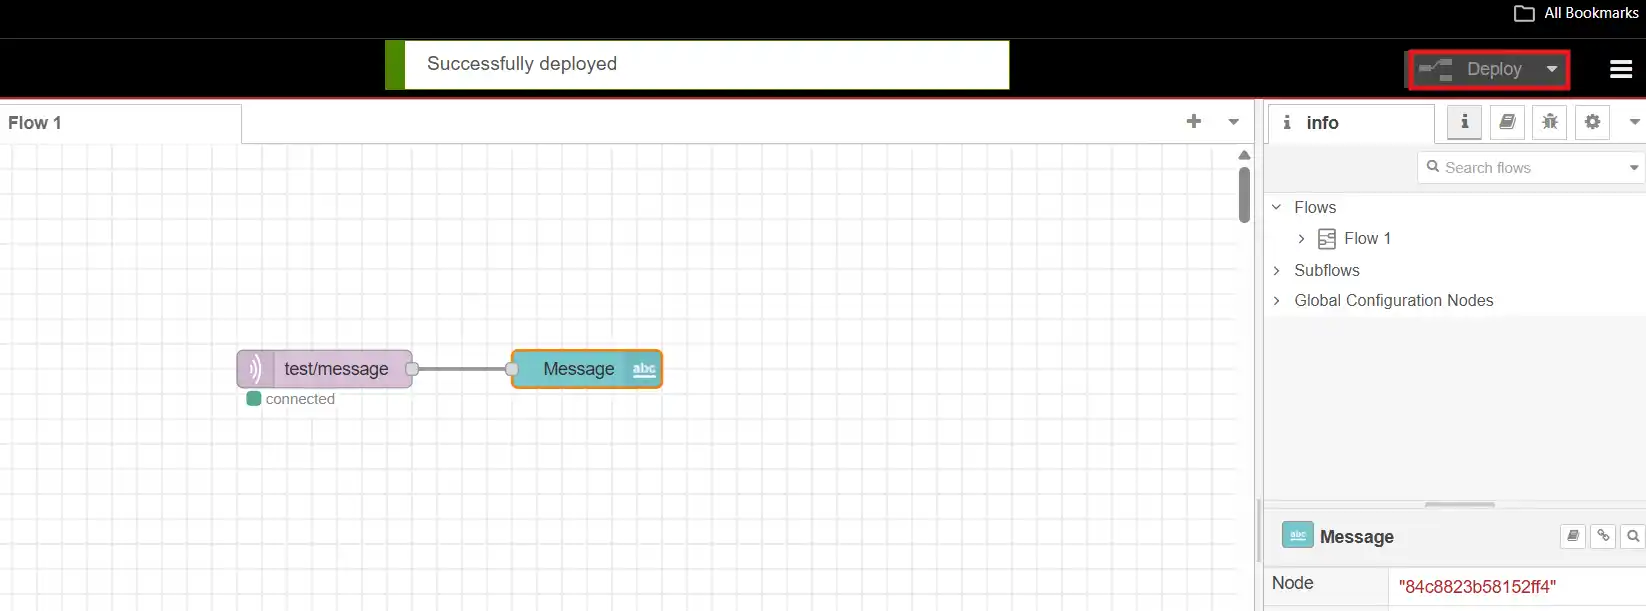
Finally we clicked Deploy to push the flow live.
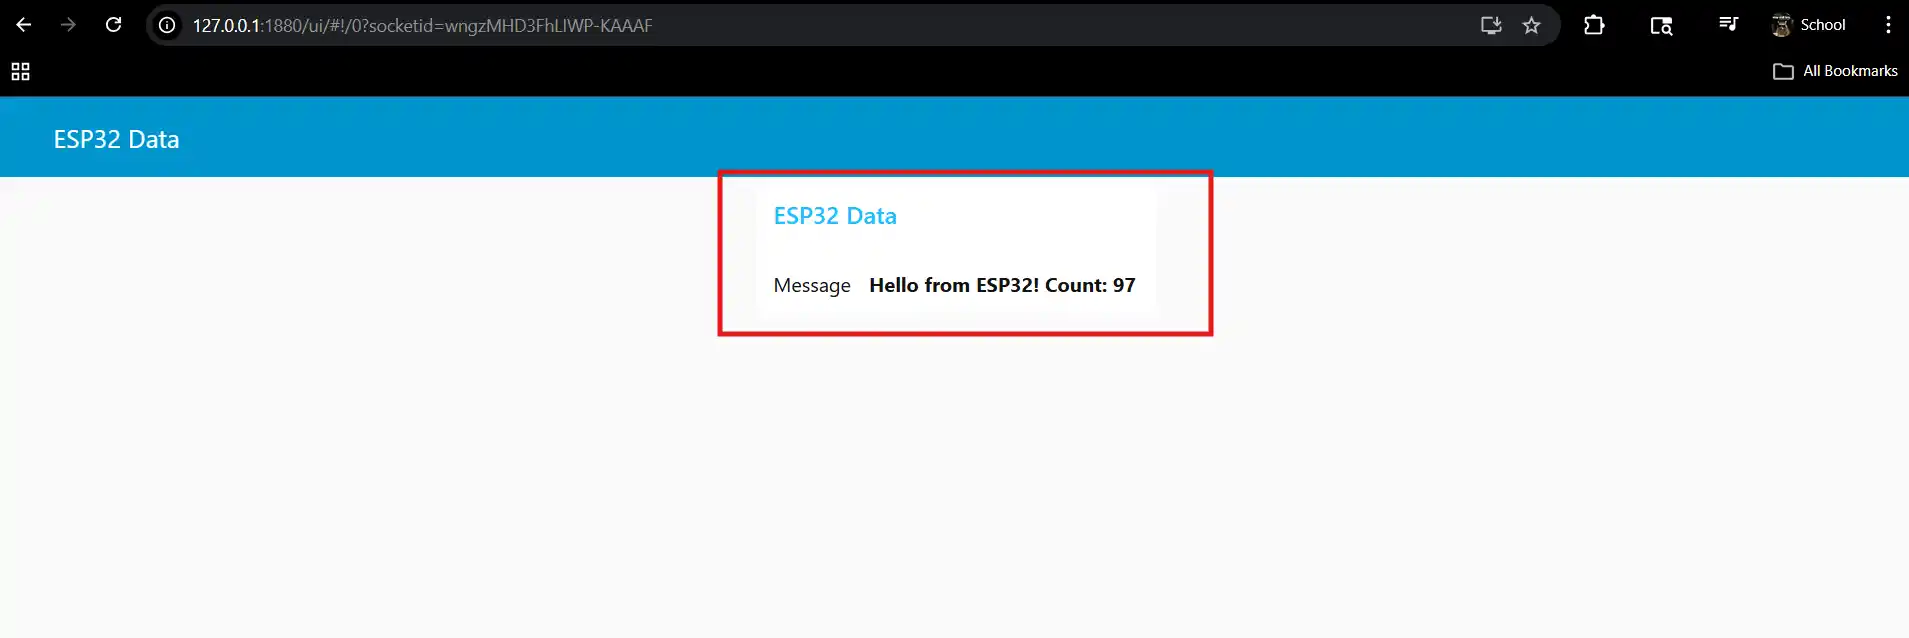
Opening http://127.0.0.1:1880/ui showed the dashboard with messages from the ESP32 updating live!
What we thought
Node-RED was the most impressive tool of the three for wireless projects. The drag and drop flow is genuinely satisfying for prototyping — we built a working dashboard without writing almost any code at all. The MQTT over WiFi setup means the hardware can be completely untethered from the computer which is a huge deal for wearable projects. The setup was the most involved of the three tools though — getting Mosquitto configured correctly and opening the firewall took some troubleshooting. Once it was all running it was very solid.
Comparison
| Tool | Interface Type | Communication | Installation | Best Use Case |
|---|---|---|---|---|
| Processing | Desktop app | USB Serial (UART) | Low | Quick visual prototypes |
| p5.js | Browser canvas | USB Serial (Web Serial API) | Zero | Shareable, modern web UIs |
| Node-RED | Browser dashboard | WiFi (MQTT) | High | IoT and wireless projects |
Reflection
Testing all three tools was really eye-opening. We came in thinking we would just pick one and use it for everything but each one clearly has its own sweet spot. Processing is the fastest to get started with if you just want to see data on screen quickly. p5.js is the move when you want to share your interface or keep things browser-based without a server. Node-RED is where it gets exciting for wireless work.
The biggest thing we learned is that the choice of interface tool is not just about aesthetics — it is fundamentally about how your hardware communicates. Serial, Web Serial, and MQTT all solve different problems and knowing when to use each one is a really valuable skill going forward for all of us.