11. Networking and Communications
Starting Point
I came into this week intimidated. The idea of two microcontrollers talking to each other wirelessly felt abstract and far away from anything I understood. Before writing a single line of code, I needed to understand what was actually happening — not in technical terms, but in human ones.
So the first thing I did was ask AI Claude for analogies. I needed networking to explain the way you would explain it to someone who has never thought about data, protocols, or IP addresses. What helped most was this: a web server is just a café. It sits and waits. When someone walks in and orders something, it responds. When nobody is there, it does nothing. An IP address is just a house number on a street. A handshake is two people confirming the phone line is working before they start talking.
What I Built
Two ESP32-S3-WROOM-1 boards communicating over WiFi. When a button is pressed on Board A, an LED blinks on Board B. That is the whole thing — and deliberately so. My goal for this week was to break the fear barrier. To see how two separate physical objects could talk to each other through the air.
Board A — the sender The ESP32-S3 development board. Acts as a WiFi Access Point — meaning it creates its own wireless network, the way a phone creates a hotspot. Has a button on GPIO0 (the onboard BOOT button). When pressed, it sends a message to Board B.
Board B — the receiver My custom PCB, designed and milled during the electronics production week. Has an LED on pin 35. Joins Board A’s network and runs a small web server, waiting for instructions.
The Concept: Access Point Mode
The most important decision in this project was choosing Access Point mode over connecting both boards to an external WiFi router. In Access Point mode, one board becomes the router — it creates the network itself. The other board joins it directly. This meant:
-
Board A always has the address 192.168.4.1 — fixed, automatic, no searching required
-
Board B always gets the address 192.168.4.2 — the first guest on the network
The two boards form their own private street, with their own house numbers, invisible to everything else in the room.
How It Works?
- Layer 1 — The Network Board A runs WiFi.softAP() — one line that transforms it from a WiFi guest into a WiFi host. Board B runs WiFi.begin() with the matching network name and password, joining that private network exactly the way a phone joins a hotspot.
- Layer 2 — The Web Server Board B opens a web server on port 80 — the standard door for web traffic. It listens for requests at the address /blink. This is the café with a one-item menu.
- Layer 3 — The Message When the button on Board A is pressed, it sends an HTTP GET request to http://192.168.4.2/blink. This is the same mechanism a browser uses to load a webpage — just between two chips on a workbench instead of a computer and a data centre.
- Layer 4 — The Action Board B receives the request, matches it to the /blink handler, and blinks the LED three times. It sends back a 200 OK response — the same confirmation code a website sends when a page loads successfully.
The Code:
Board A — Access Point + Button Sender
#include <WiFi.h>
#include <HTTPClient.h>

const char* ap_ssid     = "BoardA_Network";
const char* ap_password = "12345678";

#define BUTTON_PIN 0

void setup() {
  Serial.begin(115200);
  pinMode(BUTTON_PIN, INPUT_PULLUP);

  // Board A becomes the router
  WiFi.softAP(ap_ssid, ap_password);
  Serial.println("Access Point started");
  Serial.print("Board A IP address: ");
  Serial.println(WiFi.softAPIP()); // always 192.168.4.1
}

void loop() {
  if (digitalRead(BUTTON_PIN) == LOW) {
    Serial.println("Button pressed — sending to Board B...");

    HTTPClient http;
    http.begin("http://192.168.4.2/blink");
    int responseCode = http.GET();
    Serial.print("Response: ");
    Serial.println(responseCode);
    http.end();

    delay(500); // debounce
  }
}
Board B — WiFi Client + Web Server + LED
#include <WiFi.h>
#include <WebServer.h>

const char* ssid     = "BoardA_Network";
const char* password = "12345678";

#define LED_PIN 35

WebServer server(80);

void handleBlink() {
  Serial.println("Blink request received!");
  for (int i = 0; i < 3; i++) {
    digitalWrite(LED_PIN, HIGH);
    delay(200);
    digitalWrite(LED_PIN, LOW);
    delay(200);
  }
  server.send(200, "text/plain", "Blinked!");
}

void setup() {
  Serial.begin(115200);
  pinMode(LED_PIN, OUTPUT);
  digitalWrite(LED_PIN, LOW);

  // Board B joins Board A's network
  WiFi.begin(ssid, password);
  Serial.print("Connecting to Board A...");
  while (WiFi.status() != WL_CONNECTED) {
    delay(500);
    Serial.print(".");
  }
  Serial.println("");
  Serial.println("Connected!");
  Serial.print("Board B IP address: ");
  Serial.println(WiFi.localIP()); // will be 192.168.4.2

  server.on("/blink", handleBlink);
  server.begin();
  Serial.println("Server started — waiting for requests");
}

void loop() {
  server.handleClient();
}
I had to connect both board to the laptop at the same time through and set two different ports.Board A (the sender/router) was the bardiuno with the button on pin 00. While Board B was my personally design and cut pentagonal PCB, with the LED connected to pin 35.
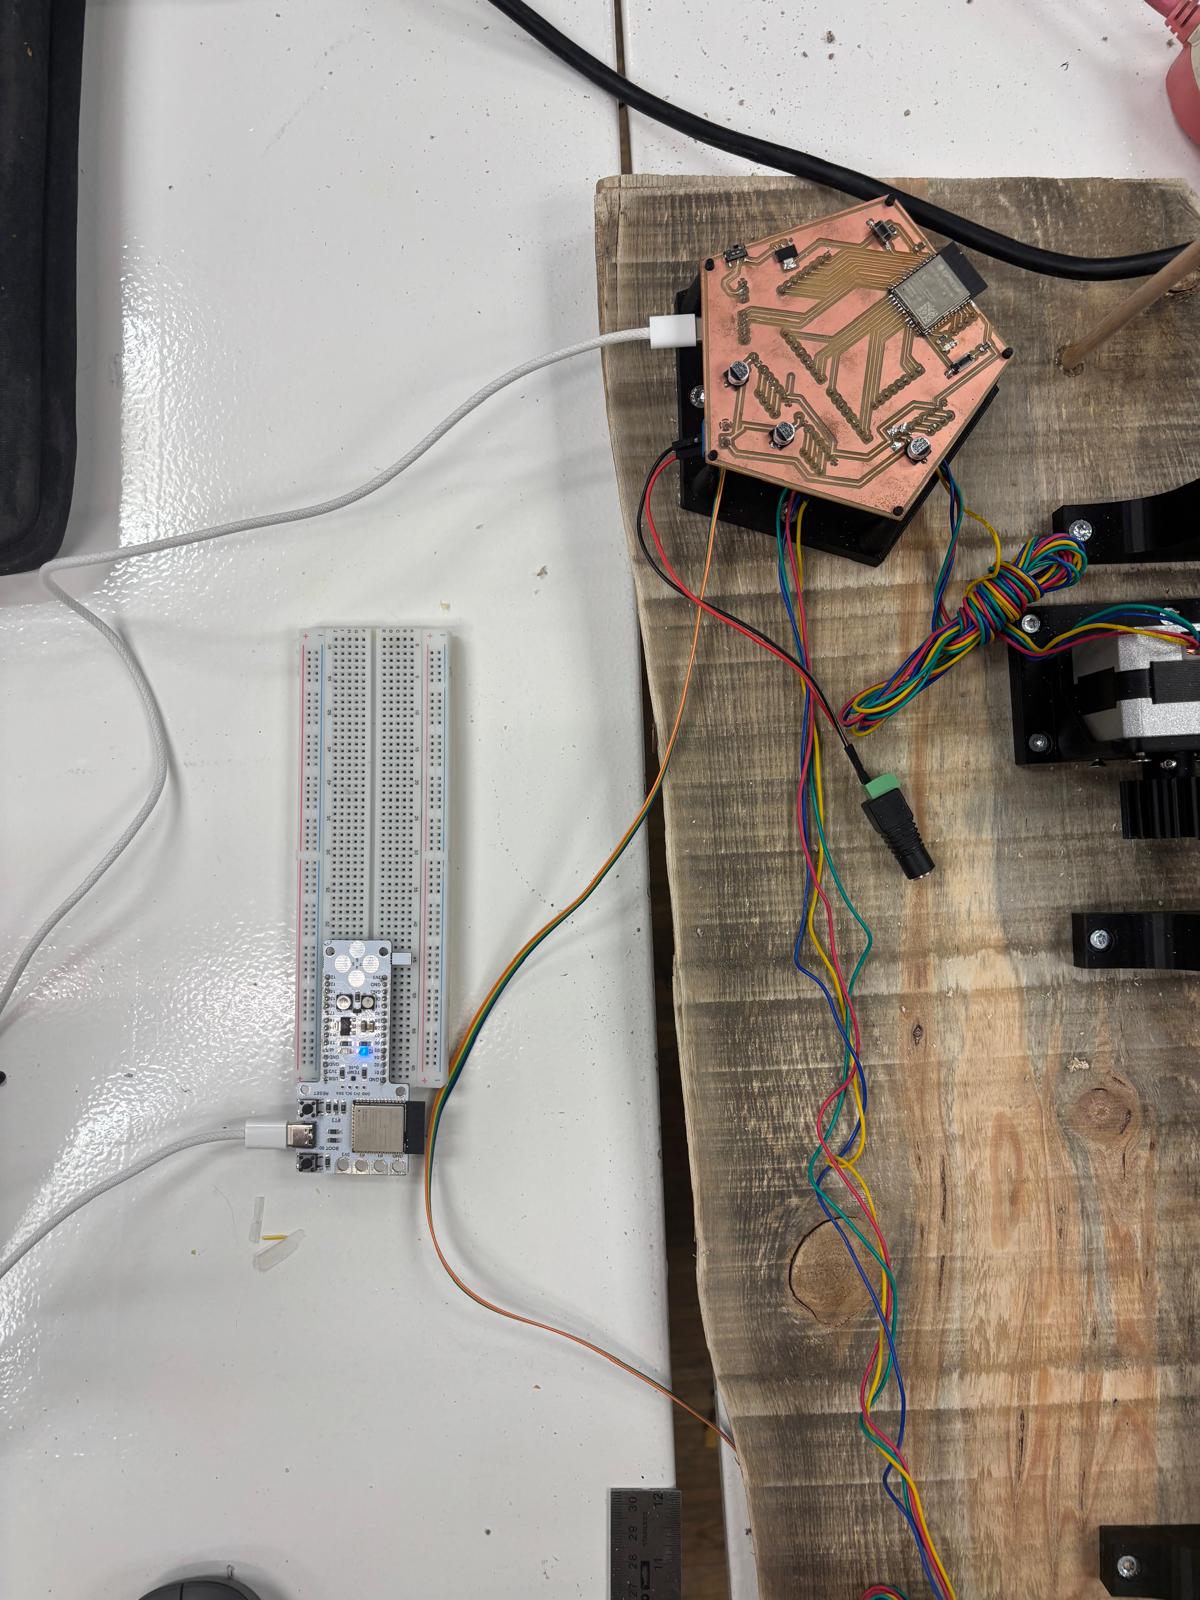
Here is a photo to the screen set up side by side:

What the Serial Monitor Showed
When both boards were powered and running correctly: Board A Serial Monitor:
Access Point started Board A IP address: 192.168.4.1 Button pressed — sending to Board B… Response: 200
Board B Serial Monitor: Connecting to Board A...... Connected! Board B IP address: 192.168.4.2 Server started — waiting for requests Blink request received!
The 200 response on Board A confirmed the message arrived and was acted on. The LED on Board B blinked three times.
Video
It was simple but amazing to see it work:
What I Learned
I used AI prompting extensively this week — not to generate code blindly, but to understand what the code was actually doing before I wrote or uploaded anything. I would ask questions like “explain a web server in human or social analogies” or “what is an IP address in plain language” before ever opening the Arduino IDE. That process of building understanding through analogy before touching the tools made the technical steps far less opaque. The biggest realisation was how few lines of code are actually needed. Three lines make a web server. One line makes an Access Point. The complexity I feared was mostly conceptual — once the concept was clear, the code was almost obvious.