W18 | Applications and Implications, Project Development
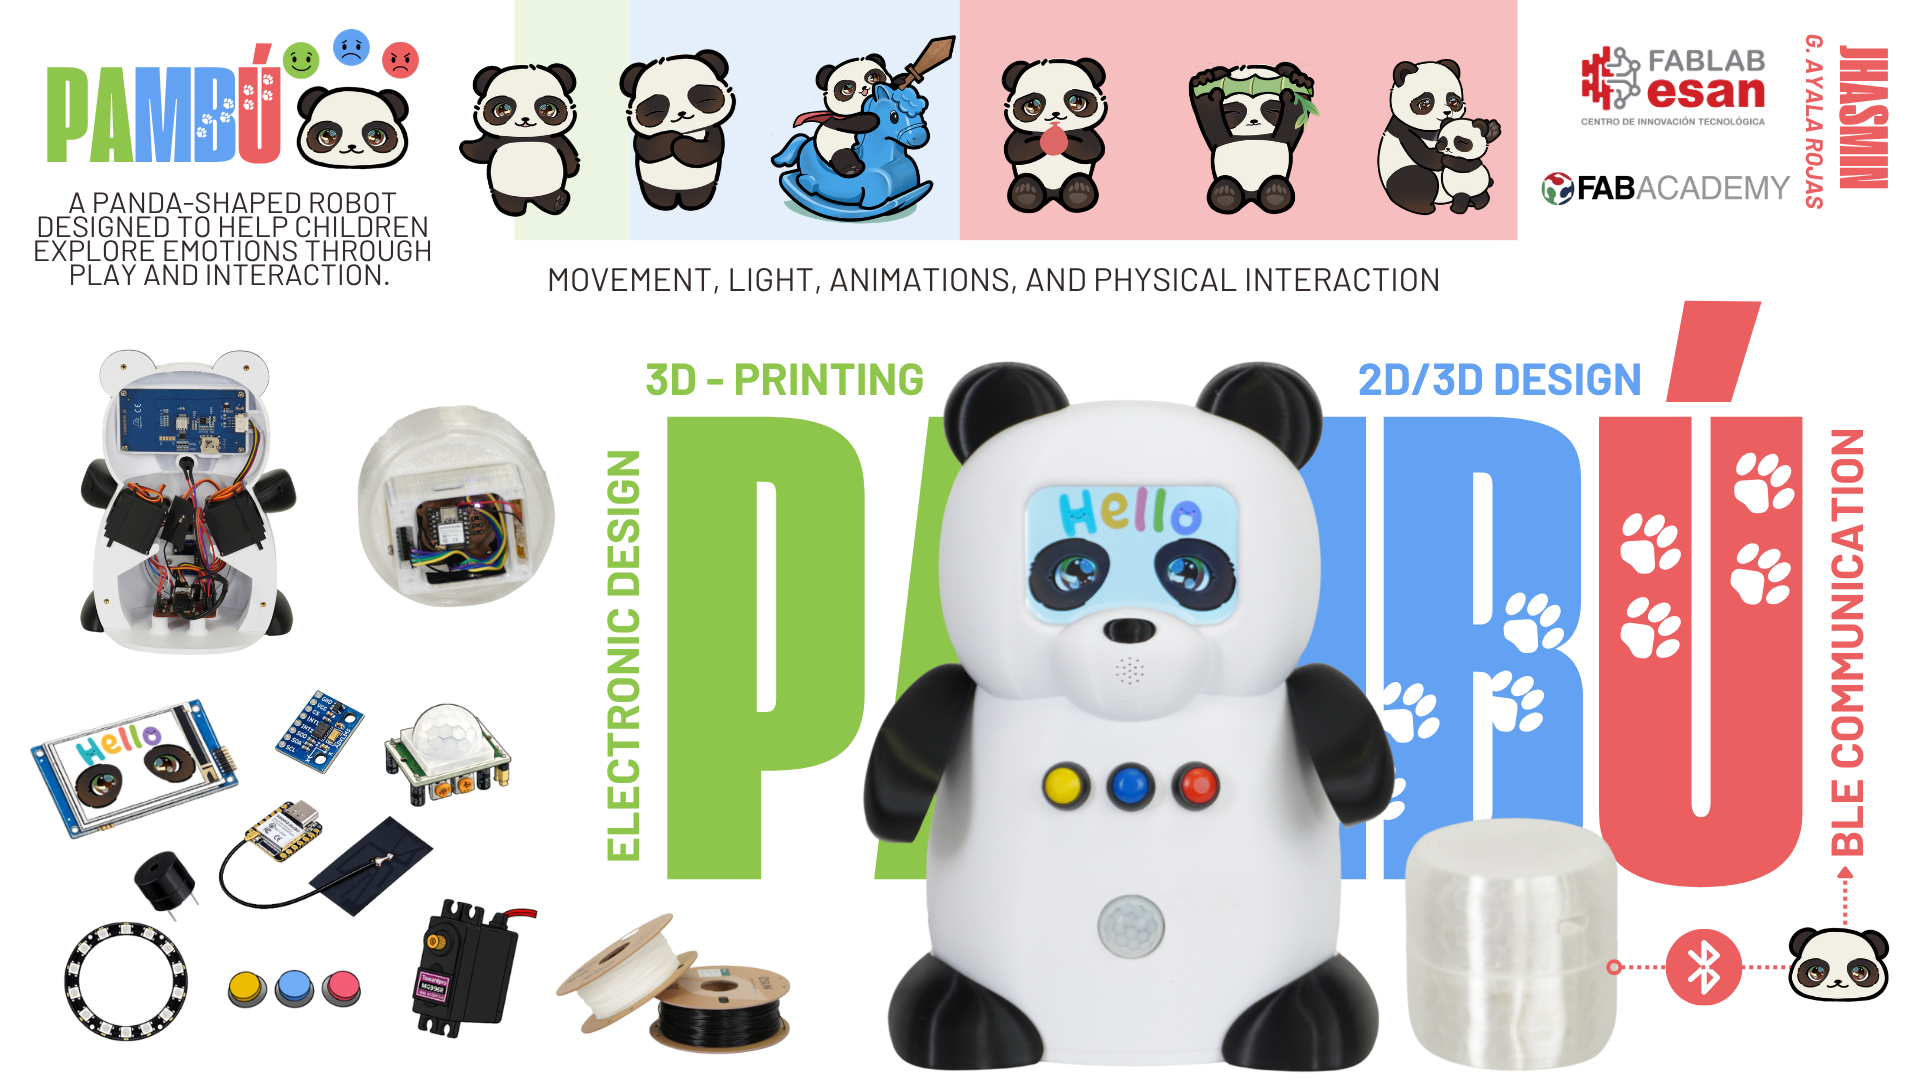
📝 Poster:
📹 Video:
What will it do?
This project was born from a simple idea:
For many children, recognizing and expressing what they feel is not always easy. Access to emotional support can also be limited, making it difficult for some families to find the resources they need. This project aims to contribute, in a small way, by creating a companion that helps children explore emotions through play and interaction.
The robot is not intended to replace psychologists, therapists, or caregivers. Instead, it is designed to be a friendly companion that encourages emotional awareness through simple and engaging experiences. Using movement, light, animations, and physical interaction, it helps transform emotions into something more tangible and easier for a child to understand.
In addition to helping children recognize emotions, the robot introduces simple self-regulation techniques such as breathing exercises, movement-based activities, and other age-appropriate practices. The goal is not only to support the child in the moment, but also to help them build tools they can remember and apply later when they encounter similar situations in their daily lives.
Beyond the technology, the purpose of this project is to make emotional learning feel approachable and accessible. Whether used in a school, a healthcare environment, or at home, the goal is to provide a supportive experience that helps children feel more comfortable understanding, expressing, and managing their emotions.
How it works
| Emotion | Input | Robot response |
|---|---|---|
| 😃 Happy | Button press | Rainbow LED, dancing arms, happy melody |
| 😞 Sad | Button press | Hug therapy → check-in → if not better: funny activity → check-in again → adult help if needed |
| 😠 Angry | Button press + bamboo shake |
BLE intensity reading → triggers a specific calming response based on the intensity level detected |
When a child approaches, the PIR sensor wakes the robot, which greets them and asks how they are feeling. The child responds by pressing one of three buttons, and the robot guides them through a specific interaction using animations, arm movements, LED light, and sound. For the angry state, the child also interacts with a bamboo-shaped accessory that measures movement intensity via BLE and triggers a specific calming response based on the intensity level detected.
Who has done what beforehand?
Social robotics applied to children's emotional support is a growing field. Two projects that I found particularly relevant are Huggable, developed by MIT Media Lab, and RoPi, developed in Peru by PUCP and INSN San Borja. Both show how robotics can be used to create meaningful interactions that support children's wellbeing.
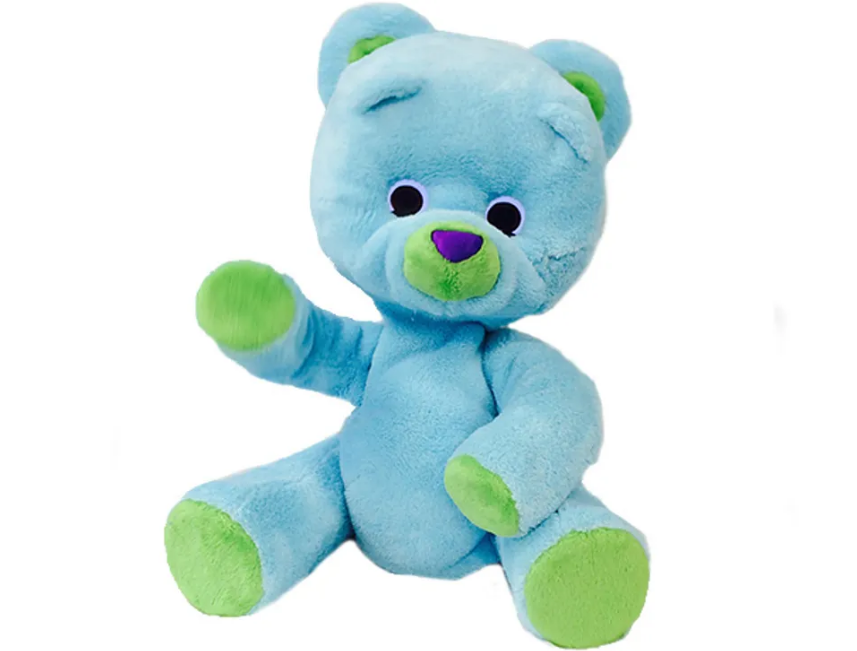
Huggable and RoPi are two projects that have influenced my interest in social robotics and its potential to create meaningful experiences for children. Their use of technology to encourage interaction and emotional wellbeing reflects the kind of impact I hope to achieve through my own project.
What sources will you use?
The main technical reference for the microcontroller is the official Seeed Studio wiki for the XIAO ESP32S3, covering setup, pin configuration, and BLE connectivity. For the Nextion display, the official datasheet was used alongside various video resources available online — there is a wide range of tutorials covering Nextion programming, and CheapControls is one of the YouTube channels reviewed during the development process. The libraries used were selected after reviewing the documentation for each component and tested during the development process.
| Category | Source | Purpose |
|---|---|---|
| Microcontroller | Seeed Studio Wiki — XIAO ESP32S3 | Setup, pin configuration, BLE board-to-board communication |
| Display | Nextion NX4832T035 Datasheet | Display specs and UART communication protocol |
| Display | CheapControls — YouTube | Video references reviewed for Nextion programming |
| Arduino Library | ESP32Servo | Servo motor control — robot board |
| Arduino Library | Adafruit NeoPixel | LED ring color and brightness control — robot board |
| Arduino Library | NimBLE (NimBLEDevice) | BLE communication — both boards |
| Arduino Library | Wire | I2C communication with MPU6050 — accessory board |
| Arduino Library | Adafruit MPU6050 | Accelerometer readings — accessory board |
| Arduino Library | Adafruit Sensor | Base layer required by Adafruit MPU6050 — accessory board |
What will you design?
Three main areas of design are involved in this project:
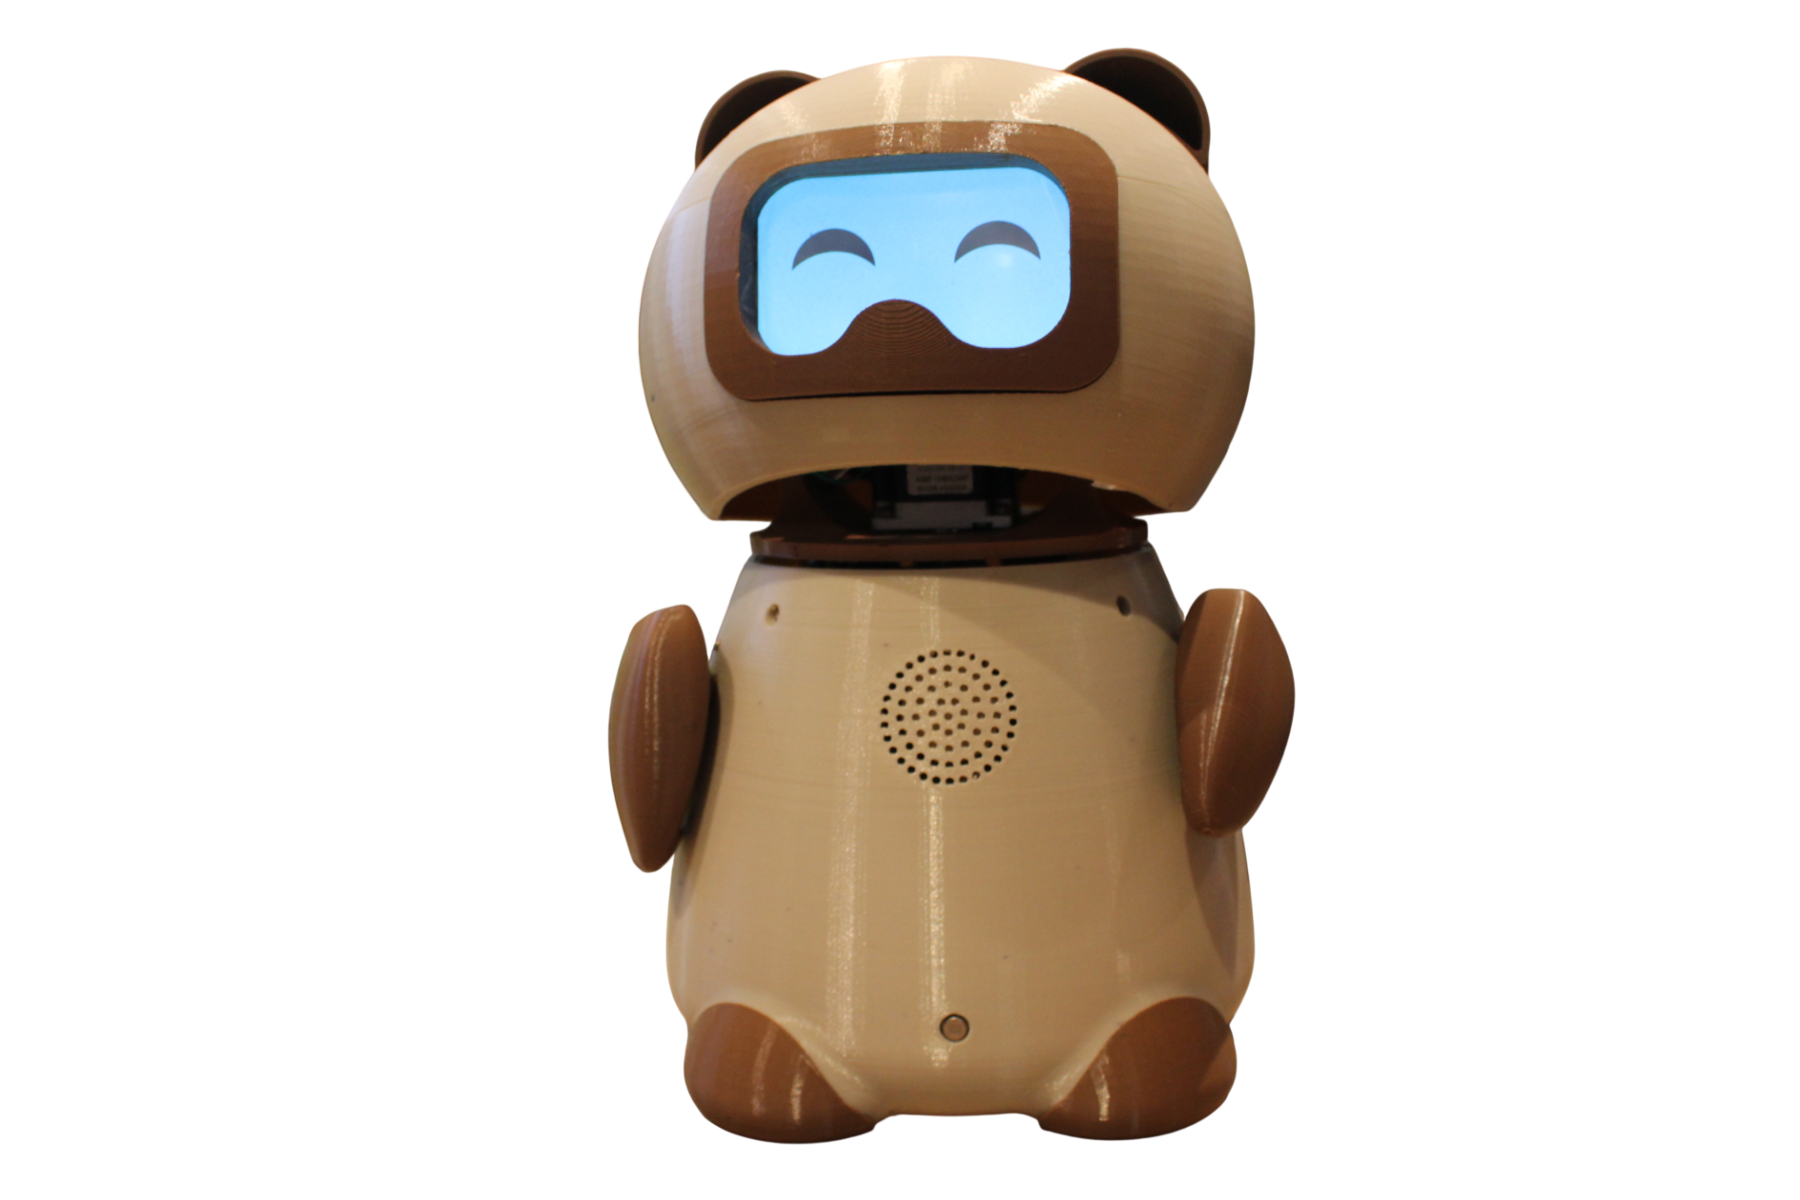
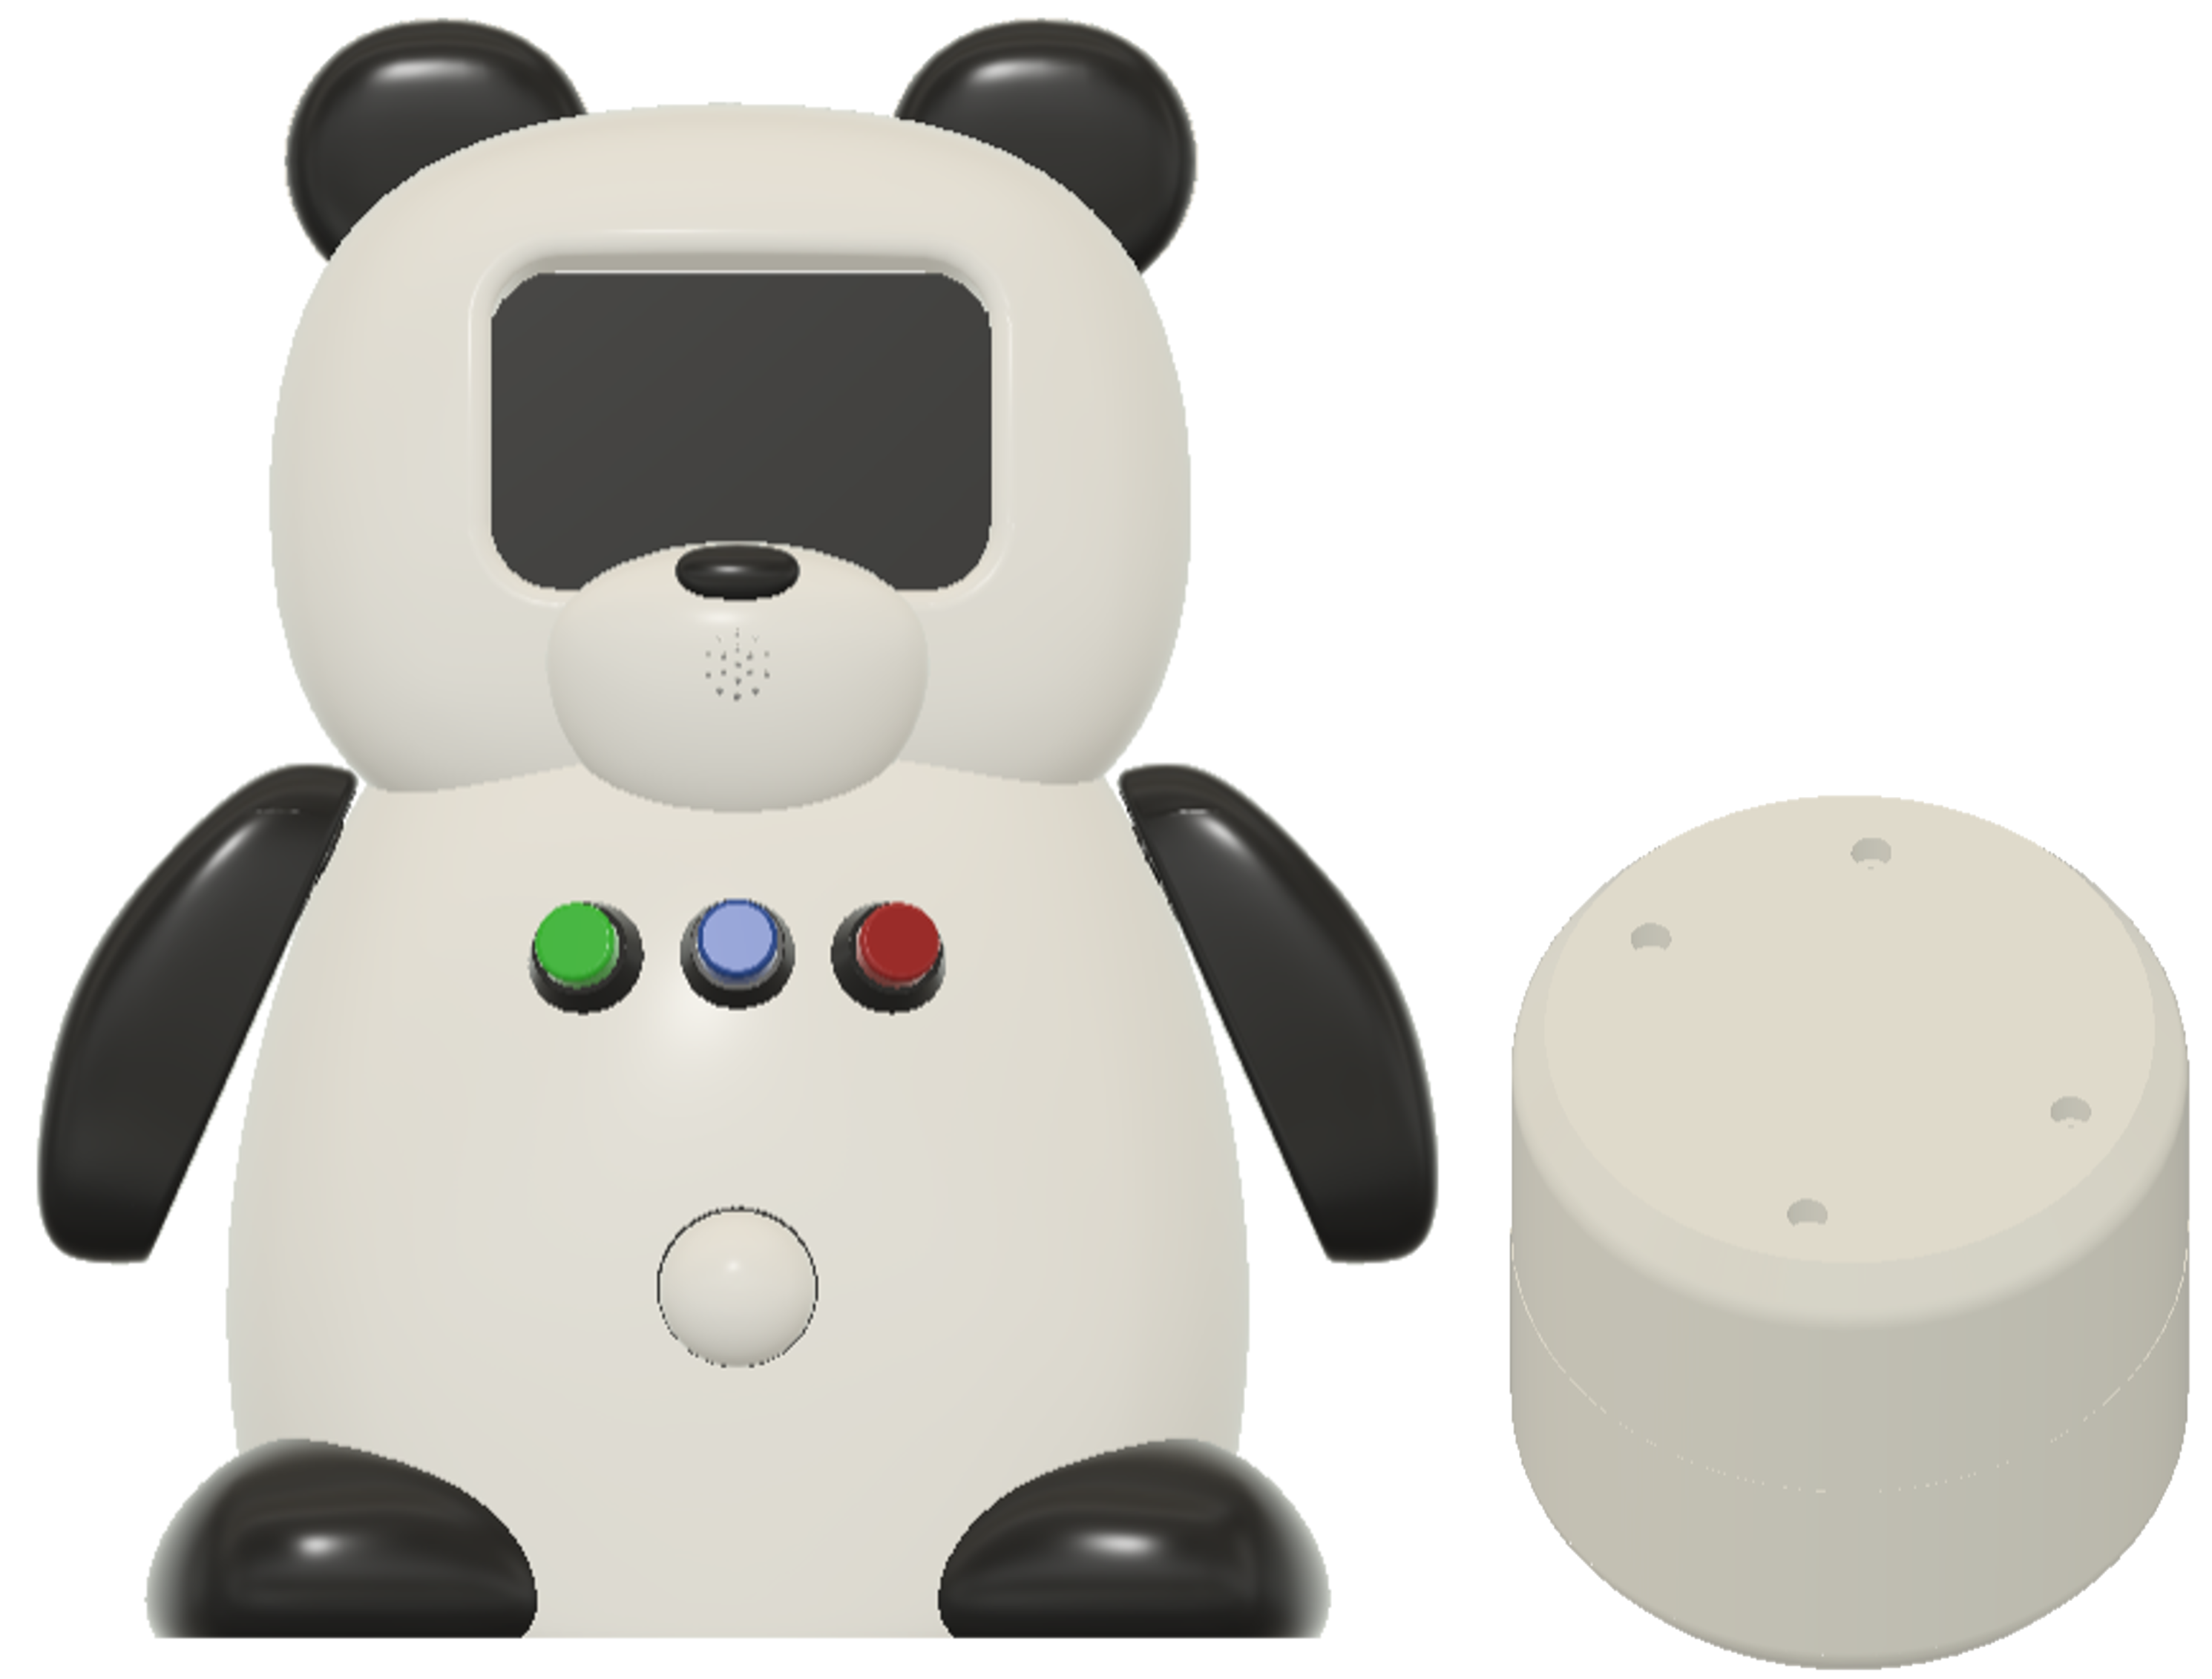
Physical Body/3D Design
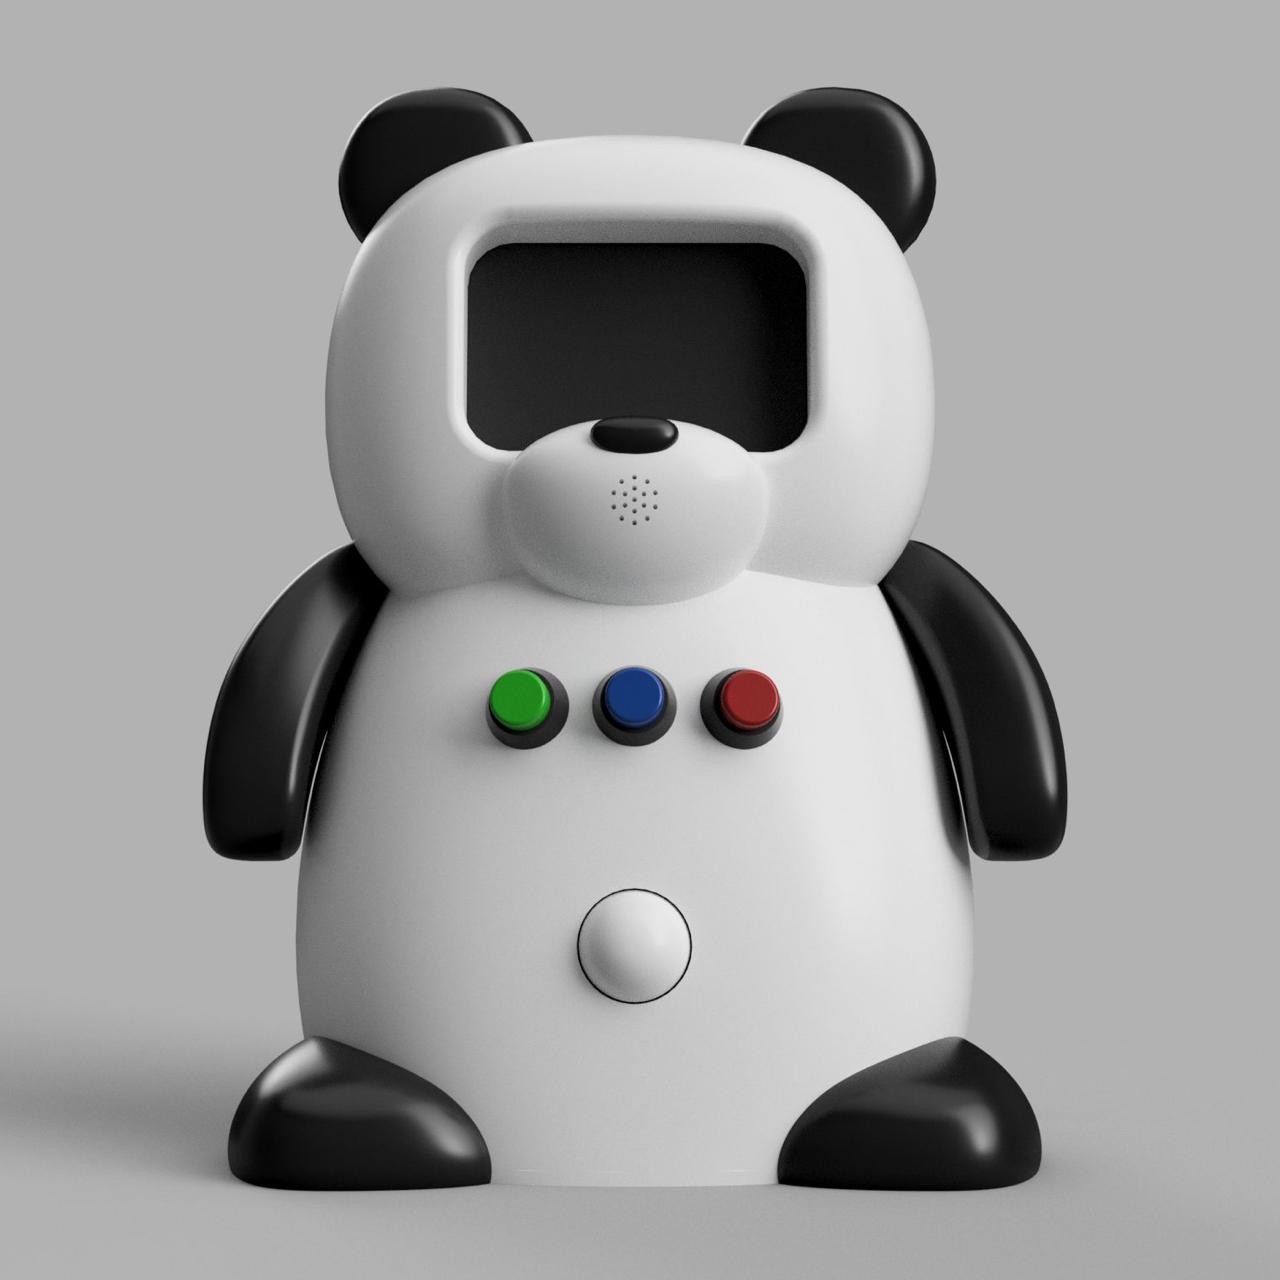
The panda body was designed in Fusion 360 starting with the Form tool to achieve its organic, rounded shape. Once the base form was defined, other Fusion 360 tools were used to build the internal structure — dedicated spaces for each component, cable routing channels, and mounting slots. The bamboo accessory was designed using standard Fusion 360 tools, shaped to resemble a bamboo segment sized to fit comfortably in a child's hand, with an inner structure to house the board and LED.
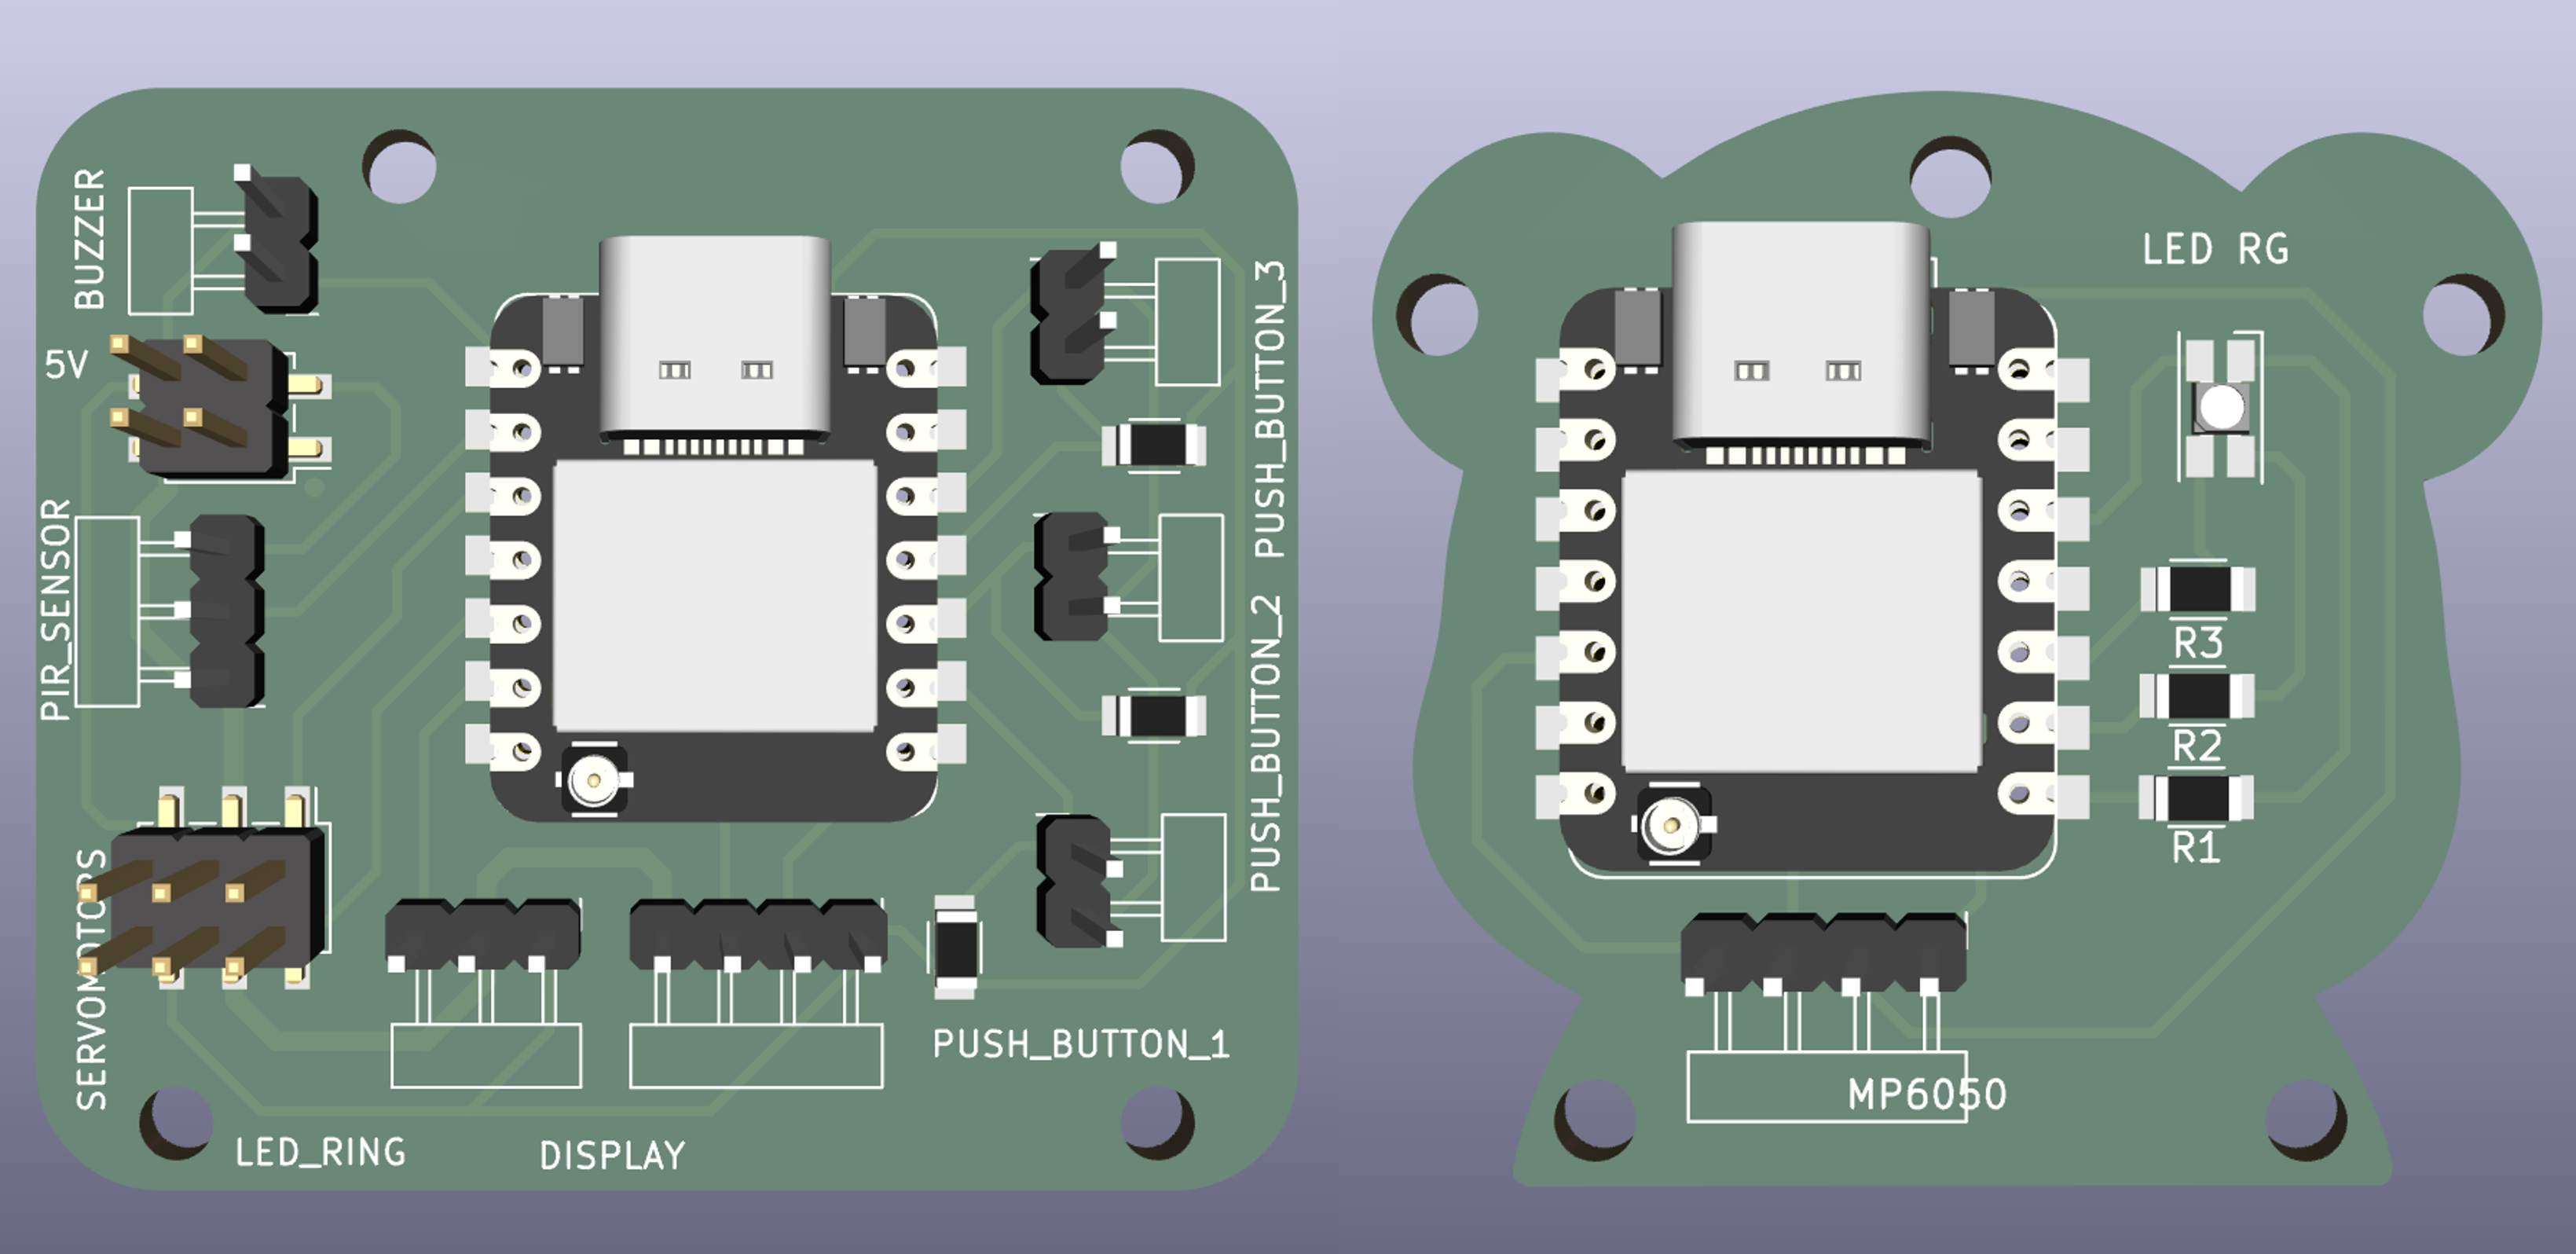
Electronics Design
Two custom PCBs designed in KiCad. The main board was designed to be as compact as possible, fitting all connections in a form that fits within its designated space in the robot base. The accessory board was designed in the shape of a small bear. However, for encapsulated applications like the bamboo accessory, a shaped board can complicate the packaging process significantly.
📝 Custom board shapes are achievable and add a unique character to the design, but when space is limited inside an enclosure, a more compact and standard form is often the better choice. In a future iteration, the accessory board will be redesigned smaller to simplify the bamboo packaging.
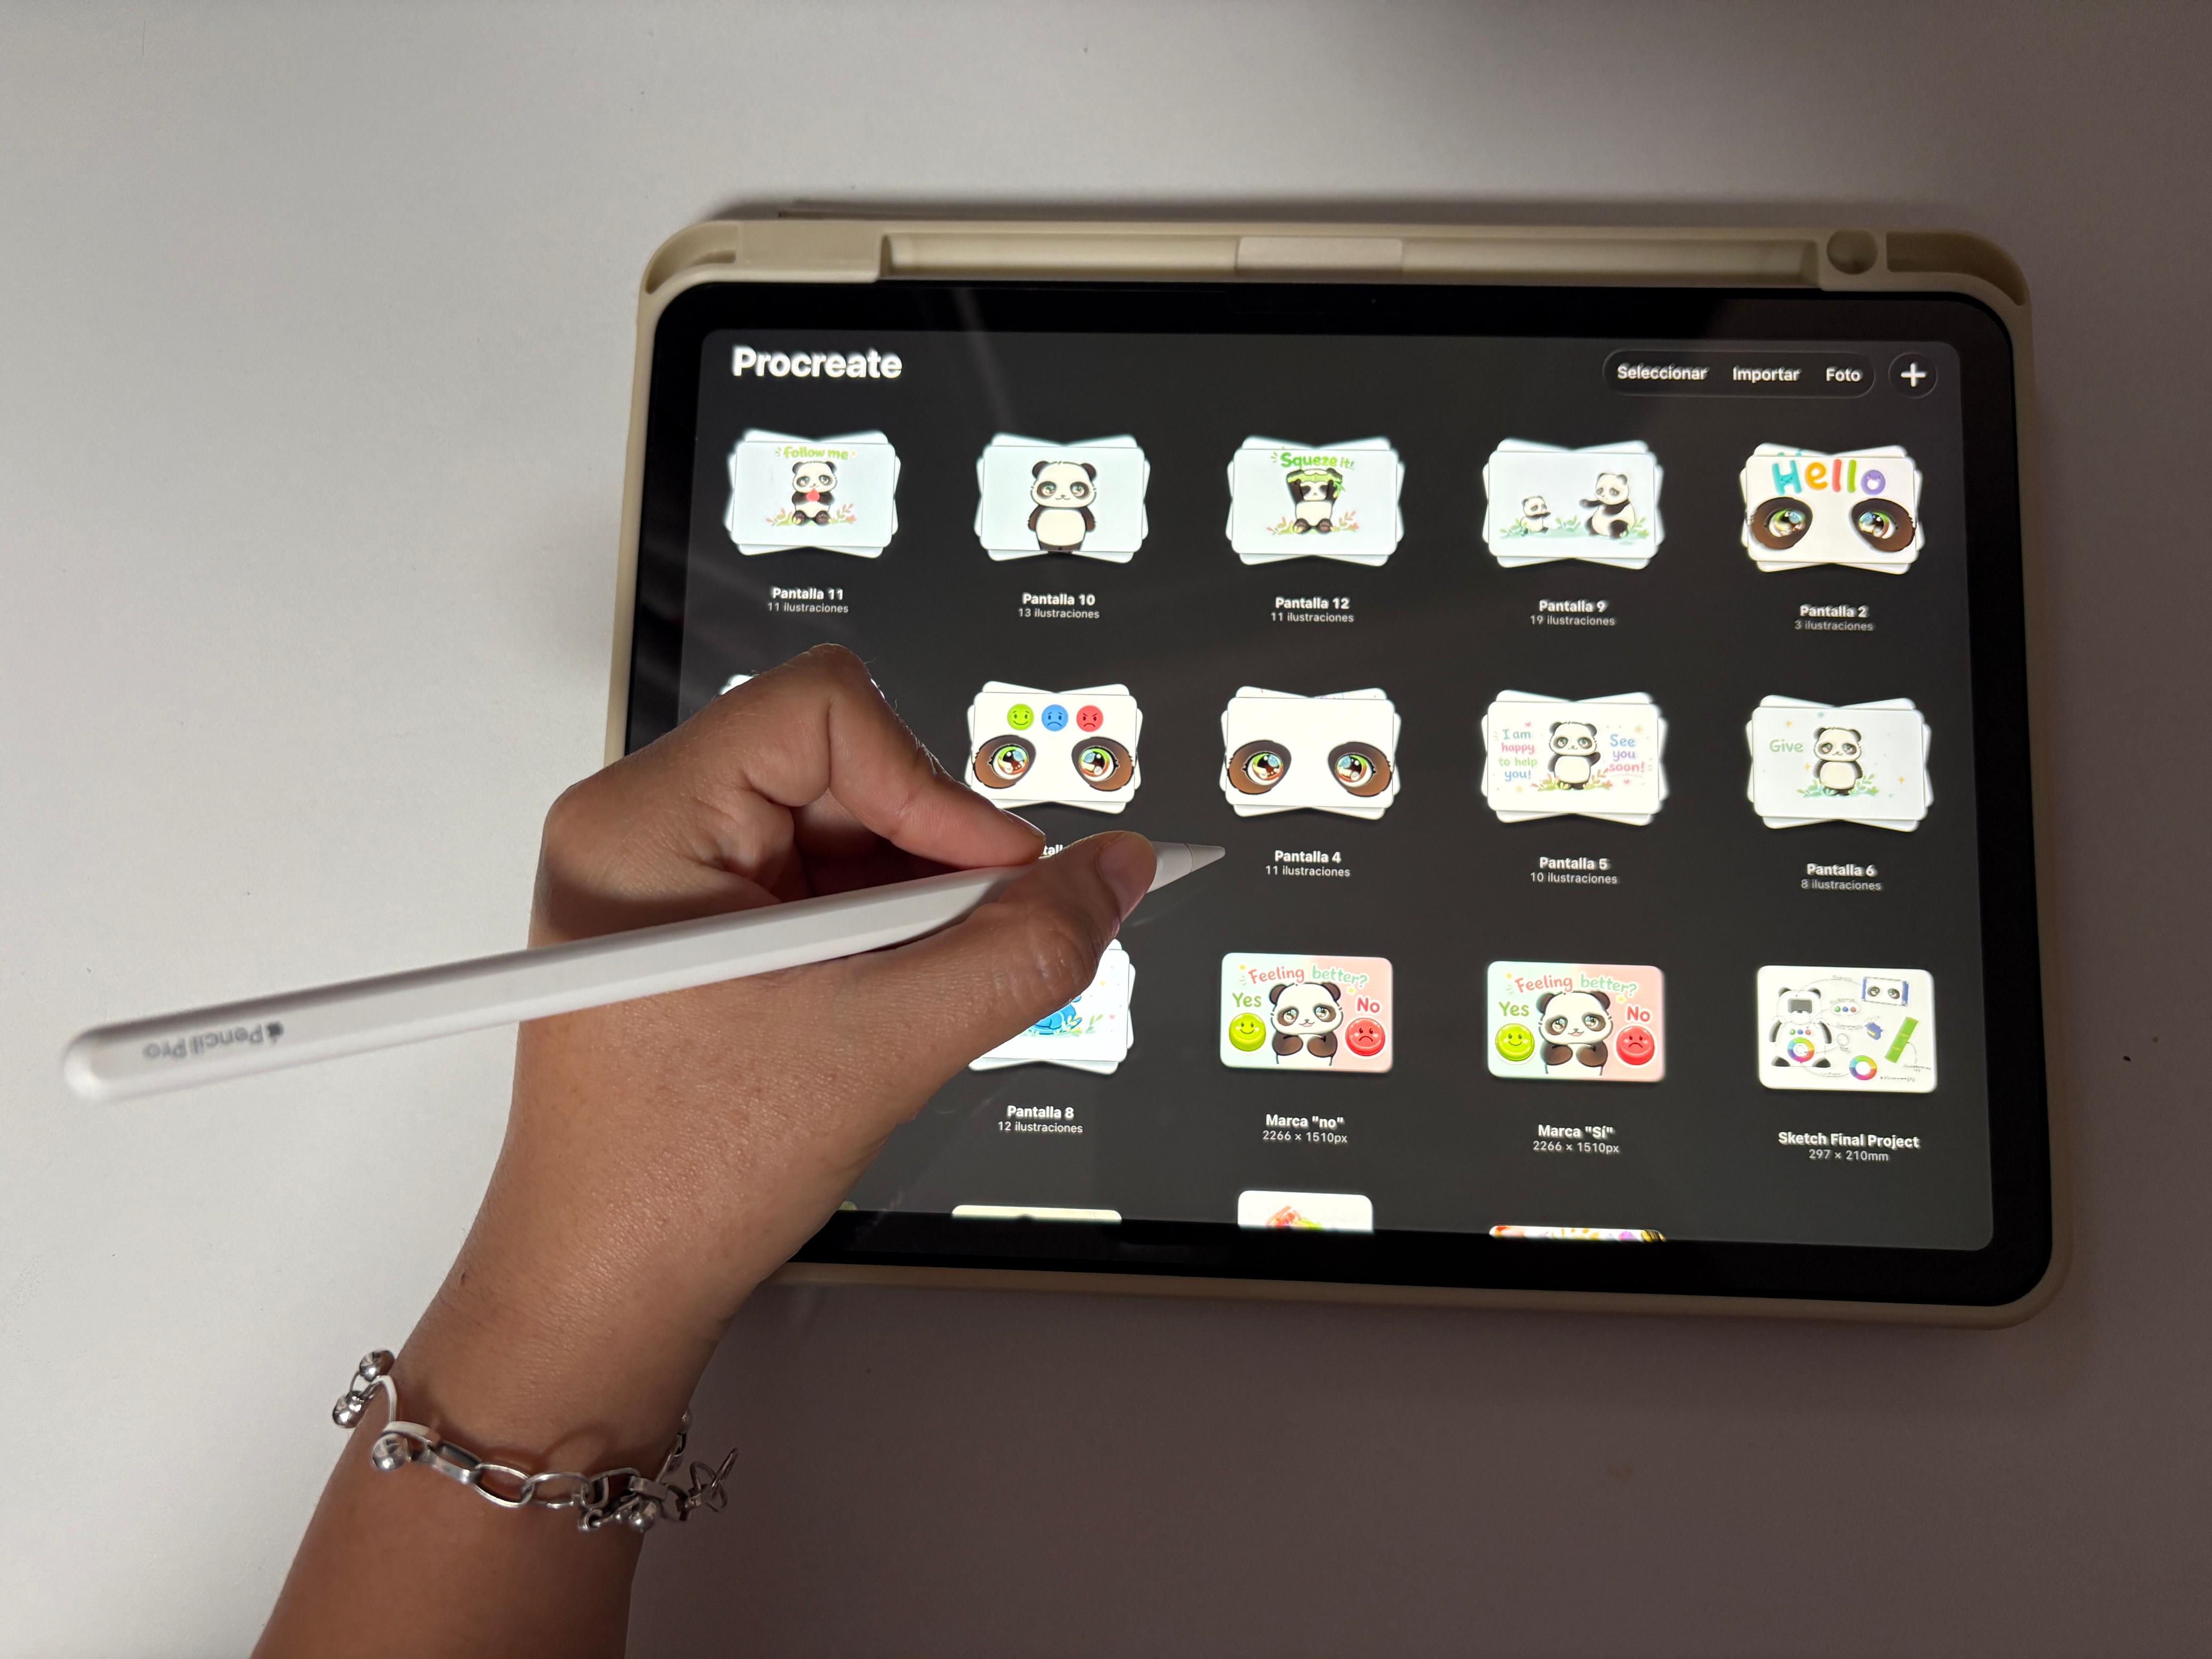
Visual Content/2D Design
12 animated screens designed in Procreate, one per state in the interaction flow, built frame by frame and designed to be immediately readable by a child.
What materials and components will be used? Where will they come from? How much will they cost?
The project uses two sets of components — one for the main robot and one for the bamboo accessory. The core electronics include two XIAO ESP32S3 microcontrollers, a Nextion display, two servo motors, a NeoPixel LED ring, a PIR sensor, an MPU-6050 accelerometer, push buttons, a buzzer, and an RGB LED. The physical structure is fabricated using PLA filament for the robot body, and PETG and TPU for the bamboo accessory. Two custom PCBs were designed in KiCad and milled at the fab lab.
The assembly uses threaded inserts and screws to join the printed parts, creating a strong and clean connection. The inserts are embedded into the printed parts and the screws go through them, keeping them as hidden as possible so they do not affect the final appearance.
Most components were already available at the fab lab. The only component that required importing was the Nextion display, sourced from Seeed Studio. The estimated total cost based on reference prices is $183.95, though actual costs will vary depending on the supplier and country.
| 🐼 Panda Robot — Main Board | |||
|---|---|---|---|
| Component | Qty | Price (ref.) | Supplier |
| SMD Resistor 1kΩ | 3 | $0.18 | Amazon |
| PinHeader-01x02 P2.54mm Vertical THT | 4 | $7.49 (set) | Amazon |
| PinHeader-01x03 P2.54mm Vertical THT | 2 | — | Amazon |
| PinHeader-01x04 P2.54mm Vertical THT | 1 | — | Amazon |
| PinHeader 2x02 P2.54mm Vertical SMD | 1 | — | Amazon |
| PinHeader 2x03 P2.54mm Vertical SMD | 1 | — | Amazon |
| PinSocket-01x07 SMD | 2 | $0.47 | Amazon |
| SERVO MOTOR MG996 11KG/CM | 2 | $9.99 | Amazon |
| Seeed Studio XIAO ESP32S3 | 1 | $7.49 | Seeed Studio |
| NeoPixel LED Ring 16x5050 | 1 | $14.89 | Amazon |
| IR PIR HC-SR501 | 1 | $6.00 | Amazon |
| Push Button | 3 | $1.44 | Amazon |
| Passive Electronic Buzzer | 1 | $0.90 | Amazon |
| Nextion Basic NX4832T035 | 1 | $59.00 | Seeed Studio |
| eSUN PLA 1.75mm (black & white) | 2 | $17.99 | Amazon |
| Subtotal: $125.82 | |||
| 🌿 Bamboo Accessory — Accessory Board | |||
|---|---|---|---|
| Component | Qty | Price (ref.) | Supplier |
| PinHeader-01x04 THT | 1 | $0.62 | Amazon |
| SMD Resistor 1kΩ | 1 | $0.18 | Amazon |
| SMD Resistor 4.99kΩ | 2 | $0.36 | Amazon |
| SMD RGB LED | 1 | $0.05 | Amazon |
| PinSocket-01x07 SMD | 2 | $0.47 | Amazon |
| Seeed Studio XIAO ESP32S3 | 1 | $7.49 | Seeed Studio |
| MPU-6050 Accelerometer | 1 | $3.00 | Amazon |
| eSUN PETG 1.75mm transparent | 1 | $14.99 | Amazon |
| eSUN TPU 1.75mm transparent | 1 | $23.99 | Amazon |
| Breadboard Jumper Wires | 1 | $6.98 | Amazon |
| Subtotal: $58.12 | |||
| Total estimated cost: $183.95 | |||
What parts and systems will be made?
Every part of this project was made rather than bought. The system is divided into two physical units — the robot and the bamboo accessory — that work together wirelessly. The robot contains all the main electronics and handles the interaction with the child, while the accessory sends movement data via BLE. Together they form a complete, independently operable system.
| System | What was made | How |
|---|---|---|
| 🐼 Head | Front + back panels | FDM 3D printing — multi-color PLA |
| 🐼 Torso | Front + back panels | FDM 3D printing — multi-color PLA |
| 🐼 Arms + legs + tail | Individual printed parts | FDM 3D printing — multi-color PLA |
| 🌿 Bamboo accessory | PETG inner capsule + TPU outer layer | FDM 3D printing — dual material |
| ⚡ Main PCB | Compact board housing all robot connections | Designed in KiCad, milled at the fab lab |
| ⚡ Accessory PCB | Bear-shaped board for the bamboo | Designed in KiCad, milled at the fab lab |
| 📷 Visual content | 12 animated screens — one per interaction state | Designed in Procreate, programmed in Nextion Editor |
| 💻 Programming | Full interaction flow — both boards | C++ via Arduino IDE |
| 📡 BLE communication | Wireless link between robot and accessory | NimBLE on both XIAO ESP32S3 boards |
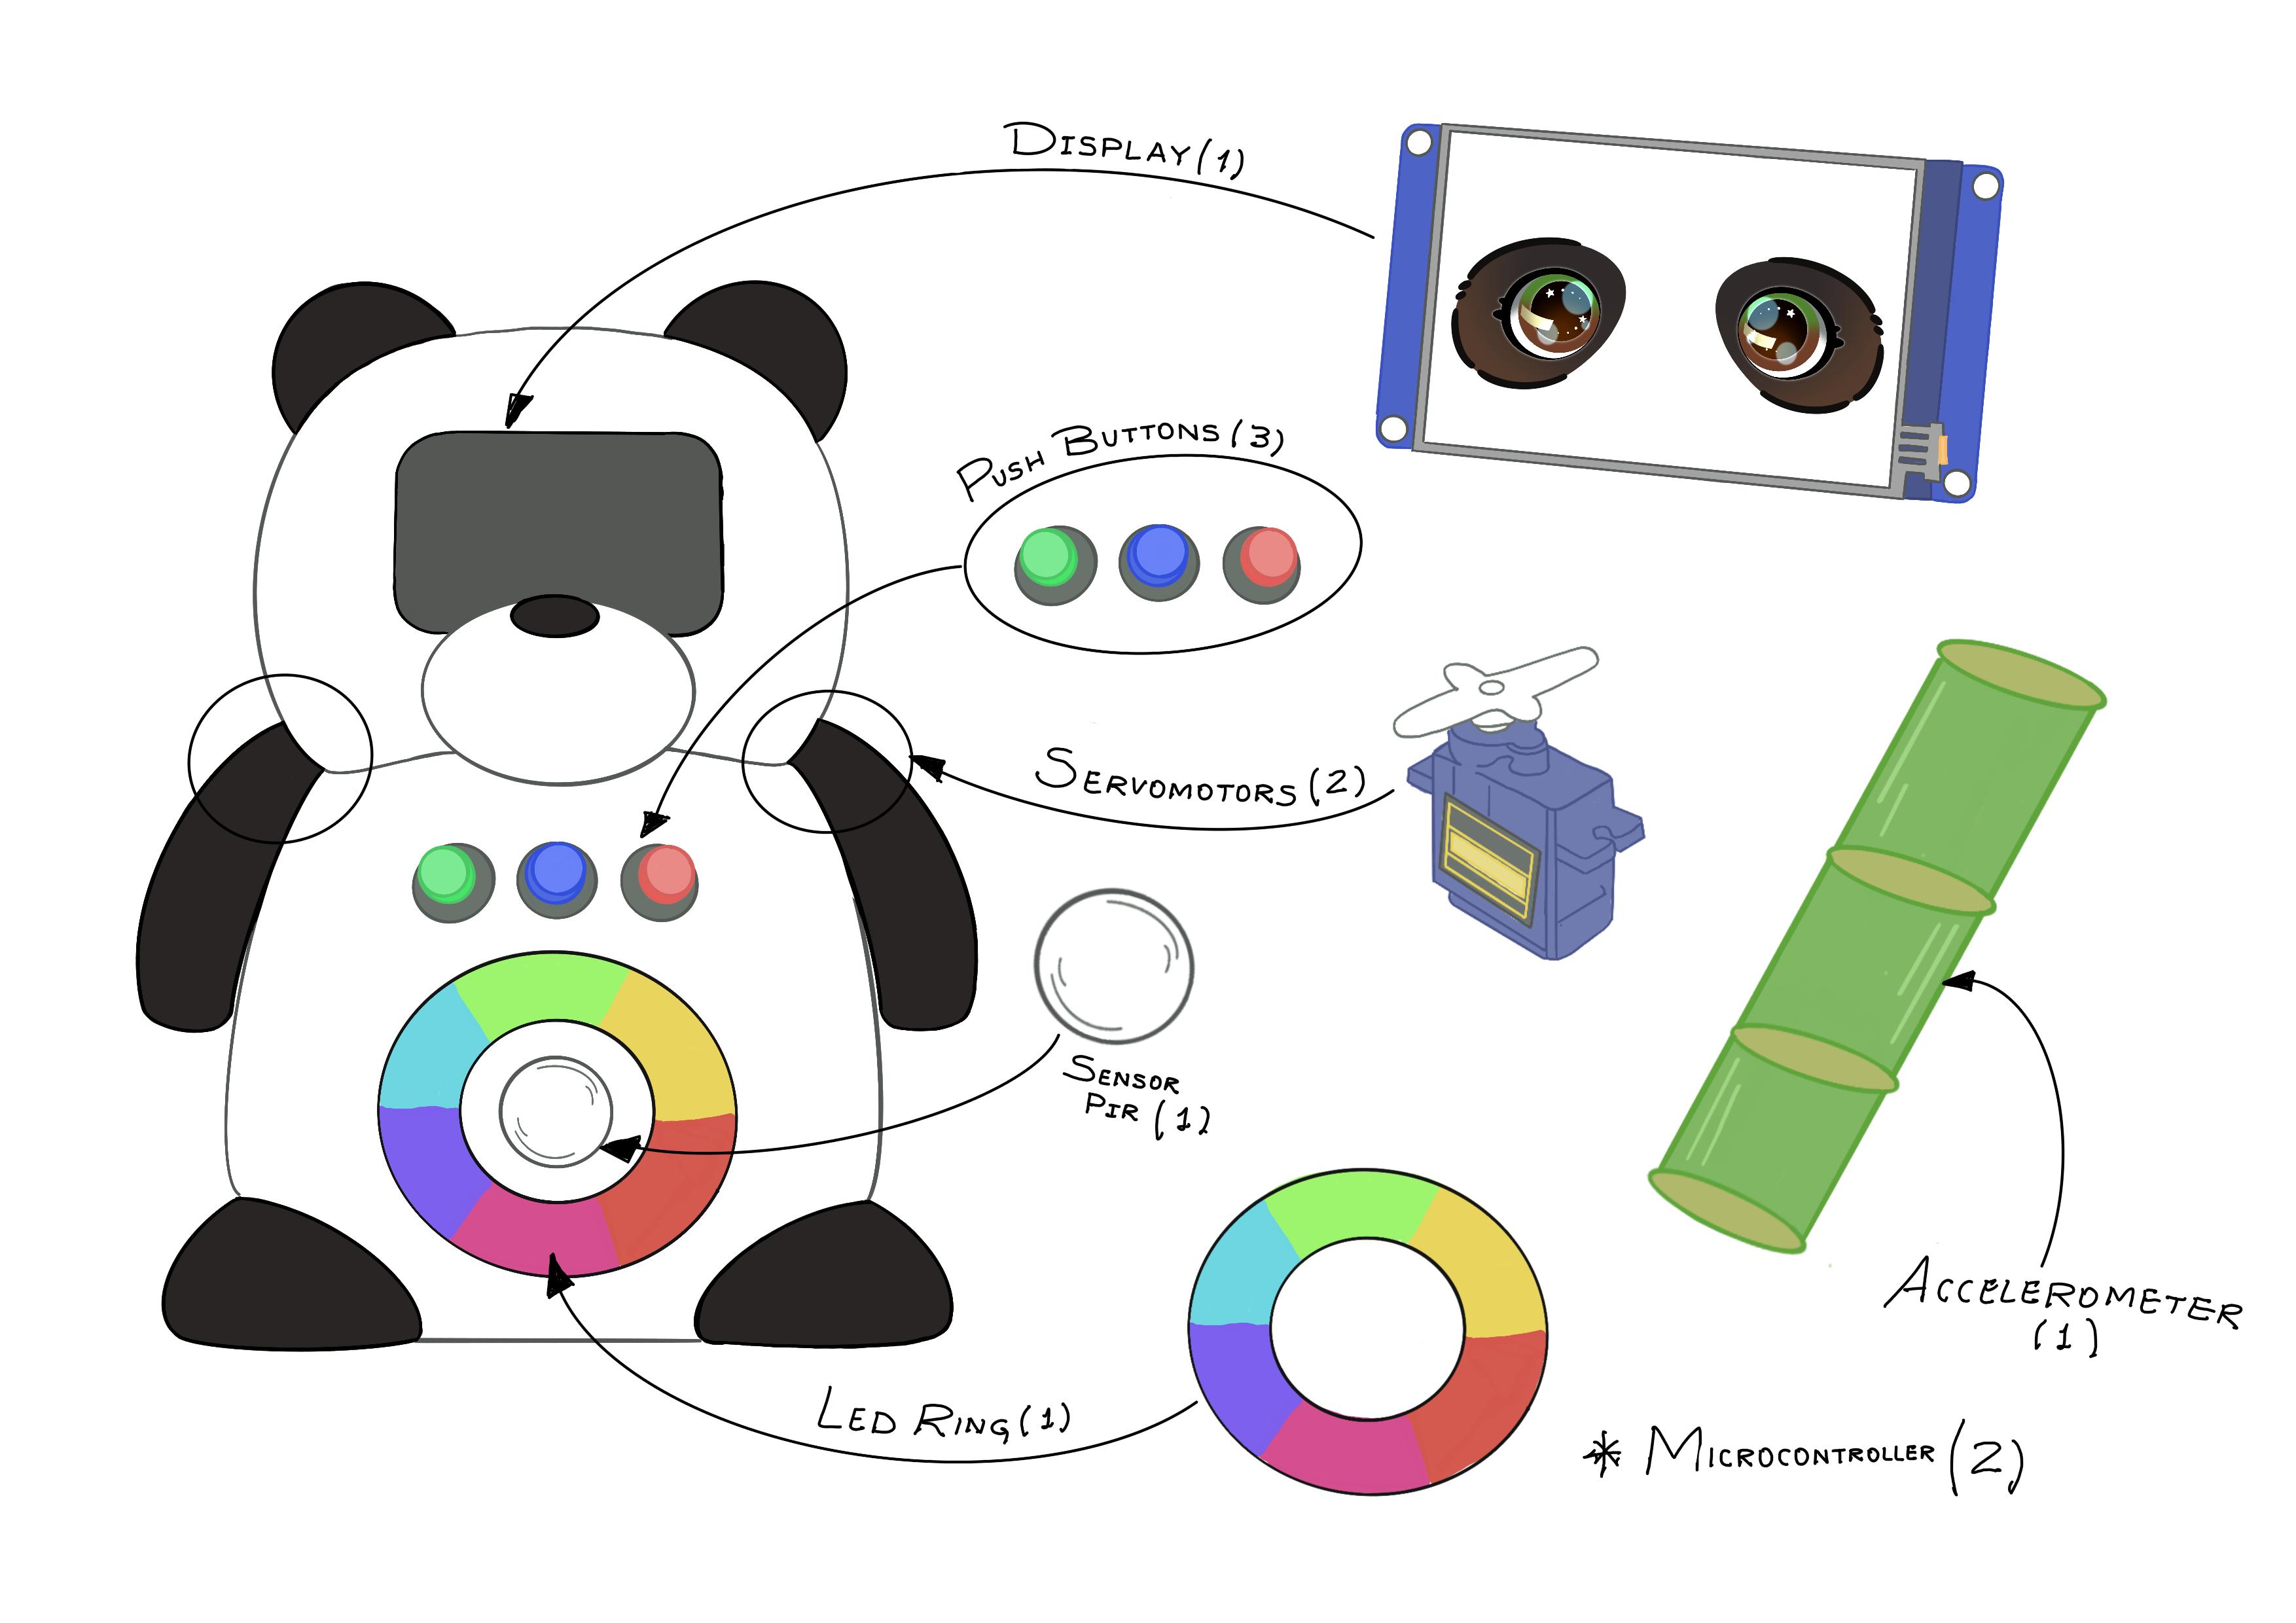
The diagram below shows everything that will be designed and made for this project — from the physical body of the robot and its bamboo accessory, to the custom electronics, the animated screen content, the programming tools, and how all the components connect and communicate with each other.
Physical body
Front — Head, torso, arms, legs
Back — Torso rear, tail
Bamboo — PETG inner + TPU outer
Electronics
Main board — XIAO ESP32S3 · KiCad
Accessory board — XIAO ESP32S3 · KiCad
Visual content
Screen animations — 12 screens · Procreate
Nextion display — Nextion Editor
Programming
Arduino IDE — both boards
Nextion Editor — display logic
C++ — main language
Networking and communications
Main board connects to:
• Nextion display (UART)
• Servomotors × 2
• NeoPixel LED ring
• Push buttons × 3
• PIR sensor · Buzzer
Accessory board connects to:
• MPU6050 (I2C)
• RGB LED SMD
What processes will be used?
The project combines digital design, fabrication, electronics, and programming into a single integrated system. The physical body is modeled in Fusion 360 and fabricated with FDM 3D printing. The electronics are designed in KiCad and milled in the fab lab. The interaction is driven by input sensors and output devices programmed in C++ via Arduino IDE, with the display logic handled in Nextion Editor. Both boards communicate wirelessly via BLE.
| Process | Application | Week |
|---|---|---|
| Computer-Aided Design (3D) | Robot body and bamboo accessory — Fusion 360 | Computer-Aided Design |
| Computer-Aided Design (2D) | Screen animations — Procreate | Computer-Aided Design |
| FDM 3D Printing | Robot body parts and bamboo accessory | 3D Printing |
| PCB design and milling | Main board and accessory board — KiCad | Electronics Design / Production |
| Embedded programming | Both XIAO ESP32S3 boards — Arduino IDE + C++ | Embedded Programming |
| Nextion Instruction Set | Display logic — Nextion Editor | Output Devices |
| Input devices | MPU6050 accelerometer, PIR sensor, push buttons | Input Devices |
| Output devices | Nextion display, NeoPixel LED ring, servomotors, RGB LED, buzzer | Output Devices |
| BLE wireless communication | Communication between both boards | Networking and Communications |
What questions need to be answered?
These are the open questions that need to be resolved to consider the project complete. Some are technical calibration challenges — like finding the right MPU6050 thresholds for a child's shaking intensity — while others involve system-level decisions, such as synchronizing all outputs so that the robot's responses feel natural and coordinated. The bamboo accessory is still being tested in terms of material and infill, and the full interaction flow, including PIR and servo integration, is pending final programming.
| Area | Question |
|---|---|
| Sensors | How to fine-tune the three intensity thresholds of the MPU6050 so that low, medium, and high levels reflect realistic shaking patterns from a child? |
| Networking | What is the reliable BLE range in a real interaction environment, and how should the system handle a dropped connection gracefully? |
| System integration | How to synchronize the timing of Nextion screen animations with servo movements and LED feedback so that all outputs feel coordinated? |
| Fabrication | What is the optimal infill pattern and density for the TPU outer layer of the bamboo accessory to achieve the right balance between softness and structural integrity? |
| Programming | How to complete and integrate the PIR sensor and servo logic into the full interaction flow? |
How will it be evaluated?
The project will be considered successful if all the criteria above are met. The evaluation focuses on the full interaction loop — from presence detection to farewell — verifying that every component plays its role at the right moment. Most of the technical criteria are already validated: the three emotional sequences work correctly, the BLE communication between both boards is stable, and the bamboo accessory classifies movement intensity as expected. The remaining steps before the final presentation on June 12 are the summary slide, the video clip, and a full recorded demo of the interaction from start to finish.
| Evaluation criteria & timeline | ||
|---|---|---|
| Criterion | How it will be verified | Target date |
| PIR sensor detects presence and wakes the robot | Robot transitions from idle to welcome state when a person approaches | ✓ Done |
| All three emotional sequences execute correctly | Each button triggers the right combination of display, LED, servos, and sound | ✓ Done |
| Nextion display shows the correct screen for each state | All 12 screens appear at the right moment during the interaction flow | ✓ Done |
| NeoPixel LED ring and servos respond as expected | Visual and physical feedback matches the designed response for each emotion | ✓ Done |
| BLE communication is stable | Accessory transmits the three intensity levels reliably to the robot | ✓ Done |
| Bamboo accessory correctly classifies movement | Low, medium, and high shaking produce different responses in the robot | ✓ Done |
| System returns to idle after every interaction | Robot resets correctly after the farewell state | ✓ Done |
| Summary slide completed and uploaded | Slide designed and published on the final project page | June 10 |
| Video clip completed and uploaded | Video recorded, edited and published on the final project page | June 11 |
| Full interaction demo recorded | A complete run from idle to farewell recorded on video | June 12 |
Final Thought
As part of the 2026 cycle, this week felt different from the others. Having the poster and video completed — and seeing the project presented as a whole — gave me a clear perspective on how much it has evolved since the initial concept. Developing a project like this, from an idea inspired by a personal experience to a functional robot with its own identity, involved many iterations and challenges that I had to overcome along the way. There were technical obstacles and moments when integrating all the different components seemed difficult, but the process gradually came together. Pambu is now functional, documented, and close to its final presentation. Looking back at the progress made throughout the program has been one of the most rewarding aspects of this stage of the project.