W2 | Computer-Aided Design
📝 Individual Assignment:
- Model (raster, vector, 2D, 3D, render, animate, simulate, ...) a possible final project, compress your images and videos, and post a description with your design files on your class page.
2D Design
CorelDRAW X7
This week was an opportunity to explore 2D modelling through tools that are already part of my workflow 💻. I worked with CorelDRAW, a software I've been using to develop different types of designs, from small functional objects to more detailed design pieces. Over time, this tool has helped me understand how to move from an idea to a clean vector-based design. One feature I especially value is vectorization, which allows me to transform images or logos into editable paths, making it easier to refine, simplify, and adapt designs. For this assignment, I revisited some of my previous projects and approached them as experimental objects — refining their structure, adjusting proportions, and improving their overall design.
- To explore these ideas, I selected two designs I had previously worked on and reworked them as part of this assignment.
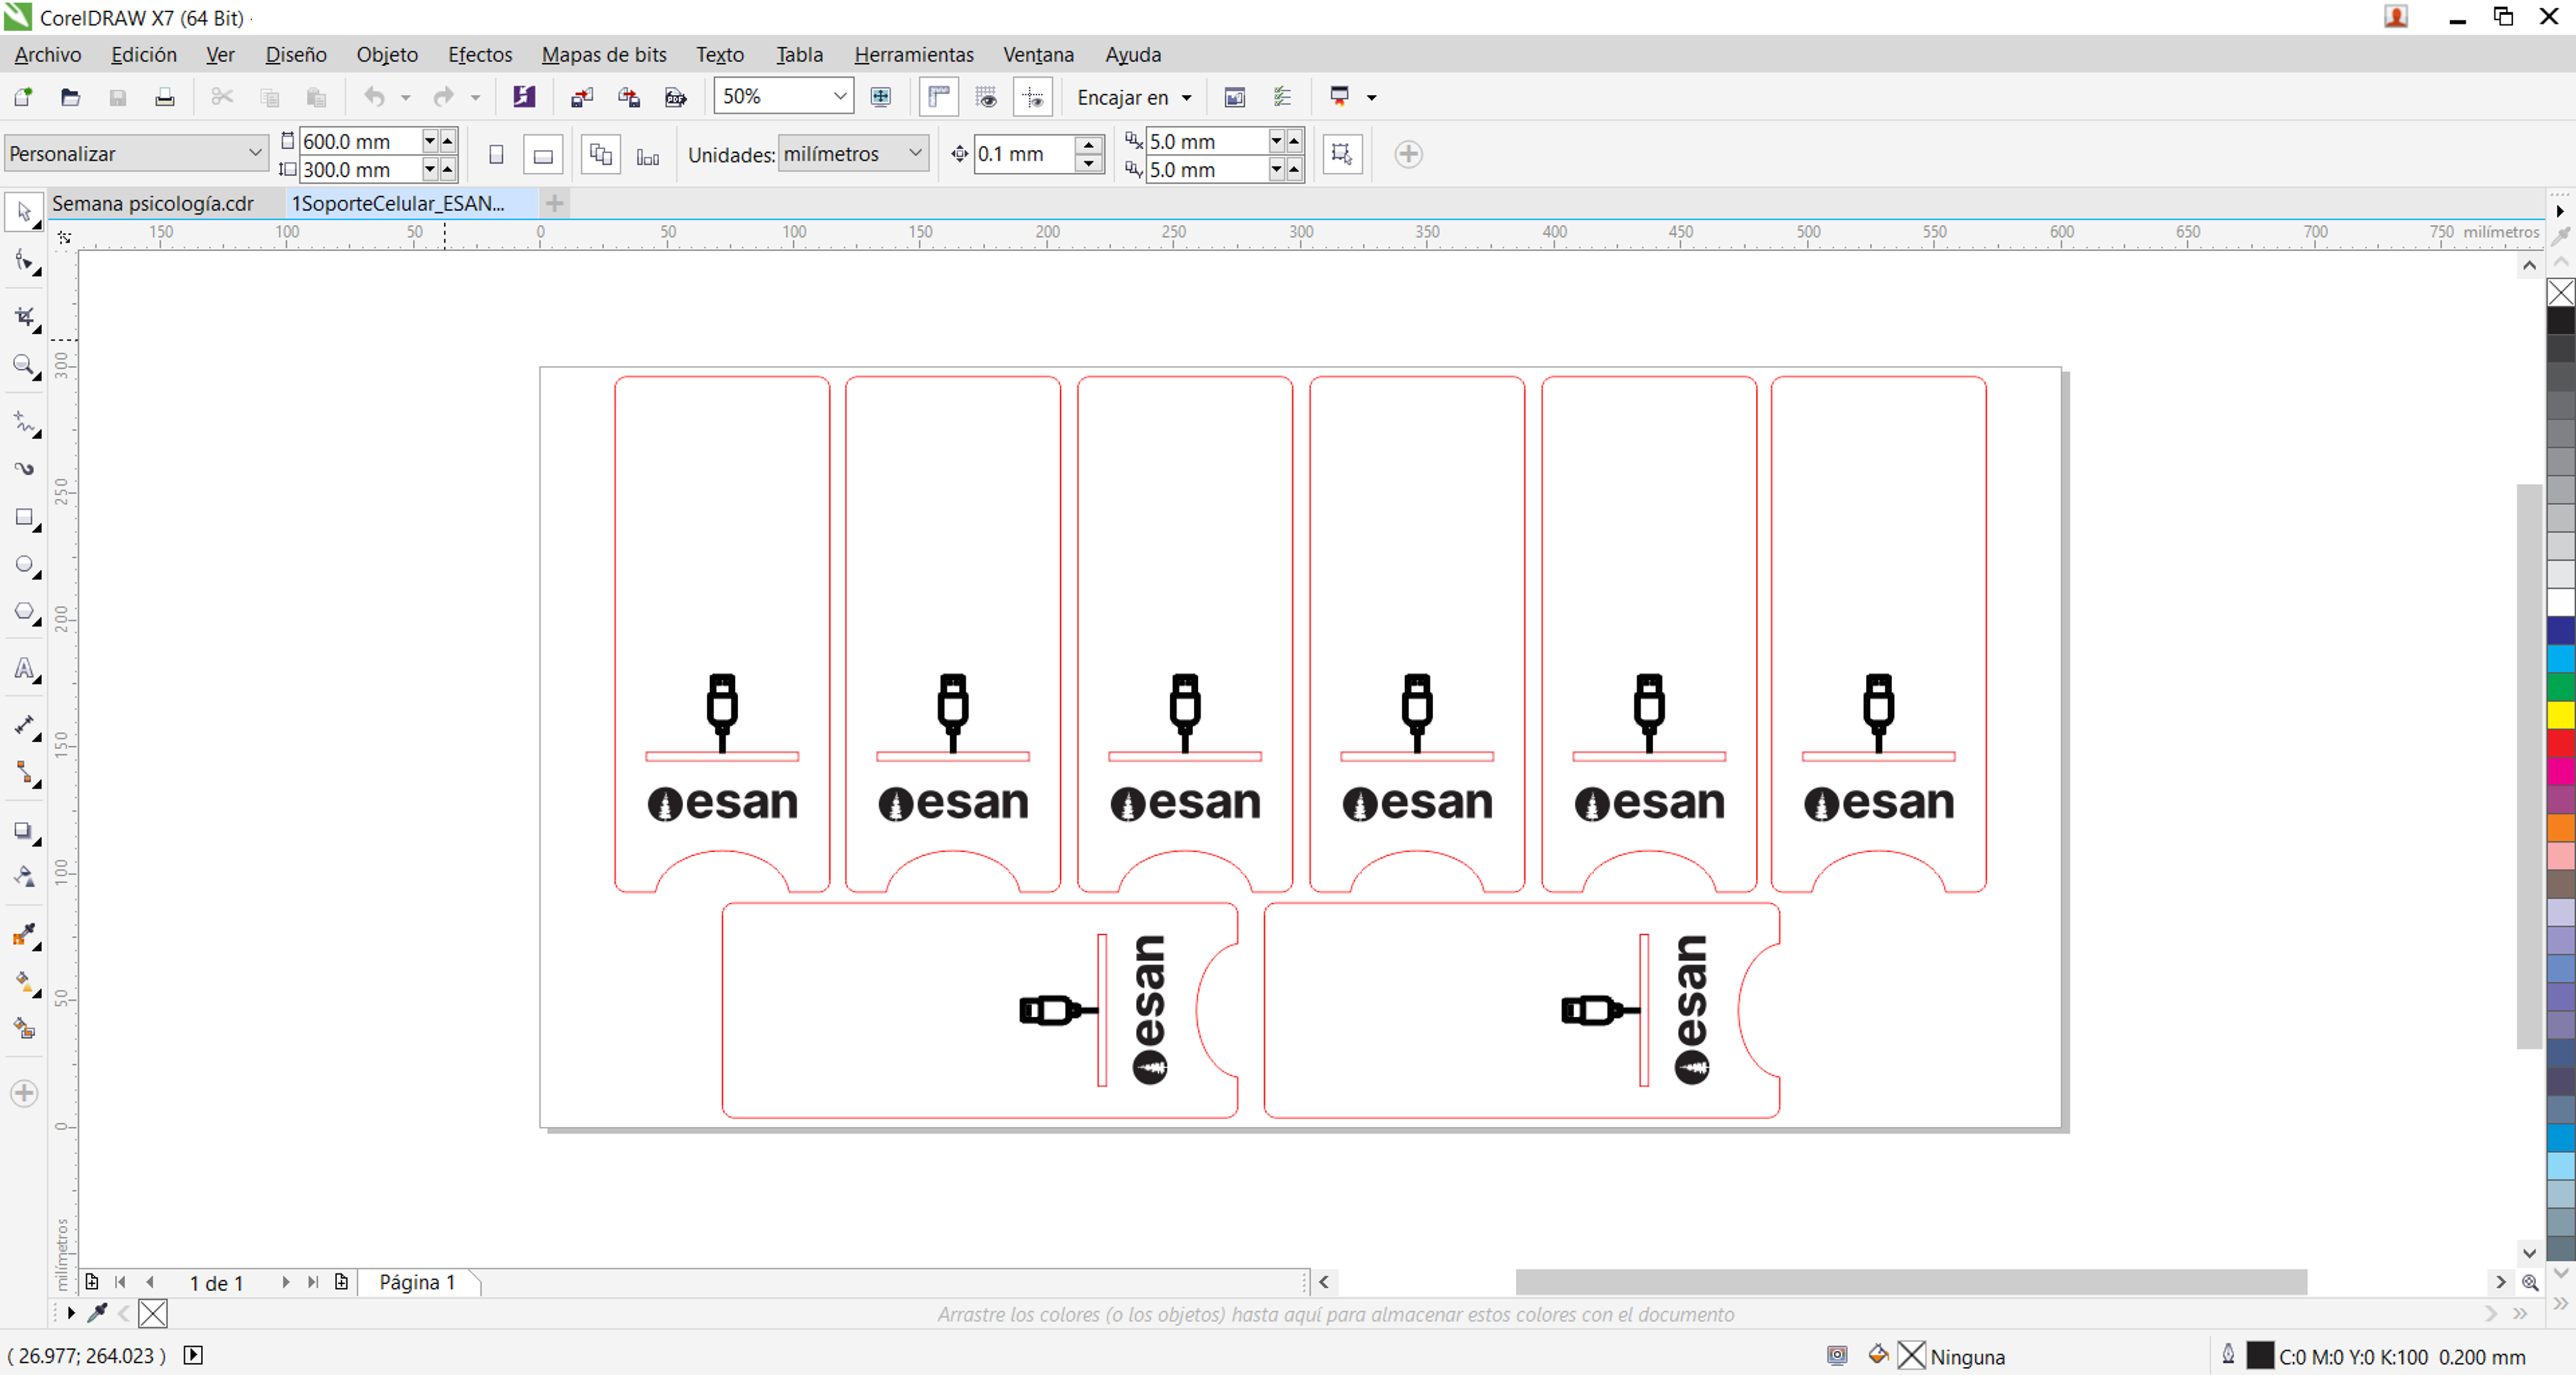
For this design, I revisited a phone stand I had previously worked on and focused on refining its geometry. I adjusted the overall dimensions to improve proportions and redesigned the base to incorporate space for a charging cable. These changes refined the proportions and improved the overall geometry of the design.
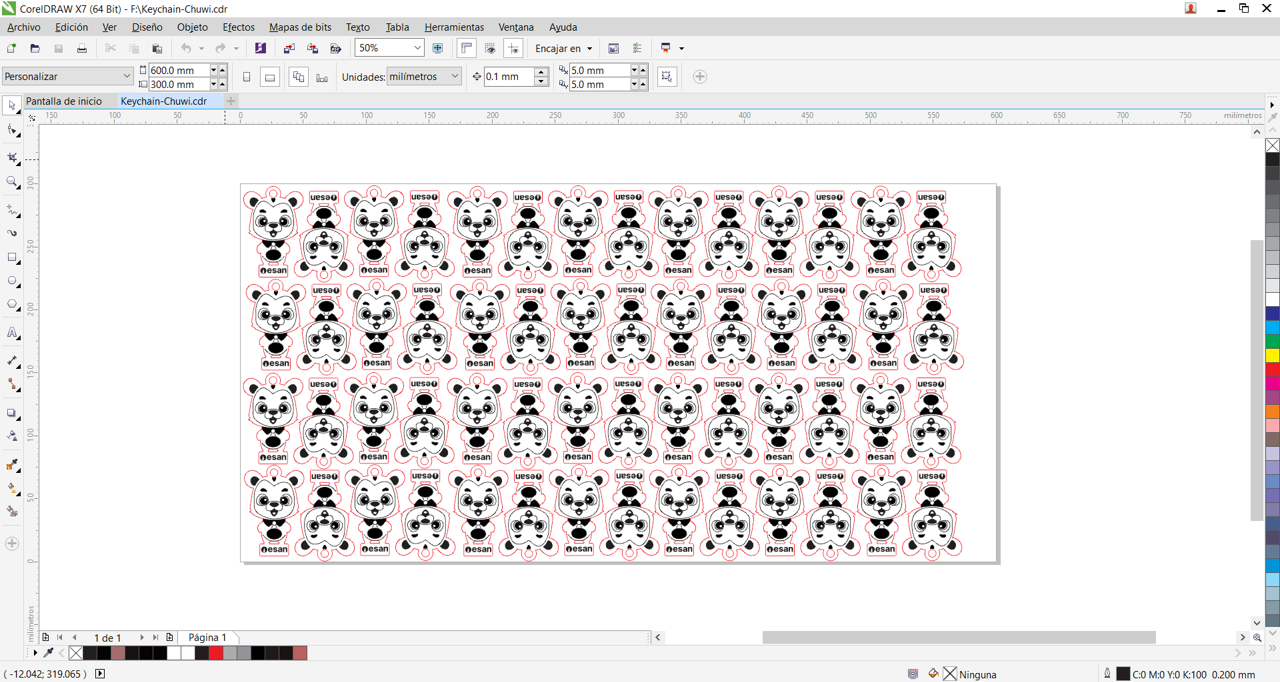
In this case, I started from a vectorized version of the Chuwi character that I had developed before. I reworked the design by simplifying its geometry and adapting it into a keychain format. This involved refining outlines, adjusting proportions, and integrating a circular opening while preserving the character's identity.
⚙️ Design Process
To develop these designs, I followed a workflow that allows me to move efficiently from an idea to a structured vector design. I begin by importing or sketching an initial concept. When needed, I use vectorization tools to convert images into editable paths. From there, I adjust dimensions and proportions, working directly with shapes and curves to refine the overall form. I define line properties and organize elements clearly. Finally, I export the files in formats such as SVG or DXF.
Working with CorelDRAW has allowed me to develop a fast and intuitive workflow. However, it does not offer parametric control, so adjustments need to be made manually. It is also more limited when working with illustration-based 2D designs, where more flexibility is needed. For this reason, I've explored other tools for 2D design and illustration.
Procreate
I started using Procreate to sketch how I want my final project to look. From there, I explored how the panda could express different emotions through simple illustrations. Procreate is a design app for iPad 🍎, and compared to other illustration software like Illustrator — which requires a more expensive license — it was a more accessible option for me, especially since I already had an iPad. At the beginning, like any new tool, it felt a bit tedious. Even though the interface is simple, getting used to drawing with the Apple Pencil and controlling shapes takes time. Over time, it becomes easier to explore shapes, proportions, and visual ideas.
Final Project Sketch
For my project, this has been useful since I'm considering using a display that does not easily support video. Instead, I can create a sequence of illustrated frames — similar to a GIF — to represent different emotions. However, illustration also has its limitations. It can be time-consuming, especially when creating multiple expressions, and even more challenging if drawing is not your strongest skill.
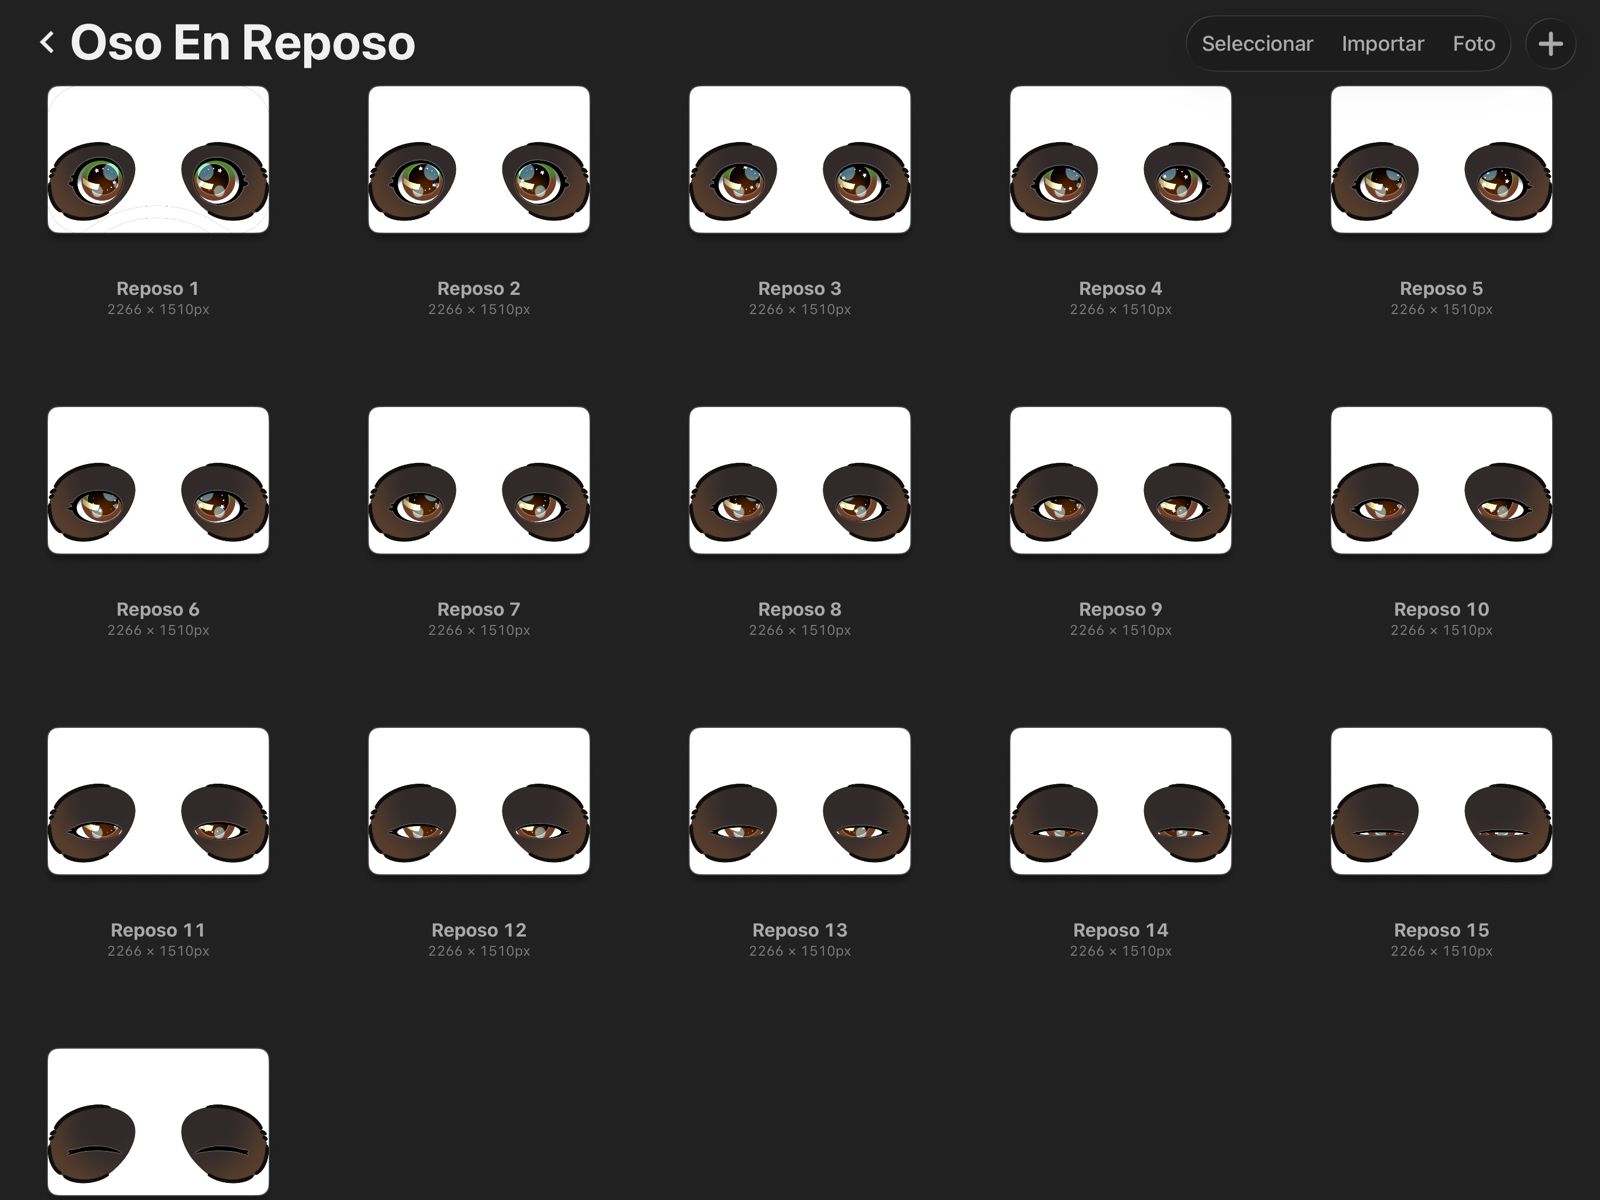
- This is an example of the idle mode, where the panda appears to be sleeping before detecting the child's presence:
⚙️ Design Process
To create the idle mode animation, I used Procreate to design a sequence of illustrated frames where the panda gradually falls asleep. Starting from an open-eye expression, I adjusted the eyes frame by frame — modifying the eyelids and shape — to simulate a blinking and closing motion. Each frame introduces a small change, creating a smooth transition. When displayed in sequence, these frames create a simple animation, similar to a GIF, ending with the panda in a sleeping state.
3D Design
Autodesk Inventor
For the 3D modelling part, my background is mainly in Autodesk Inventor 💻, which is the 3D modelling software I am most familiar with. I learned this tool during my engineering courses, where it was essential for developing different projects. Using Inventor, I worked with sketches, assemblies, and animations, which helped me understand how to build structured 3D models and define relationships between components. This made it especially useful for projects that require precision and organization. However, I find its interface less intuitive, and some workflows can take more steps than expected. Even so, it has been a solid tool for developing more technical designs.
For this assignment, I revisited a candy dispenser project I had previously developed. It consists of a mechanism made up of multiple parts that interact within an assembly. Working on this project helped me understand the importance of keeping an organized workflow when handling several components. Using Autodesk Inventor, I applied constraints to define relationships between parts and ensure proper alignment and movement. It also allowed me to manage each component separately, making it easier to modify parts without affecting the entire system. Additionally, assemblies and animations helped me visualize how the mechanism works.
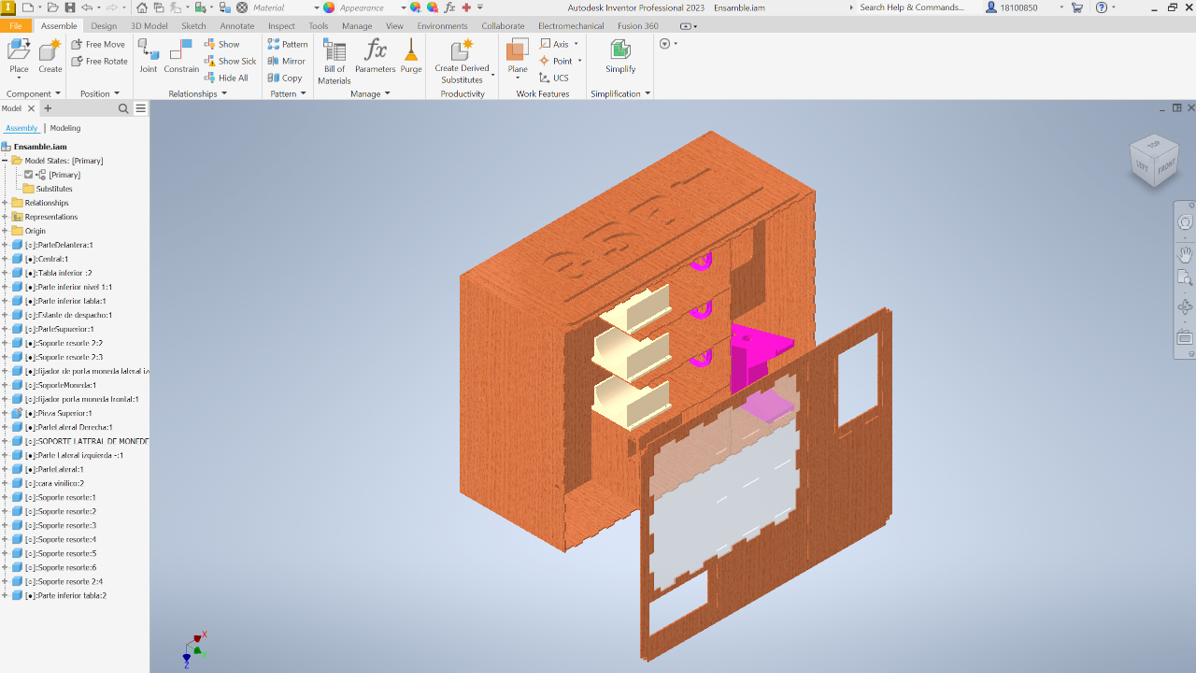
⚙️ Design Process
As part of the design process, I started by creating sketches to define the main geometry of the components. From there, I generated the 3D solids based on those sketches. Once the parts were defined, I assembled them to understand how they interact within the system. I also created basic drawings and animations to visualize the mechanism.
Autodesk Fusion 360
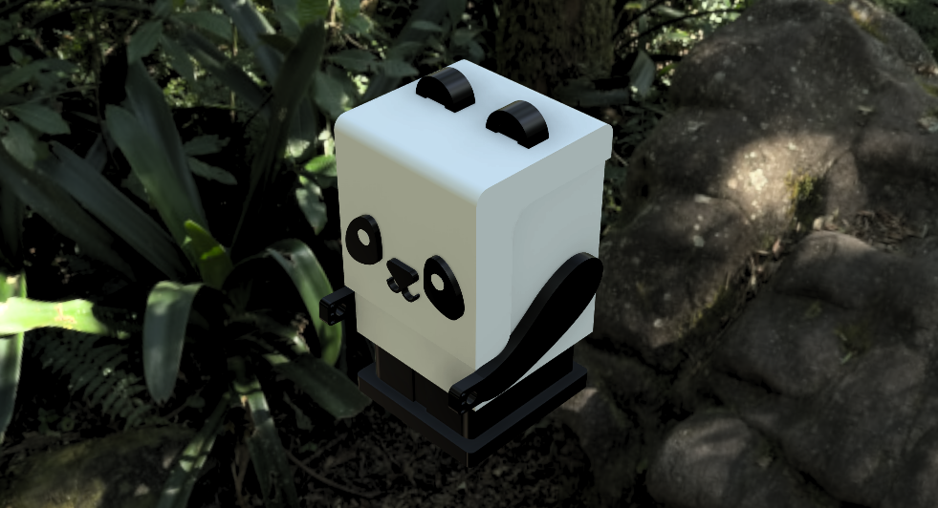
Autodesk Fusion 360 is a 3D design software that I’ve recently started using 💻. One of my first projects was a panda-shaped pencil holder. Through this project, I learned the basic tools of the software. While the workflow is similar to Autodesk Inventor, Fusion 360 feels more intuitive. Working with components and different parts is more flexible, allowing me to create, modify, and interact with geometry in a more direct way—for example, sketching directly over existing faces and turning them into new features or components.
I revisited this project because I was considering using it as a base for my final project. However, I wanted to move away from a more rigid, block-like style and achieve a more organic and expressive form. Both Autodesk Inventor and Fusion 360 are not specifically focused on organic modelling — there are other tools better suited for that. However, since these are the tools I'm already familiar with, I decided to continue exploring them. This is where I discovered the Form tool in Fusion 360, which allows for more flexible and organic shapes. Using this tool, I was able to experiment with smoother geometries and move towards a more friendly and expressive design.
This is the Fusion 360 online viewer—super helpful for staying within GitLab's file size limits!
The Form feature in Autodesk Fusion allows you to shape geometry in a more flexible way, similar to working with digital clay. Instead of relying only on rigid operations, you can directly push, pull, and adjust surfaces to achieve the desired form. It is especially useful for creating organic shapes and you can modify proportions, smooth transitions, and refine curves directly on the geometry. Tools like symmetry and subdivision also help maintain consistency while working on more complex forms. Dimensions can still be applied later to refine and control the final result.
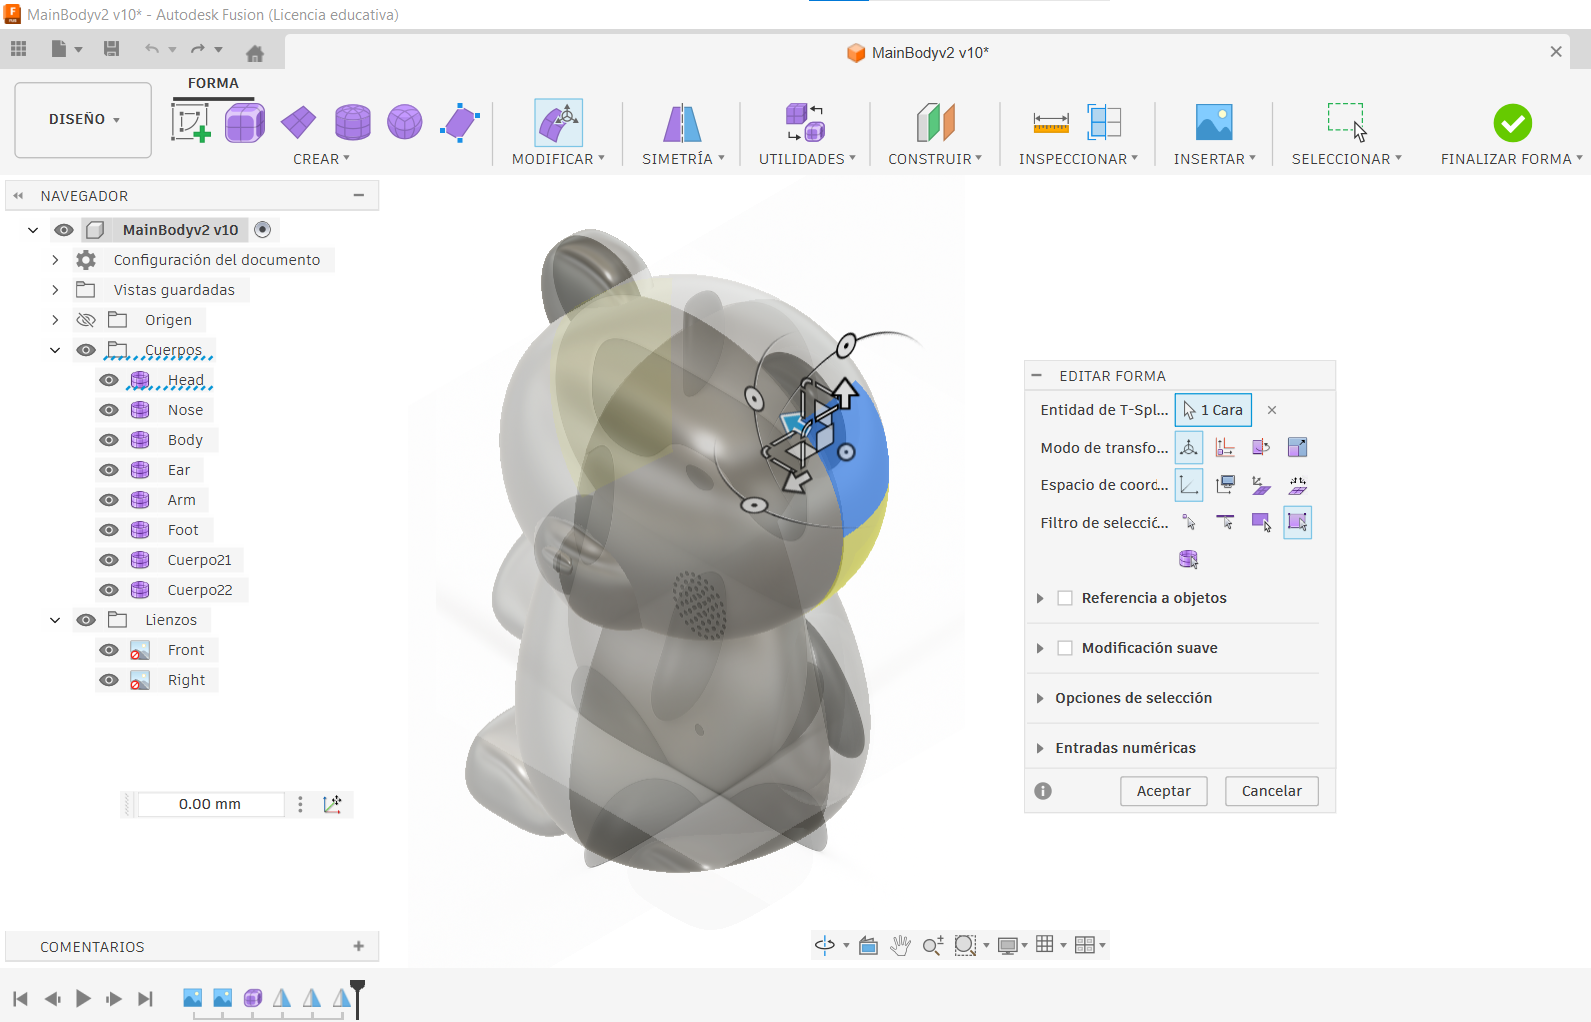
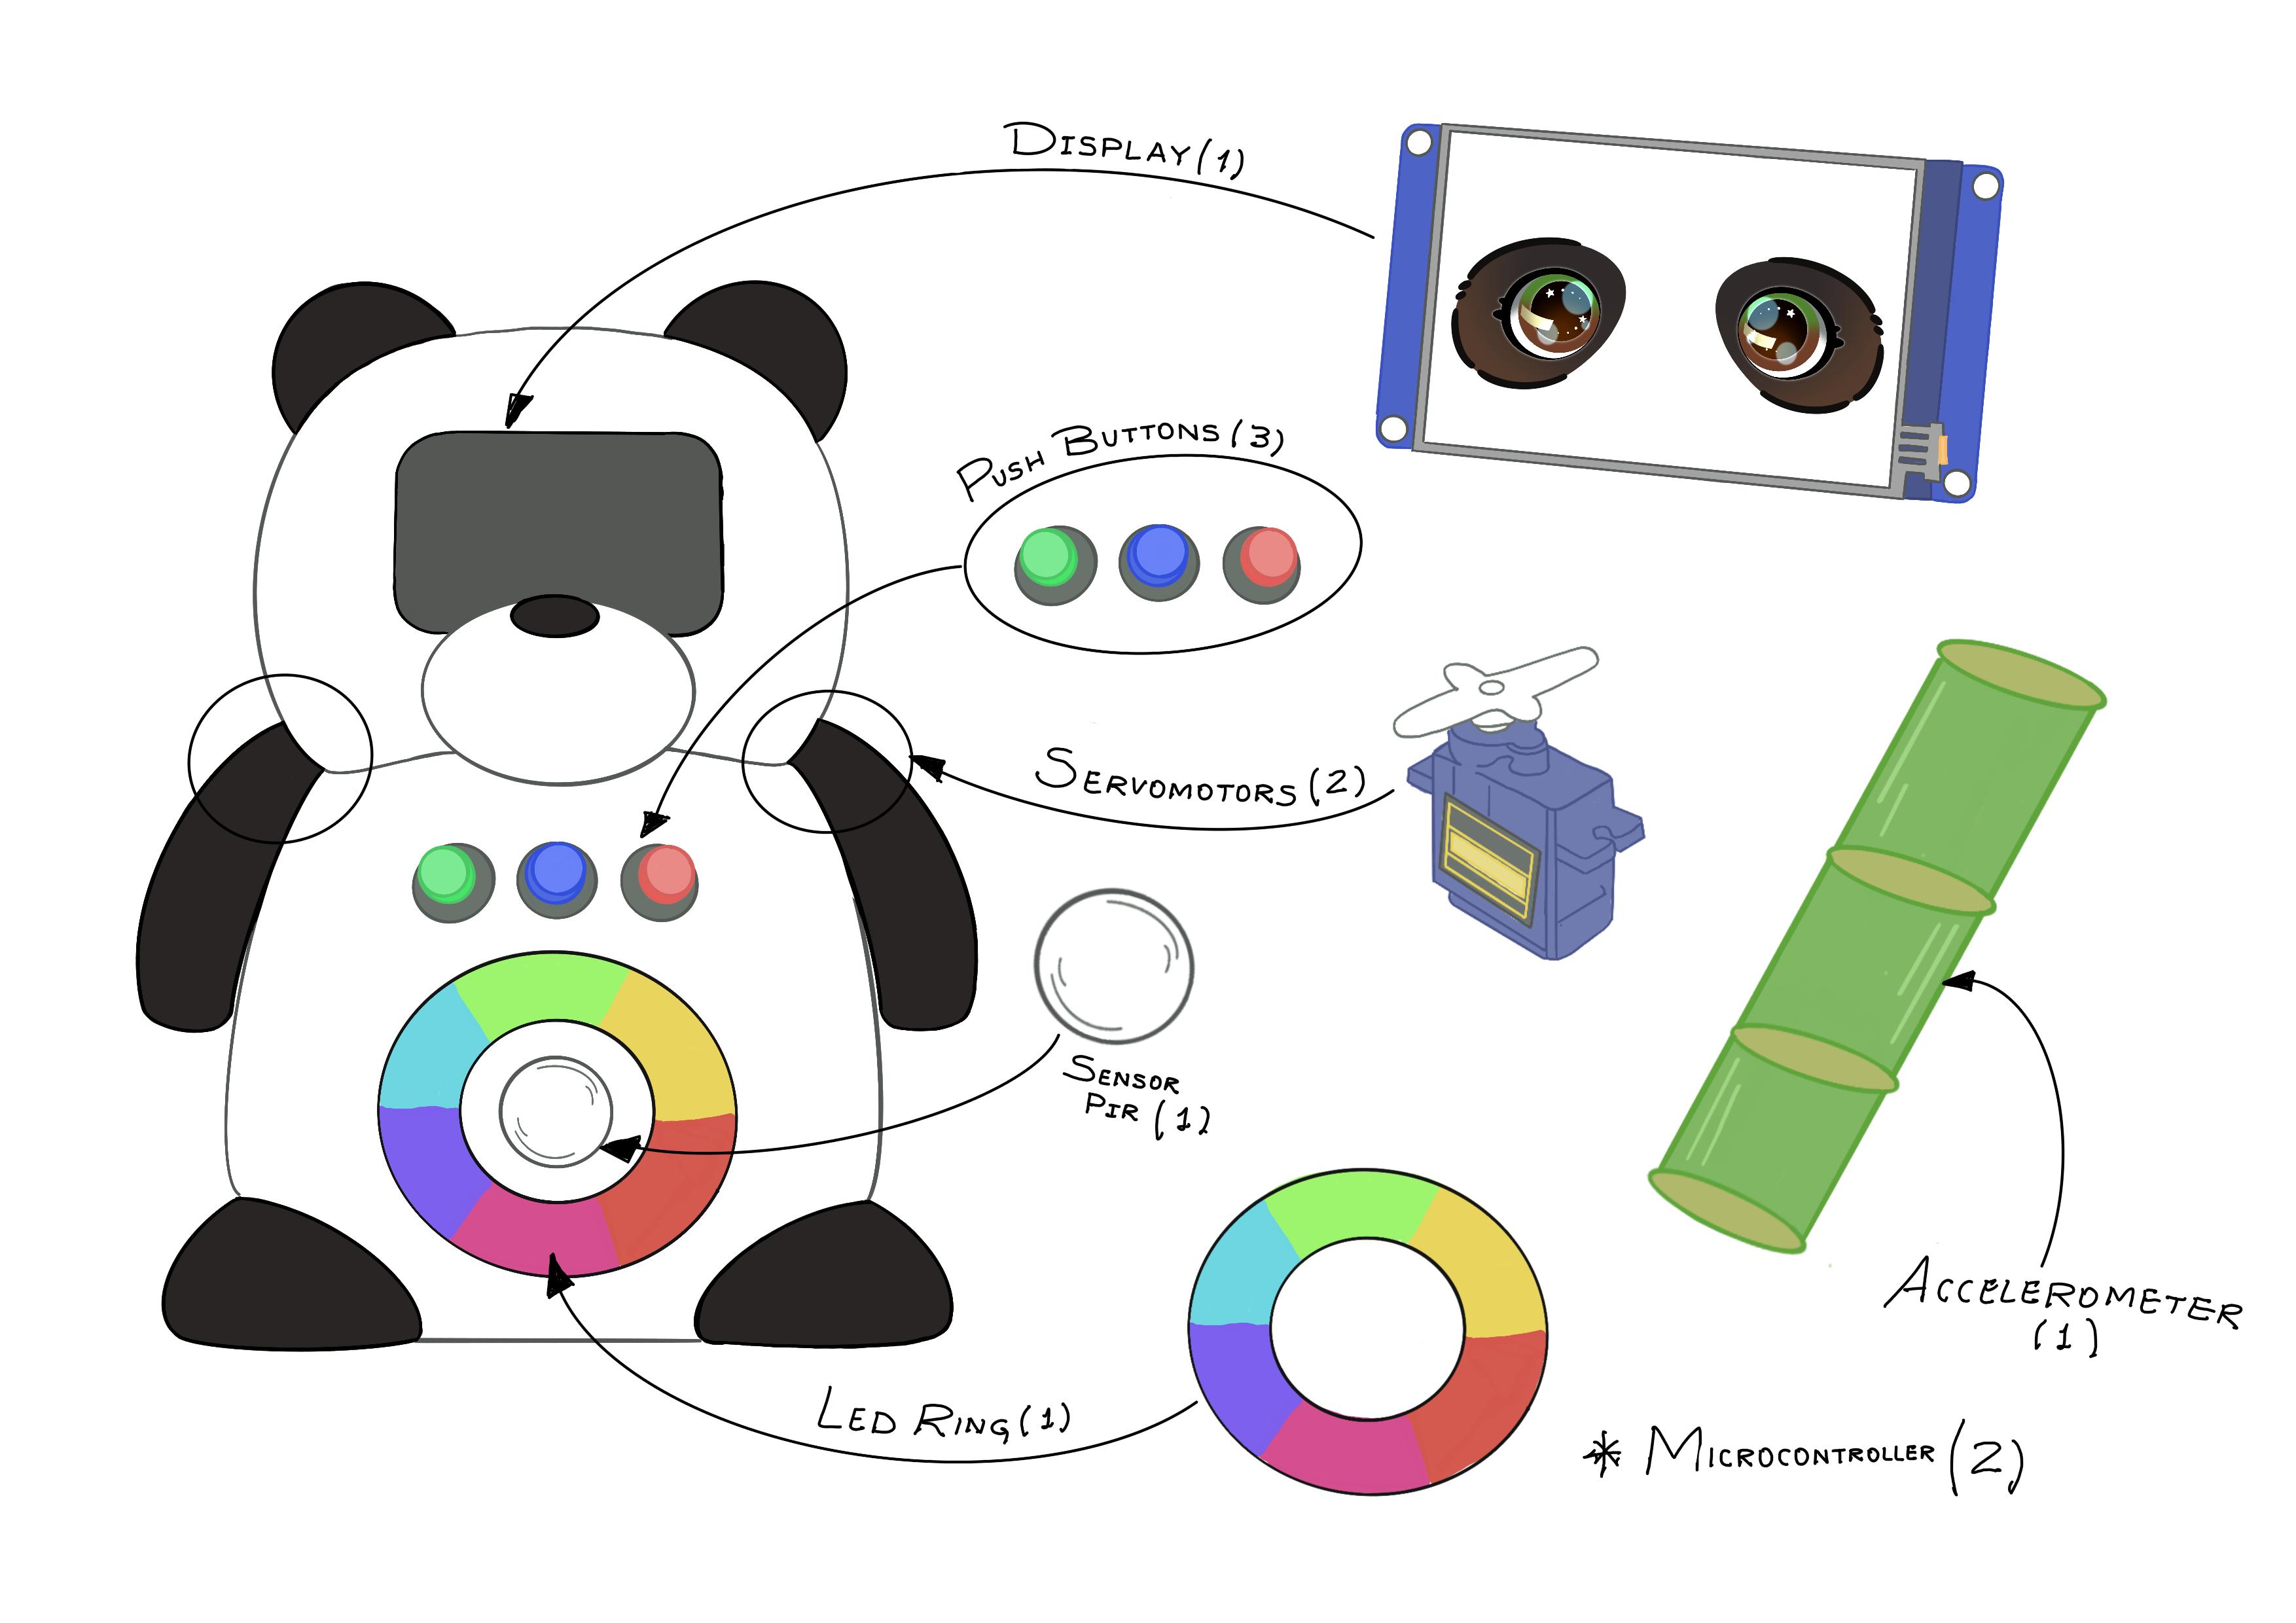
For this stage, I used ChatGPT to generate two reference images based on the characteristics of my robot. These images served as visual guides. I imported them as canvases in Autodesk Fusion, aligned them, and started building the base geometry using the Form tool.
A minimalist 3D render of a cute panda-shaped robot, smooth rounded body, soft matte plastic texture in light gray and dark gray, simple facial features with a large visor-like face, small ears, compact body, front view and side view, centered composition, soft studio lighting, subtle shadows, clean white background, product design style, highly detailed, octane render, no text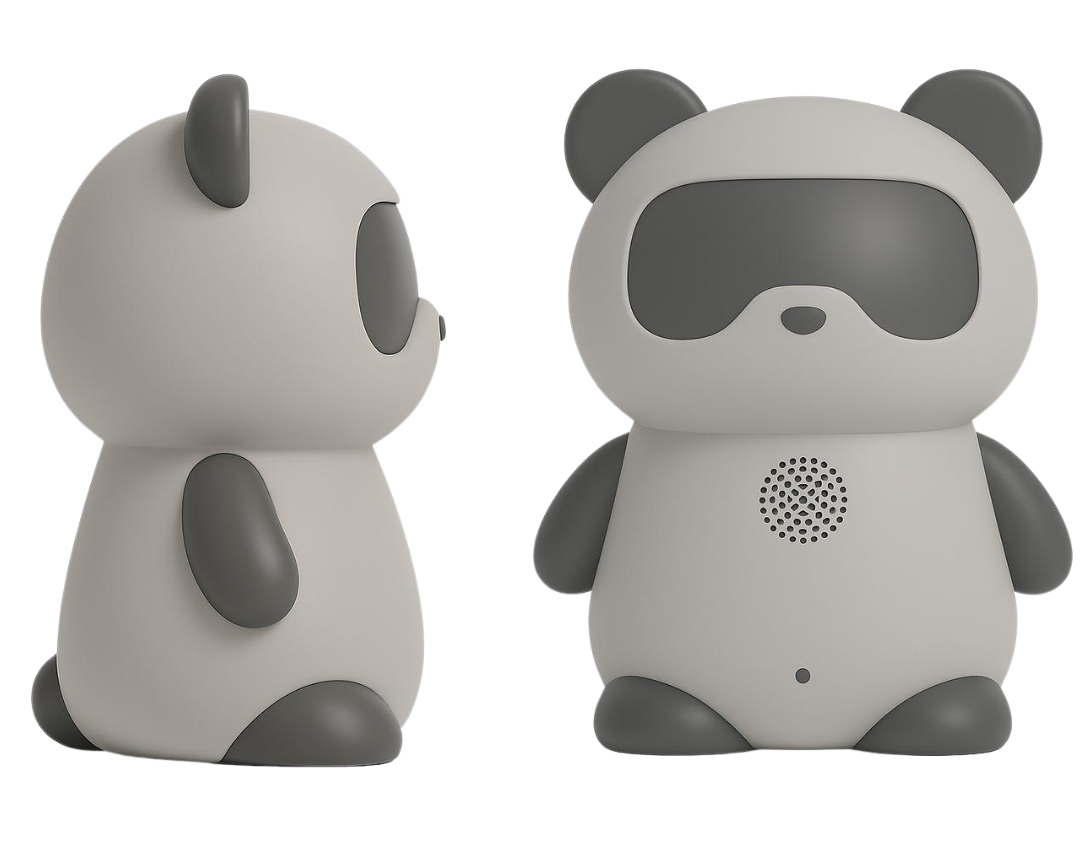
Compressing Images
GIMP
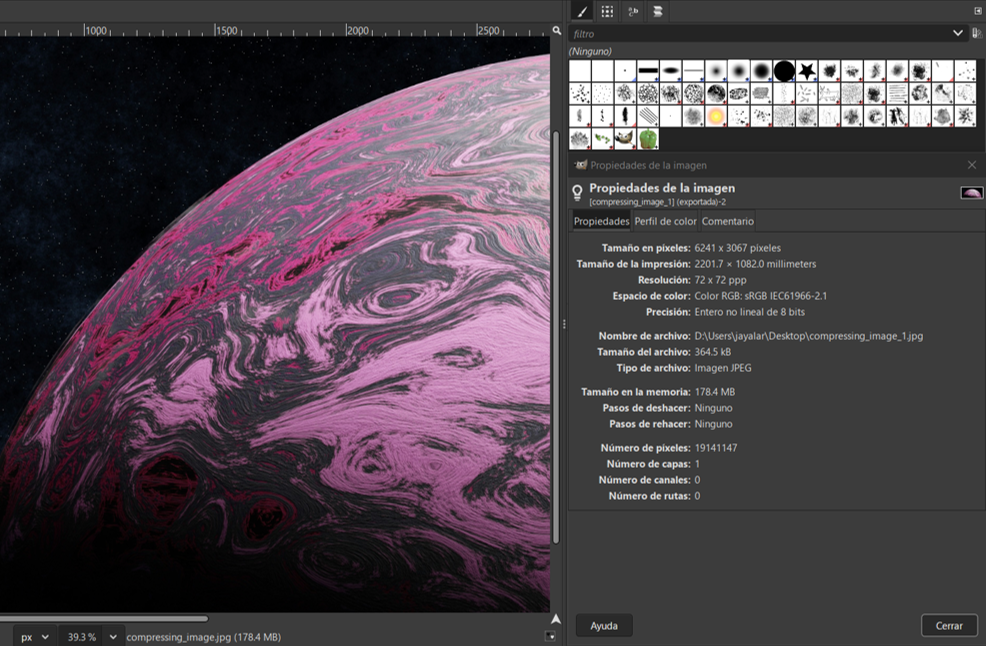
To compress my images, I used GIMP, a free and open-source image editing software. I started by opening an image for testing and checking its properties to identify the initial parameters. The image had a resolution of 6241 × 3067 px, was in JPG format, with an initial quality of 100 and a file size of 4.1 MB.
To perform the compression, I opened the image and exported it using File > Export As, keeping the JPG format. The main parameter I modified was the quality, reducing it from 100 to 5, and enabling the optimization option. The resolution was kept unchanged throughout the process.

After exporting, the image kept the same resolution (6241 × 3067 px), but the file size dropped significantly to 364.5 KB, which represents a reduction of around 90%.
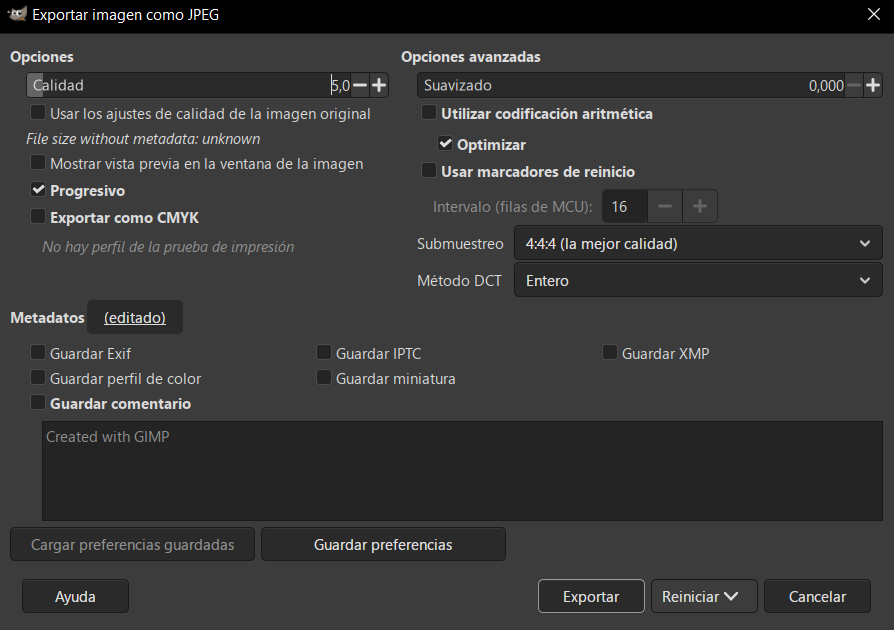
Final weight: 364.5 KB
When comparing both versions, I noticed that at normal viewing scale, the image still looks acceptable, while the file size is significantly reduced, making it more suitable for web use. However, when zooming in, some changes become noticeable, such as pixelation and slight loss of color detail, especially in more detailed areas. Even with these changes, the overall result is still usable, and the tool works well for reducing file size while maintaining a reasonable visual quality.
Compressing Videos
Video Compressor: Resize & Compress Video
To compress my video files, I used an application from the Microsoft Store called Video Compressor: Resize & Compress Video. At first, I wasn't very confident about using this tool, but it turned out to be simple and effective. The interface is intuitive — you just load the video you want to compress, and it allows you to adjust different parameters for both video and audio.
- For video settings, you can modify:
- Resolution
- Bitrate
- Frame rate
- For audio, you can adjust:
- Bitrate
- Channels

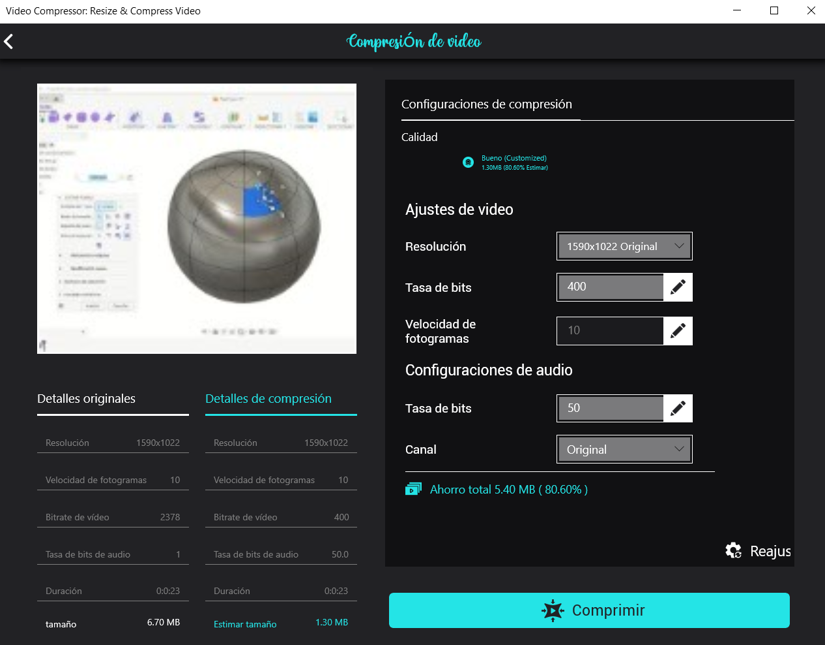
The tool also provides a preview, allowing you to compare the original video with the compressed version. In addition, it shows the estimated file size and the percentage of reduction, which helps evaluate the impact of the changes.
The compression reduced the file size significantly, from 6.7 MB to 1.1 MB, achieving approximately 83% reduction. This was mainly done by lowering the video bitrate (2378 → 378) while keeping the resolution (1590×1022) and frame rate (10 fps) unchanged.
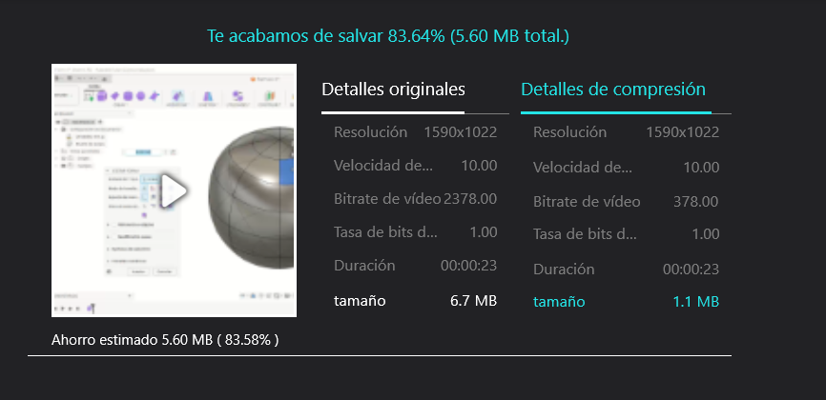
The preview shows an estimation of the compression result, including expected file size (around 1.30 MB) and quality. However, after exporting, the final file size was 1.1 MB, slightly lower than the preview.
During playback, some compression artifacts (visible blocks or pixelation) may appear due to the reduced bitrate. Even so, the overall quality remains acceptable for documentation purposes.
Final Result
Video
Final Thought
For this assignment, I built upon work started in the previous cycle while continuing its development this year. This iteration included redesigning the final project and exploring new tools and workflows.
During this week, I worked on modelling experimental objects as part of a possible final project using both 2D and 3D tools. In 2D, I refined previous designs using CorelDRAW and explored illustration with Procreate to develop visual ideas and expressions. In 3D, I revisited structured modelling with Autodesk Inventor and explored more flexible approaches in Autodesk Fusion, especially using the Form tool to achieve more organic shapes.
The design process was documented through descriptions, images, and screenshots, showing how each model evolved from initial sketches to final results. This helped me clearly communicate both the workflow and the decisions made throughout the process.
I also worked on compressing images and videos. For images, I used GIMP to reduce file size by adjusting quality while keeping the same resolution, observing how this affects detail and color. For videos, I used Video Compressor: Resize & Compress Video, adjusting parameters such as bitrate while keeping resolution, which allowed me to significantly reduce file size while maintaining usable quality.