Week 04. Electronics Production
Assignments for the Week
Group Assignment:
- Characterize the design rules for your in-house PCB production process: document feeds, speeds, plunge rate, depth of cut (traces and outline) and tooling.
- Document the workflow for sending a PCB to a board house.
- Document your work to the group work page and reflect on your individual page what you learned.
Individual assignment:
- Make and test a microcontroller development board.
Group Assignment
Individual Assignment
Disclaimer: All the Assignments and Documentations are done and written by me, however after writing it myself, some I pass it through chatGPT to fix my language and grammar.

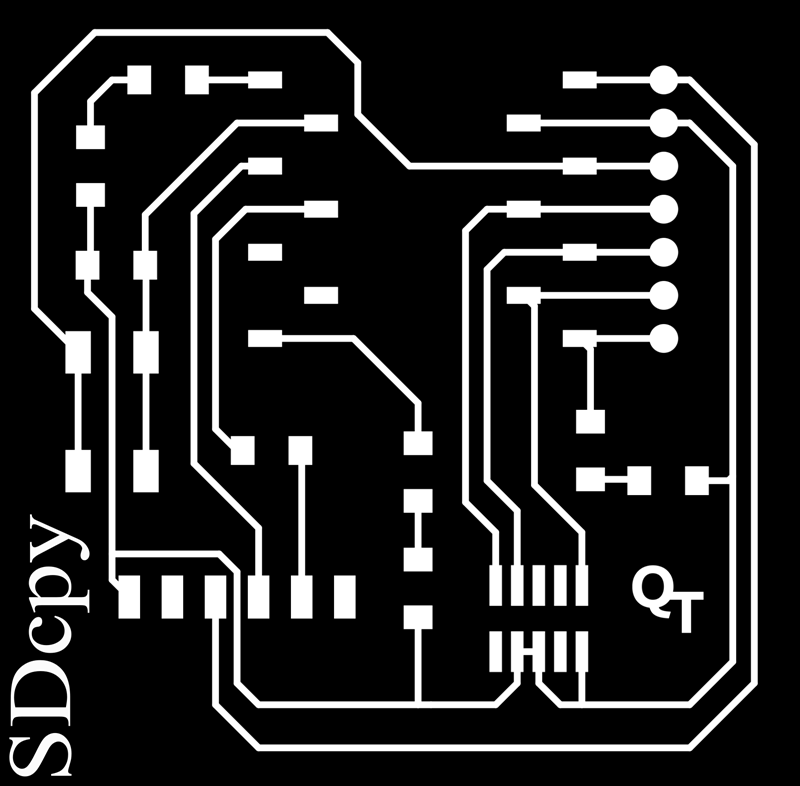
- This week, we’re tasked with creating Quentorres, an original programming project conceived by Quentin Bolsée and further developed by Adrián Torres.
- To start, I saved the project images in PNG format and adjusted the DPI from 96 to 960 using Inkscape.
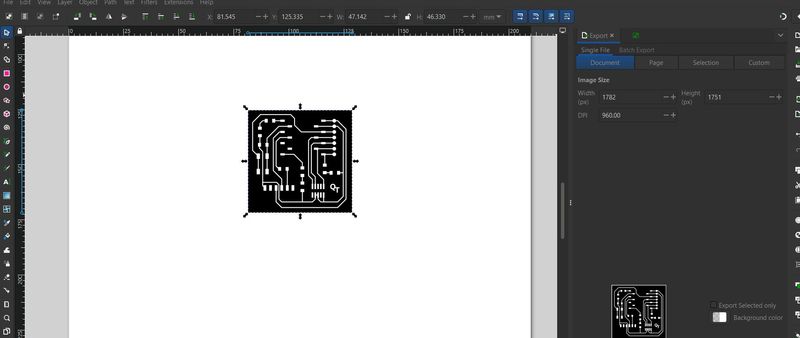
- Next, utilizing mods, I selected the ROLAND SRM 20 program to generate tool paths for the milling operation.
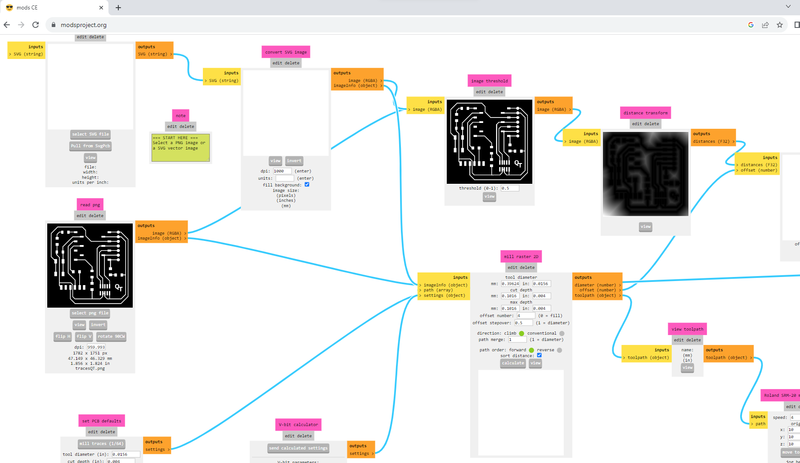
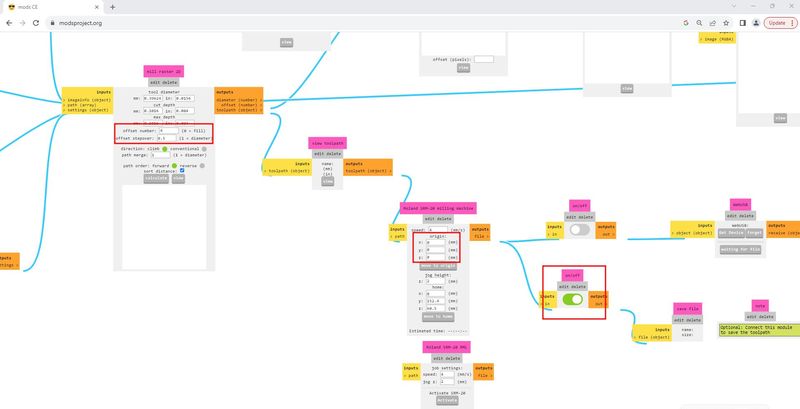
-
Notes: Keep in mind to set origin to 0,0,0.
-
monoFab SRM-20 Specifications: In our Lab, we have monoFab SRM-20.
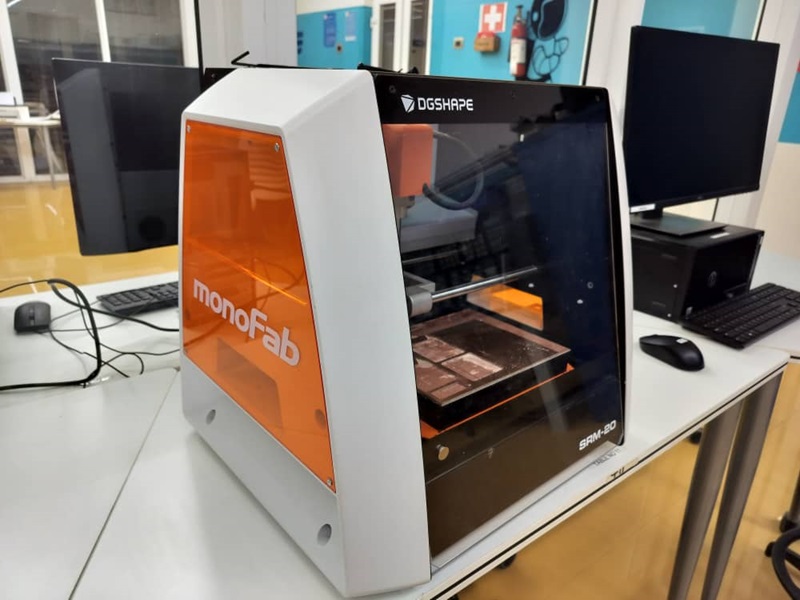
- Cuttable Material: Modelling Wax, Chemical Wood, Foam, Acrylic, Poly acetate, ABS, PC board
- X, Y, and Z Operation Strokes: 203.2 (X) x 152.4 (Y) x 60.5 (Z) mm
- Workpiece table size: 232.2 (X) x 156.6 (Y) mm
- Distance From Collet Tip to Table: Max. 130.75mm
- Loadable Workpiece Weight: 2 kg
- Power Requirements: Machine: DC24V, 2.5A, Dedicated AC adapter: AC 100-240 V ±10%, 50/60 Hz
- Power Consumption: Approx. 50 W
- External Dimensions: 451.0 (W) x 426.6 (D) x 426.2 (H) mm
- Weight: 19.6 kg
- Installation Environment: Temperature of 5 to 40°C, 35 to 80% relative humidity (no condensation)
-
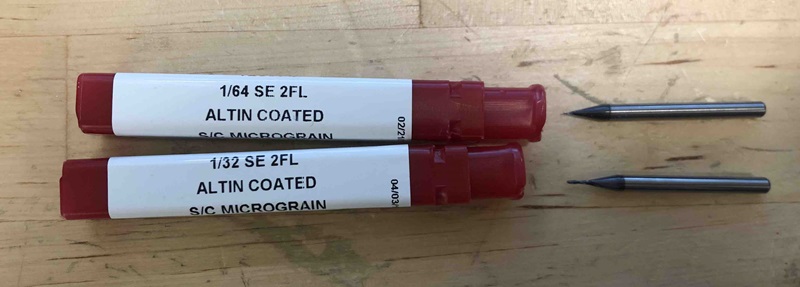
Milling Operation: Utilize a 1/64 tool for tracing and a 1/32 tool for edge cutting and drilling.
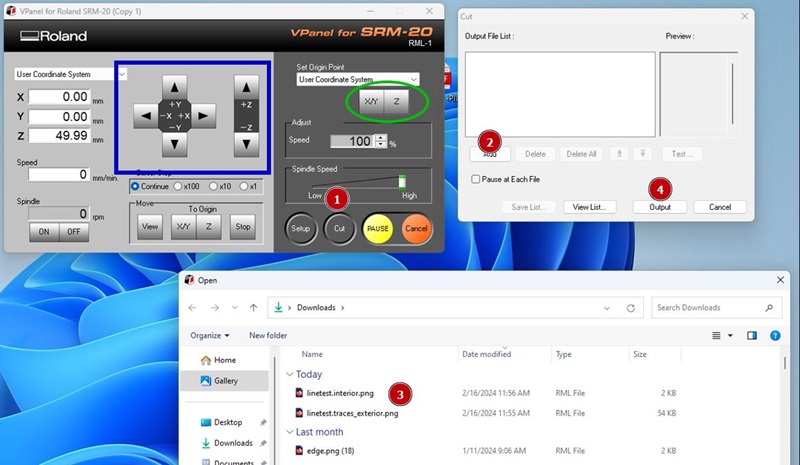
- To prepare for milling, secure a sacrificial board using tape to protect the milling bed. Apply double-sided tape to the desired stock and firmly press it onto the bed. Insert the chosen bit size into the set screw and tighten it with an Allen wrench. Utilize VPanel to set the machine origin and select RML files for milling operations. With VPanel, adjust the machine origin to the desired spot and ensure accurate positioning for milling tasks.
-
Note: While using FR4, my first and foremost concern is safety. It is important for us to always put on masks that are N95 when milling, handling or even cleaning up so as to safeguard ourselves against dangerous particles. The dust can be kept inside by closing the lid during milling then cleaned it with a vacuum cleaner thereafter. If we wear gloves during clean up, it will help us avoid touching harmful chemicals directly through our skin. These measures are essential for a safe work environment in the context of handling FR4.
- Begin by tracing the mill using a 1/64 inch bit, ensuring the shield is closed and the machine is powered on.
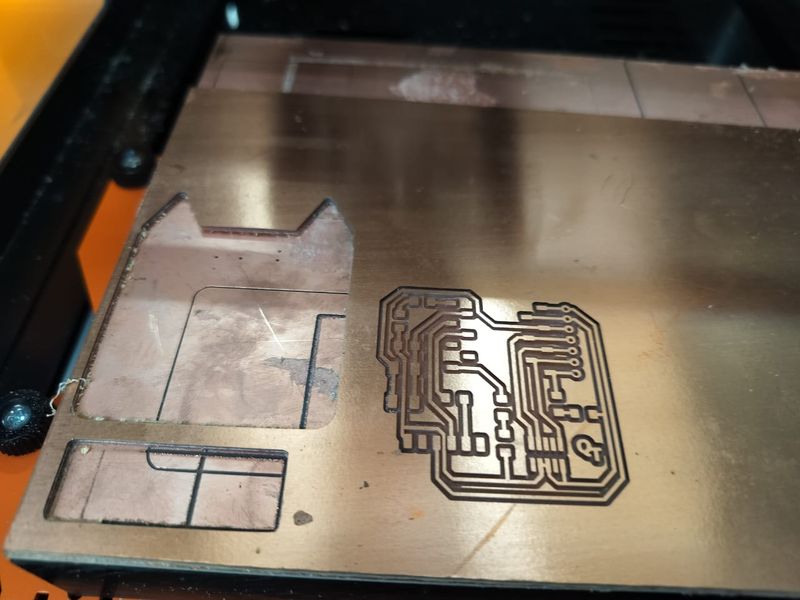
- Next, set the origin and Z-position. Load the PNG file in Mods, adjust settings, and proceed with cutting, switching to a 1/32 inch bit as needed. After cutting, vacuum out debris, remove the cut part, and clean the board with alcohol or water for a finished PCB.

-
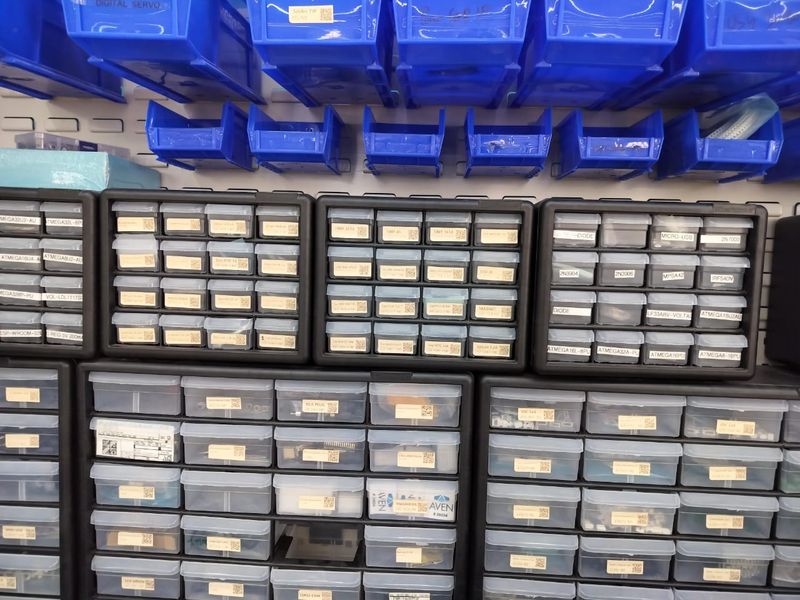
Gather all the necessary electronics components for assembly.
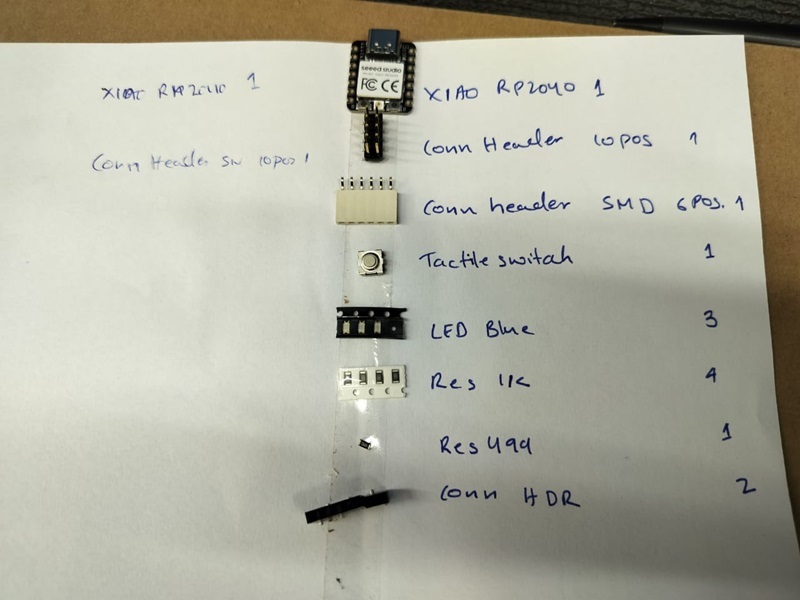
-
At first, I attempted soldering, I found it little bit challenging, so I did the reflow method instead.
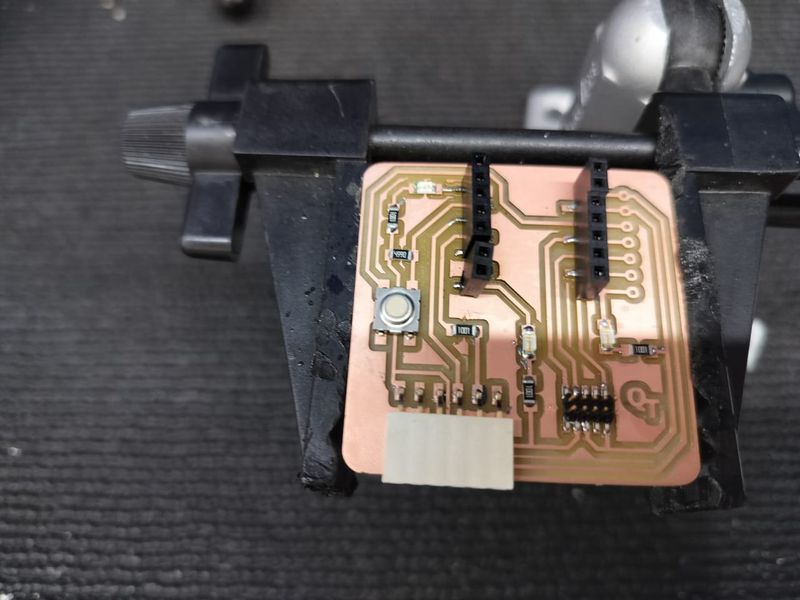 Typical reflow soldering workflow:
- Solder paste is deposited on PCB pads using stencil.
- Components are accurately placed on board.
- The PCB passes through preheat, reflow and cool down zones to melt and solidify solder.
- Post reflow inspection performed.
- The heat melts the solder, causing it to flow and create a strong bond between the components and the circuit board.
- Allow the solder to cool and solidify, forming a secure connection between the components.
- After soldering, clean the board and components to remove any excess flux or solder residue.
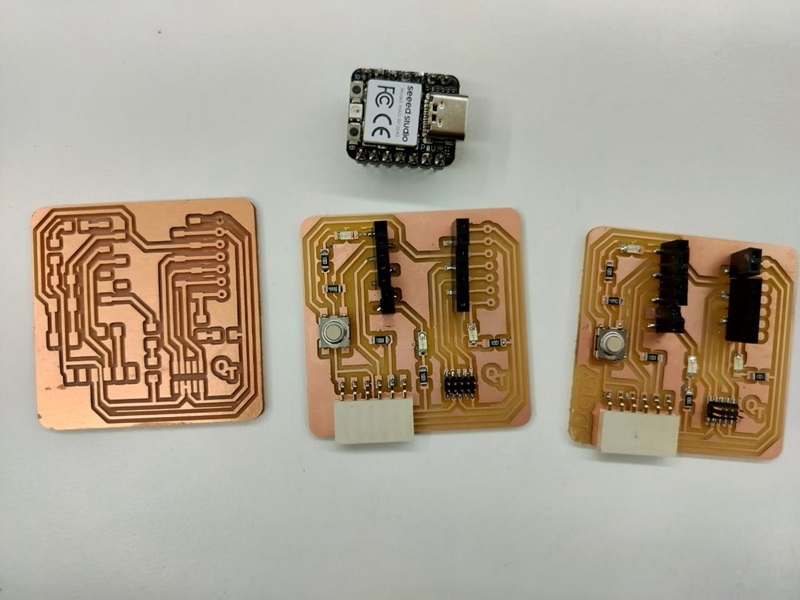
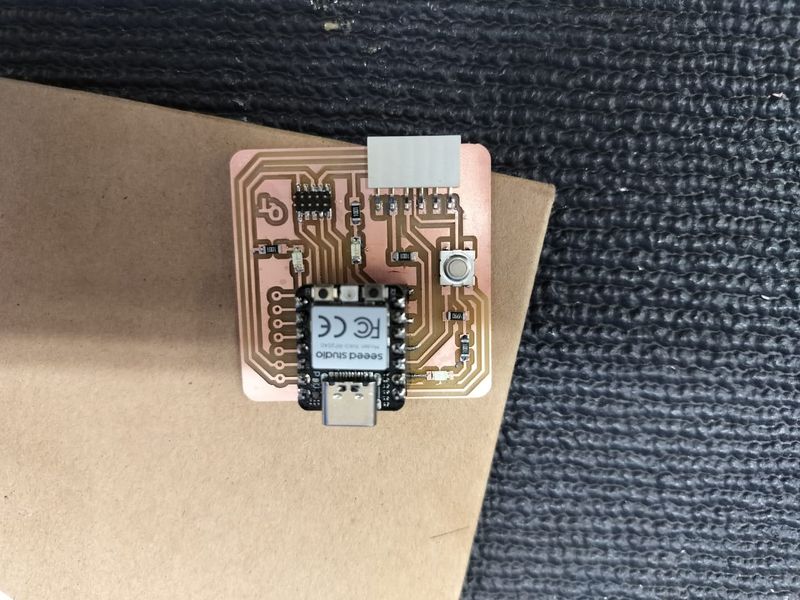 - Also I made another pcb writing some Text using Inkscape on Quentorres v2 traces.
  - These are the pcbs I made:
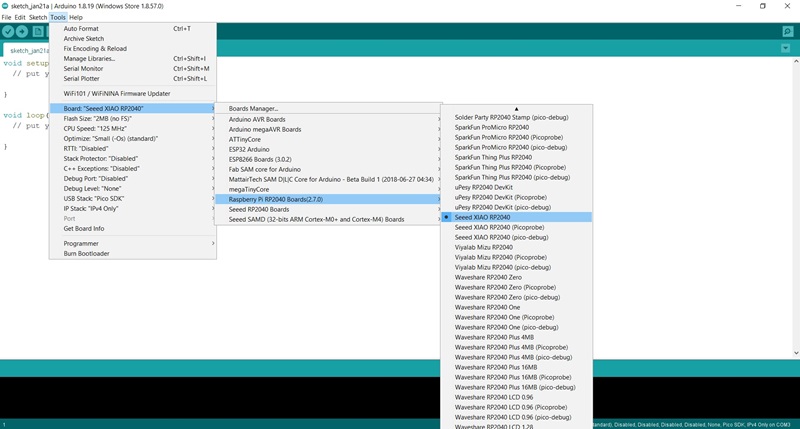
 - Next, configure the Arduino IDE for the Seeed Studio XIAO RP2040. Go to Tool > Board > and select board as shown below.
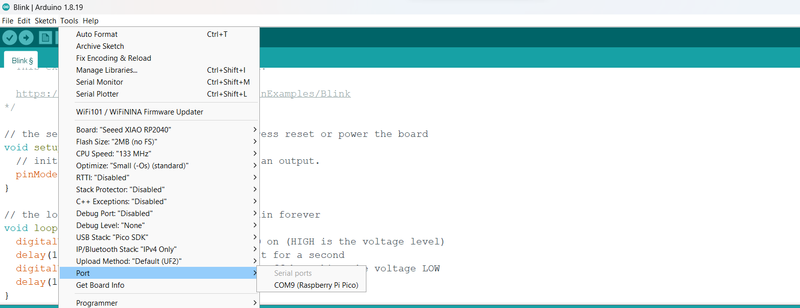
  - The Seeed Studio XIAO RP2040 will appear in the COM port, in my case in COM 9.
  - Upload an example program “blink LED” to Quentorres, to test functionality.
// the setup function runs once when you press reset or power the board
void setup() {
  // initialize digital pin LED_BUILTIN as an output.
  pinMode(26, OUTPUT);
}

// the loop function runs over and over again forever
void loop() {
  digitalWrite(26, HIGH);   // turn the LED on (HIGH is the voltage level)
  delay(1000);                       // wait for a second
  digitalWrite(26, LOW);    // turn the LED off by making the voltage LOW
  delay(1000);                       // wait for a second
}
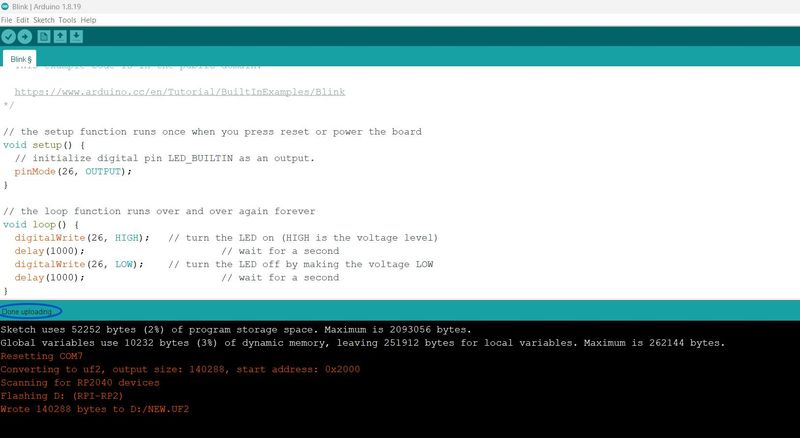
- In this video you can see the operation of a Blink on pin GPIO 26 (26 in Arduino) where the LED is integrated.
- This video shows Blink LED when delay is 100ms.
Seeed Studio XIAO RP2040
There are 14 GPIO PINs on Seeed Studio XIAO RP2040, on which there are 11 digital pins, 4 analog pins, 11 PWM Pins,1 I2C interface, 1 UART interface, 1 SPI interface, 1 SWD Bonding pad interface.
images are from this link
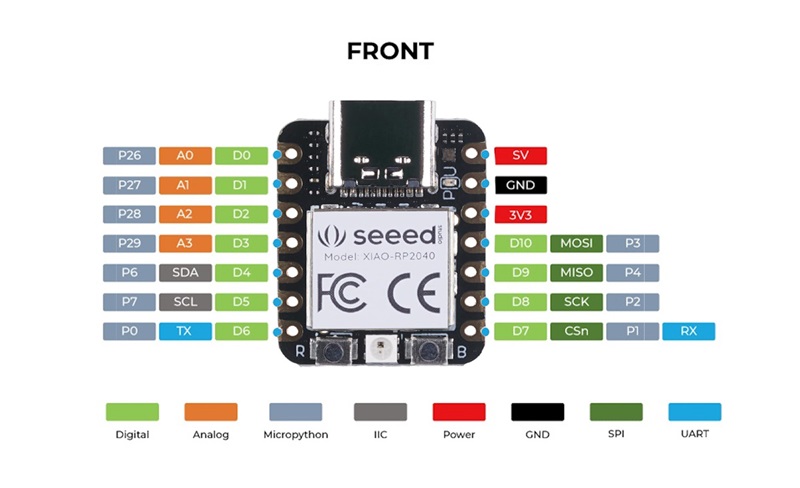
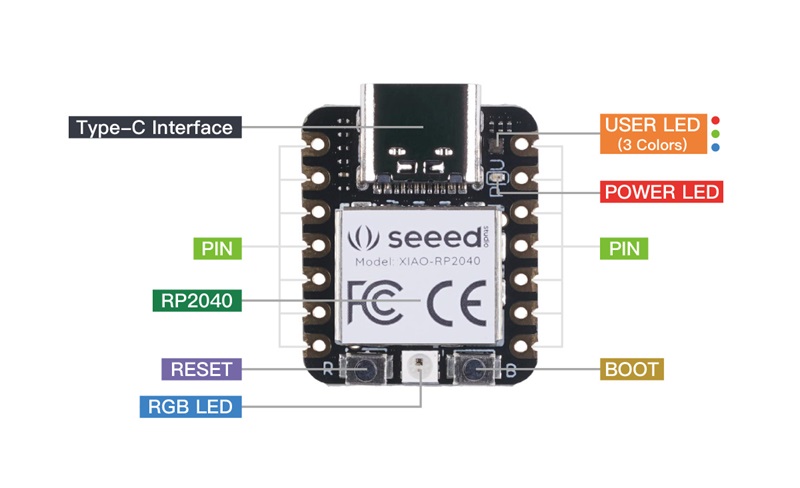
To learn about seed studio XIAO RP2040, follow this Link