Week 03. Computer-Controlled Cutting
Assignments for the Week:
-
Group Assignment: Characterize your lasercutter’s focus, power, speed, rate, kerf, joint clearance and types.
-
Individual Assignment:
- Cut something on the vinylcutter.
- Design, lasercut, and document a parametric construction kit, accounting for the lasercutter kerf,which can be assembled in multiple ways, and for extra credit include elements that aren’t flat
This is the Link for the Group Assignmemt.
Disclaimer: All the Assignments and Documentations are done and written by me, however after writing it myself, some I pass it through chatGPT to fix my language and grammar.
Vinyl Cutting
Vinyl cutting involves using design software like Inkscape to create digital designs which can then be exported as vector files compatible with vinyl cutting software or directly sent to the vinyl cutter for cutting.
Using the ROLAND GX-24 vinyl cutter I cut a sticker For vinyl cutting assignment.
ROLAND GX-24 Specification

- Driving method: Digital control servo motor
- Loadable material width: 50 to 70 mm
- Maximum cutting area: Width x Length (584 mm x 24998 mm)
- Acceptable tool: Special blade for CAMM-1 series
- Max.cutting speed: 500mm/s
- Blade force: 30 to 250 gf
- Interface: USB interface
- Power supply: Input: AC 100 to 240 V & Output: DC 24 V, 2.8 A
- Power consumption: Approx. 30W
To learn more about specification go to this Link
Vinyl Cutting Workflow
- Design Creation: Being a huge fan of Luffy from One Piece anime, I searched for him on hdqwalls and downloaded an image in PNG format. I then imported it into Inkscape to convert it into a vector format.
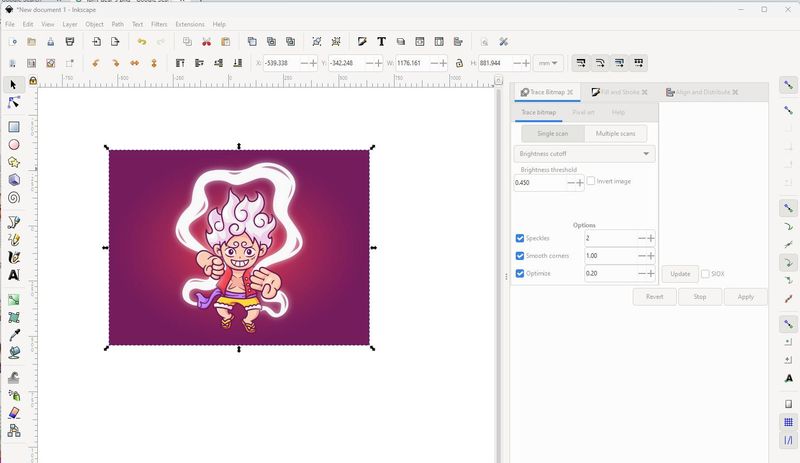
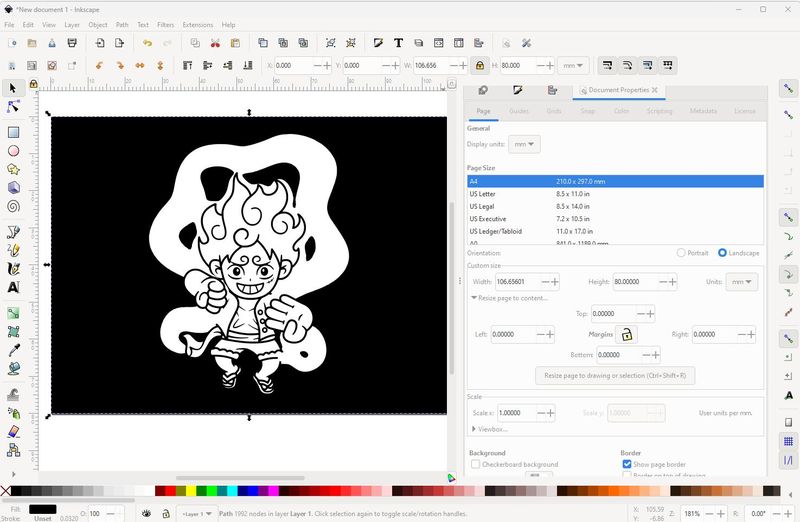
- Design Setup: Adjust settings in the software.

- Machine Setup: Check the blade tip as it should barely be exposed since vinyl is typically only about a millimeter thick. A useful trick is to run your finger over it; the blade should be barely felt and Put vinyl in the cutter(sheet type:piece).


- Connection: Connect cutter to computer and get dimension of the vinyl.

- Sending Design to Cutter: Send design to cutter from the computer and follow the steps shown below.
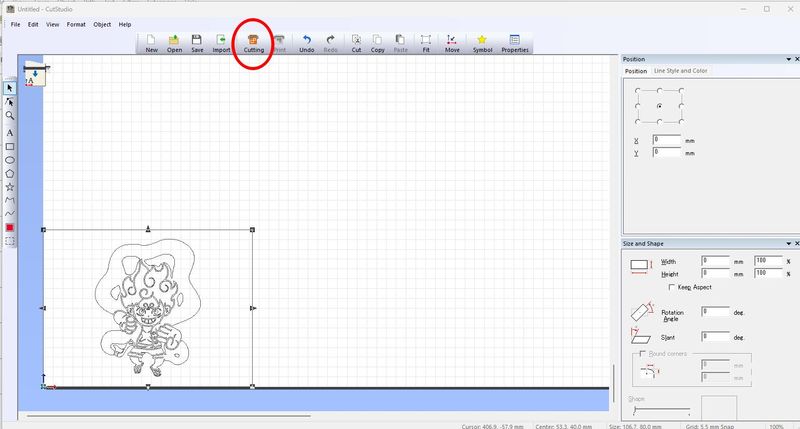
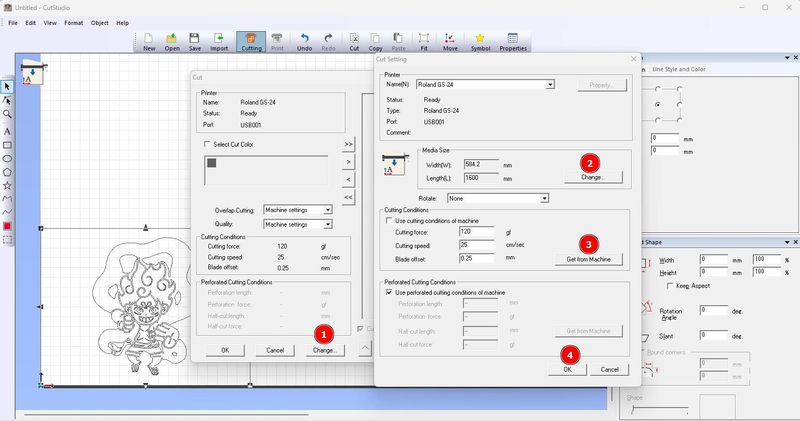
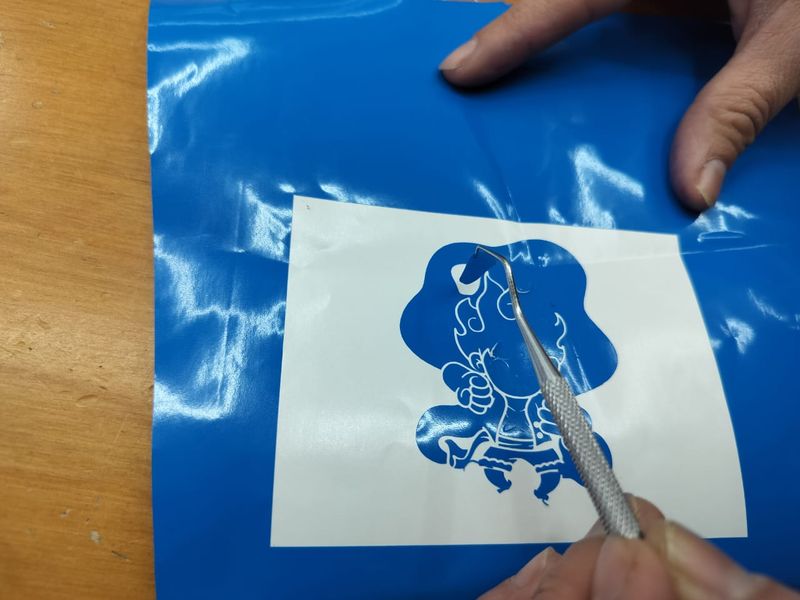
- Cutting & Weeding: After Cutter cuts the design, Remove unwanted vinyl.
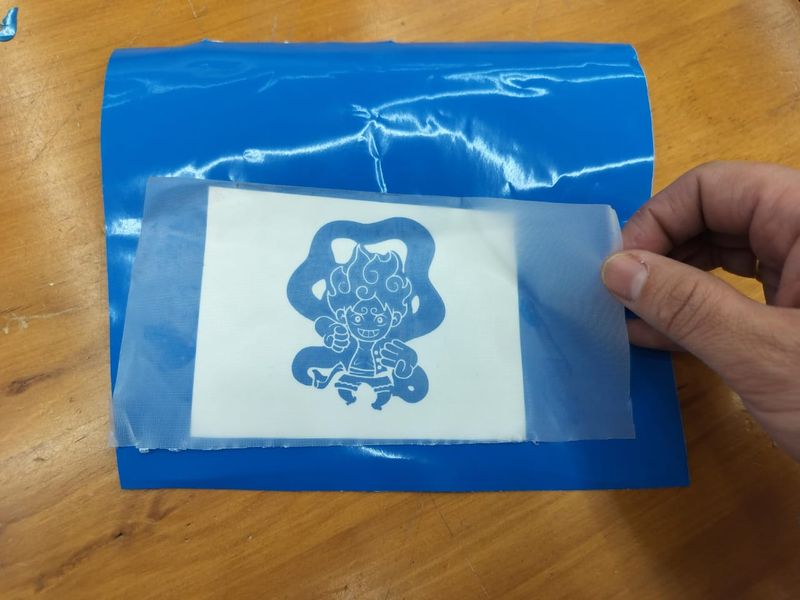
- Transfer & Finishing: Then adding masking transfer tape over the design to transfer the design, Move the design onto desired surface and smooth out.
- Cleanup: Clean up leftover material.
Laser Cutting
Our lab has two laser cutters, the Trotec Speedy 400 and the Trotec Speedy 100. Trotec Speedy laser cutters utilize CO2 lasers to precisely cut and engrave materials. Controlled by computer software, users design their projects and set parameters for the laser cutter.
Trotec Speedy laser cutters, including the Speedy 100 and Speedy 400 models, typically use CO2 lasers. CO2 lasers are commonly classified as Class 4 lasers according to the ANSI Z136.1 Laser Safety Standard.
What are the risks of using a laser cutter?
- Beam exposure: When using Class 4 lasers like those in Trotec Speedy models, proper enclosure prevents harm, with the machine’s window absorbing reflected beams. Keep doors closed during operation and wear safety glasses when necessary.
- Fire: Laser cutters can cause fires because they use intense heat to cut materials like acrylic, which can easily catch fire. Even a small flame, combined with the machine’s fume extraction fans pulling in air, can quickly lead to a big fire.
- Smoke and Fumes: Cutting materials produces smoke and fumes that must be removed. Some materials create harmful fumes that can damage the machine or harm you. -Avoid cutting PVC or anything with chlorine_ because it produces dangerous hydrochloric acid that can harm your lungs and eyes, and damage the machine. Always check MSDS (material safety data sheet) for new materials.
- Electrical Hazards
Laser cutter safety measures:
- Safety stop button for an emergency interrupt of the power to the entire machine.
- Interlocking switch that prevents the laser from firing when doors are open.
- Don’t cut PVC and other problematic materials.
- Use air assist for cutting (airflow from air assist can put out small flames)
- Keep fire extinguisher and fire blanket close to the laser.
- Never leave laser running without supervision.
- Don’t disable safety features and don’t operate the machine with laser doors open.
- Keep machine clean.
- Remove residue from honeycomb bed to prevent it from catching on fire.
- Remove debris from the exhaust blower and duct system.
- Use common sense and never leave laser running unattended.
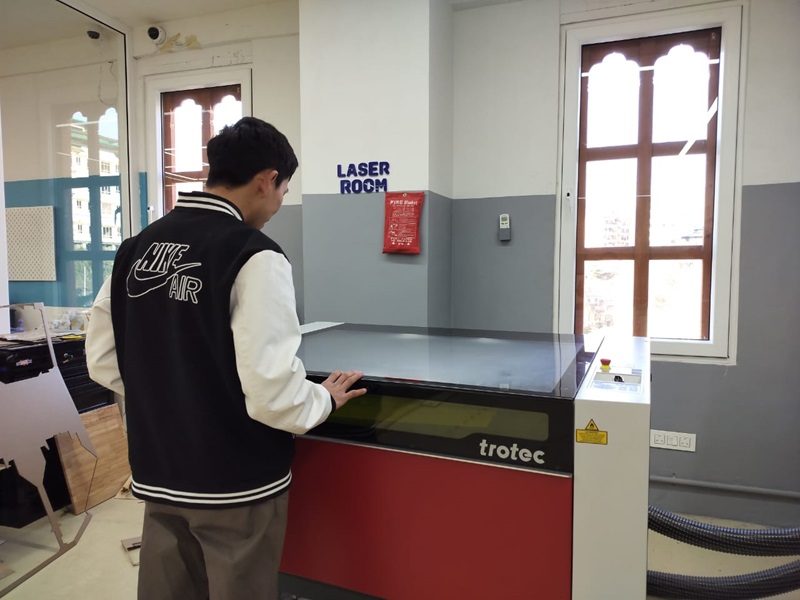
Specifications of Trotec Speedy laser cutters
Trotec Speedy 400 Laser Cutter Specification:
- It has two laser sources in one system which allows the use of a wide variety of different materials in one Job.
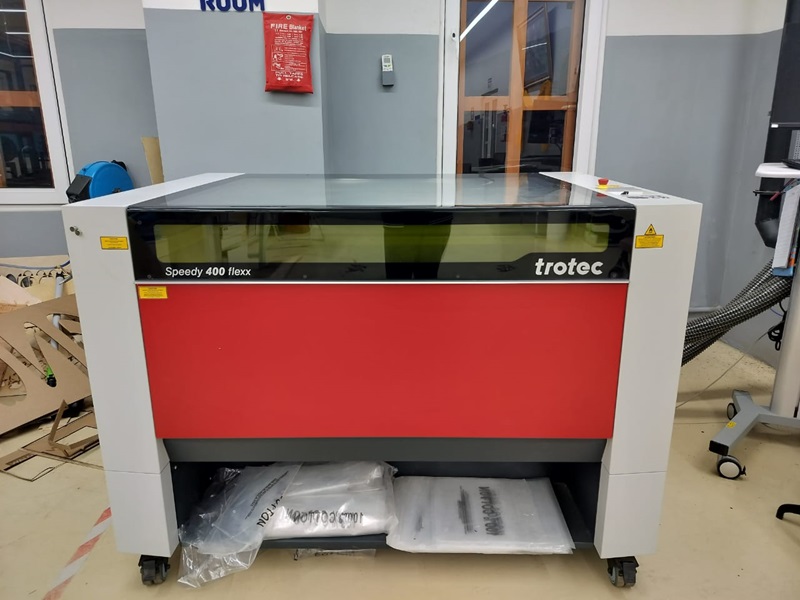
- Engraving speed of 4.2 m/sec.
- CO~2~ laser power up to 250 watts.
- Overall dimensions(W x D x H): 1428 x 952 x 1050 mm.
- Max.height of workpiece 305 mm with CO~2~ and 283 mmwith fibre.
- Laser power: CO~2~: 60-250 watts and Fiber: 20-50 watts
Trotec Speedy 100 Laser Cutter specification
- CO~2~ laser which power up to 250 watts and can work with materials like acrylic, glass, fabric, papers, stones and woods.
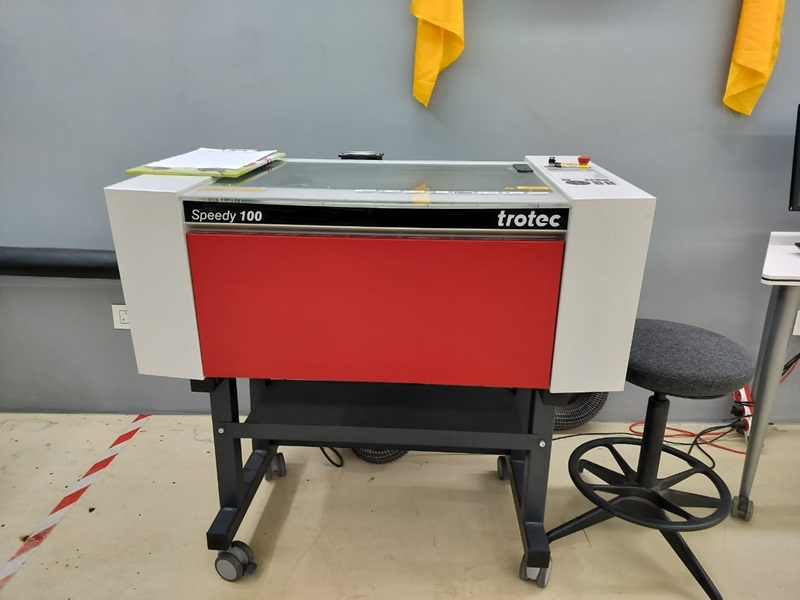
- Overall dimensions(W x D x H): 982 x 739 x 993 mm.
- Max.height of workpiece 170mm.
- Laser power: CO~2~:30-60 watts
Characterization of lasercutter’s kerf & joint clearances
- I used Kerf Check Parts Generator, created by Atsufumi Suzuki, from Fablab Kamakura to generating combs with varying gap sizes to determine the best fit for the material.
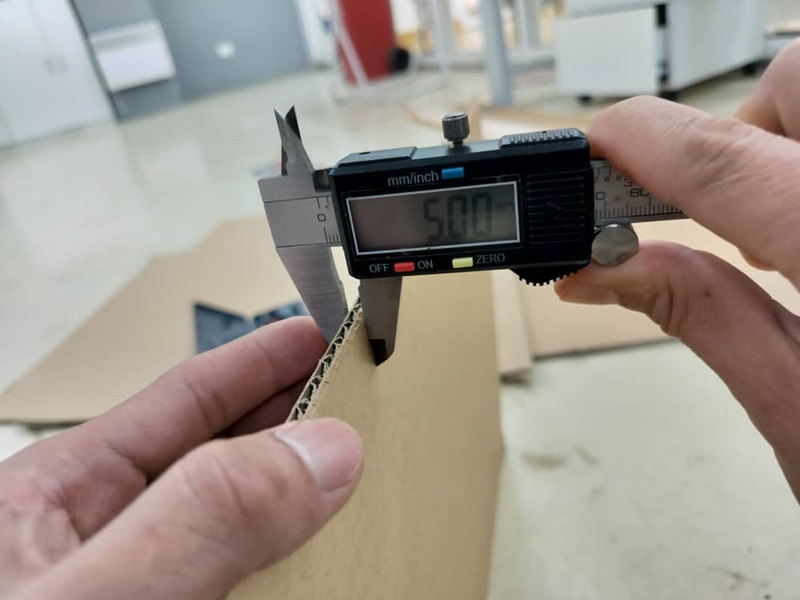
- The gaps in the combs ranged from 4.4mm to 5.2mm, with increments of 0.2mm. This range allowed for a thorough assessment of the most suitable fit.
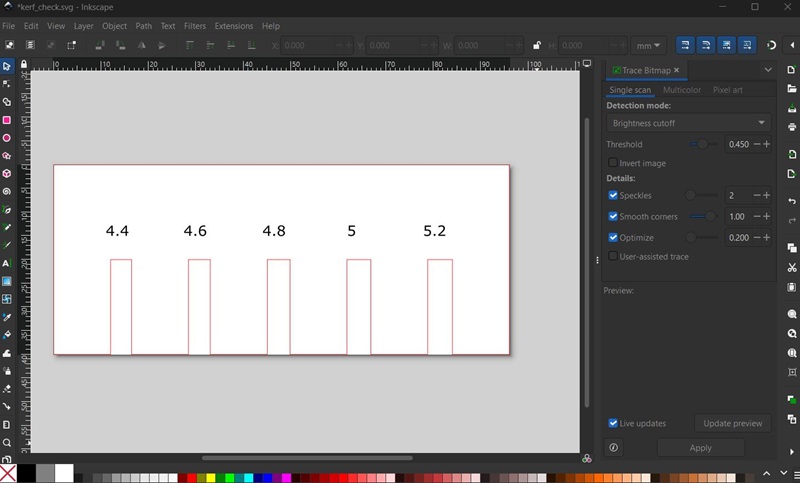
- Two combs were cut from the same material(C Flute Corrugated Cardboard) to study the kerf and joint clearances.

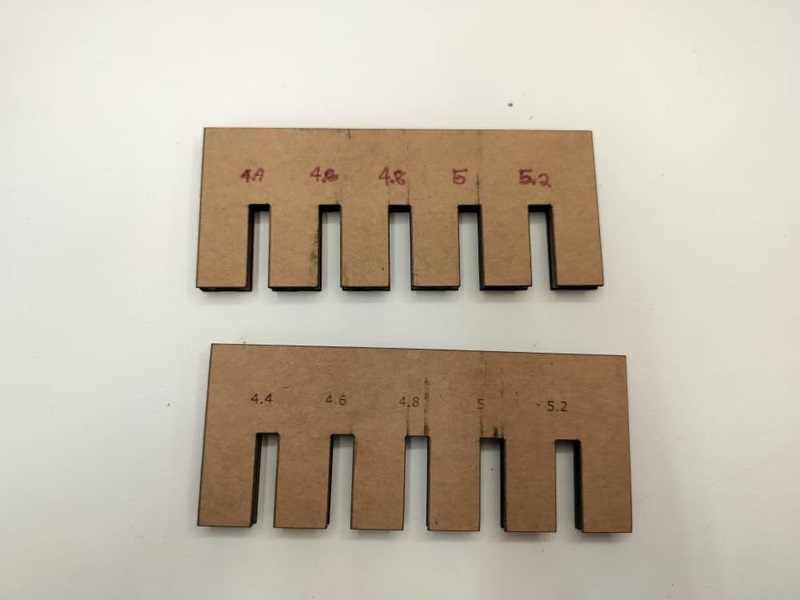
- After cutting and testing, it was found that the 4.8mm gap provided the best fit, ensuring optimal joint clearances.
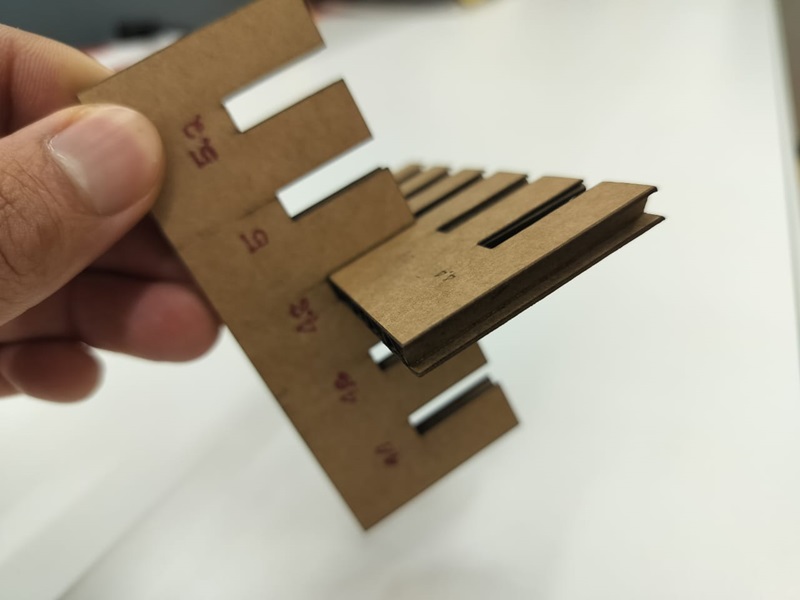
- So, On 5mm cardboard, 4.8mm is perfect. Therefore, joint clearance = 4.8mm and kerf = 0.2
Some points to remember
- Using high power and slow speeds can lead to fires, while lower power and faster speeds are better for engraving cardboard.
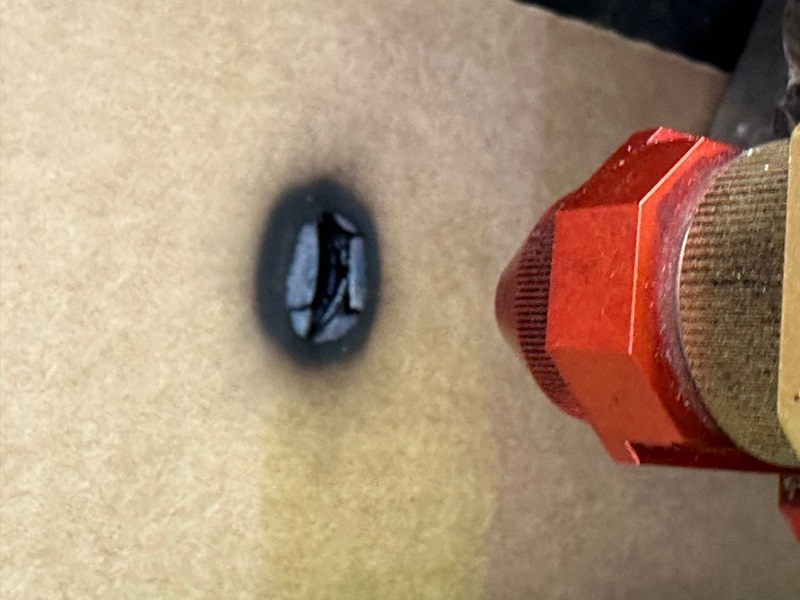
- Make sure to keep the exhaust system on during the operation. This helps to remove any smoke or fumes generated during cutting, ensuring a safer working environment.
- After finishing the cutting, make sure to closed the lid for some time. This allows any harmful fumes and smells to dissipate.
- Instead of choosing the “hairline” stroke width setting, it’s more reliable to set the stroke width to “0.001 mm”.
Parametric Product Modeling
In parametric modeling I chose to utilize Fusion 360 because I’m eager to expand my knowledge and skills with the software.
- Designing in Fusion360: I used Fusion360 to create the parametric construction kit and parameterize all dimensions for easy modification later.
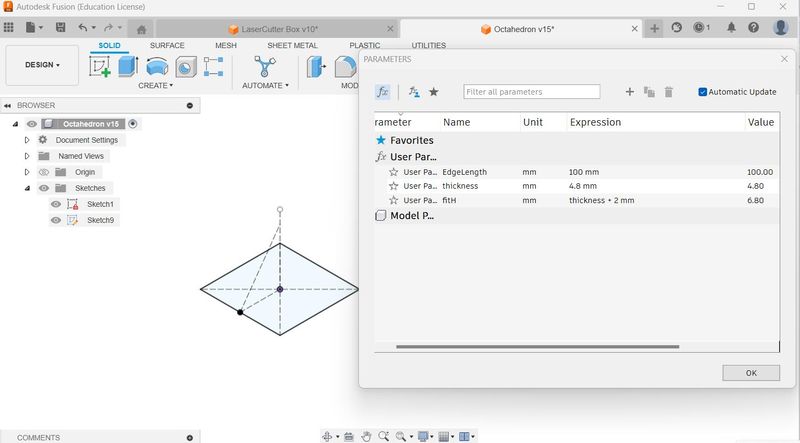
- Adding User Parameters: Go to “Modify” > “Change Parameters” and click on ” + User Parameters”.
- Enter parameter name, numerical value or expression, and unit for each dimension.
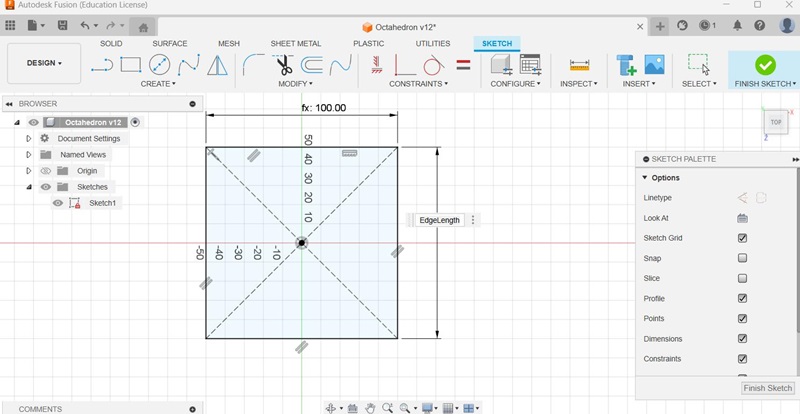
- In fusion Design workspace, sketch square by giving dimensions from the formula parameters.
- To use loft operation, ctreate another sketch as shown below.
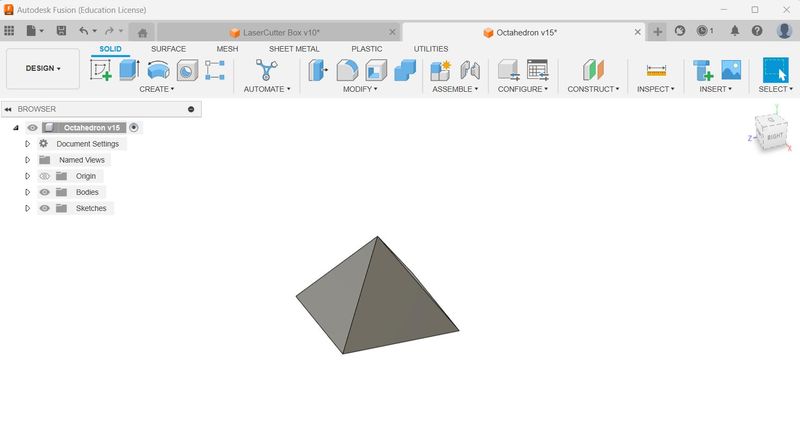
- To create first piece laser cuttable kit, extrude any one face from the pyramid (make sure operation should be new body) and then create sketch on surface to make gaps for connector.
-
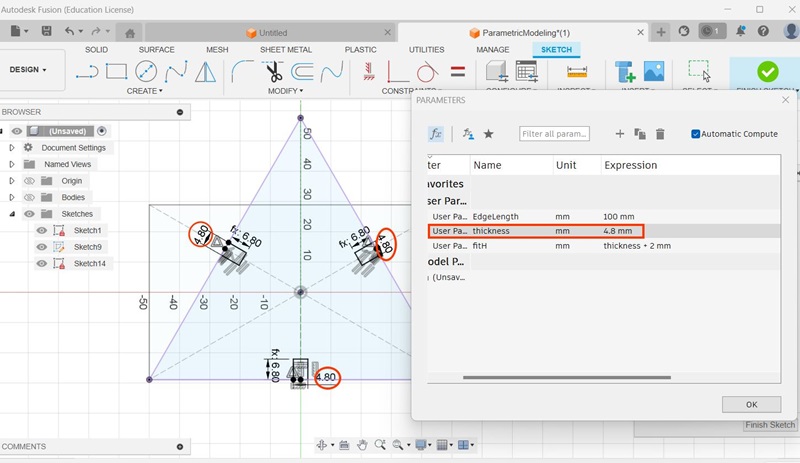
Note: In the laser cutter’s characterization, it was found that on 5mm cardboard, a joint clearance of 4.8mm and a kerf of 0.2mm provide perfect fit. Thus, I designed with a 4.8mm thickness to ensure the necessary kerf and joint clearance for a snug joint.
- Now to make in pyramid shapes, go to cirular pattern and select bodies and vertical axis line.
- Project the marked parts to make a connector piece.
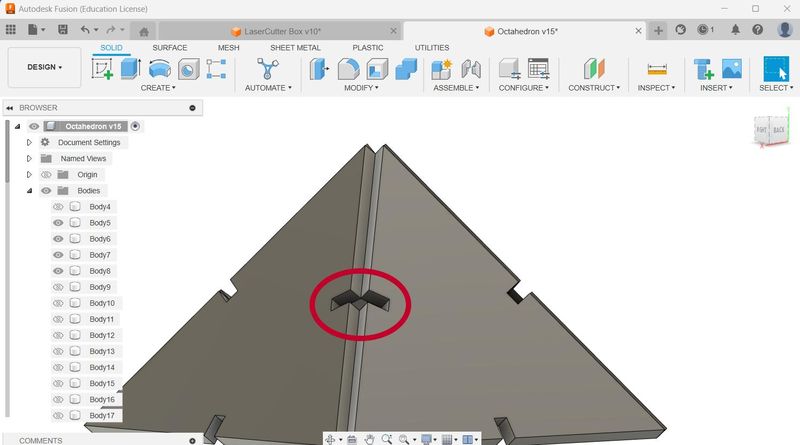
- Selecting projected sketch, edit sketch to make connector considering thickness, kerf of o.2mm and dimensions.
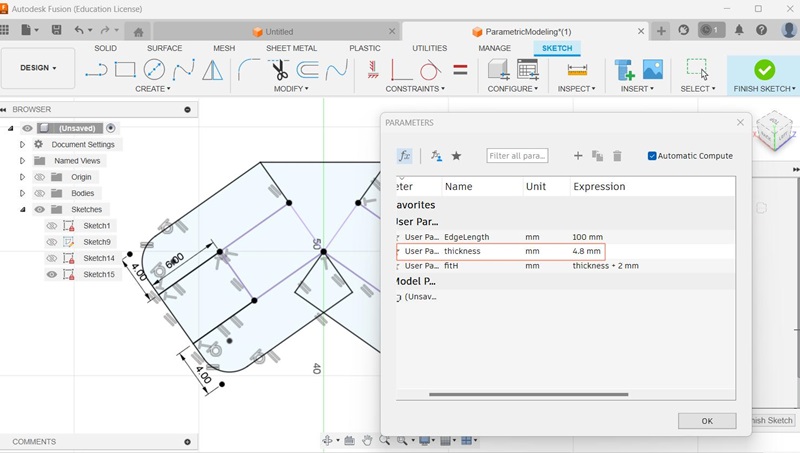
- Finally, move and create copy of parts and connector (make sure they are all align in one plane).
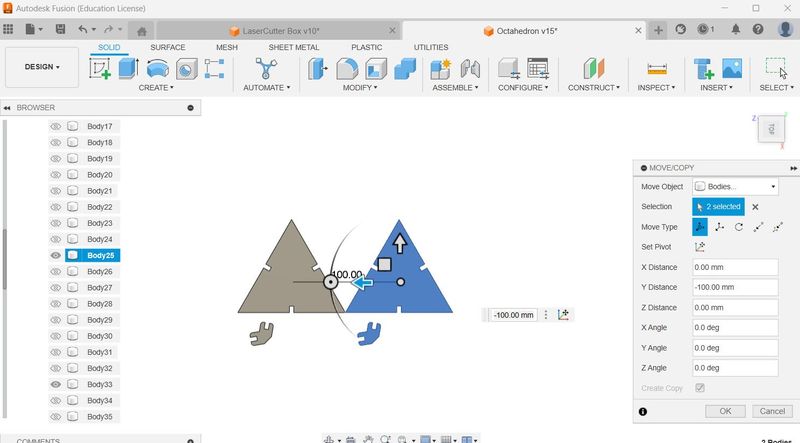
-
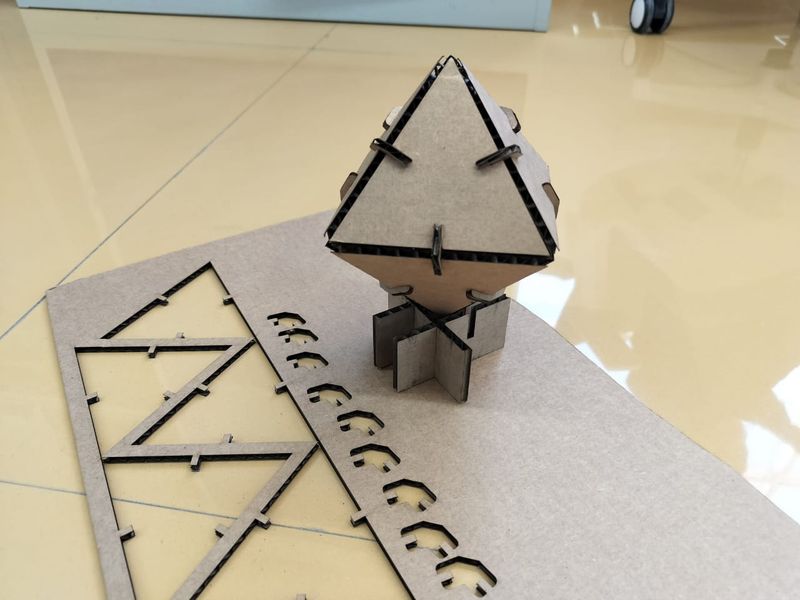
By giving mirror operation to pyramid body, I can make octahedron as well.
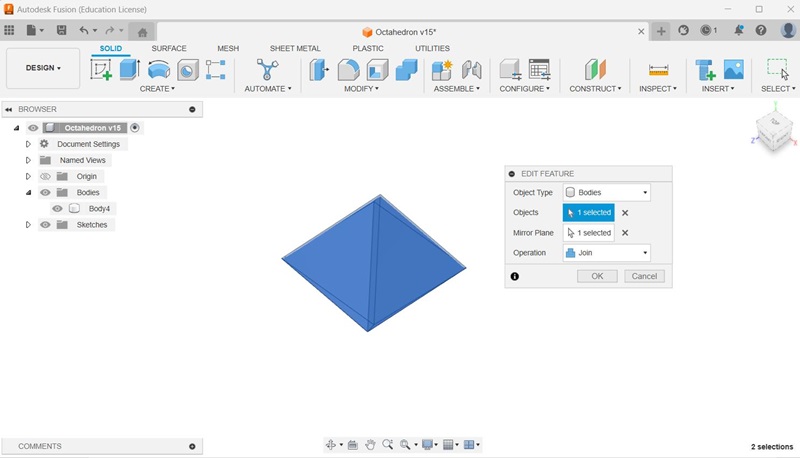
-
Exporting for Laser Cutting: Once Okay with the design, use project command to parts and connectors and save the sketch as a DXF file.
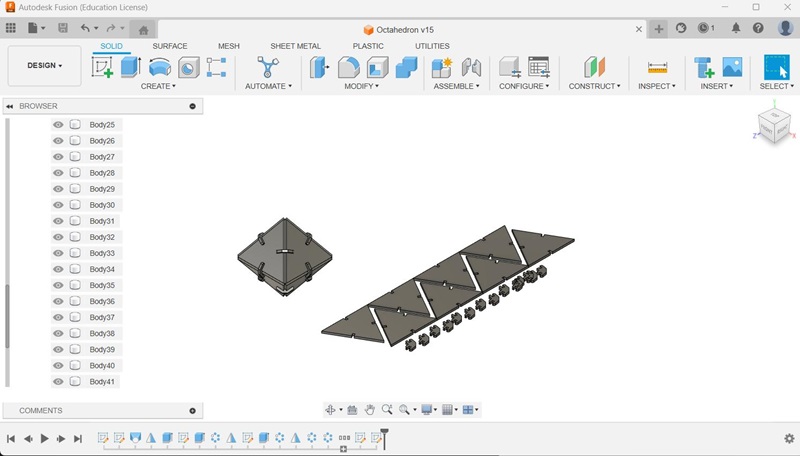

- Open the DXF file in Inkscape.

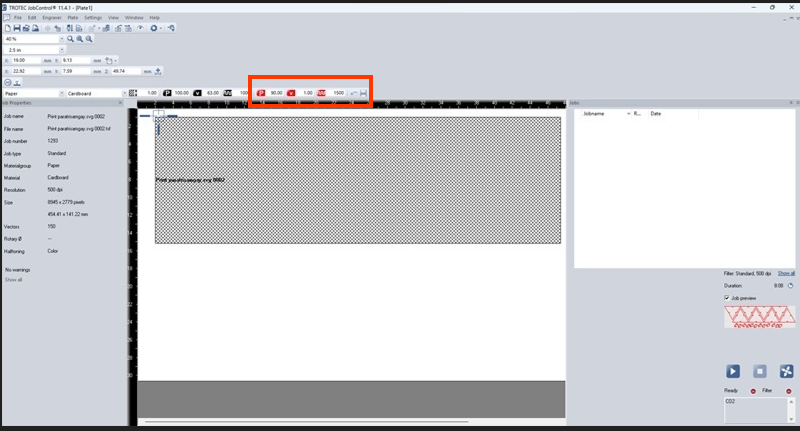
- Set the line color to red for cutting and adjust stroke thickness (0.01 mm).
- Send the prepared job to the Trotec JobControl for laser cutting. To ensure precise laser cutting, I maintained the following parameters: a speed setting of 1, power set at 90, and a pulse rate of 1800.
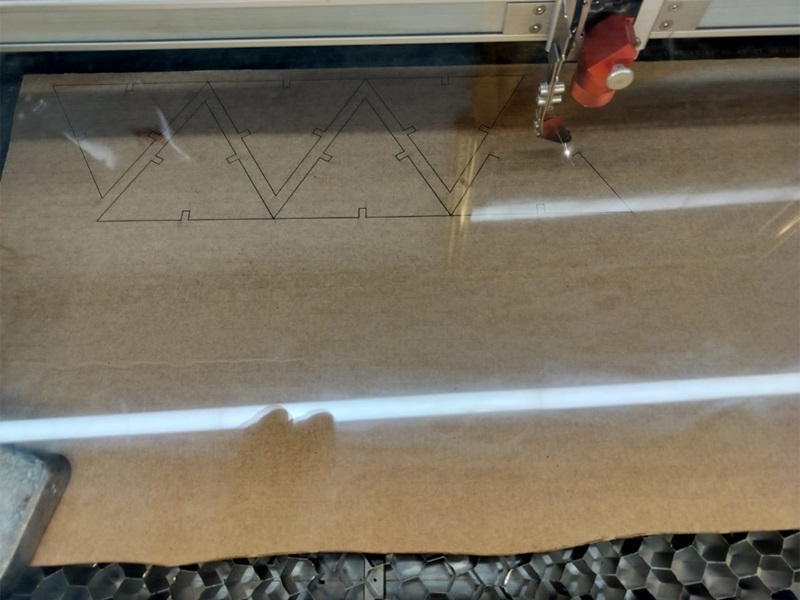
- After laser cutting, extract our desired components from the workpiece.

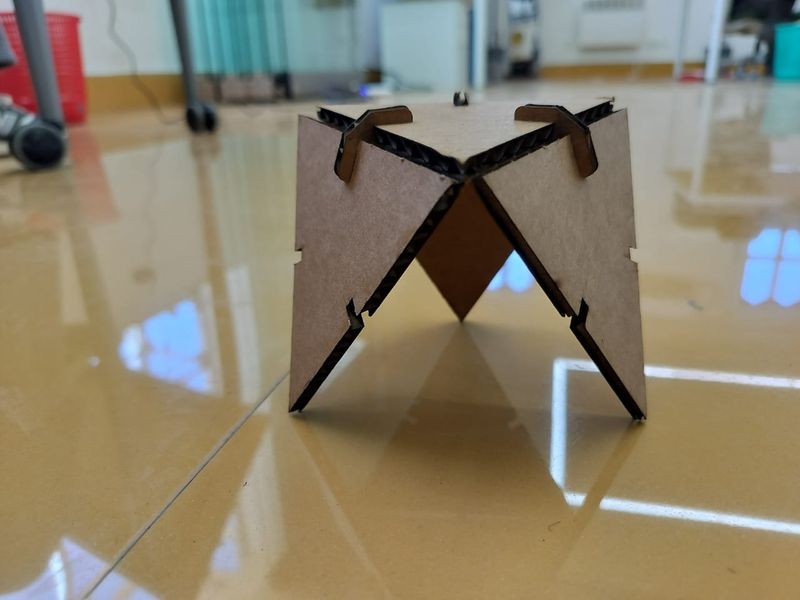
- Finally I assembled them to create parametric products as shown below:
- Louvre Pyramid at JNWSFL
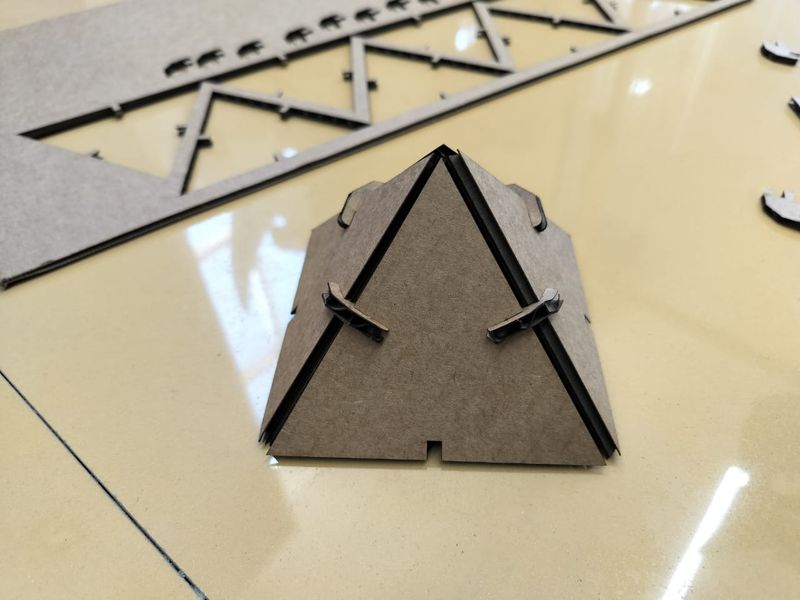
- Octahedron
- Tri Coffe Table
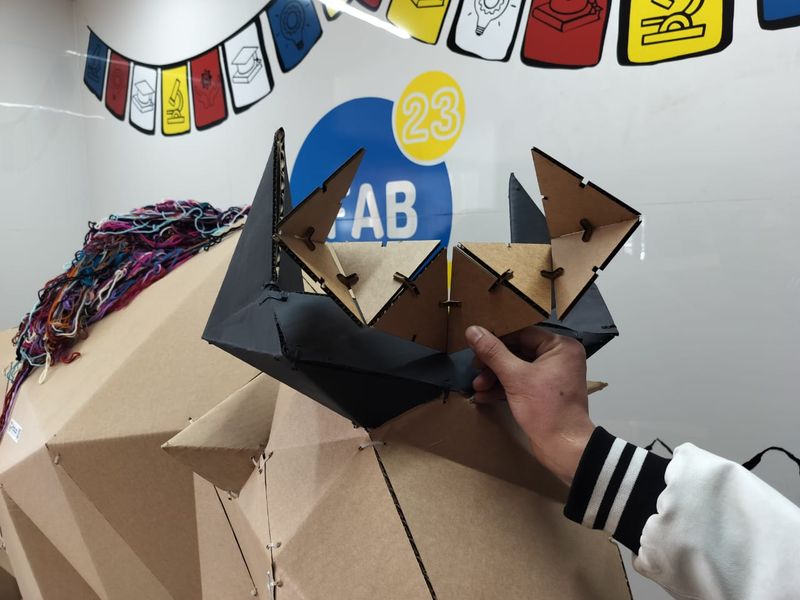
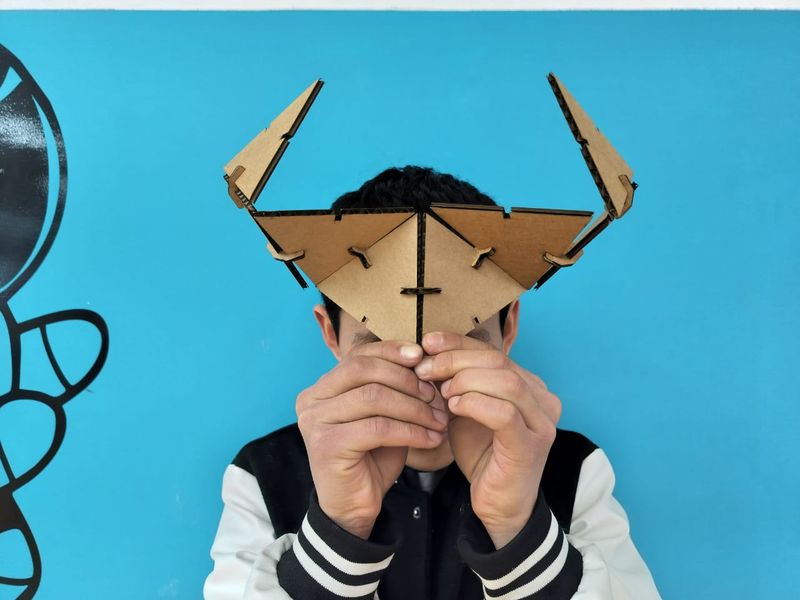
- Takin (Bhutan’s National Animal) horn
