Group Assignment
3D Printer (Ultimaker)
A 3D printer is a type of manufacturing technology that creates three-dimensional objects by layering materials, typically plastic or resin, until the desired shape is formed. The printer reads a 3D digital model created in a computer-aided design (CAD) software and translates it into a series of cross-sectional slices that it then prints layer by layer, adding material as it goes.
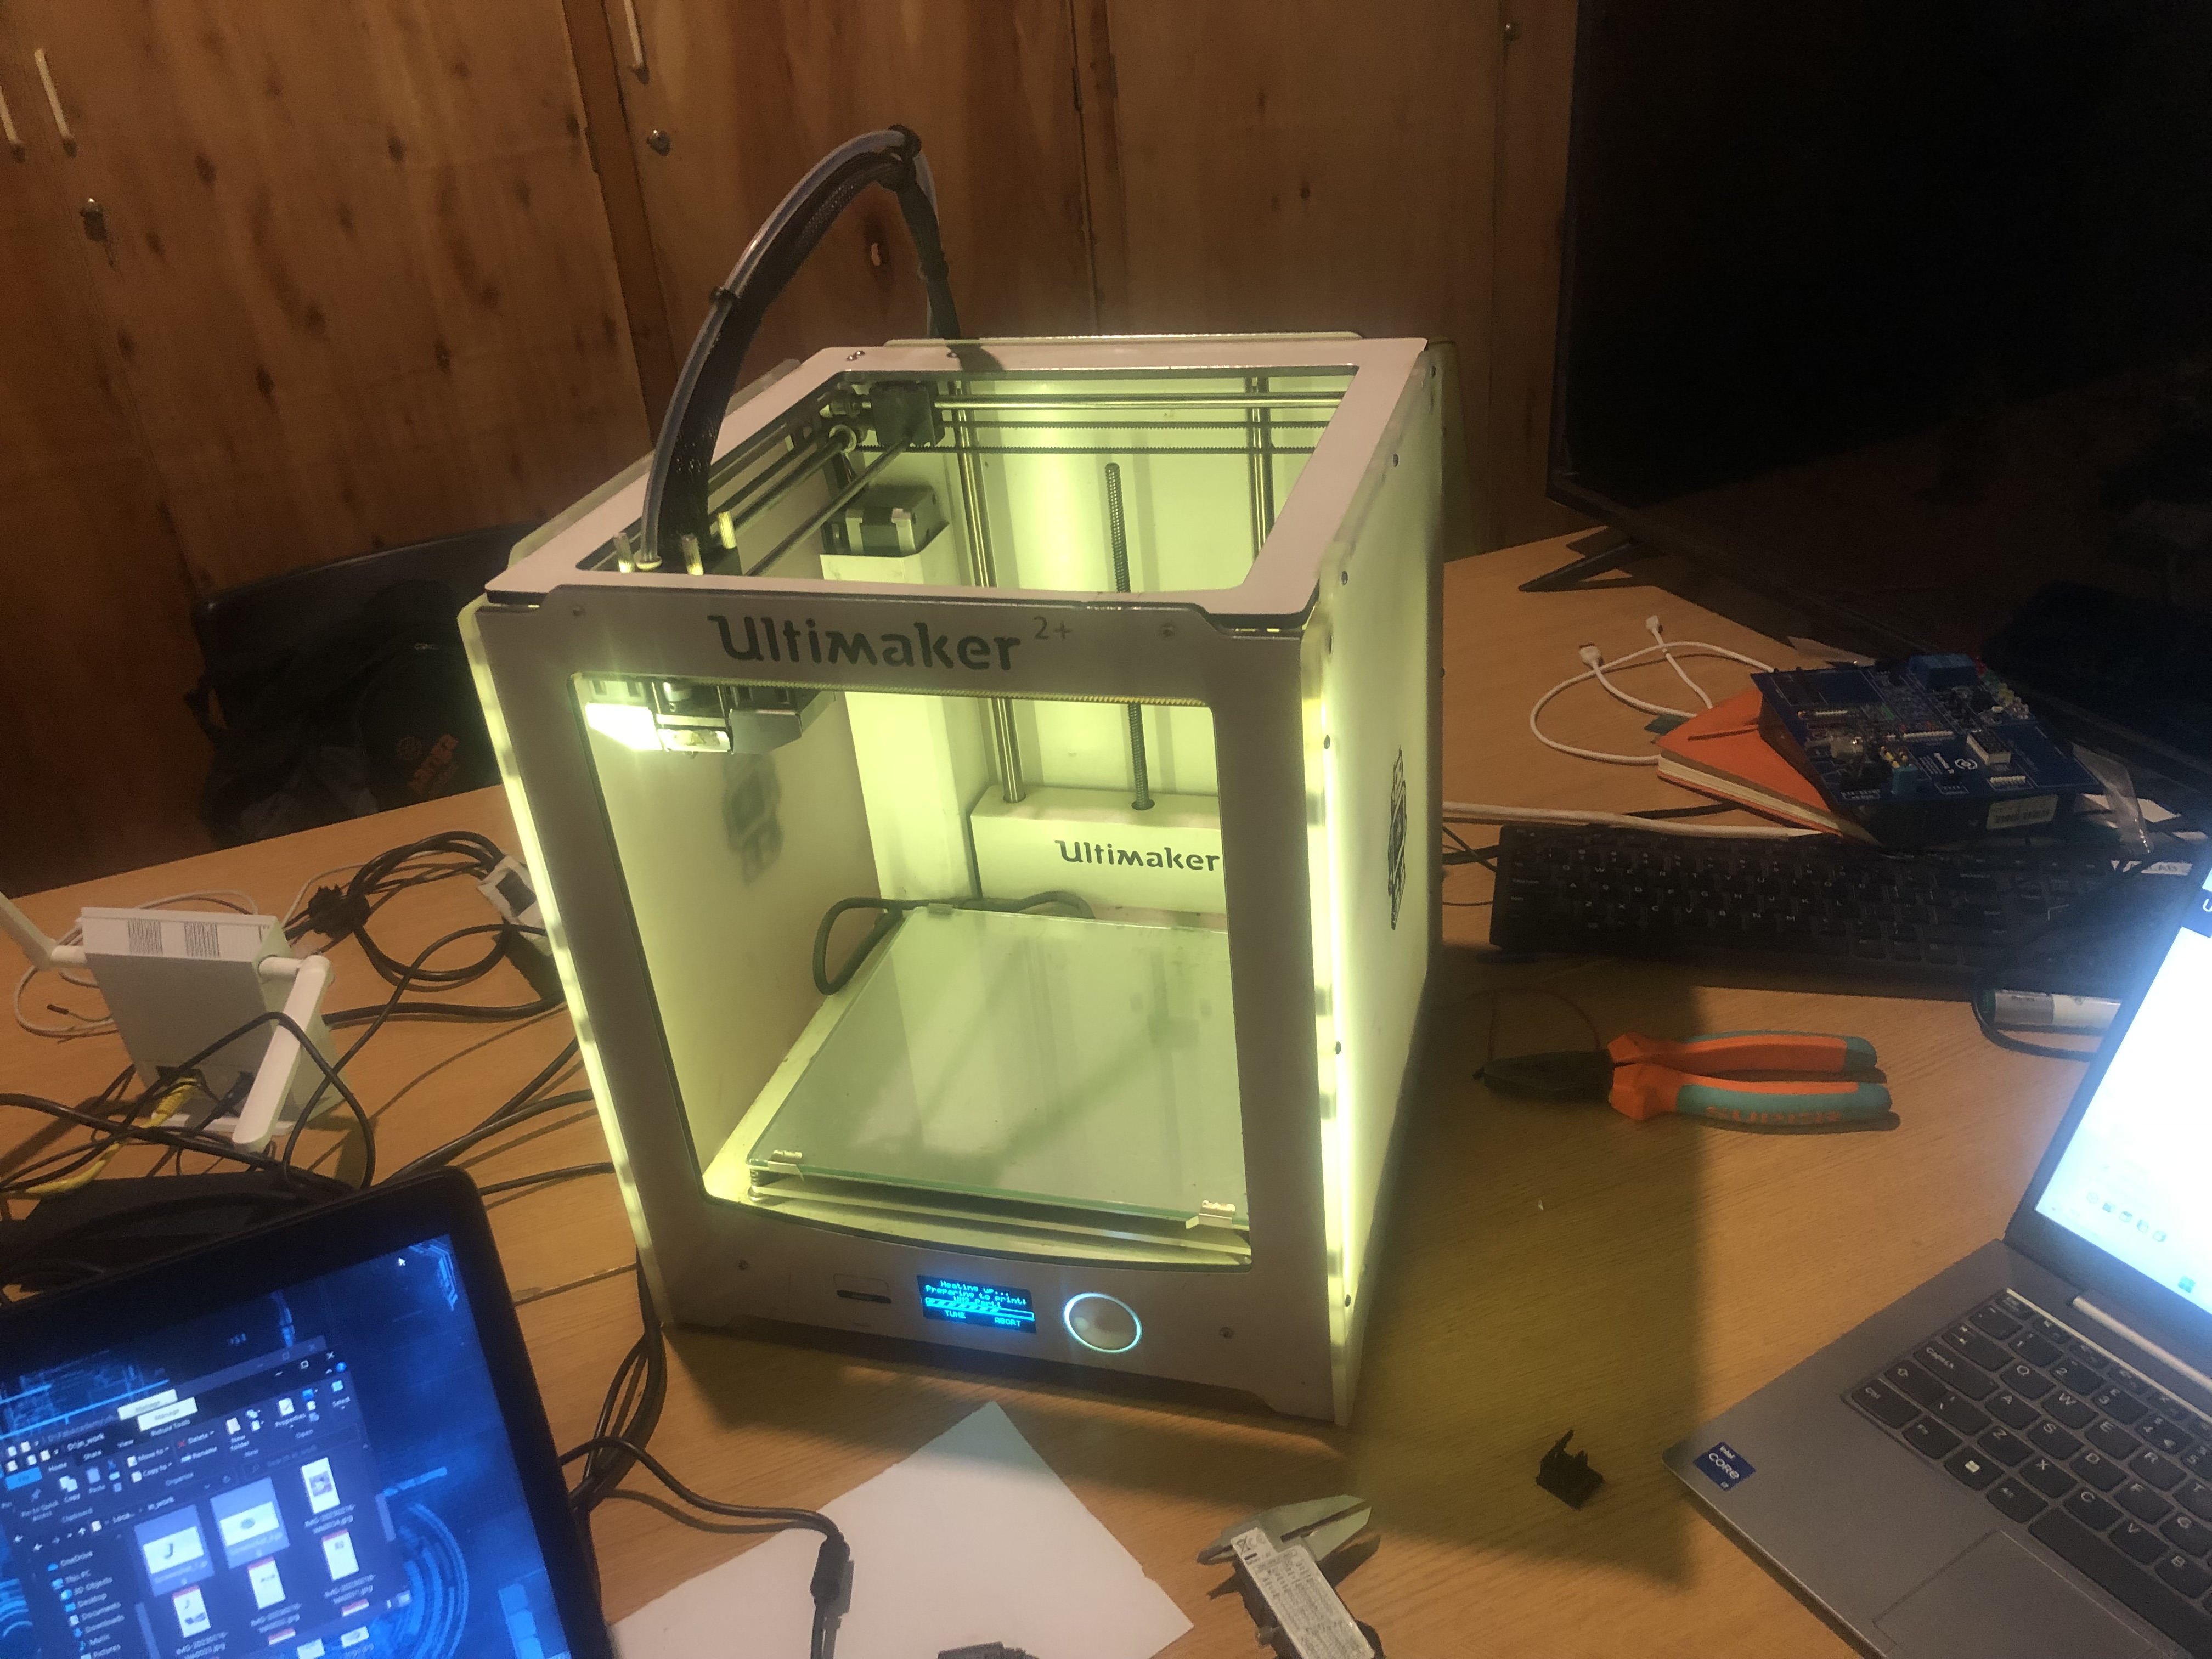 In thi group Assignment we Test the design rules for your 3D printer(s):
Before using a 3D printer, it's important to perform some tests to ensure that the printer is in good working condition and that it can produce high-quality prints. Here are some tests that you can perform on a 3D printer:
1. Extrusion Speed : Extrude a small amount of filament to make sure that the printer is properly loaded and that the filament is flowing smoothly.
2. Nozzle Temperature control: Set the nozzle and bed temperatures to the recommended settings for the filament you are using and monitor the temperature to make sure it is consistent.
3. Bed Temperature:bed temperature, it's also important to ensure that the build plate is clean and free from debris, to help prevent issues such as uneven adhesion or warping
4. Build Speed: Print a small calibration cube or another test model at different speeds to find the optimal speed for your printer and filament.
In this Assignment we tested our 3D Printer by using object downloaded on
Ultimaker thingiverse
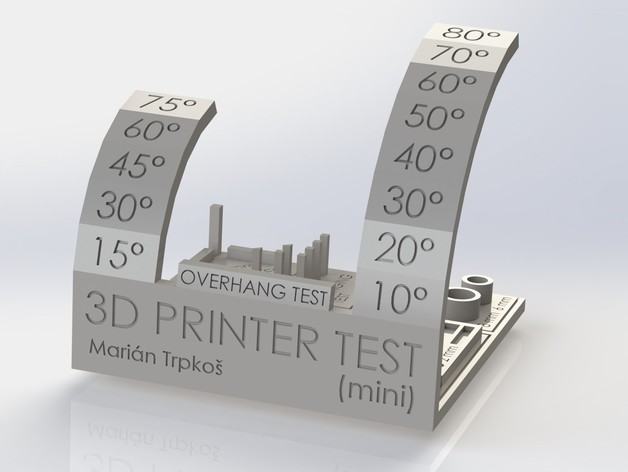 Extrusion Speed
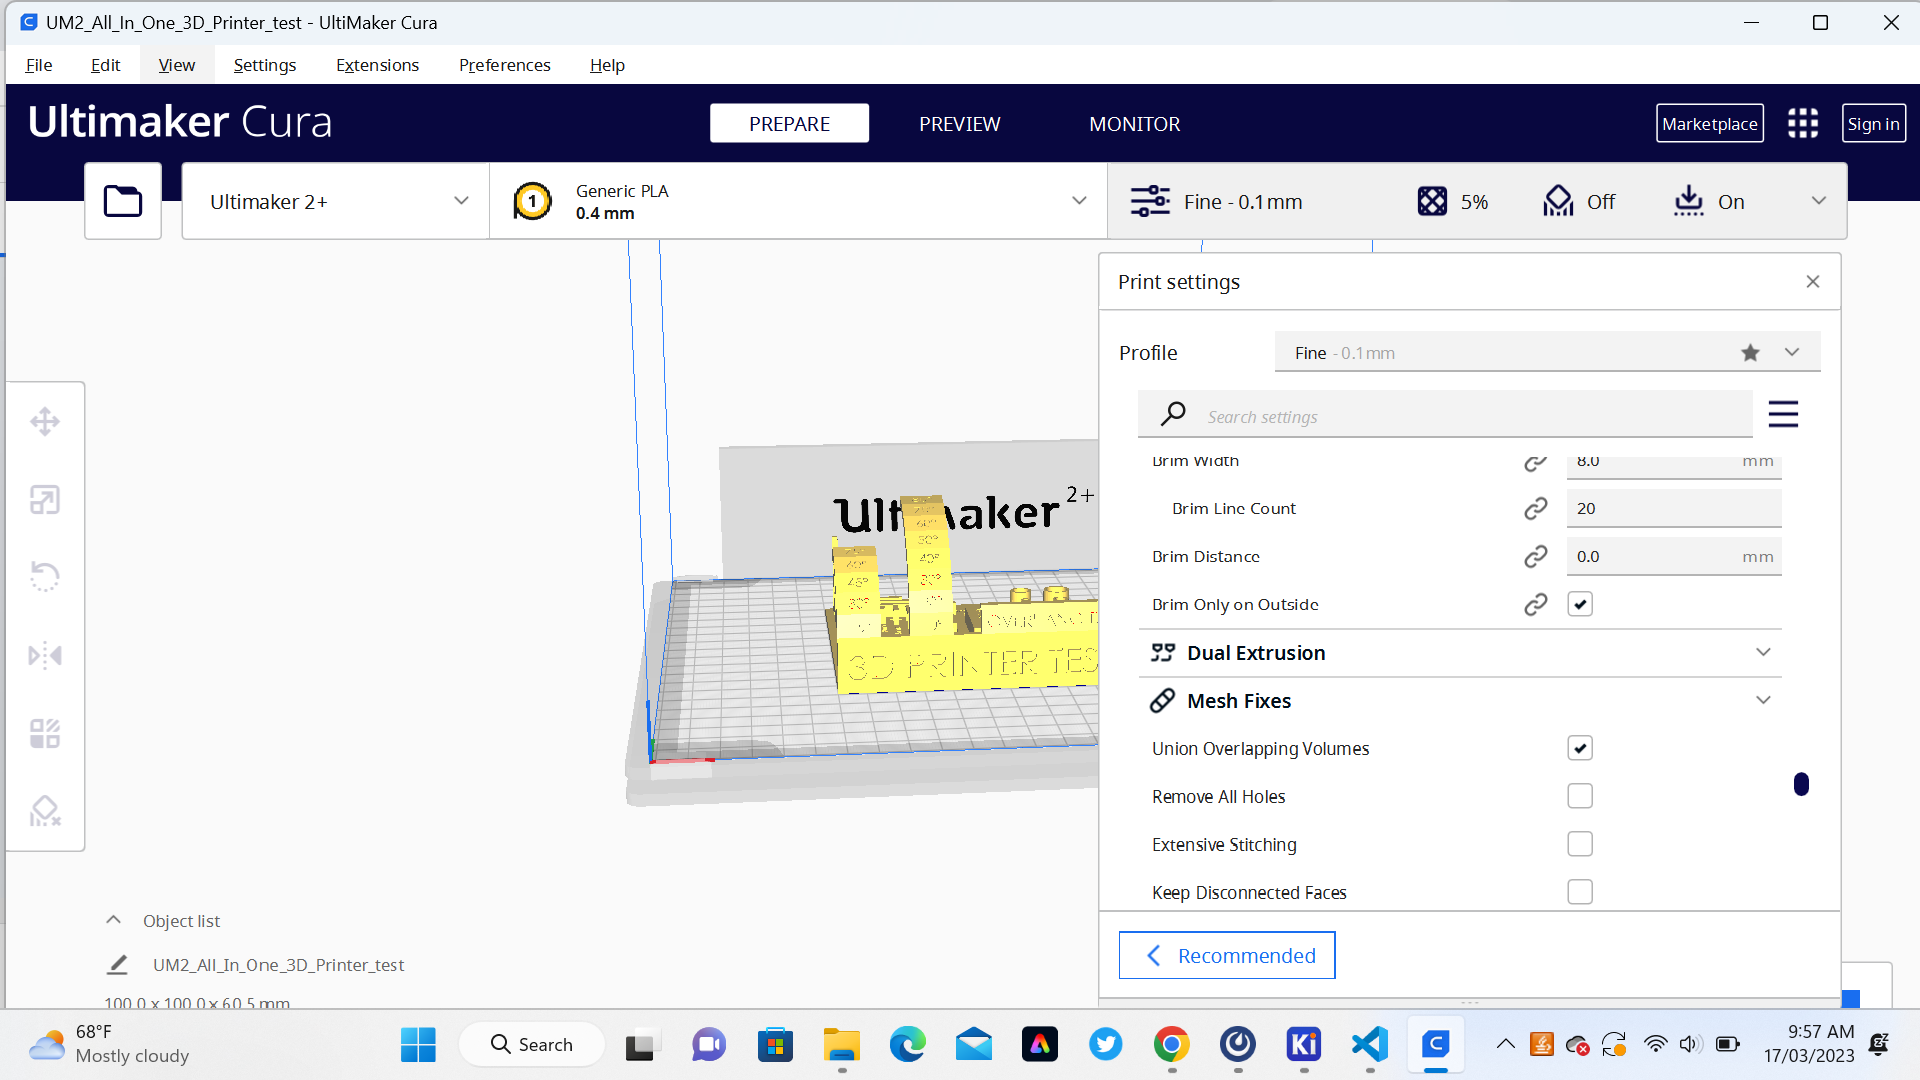
In general, a good extrusion speed for the Ultimaker 2+ is between 20-60 mm/s, depending on the factors mentioned above. Slower speeds are recommended for more intricate or detailed prints or when using materials that require more precise temperature control, such as ABS. On the other hand, faster speeds can be used for simpler designs and when using materials that have a wider temperature range, such as PLA.
 2. Nozzle Temperature control
The optimal nozzle temperature for the Ultimaker 2+ depends on the type of filament being used. Here are some general guidelines:
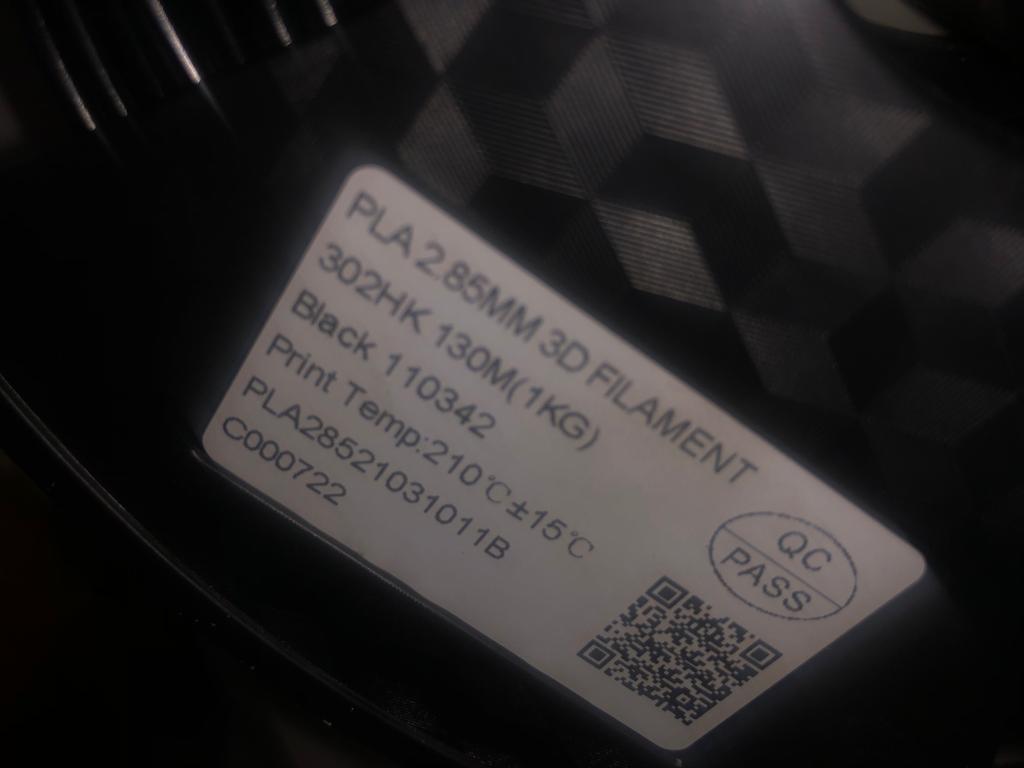
In our Assignment we use Printing Nozzle Temperature control of 210°C because our filement material was in PLA
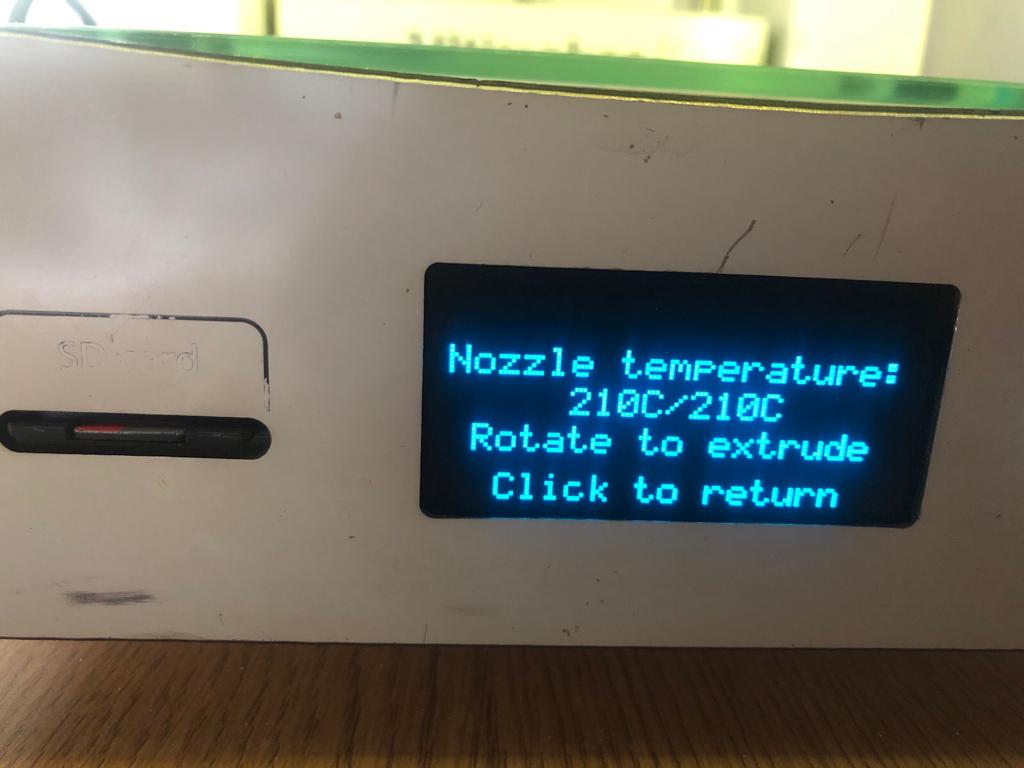
 3.Bed Temperature:
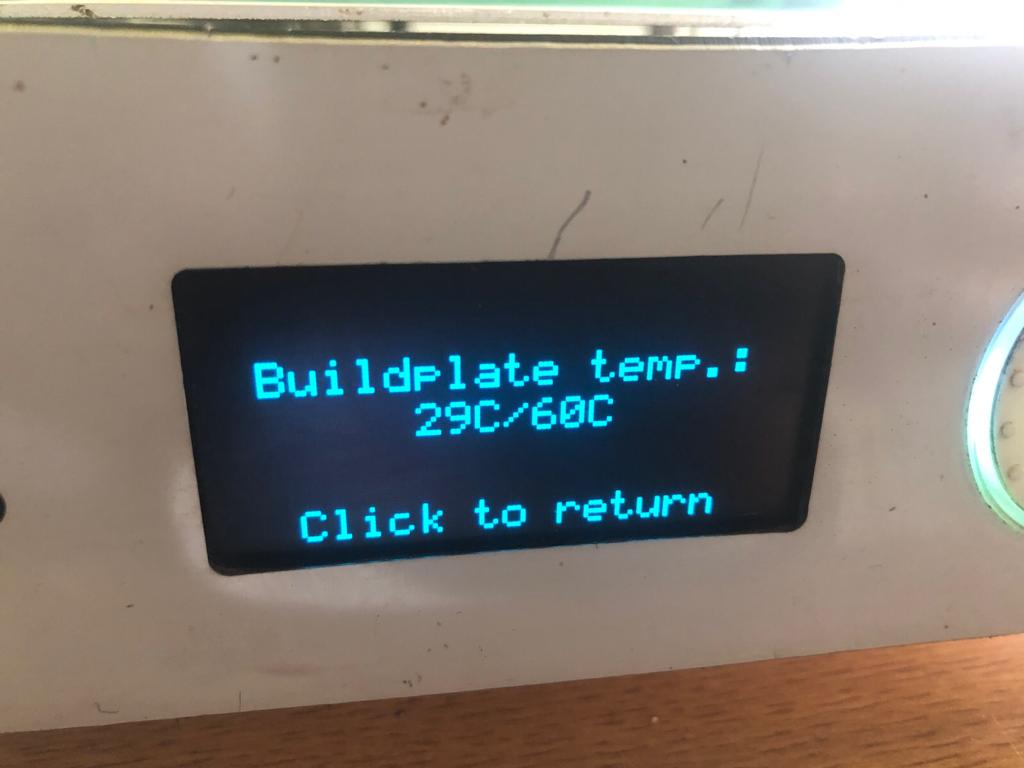
The optimal bed temperature for the Ultimaker 2+ depends on the type of filament being used. Here are some general guidelines:
 4.Printing Speed
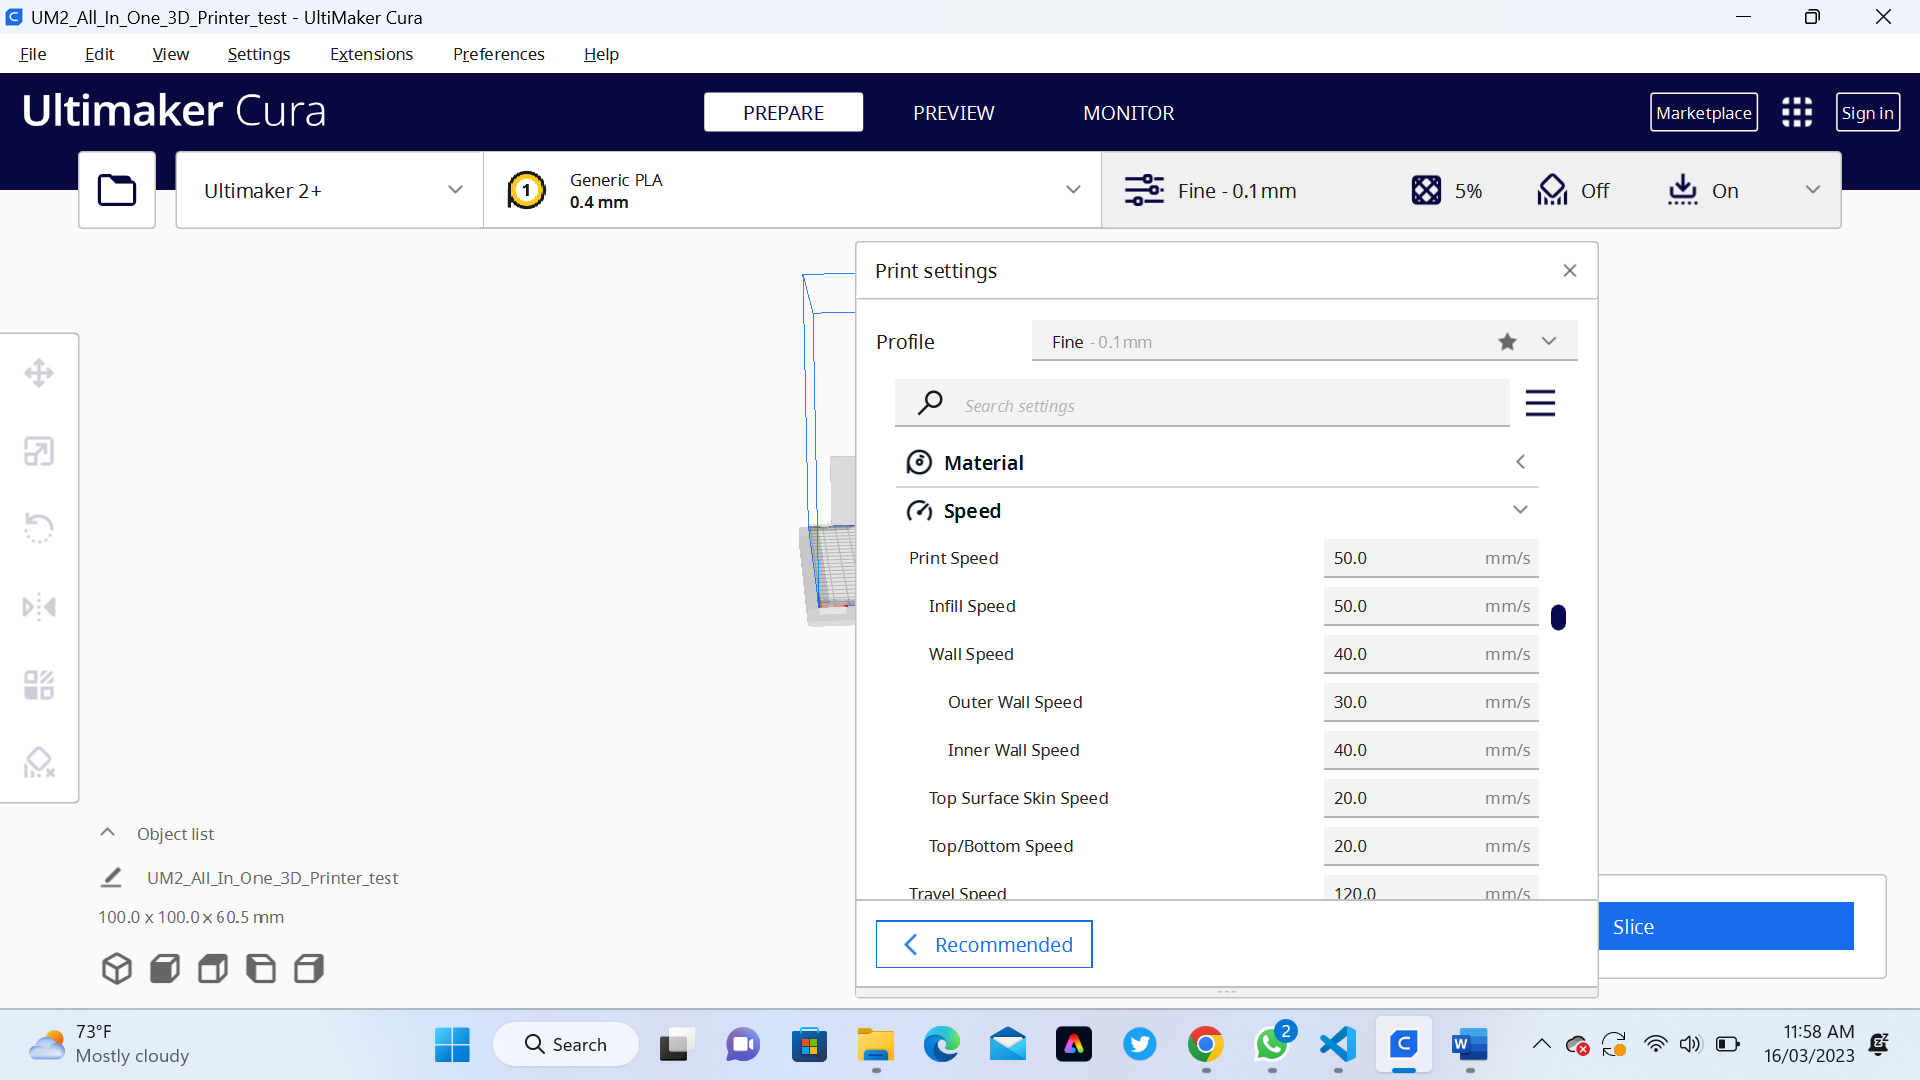
In General a good printing speed for the Ultimaker 2+ is between 30-60 mm/s, depending on the factors mentioned above. Slower speeds are recommended for more intricate or detailed prints or when using materials that require more precise temperature control, such as ABS. On the other hand, faster speeds can be used for simpler designs and when using materials that have a wider temperature range, such as PLA.
In our Assignment we use Printing Speed of 50mm/s
It's important to note that different brands and types of filaments may have slightly different temperature requirements, so it's a good idea to check the manufacturer's recommendations before printing.
 5.Infill density
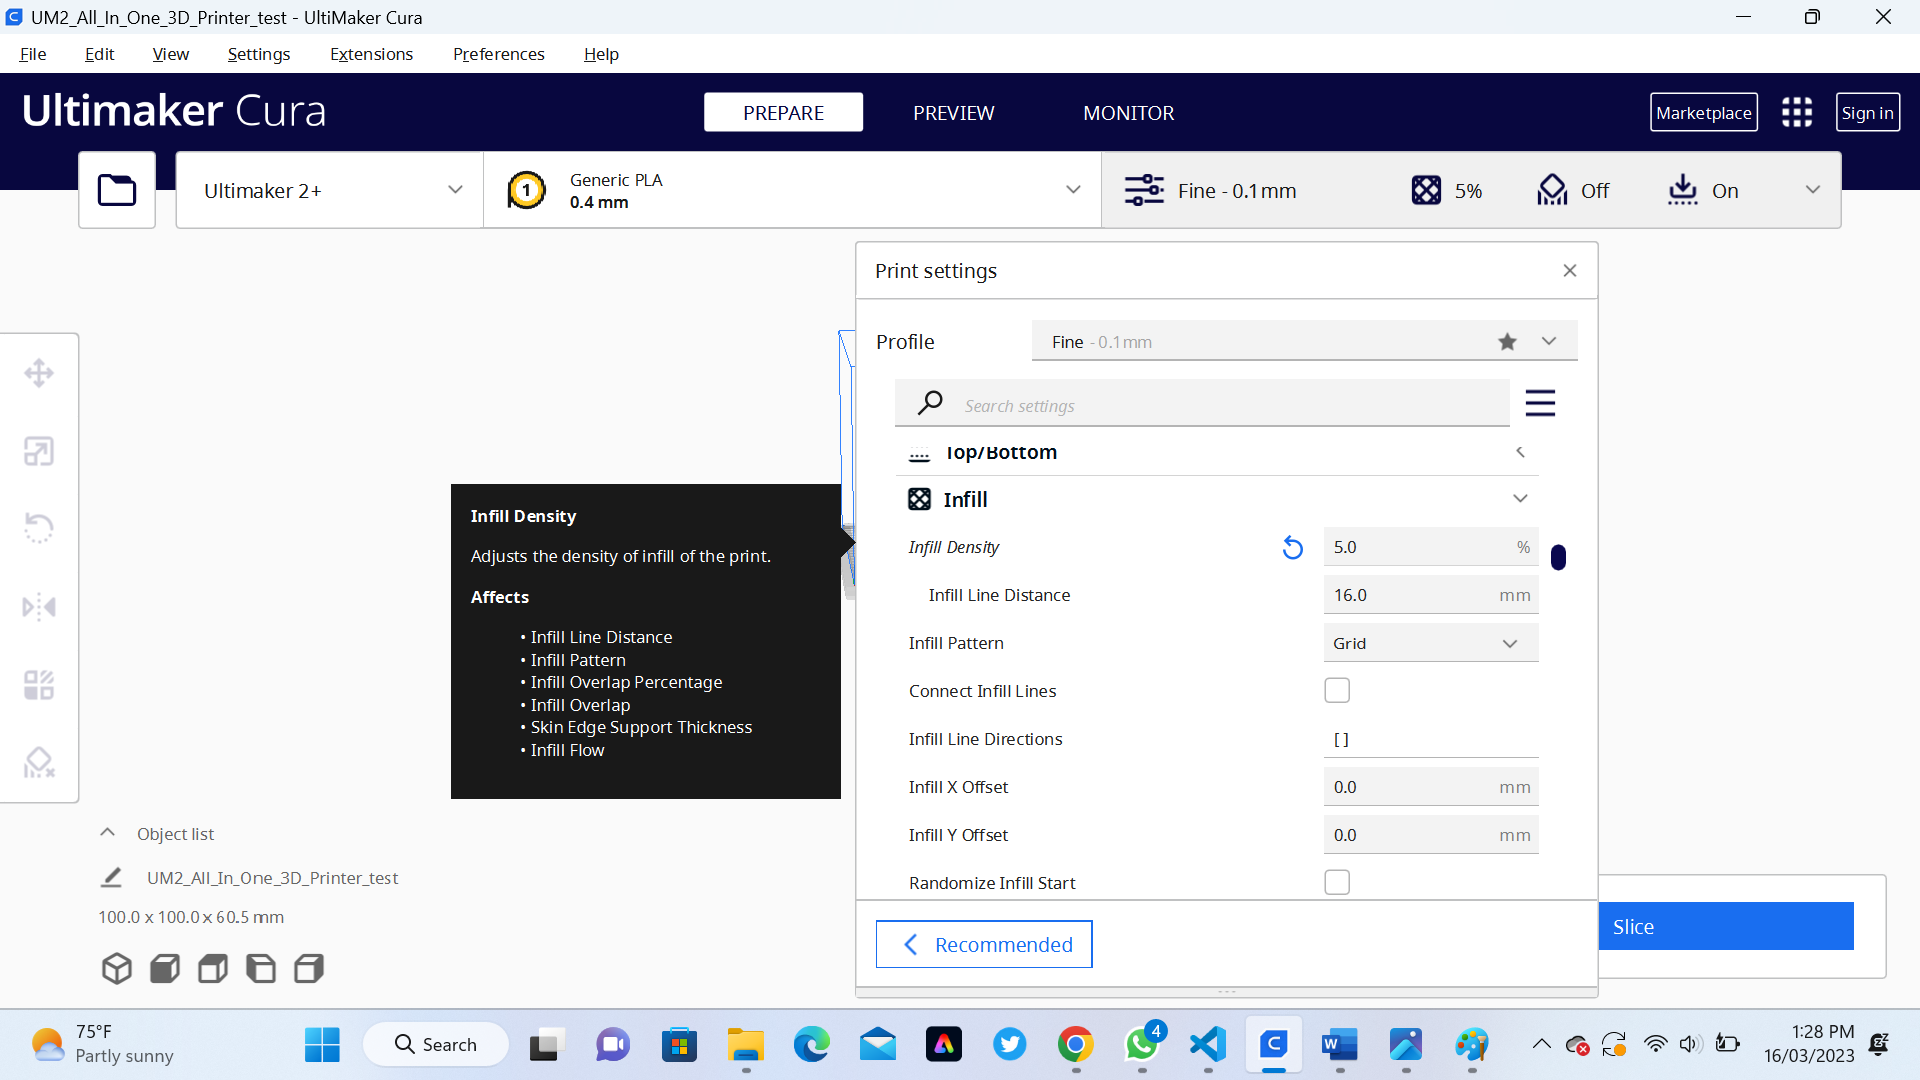
The best infill density for Ultimaker 2+ depends on the specific application and the desired properties of the printed object. In general, higher infill densities result in stronger and more durable prints, but they also take longer to print and require more material.
For functional parts that require strength and durability, an infill density of 50% to 100% may be suitable. However, for objects that do not need to support weight or stress, lower infill densities of 20% to 30% may be sufficient, which will also help to reduce the print time and material usage.
In our Assignment we use Printing Infill density of 20%
 After Printing we have the final object
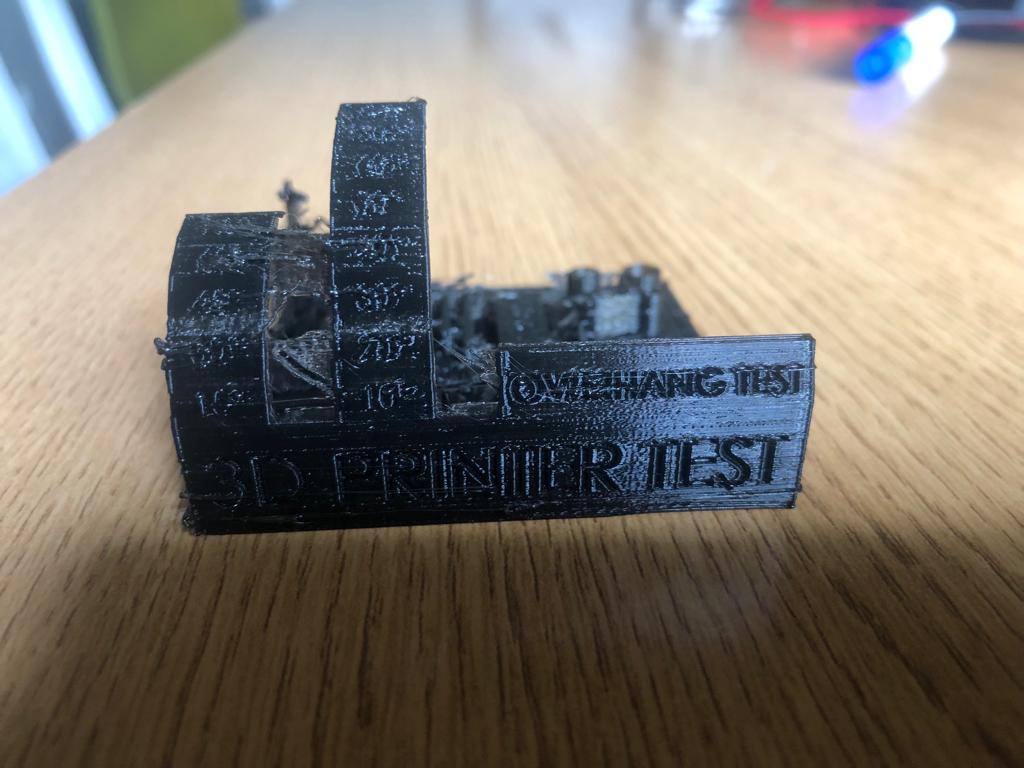 Analysing the Results found after printing
1. PLayer heights- Resolution vs Time: Layer heights- Resolution vs Time. Thickness of the layer height determines the resolution of the surface.
2. nozzle size: Lower nozzle size = higher precision.
3. resolution: Higher resolution = more printing time.
4. Thickness: Thickness of the casing must be a multiple of the diameter of the nozzle to prevent gaps from forming.
5. Infill density: 20% infill density can be used as a standard for most printers.
6. Orientation: Pay attention to the orientation: strength is more in the XY direction vs. Z direction.
7. Print speed and temperature:Print speed and temperature: You have to be careful with print speed and temperature when it comes to overhangs and bridges.
8. Temperature: If the temperature is too high it takes longer for the filament to cool down and solidify, and therefore once again giving it more change for it to fall.


 In thi group Assignment we Test the design rules for your 3D printer(s):
Before using a 3D printer, it's important to perform some tests to ensure that the printer is in good working condition and that it can produce high-quality prints. Here are some tests that you can perform on a 3D printer:
 Extrusion Speed
In general, a good extrusion speed for the Ultimaker 2+ is between 20-60 mm/s, depending on the factors mentioned above. Slower speeds are recommended for more intricate or detailed prints or when using materials that require more precise temperature control, such as ABS. On the other hand, faster speeds can be used for simpler designs and when using materials that have a wider temperature range, such as PLA.
 2. Nozzle Temperature control
The optimal nozzle temperature for the Ultimaker 2+ depends on the type of filament being used. Here are some general guidelines:

 3.Bed Temperature:
The optimal bed temperature for the Ultimaker 2+ depends on the type of filament being used. Here are some general guidelines:
 4.Printing Speed
In General a good printing speed for the Ultimaker 2+ is between 30-60 mm/s, depending on the factors mentioned above. Slower speeds are recommended for more intricate or detailed prints or when using materials that require more precise temperature control, such as ABS. On the other hand, faster speeds can be used for simpler designs and when using materials that have a wider temperature range, such as PLA.
In our Assignment we use Printing Speed of 50mm/s
It's important to note that different brands and types of filaments may have slightly different temperature requirements, so it's a good idea to check the manufacturer's recommendations before printing.
 5.Infill density
The best infill density for Ultimaker 2+ depends on the specific application and the desired properties of the printed object. In general, higher infill densities result in stronger and more durable prints, but they also take longer to print and require more material.
For functional parts that require strength and durability, an infill density of 50% to 100% may be suitable. However, for objects that do not need to support weight or stress, lower infill densities of 20% to 30% may be sufficient, which will also help to reduce the print time and material usage.
In our Assignment we use Printing Infill density of 20%
 After Printing we have the final object
 Analysing the Results found after printing