Embedded Programming
Group assignment:-
Compare the performance and development workflows for other architectures
-
Document your work to the group work page and reflect on your individual page what you learned
- I currently do not have a group to work with.
Individual assignment:- Browse through the datasheet for your microcontroller
- Program a microcontroller development board to interact and communicate
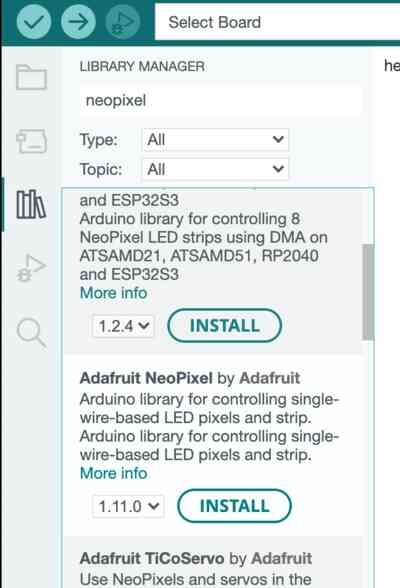
Installing the NeoPixel library
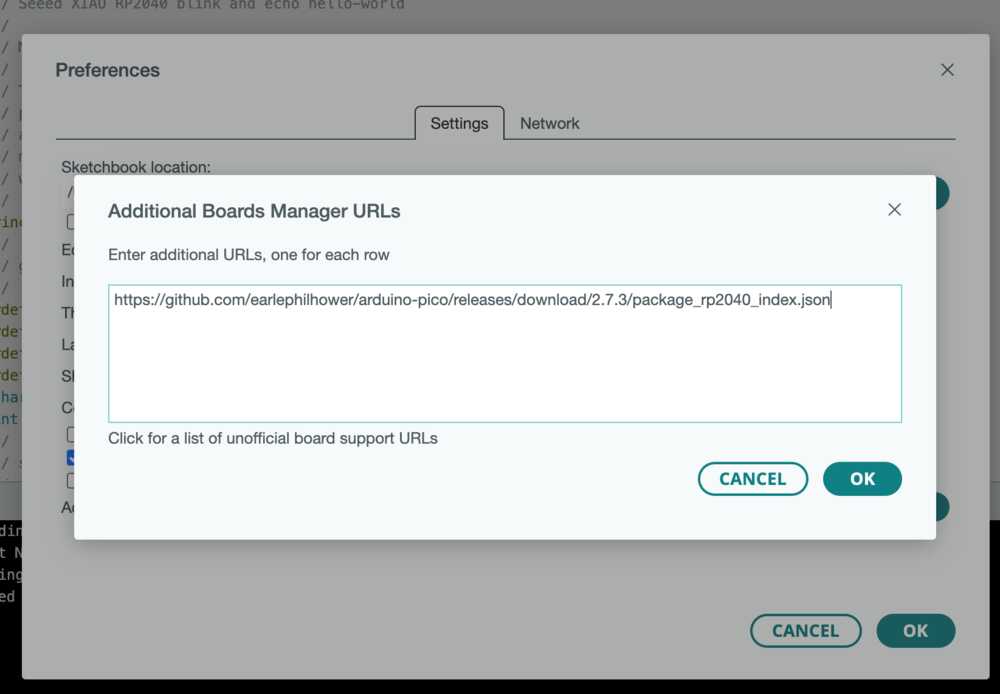
Adding the Earle Philhower arduino-pico library url
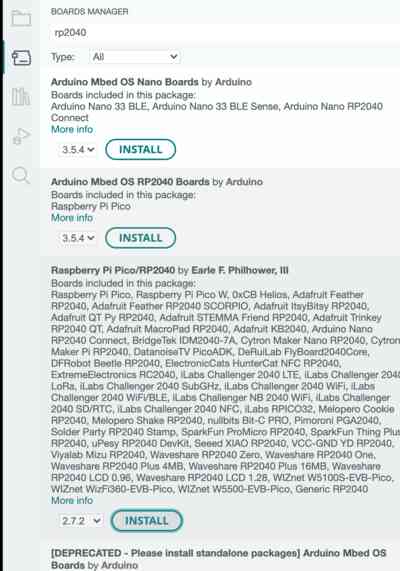
Installing the arduino-pico library
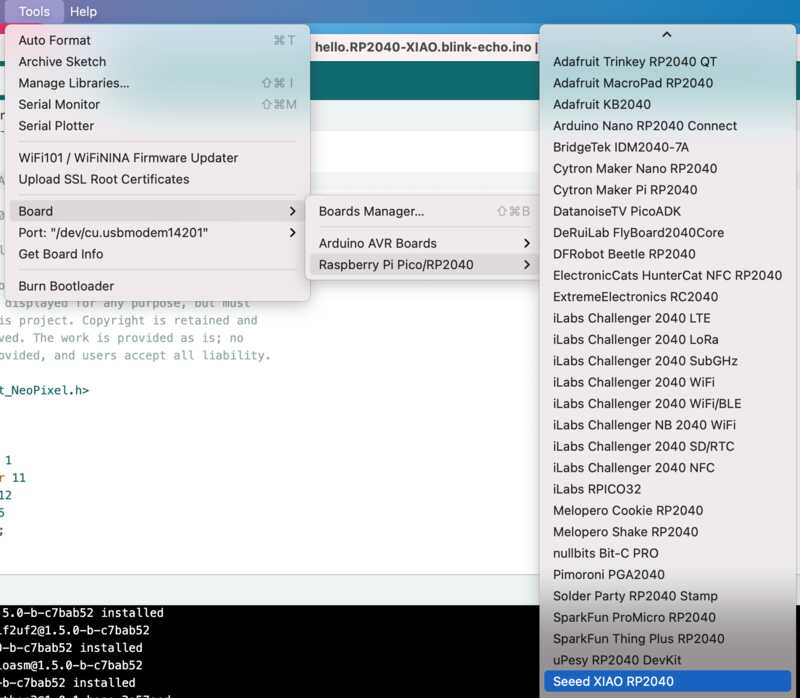
Board selection
Port selection

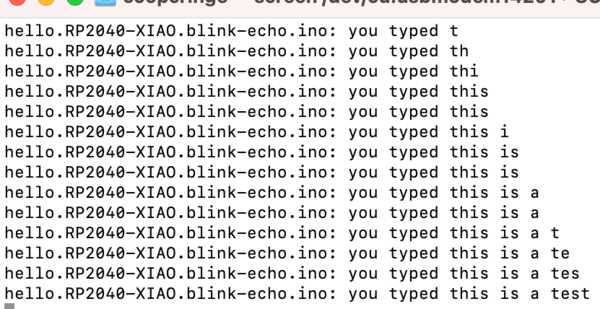
I was successful in uploading the hello.RP2040-XIAO.blink-echo.ino code.
Browse through the datasheet for your microcontroller
RP2040 has 2 identical instances of a UART peripheral and support the following features:
- Separate 32×8 Tx and 32×12 Rx FIFOs
- Programmable baud rate generator, clocked by clk_peri
- Standard asynchronous communication bits (start, stop, parity) added on transmit and removed on receive
- line break detection
- programmable serial interface (5, 6, 7, or 8 bits)
- 1 or 2 stop bits
- programmable hardware flow control
- Each UART can be connected to a number of GPIO pins
Program a microcontroller development board to interact and communicate
I modified the code to recieve numeric input ranging from 1 to 9 and blink the led that many times while printing that many dots to the terminal screen. The code can be downloaded code.
///////////////////////////////////////////////////////////////
// hello.RP204-XIAO.blink-echo.ino
//
// Seeed XIAO RP2040 blink and echo hello-world
//
// Neil Gershenfeld 2/12/23
//
// This work may be reproduced, modified, distributed,
// performed, and displayed for any purpose, but must
// acknowledge this project. Copyright is retained and
// must be preserved. The work is provided as is; no
// warranty is provided, and users accept all liability.
//
#include <Adafruit_NeoPixel.h>

//
// globals
//
#define numpixels 1
#define pixelpower 11
#define pixelpin 12

//
// setup
//
Adafruit_NeoPixel pixel(numpixels,pixelpin,NEO_GRB+NEO_KHZ800);

void setup() {
   Serial.begin();
   pixel.begin();
   pinMode(pixelpower,OUTPUT);
   digitalWrite(pixelpower,HIGH);
}

//
// main loop
//
void loop() {
   char chr;
   int code;

   //
   // check for a char
   //
    if (Serial.available()) {
        //
        // read, save, and send char
        //
        chr = Serial.read();

        int code = (chr + 0) - 48;

        if( code > 0 and code <= 9)
        {
            for(int i = 0; i < code; i++) {
              pixel.setPixelColor(0,pixel.Color(255,0,0));
              pixel.show();
              delay(300);
              pixel.setPixelColor(0,pixel.Color(255,255,255));
              pixel.show();
              Serial.print(".");
              delay(200);
            }
        }

        Serial.println();
    }
}
/////////////////////////////////////////////////////////////
Video demo below
RP2040 blinking as 1 through 9 is entered into the terminal
The terminal output as 1 through 9 is entered
Compare the performance and development workflows for other architectures
I programmed the RP2040 with the ARM architecture and the Arduino Uno with the Atmel and used the Arduino IDE for both. Ther isn't much difference in programming both boards with the exception of installing different board cores. I used a modified version of the program listed above to blink the onboard LED on the Uno which does not utilize the Adafruit NeoPixel.