14. Applications and implications
For this group assignment, we had to test several different tools for interfacing our devices. We decided to try out Processing, Python and the Unity game engine. As a test device, we used a DS18B20 digital temperature sensor. We plugged it to an Arduino. We used this tutorial in order to understand how to use it. It was recommended to use a 4.7 kΩ resistor between the signal and +5V, but since we didn’t have this kind of resistor, we used two 10 kΩ resistors in parallel. Even if it would affect the accuracy, it would be enough for a demonstration purpose.
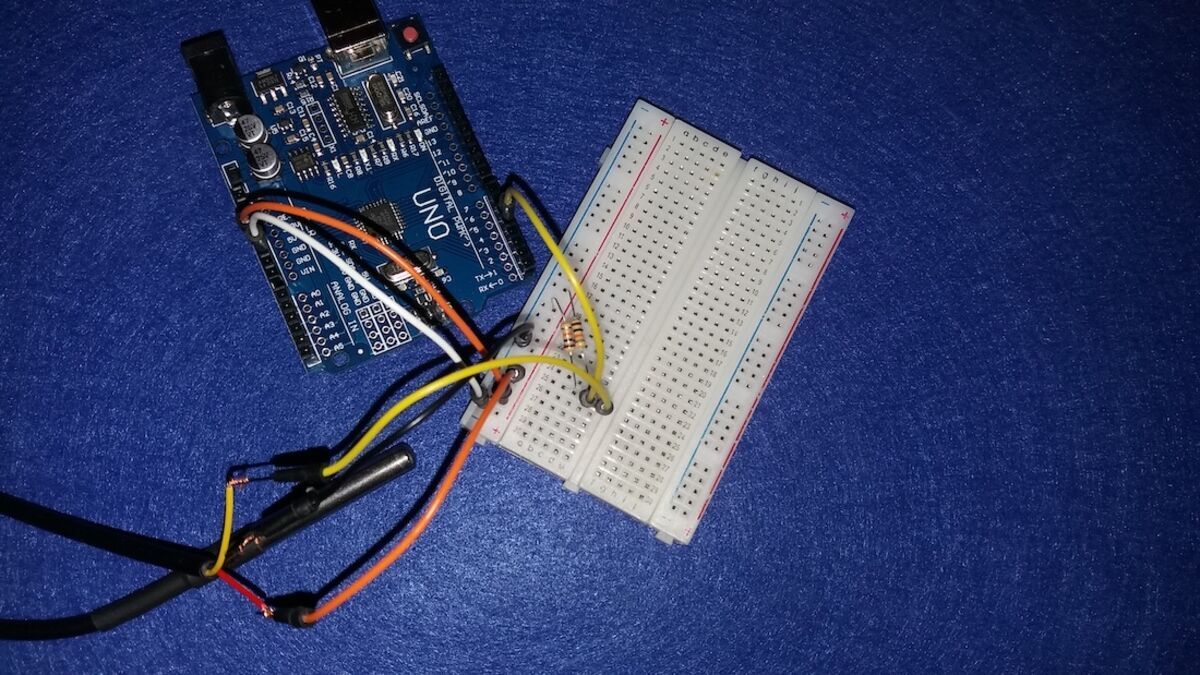
We uploaded the following code and were able to make sure that it was working as intended:
/* DS18B20 1-Wire digital temperature sensor with Arduino example code. More info: https://www.makerguides.com */
// Include the required Arduino libraries:
#include <OneWire.h>
#include <DallasTemperature.h>
// Define to which pin of the Arduino the 1-Wire bus is connected:
#define ONE_WIRE_BUS 4
// Create a new instance of the oneWire class to communicate with any OneWire device:
OneWire oneWire(ONE_WIRE_BUS);
// Pass the oneWire reference to DallasTemperature library:
DallasTemperature sensors(&oneWire);
void setup() {
  // Begin serial communication at a baud rate of 9600:
  Serial.begin(9600);
  // Start up the library:
  sensors.begin();
}
void loop() {
  // Send the command for all devices on the bus to perform a temperature conversion:
  sensors.requestTemperatures();
  // Fetch the temperature in degrees Celsius for device index:
  float tempC = sensors.getTempCByIndex(0); // the index 0 refers to the first device

  // Print the temperature in Celsius in the Serial Monitor:
  Serial.println(tempC);  //for processing
  //Serial.write(tempC);  //for Unity and Python

  // Wait 200 ms:
  delay(200);
}
Processing
Processing is a language and a software sketchbook that makes it easy to program some graphic interface. We downloaded the 3.5.4 version, since the computer we were using couldn’t support the latest version.
We found some code for plotting a variable made Tom Igoe that was in the public domain:
// Graphing sketch

  // This program takes ASCII-encoded strings from the serial port at 9600 baud
  // and graphs them. It expects values in the range 0 to 1023, followed by a
  // newline, or newline and carriage return

  // created 20 Apr 2005
  // updated 24 Nov 2015
  // by Tom Igoe
  // This example code is in the public domain.

  import processing.serial.*;

  Serial myPort;        // The serial port
  int xPos = 1;         // horizontal position of the graph
  float inByte = 0;

  void setup () {
    // set the window size:
    size(1100, 700);

    // List all the available serial ports
    // if using Processing 2.1 or later, use Serial.printArray()
    println(Serial.list());

    //we had to change the number in the list to correspond to our device
    println(Serial.list()[3]);

    // Open whatever port is the one you're using.
    myPort = new Serial(this, Serial.list()[3], 9600);

    // don't generate a serialEvent() unless you get a newline character:
    myPort.bufferUntil('\n');

    // set initial background:
    background(0);
  }

  void draw () {
    // draw the line:
    stroke(127, 34, 255);
    line(xPos, height, xPos, height - inByte);

    // at the edge of the screen, go back to the beginning:
    if (xPos >= width) {
      xPos = 0;
      background(0);
    } else {
      // increment the horizontal position:
      xPos++;
    }
  }

  void serialEvent (Serial myPort) {
    // get the ASCII string:
    String inString = myPort.readStringUntil('\n');

    if (inString != null) {
      // trim off any whitespace:
      inString = trim(inString);
      // convert to a float and map to the screen height:
      inByte = float(inString);
      println(inByte);

      //we changed the range of the mapping to better correspond to our temperatures
      inByte = map(inByte, 0, 80, 0, height);
    }
  }
We made some very basic modifications, like the mapping range, in order to correspond to the range of temperatures we would want to work with.
Once we got everything working, we obtained the following result:
Python and Matplotlib
Python is a ubiquitous language that has some good tools for data visualisation. One of these tools is Kivy. However, we chose a simpler tool: Matplotlib. It was already installed on the computer we were using. We just had to install the pyserial package in order to read the serial port. It was simply done using:
pip install pyserial
Then, using this tutorial about python serial communication and this one about updating a graph, we made this small program:
import time
from time import sleep
import serial
import matplotlib.pyplot as plt
import numpy as np
import array

#define serial port
ser = serial.Serial('/dev/cu.usbserial-1410', 9600)


tempData = []
timeData = []


#setup plot
x = np.linspace(0, 10*np.pi, 100)
y = np.sin(x)

plt.ion()
fig = plt.figure()
ax = fig.add_subplot(111)
line1, = ax.plot(timeData, tempData, 'b-')

startingTime = time.time()


while True:
    #read serial port
    serialInput = ser.readline()
    stringInput = serialInput.decode("utf-8")
    stringInput = stringInput.strip("\r\n")
    floatInput = float(stringInput)
    print(floatInput)

    #add data at the end of the array
    if floatInput > -100:
        timeData.append(time.time() - startingTime)
        tempData.append(floatInput)

    #update plot
    line1, = ax.plot(timeData, tempData, 'b-')
    #line1.set_ydata(np.sin(0.5 * x + counter))
    fig.canvas.draw()
    fig.canvas.flush_events()

    #plot doesn't show if pause omitted
    plt.pause(0.1)
Running this code gives this result:
Unity game engine
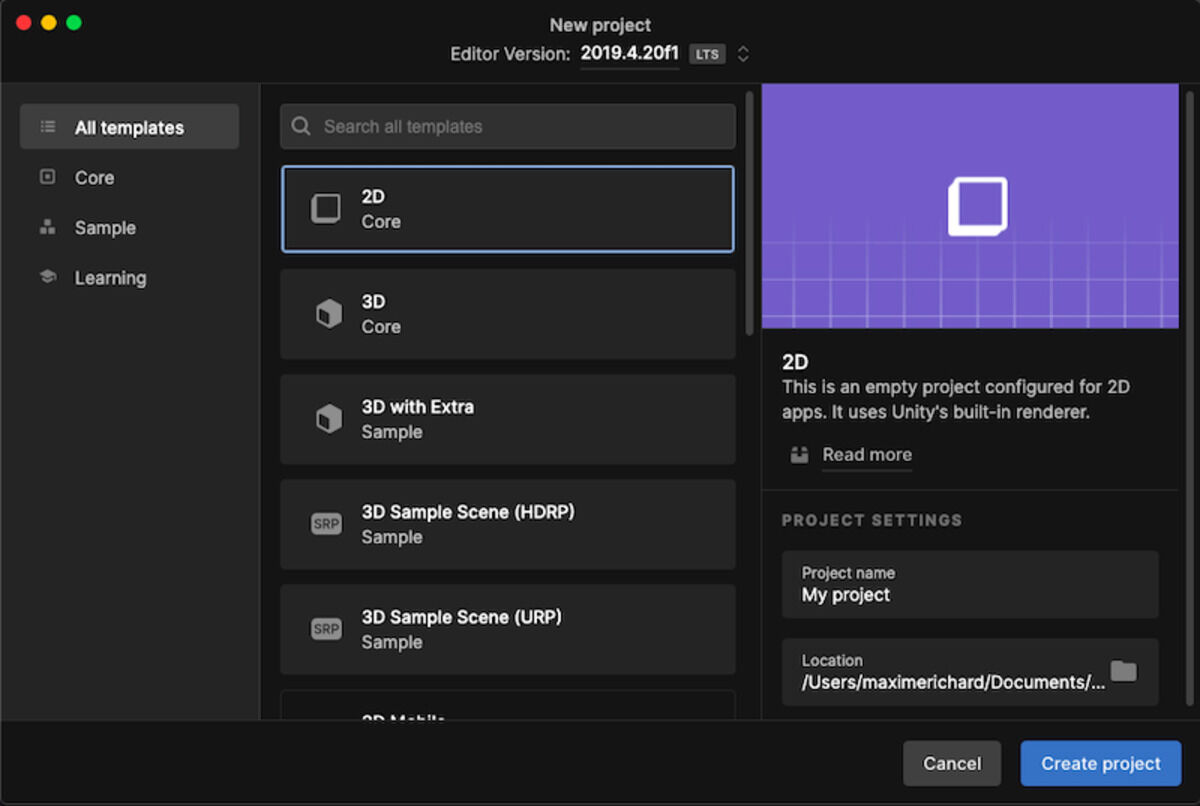
The Unity game engine has 2D and 3D capabilities. For this test, we chose to use the 2D core template.
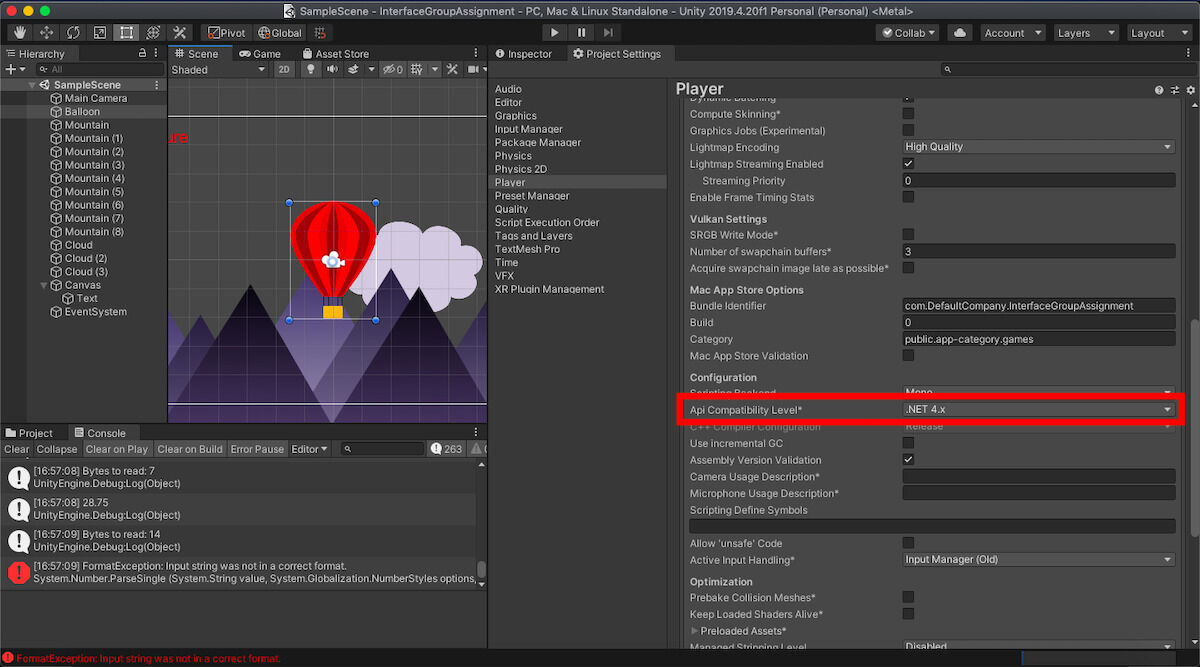
We created few assets to represent our temperature reading as an ascending or descending ho air balloon.
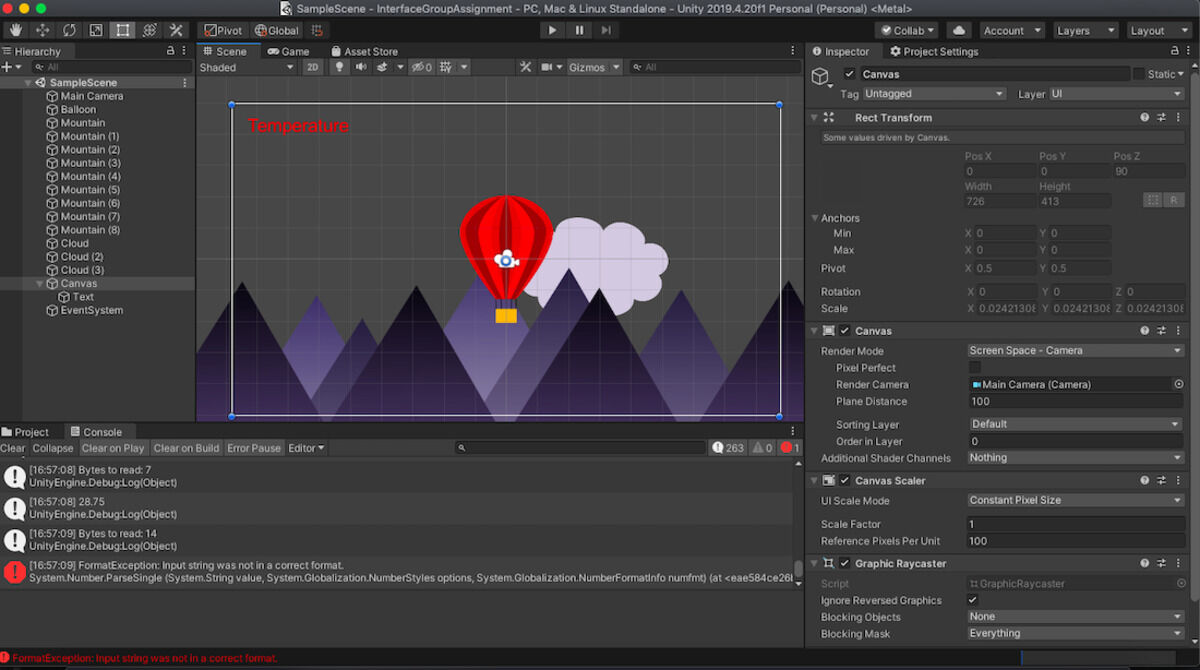
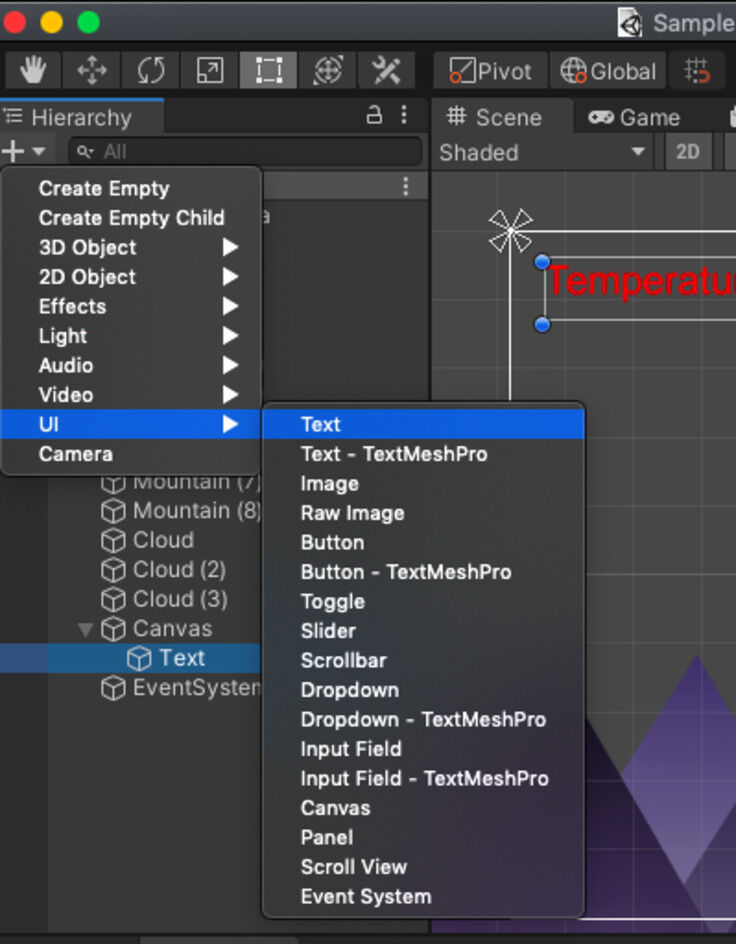
We also added a text object to display the temperature reading:
For reading the serial port, we had to make sure that the API compatibility level was .NET 4.x.
We could then write the script that would be attached to the balloon game object:
using System.Collections;
using System.Collections.Generic;
using UnityEngine;
using System.IO.Ports;
using System.IO; // Requires .NET 4 in Project Settings
using System.Text;
using System.Globalization;

public class BalloonMovement : MonoBehaviour
{
    public UnityEngine.UI.Text temperature;
    private float speed = 0.25f;
    private float upperTempBound = 32.0f;
    private float lowerTempBound = 20.0f;
    private float upperYBound = 3.0f;
    private float lowerYBound = -3.0f;
    private float currentTemperature = 0;
    private float tolerance = 0.2f;

    SerialPort _serial;
    // Start is called before the first frame update
    void Start()
    {
        //Serial initialization
        string the_com = "";

        /*foreach (string mysps in SerialPort.GetPortNames())
        {
            print(mysps);
            if (mysps != "COM1") { the_com = mysps; break; }
        }*/

        the_com = "/dev/cu.usbserial-1410";
        //sp = new SerialPort("\\\\.\\" + the_com, 9600);
        _serial = new SerialPort(the_com, 9600);
        if (!_serial.IsOpen)
        {
            print("Opening " + the_com + ", baud 9600");
            _serial.ReadTimeout = 500;
            _serial.Handshake = Handshake.None;
            _serial.Open();
            if (_serial.IsOpen) { print("Open"); }
        }

    }

    // For simplicity we are reading data in our Update loop of our script. However, if you have a lot of data to read, I would recommend creating a separate thread and reading the data from that instead of the main UI thread.
    void Update()
    {
        // Make sure we have a serial port and that the connection is open
        if (_serial != null && _serial.IsOpen)
        {
            // Check to see if there are any bytes available to read
            int bytesToRead = _serial.BytesToRead;
            if (bytesToRead > 0)
            {
                Debug.Log($"Bytes to read: {bytesToRead}");

                // Create our buffer to store the data
                byte[] buff = new byte[bytesToRead];

                // Read the available data into our buffer
                int read = _serial.Read(buff, 0, bytesToRead);

                // Check if we were able to read anything
                if (read > 0)
                {
                    var str = System.Text.Encoding.Default.GetString(buff);
                    currentTemperature = float.Parse(str, CultureInfo.InvariantCulture.NumberFormat);
                    Debug.Log(currentTemperature);
                    temperature.text = "Temperature = " + currentTemperature + "°C";
                }
                else
                {
                    Debug.Log("Didn't read anything.");
                }
            }
        }
    }

    private void FixedUpdate()
    {
        float targetYPosition = (currentTemperature - lowerTempBound) / (upperTempBound - lowerTempBound) * (upperYBound - lowerYBound) + lowerYBound;
        if (transform.position.y > targetYPosition + tolerance)
        {
            transform.Translate(Vector3.down * speed * Time.deltaTime);
        } else if (transform.position.y < targetYPosition - tolerance)
        {
            transform.Translate(Vector3.up * speed * Time.deltaTime);
        }
    }
}
We also enabled the clouds to move by writing a short script:
using UnityEngine;

public class CloudMovingScript : MonoBehaviour
{
    public float speed = 2;

    // Start is called before the first frame update
    void Start()
    {

    }


    void Update()
    {
        // Moves the object forward at two units per second.
        transform.Translate(Vector3.left * speed * Time.deltaTime);
        if (transform.position.x < -13)
        {
            transform.position = transform.position + Vector3.right * 30;
        }
    }
}
Once everything was ready, we could have a representation of our sensor data: