7: Computer-Controlled Machining
Group assignment
Safety
During the safety training, we were given these instructions:
- never reach for the tool when it is working
- make sure that the part is well fasten to the machine
- always wear safety glasses
- wear earpads
- don’t wear gloves while operating the machine
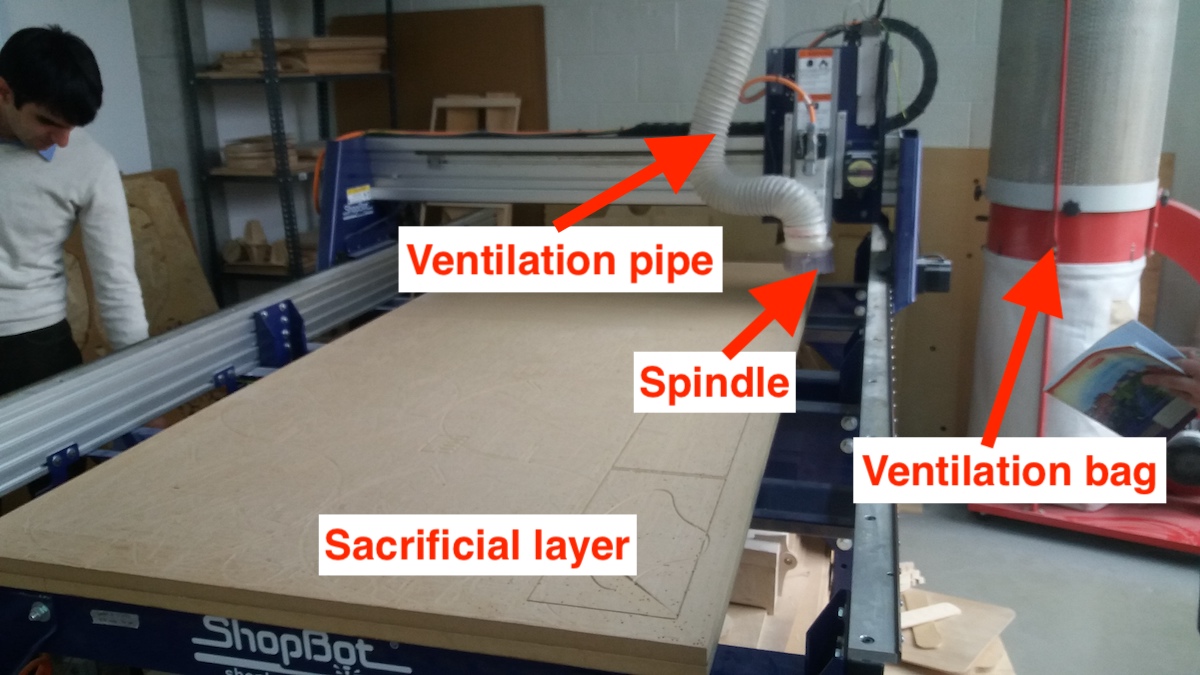
Getting acquainted with the machine
We first got some explanations for the different parts of the machine, a Shopbot PRSalpha:
In order to start the machine, the button is on the side:
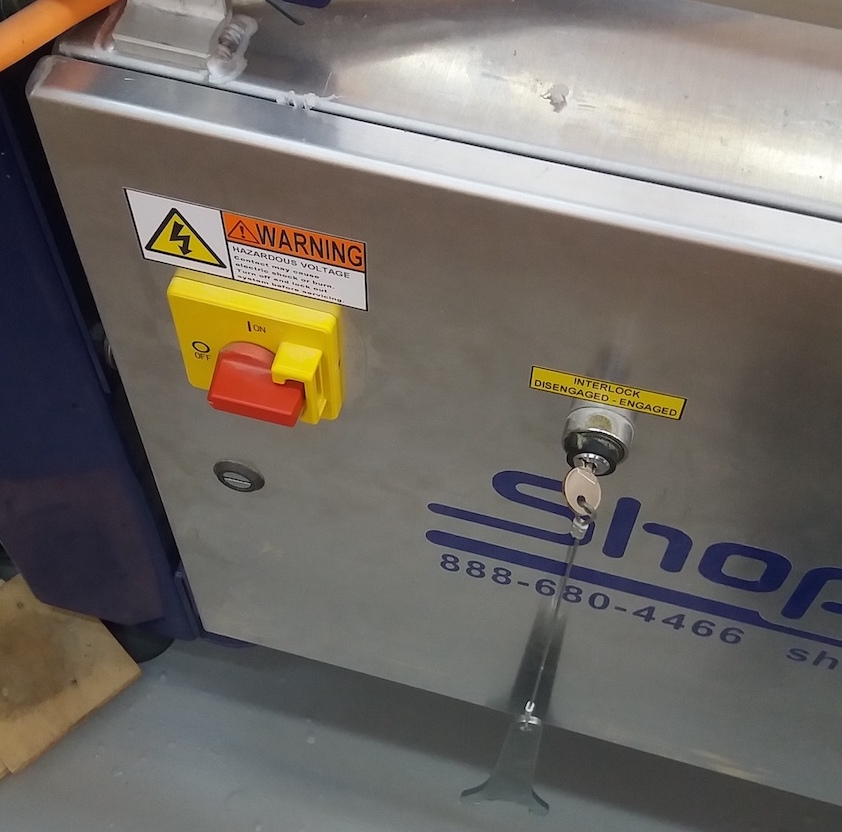
On the photo above, we can also see an important part of the machine: the key to engage the spindle. This key is attached to the special wrench used to change the router bit. This is a safety measure that prevents the spindle to unexpectedly start while we are working on it.
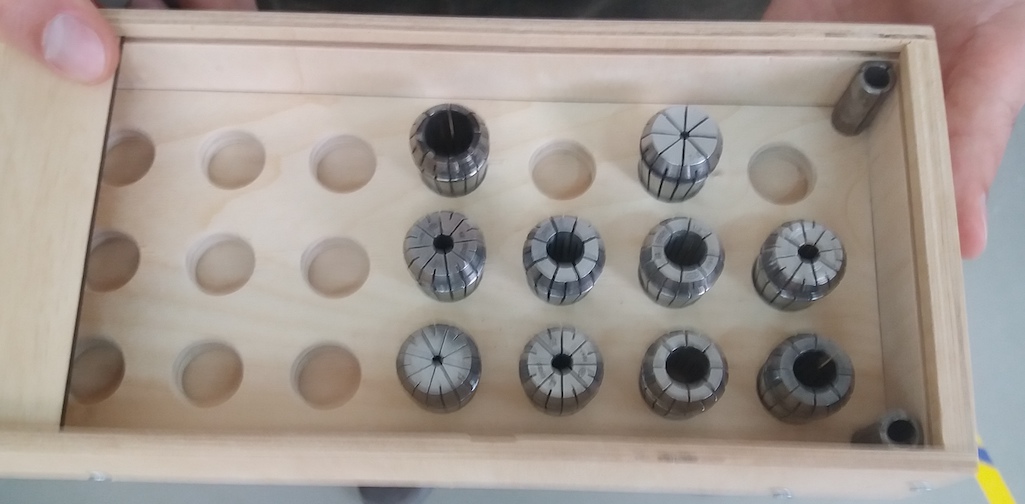
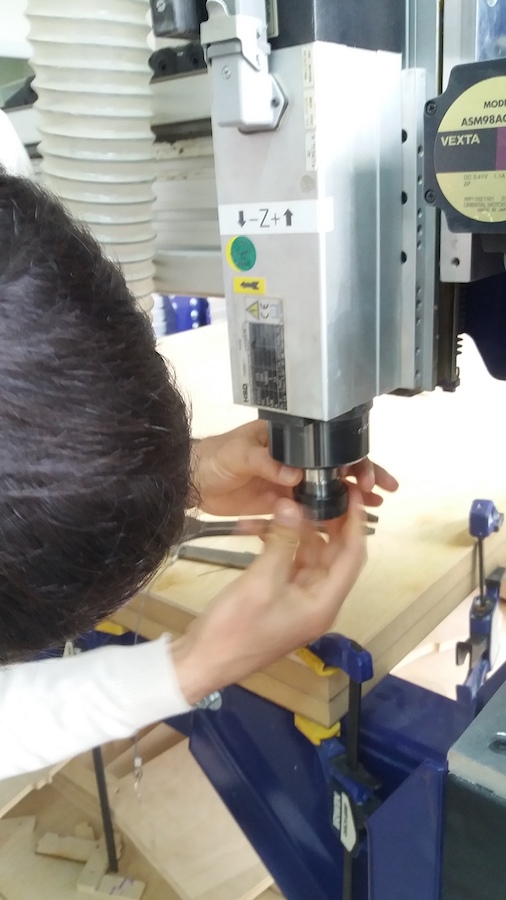
Since the different rouer bits have different diameters, we need different collets to adapt to them:
Preparing the job
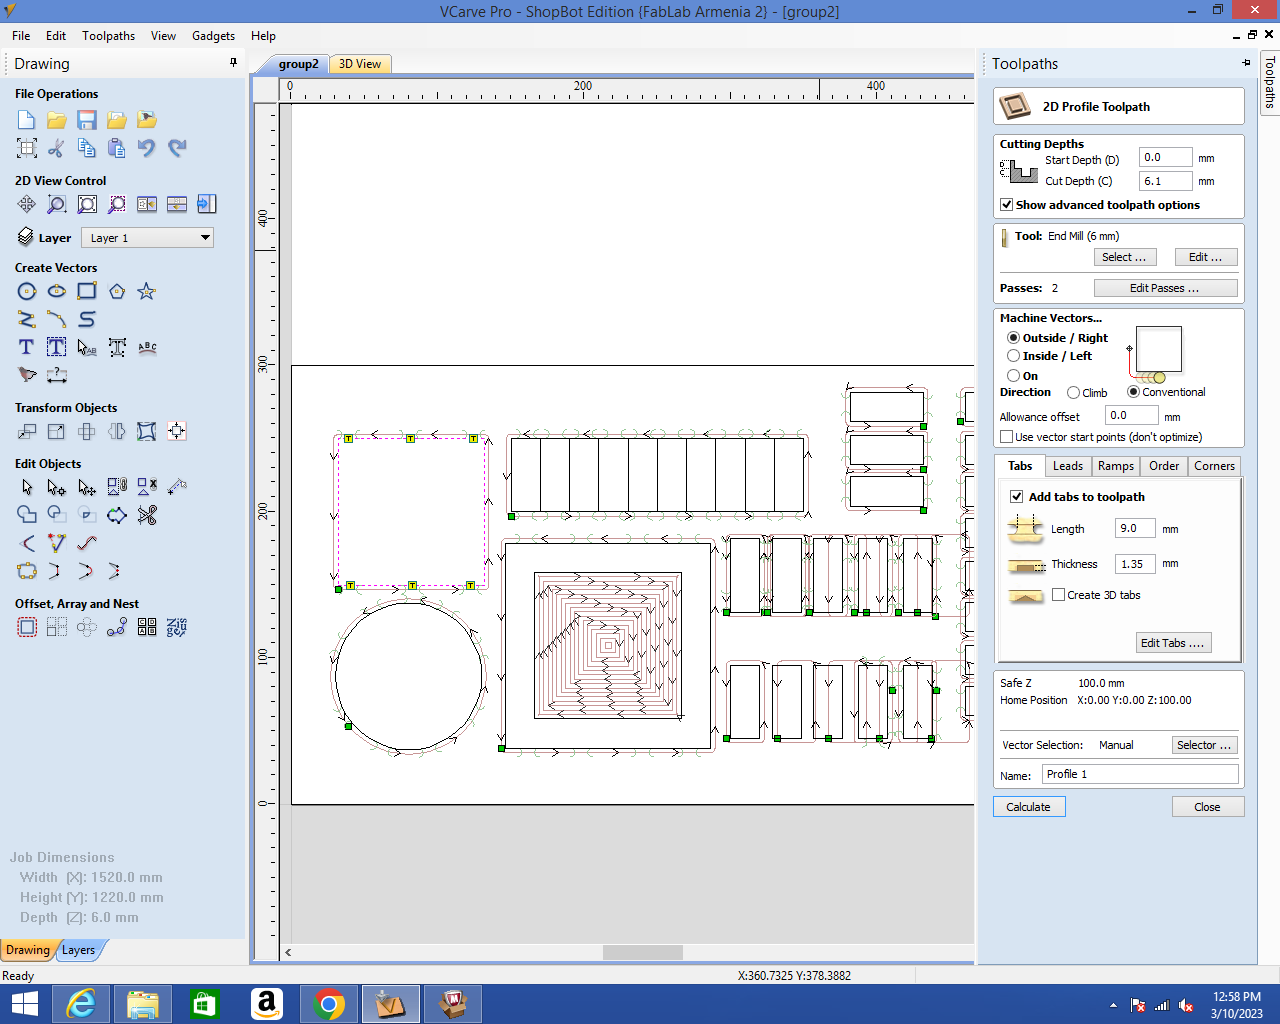
We used VCarve Pro. There are quite few steps to perform before cutting:
- We set the Z-zero for the top of material.
- We defined a rectangle the size of the base material. Since our piece of wood was smaller than the full working surface, we drew a rectangle inside our workspace. We could also have changed the workspace size.
- We drew basic geometrical shapes for our tests.
- We set up the toolpath, choosing if the tool would cut the shape from the inside, from the outside or on the line.
- We added tabs with dimensions 9mm long and 1.35mm thickness. When working with plywood, it is easier to remove them if they are set parallel to the fibers.
- We chose the corresponding tool (6mm diameter).
Cutting
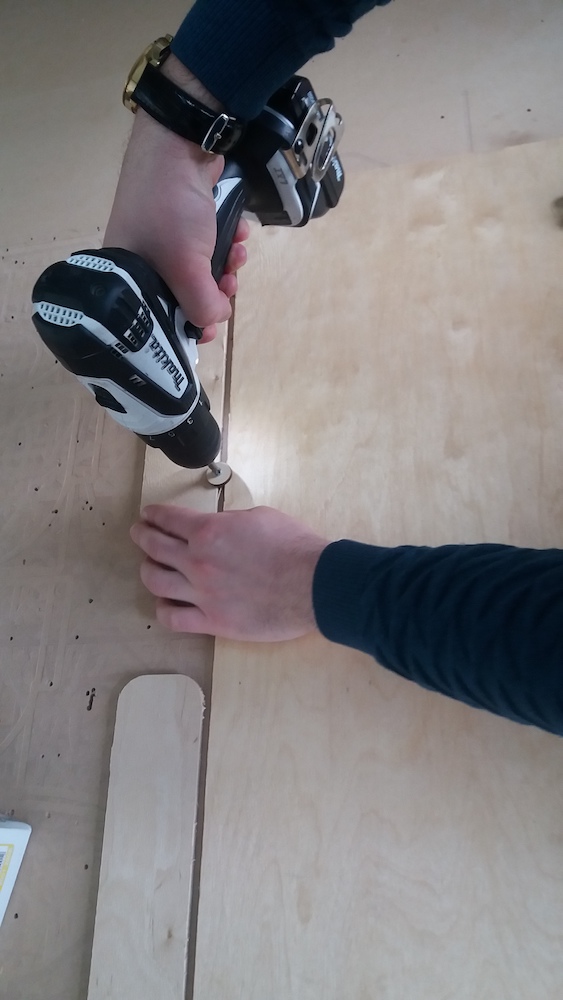
Before cutting, we need to fasten the wood to be cut to the MDF sacrificial layer using clamps and screws:
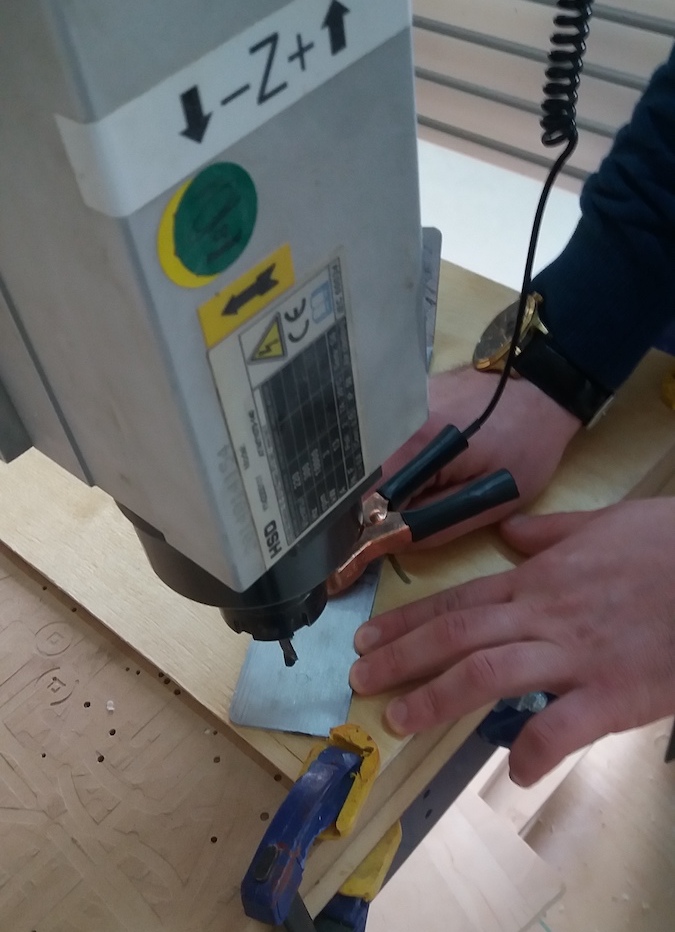
In order to start cutting, we need to:
- Turn the red button to turn on the machine
- Turn the key to engage the spindle
- Set the zero point as in the image below.
- Turn on the ventilation for the filter
- Send the job
- When we are prompted to do it, turn on the spindle.
When cutting, it sometimes happen that some small parts is not held anymore by the tabs and gets sucked into the filter. In this case, we promptly paused the cutting by pressing the space bar and then stopped the ventilation to remove the piece.
The spindle was spinning at 12600rpm and its horizontal speed was 25 mm/s.
Results
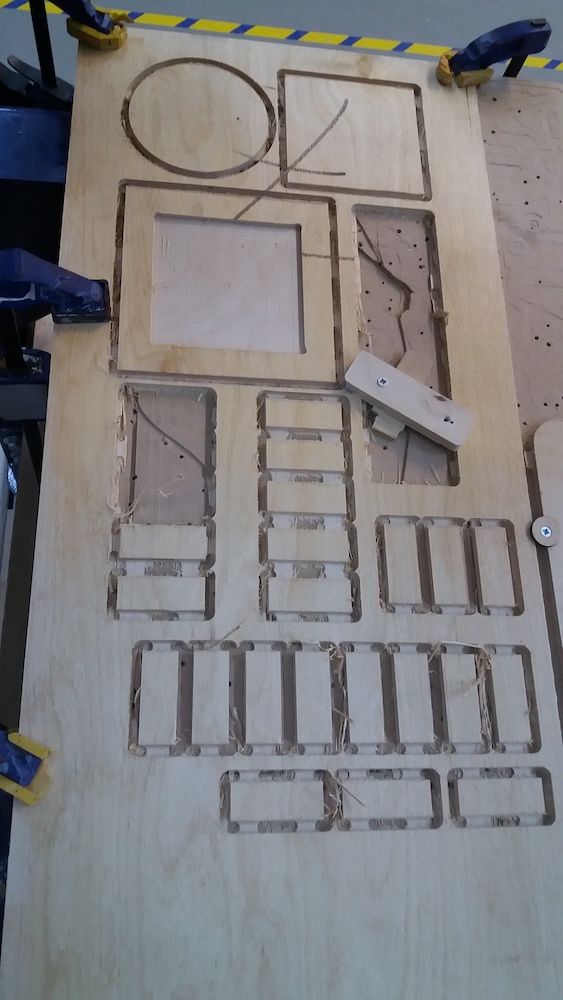
Once all our parts were cut, we could proceed with the measurements:
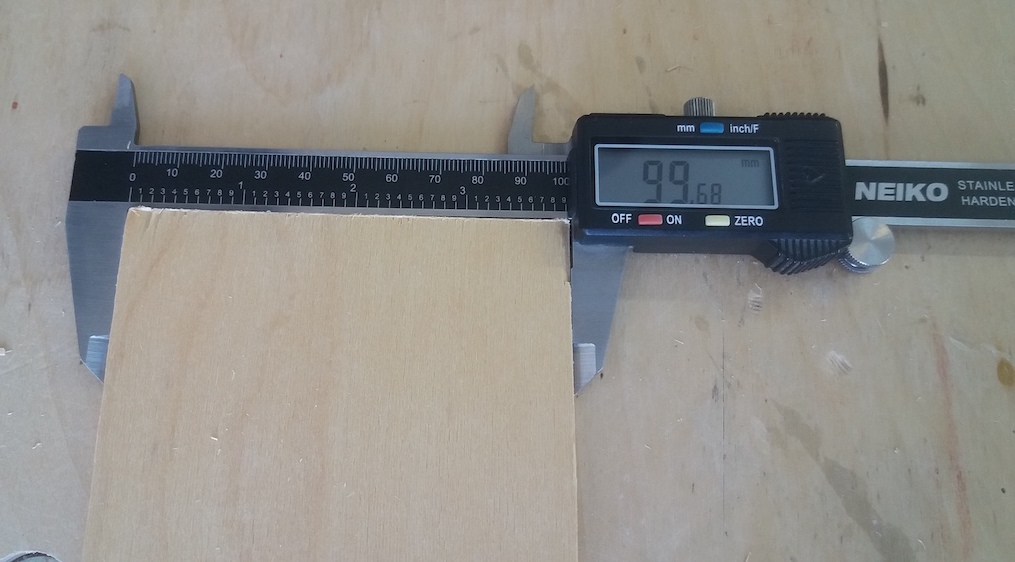
We noticed that our square was a bit smaller thant expected (100mm expected). Our circle had also a smaller diameter than expected (100mm):
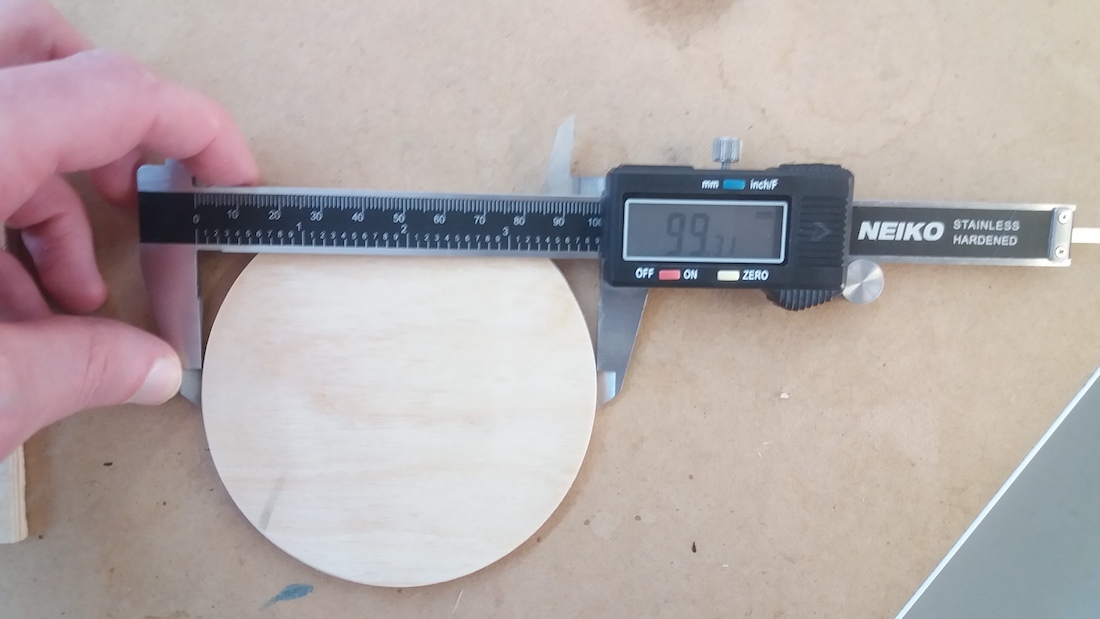
This would mean that the runout is quite large.
When we measured the square pocket, we had another surprise: it should have been 100mm wide but was measured less:

If the runout would be the only factor for the deviation, this square should have been larger than 100mm, since we cut it from the inside.
In order to measure the alignment, we measured both diagonals of our square. We obtained 140.15 mm and 140.20 mm (in theory: ~141.42mm):
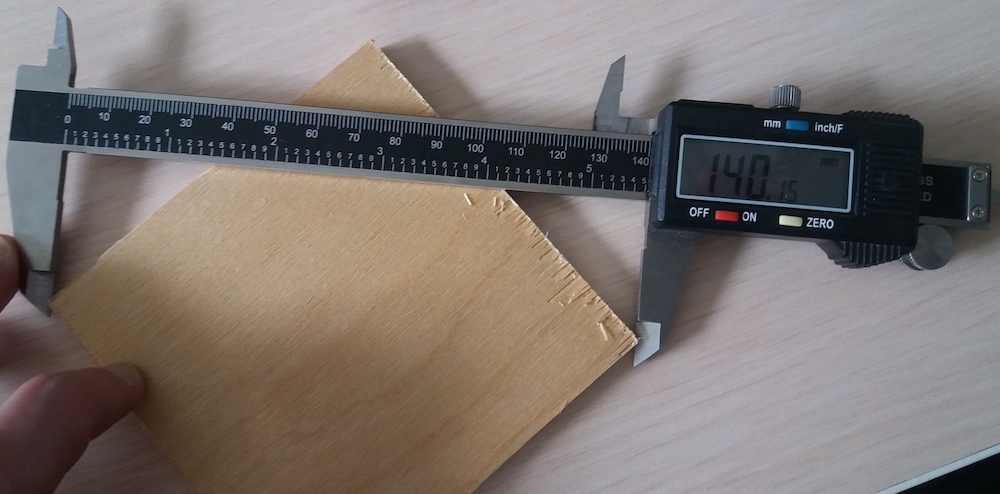
It is not perfectly equal, but almost. The alignment on our CNC router should therefore be quite accurate.
Upcut and downcut
We have two families of cutting bits: upcut bits and downcut bits. On the picture below, the upcut is on the left and the downcut on the right:
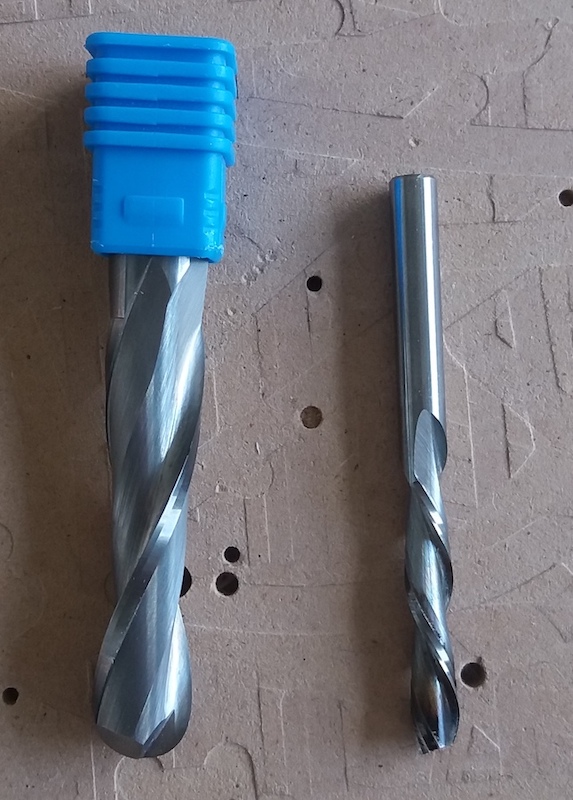
The upcut bits pull up the material when rotating clockwise. When worn out, the upper side of the part will be not very clean.
The downcut bits push down the material when rotating clockwise. If the ventilation is not powerful enough, there is a risk of the dust from the cut over