Week07. Computer-Controlled Machining
| Assignment | |
|---|---|
| group | do your lab’s safety training; test runout, alignment, fixturing, speeds, feeds, materials, and toolpaths for your machine link |
| individual | make (design+mill+assemble) something big (~meter-scale); extra credit: don’t use fasteners or glue; extra credit: include curved surfaces |
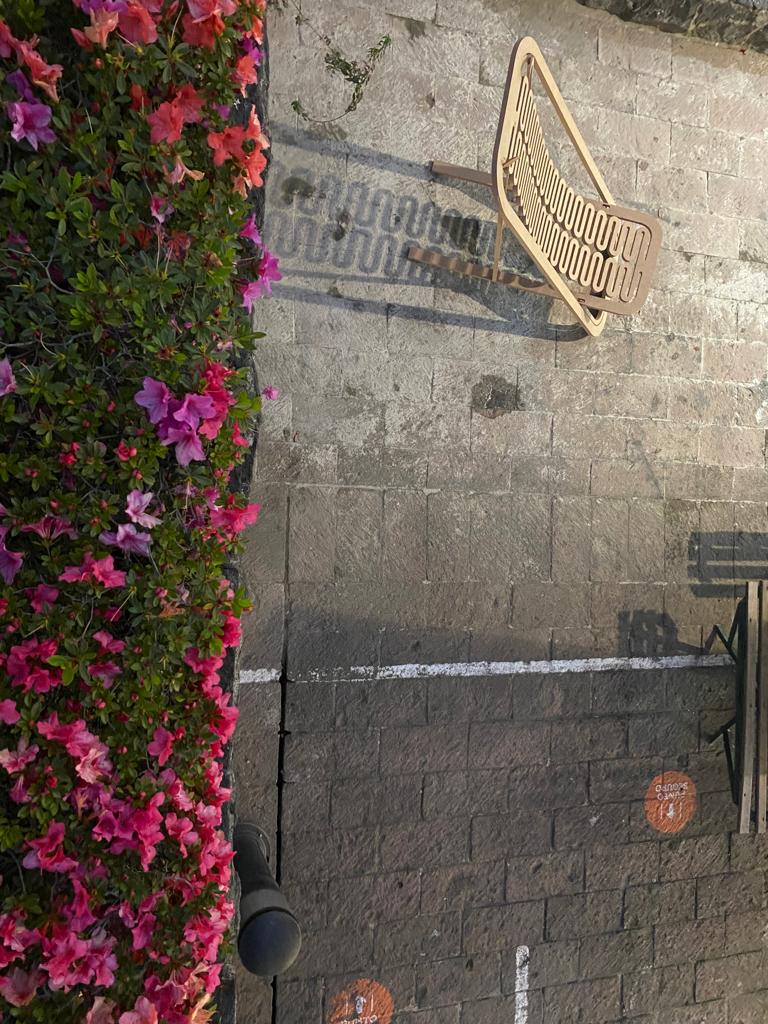
Photo of the week
Lecture Notes
-
Shapeoko 3 xxl working area is 830mm x850mm.
-
Chairigami - cardboard products.
Take aways from the group Assignment
- basic health & safety rules
- how to setup the files for cutting: material, tool, step size, planning tasks
- how to setup machine: warming up spindle, setting up origin, bed and material levels
- trying different joint tolerances for the 18mm MDF - 18.2mm seemed to work fine
Chat GPT trial
I asked Chat GPT for a Python script for Grasshopper that generates a simple deck chair. Below the response:
import Rhino.Geometry as rg

# Set input values
height = height # input variable for the overall height of the chair
width = width # input variable for the overall width of the chair
depth = depth # input variable for the overall depth of the chair
thickness = thickness # input variable for the thickness of the chair frame
leg_height = leg_height # input variable for the height of the chair legs
back_height = back_height # input variable for the height of the chair backrest
seat_height = seat_height # input variable for the height of the chair seat
back_angle = back_angle # input variable for the angle of the chair backrest
seat_angle = seat_angle # input variable for the angle of the chair seat

# Create base frame
base_frame = rg.Box(rg.Plane.WorldXY, rg.Point3D(0,0,0), depth, width, thickness)

# Create front legs
front_left_leg = rg.Box(rg.Plane(rg.Point3d(thickness, 0, thickness),hickness, leg_height, thickness))
front_right_leg = rg.Box(rg.Plane.WorldXY, rg.Point3d(depth - thickness, 0, thickness), thickness, leg_height, thickness)

# Create back legs
back_left_leg = rg.Box(rg.Plane.WorldXY, rg.Point3d(thickness, 0, width - 2 * thickness), thickness, leg_height, thickness)
back_right_leg = rg.Box(rg.Plane.WorldXY, rg.Point3d(depth - thickness, 0, width - 2 * thickness), thickness, leg_height, thickness)

# Create backrest
backrest = rg.Box(rg.Plane.WorldXY, rg.Point3d(0, leg_height - thickness, thickness), depth, back_height, thickness)
backrest_transform = rg.Transform.Rotation(back_angle, rg.Vector3d.YAxis, rg.Point3d(0, leg_height, 0))
backrest.Transform(backrest_transform)

# Create seat
seat = rg.Box(rg.Plane.WorldXY, rg.Point3d(0, seat_height - thickness, thickness), depth, thickness, width - 2 * thickness)
seat_transform = rg.Transform.Rotation(seat_angle, rg.Vector3d.XAxis, rg.Point3d(0, seat_height, 0))
seat.Transform(seat_transform)

# Join all objects together
all_objects = [base_frame, front_left_leg, front_right_leg, back_left_leg, back_right_leg, backrest, seat]
result = rg.Brep.JoinBreps(all_objects, 0.01)

# Output the result
chair = result[0]
This code doesn’t work. Apparently Chat GPT made ups some functions that doesnt exist.
Runtime error (MissingMemberException): 'Rhino.Geometry' object has no attribute 'Point3D'

Traceback:
  line 25, in script
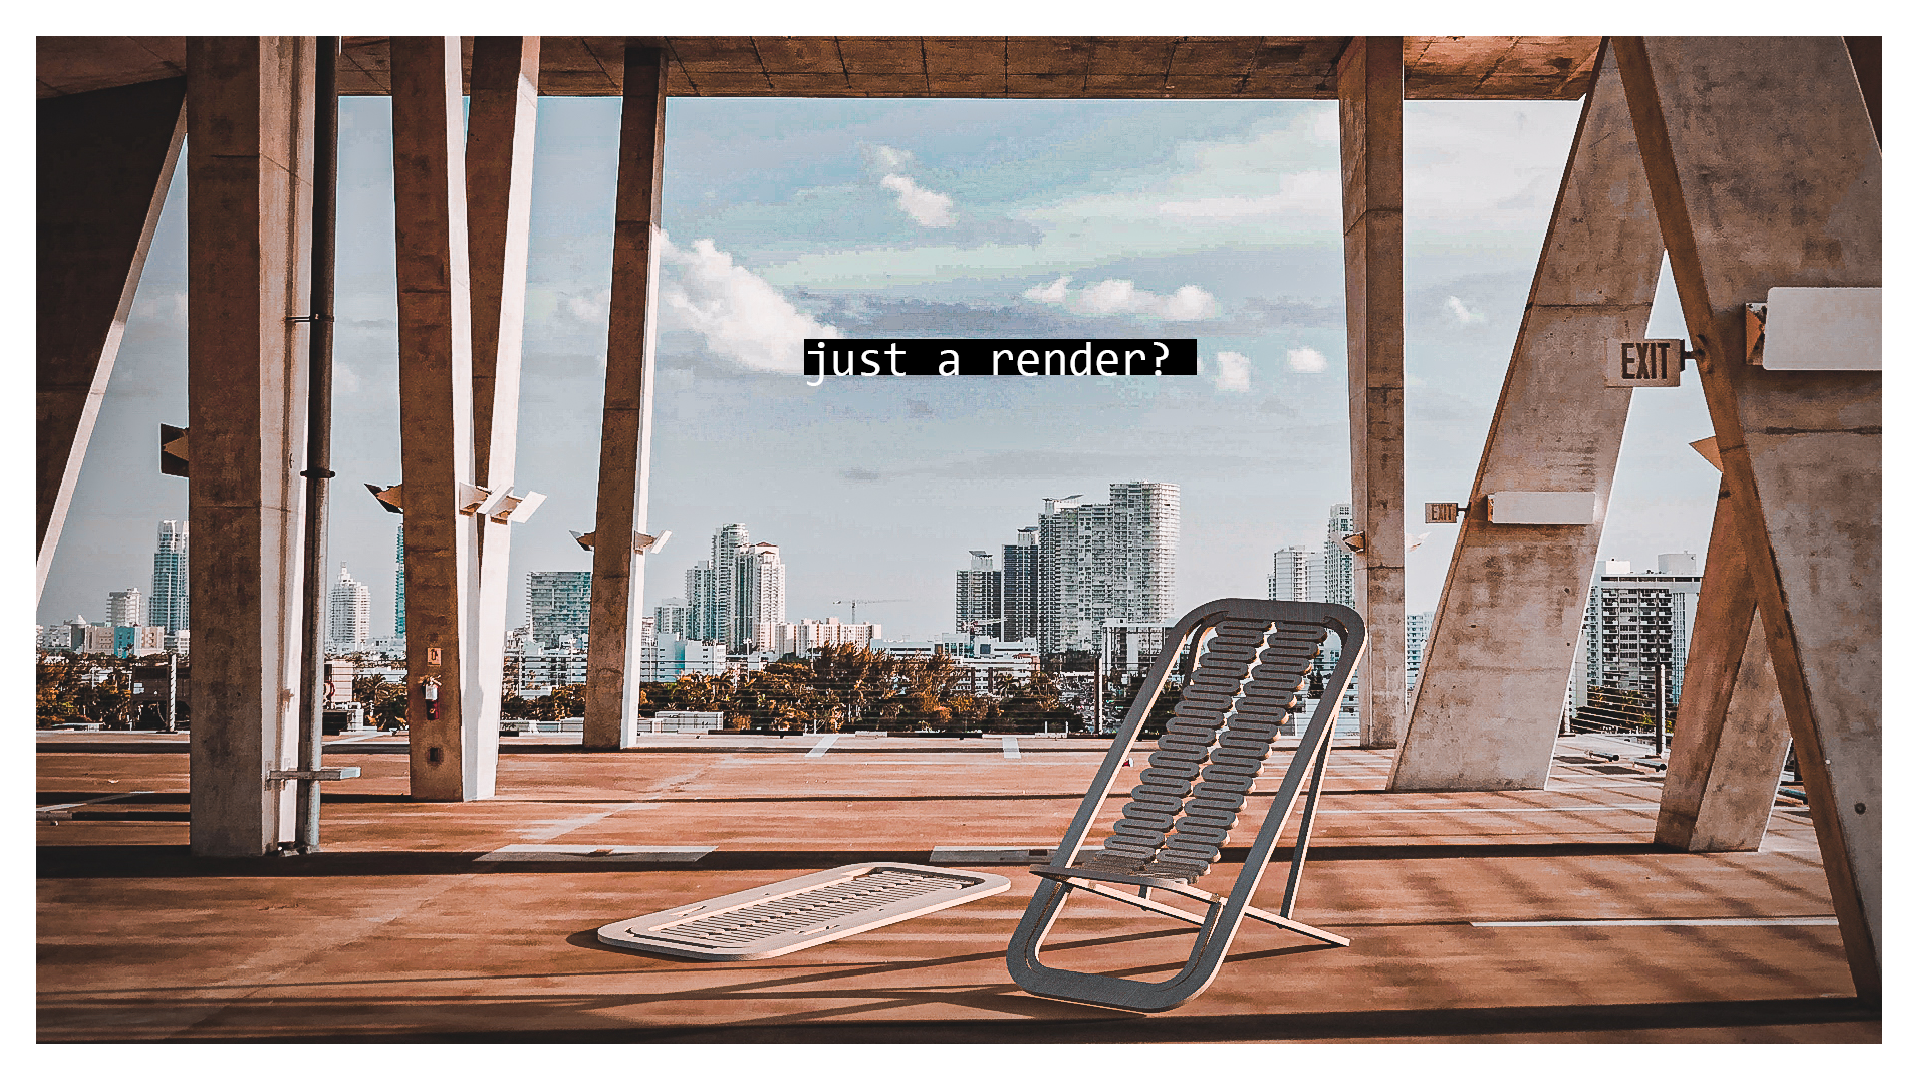
Idea
A deckchair has a well established design for decades. Its simple, foldable and comfortable. I found in the internet some deckchair drawings from previous century.
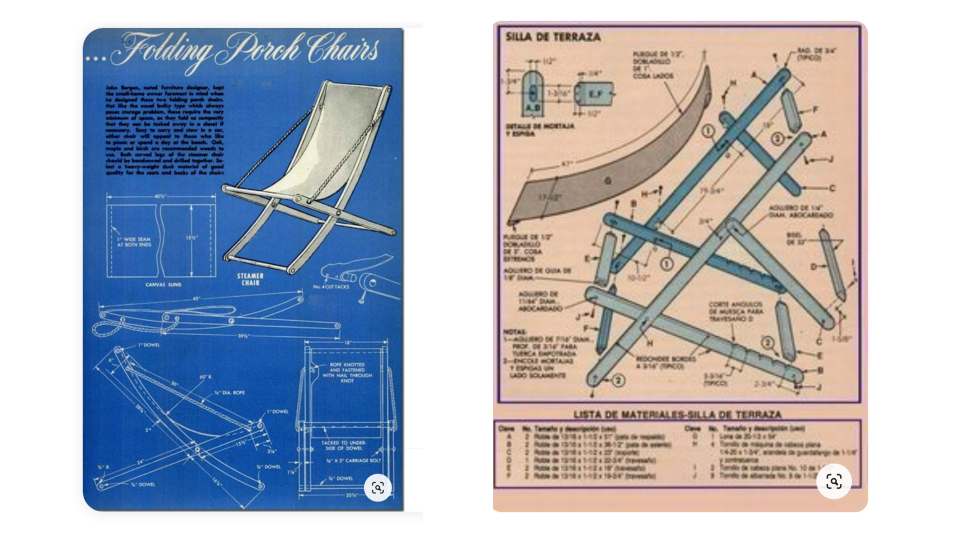
Design
I have started with some basic dimensions of the simple deckchair, keeping in mind that the seat lenght (if not strechted a lot) should have a lenght of the dashed line. I inteded to design a deckchair that can be milled from one rectangular piece of the board.
Design objectives:
-
deckchair is produced as one element
-
no glue, fasteners or other additional elements
-
assembly from flat
-
design fits in rectangle (minimize waste)

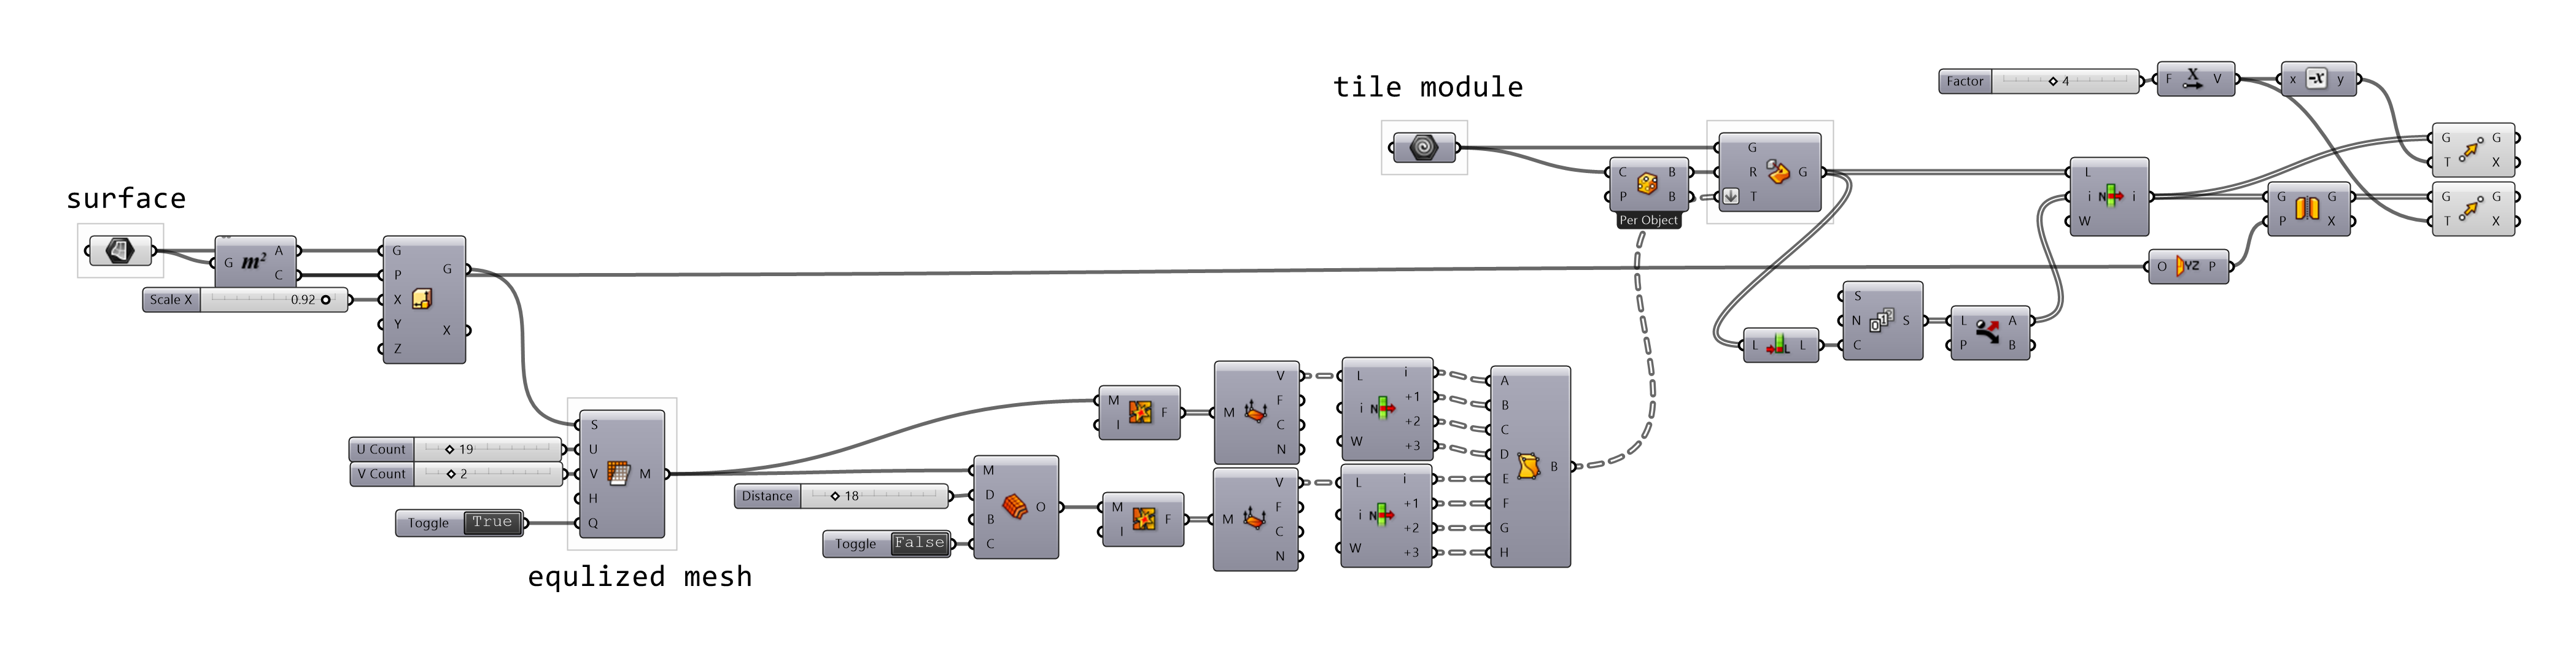
The frame design went through a few iterations. I practised also using the rhinoscript syntax and rhino geometry for the generation of the flex part of the deck chair, which could be easily modified if it turns out to be to flexible or too stiff.
__author__ = "judyt"
__version__ = "2023.03.12"

import rhinoscriptsyntax as rs
import Rhino.Geometry as rg
import math
import clr
from Grasshopper.Kernel.Data import GH_Path
from Grasshopper import DataTree

def nestedListToDataTree(nestedlist):
    dataTree = DataTree[object]()
    for i,item_list in enumerate (nestedlist):
        path = GH_Path(i)
        dataTree.AddRange(item_list,path)
    return dataTree

def Spiral(p,len, rad):

    point = rg.Point3d(p[0]+rad,p[1],p[2])
    point2 = rg.Point3d(p[0]+len-rad,p[1],p[2])
    point3 = rg.Point3d(p[0]+rad,p[1]+rad*2,p[2])
    point4 = rg.Point3d(p[0]+len-rad,p[1]+2*rad,p[2])
    line =  rg.Line(point,point2)
    center = rg.Point3d(p[0]+len-rad,p[1]+rad,p[2])
    plane = rg.Plane(center, rg.Vector3d(0,1,0), rg.Vector3d(1,0,0))
    arc =rg.Arc(plane, center,rad, math.pi)
    line2 = rg.Line(point3,point4)
    center2 = rg.Point3d(p[0]+rad,p[1]+3*rad,p[2])
    plane2 = rg.Plane(center2, rg.Vector3d(0,1,0), rg.Vector3d(-1,0,0))
    arc2 =rg.Arc(plane2, center2,rad, math.pi)

    return  [line, arc, line2, arc2]

spirals = []
for i in range(iter):
    pt = rg.Point3d(p[0],p[1]+i*4*rad,p[2])
    spiral = Spiral(pt, len, rad)
    spirals.append(spiral)

spirals = nestedListToDataTree(spirals)
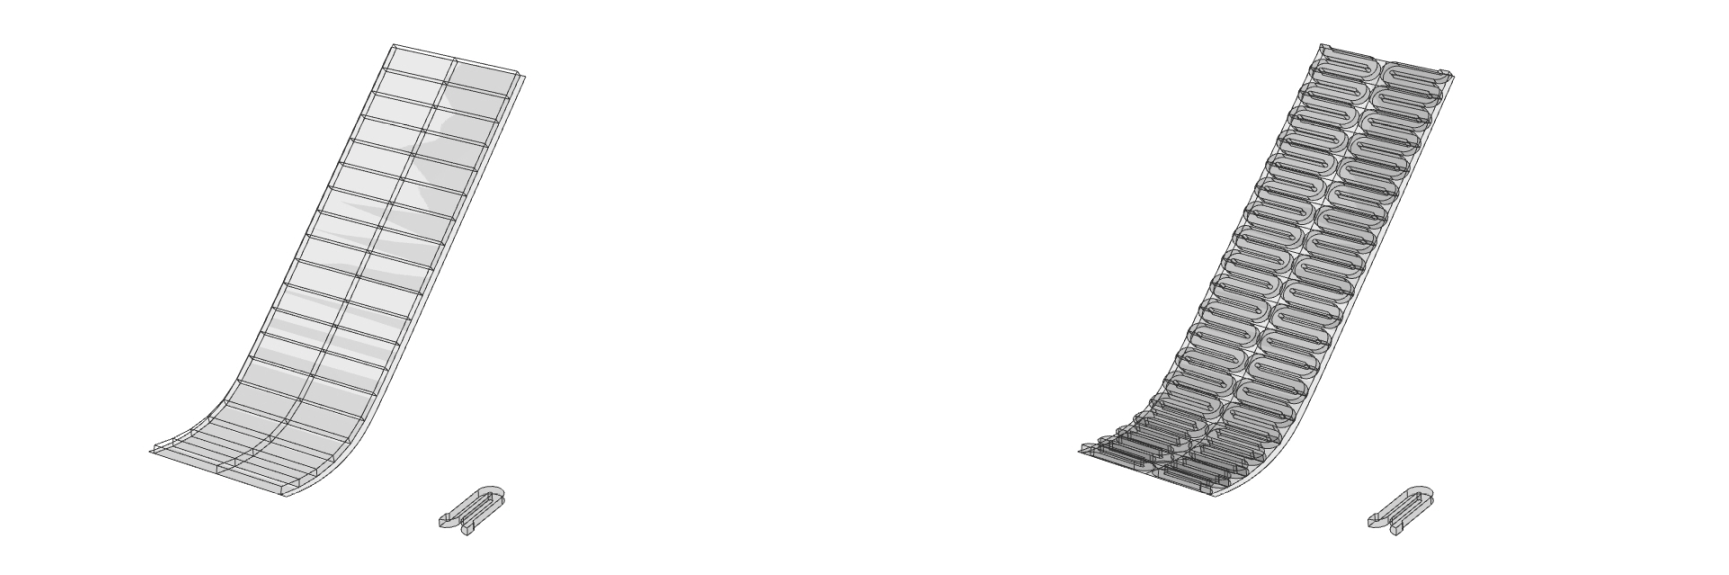
Modelling the flexible part required some more thought. The surface shape was approximated taking into account the total lengh of the flex part. The exact shape is possible to be defined using simuluation with active bending and gravity, calibrating the material properties, in particular the tensile and bending stenght of the material.
In order to model the flex part in 3D, the following steps were taken:
- seperate the tile part of the flex part
- create a mesh with equalized faces
- offset the mesh (material thickness)
- use the vertices of the input mesh and offset mesh to define deformed boxes
- morph the tile element to created boxes
After some trial and error process, the final design looked like:
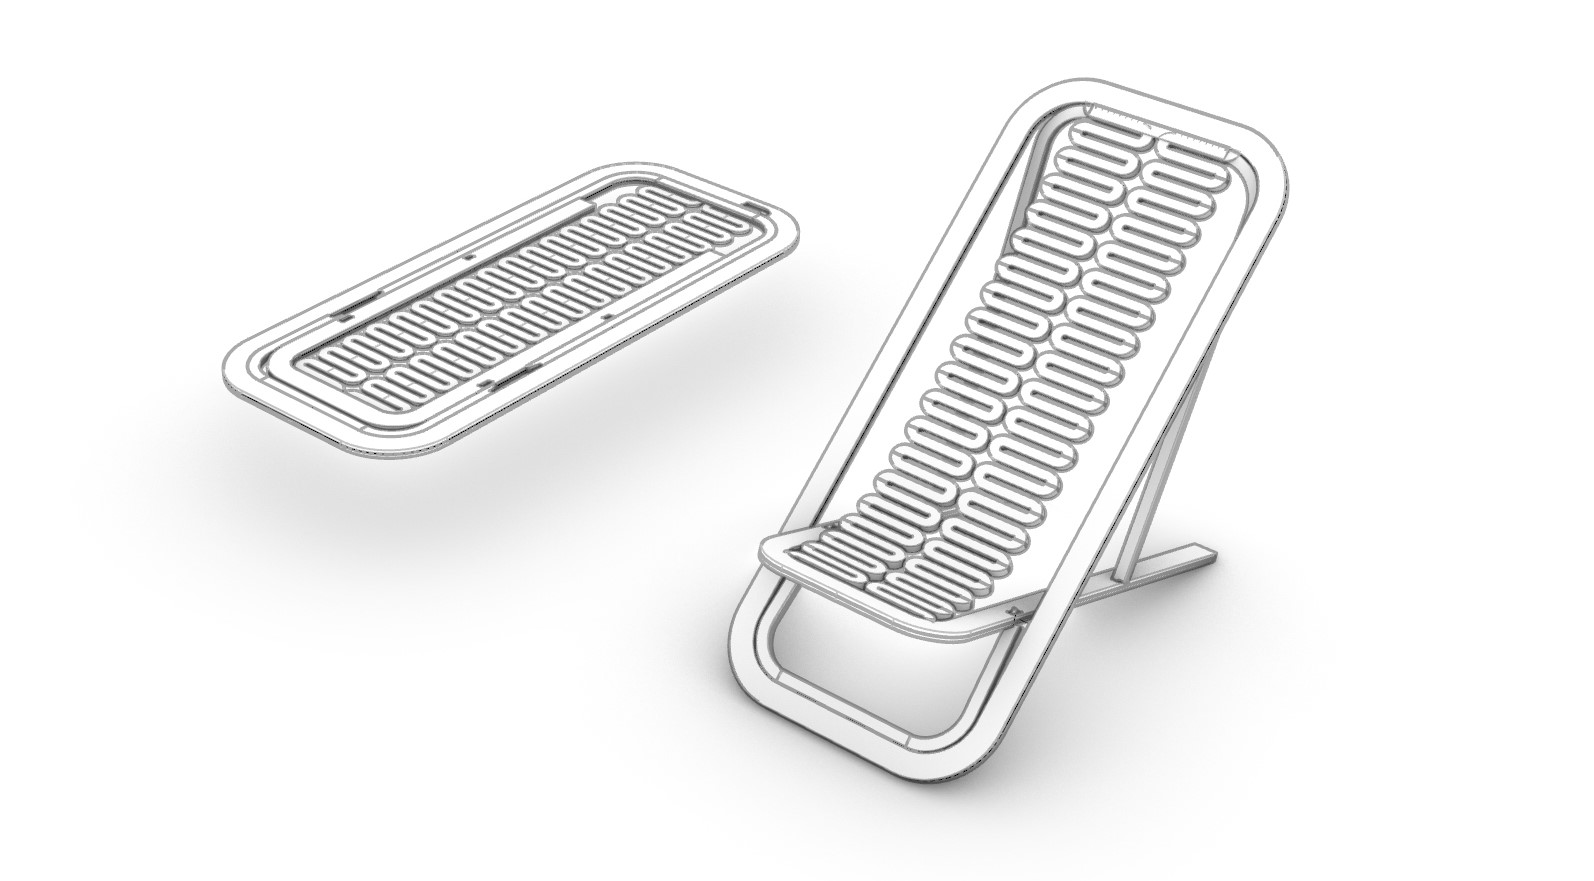 Fig. Final design.
Production
Health & safety
User preparation:
- avoid loose clothing or wearing jewelery -> use gown or overalls
- wear safety classes
- keep safe distance from the machine
Noise different from cutting material meanss something is off. What can go wrong: - the spindle can break - spindle can hit the clamps or wood screws used for fixing material
- stop machine with the emergency button
- stop the vaccum
- inspect the dust collector bag
The spindle and material are getting hot during the milling process - this can cause that the dust from fabrication can be put on fire. If any smoke is comming out:
- close the dust bag to reduce the accsess to oxygen
- if the smoke doesnt stop and fire grows, use the fire extinhuisher
- if situation gets out of control -> call the university guards -> ultimately direcly call the fire brigade
Setting up g-code file.
For the milling a tool of diameter 4.7mm was used. It had to be accounted in the path planning and material waste.
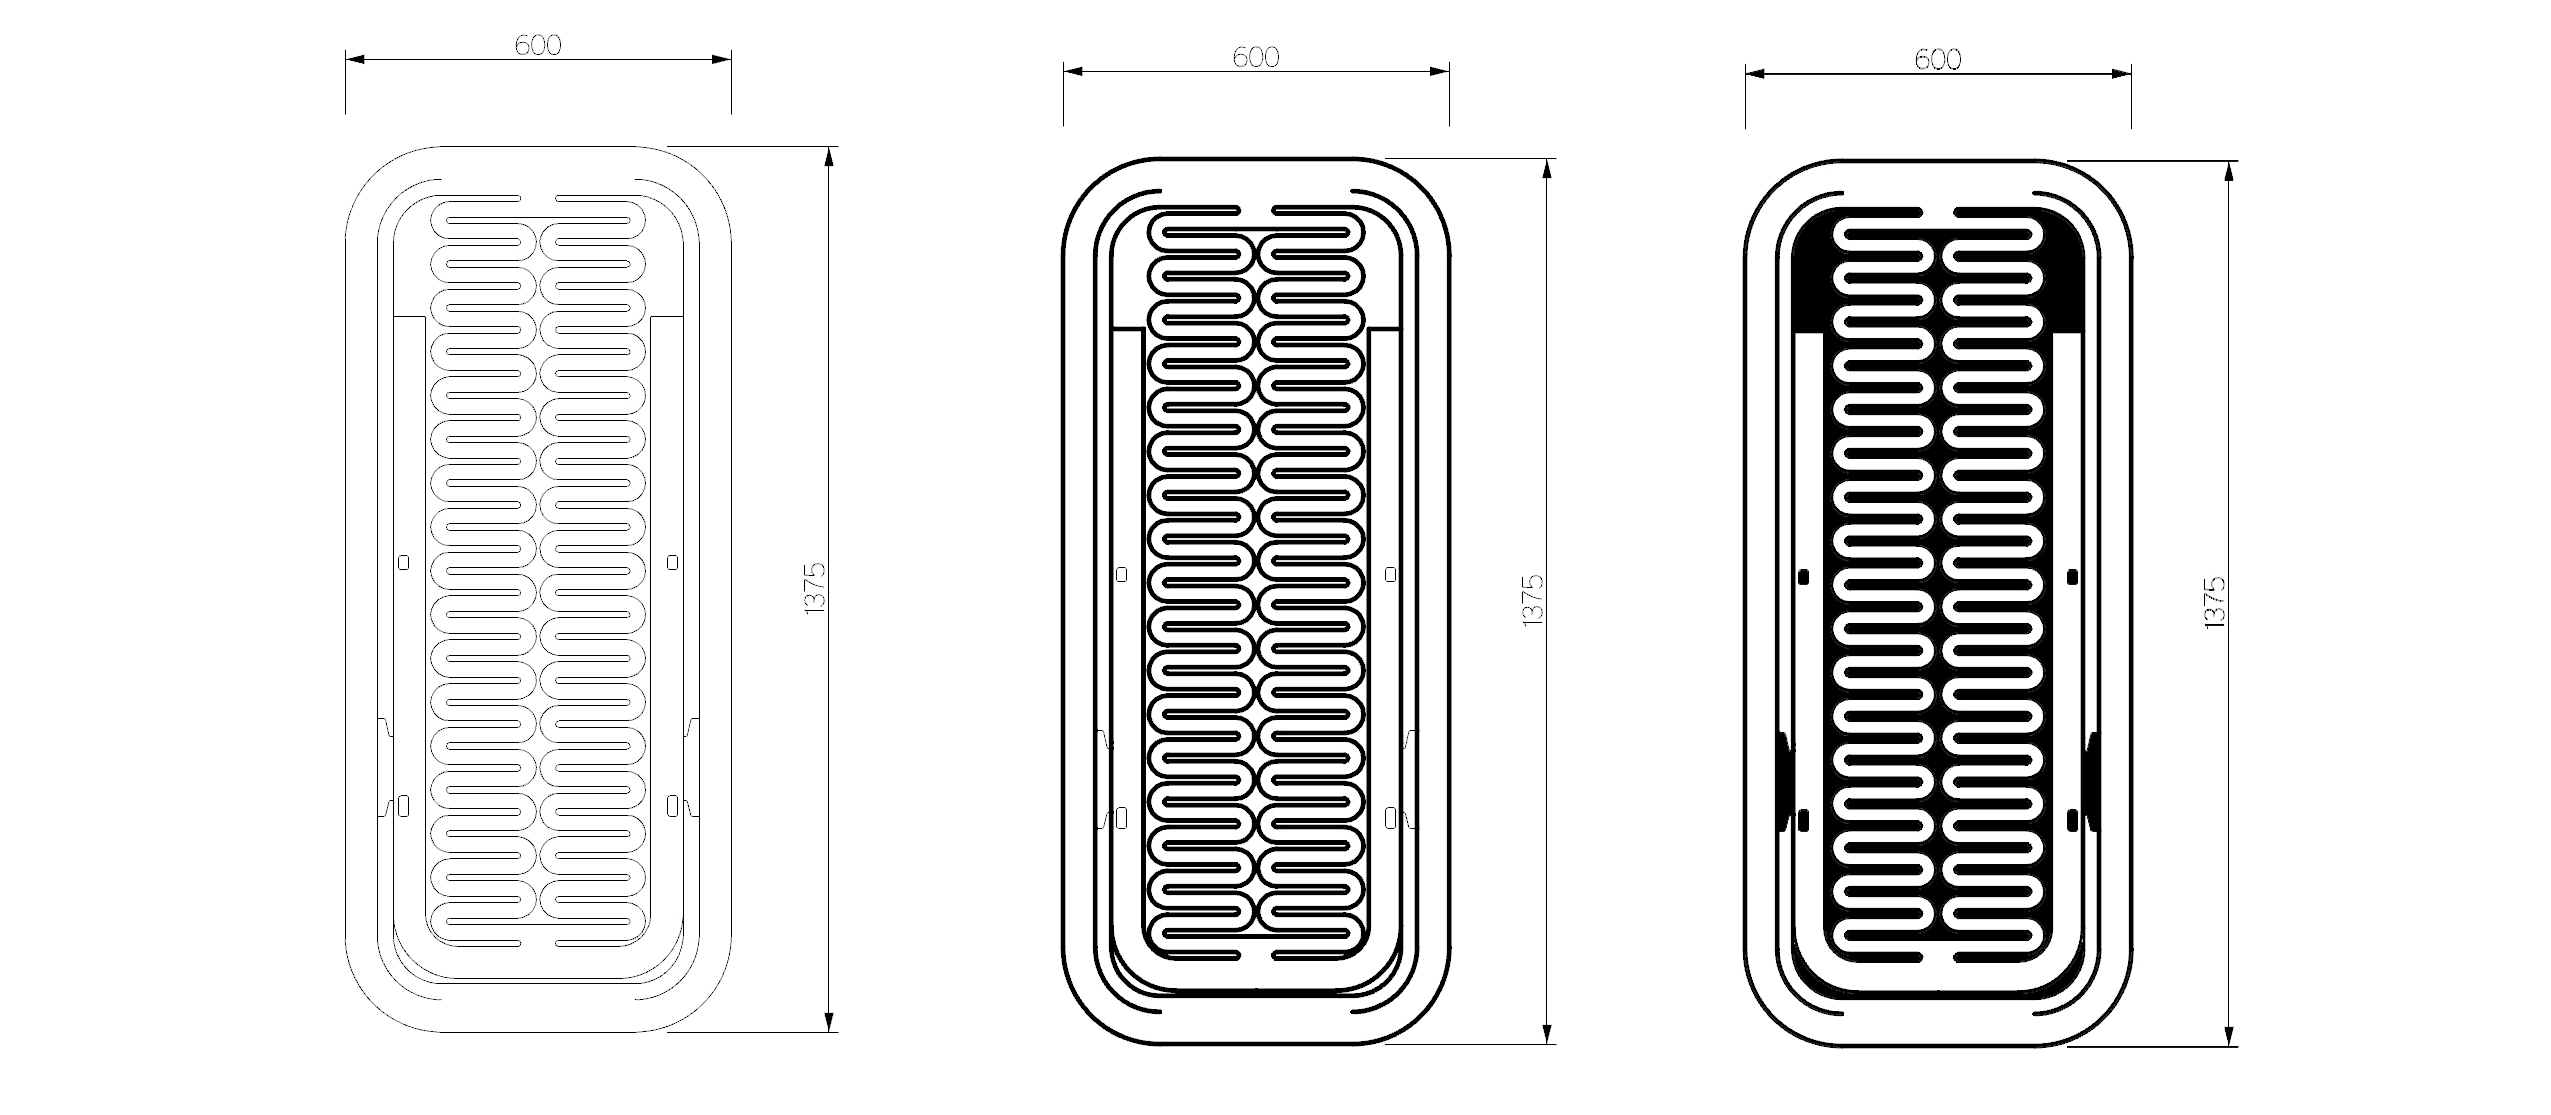 Fig. 1.(left) Basic lines. 2.(center) Thin lines - tool inside, thick ones - tool in the center of the line. 3.(right)- Waste (black) vs design material (white).
- Software: VCarve PRO
- Material: Medium-Density Fiberboard (MDF) of 18mm, 4 by 8 ft
- Tool: 4.77mm diameter ( 3/16in straight 1 flute)
- Passes: material thickness/6 : 19mm/6 = 3.17mm . 6 passes with step vertical 3.2mm per pass
- RPM: 11000rpm
-
Speed: 58mm/s
-
Job1 (Trajectorias) - cutting the holes - above settings; tool inside
- Job2 (Trajectorias) - cutting the outline - above settings; tool in the center of the line
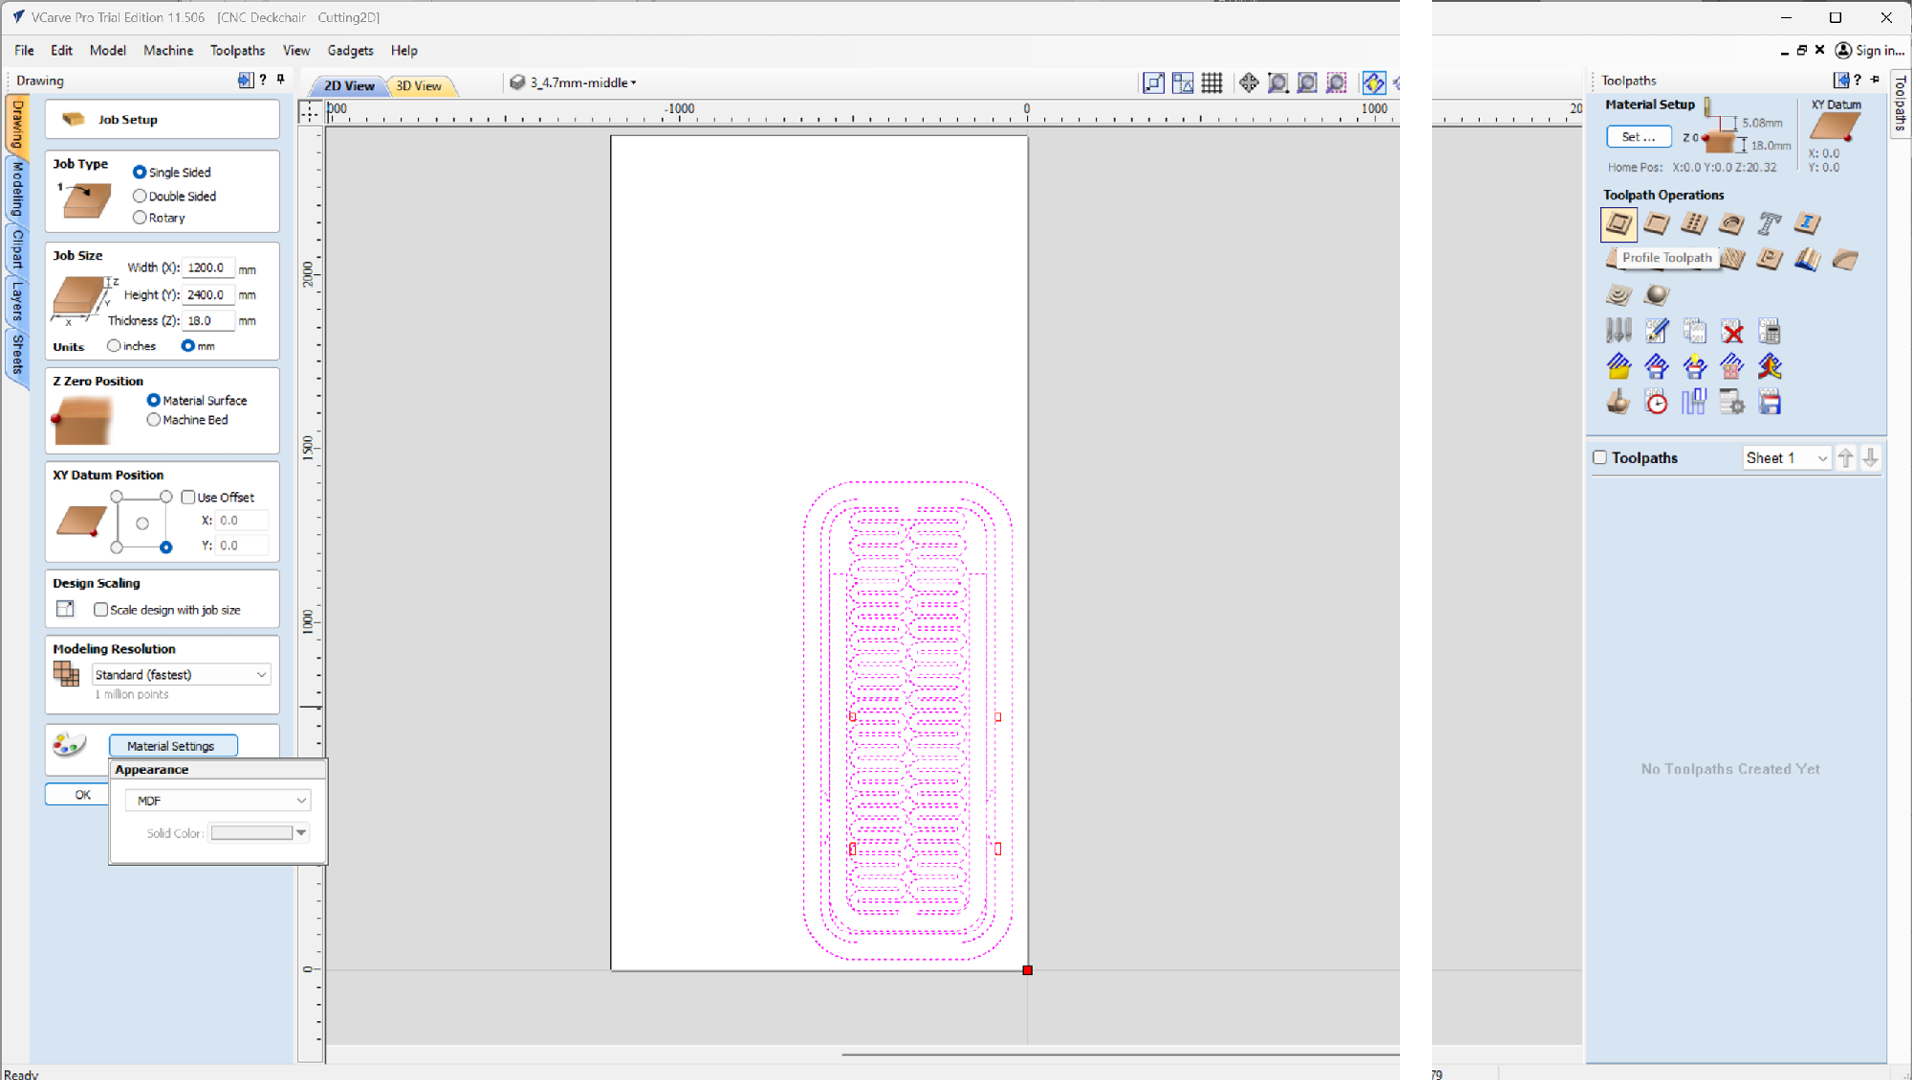 Fig. Left: VCarve Pro - Job Setup. Right: VCarve Pro - Toolpath Oprations - Profile Toolpath (for both job 1 &2).
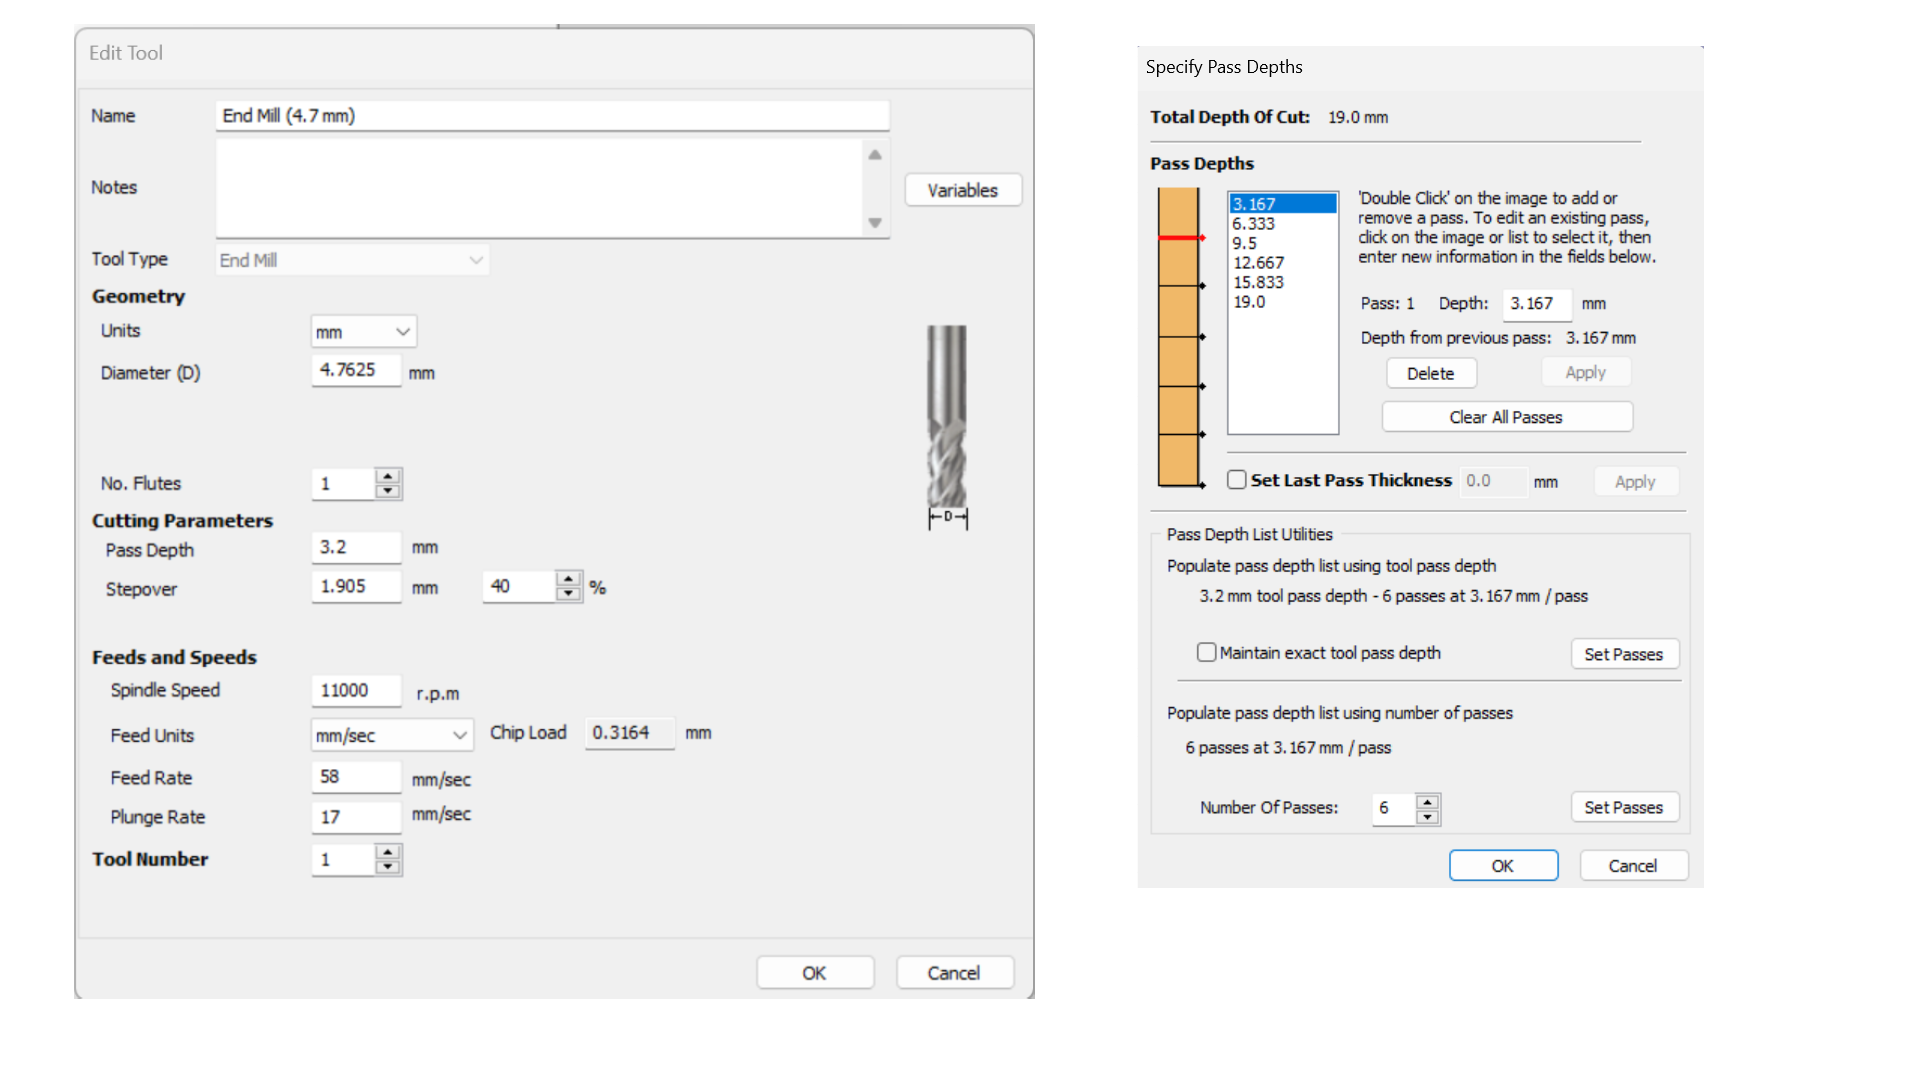 Fig. Left: VCarve Pro - Tool Edit. Right: VCarve Pro - Sepcify Passes Depth).
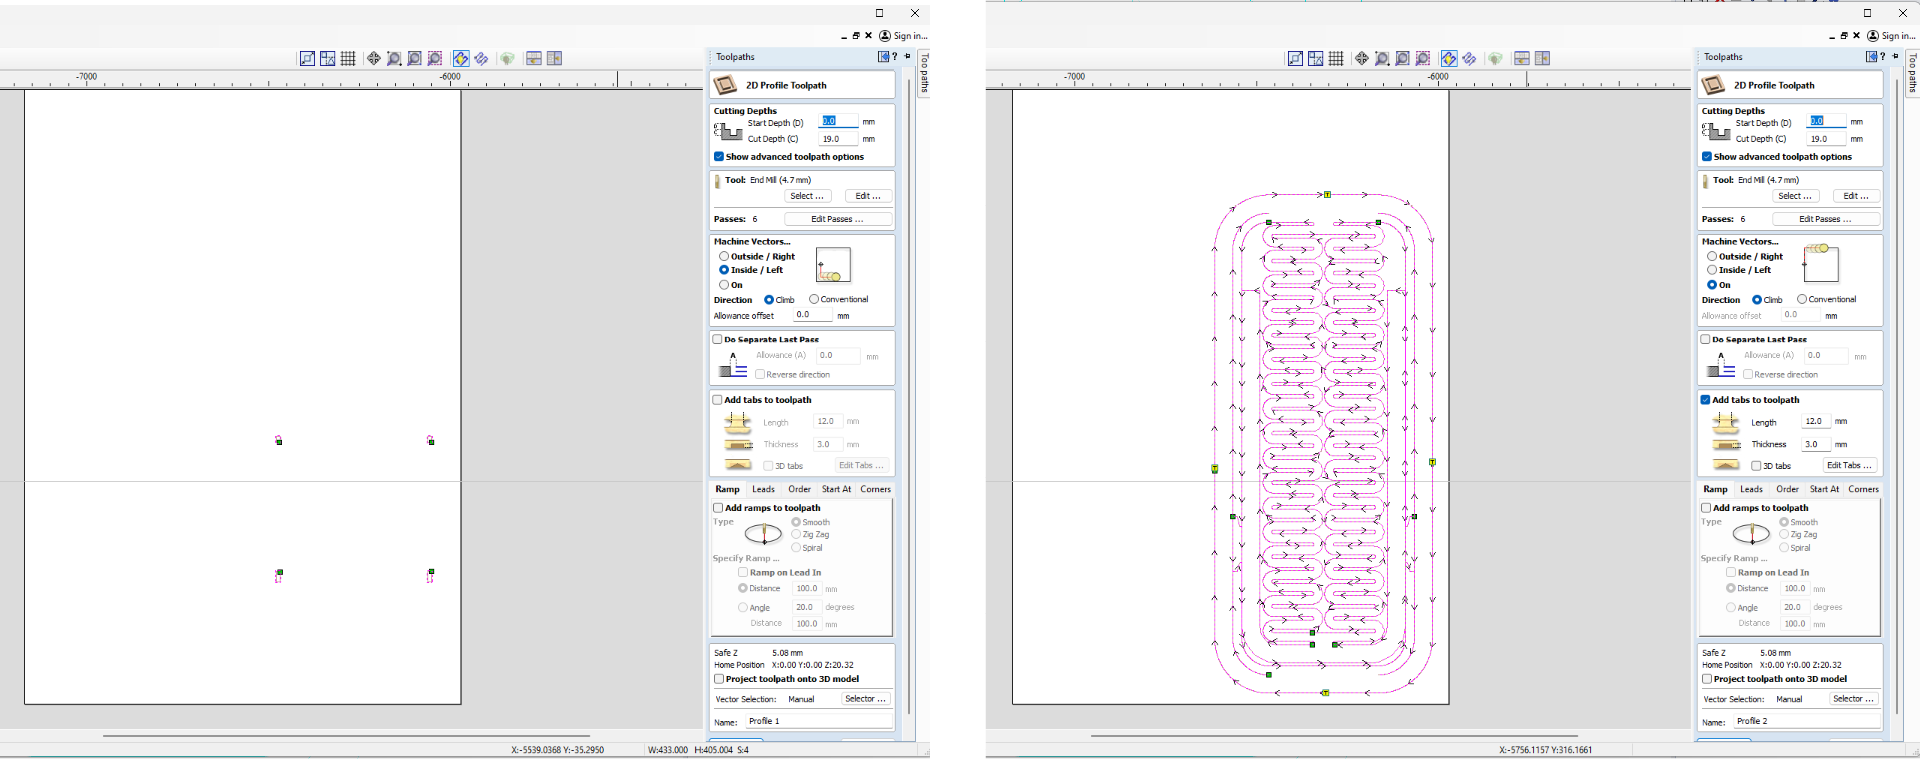 Fig. Left: Job1 - Settings. Right:Job2 - Settings.
Fixing MDF Board
The CNC clamps Asia Robótica were used to fix the MDF board on the outline. Durnig the process, we had to stop the machine to fix flexible spiral parts, that started to move after milling with the timber nails.
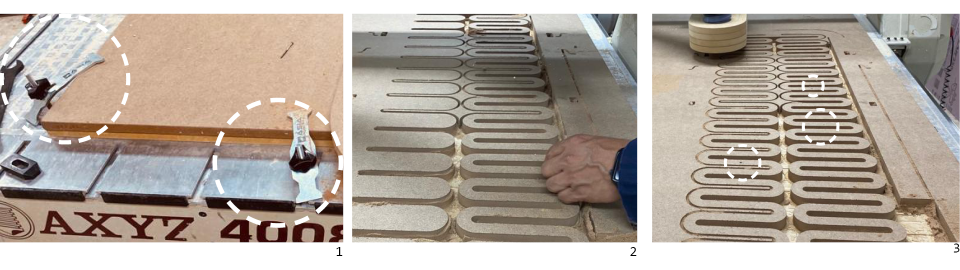 Fig. 1.(left) CNC clamps - Asia Robotica. 2.(center) After cutting the middle part - it was moving too much and required additional fixing with the wood nails. 3.(right)- fixturing places with timber nails.
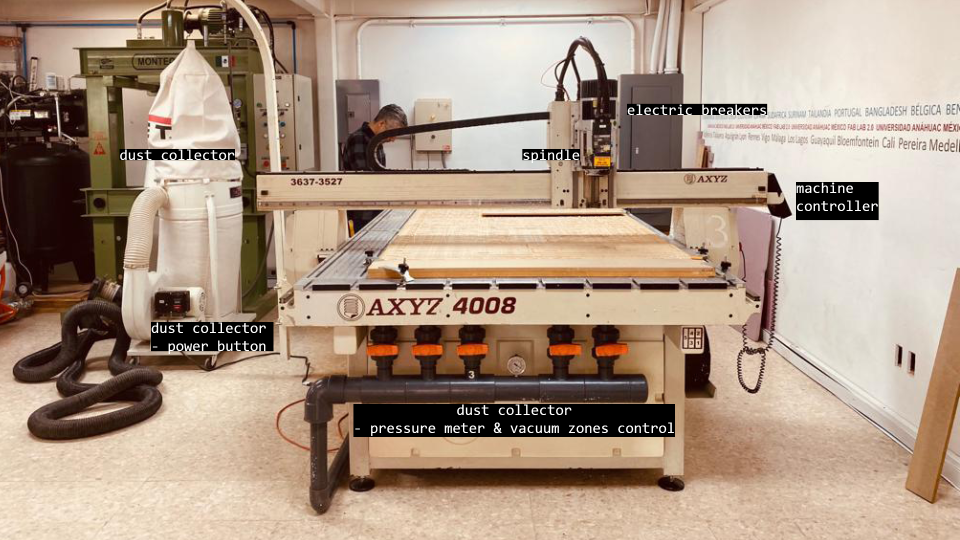
Setting up machine.
AXYZ CNC ROUTER 4008 · Work area. 1220x2440mm · Power: 220V/380V, 400Hz, 24000RPM. Data sheet AXYZ Series.
Before production the following steps had to be taken:
- Warm up the spindle.
- Set the XY origin (corner of the material board offseted to avoid collisions with clamps) - F10.
- Set the bed level (surface of the spoilboard )- F24.
- Set the material surface level -F20.
- Adjust the material surface level- F23.
Milling process.
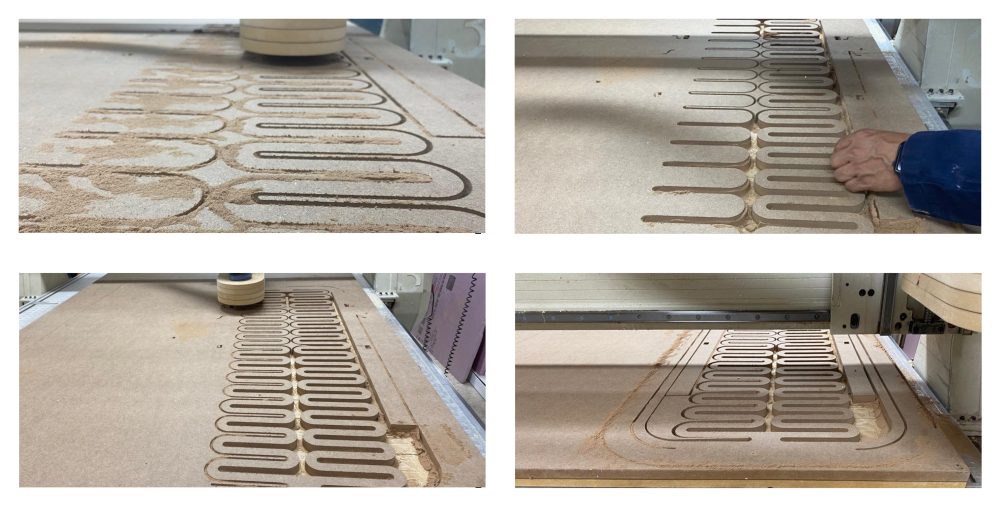 Fig. Machining process. The flex parts had to be stabilize with the nails.
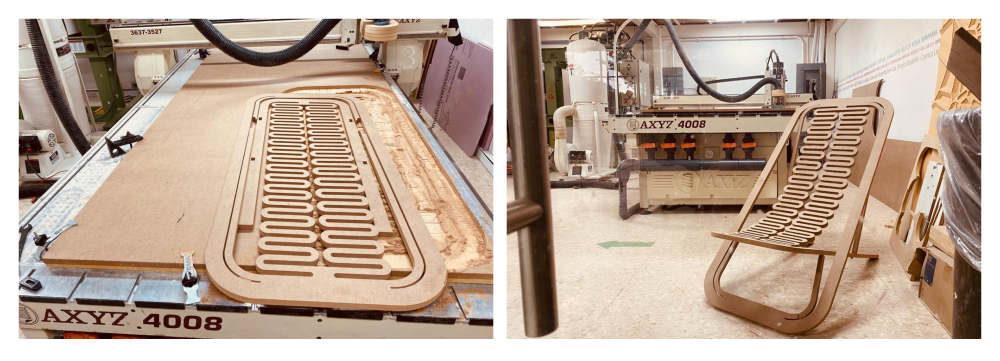 Fig. Final part (left), final part assembled (right).
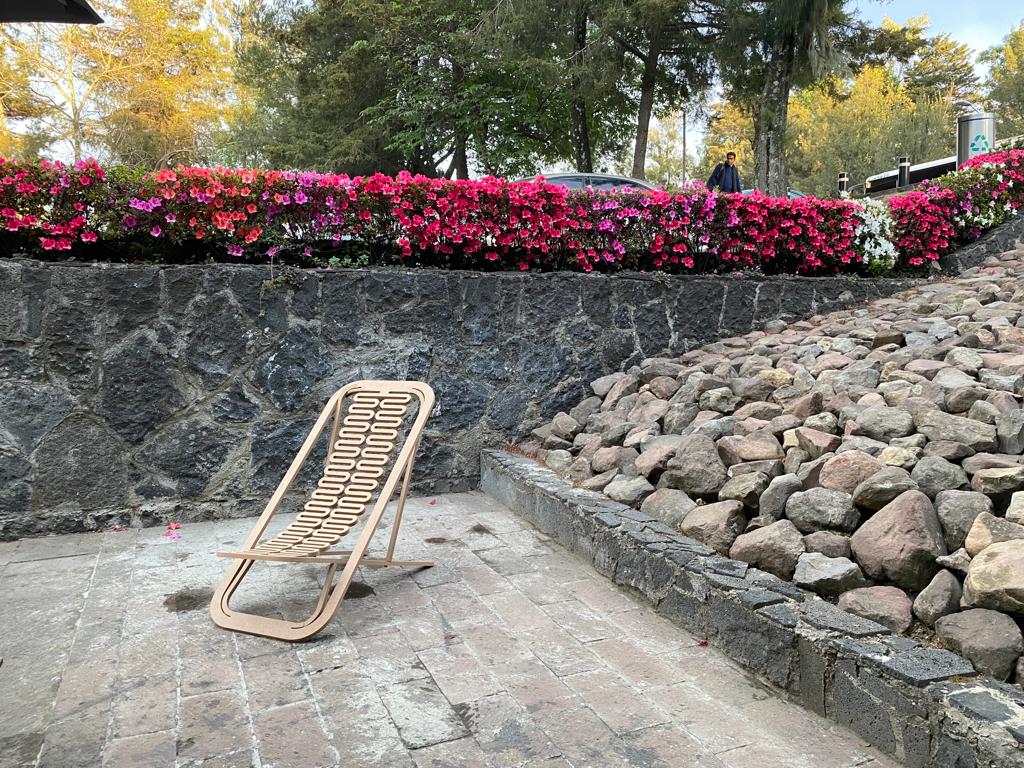
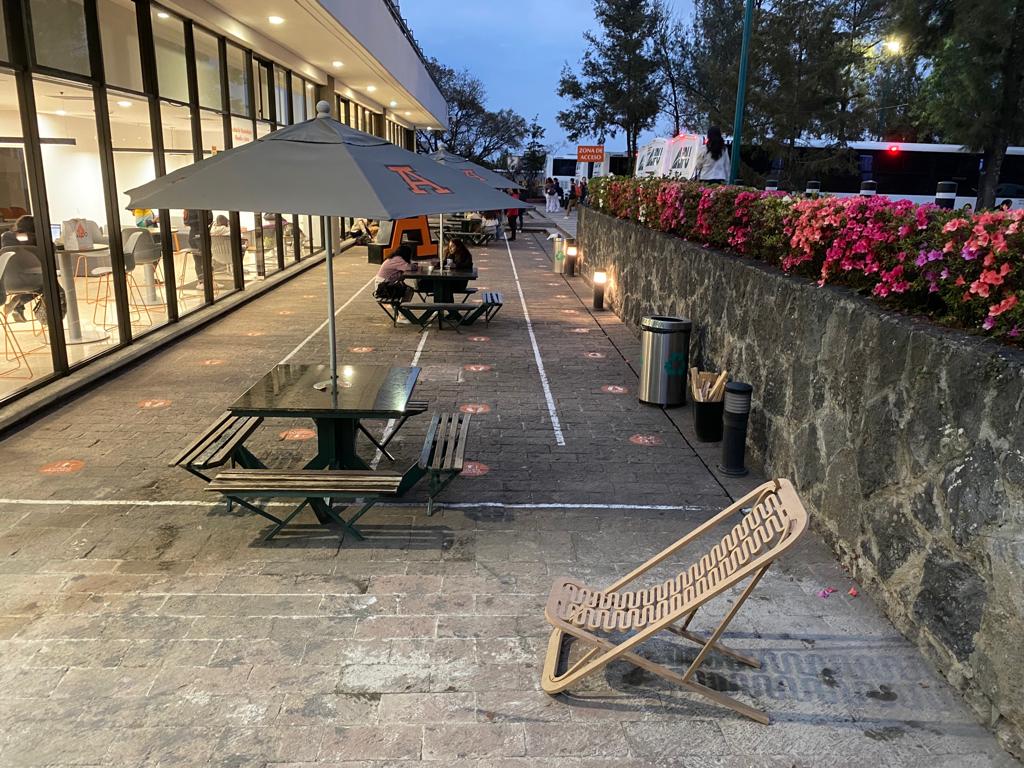
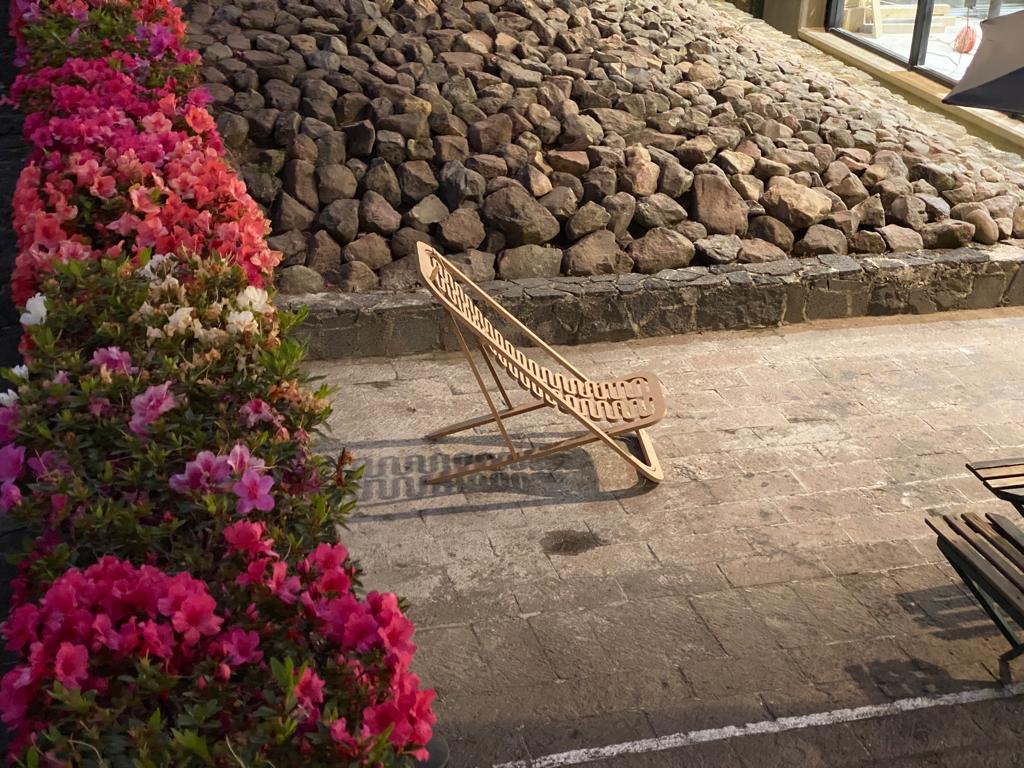
Final Pictures
Problems/Questions/Dilemas
- The main frames of the deckchar should be directly connected for stability.
- This design could be adjusted to work as onced-assembled furniture. The foldable design would rather require hinges, as with material fatigue the bend parts would eventually break.
- The more layers would have the plywood - the better (for flexible parts).
- The flex pattern require more research - perhaps the back part can be connected in the middle for more stability -> seperating the g-code in more jobs cutting first part of the pattern lines, and and the end the second part -> or installing the bridges.
- Planning for the toolpath requires more thought to stabilize the flex part during cutting without nails.
- Some of polylines should be connected to enable machine cut the whole layout as one step of depth.
License
This project is licensed under Attribution-NonCommercial 4.0 International (CC BY-NC 4.0).
“© Judy Curie, 2023 This work may be reproduced, modified, distributed, performed and displayed for any purpose, but must acknowledge “CNC Deckchair”. Copyright is retained and must be preserved. The work is provided as is; no warranty is provided, and users accept all liability.”
Files
desing & production files: CNC-Deckchair - Rhino/GH, DWG, CRV