Week04. Embedded programming
| Assignment | |
|---|---|
| group | compare the performance and development workflows for other architectures link |
| individual | browse through the data sheet for your microcontroller; program a microcontroller development board; to interact (with local input &/or output) and communicate (remotely); extra credit: use different languages &/or development environments |
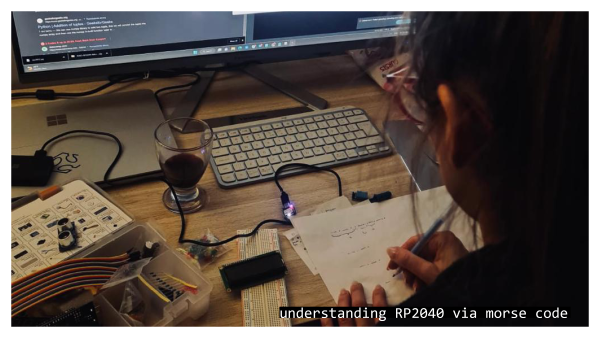
Photo of the week
Reading the morse light signals from RP2040.
Take aways from the group Assignment
- arduino based on C is generally faster, although it loads slower to the board than MicroPython
- its hard to smoothly swich programming the board between diffent architectures
Intro to electronics
The started the work this week only on Saturday, joining the open global time session. Rico gave us a very useful brief introduction. Below there is a note from the meeting.
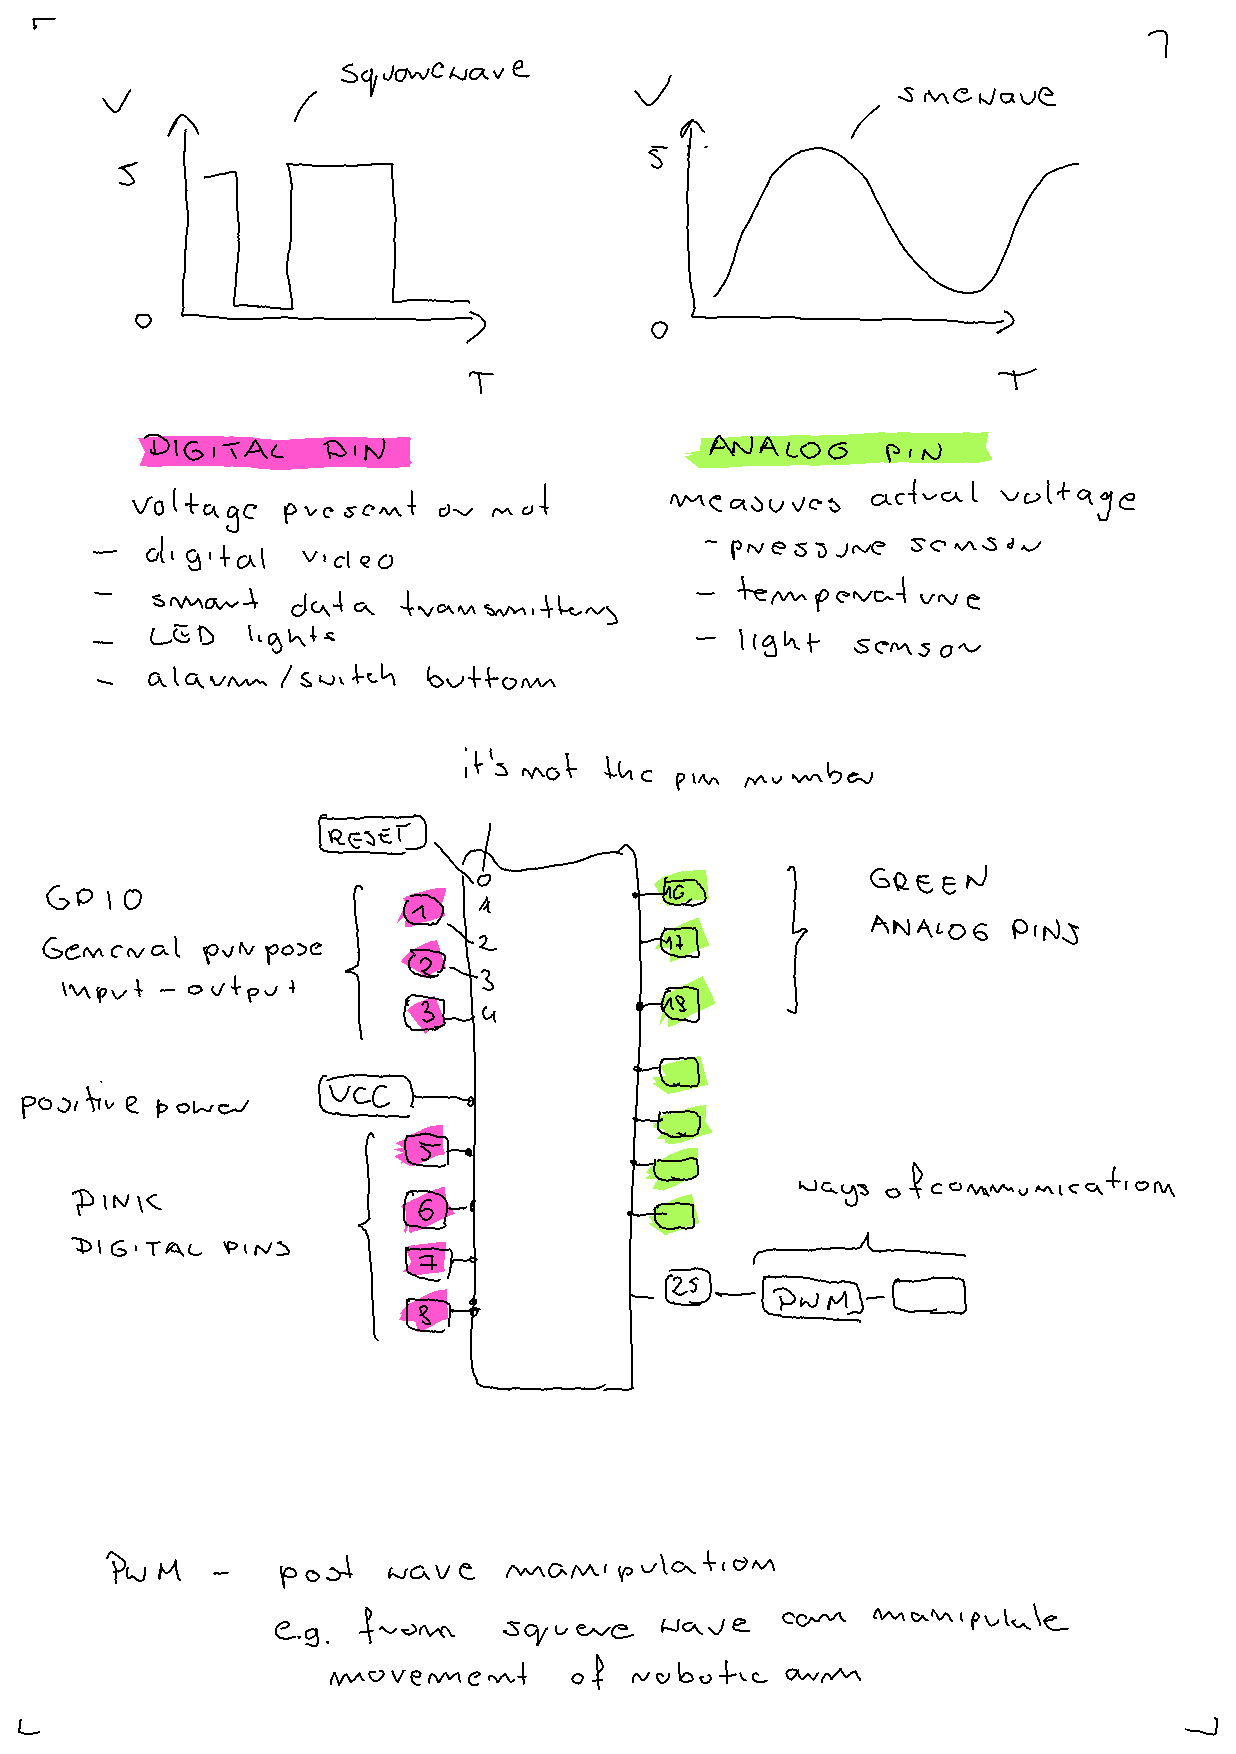
Rico also recommended a youtube video - A simple guide to electronic components link.
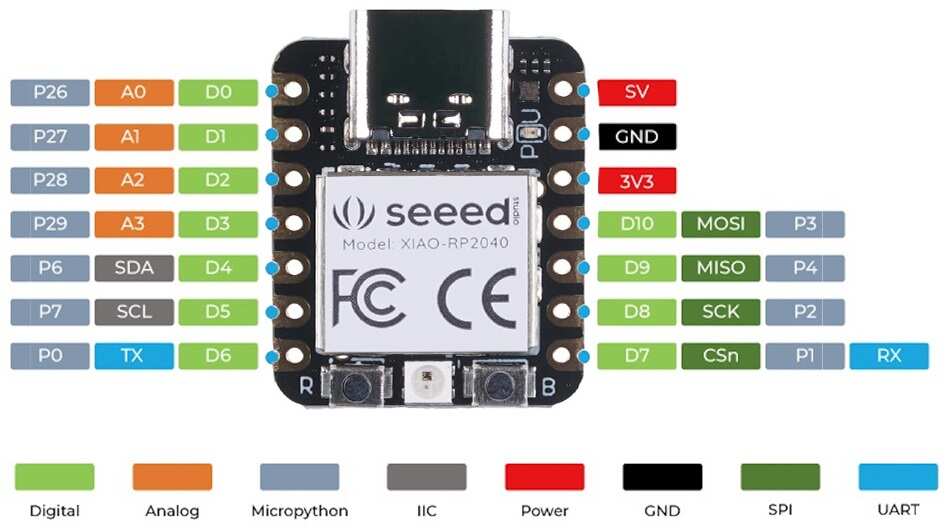
RP2040 data sheet

RP2040 Project Examples
- https://projecthub.arduino.cc/Aboubakr_Elhammoumi/77347b69-2ade-4a44-b724-3bb91e954188
- https://how2electronics.com/getting-started-with-seeed-xiao-rp2040-with-projects/
RP2040 with Arduino
I took the following steps following this tutorial:
- Step 1. Download and Install the latest version of Arduino IDE according to your operating system
- Step 2. Launch the Arduino application.
- Step 3. Add Seeed Studio XIAO RP2040 board package to your Arduino IDE
-
Navigate to File > Preferences, and fill Additional Boards Manager URLs with the url below: https://github.com/earlephilhower/arduino-pico/releases/download/global/package_rp2040_index.json. This packacage doesn’t work anymore!
-
Therefore, I used board Raspberry Pi Pico and the example codes worked as expected for the user LED.
- For blinkng the RGB LED, the library “Adafruit_NeoPixel”. The operationed worked.
Blinking LED ARDUINO IDE source
// Original code: https://wiki.seeedstudio.com/XIAO-RP2040-with-Arduino/

#include <Adafruit_NeoPixel.h>

int Power = 11;
int PIN  = 12;
#define NUMPIXELS 1

Adafruit_NeoPixel pixels(NUMPIXELS, PIN, NEO_GRB + NEO_KHZ800);

void setup() {
  pixels.begin();
  pinMode(Power,OUTPUT);
  digitalWrite(Power, HIGH);

}

void loop() {
  pixels.clear();
  pixels.setPixelColor(0, pixels.Color(15, 25, 205));
  delay(400);
  pixels.show();
  pixels.clear();
  pixels.setPixelColor(0, pixels.Color(103, 25, 205));
  delay(400);
  pixels.show();
  pixels.clear();
  pixels.setPixelColor(0, pixels.Color(233, 242, 205));
  delay(400);
  pixels.show();
  pixels.clear();
  pixels.setPixelColor(0, pixels.Color(233, 23, 23));
  delay(400);
  pixels.show();
  pixels.clear();
  pixels.setPixelColor(0, pixels.Color(12, 66, 101));
  delay(400);
  pixels.show();
  delay(500);

}
RP2040 with MicroPython
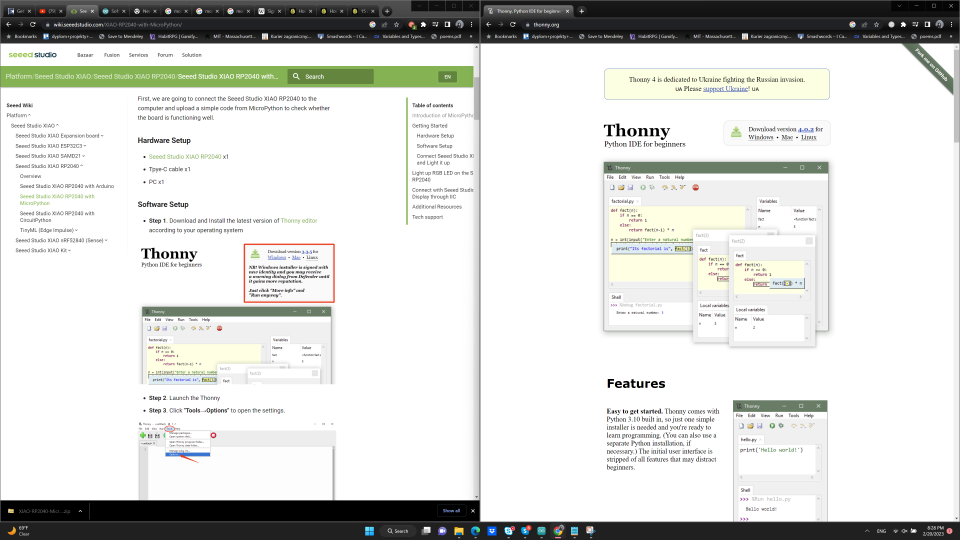 I took the following steps following this tutorial :
- Step 1. Download and Install the latest version of Thonny according to your operating system
- Step 2. Launch the Arduino application.
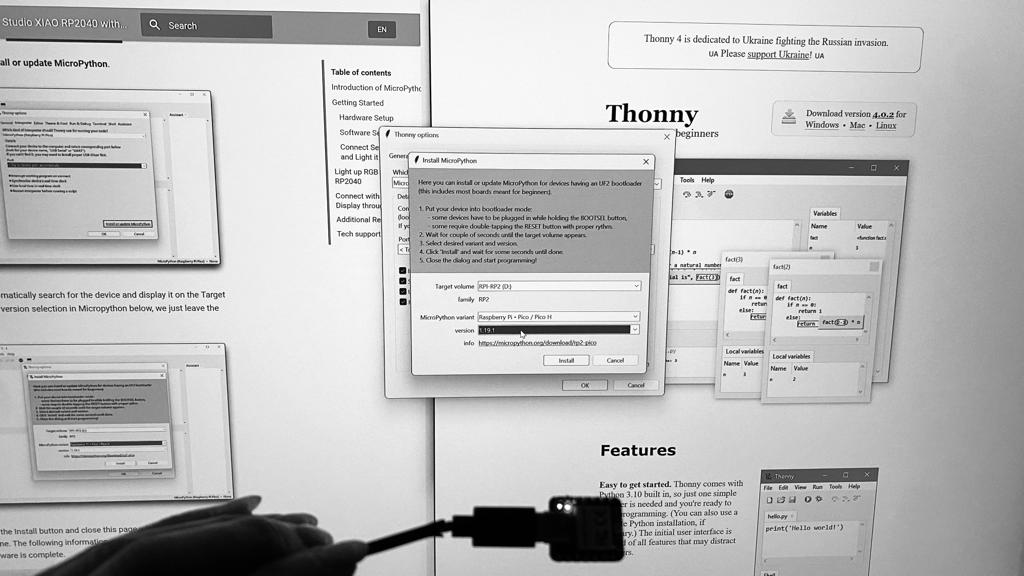
- Step 3. Add Seeed Studio XIAO RP2040 board package to your Thonny - navigate to Tools > Options > Interpreter > Choose MicroPython (Raspberry Pi Pico), Port:
, -
Click Install or update MircoPython, to have the Seeed Studio XIAO RP2040 board detected, you need to double-tap the reset Button.
-
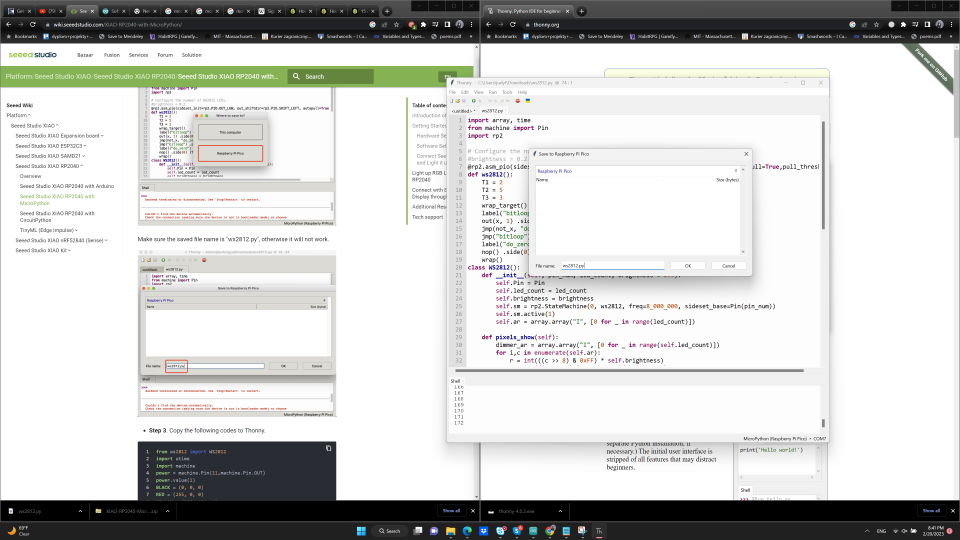
For blinking LED the ws2812.py library has to be downloaded, opened with Tonny and saved as RaspberryPi file “ws2812.py”.Blinking LED works correctly.
Blinking LED MicroPython source
"""
############################################################################################
Example sketch Light up RGB LED on the Seeed Studio XIAO RP2040
from https://wiki.seeedstudio.com/XIAO-RP2040-with-MicroPython/
############################################################################################
"""

from ws2812 import WS2812
import utime
import machine
power = machine.Pin(11,machine.Pin.OUT)
power.value(1)
BLACK = (0, 0, 0)
RED = (255, 0, 0)
YELLOW = (255, 150, 0)
GREEN = (0, 255, 0)
CYAN = (0, 255, 255)
BLUE = (0, 0, 255)
PURPLE = (180, 0, 255)
WHITE = (255, 255, 255)
COLORS = (BLACK, RED, YELLOW, GREEN, CYAN, BLUE, PURPLE, WHITE)

led = WS2812(12,1)#WS2812(pin_num,led_count)

while True:
    print("Beautiful color")
    for color in COLORS:
        led.pixels_fill(color)
        led.pixels_show()
        utime.sleep(0.2)
Loading the code in MircoPython is much faster than through Arduiono IDE.
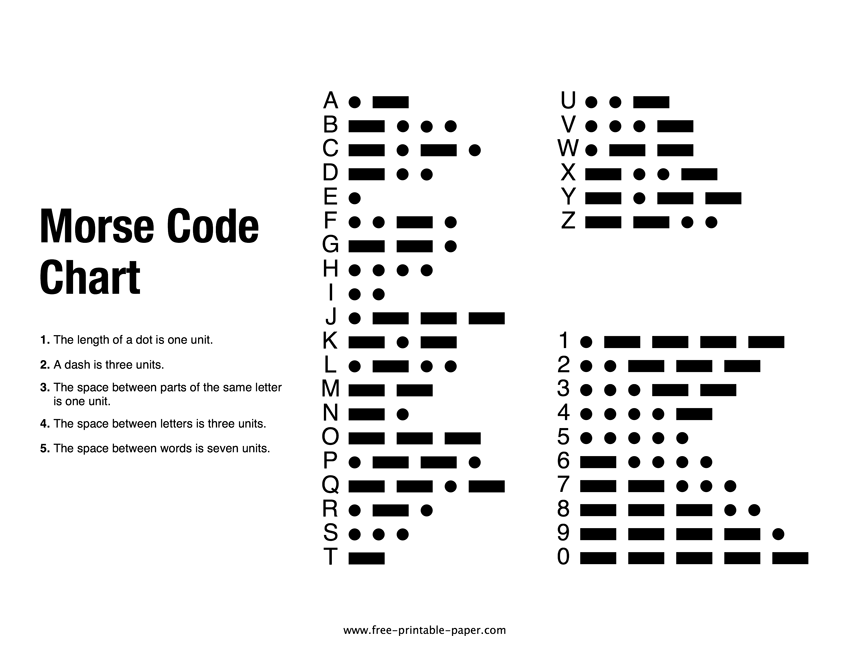
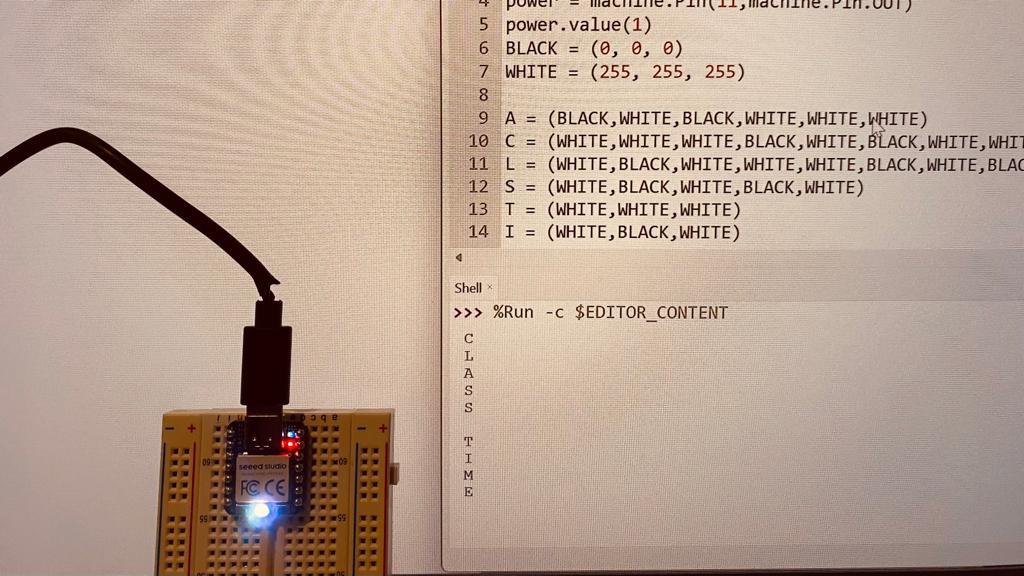
The Morse Code in MicoroPython
I wanted to blink the LED light as the morse code communicator. I followed below rules (adopted from source) to create the code:
To symbolize dots, turn your light on for 1 second. To symbolize dashes, turn your light on for 3 seconds. The time gap between dots and dashes is 1 second with the light off. The time gap between full letters is 3 seconds with the light off. The pause between complete words is 7 seconds with the light off.
MicroPython Code for blinking Morse code
"""
############################################################################################
Example sketch Light up RGB LED on the Seeed Studio XIAO RP2040
from https://wiki.seeedstudio.com/XIAO-RP2040-with-MicroPython/

Modified by Judy Curie, 23/02/2023
############################################################################################
"""

from ws2812 import WS2812
import utime
import machine
power = machine.Pin(11,machine.Pin.OUT)
power.value(1)
BLACK = (0, 0, 0)
WHITE = (255, 255, 255)

A = (BLACK,WHITE,BLACK,WHITE,WHITE,WHITE)
C = (WHITE,WHITE,WHITE,BLACK,WHITE,BLACK,WHITE,WHITE,WHITE,BLACK,WHITE)
L = (WHITE,BLACK,WHITE,WHITE,WHITE,BLACK,WHITE,BLACK,WHITE)
S = (WHITE,BLACK,WHITE,BLACK,WHITE)
T = (WHITE,WHITE,WHITE)
I = (WHITE,BLACK,WHITE)
M = (WHITE,WHITE,WHITE,BLACK,WHITE,WHITE,WHITE)
E = (WHITE,BLACK)
LETTERPAUSE = (BLACK,BLACK,BLACK)
WORDPAUSE = (BLACK,BLACK,BLACK,BLACK,BLACK,BLACK,BLACK)
word = "CLASS TIME "
CLASSTIME = (C,L,A,S,S, WORDPAUSE, T, I, M,E, WORDPAUSE)

led = WS2812(12,1)#WS2812(pin_num,led_count)

while True:
    for i in range(len(word)):
        print (word[i])
        letter =  CLASSTIME[i] + LETTERPAUSE
        for color in letter:
            led.pixels_fill(color)
            led.pixels_show()
            utime.sleep(1)
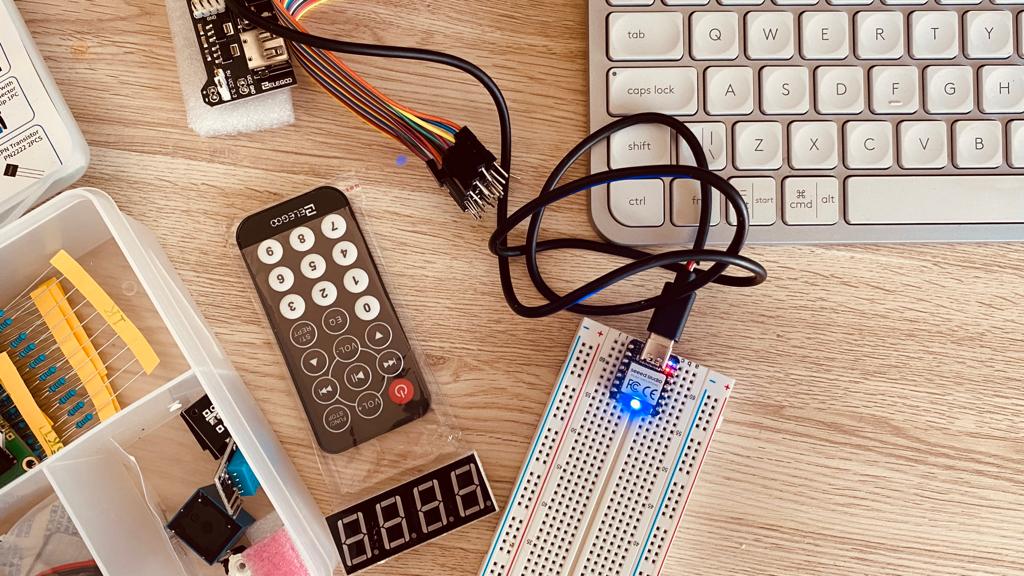
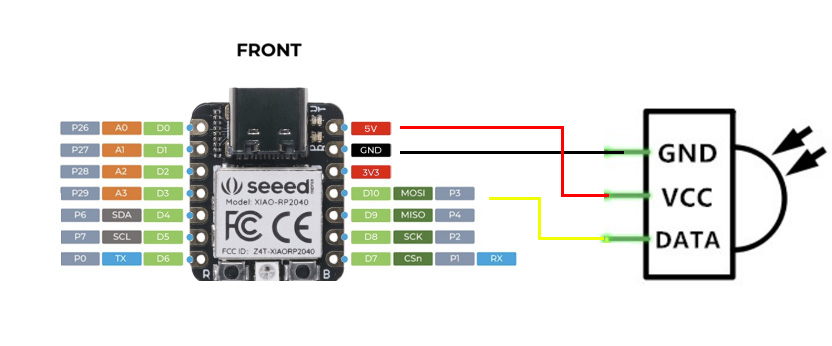
RP2040 wireless
I tried to connect the wireless module to the RP2040 to try the remote communication. I prepared first the connection scheme (based on the arduino uno board r3 scheme). However, after a few trials I got some little smoke from the module :)

Conclusions/Problems/Questions/Dilemas
- double click on reset button to reset on rp2040?
- Loading the code in MircoPython is much faster than through Arduiono IDE.
- Reset Button & Boot Button
- The components can be burnt :)
- After connecting to Thonny, I had problems to send the code through the Arduino IDE again the device.
