Group Assignment #3: 3D Scanning and Printing
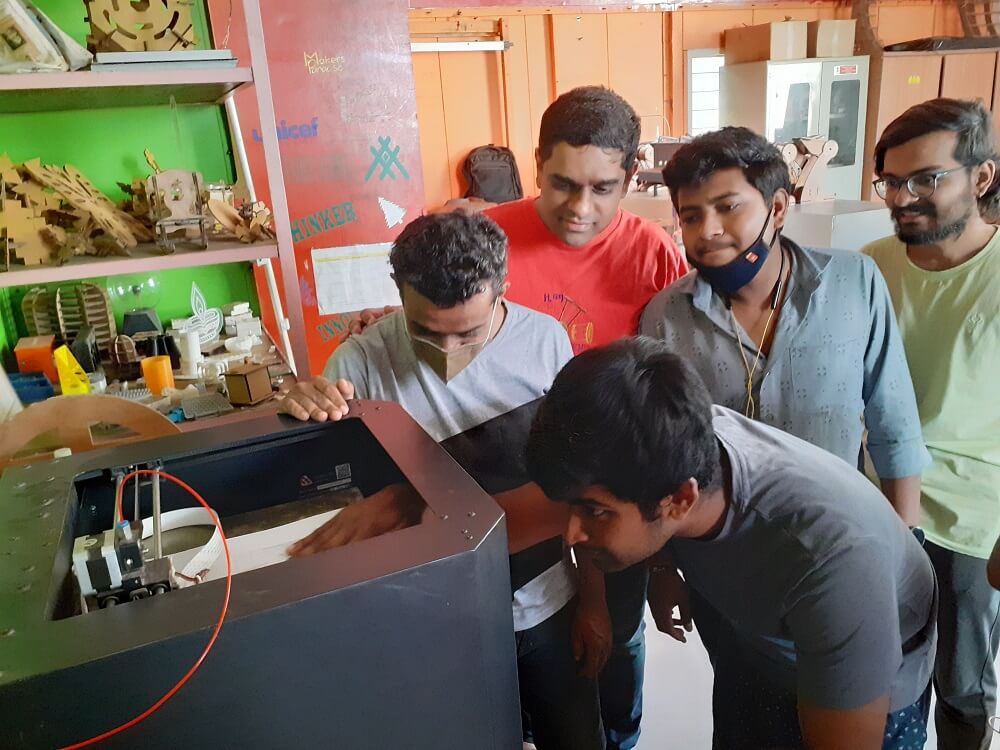
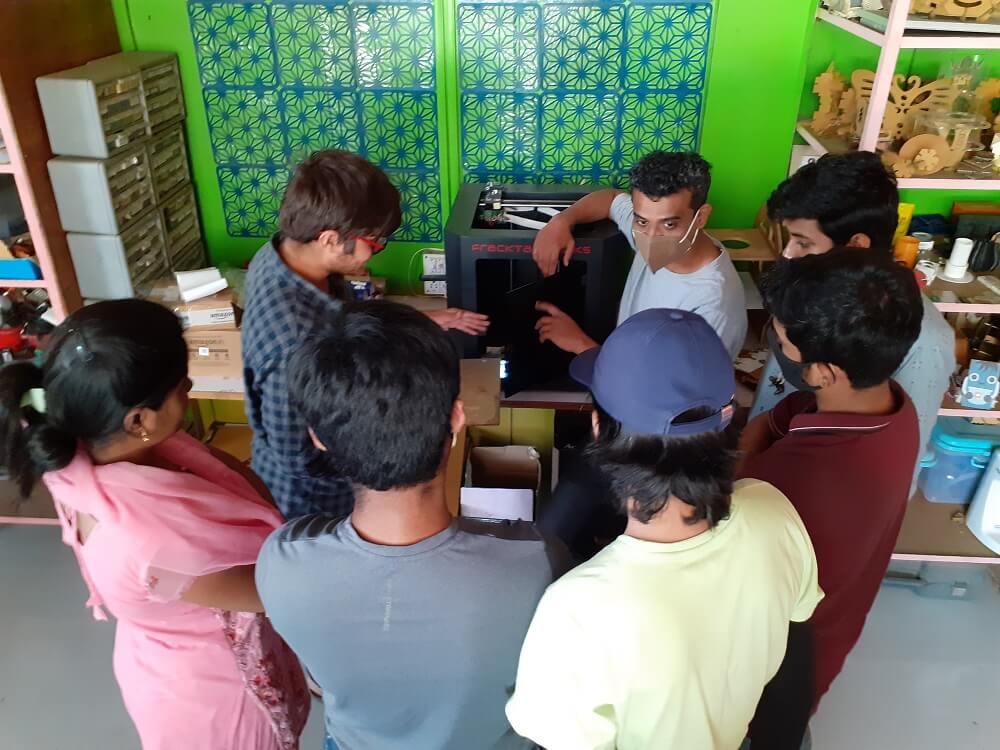
This week, we worked on 3D Scanning and Printing group assignment. This assignment is about documenting what we learned in this week regarding additive vs subtractive manufacturing, various 3D printing processes and materials, specifications of 3D printer that we have in our Fab lab. We have also documented how we used 3D printer for our group assignment, material and tools that we used, what precautions need to be taken while operating the 3D printer along with the software required for generating G code for the machine. As a conclusion we characterized the design rules for our in-house 3D printer.
 |
 |
Objectives of the Group Assignment:
- Understand additive manufacturing processes, their types, materials and tools
- Understand how to operate the 3D printer
- Learn safety precautions while operating this Machine
- Test the design rules for our in-house 3D printer
3D Printing
3D printing, or additive manufacturing, is the construction of a three-dimensional object from a CAD model or a digital 3D model. The term "3D printing" can refer to a variety of processes in which material is deposited, joined or solidified under computer control to create a three-dimensional object, with material being added together (such as plastics, liquids or powder grains being fused together), typically layer by layer.
In the 1980s, 3D printing techniques were considered suitable only for the production of functional or aesthetic prototypes, and a more appropriate term for it at the time was rapid prototyping. As of 2019, the precision, repeatability, and material range of 3D printing have increased to the point that some 3D printing processes are considered viable as an industrial-production technology, whereby the term additive manufacturing can be used synonymously with 3D printing. One of the key advantages of 3D printing is the ability to produce very complex shapes or geometries that would be otherwise impossible to construct by hand, including hollow parts or parts with internal truss structures to reduce weight. Fused deposition modeling (FDM), which uses a continuous filament of a thermoplastic material, is the most common 3D printing process in use as of 2020. Click here to read more.
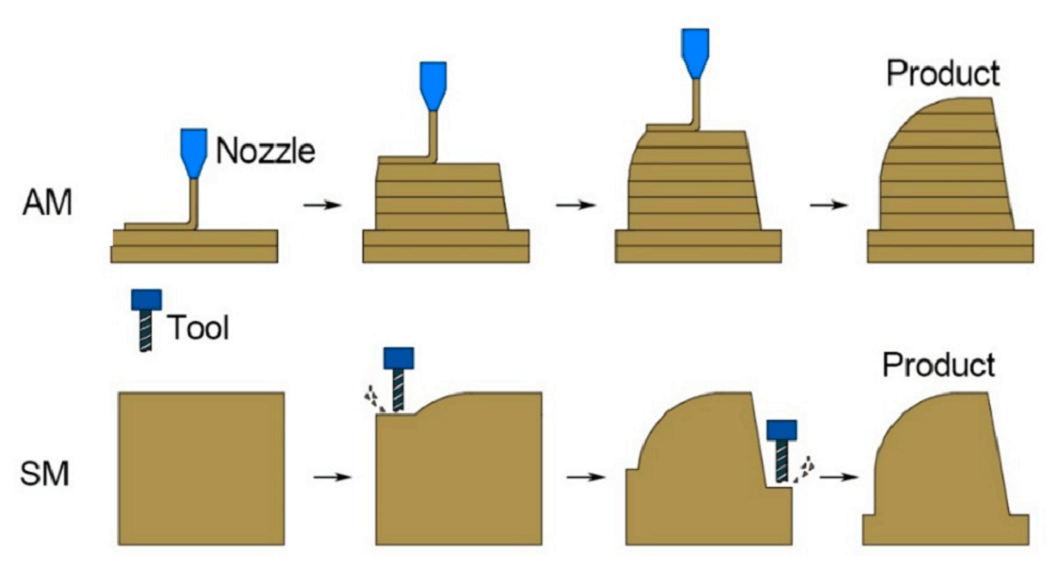
Additive vs Subtractive manufacturing
| Parameters | Additive manufacturing | Subtractive manufacturing |
|---|---|---|
| Principle | Involves adding layers of material to create an object | Removes material from an object |
| Process | Processes include 3D printing, direct digital manufacturing, rapid prototyping or additive and layered fabrication | The process is either by: manual removal, traditional machining or CNC machining |
| Equipment and tools | Uses computers and specialist 3D printing equipment to create products or prototypes | Uses computers and robotics to assist standard machining processes, e.g., turning, drilling or milling |
| Achievable complexity | Can produce parts with highly complex and intricate geometries, even better than 5-axis CNC machining. Intricate and hollow objects can easily be built up in layers | Better suited to relatively simple geometry. Milling undercuts and intricate shapes can be difficult |
| Producible features | Cannot produce features such as holes and threaded features effectively | Effectively creates holes and threaded sections. |
| Producible sizes | Best suited for smaller items or parts, especially in plastic | Best suited for manufacturing voluminous items and parts, especially in metal |
| Properties of parts produced | Parts produced may have insufficient mechanical properties. Because the parts are created layer by layer, structural weaknesses arise between these layers, thereby compromising specific properties. | Parts produced may have excellent mechanical and thermal properties. |
| Accuracy | Can achieve less dimensional accuracy. The most accurate AM process, SLM/DMLS, can produce tolerances as tight as 0.100 mm. | Can achieve greater dimensional accuracy. Tolerances as tight as 0.025 mm are possible. |
| Production materials | Works predominantly with plastics and to a small extent, metals. | Works with a wide range of materials, including plastics, metals, wood, foam, glass, and stone. |
| Finishing | Parts produced always require finishing processes. The layering often leaves a slightly 'stepped' or rough surface which needs to be finished post- printing by sanding or blowing | Parts produced may not require finishing. A variety of surface finishes can be machined, including smooth, stepped, mottled, etc. |
| Setup | Requires minimal setup which results in shorter time per part, from design to production. After designing a CAD model of the part and converting it, all you need to do is setup the feedstock material, and the 3D printer does the rest. | Requires more effort and time in setting up. In CNC machining, for example, after designing a CAD model and converting it to G-Code, you need to set several aspects and parameters of the CNC machine. These include placing the workpiece on the work table, selecting and preparing the appropriate cutting fluid, selecting and affixing the cutting tool, and setting the right speed, feed, and depth of cut. |
| Scalabitlty | Cost of production is directly proportional to production quantity. As production quantity increases, however, production costs rise significantly. | Cost of production is inversely proportional to production quantity. As production quantity increases, production costs reduce. |
| Speed and cost | Faster and less expensive for geometrically small parts, plastics, and small production runs. For large sized object, 3D printing can be a slow process | Best suited for manufacturing voluminous items and parts, especially in metal. Faster and less expensive for relative large parts, metals, and large production runs. However, quite expensive for than additive mfg for low volume |
 |
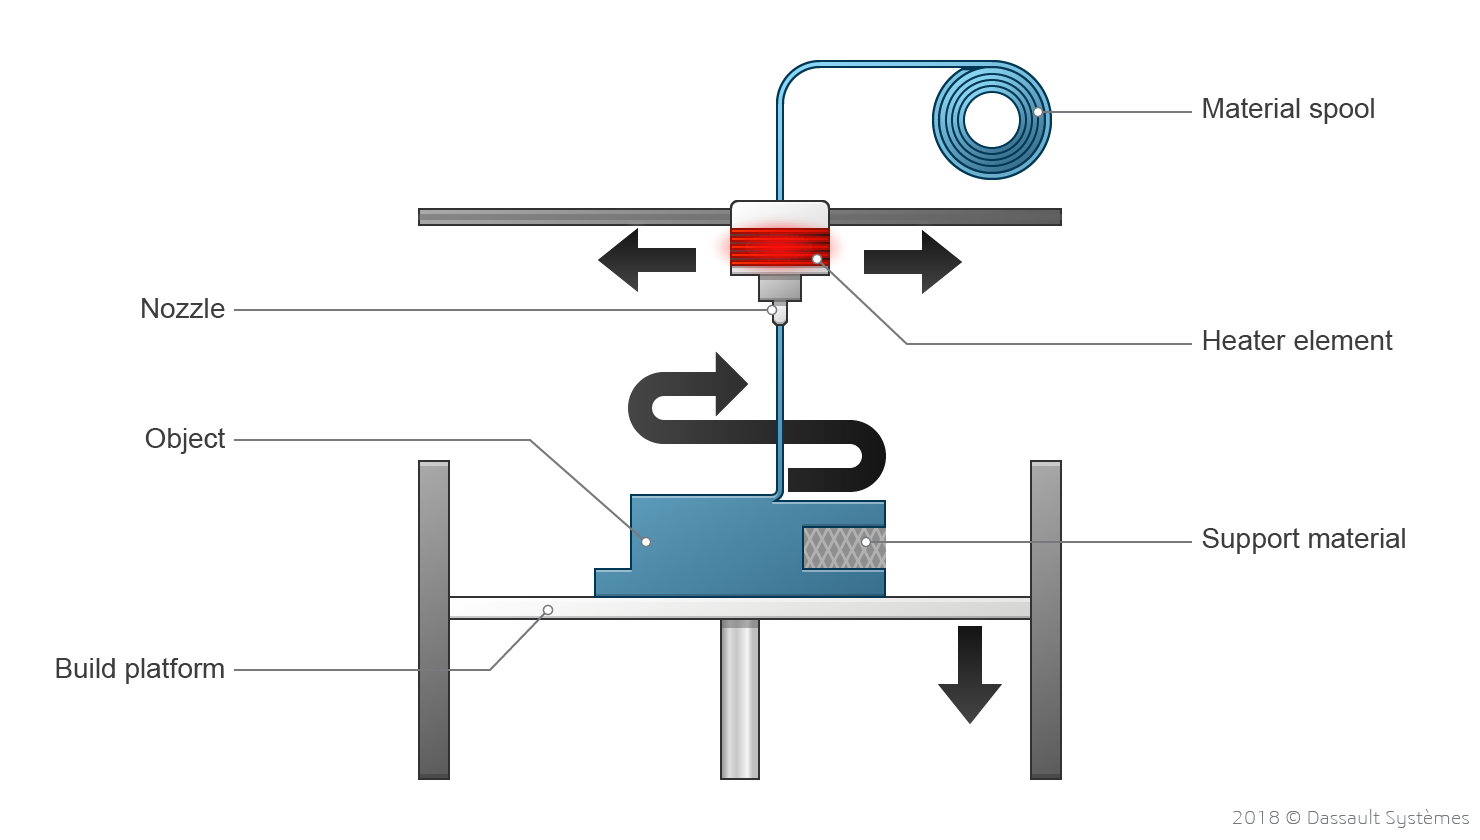
Our 3D Printing Process- FDM (Fused-Deposition Molding)
FDM- Material Extrusion 3D printing technology uses a continuous filament of a thermoplastic material as a base material. The filament is fed from a coil, through a moving heated printer extruder head, often abbreviated as an extruder. The molten material is forced out of the extruder's nozzle and is deposited first onto a 3D printing platform, which can be heated for extra adhesion. Once the first layer is completed, the extruder and the platform are parted away in one step, and the second layer can then be directly deposited onto the growing workpiece. The extruder head is moved under computer control. At least three axes are required for the extruder to move in Cartesian architectures, but polar and delta systems are also becoming increasingly popular. One layer is deposited on top of a previous layer until the objects fabrication is complete. The different Powder Bed Fusion methods notably include:
Material extrusion is known as Fused Filament Fabrication (FFF) and is one of the most popular processes for hobbyist-grade 3D printing. The proprietary term Fused Deposition Modeling (FDM) was coined by S. Scott Crump in the late 1980s and was commercialized in 1990 by the Stratasys company. With the expiration of this technologys patent, there is now a large open-source development community called RepRap, as well as commercial and DIY variants, which utilize this type of 3D printing technology. This has led to a measurable price decrease. However, the material extrusion technique has dimensional accuracy limitations and is very anisotropic.
A wide variety of materials can be extruded, the most popular being thermoplastics, such as Acrylonitrile Butadiene Styrene (ABS), PolyLactic Acid (PLA), High-Impact Polystyrene (HIPS), Thermoplastic PolyUrethane (TPU), aliphatic PolyAmides (PA, also known as Nylon), and more recently high performance plastics such as PolyEther Ether Ketone PEEK or PolyEtherimide PEI. Additionally, paste-like materials such as ceramics, concrete and chocolate can be extruded using this 3D printing technique. Please see the image below.
 |
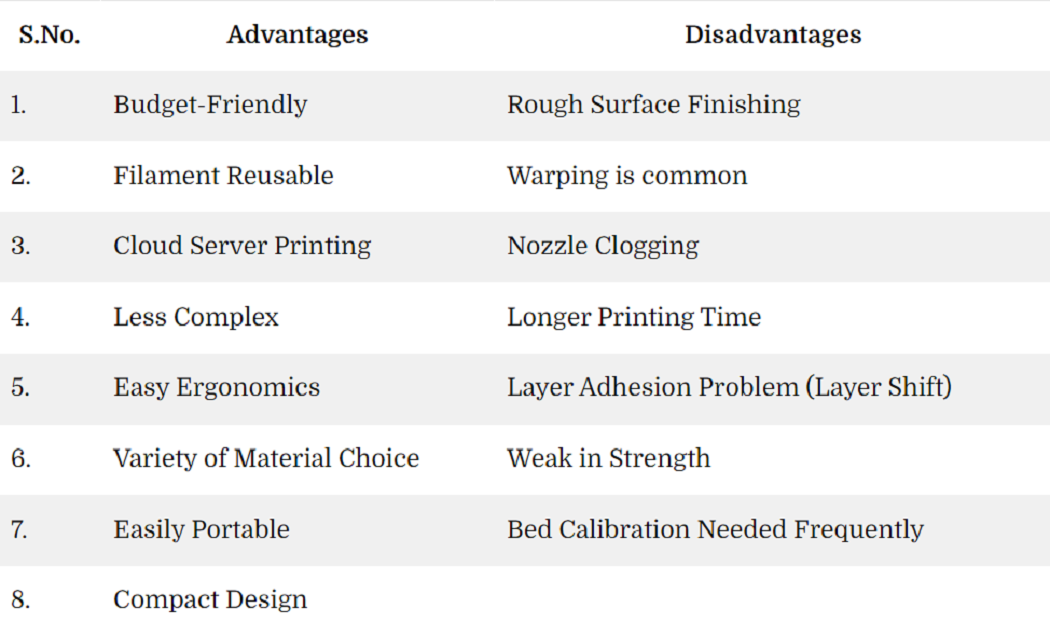
Advantages and Disadvantage of FDM
 |
Material we used- PLA
A crowd favorite in our 3D printing materials guide is Polyastic acid (PLA), which can, under certain commercially attainable conditions, biodegrade. PLA is sourced from natural products like sugar cane and corn starch and is therefore biodegradable. (You are not going to be able to compost it at home.)
First and foremost, PLA is easy to print with. It has a low printing temperature, does not need a heated bed (although it helps), and does not warp as easily. Another benefit of using PLA is that it does not give off an offputting odor during printing (unlike ABS). Moreover, it is a suitable 3D printing material for single-use food contact. However, PLA is less durable than ABS or PETG and susceptible to heat. So, for any type of engineering part, you will be better off with the latter. Avoid using it when making items that might be bent, twisted, or repeatedly dropped, such as phone cases, high-wear toys, or tool handles. PLA is available in a broad range of colors and also comes in a variety of composites from glow-in-the-dark, glittery, or color changing.
Operating 3D Printer
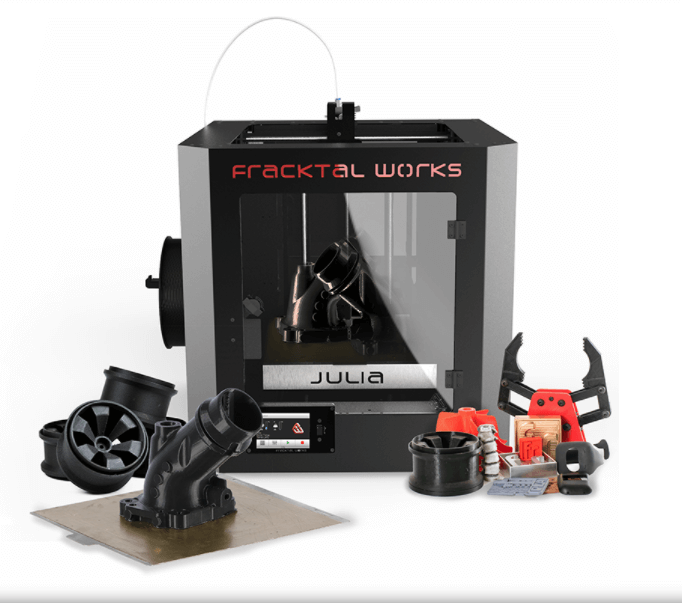
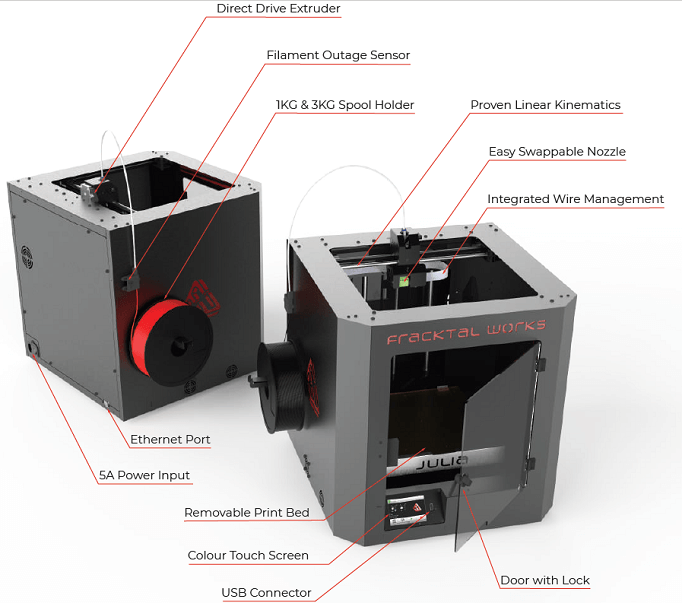
We first understood the basics of the Fracktal Works Julia Advanced 3D printer before we started operating it. Following are the details of the machine.
Fracktal Works Julia Advanced 3D printer: With a fully integrated system of hardware, software and materials, it is the most reliable, innovative and easy to use 3D printer on the market. An all-in-one solution that combines precision linear motion, integrated high-end electronics, heating and material management systems in a beautiful aesthetic design Click to know more
 |
 |
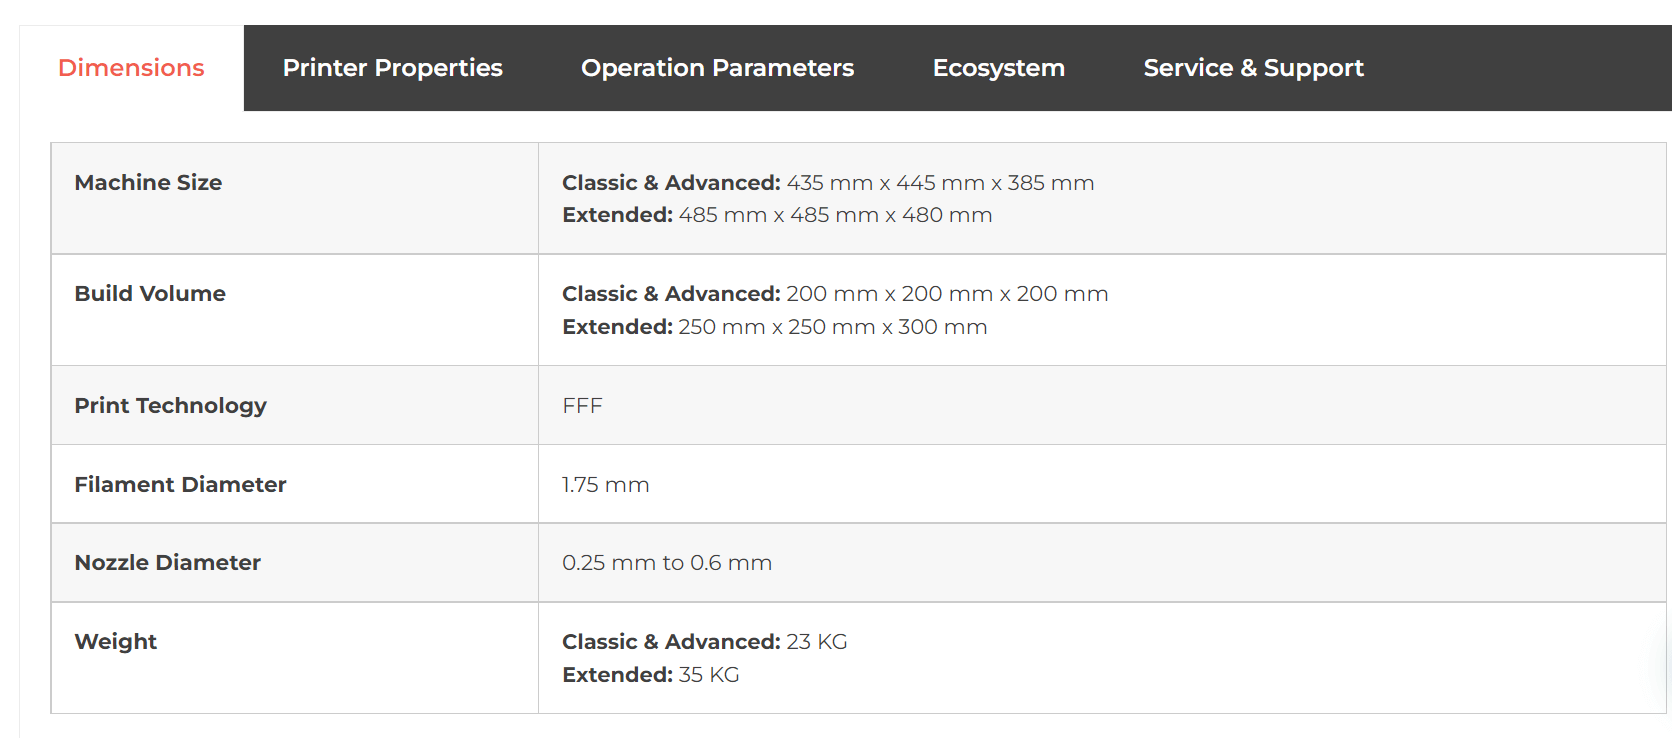
Printer Dimensions
 |
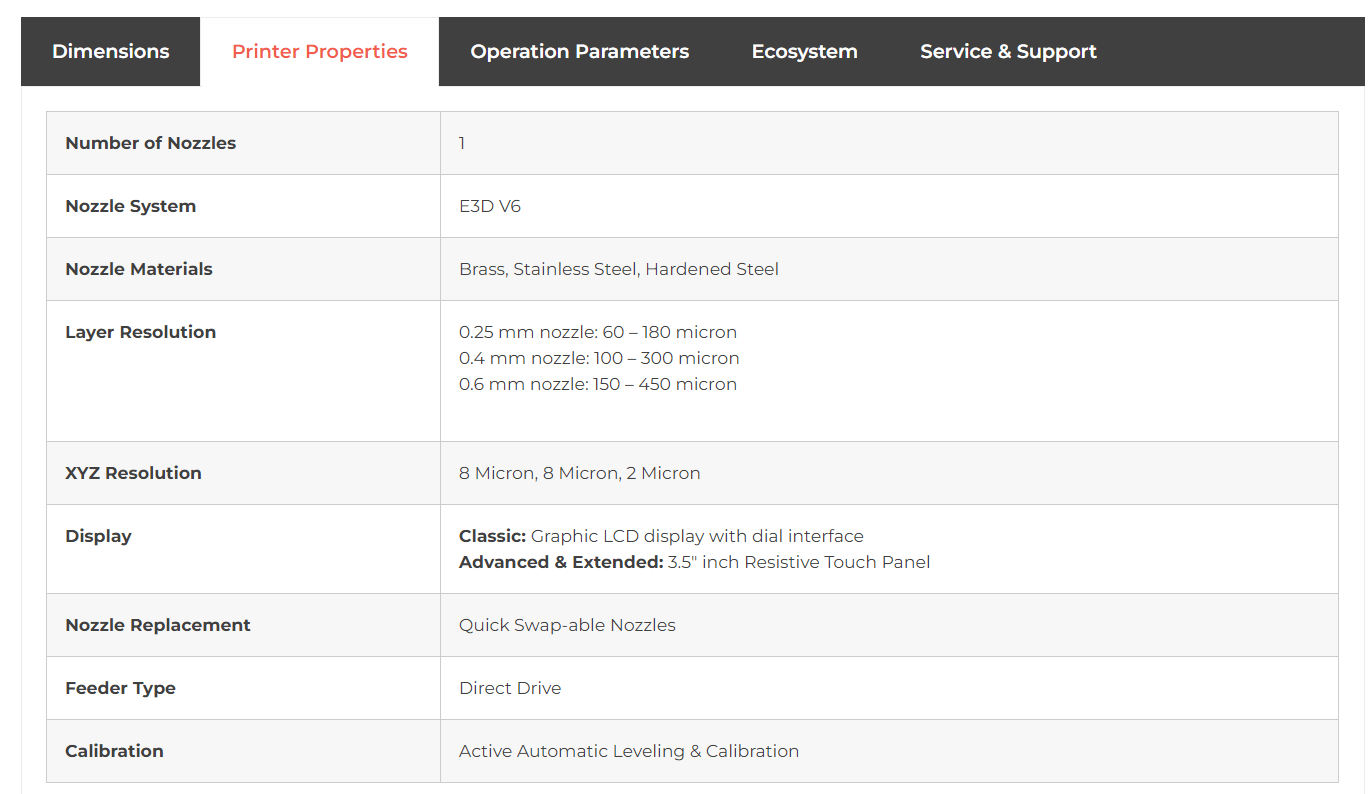
Printer Properties
 |
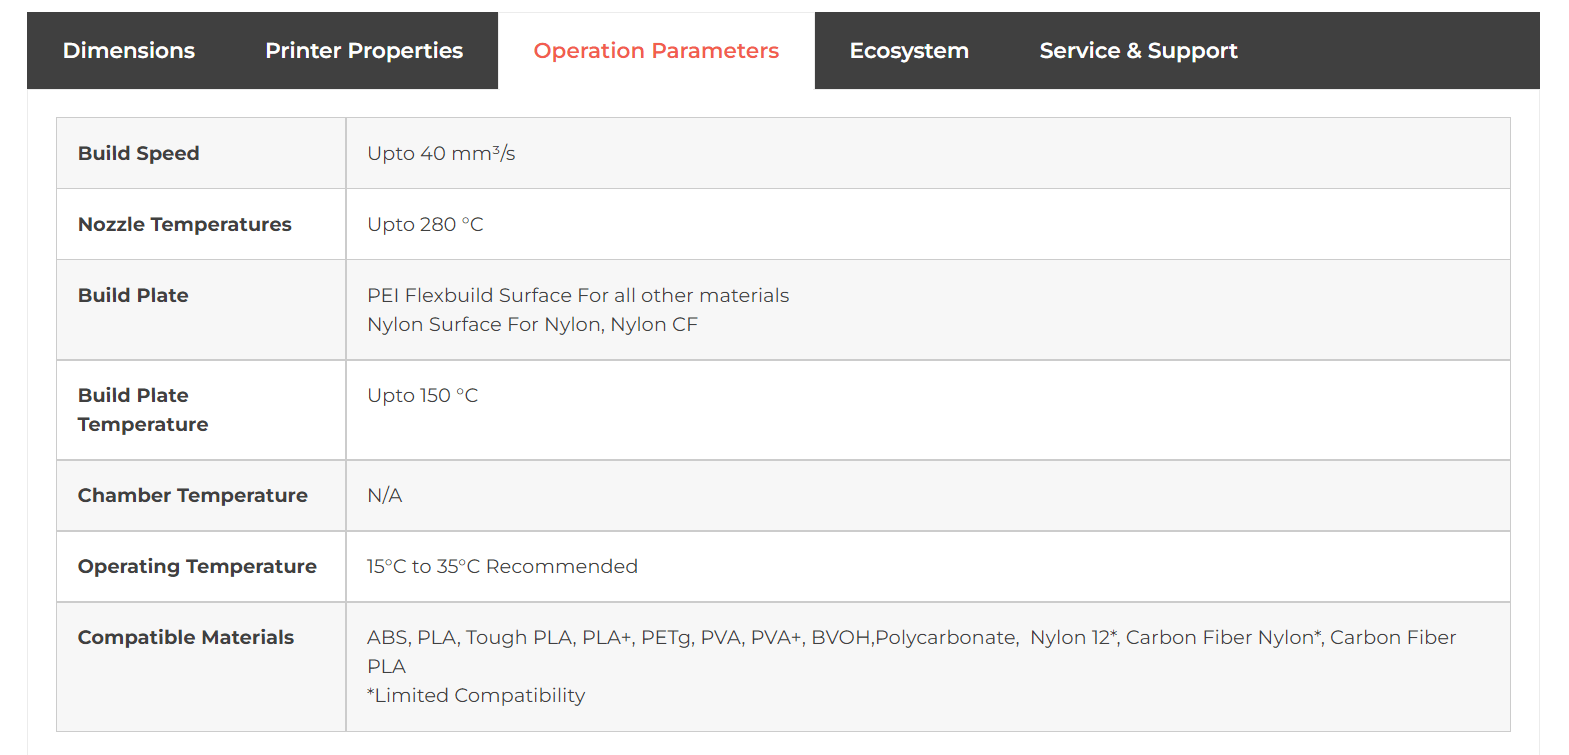
Printer Operation Parametes
 |
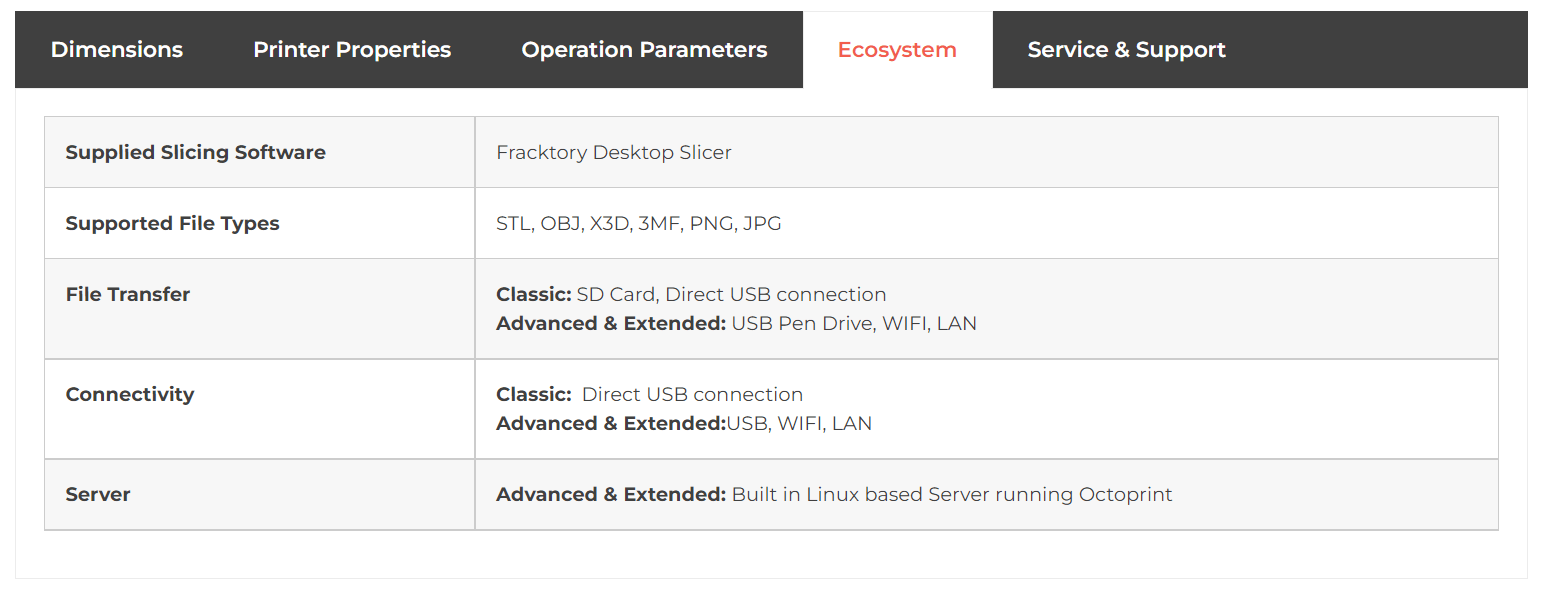
Printer Ecosystem
 |
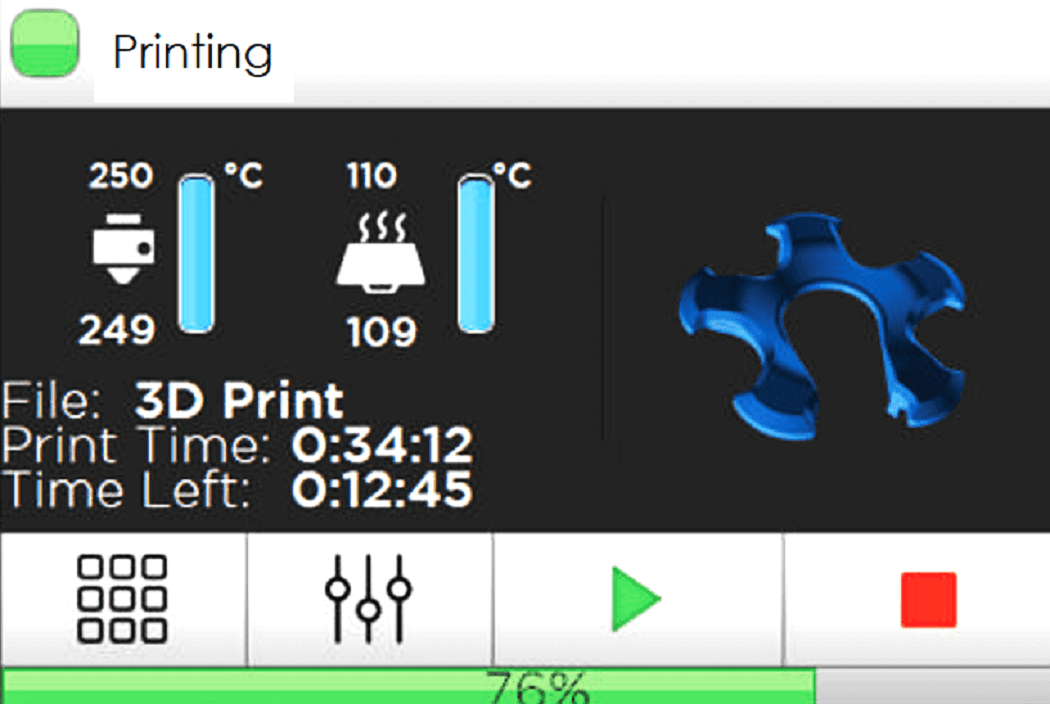
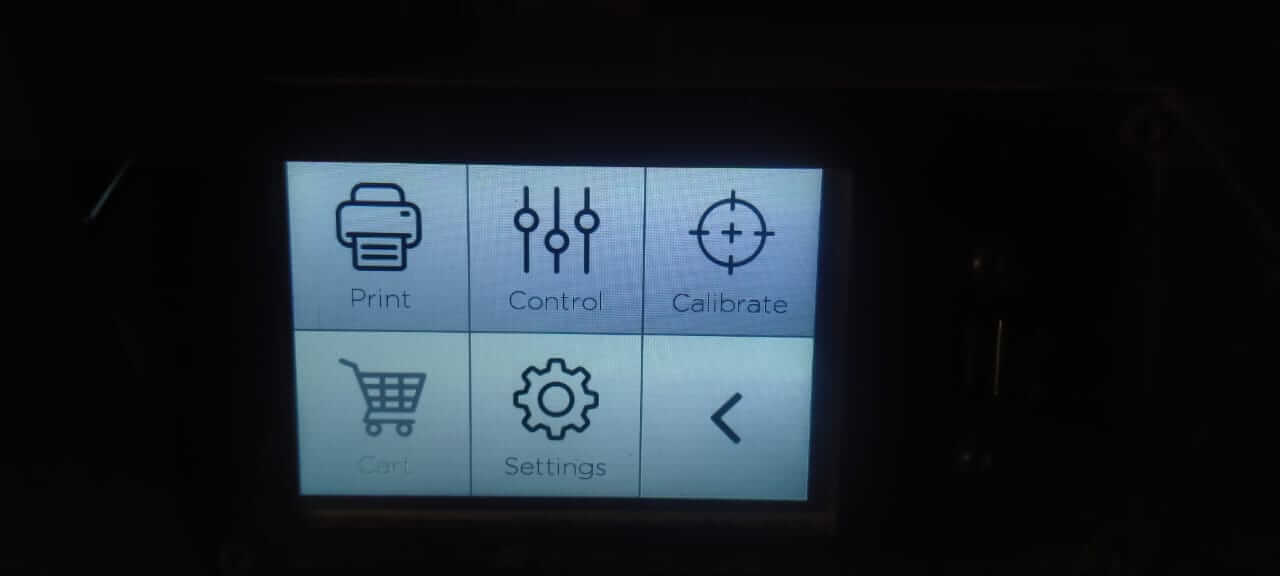
Control Panel of 3D Printer: Following are the menu on control panel of our Fractal works Julia Advanced 3D Printer.
 |
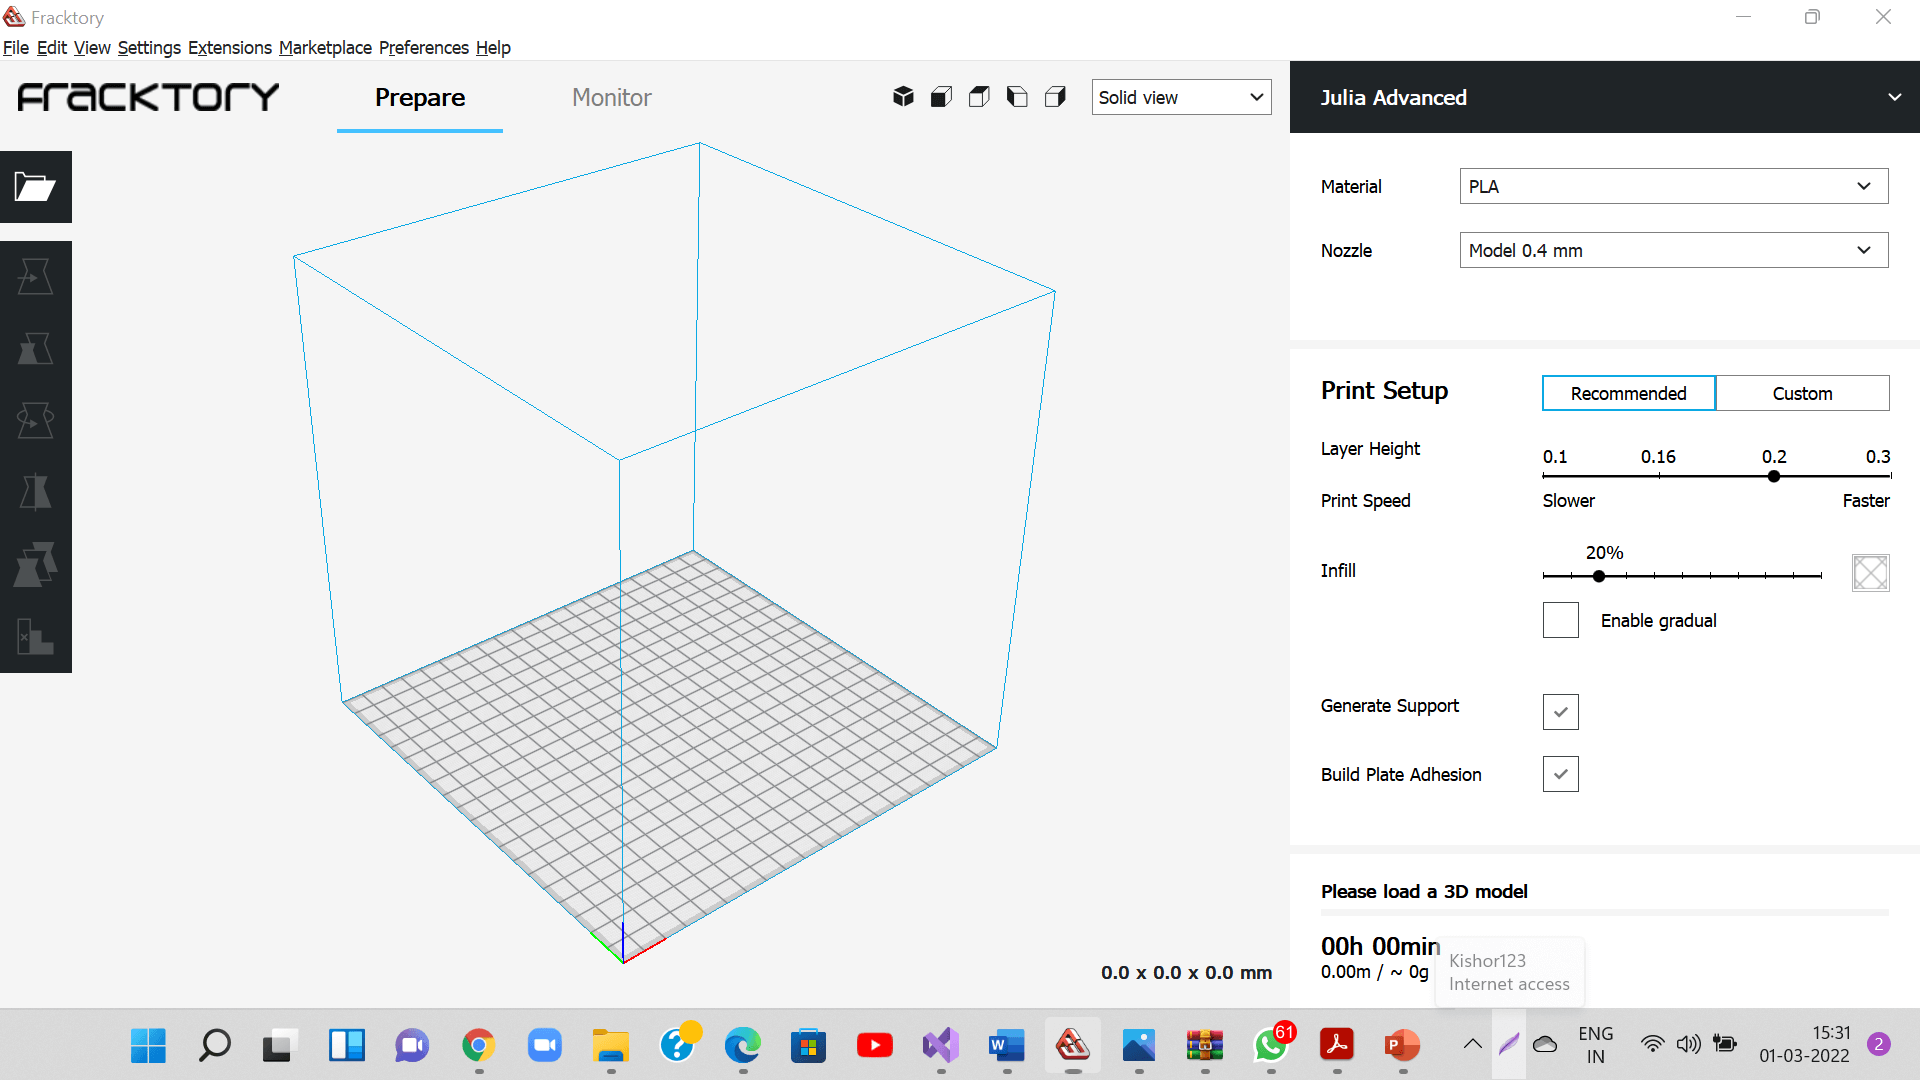
Fracktory: Slicer Software Following is a picture of the Fracktory- slicer software that we used for our Fractal works Julia Advanced 3D Printer.
 |
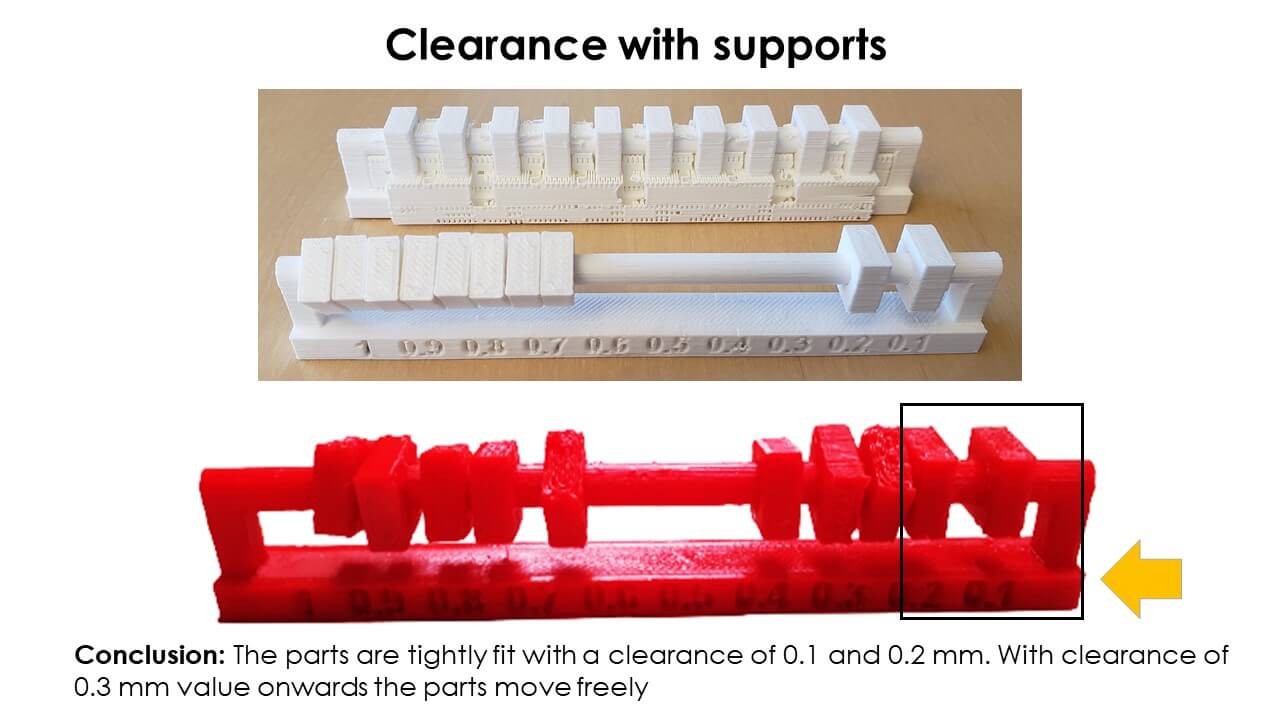
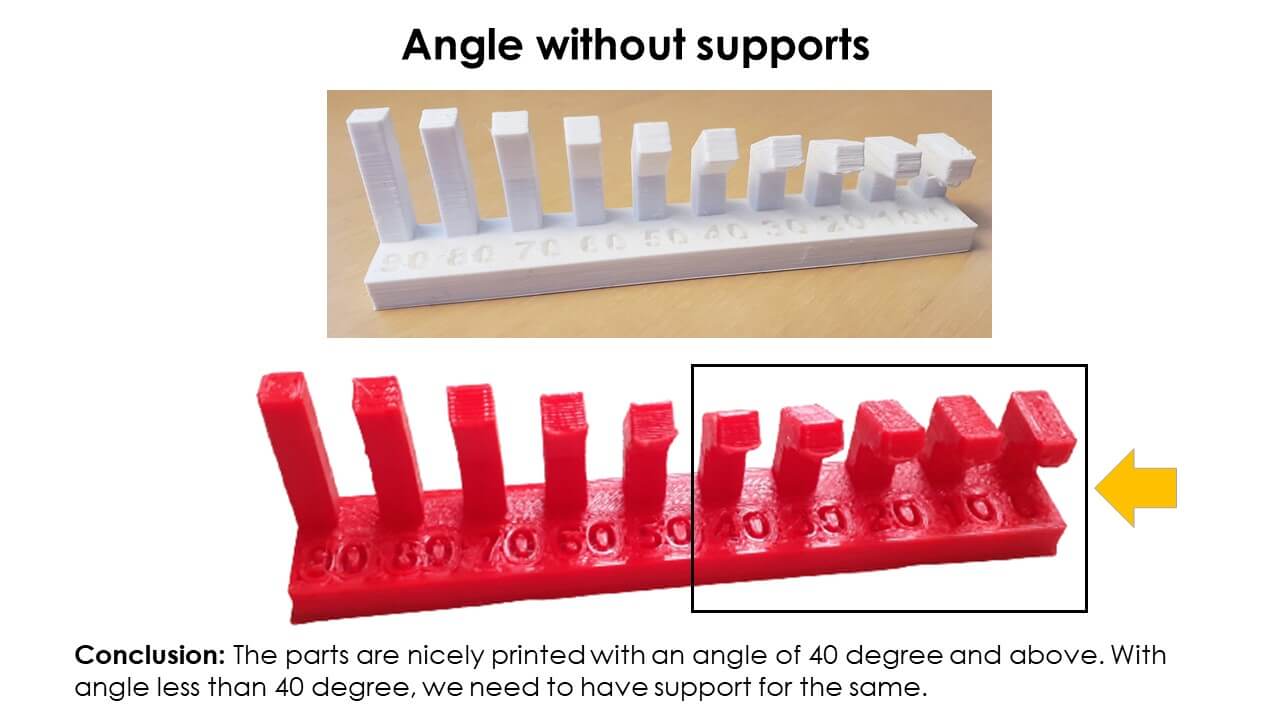
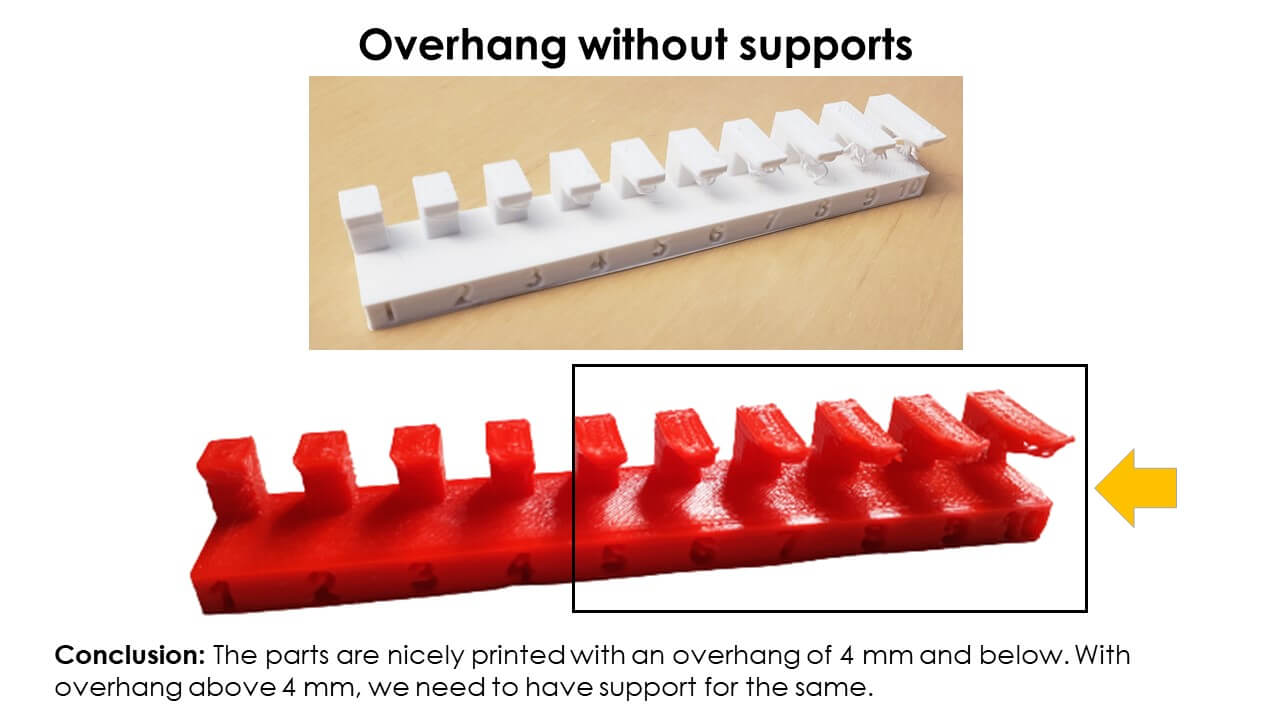
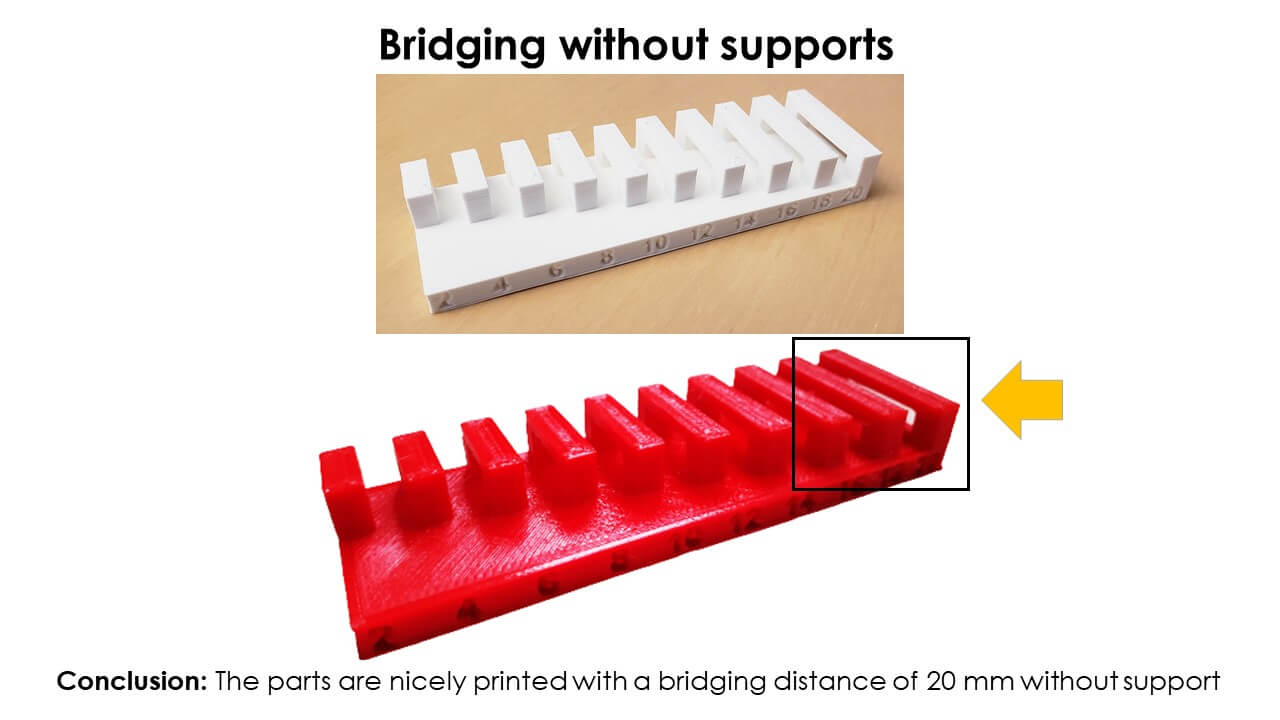
Testing Design Rules for our 3D printer
We decided to print most of the design rule components using STL files given in the academy class. We also printed one part from 3dbenchy. We also measured and analysed our 3DBenchy boat. We used PLA material for printing all these parts. We then compared our print with the reference dimensions given.
 |
 |
Generate G-code for 3D printing
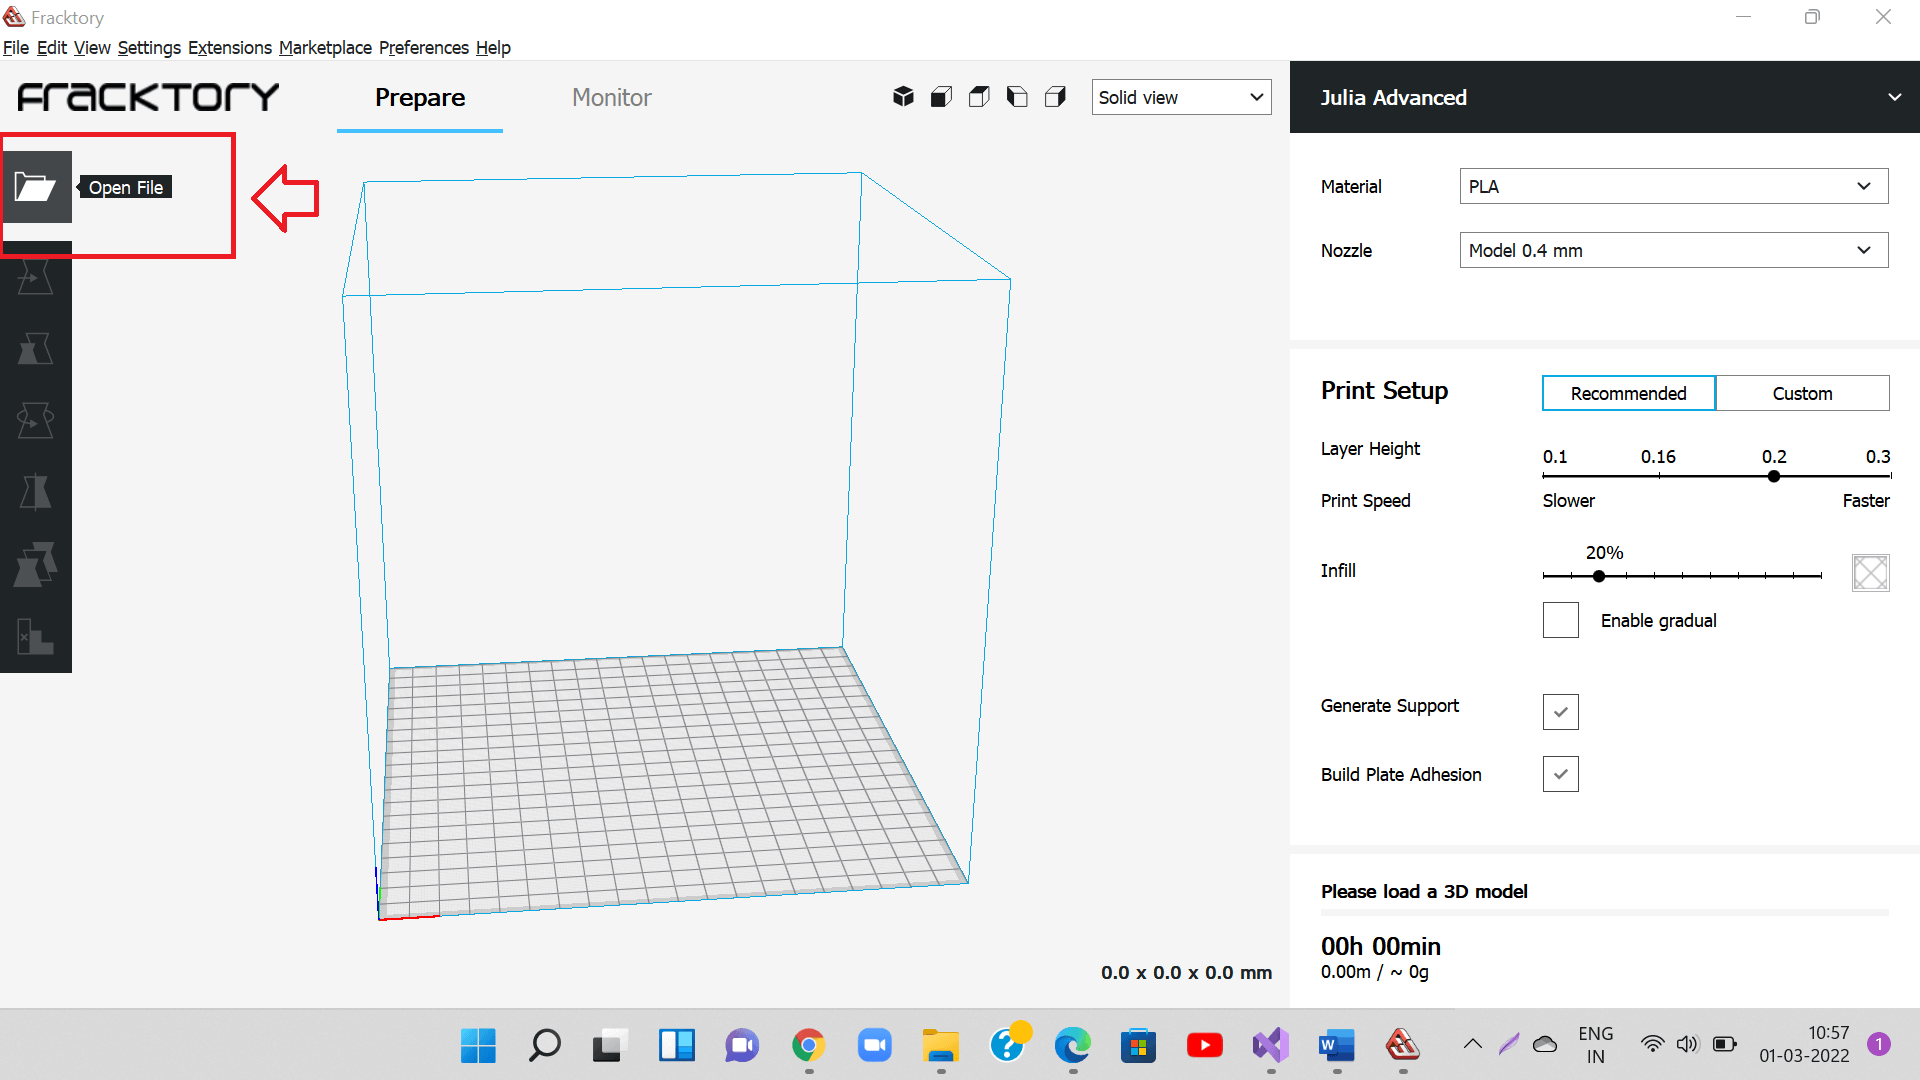
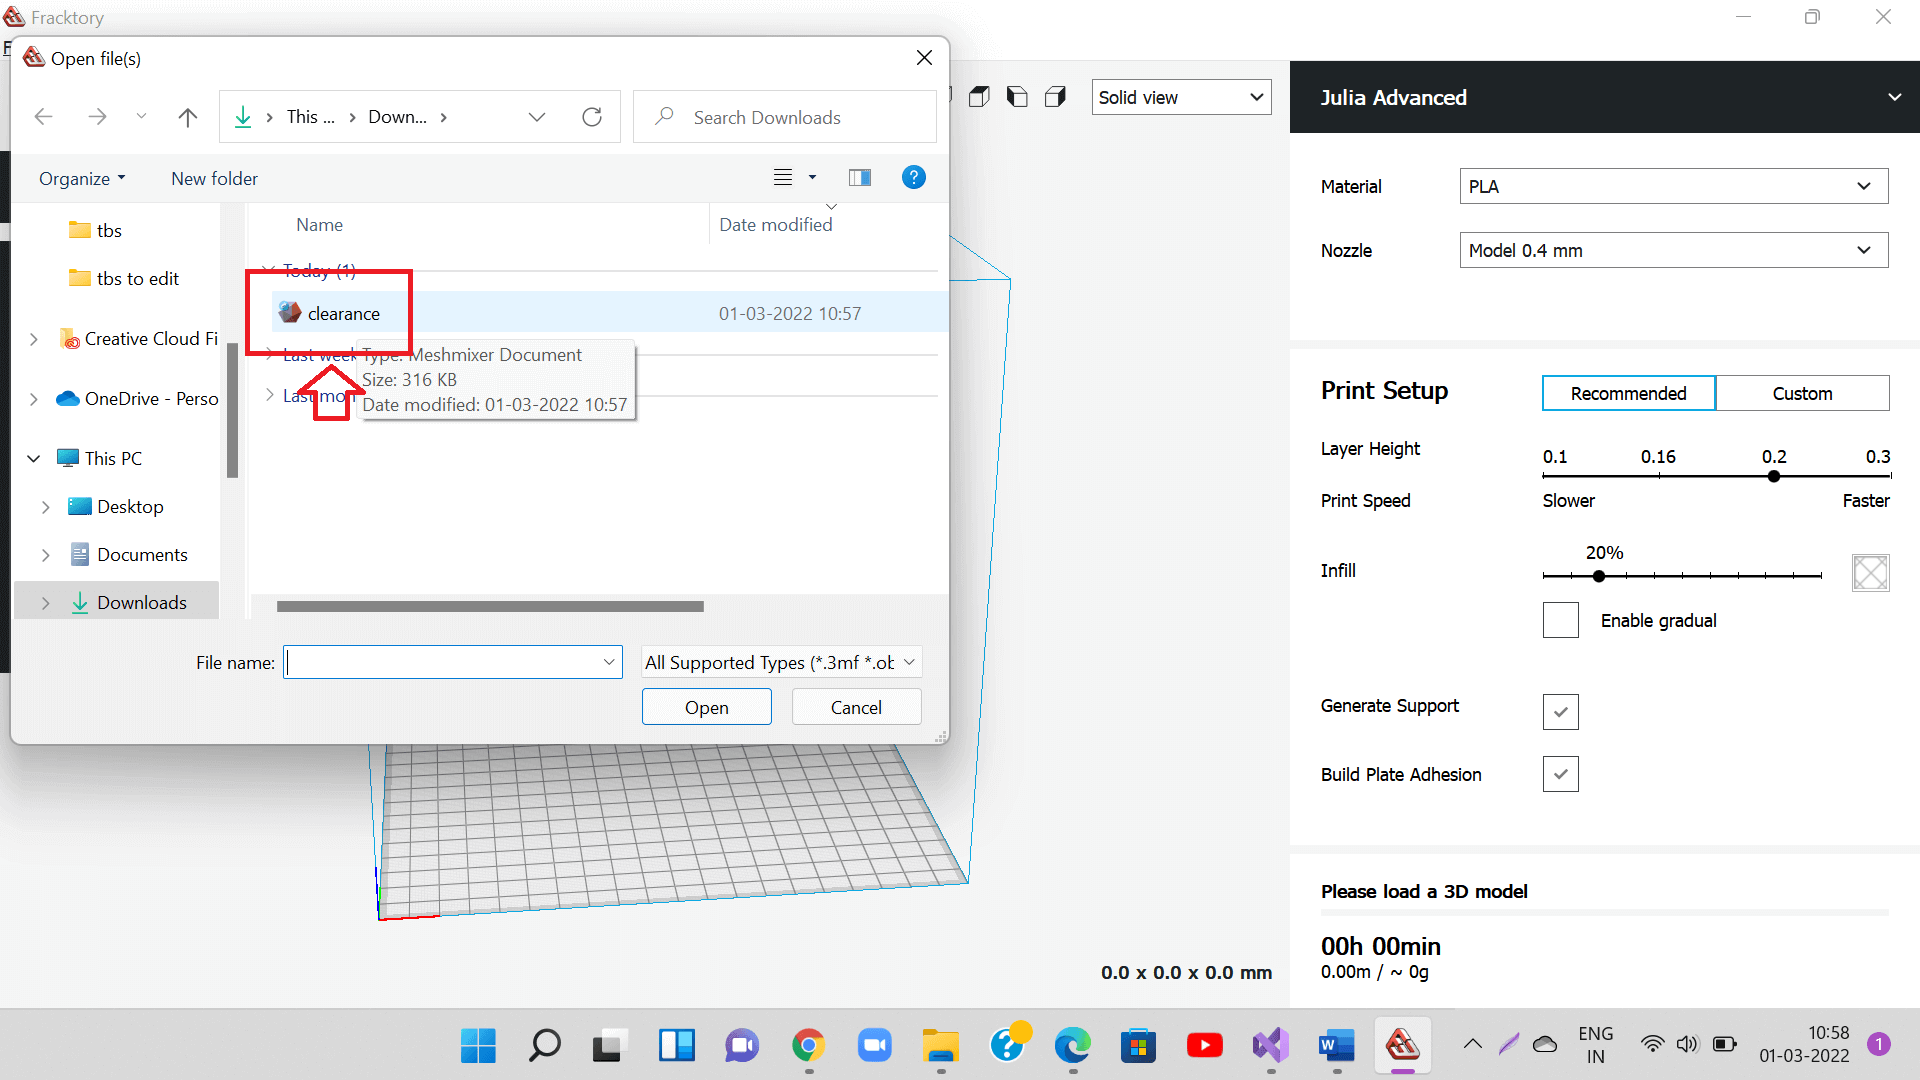
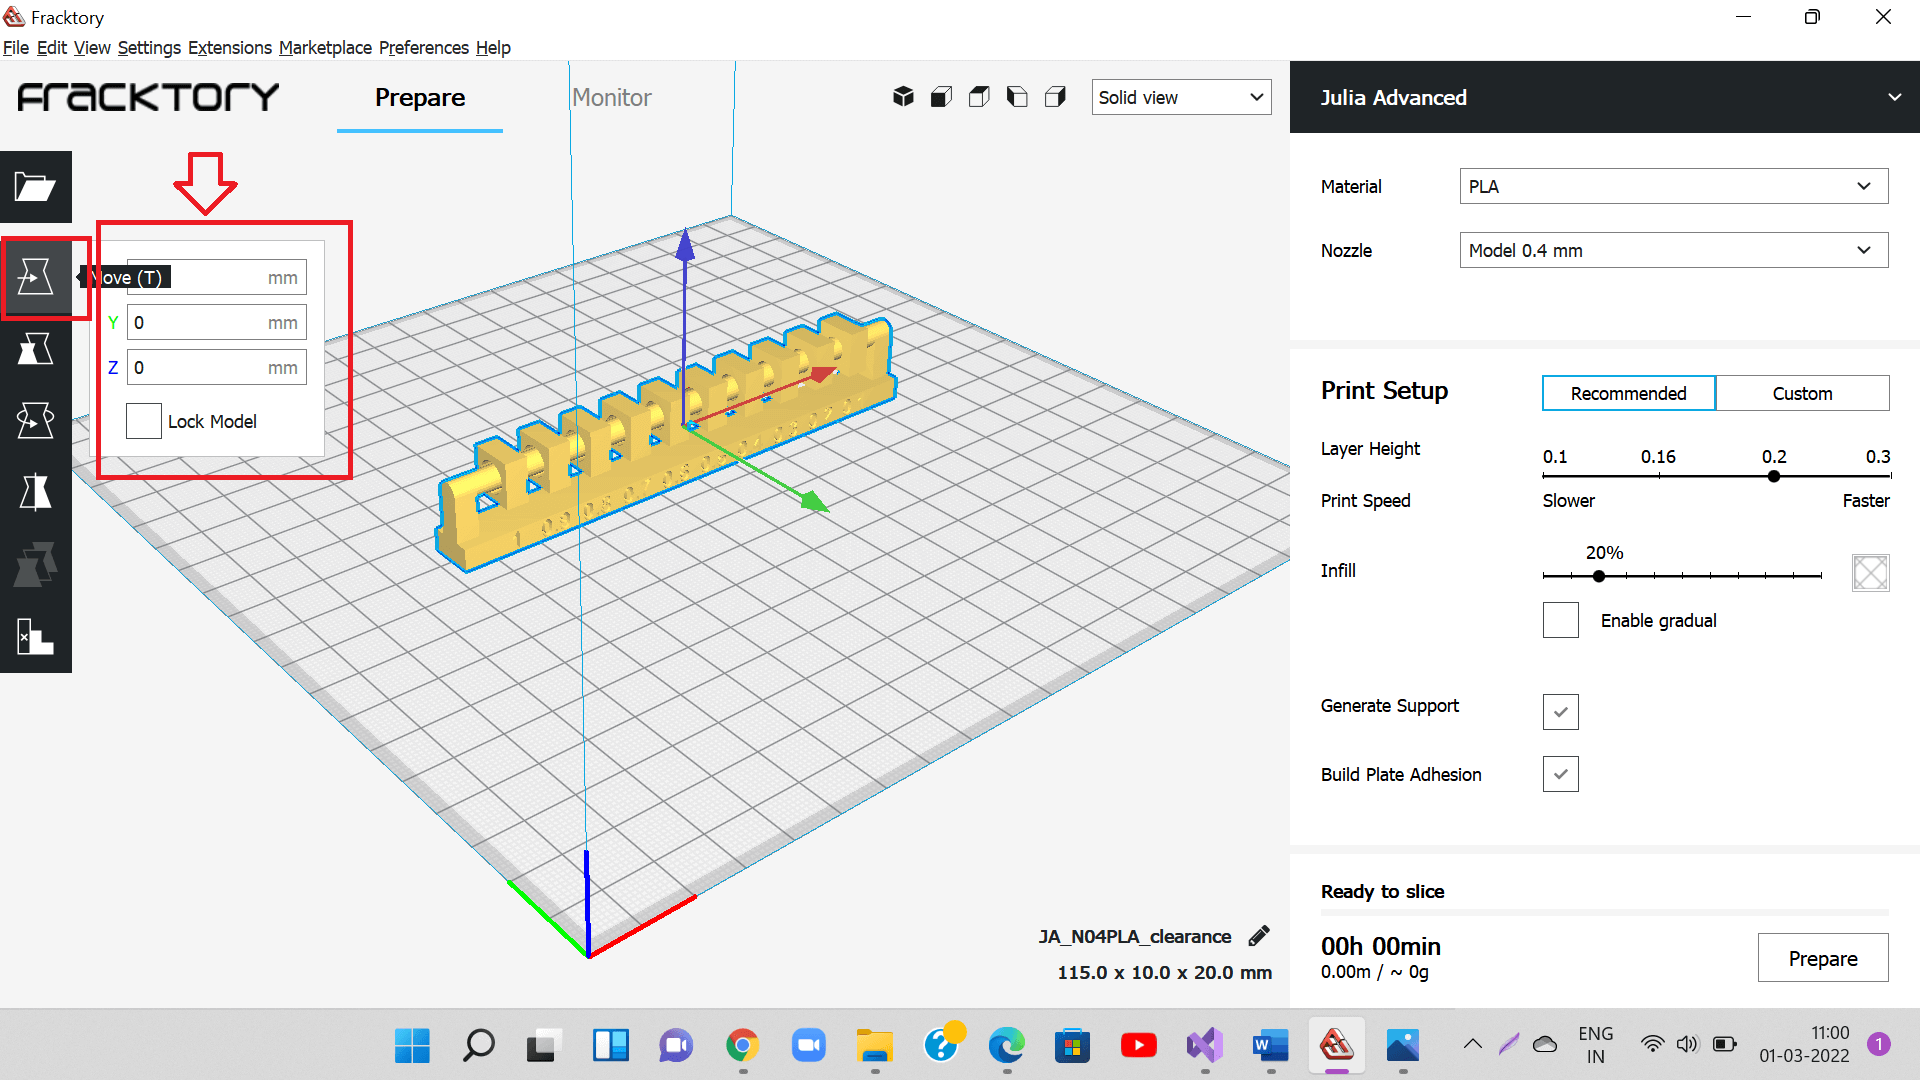
First, We downloaded STL files of all the parts including 3dbenchy for generating their G-codes. We pulled each of these STL files in Fracktory slicing software to generate G-code required for 3D printer.
 |
 |
Then, we called in STL files of other parts one by one. We used move and rotate buttons to move parts to the desired location on to the machine bed.
 |
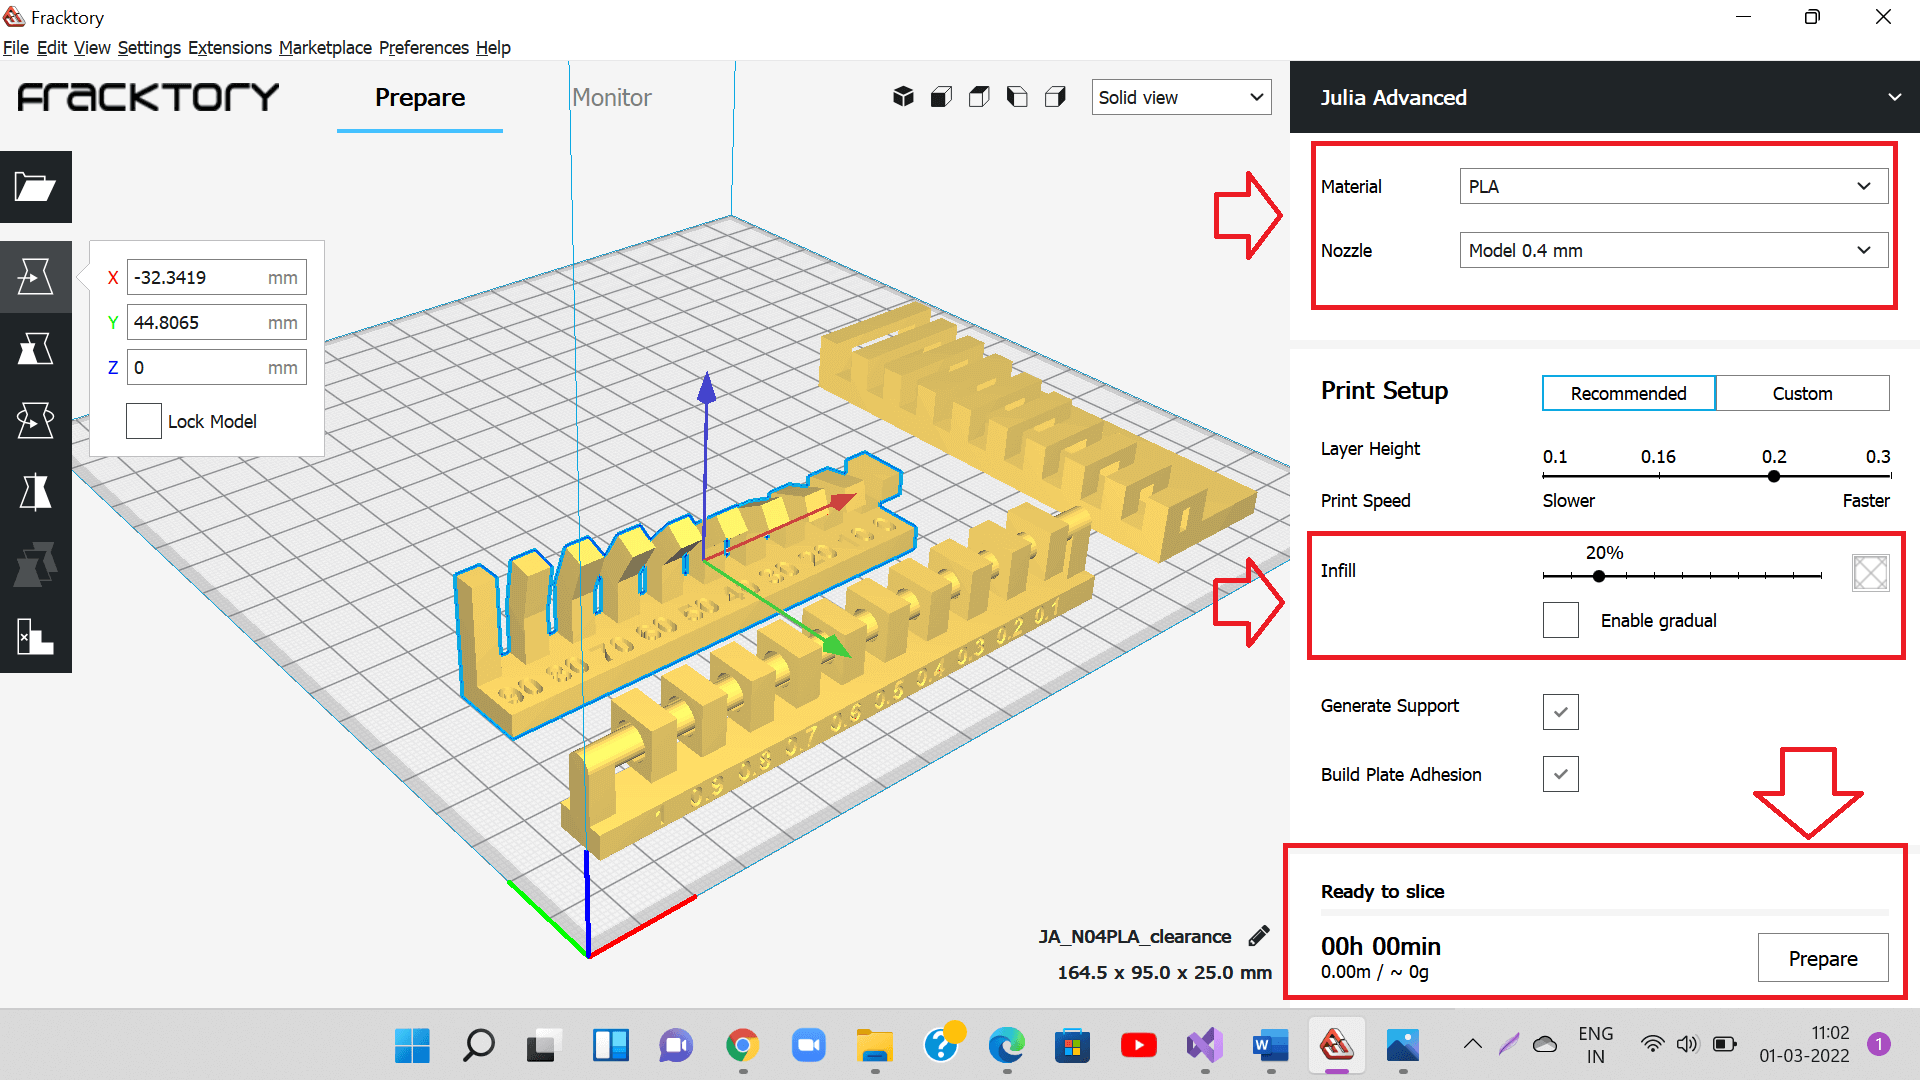
We chose PLA as a material inside Fracktory, 20% infill, selected nozzle diameter to be 0.4 mm as that of the machine. We clicked 'Prepare' button to generate the G-code for the job.
 |
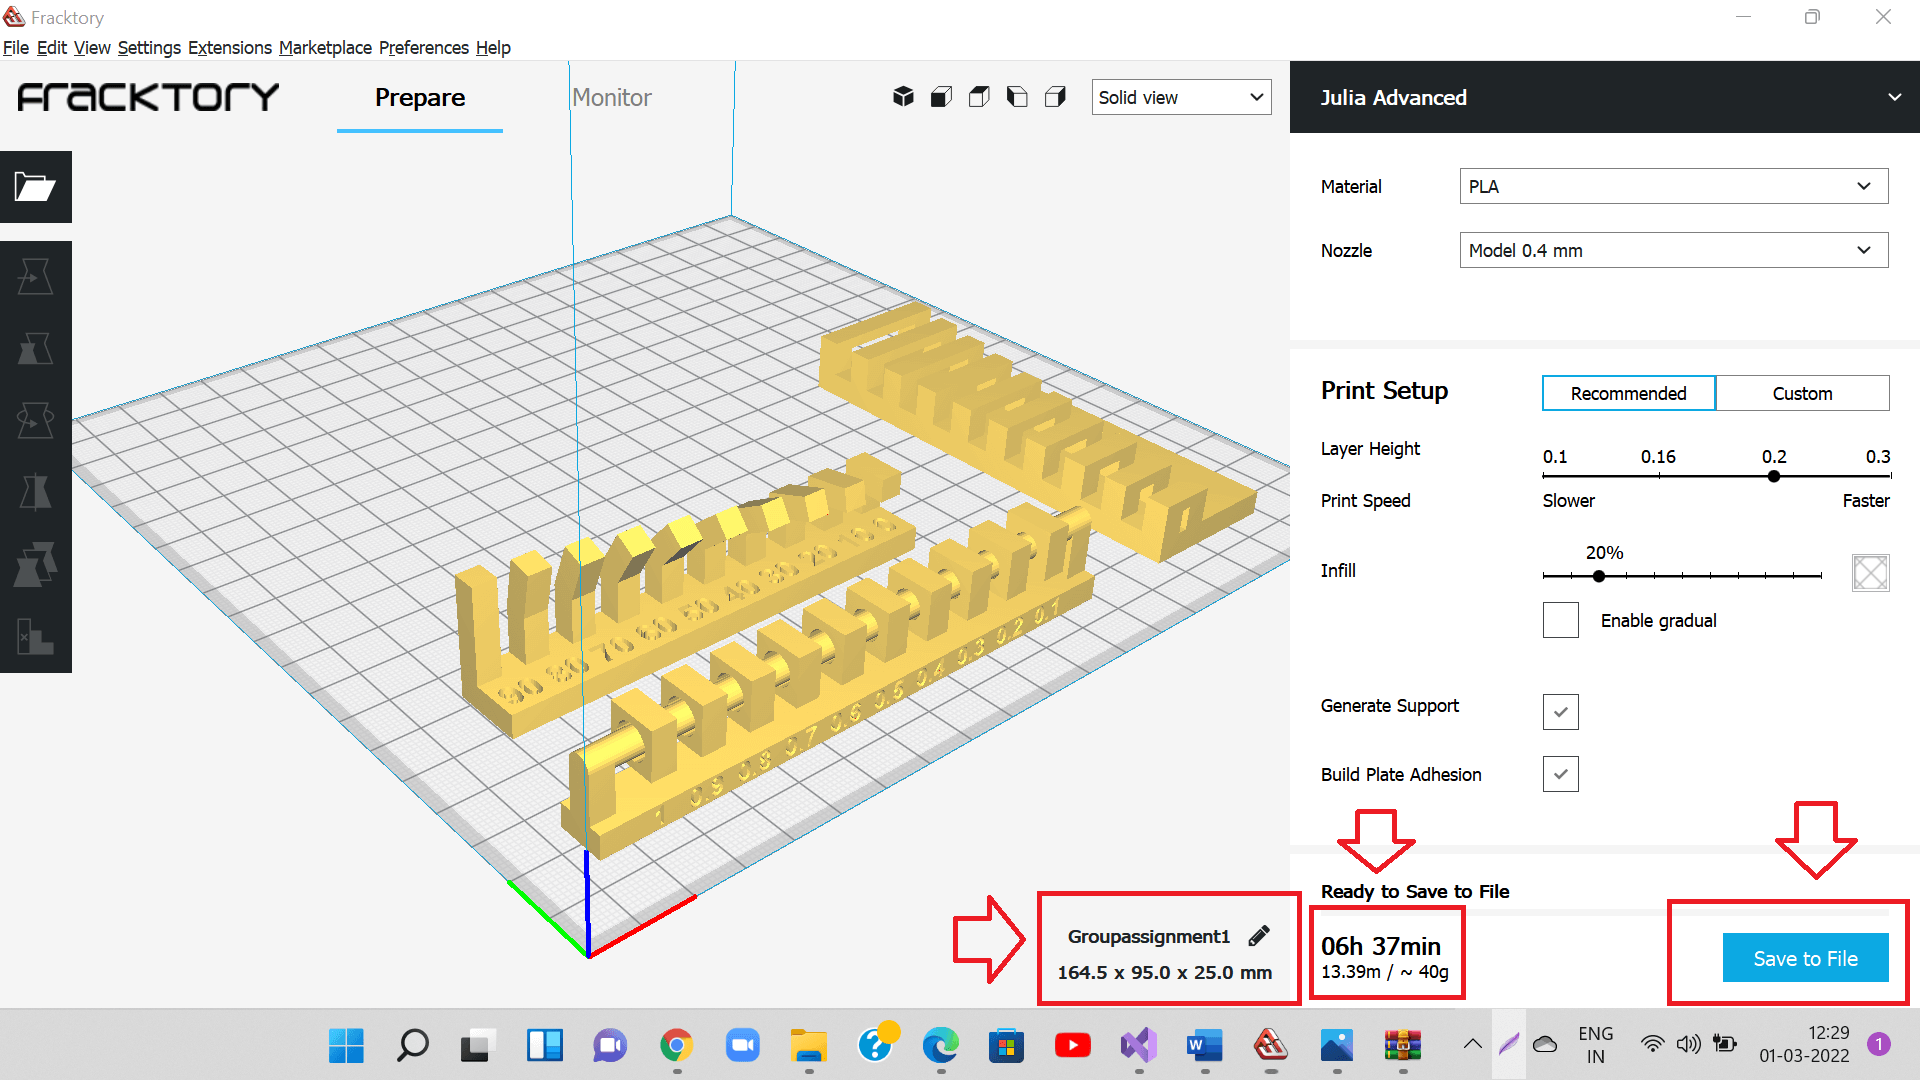
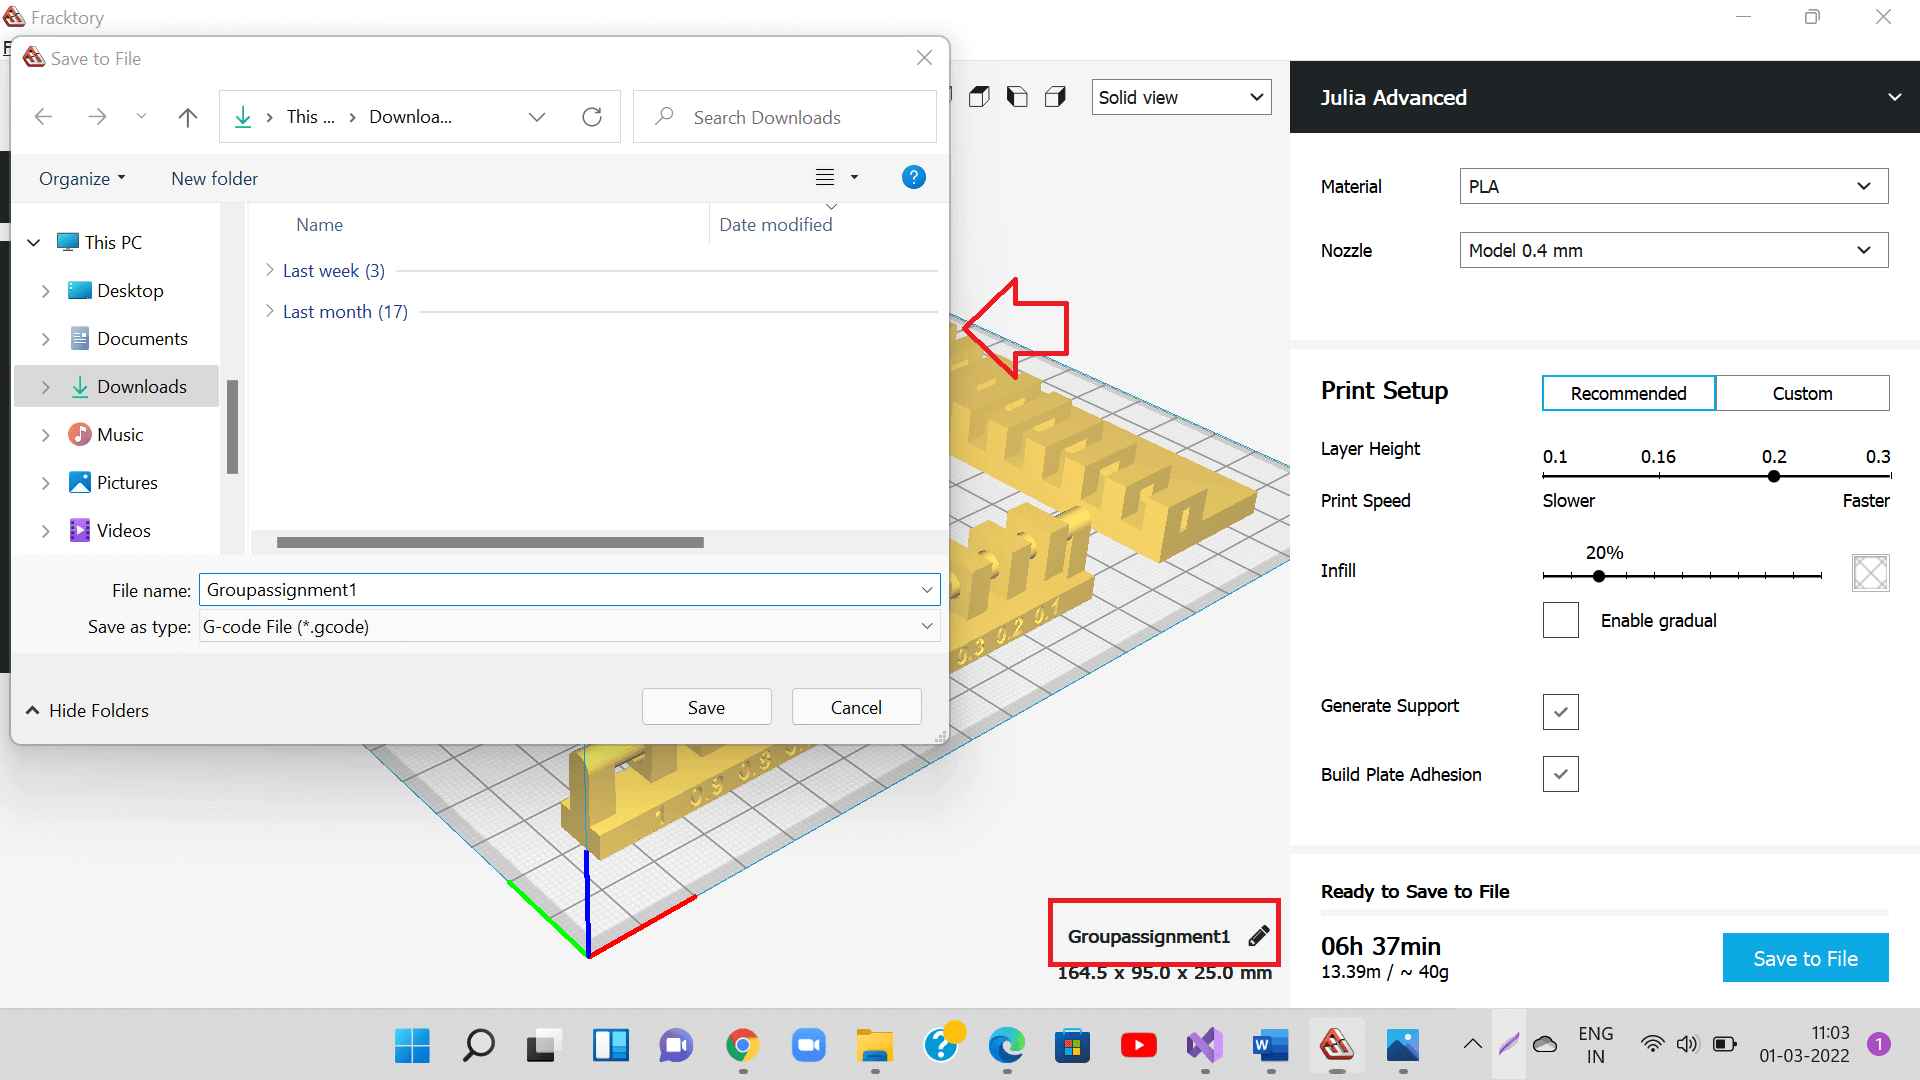
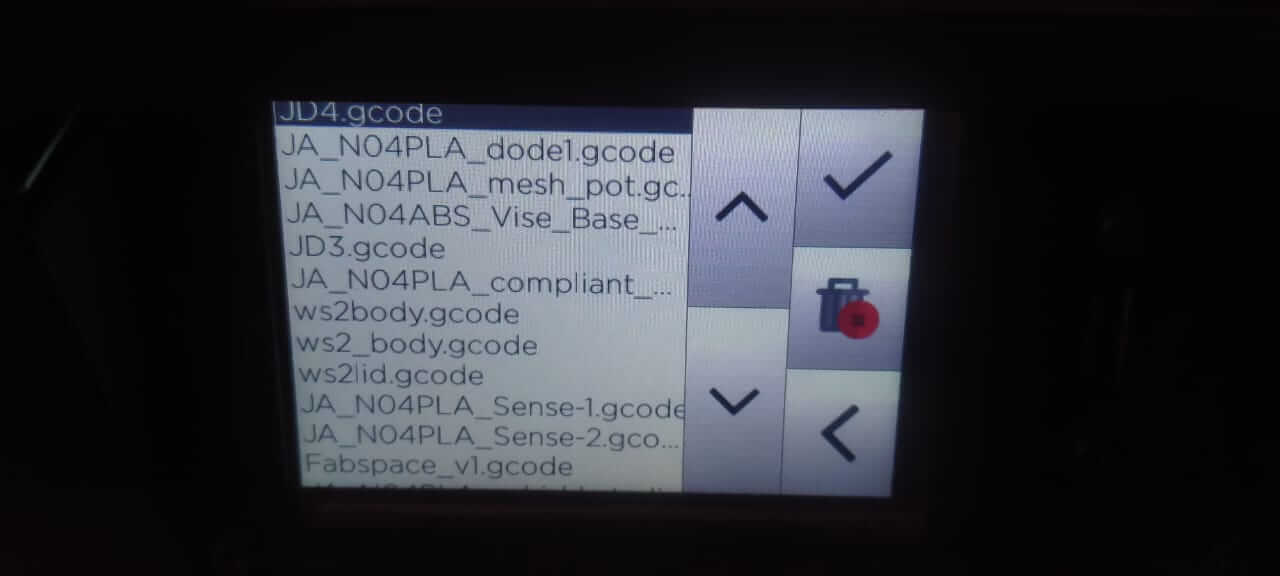
We renamed the G-code file and saved/sent it to removable disk to be able to take the code to the 3D printer. We thus generated G-codes for all the group assignment parts.
 |
 |
Setting up the 3D Printer
After the G-code file was generated, it is time to set a job on the 3D printing machine through a control panel. Following are the steps we need to take for setting up the printer.
 |
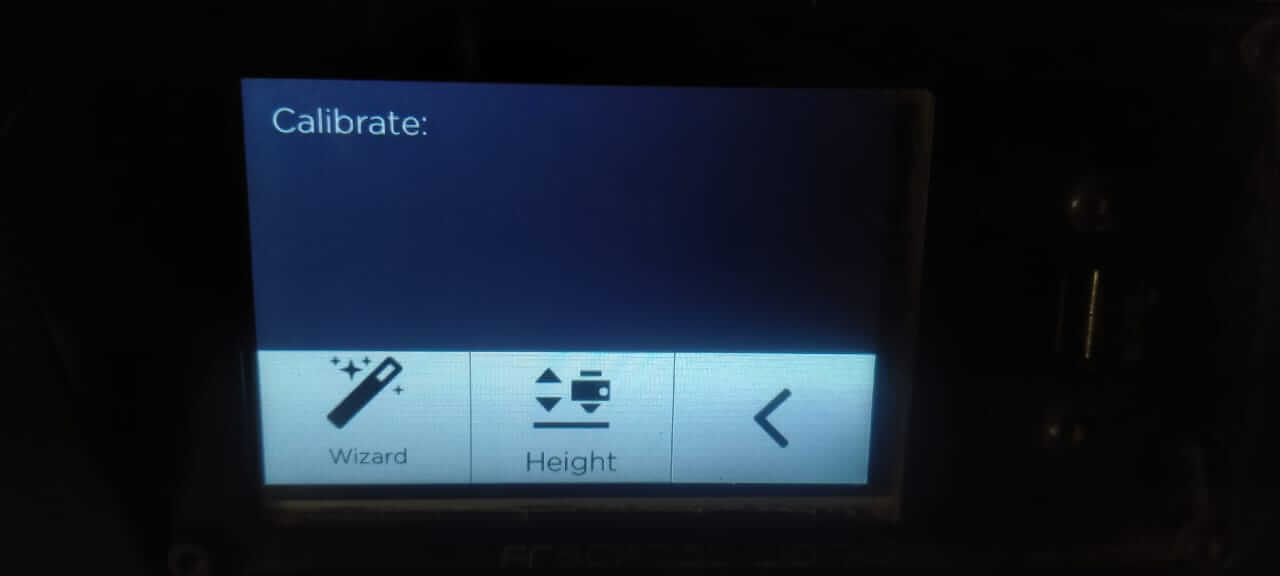
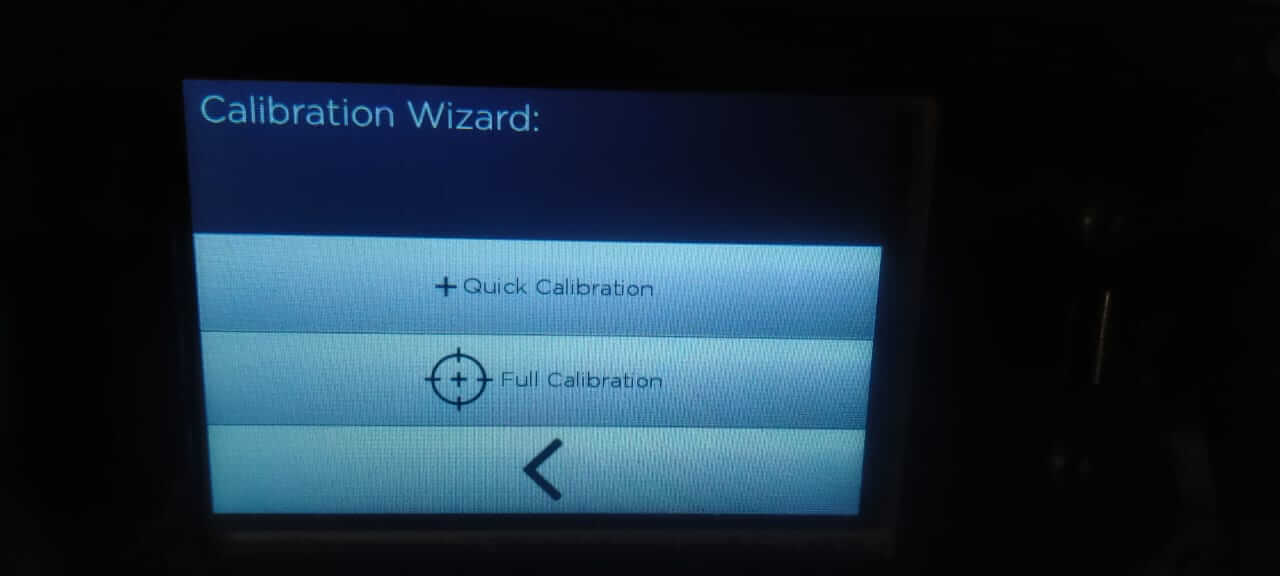
Calibration of the machine is important to set-up the bed perfectly flat with respect to the nozzle head. The quality of the printed job, surface finish, uniform printing, etc. are dependent on machine table being perfectly parallel and calibrated. One can do quick calibration (3 point resting) or full calibration (3 points plus 9 points resting).
 |
 |
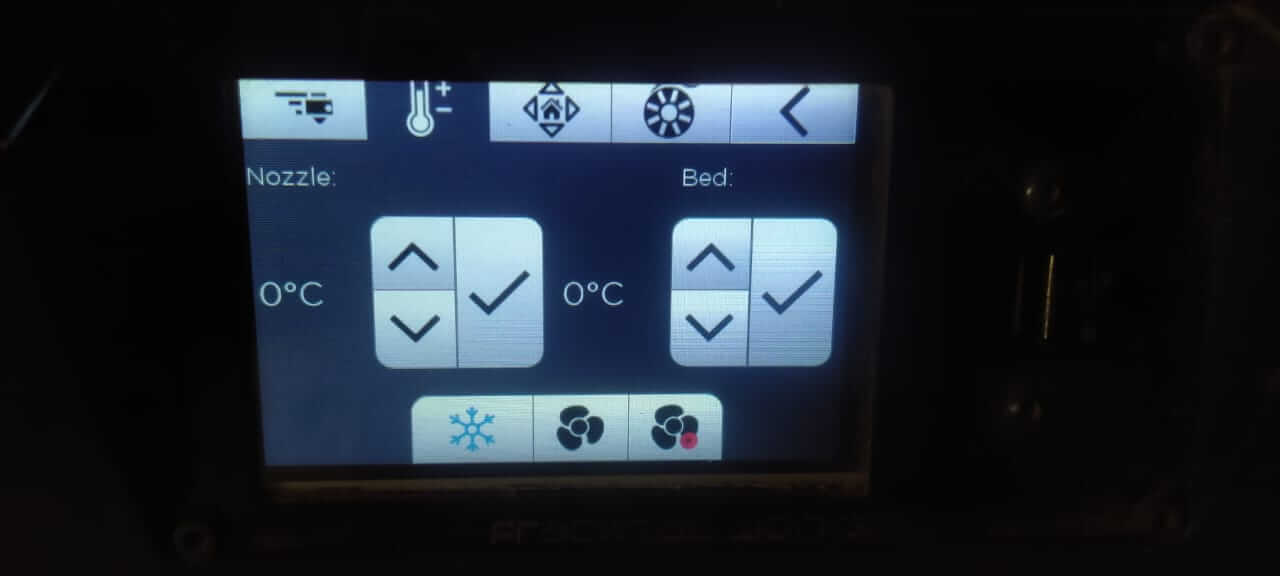
We can set-up temperature of the nozzle and bed from the control panel. However, it can also be set-up through G-code. The slicer software automatically selects these values based on the material selected for printing.
 |
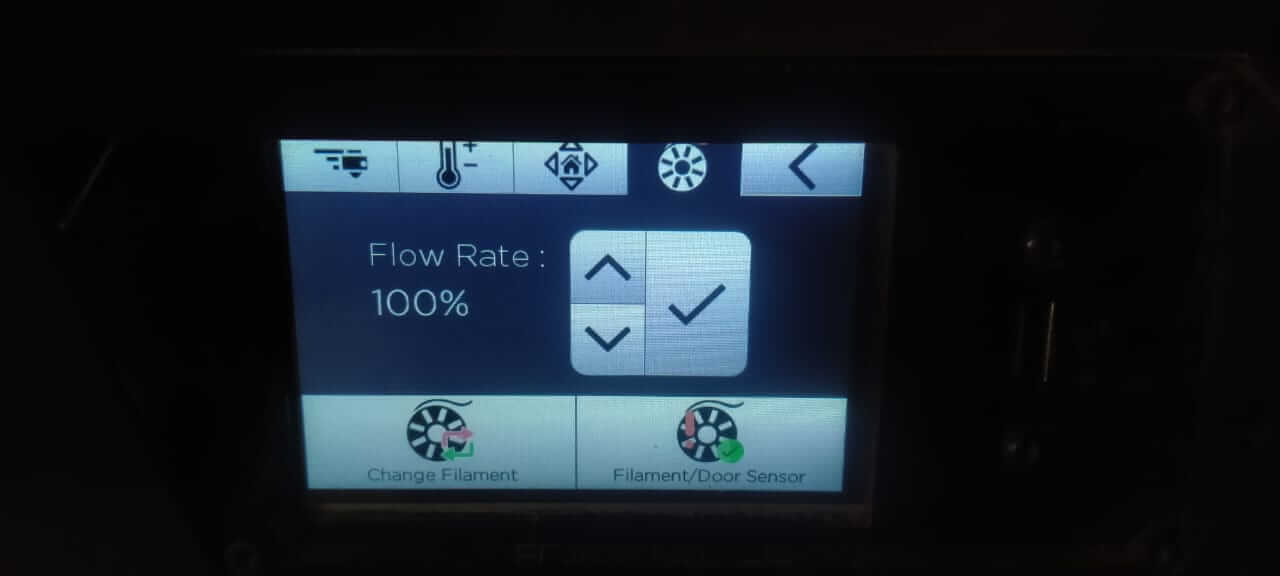
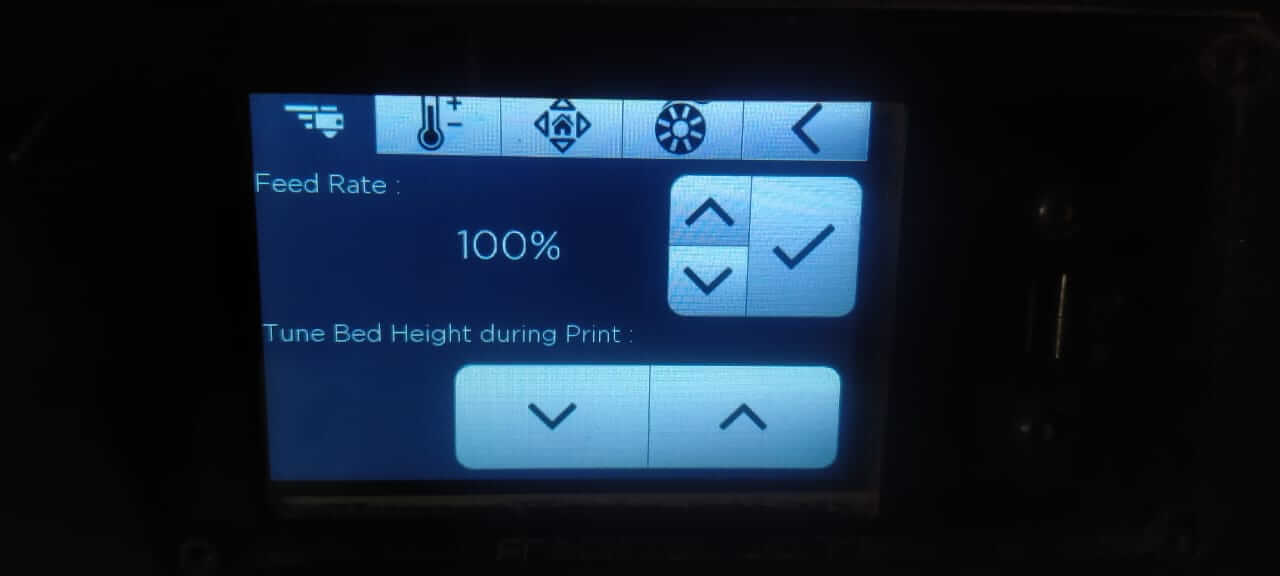
We can set-up flow rate and feed rate of the machine from this wizard.
 |
 |
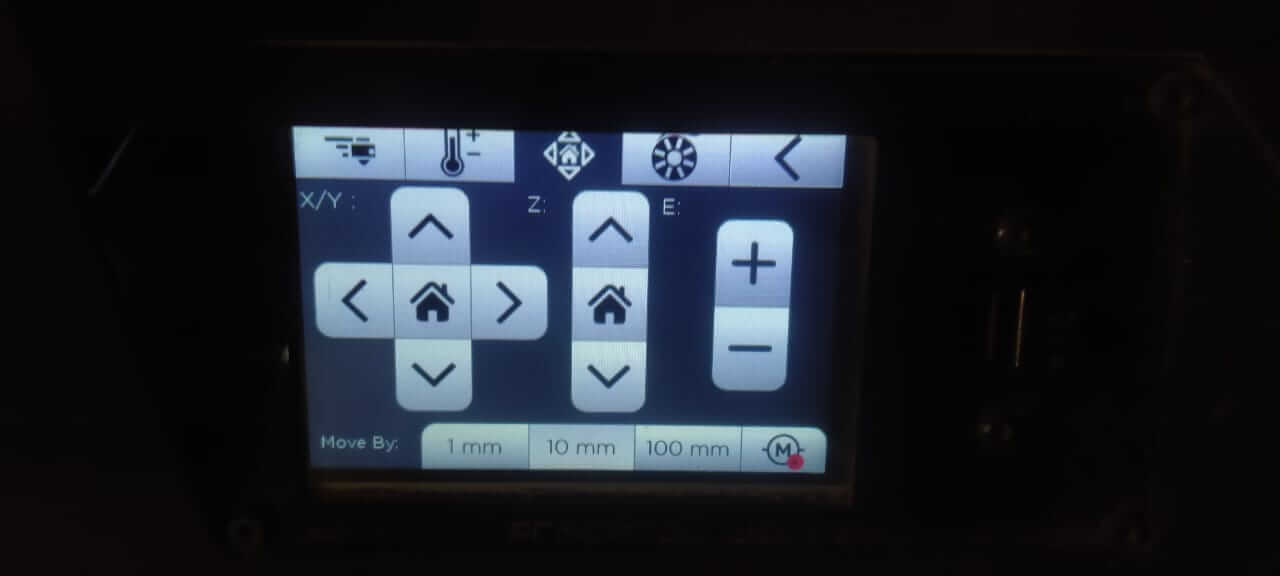
We can move the head in X and Y direction and move the table in Z direction usins these buttons. We can take the nozzle to home position as well. There is a provision to start the extrusion of the filament in both forward and reverse direction. Forward extrusion helps us to know if the nozzle is heated enough and nozzle is clear to start the extrusion when actual printing will start.
 |
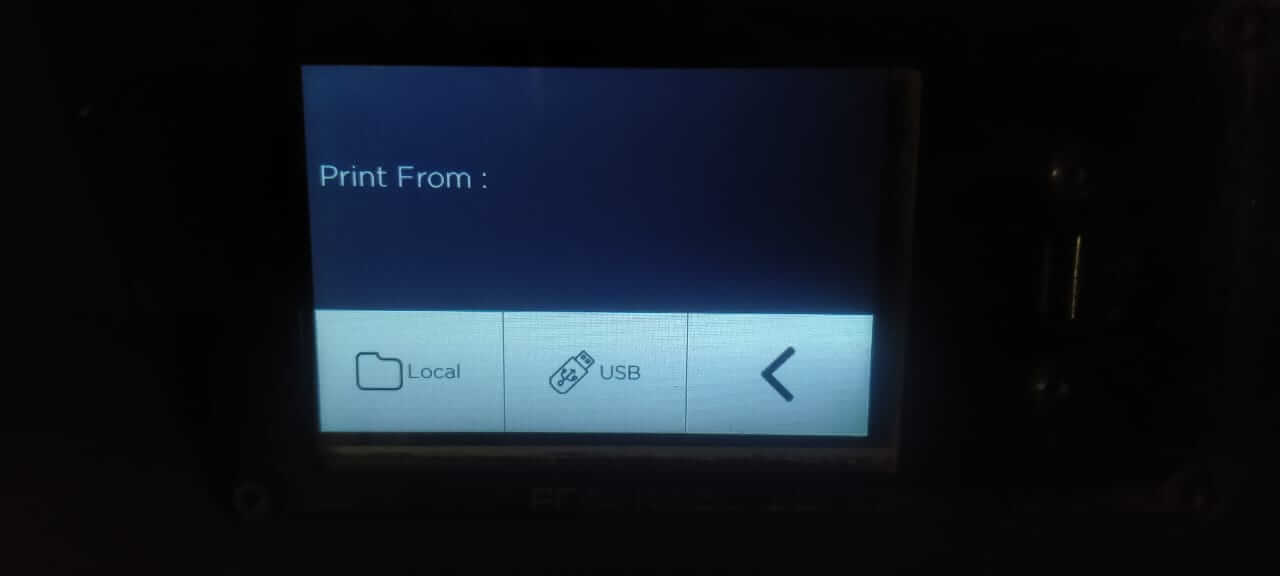
Once all the set-up is done, we can start printing. We can print directly from the USB drive or save G-code locally and print. We can also set-up machine to print through wireless connections.
 |
 |
We used PLA for our job. After setting up our 3D printer with Nozzle temperature as 210 deg C and bed temperature as 60 deg C. Following are some pictures and video of our final job we printed to test the design rules for our in-house 3D printer.
 |
 |
 |
 |
 |
 |
 |
 |
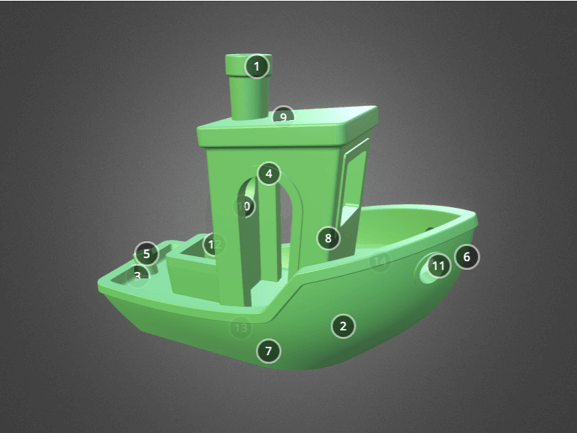
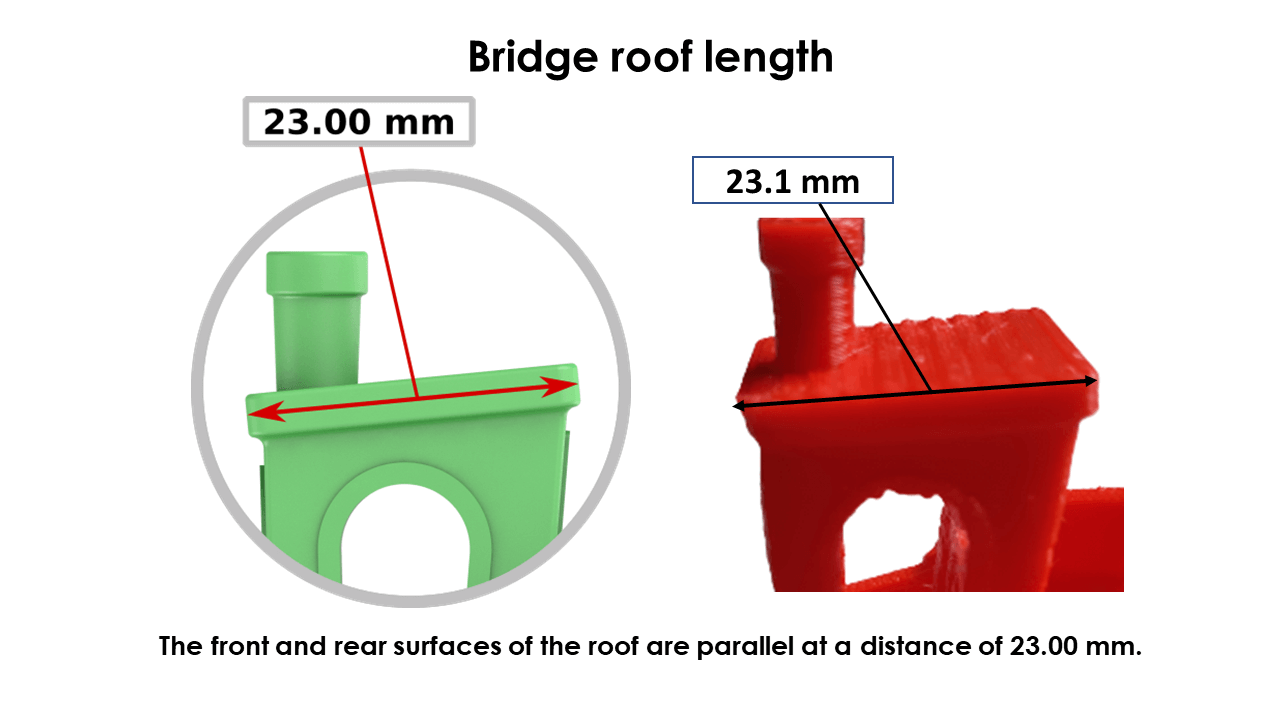
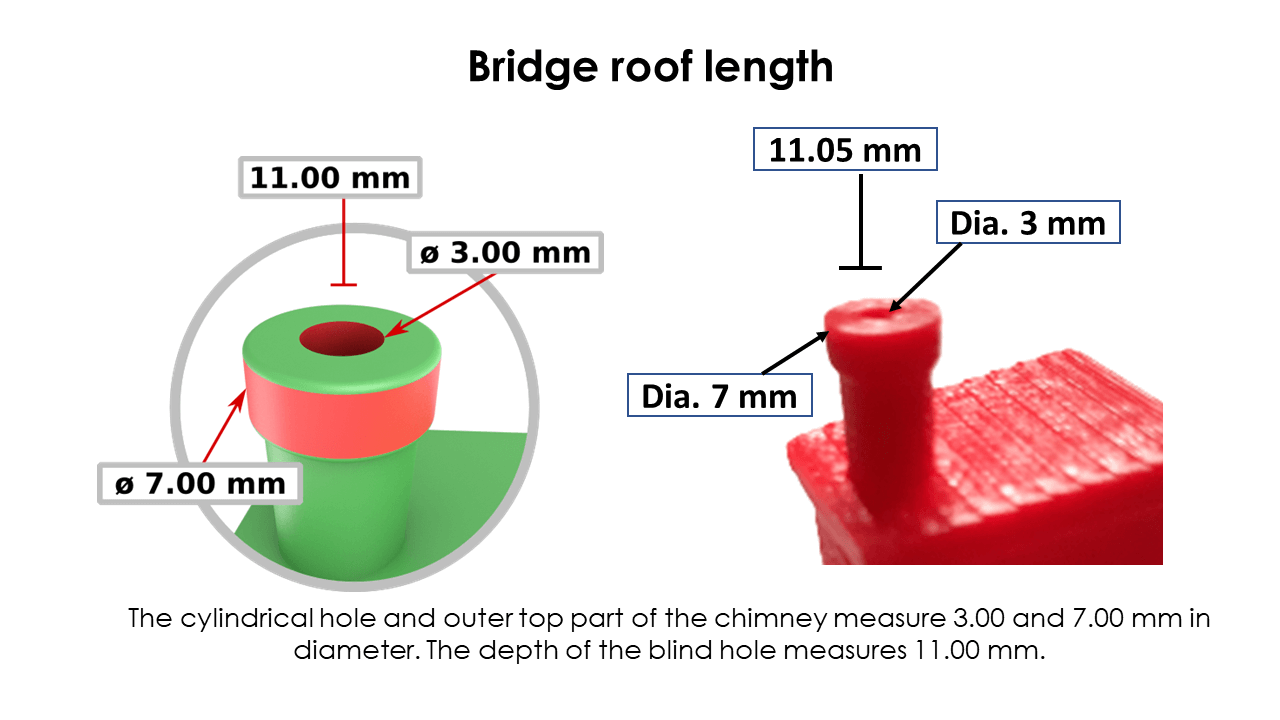
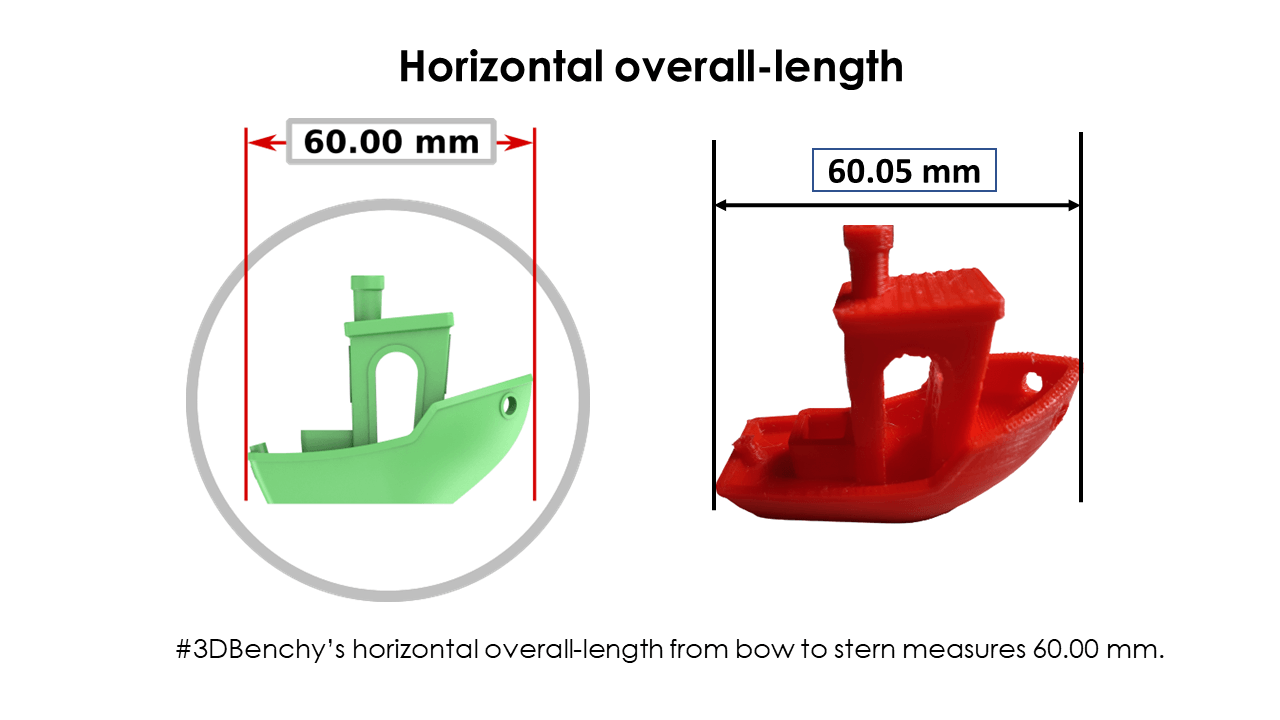
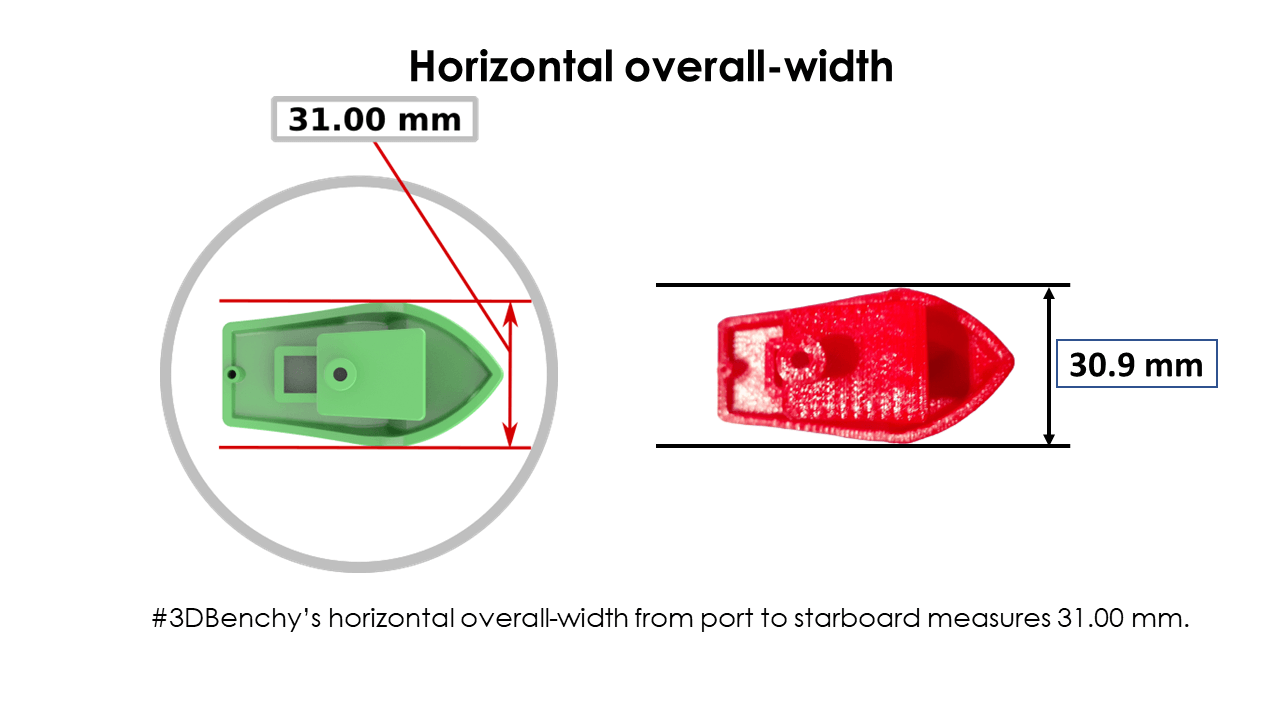
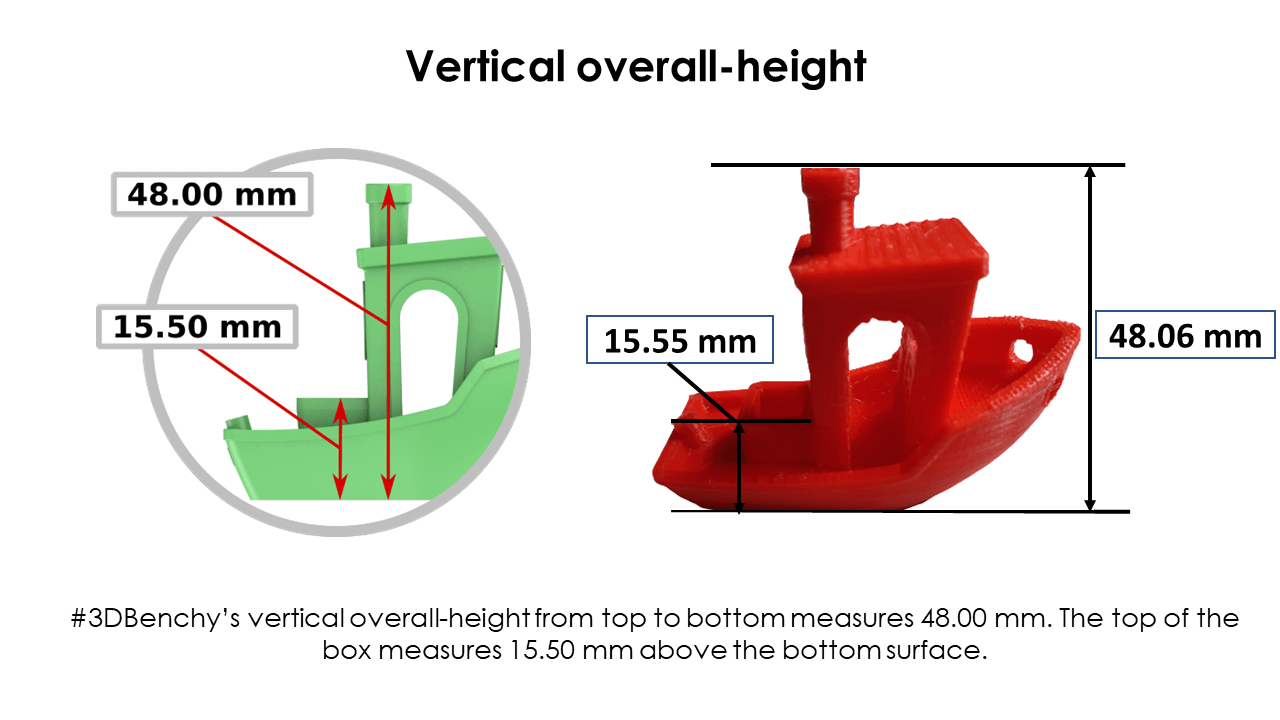
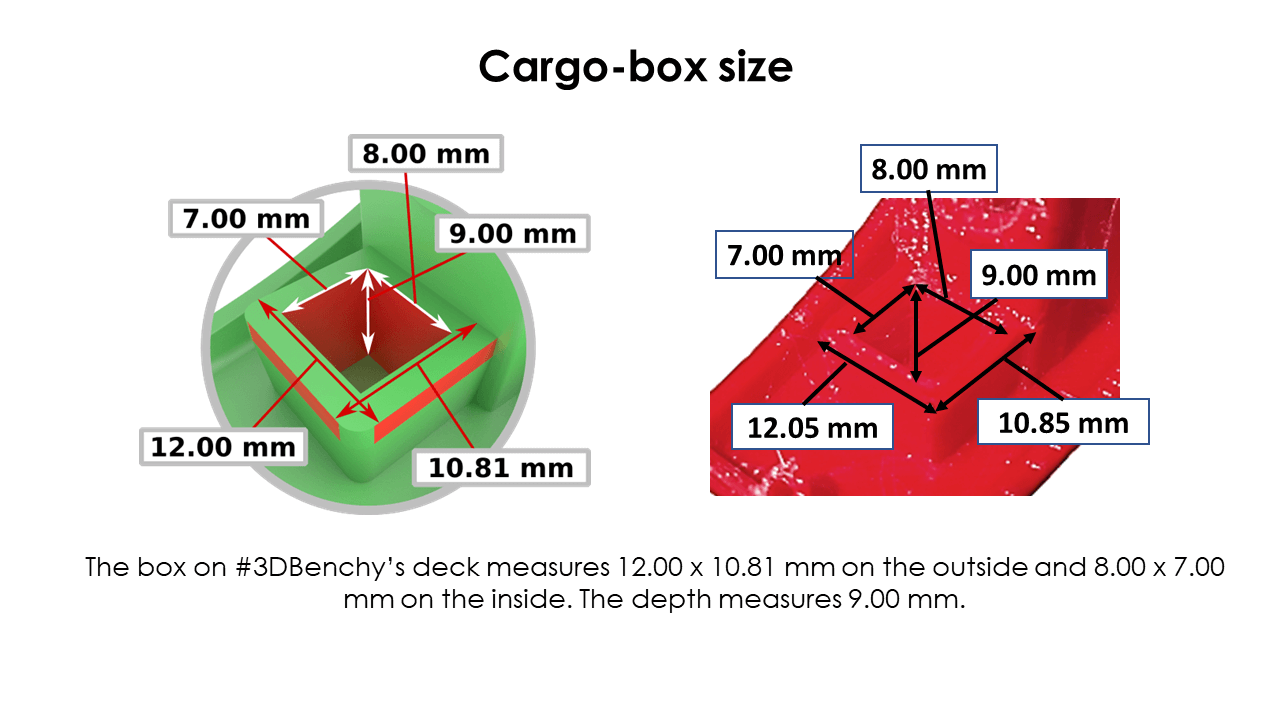
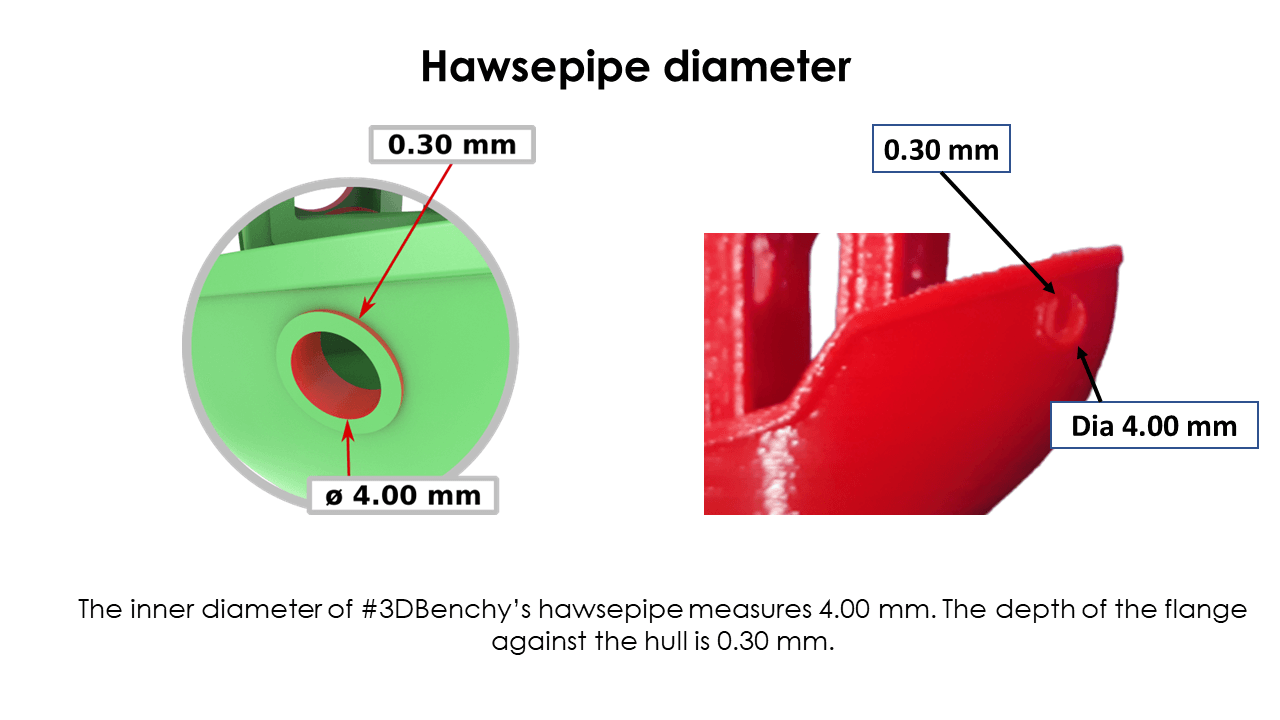
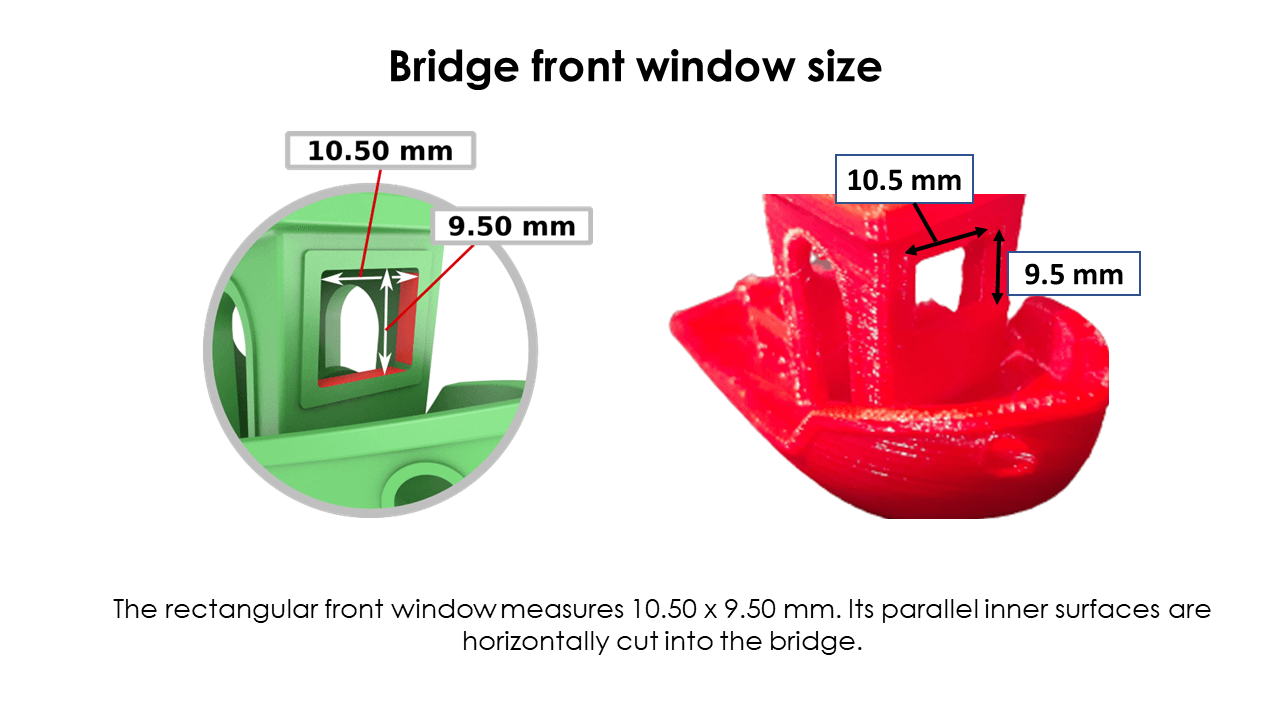
Following are our conclusions from 3dbenchy. Below are pictures of our 3dbenchy with measurements, comparison of these dimensions with the dimensions given in the original 3dbenchy file.
 |
 |
 |
 |
 |
 |
 |
 |