Week 3: Computer-controlled cutting
Group assignment: Characterizing the machines
Characterization of the laser cutter: link to Pedro Chana's description
Characterization of the vinyl cutter: link to Esther Pizarro's description
Wazer desktop water jet description
At fablabUE we are lucky to have the Wazer, a desktop water jet machine.

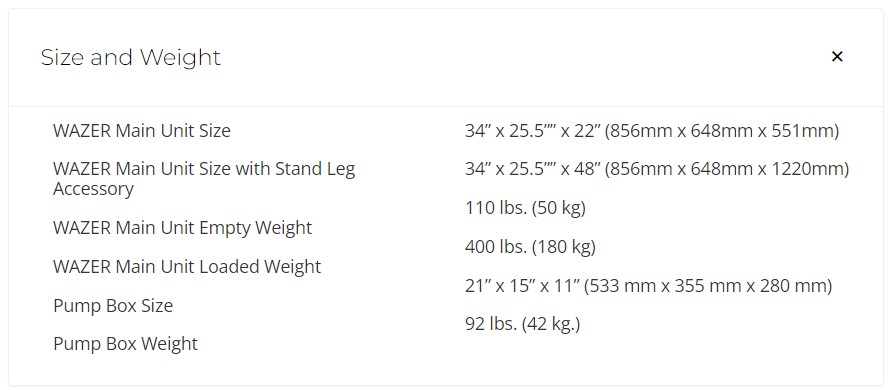
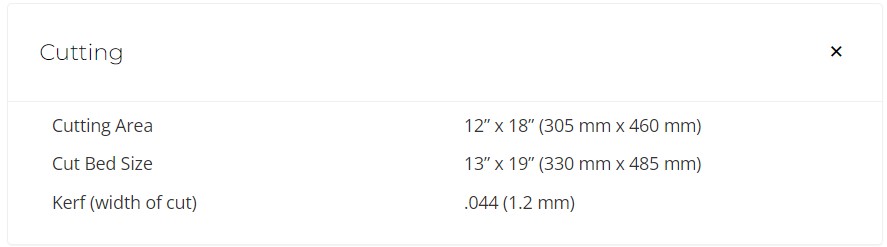
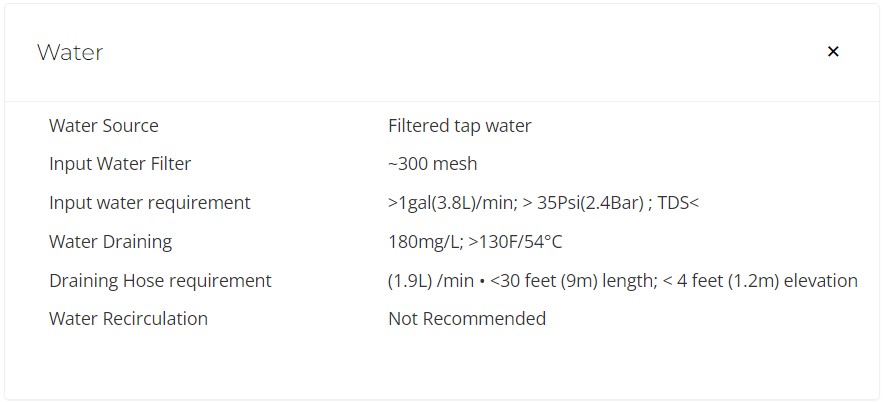
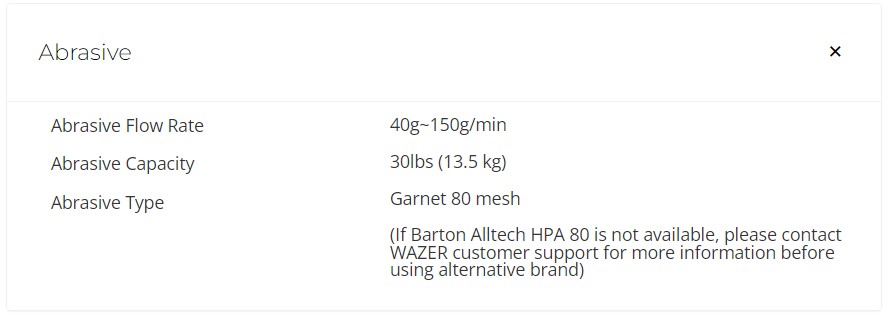
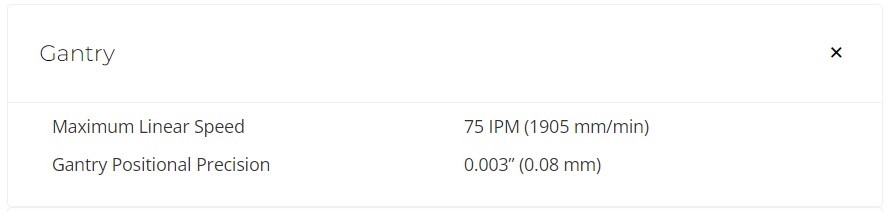
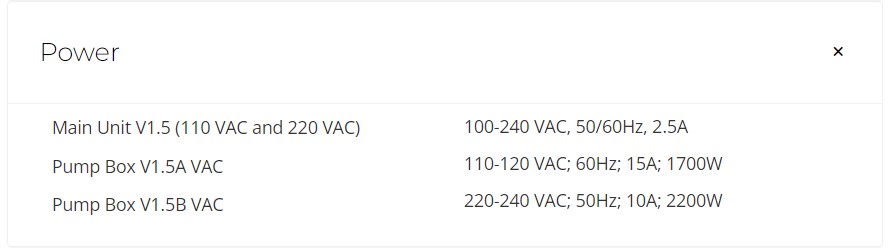
Wazer specifications
Wazer setup
- Check that the water supply is ON.
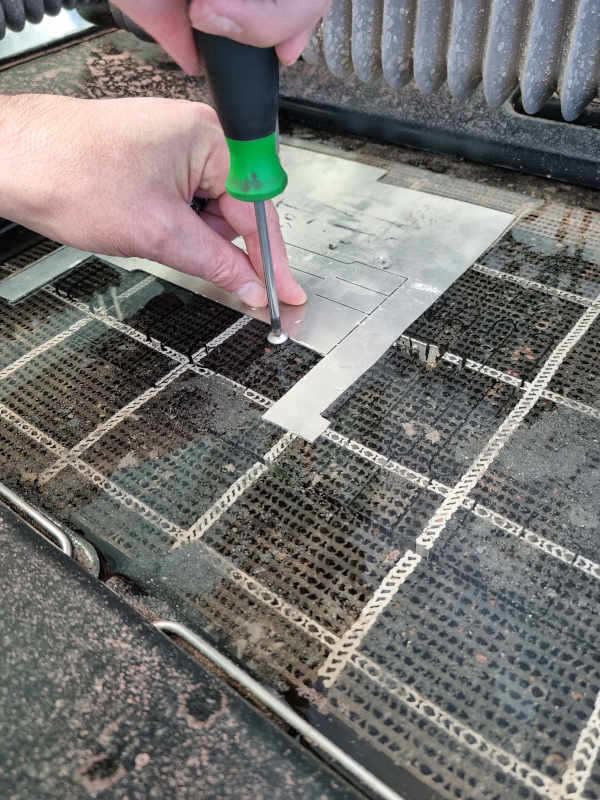
- Fasten the material.
- Make sure the material is large enough to cover the piece you are going to cut.
- Align with the top left corner.
- Fasten the material with screws.
Setting noozle height
- Grab the nozzle height tool
- Place on top of the material
- Release the nozzle
- Put the nozzle on the top of the tool
- Tighten the nozzle
Final check. Before cutting you can use one of these features:
- Check cut extents (the nozzle moves following extents)
- Dry run (it does the path without water)
- Move origin
- Restart cut
DO NOT OPEN THE DOOR
- If Wazer is running
- Until the water is off and nozzle stops
- Until you are sure the cut is cancelled
Creating cut files
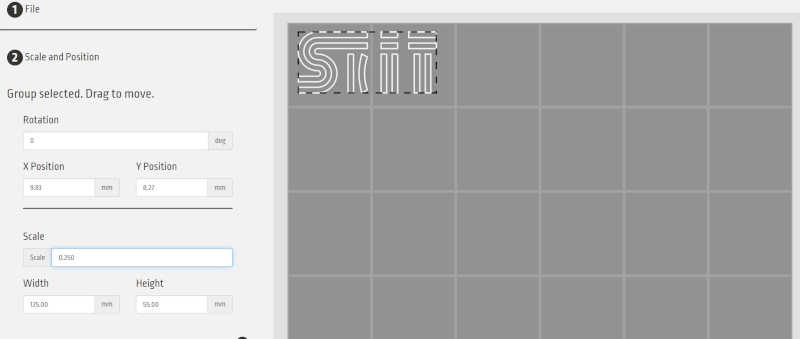
WAM is the tool to generate the gcode files for Wazer. Sequence in WAM:
You have to upload the file in dxf or svg format. You can scale and set position.
Select the material and the cutting path
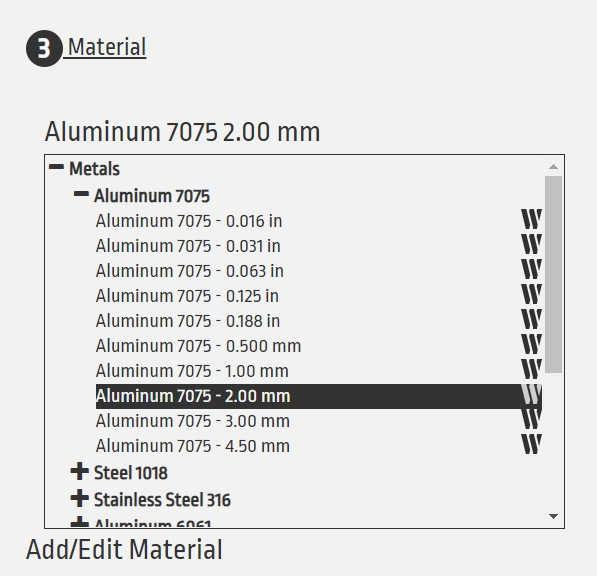
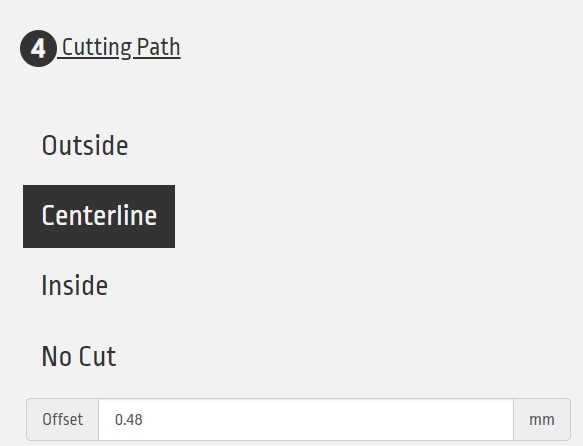
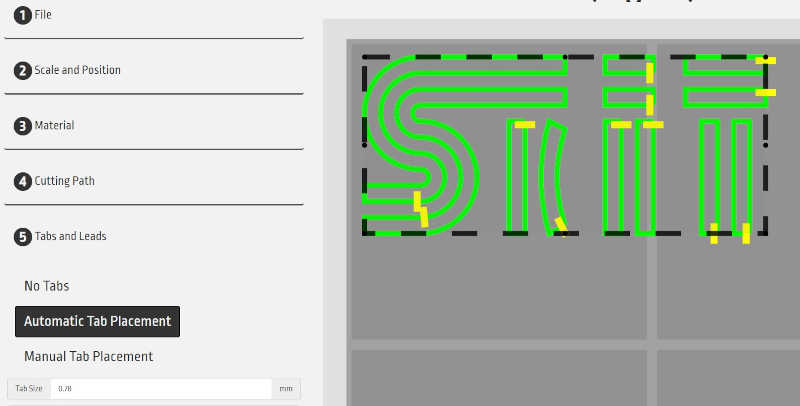
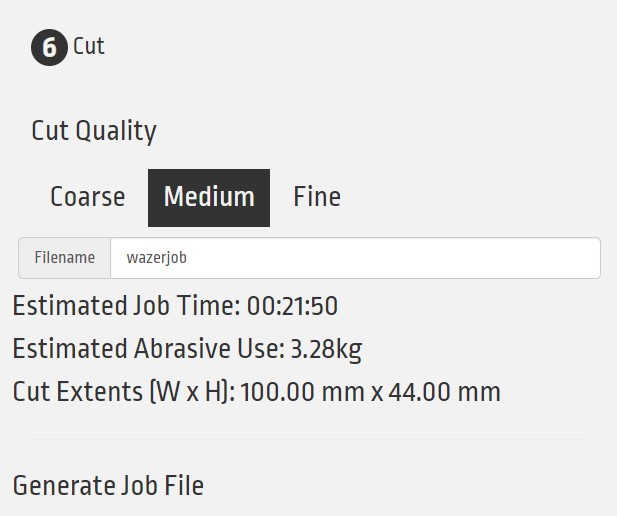
It's important not to have loose pieces of material on the machine. So the program automatically set some tabs to fix the pieces. You can also add some tabs if you consider so. Finally you select the cut quality.
Time to cut
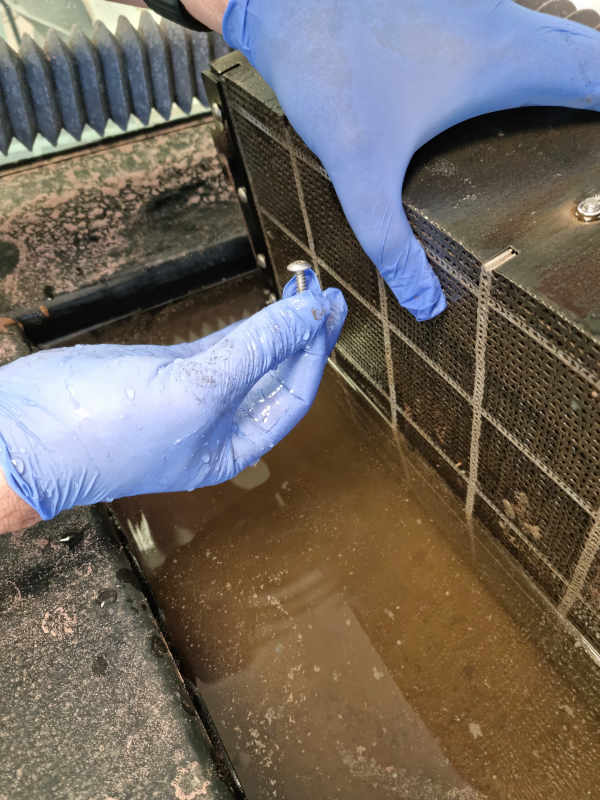
We followed all the steps described above, and when I was screwing the material to the bed, a screw dropped to the bottom of the tank. The tank is filled with water, and there is no easy access, we try to get it with various pliers, but we couldn't. So we have to take the bed out to get the screw (Nice way to learn more about the machine...).

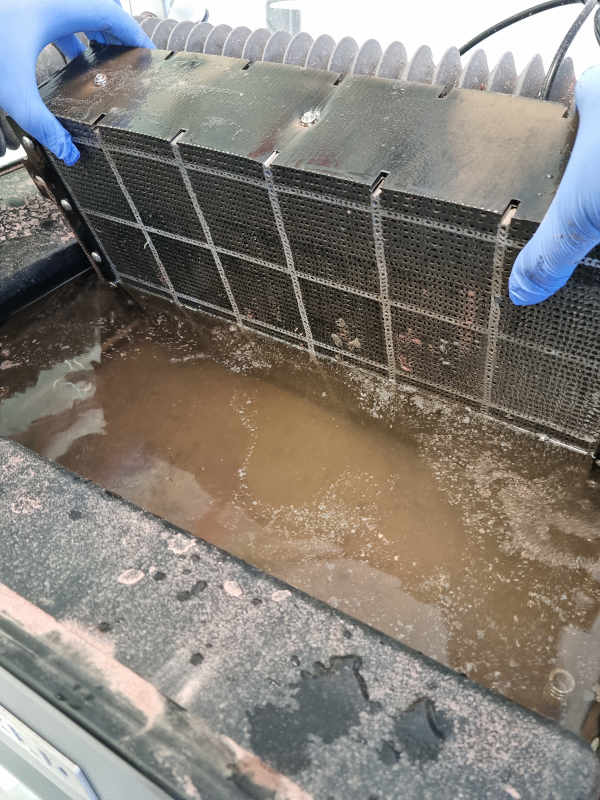
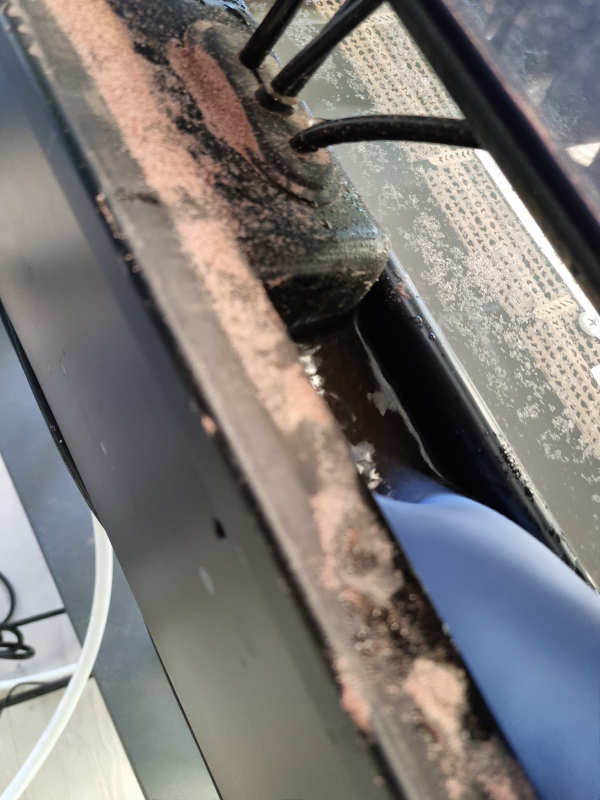
Then we finally fasten the material and the Wazer started cutting. We were happy watching the process when the machine suddenly stops with an error message:
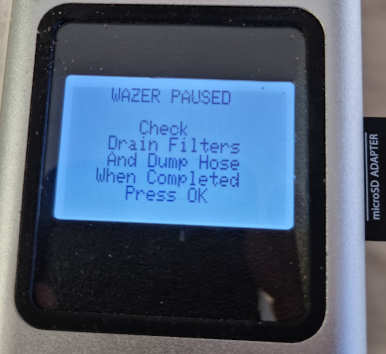
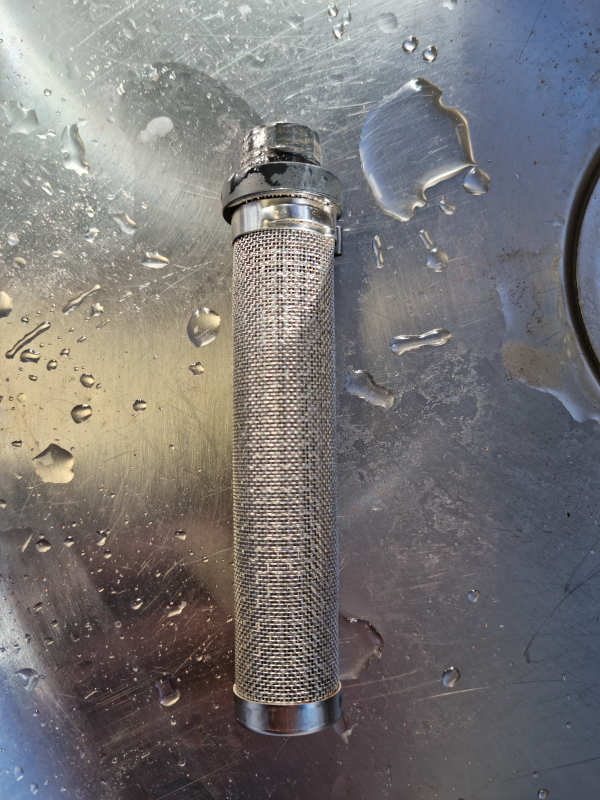
So again we had to put the gloves on to get the drain filters and clean them.
After that Wazer restarted:

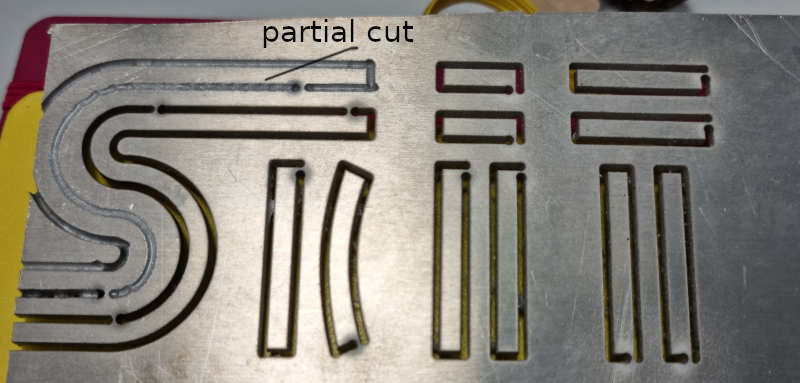
We finally got a nice cut of the piece, but it began to partial cut at the end of the process. We discovered that we had run out of abrasive. We have put around 2 kg of it, so we discovered it takes a lot of abrasive to make one cut (3.28 kg for this cut of 100 mm x 44 mm).
Individual assignment
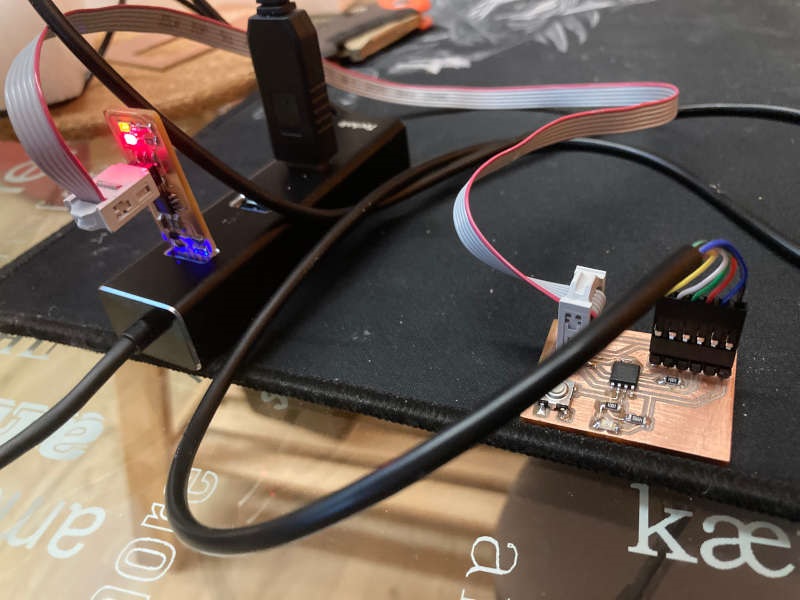
1-Cut something on the vinyl cutter
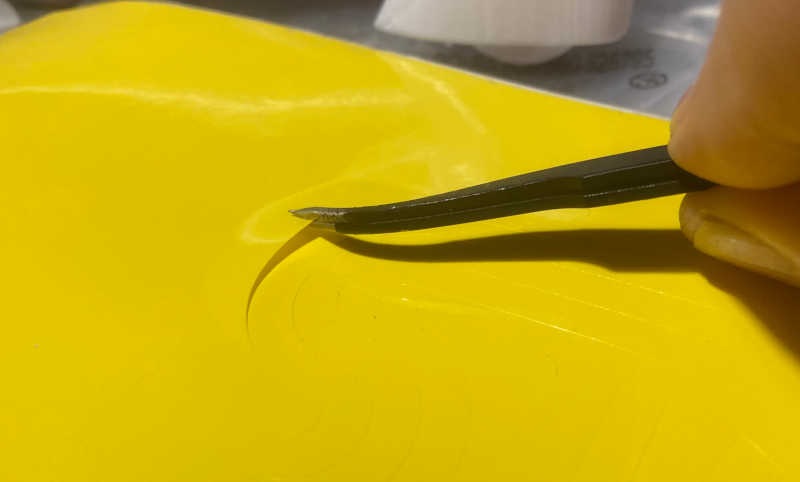
Our instructor Alberto Gonzalez showed us the way that vinyl cutter works, and when he did it everything seemed to be quite easy and straight forward. We cut the Skit logo I made the week before.
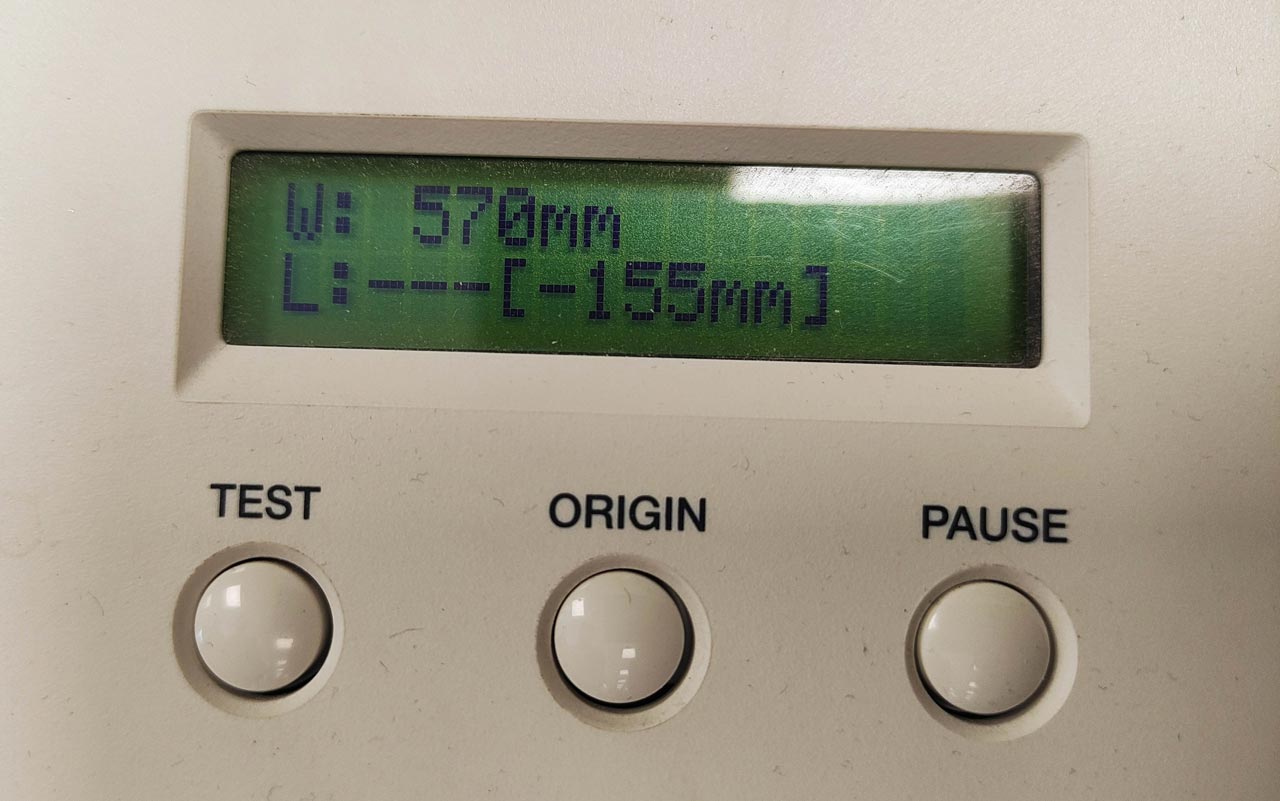
I pressed the origin button so the machine register the origin.
I set the force to 130 gr.
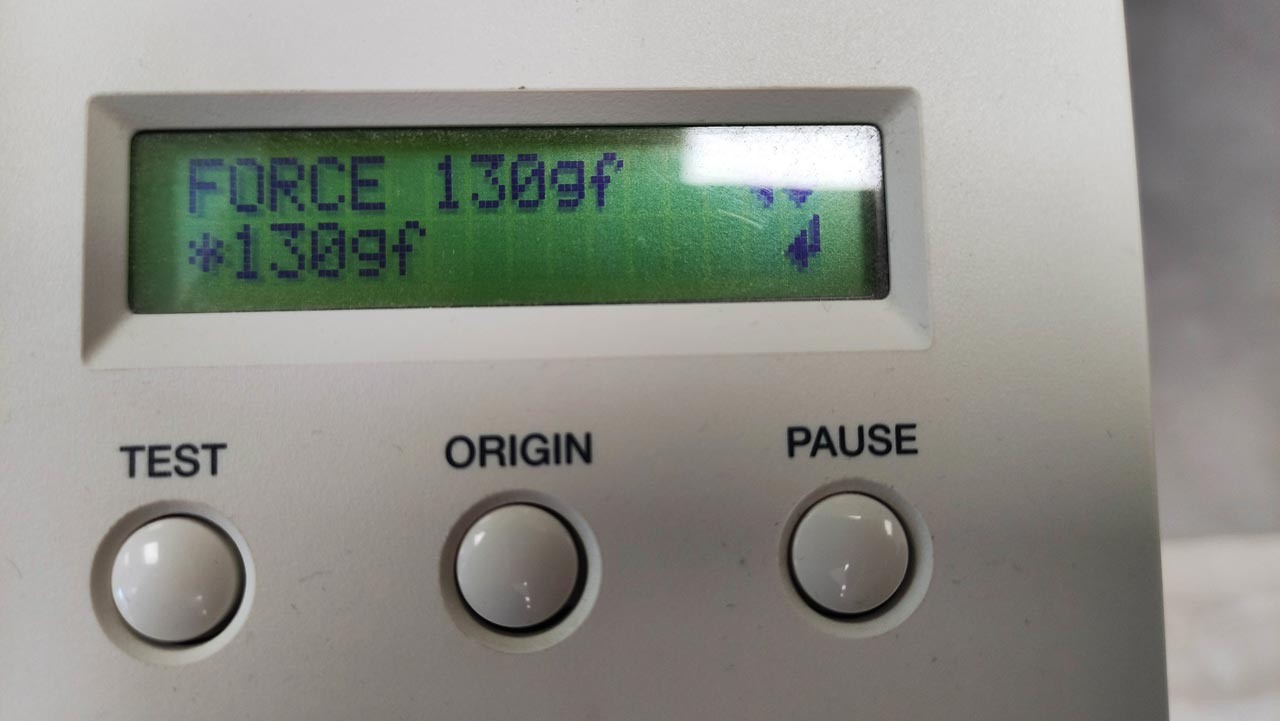
The cutter automatically calculates a width of 570 mm.
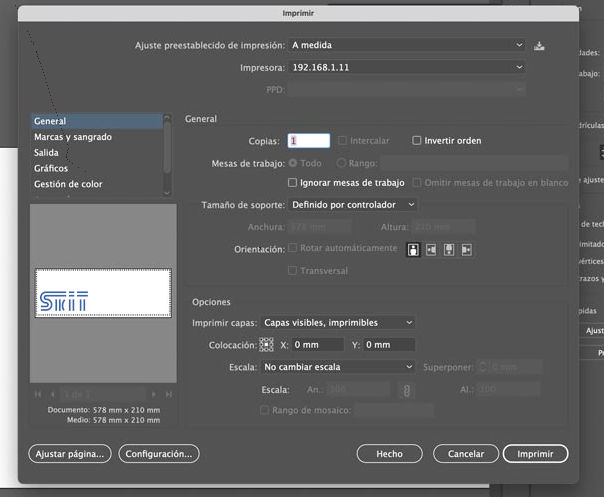
Illustrator is the software connected to the cutter in our lab, so web load the file into it.
I selected the Roland GS-24 printer to launch the file.
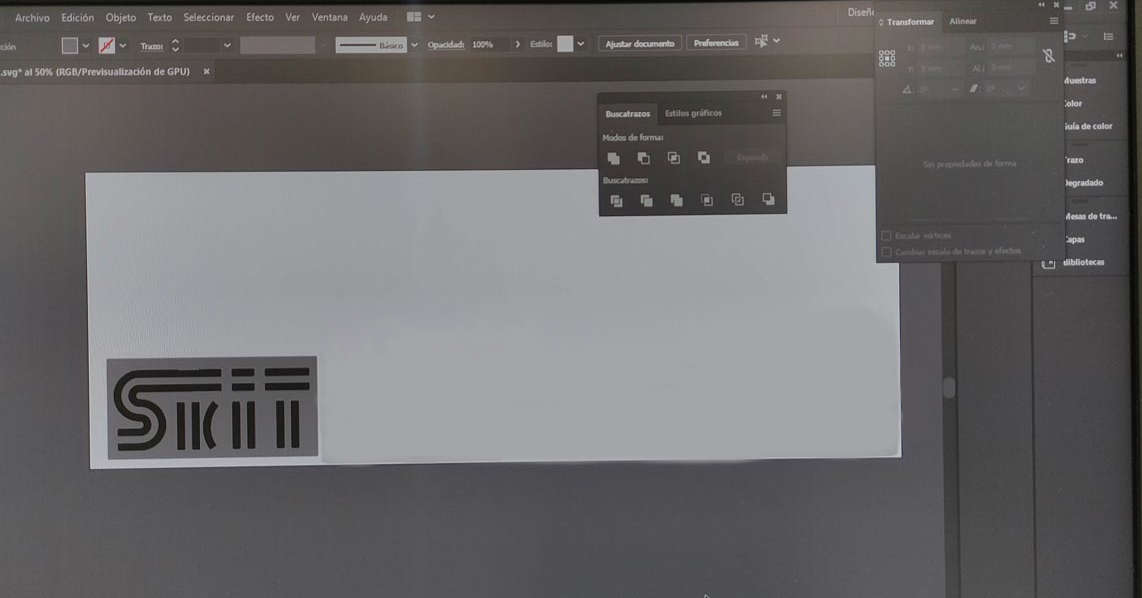
Finally I checked that the position of the logo is correct and
But when it was my turn of doing it alone, it wasn't so straight-forward. I had some problems to correctly identify the scale and positioning of the logo, and when I cut it the head of the machine was cutting over and over the same place. With the help of Alberto we discovered that my design had multiple overlapped lines. So I had to clean it, and this time everything worked as expected.

Here is the file of the new logo.
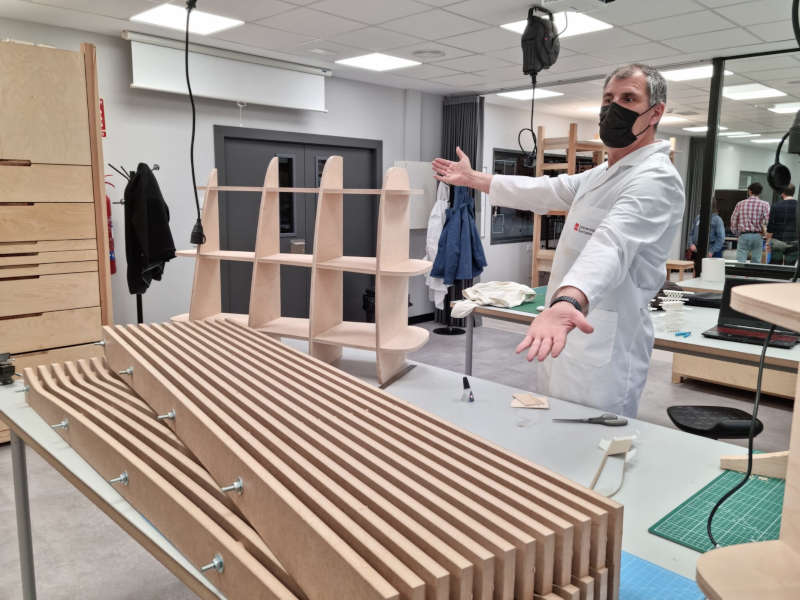
2-Design, lasercut and document a parametric construction kit
Design
If possible, I would like to apply the weekly assignments to my final project. So, I decided to make a first model of my final project, "Skit, the electric ski blade", using parametric design, cardboard, and the laser cutter. The result had to be a construction kit of the model.
My plan was to remake the model I did the last week, doing it parametric, and That's quite intuitive using the "Change parameters" option in Fusion360. I sketched some of the parameters I wanted to include: length, width, radius of gears and motor.
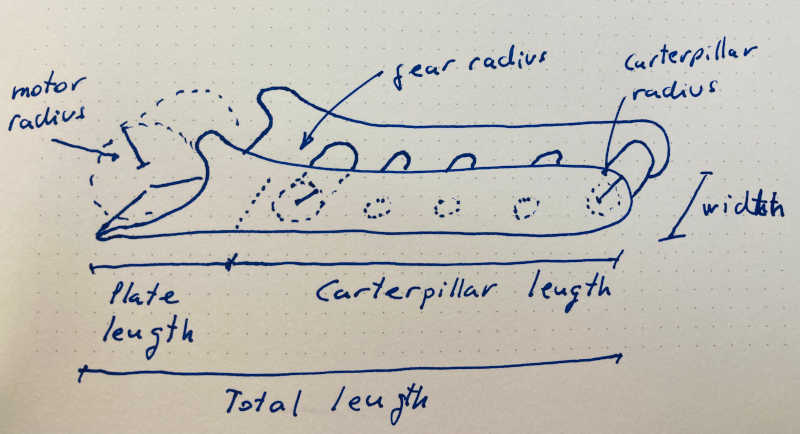
However, I quickly realized that the rest of measures depended on this parameters, so I had to create a lot of additional secondary parameters.
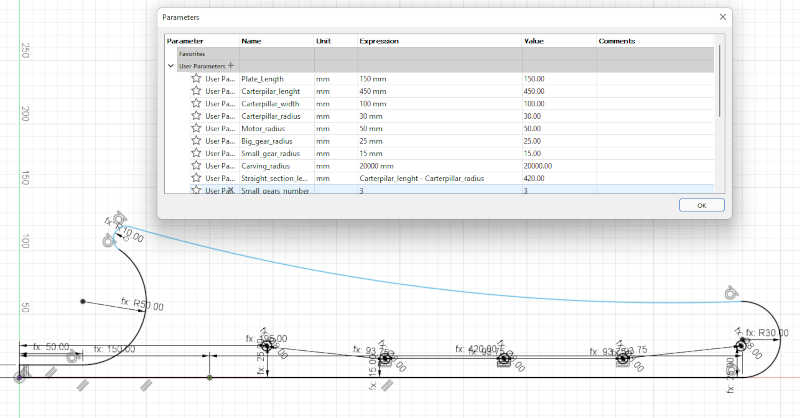
I spent a lot of time better understanding the constraints and dimensions in Fusion360. It seems simple, but you have to be careful of not overconstrain a sketch, and the behavior of the model when you change a parameter is not always as expected.
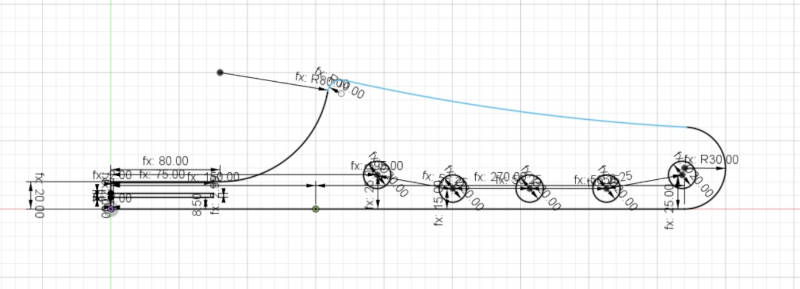
This is the same piece, with the length set to 300mm, the motor radius to 80 mm, and the gears hub radius to 25mm:
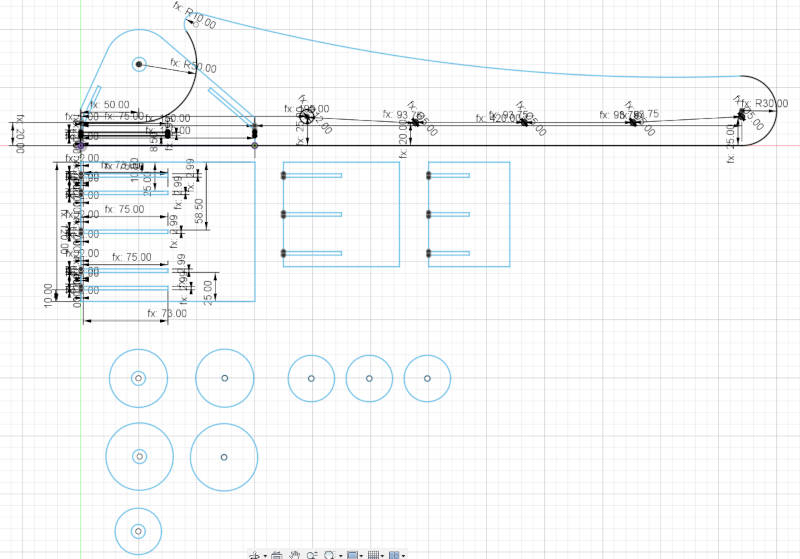
I also drew some sketches over the existing ones, so I could copy the dimensions, and then toggling the view/no view option to work better with them.

File: Parametric_designed_sketch.f3d
In our lab, the program connected to the laser cutter is Autocad, so i had to export the sketch files to .dxf. Also we found that the cardboard we could use was 6mm thick. As the design is parametric, it was very easy to change the "Cardboard_thickness" parameter in Fusion360 to adapt the model.
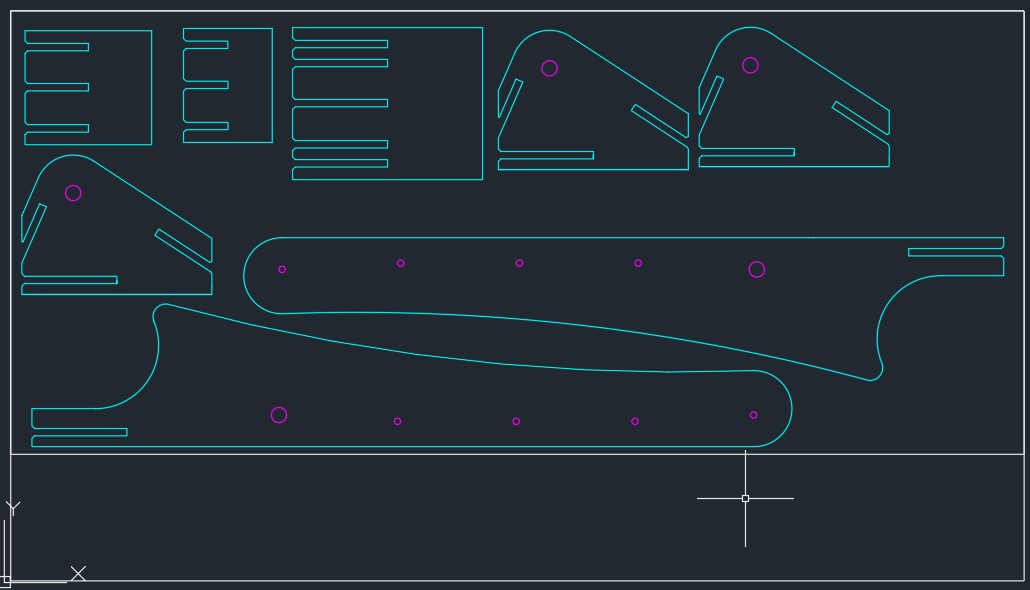
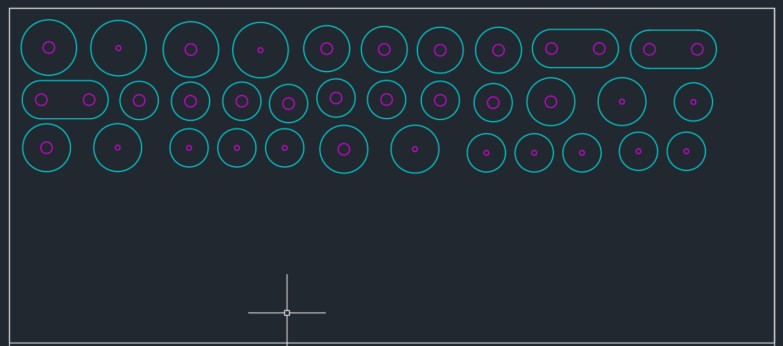
In the lab there is an Autocad template to use de laser cutter, because the machine recognizes the colors of the draw (interior cuts, exterior_cuts, etc..). So the template has different layer for each of the colors and switching on/off each of the layers is very easy to check if everything is ok.
Files:
I adjusted the layers and checked the size ratio is 1:1
I Executed _EXPLODE and _OVERKILL to get all the components and erase duplicated paths.
I exported it to the printer driver interface
I set coordinates to (0,0)
I load material settings (6mm cardboard)
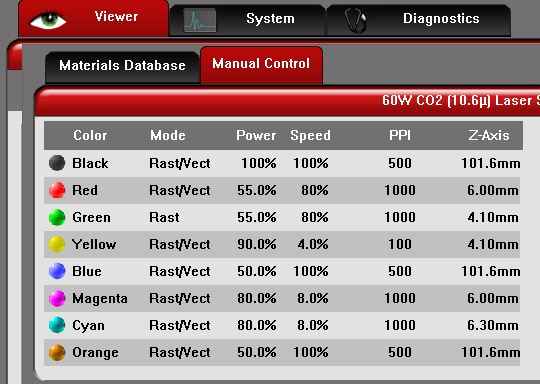
Settings are 80% of power and 8% of speed (at Cyan an Magenta colors, inside and outside cuts).
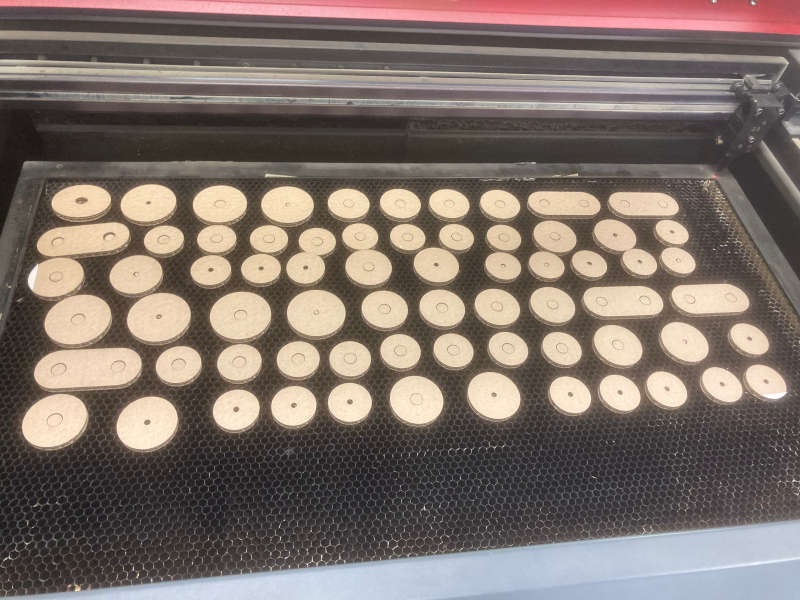
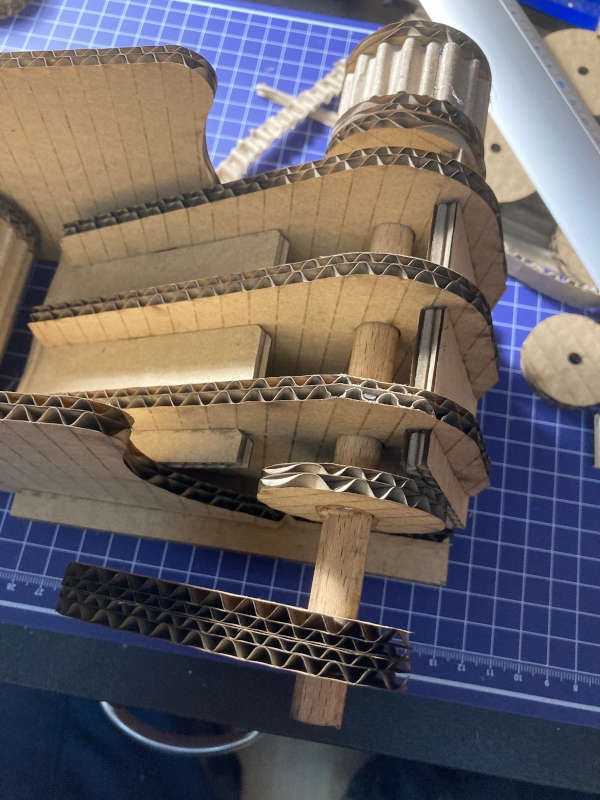
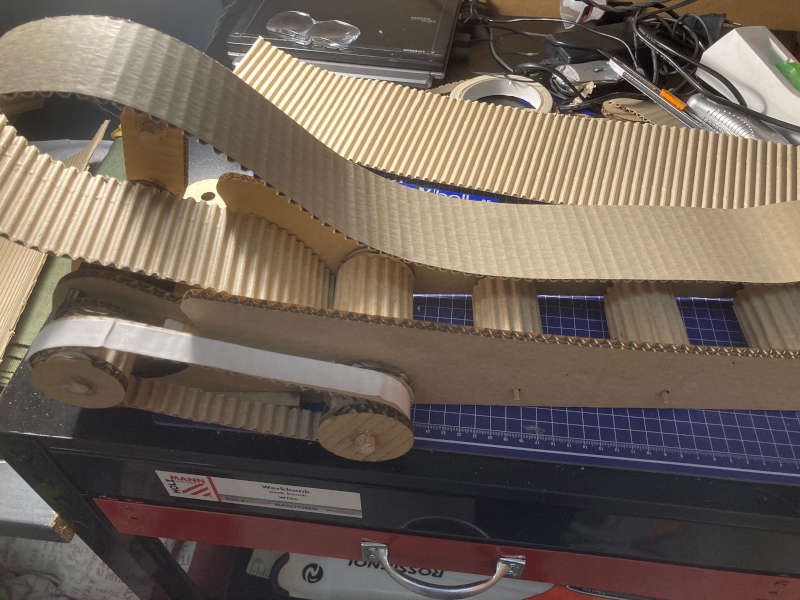
Making the model
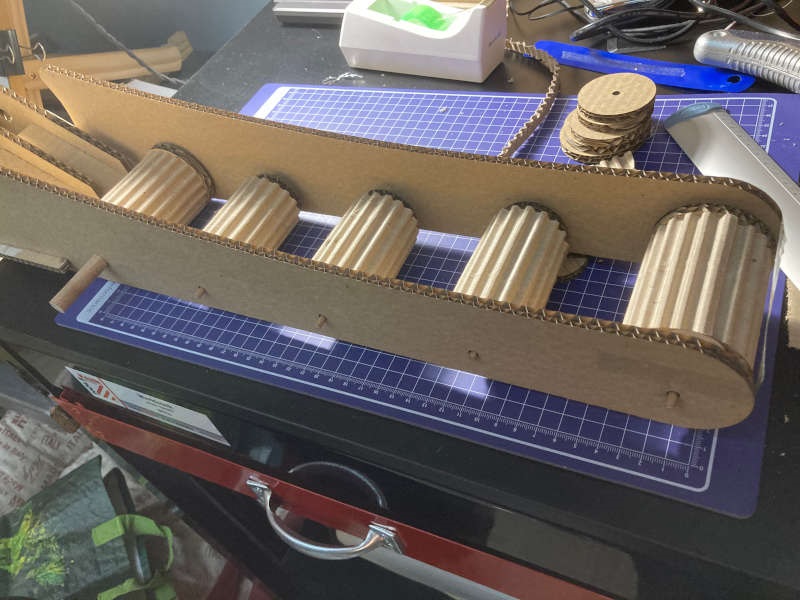
So I began to mount the kit, press-fitting the main structure to check is everything was ok:

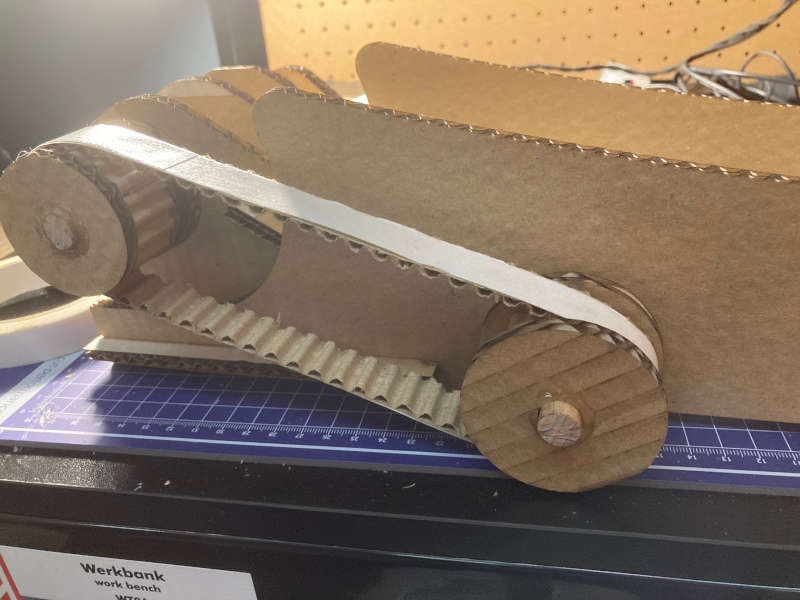
The most difficult part is to make the gears. Fortunately, I found some ideas about making the gears with the corrugated side of the cardboard. Thank you diy.org for sharing.
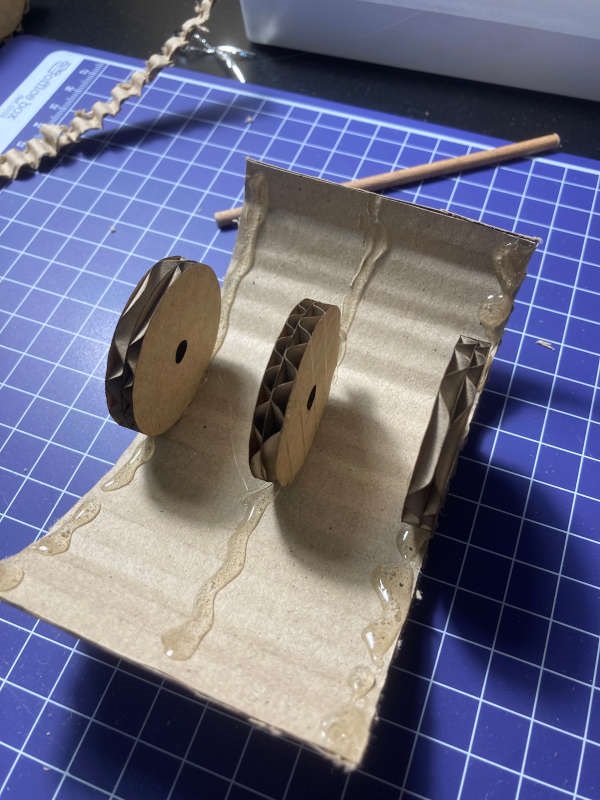
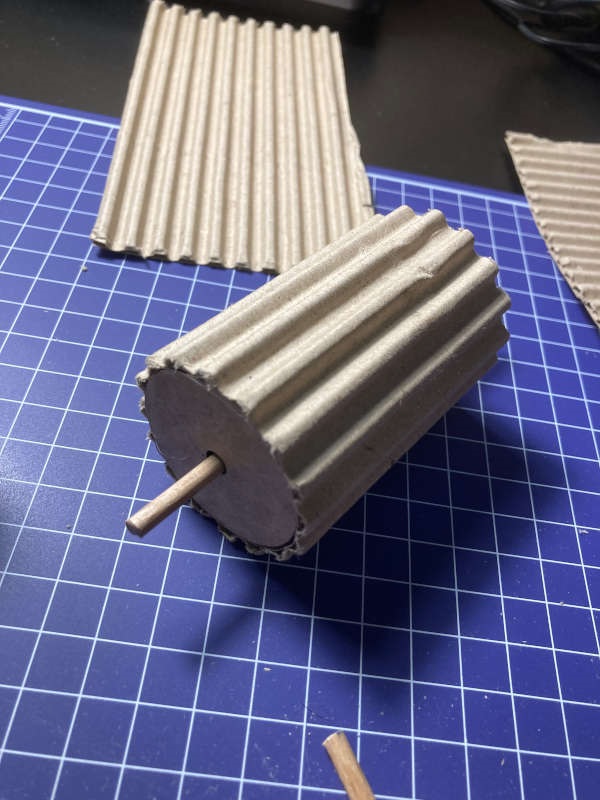
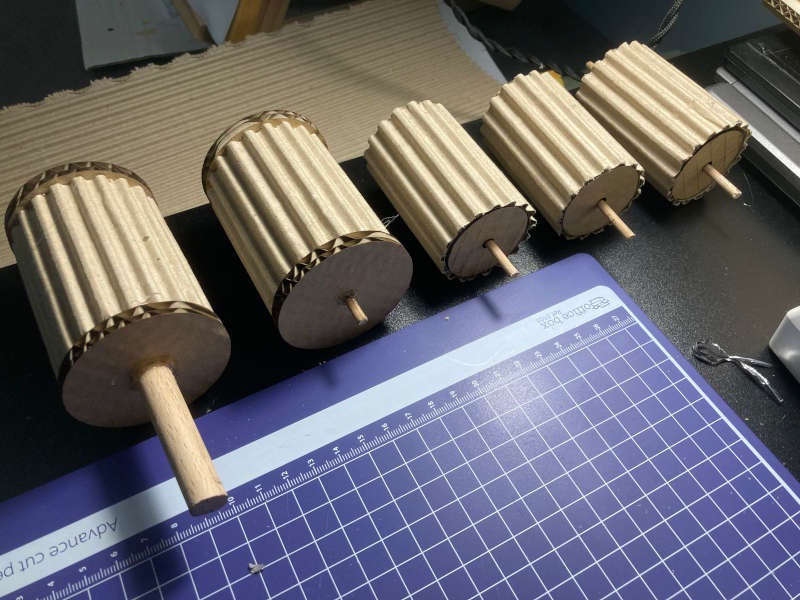

Progression of the making:

