Final Project Development
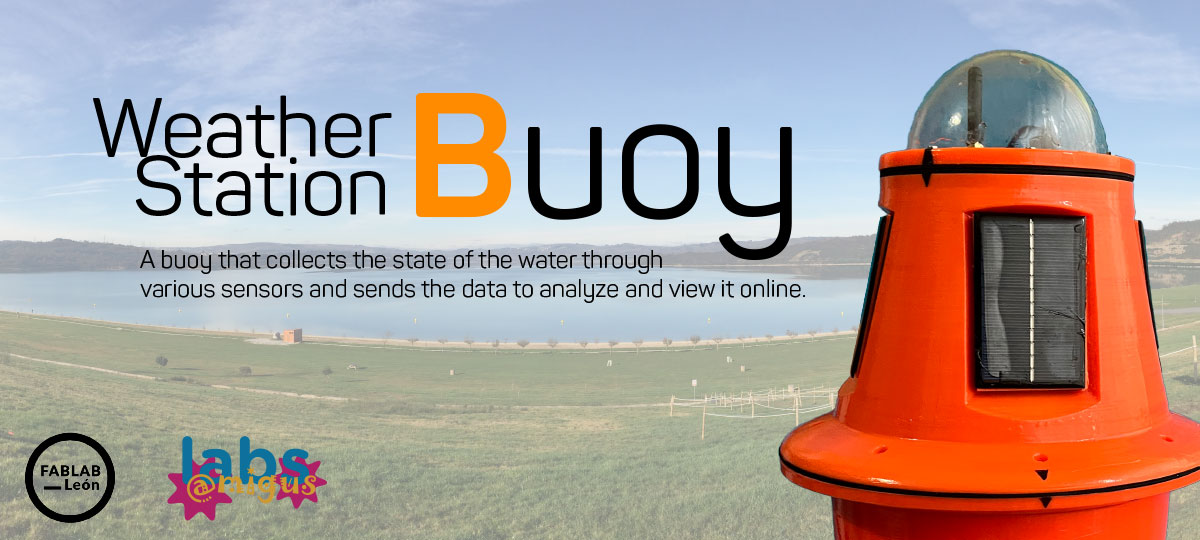
Digital fabrication
The last year I made a first design of my buoy in Cinema 4D, but I like made again a new model. (Cinema 4d Screenshot)

Bouy in 3D
For start, I made a new design of a front view in Adobe Ilustrator. I like made a buoy big but I have a limits for print 3D, with a volume 350x350x400mm, I will separate the project into 2 parts, one the upper part, with the solar panels and electronics, and another, the lower part of the buoy that will be submerged.
In Illustrator I made 2 box for draw inside and with bezier tools I draw the curves.
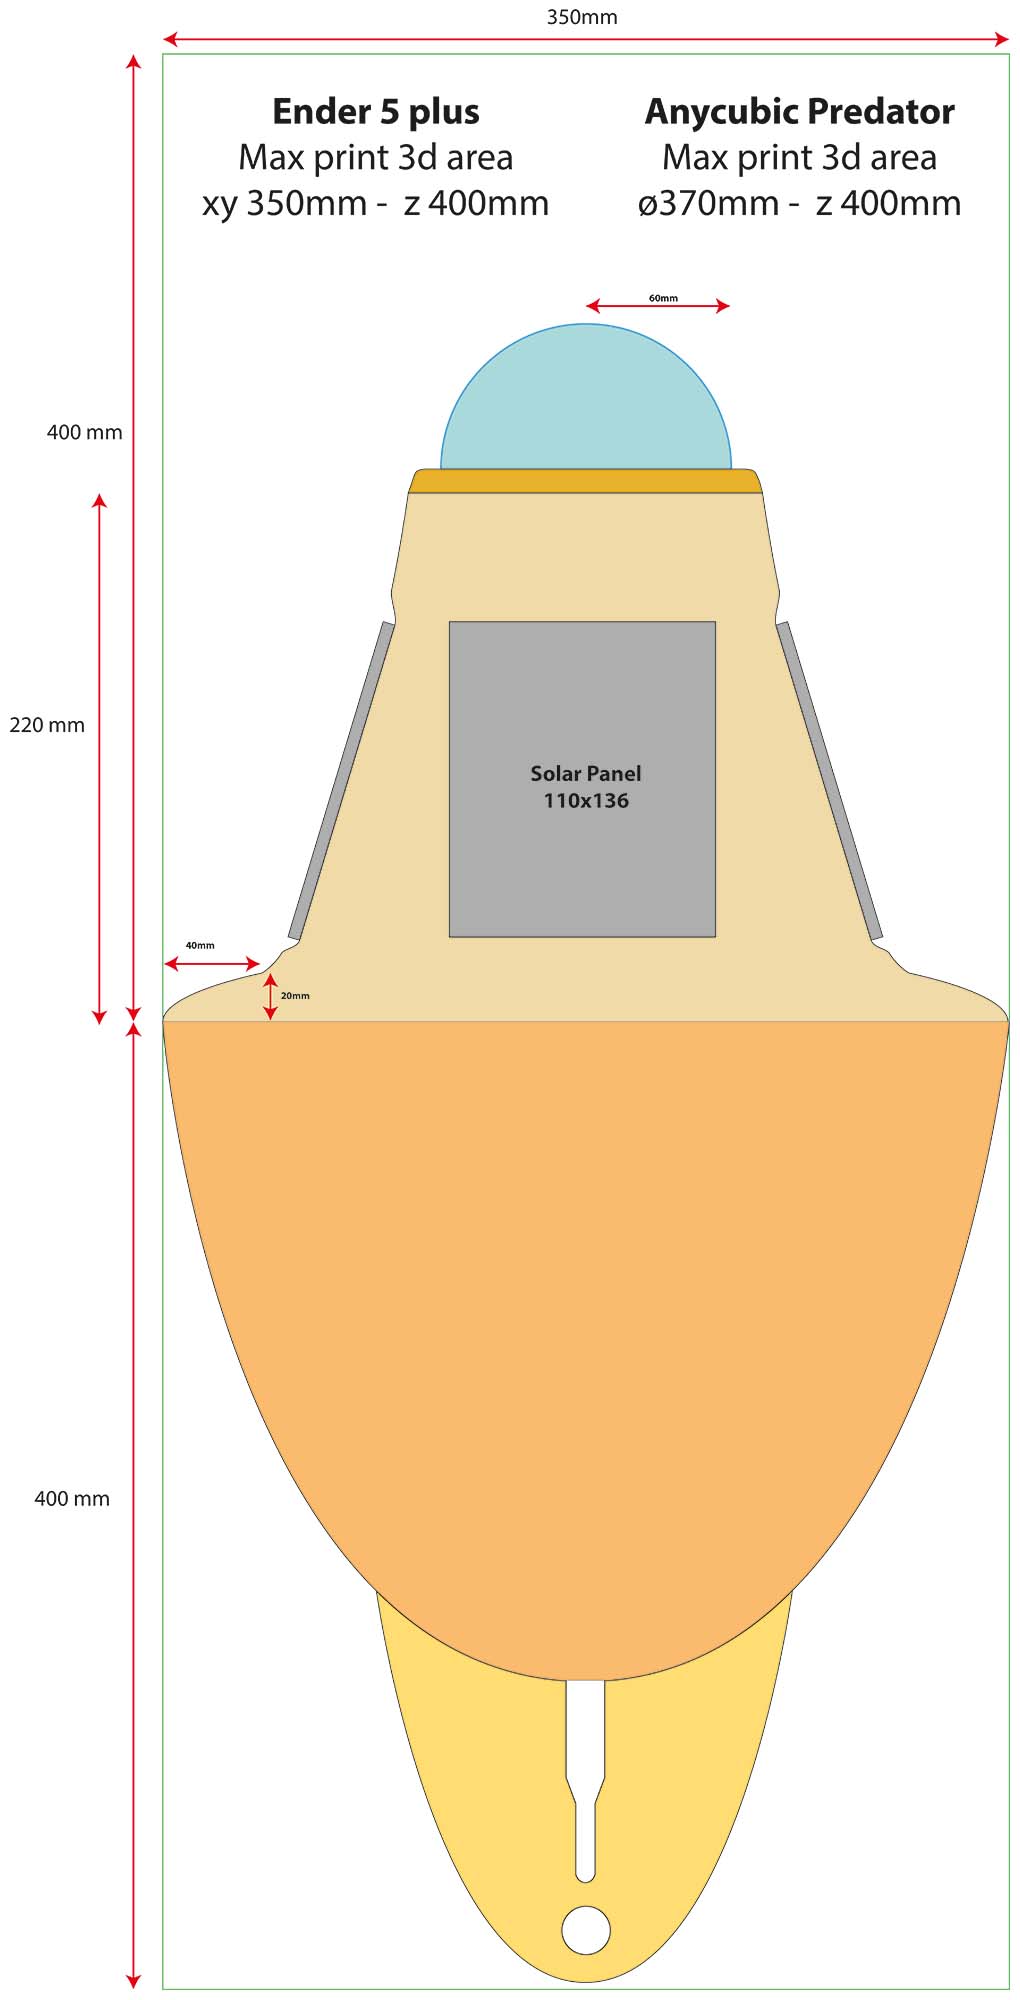
After this, I will made again the splines, and start to made the volume.

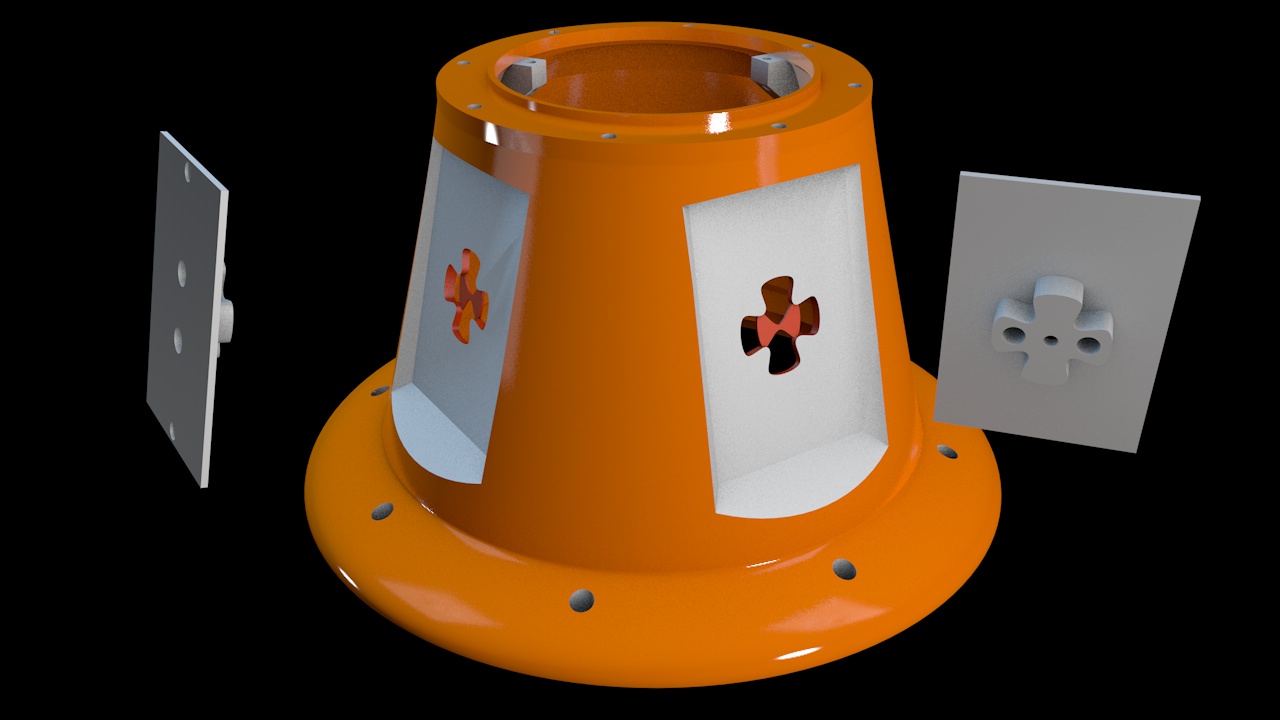
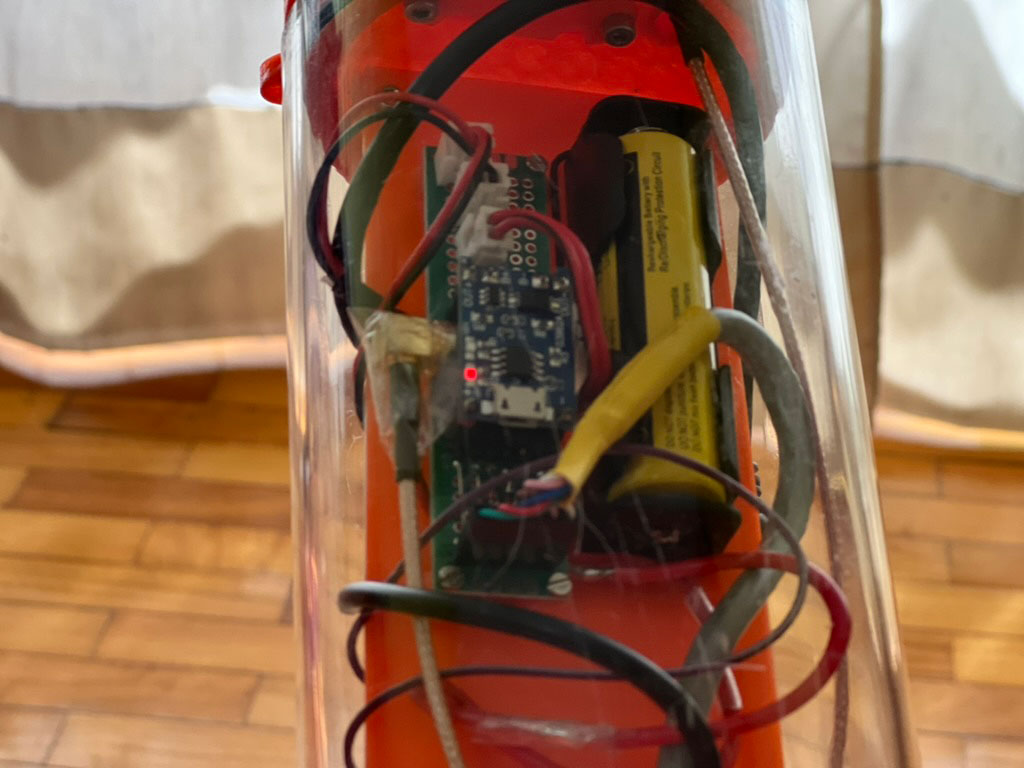
The electronics are housed in a capsule to prevent water or moisture from entering that could damage it.


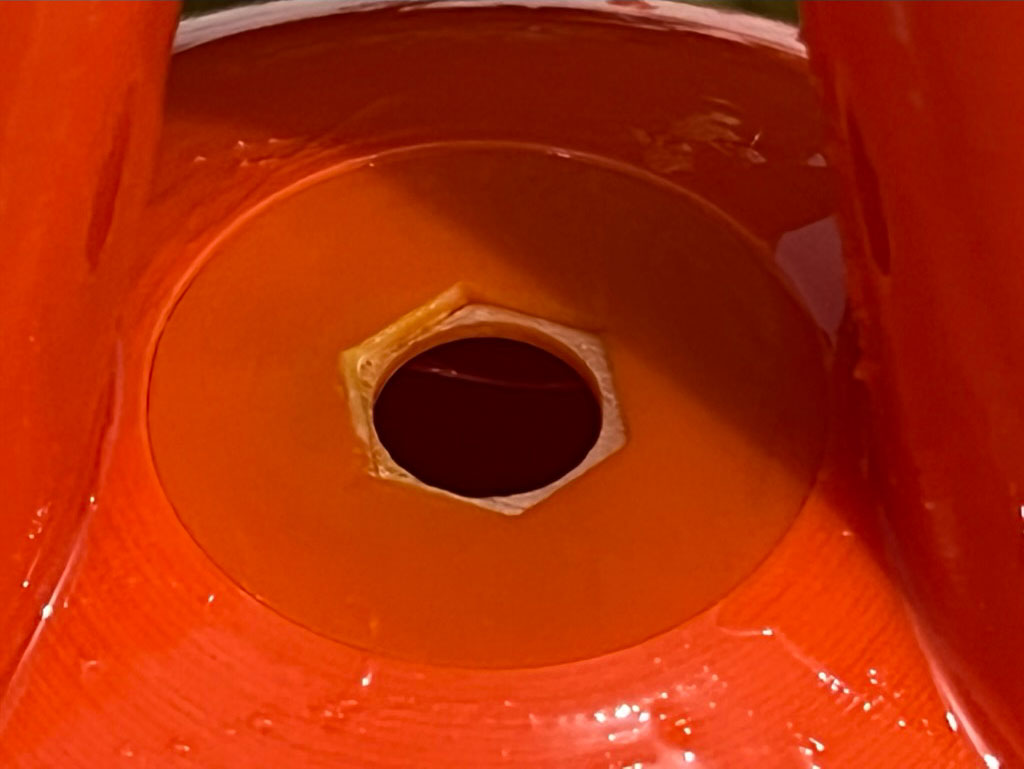
After made a exterior model of the buoy I start to made the holes for the screws and inserts.
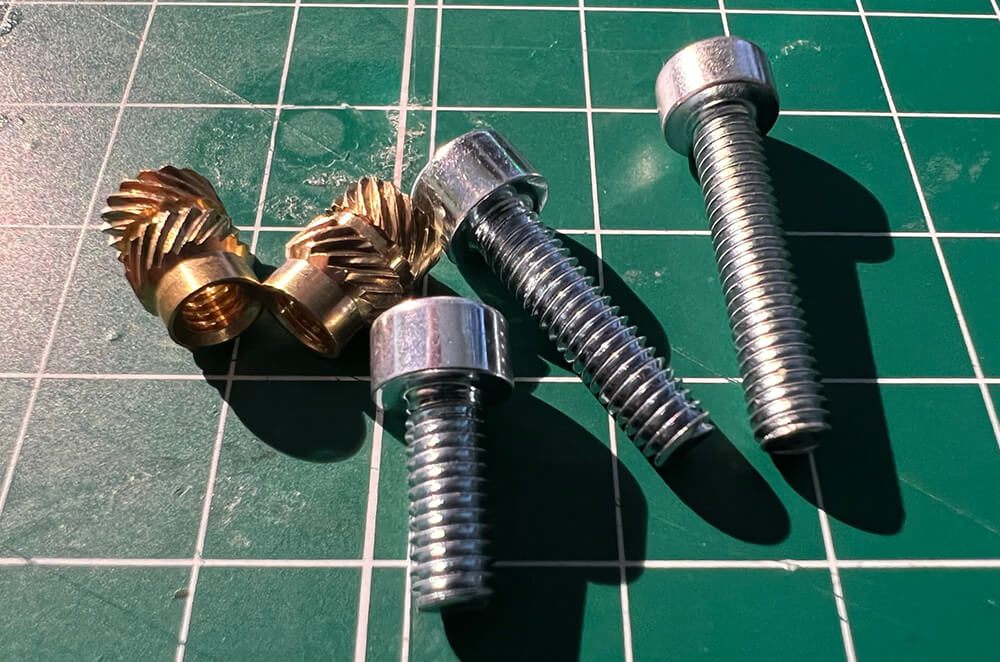
I have yet the screws and inserts M4 than i will use for made the buoy.
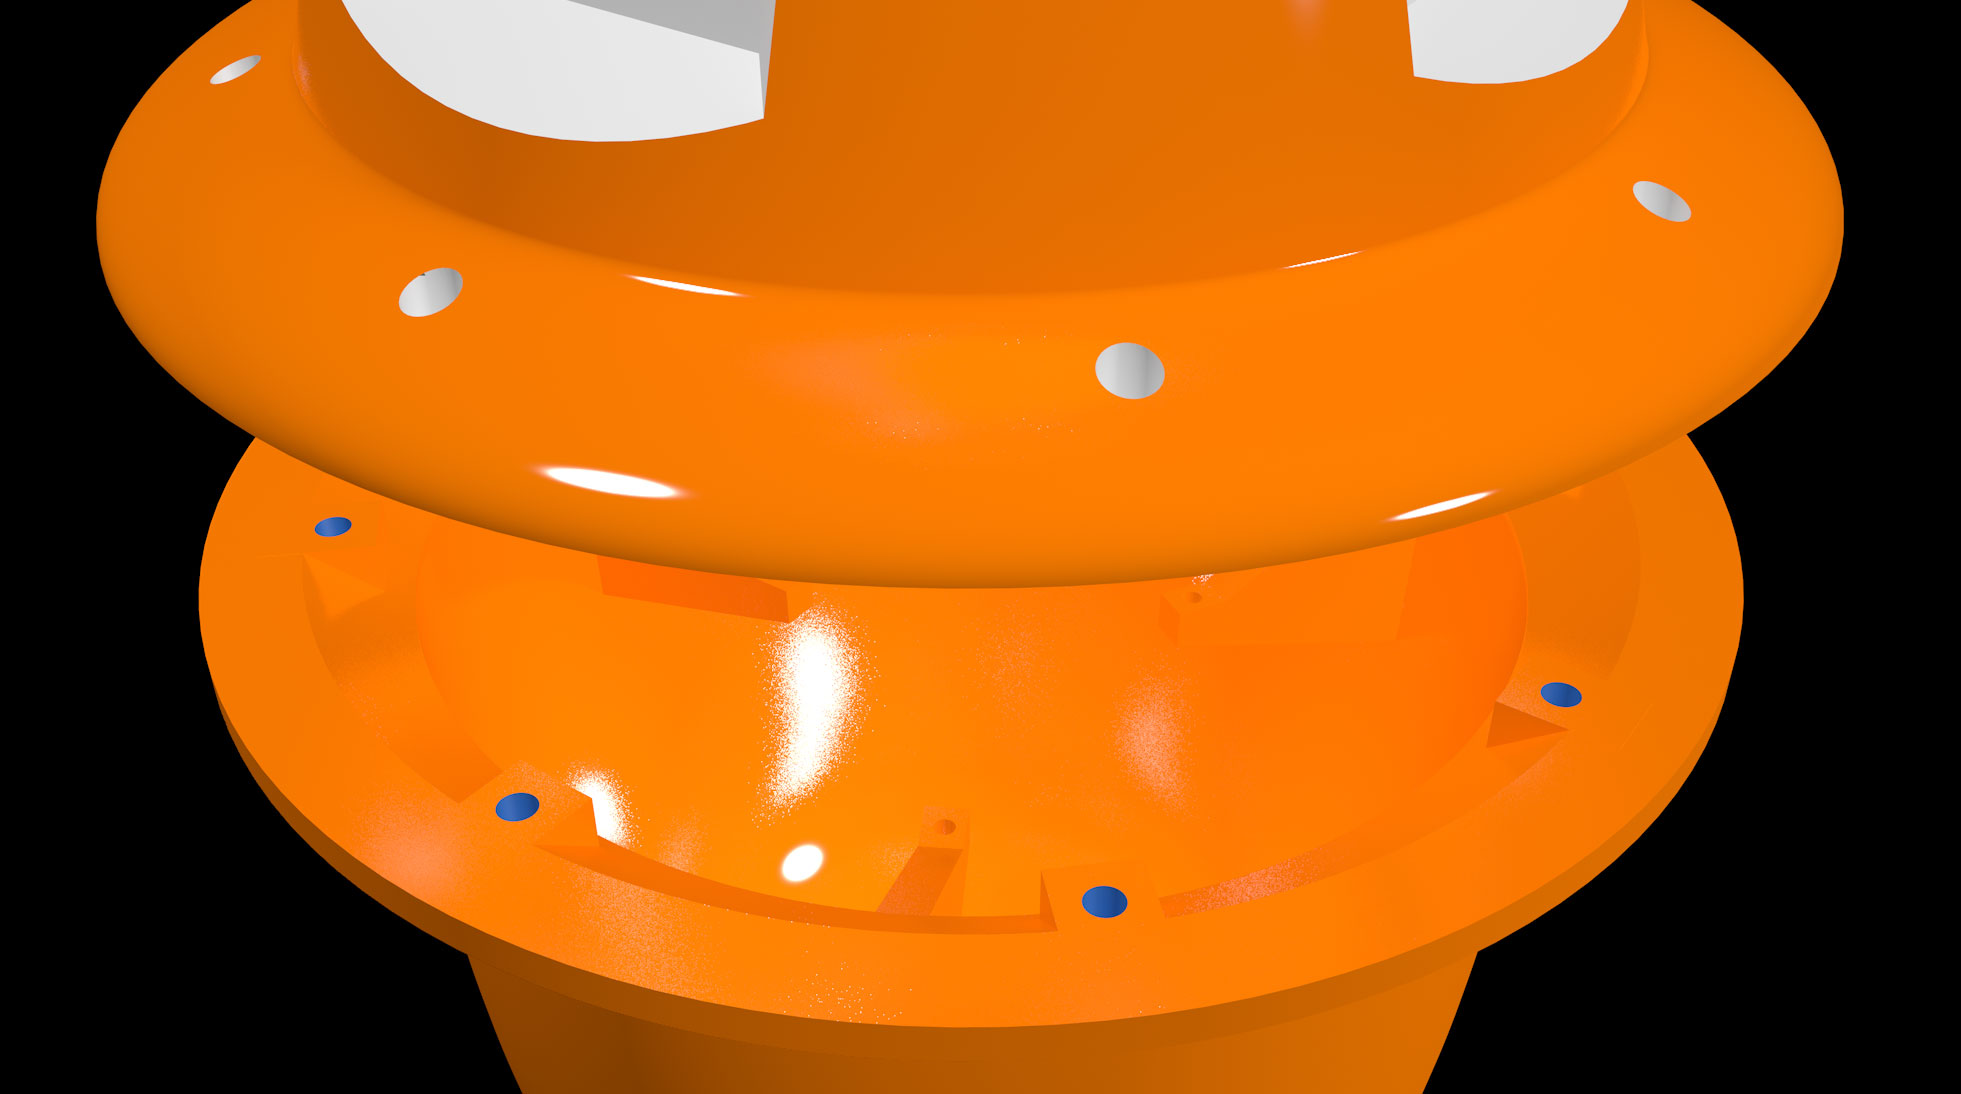
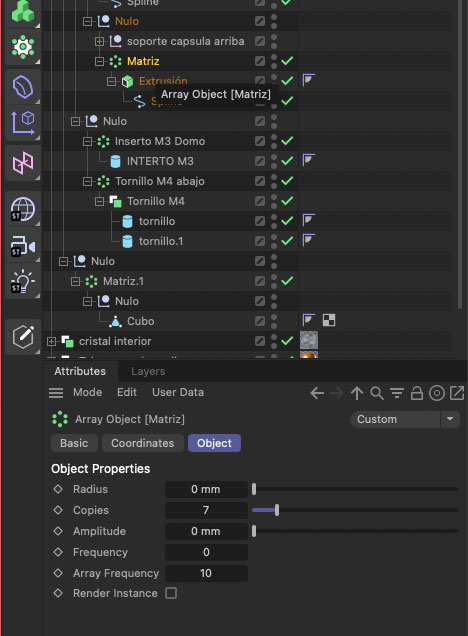
With Matrix object I can made a parametric object in Cinema 4D, and repeat X times.
3D Print
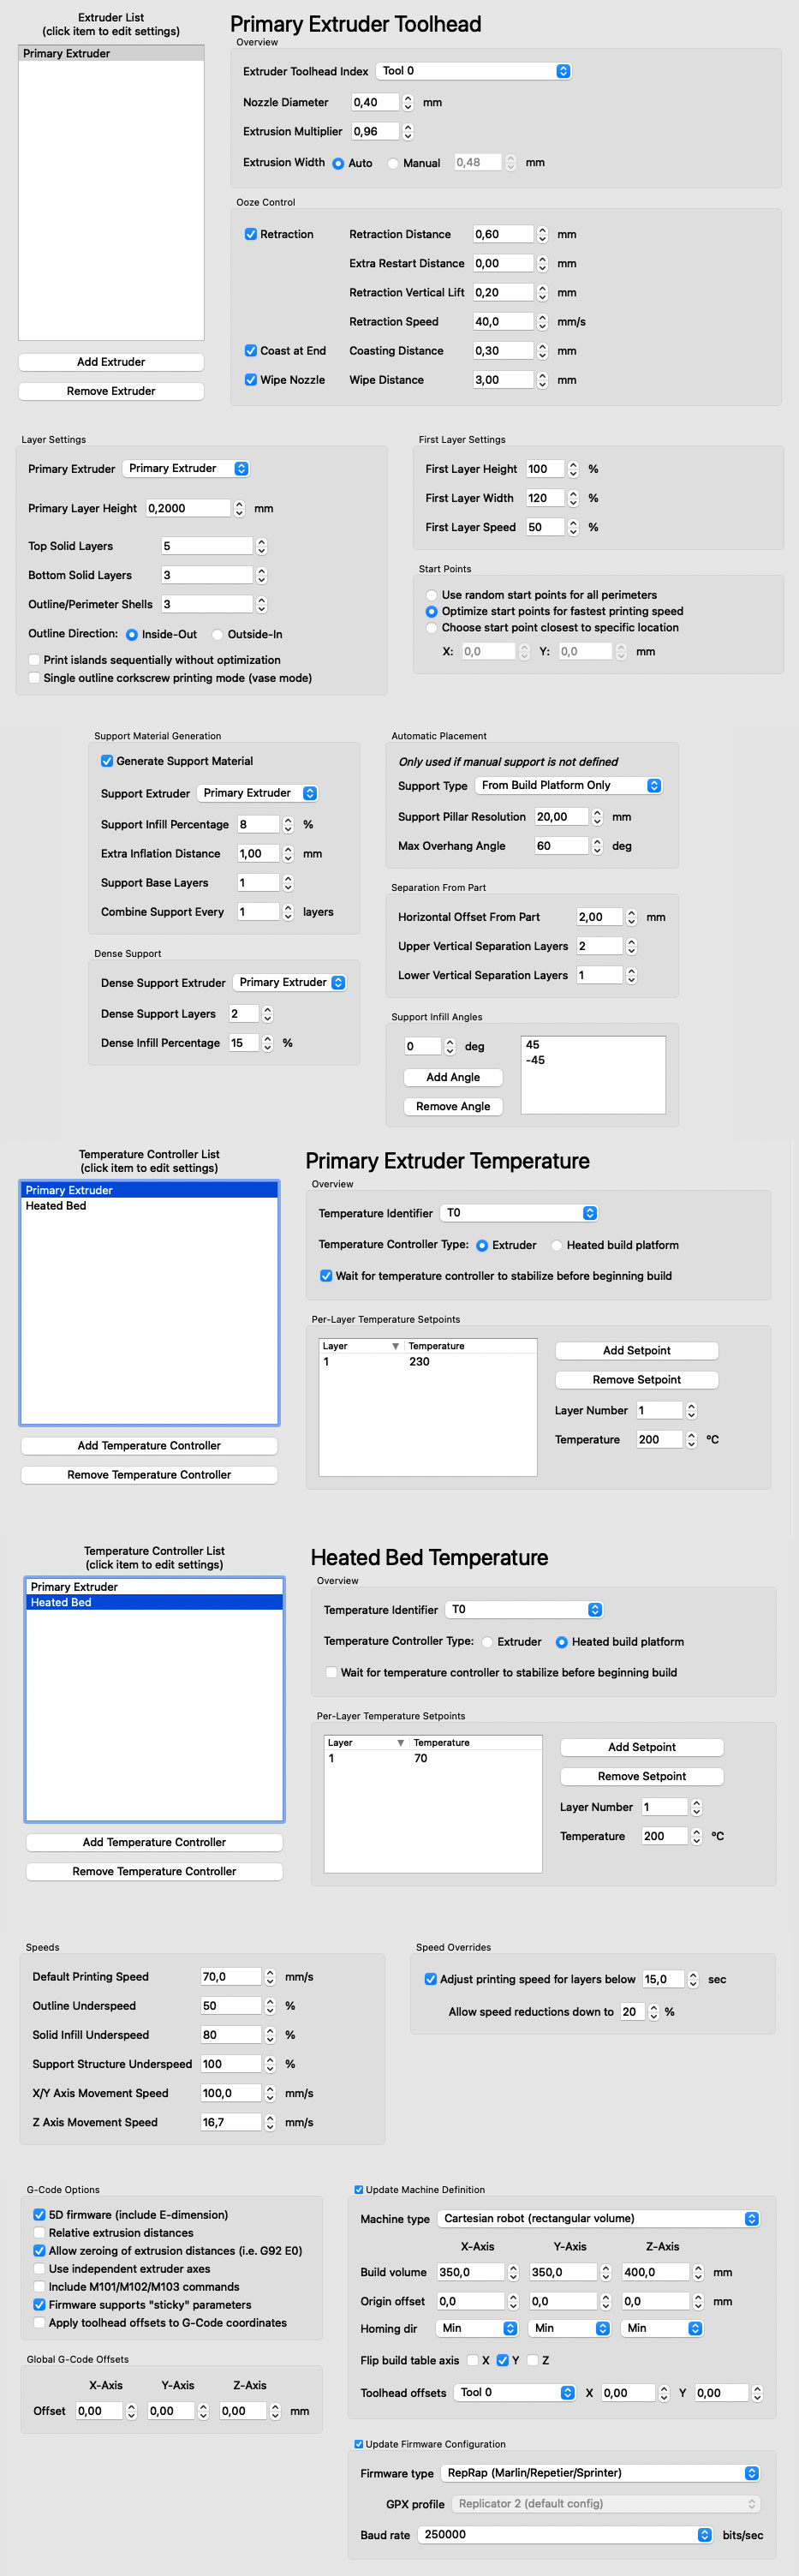
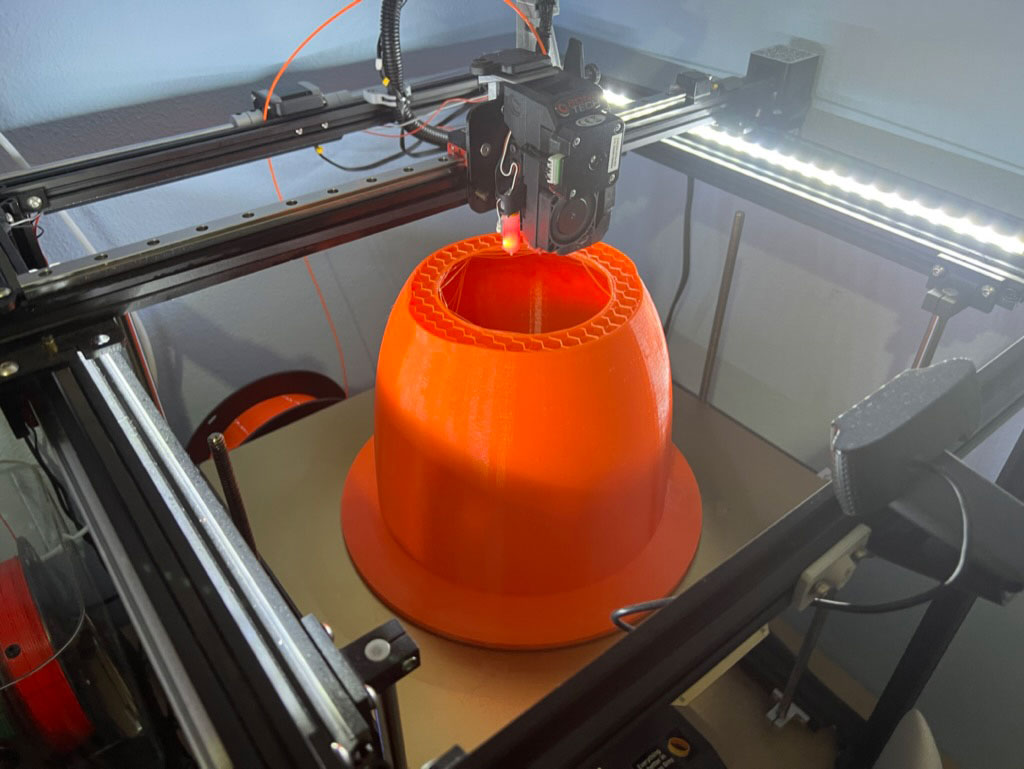
The buoy is printed with PETG. It is characterized by a functionality very similar to ABS (good resistance to temperature, durable, resistant) and the ease of being printed like PLA.
The extruder has been printed at 230ºC and the hot bed at 70ºC
In total, just over 2 Kg of PETG have been used, and it has taken 7 days to print all the pieces.
I use Simplify3D for slice the objects and print in my Ender 5 Plus.
Buoy Stand
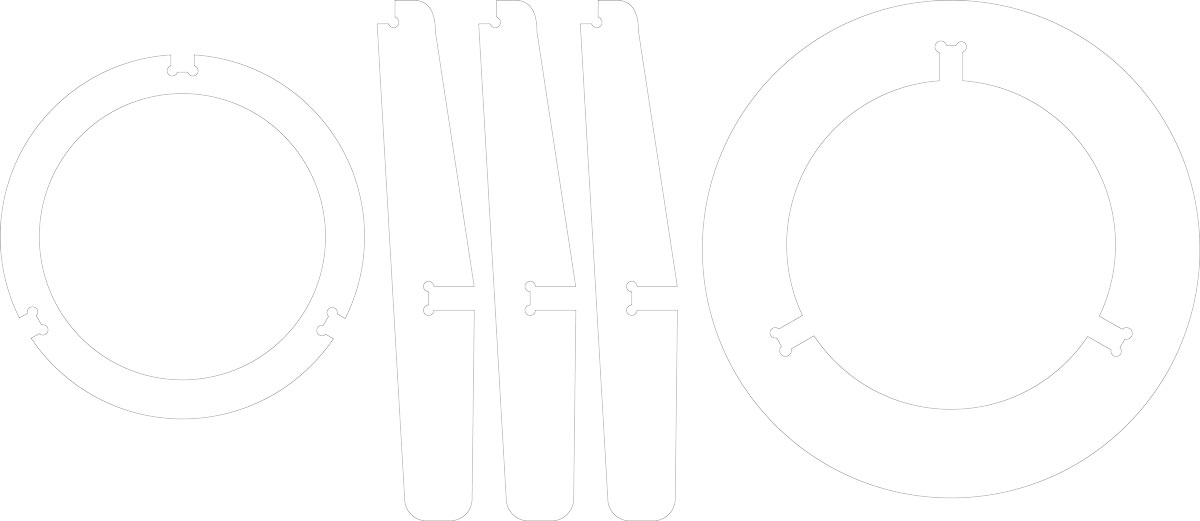
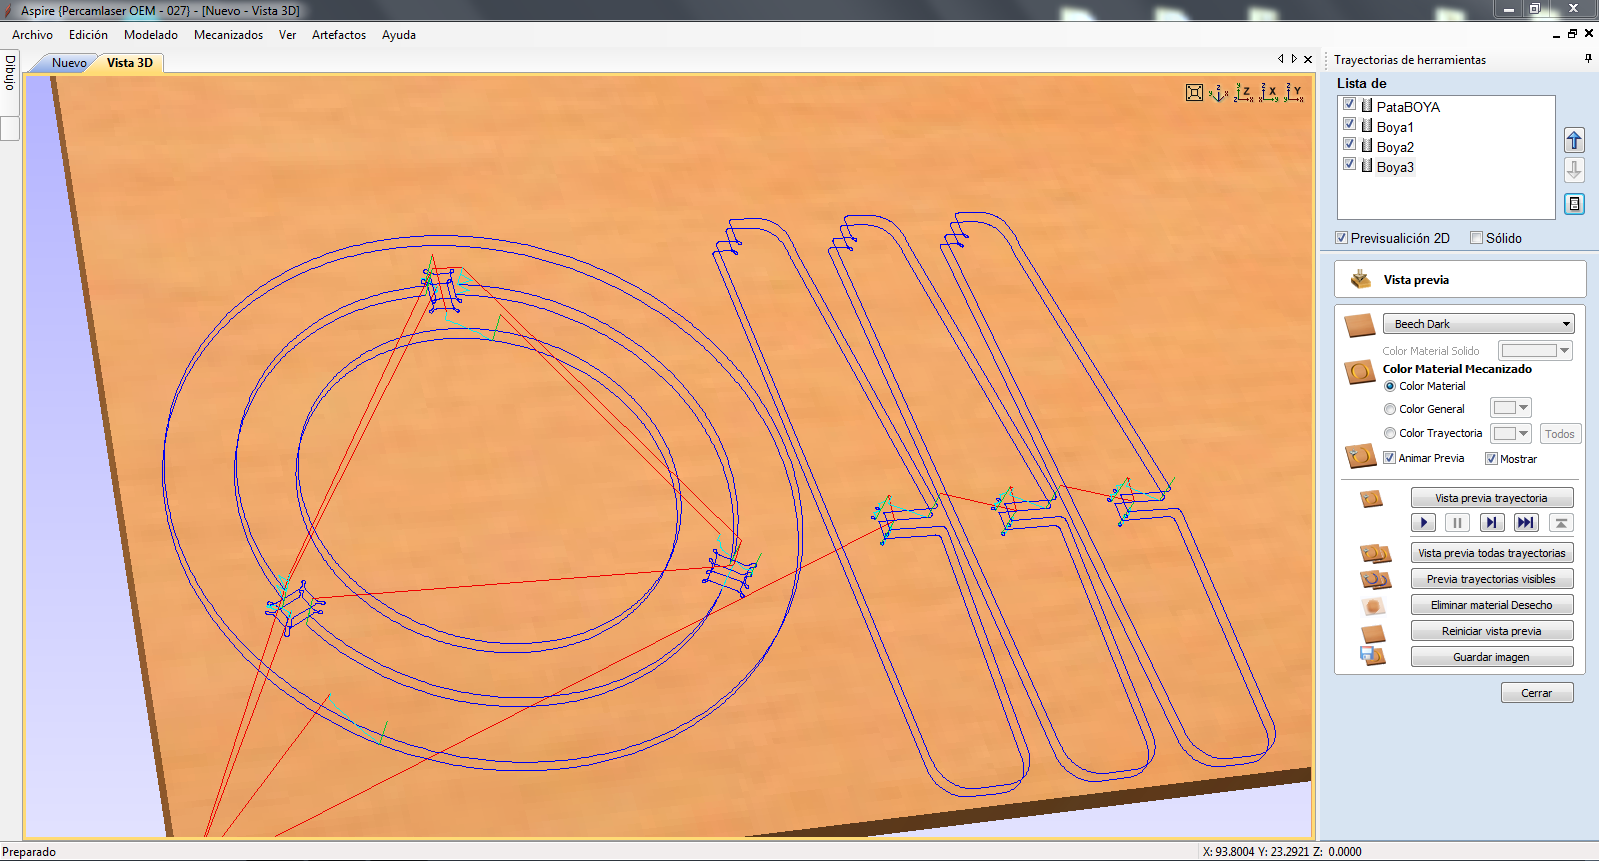
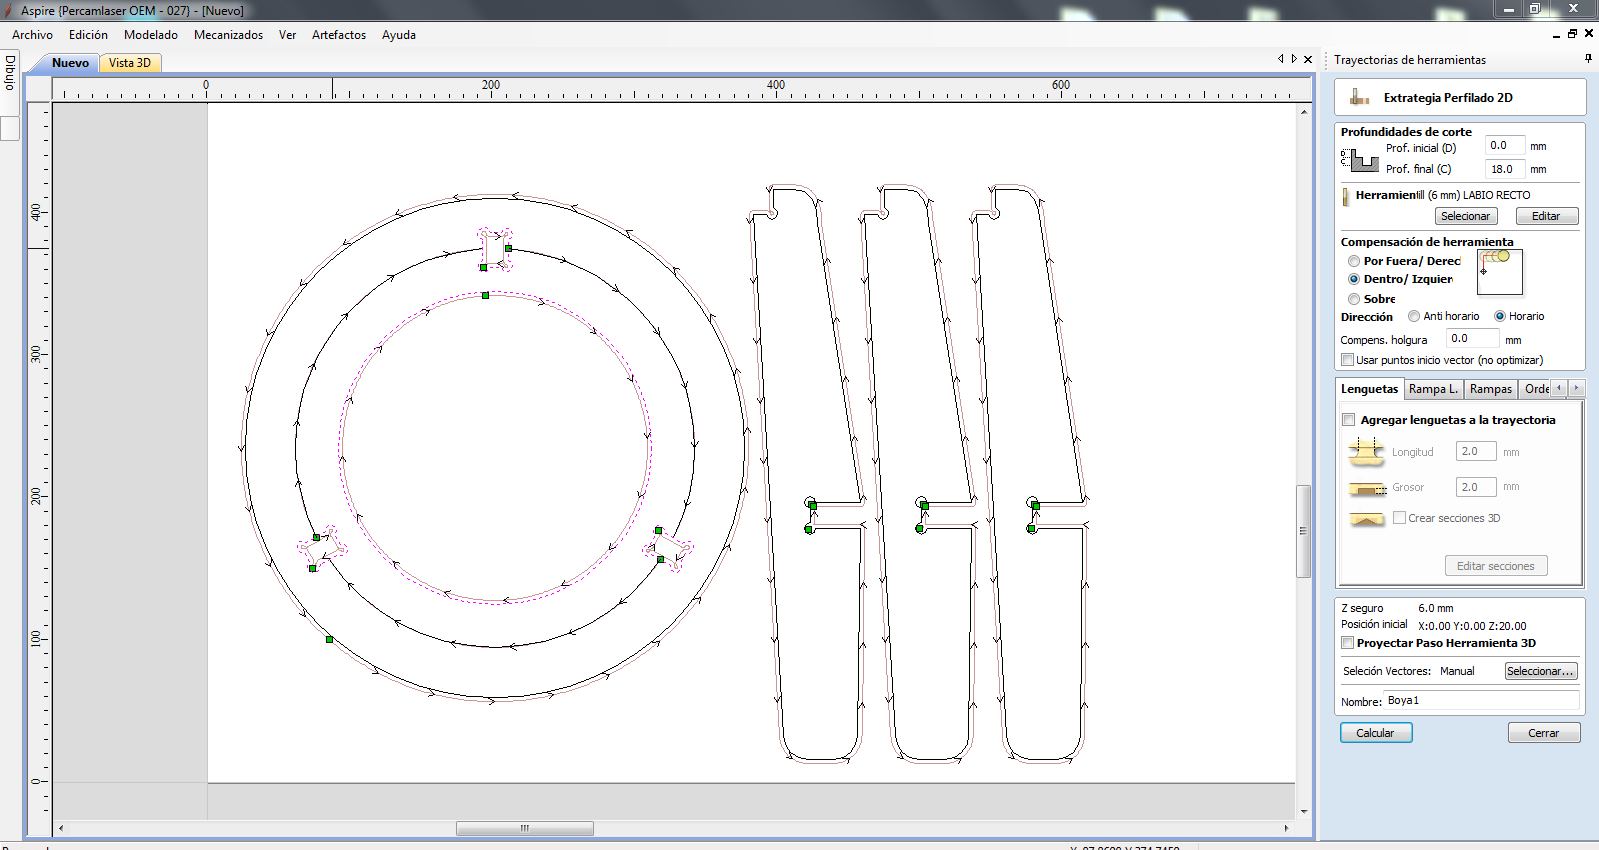
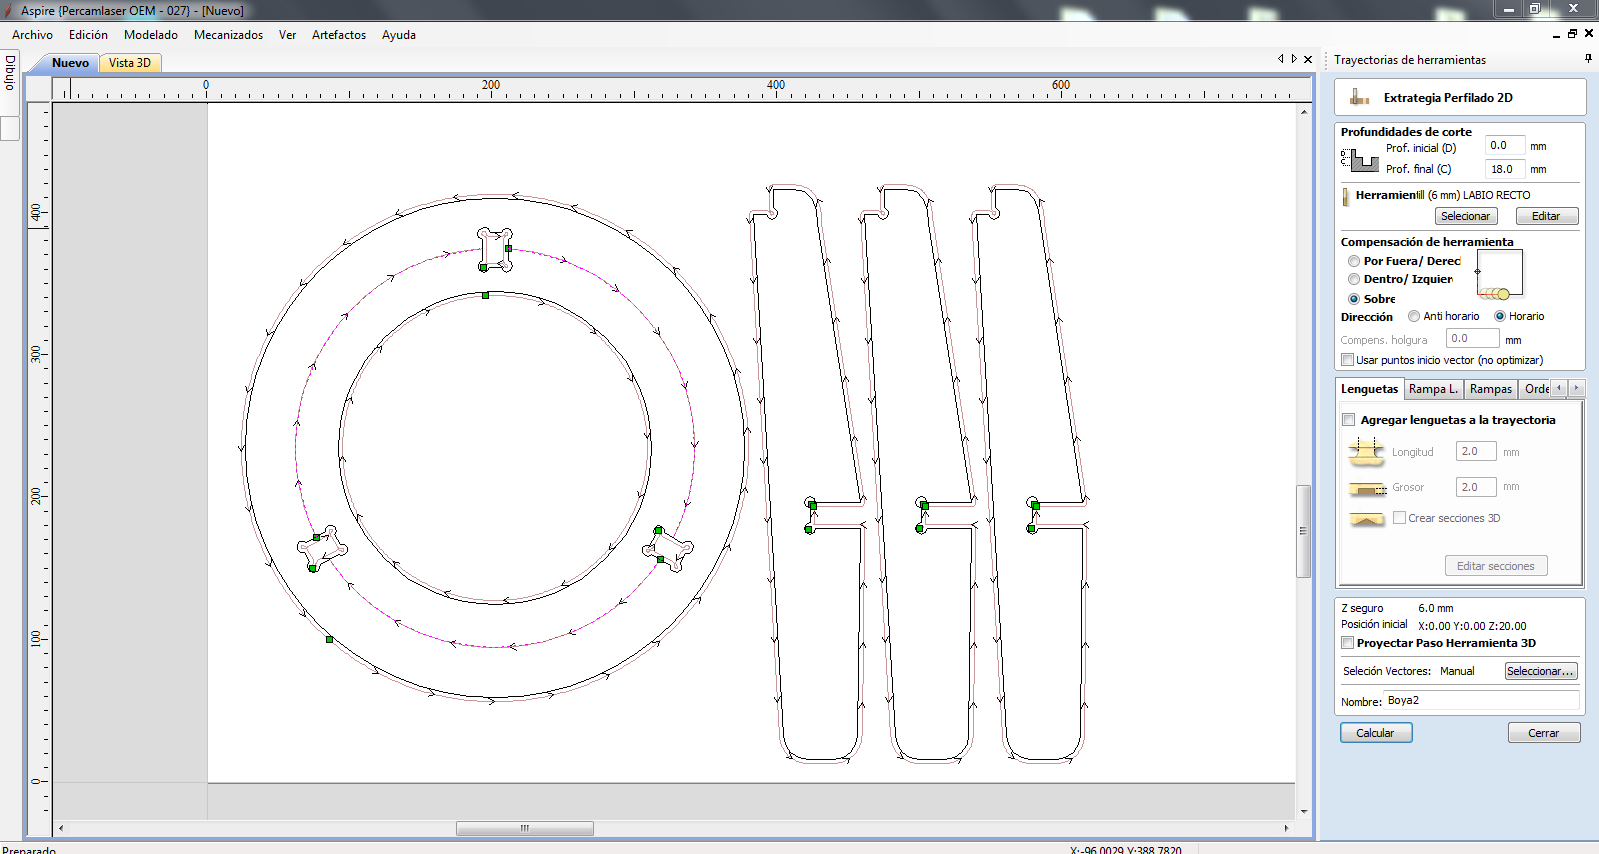
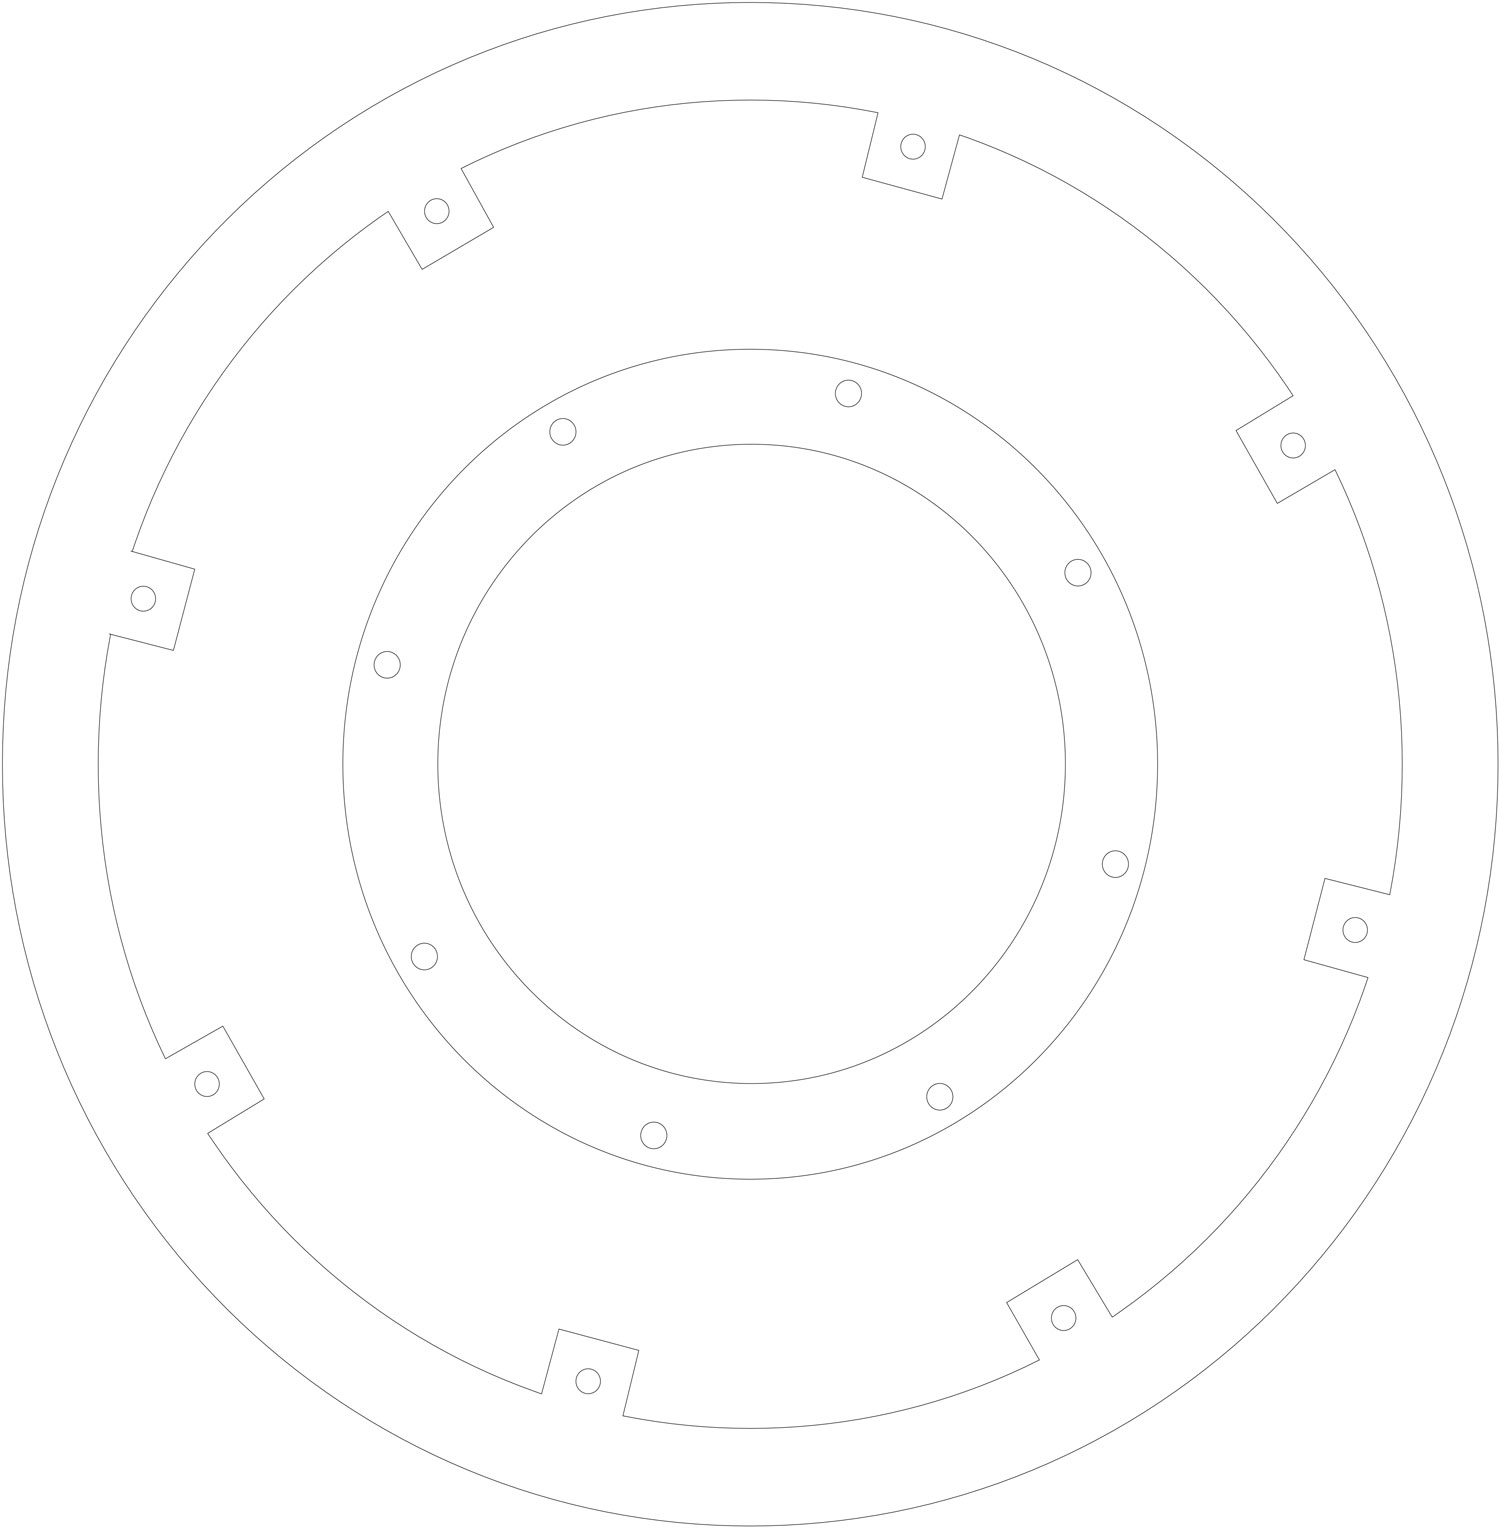
My first object to cnc cut is to make for the final project, a support for the buoy, to use while assembling, or if I had to get out of the water for repairs.
It will be a kind of stool, with a hollow center and three legs, so that it can be supported on any terrain.
The idea is that it can be assembled without the use of screws or glue and that it be rigid enough that it does not come apart on its own.
After taking the measurements of the buoy in Fusion 360, and calculating that the diameter of the buoy in the area that I want to support it is about 310mm in diameter, I make the design in Adobe Illustrator.
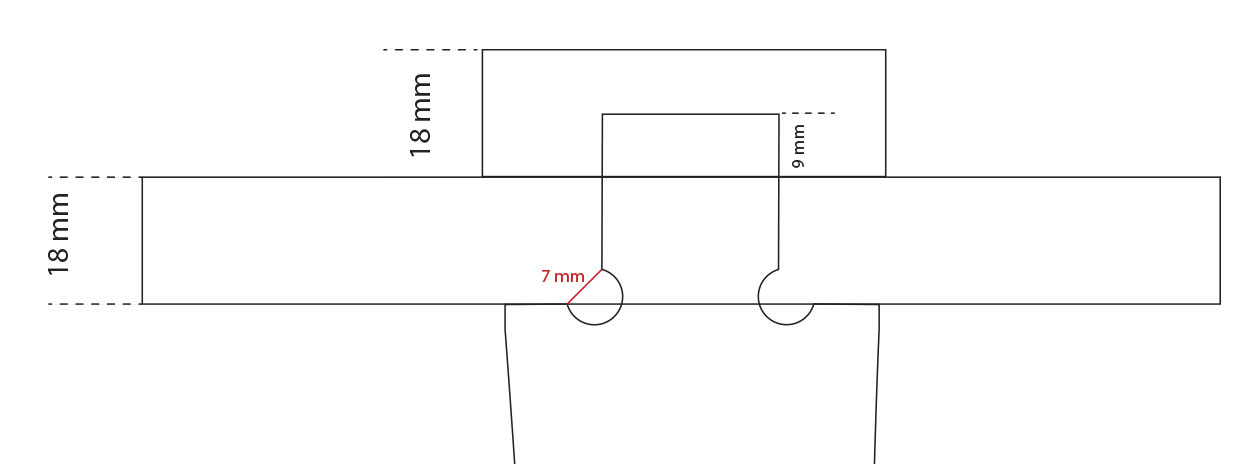
For the pressure fit in the design I make a small recess in the corners, so that when milling the angled areas they fit correctly.
The wood we will use is 18mm plywood so I already have the reference from the tests we did the night before.
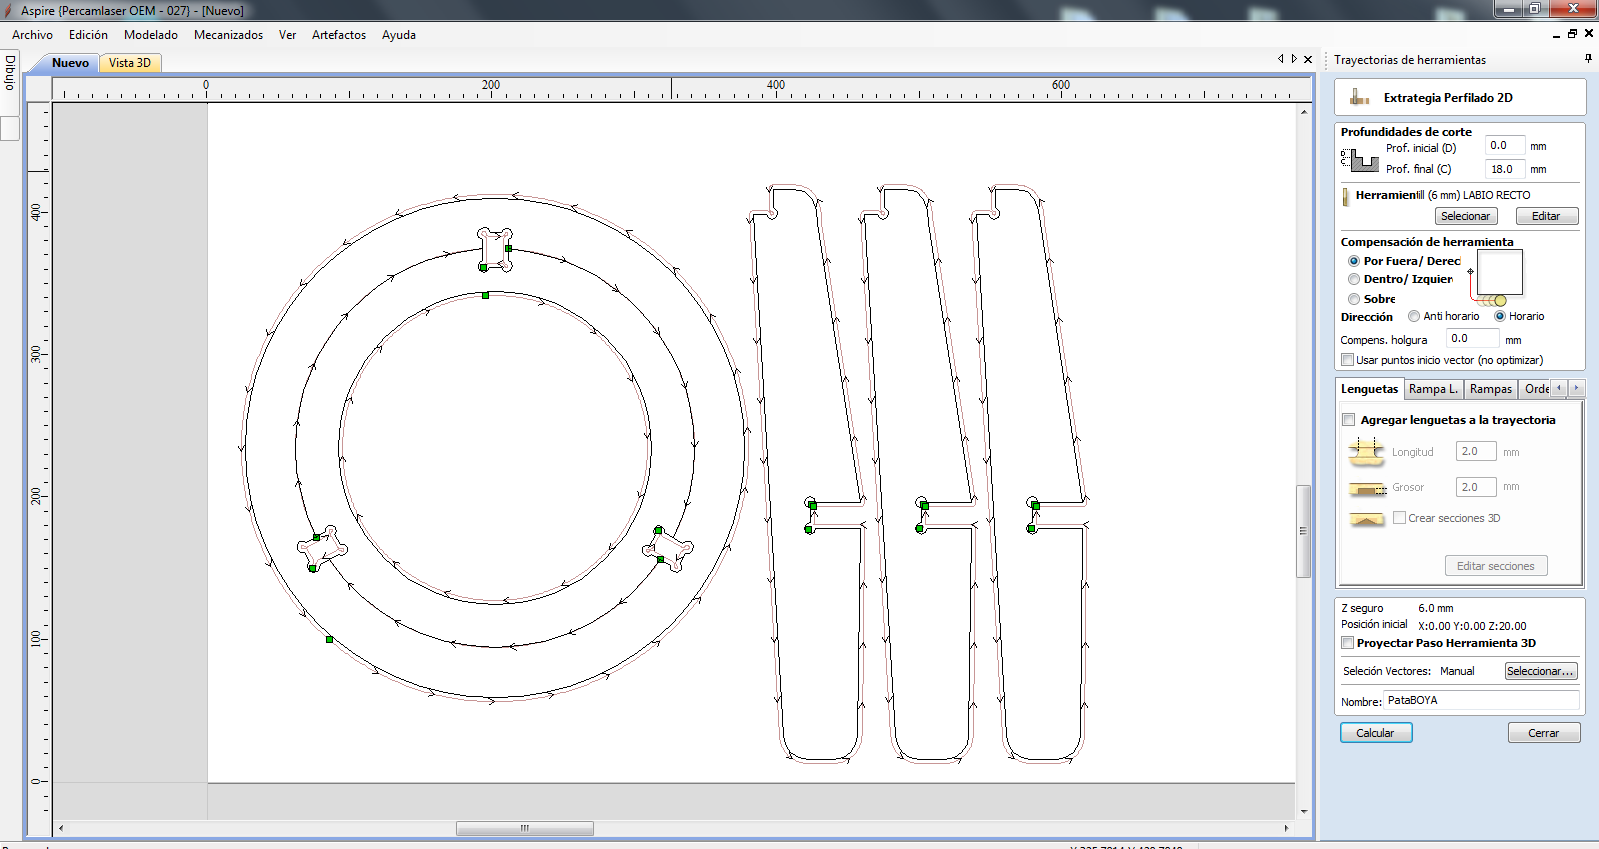
The first thing we configure in the software is the pocket toolpath of the fitting areas, with 10mm.
And then the 18.1mm 2D profile toolpath


Laser Cut
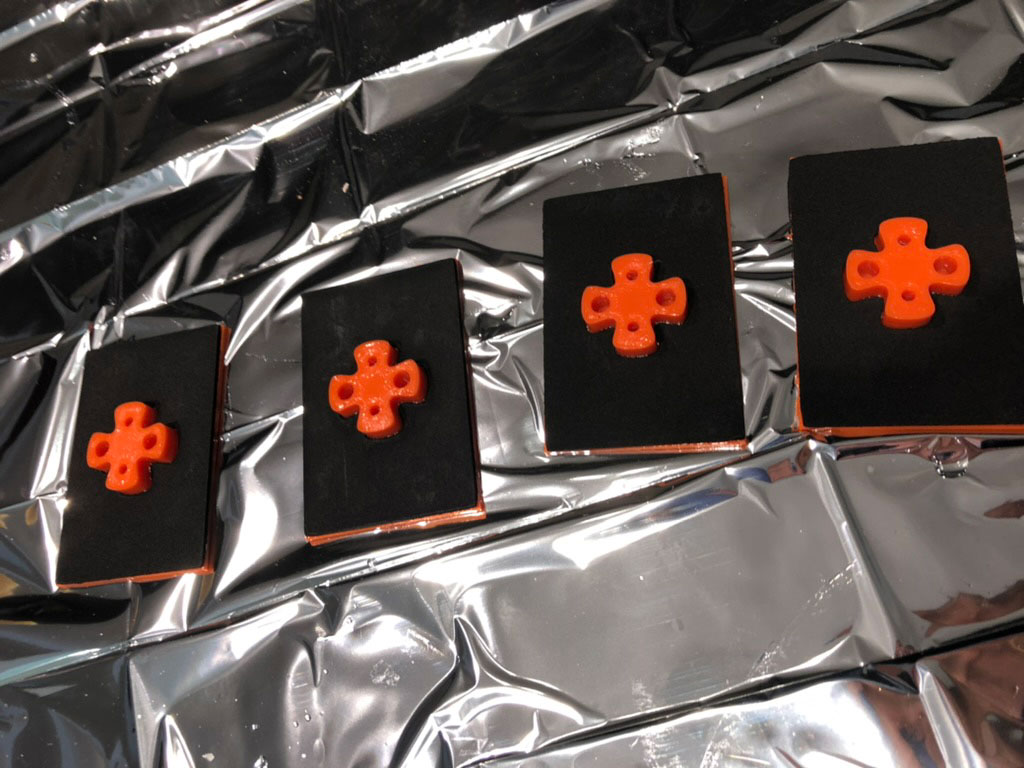
With Eva Foam i made the unions of the buoy. I made in Illustrator the files and cut with laser machine.

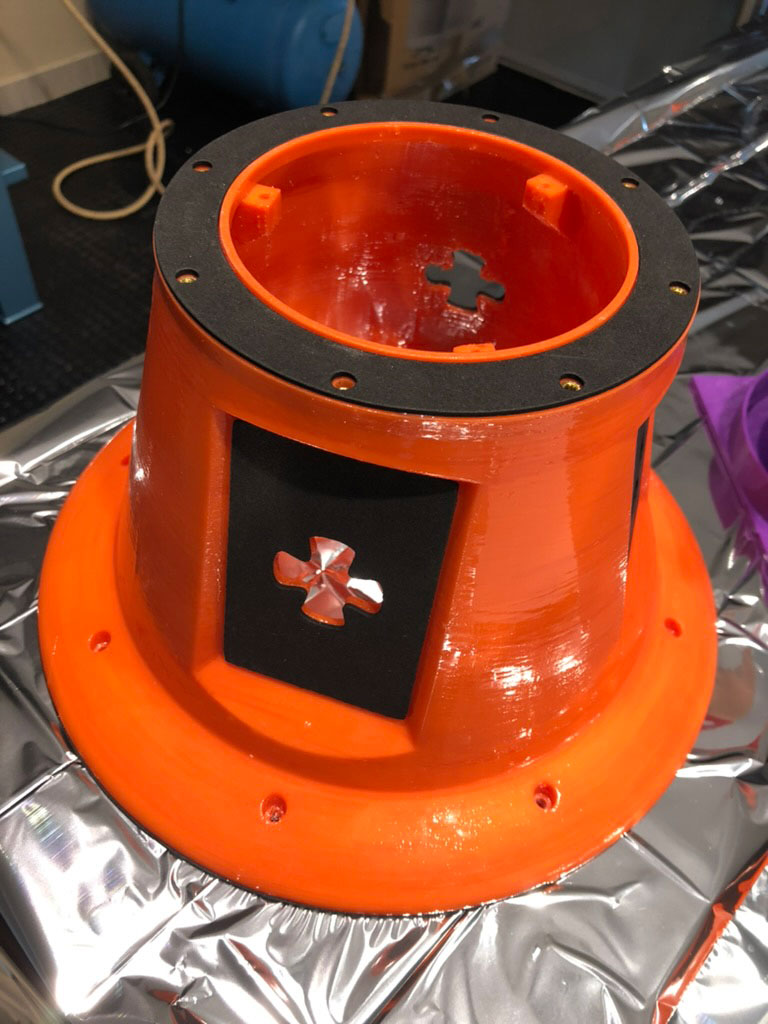
In order to be able to exchange the temperature sensor in case of failure, I have designed a piece to cut in methacrylate with a small engraving to act as a stop on the thread.

Epoxi
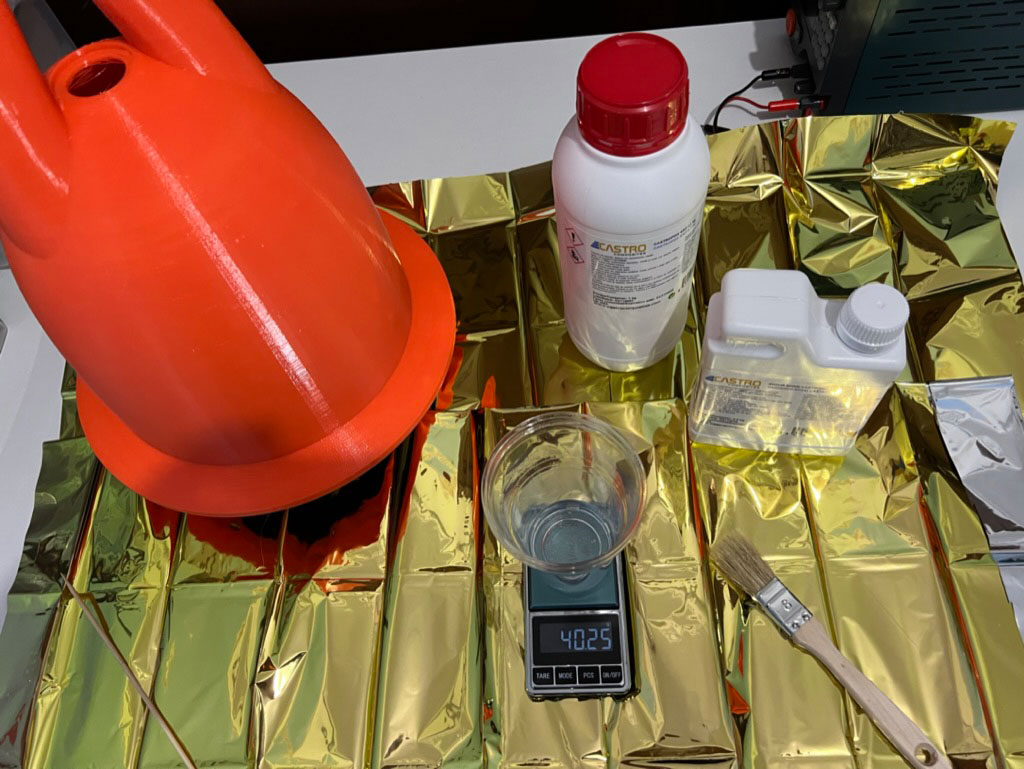
To give the buoy rigidity, and prevent water from entering, I gave it 2 coats of Epoxy, from Castro Composites (Castropox 4307/1209 Resina Epoxi). It is a 2 to 1 mixture that after stirring for a minute, is applied as if it were a paint, with light strokes.
It takes about 6 hours to dry, and it is recommended not to add too much as it covers a lot of surface and during the drying time, if there is too much it is easy for drops to come out and then we have to sand it.


Electronic
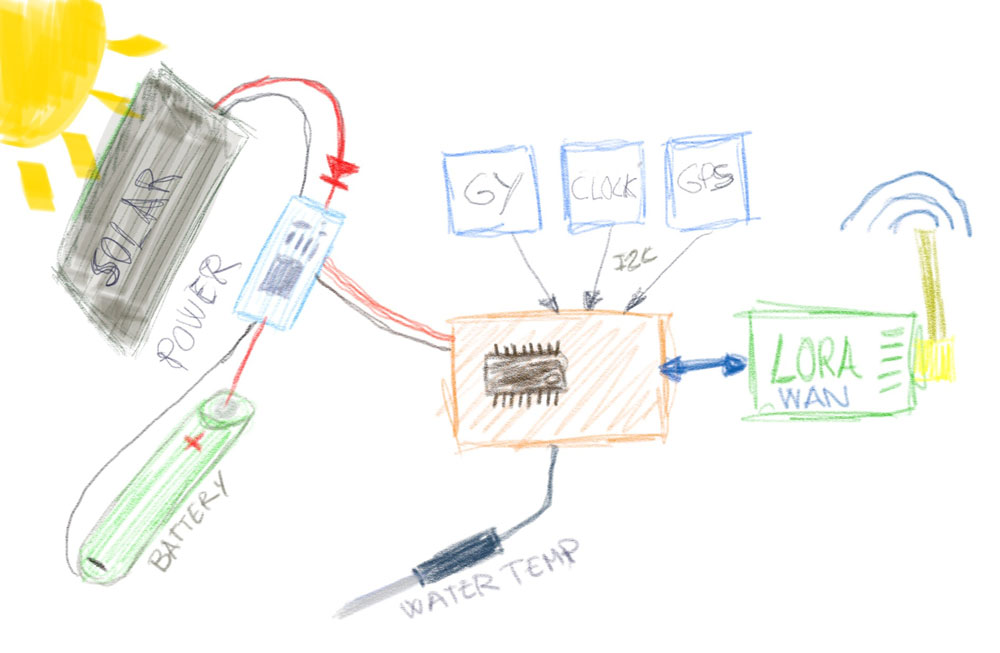
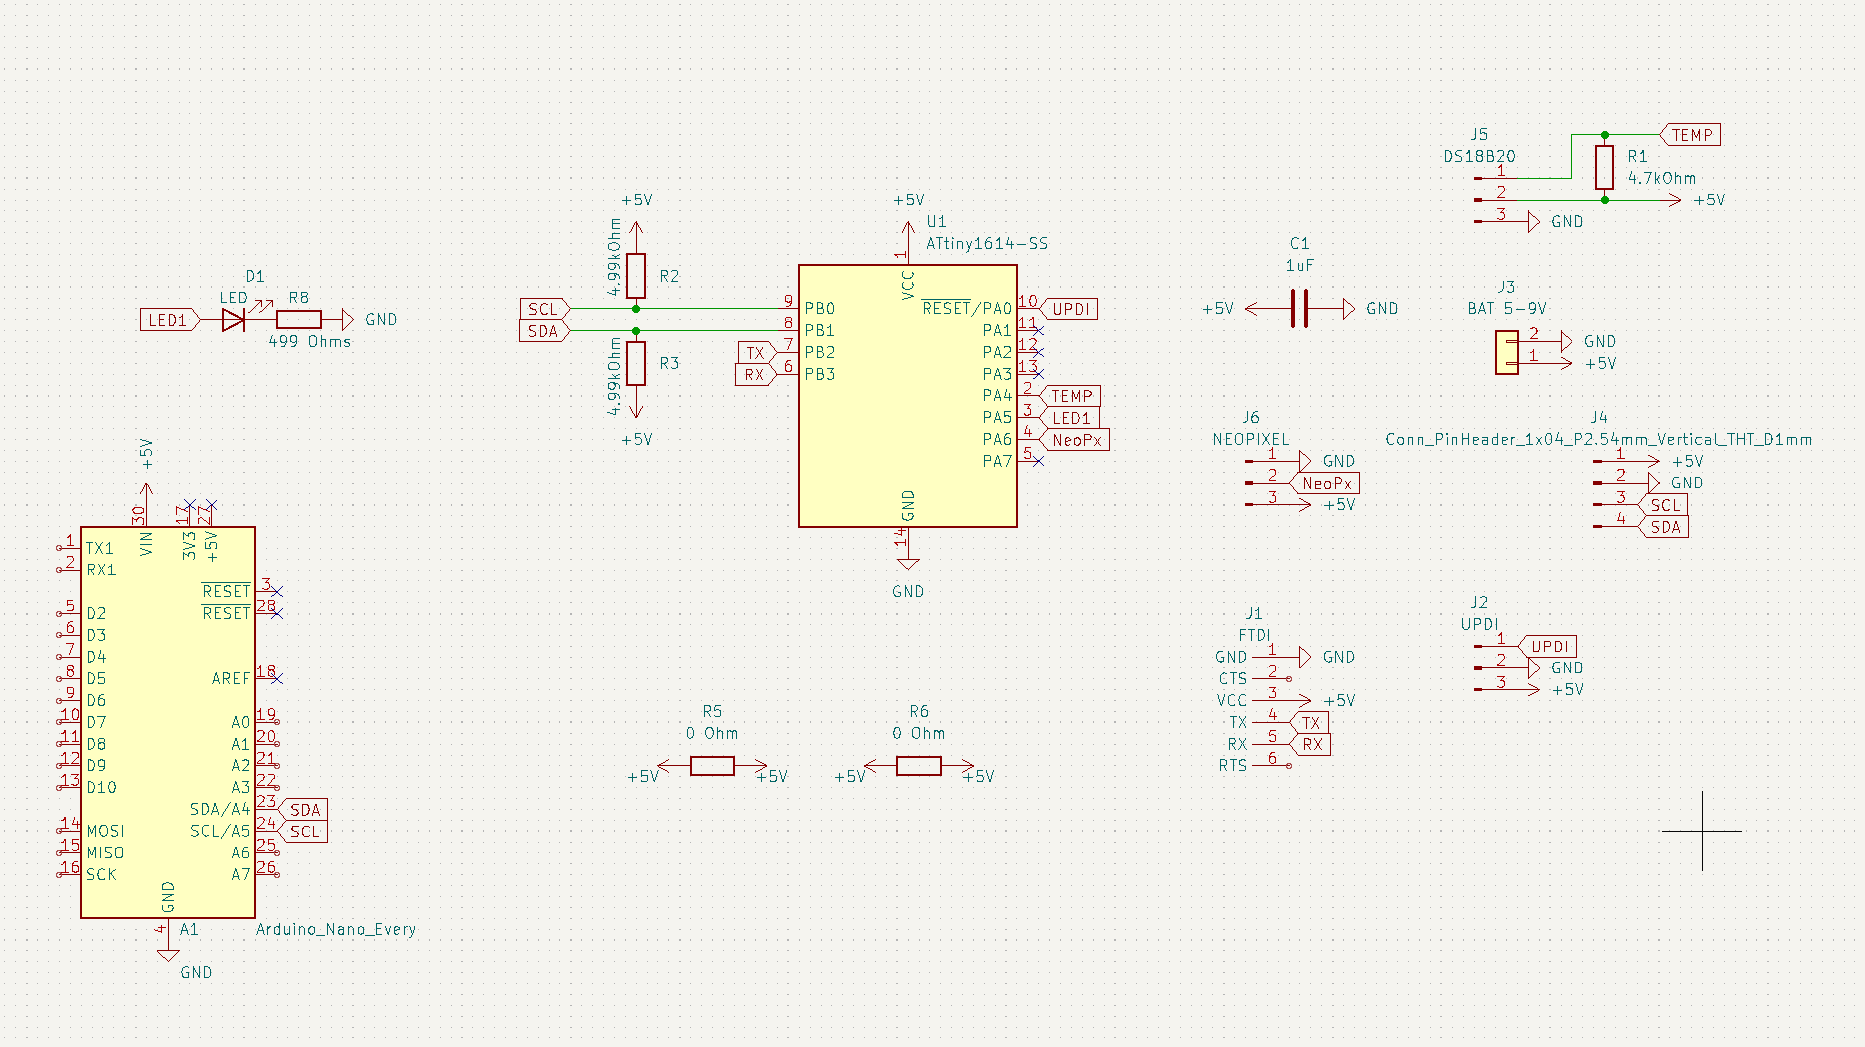
For the design of the electronic board, although initially the use of LORA technology was planned, but given the impossibility of obtaining the components, I have chosen to make a first version using an Attiny1614 with an Arduino Nano 33 IoT for data transmission via WiFi.
Sensors
The sensors on board the buoy must allow to measure: wave height, wave period, wave power, water temperature, air temperature, air pressure, voltage and current consumption.
For operation on days with little sun or at night, we must store electricity in a battery, we will have to control the voltage and consumption and optimize the use of energy.
-
GY-86 use I2C
-
Sensor temperature will use One Wire conection
PCB
I use the Attiny1614 with a Arduino Nano 33 IoT for send data to MySQL server.

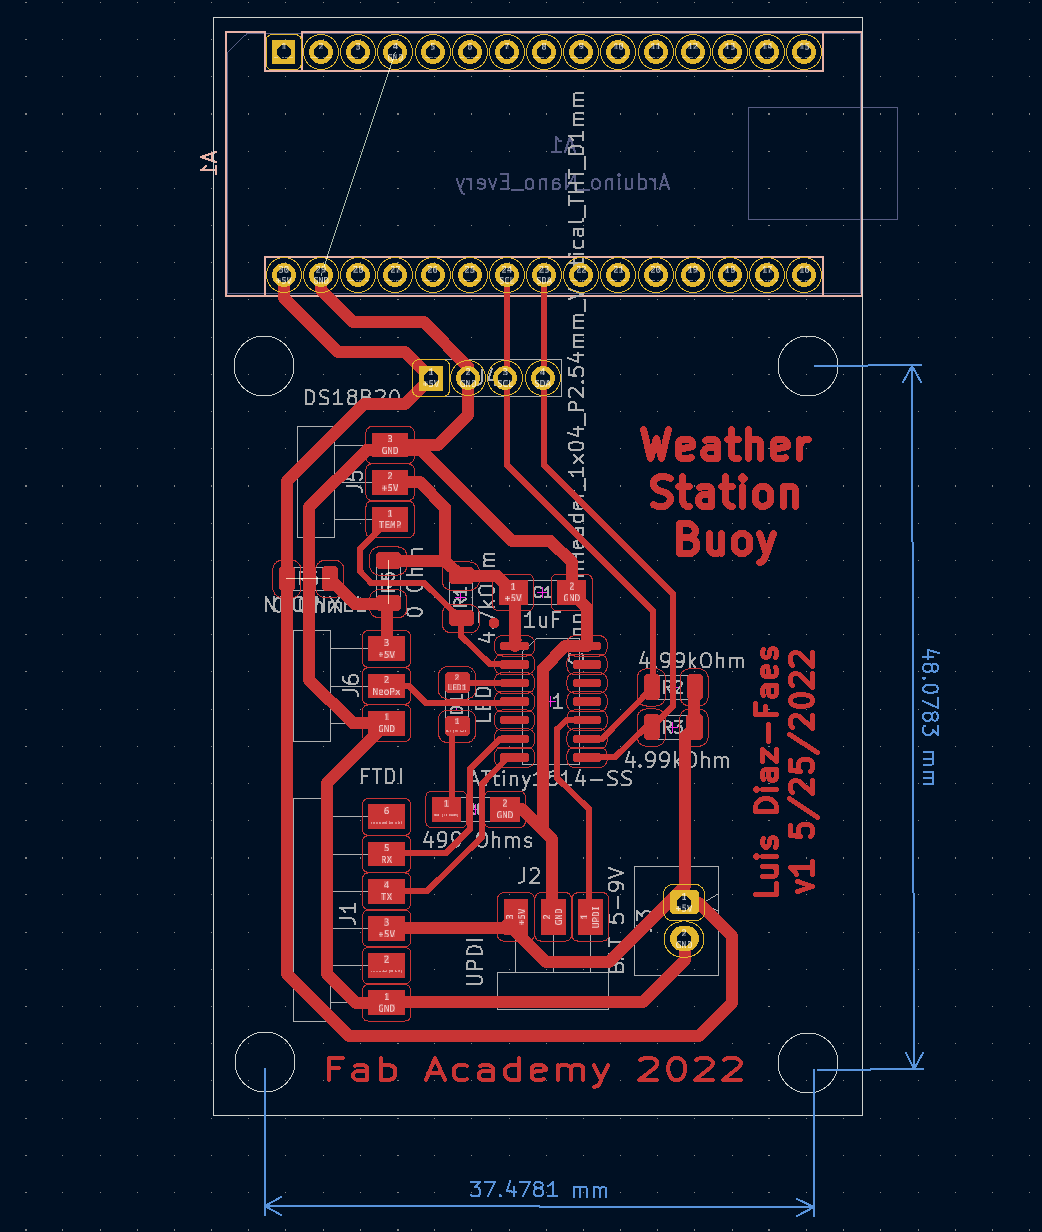
For made the PCB I realice the design in KiCad, with a shield for the Arduino Nano.

Code
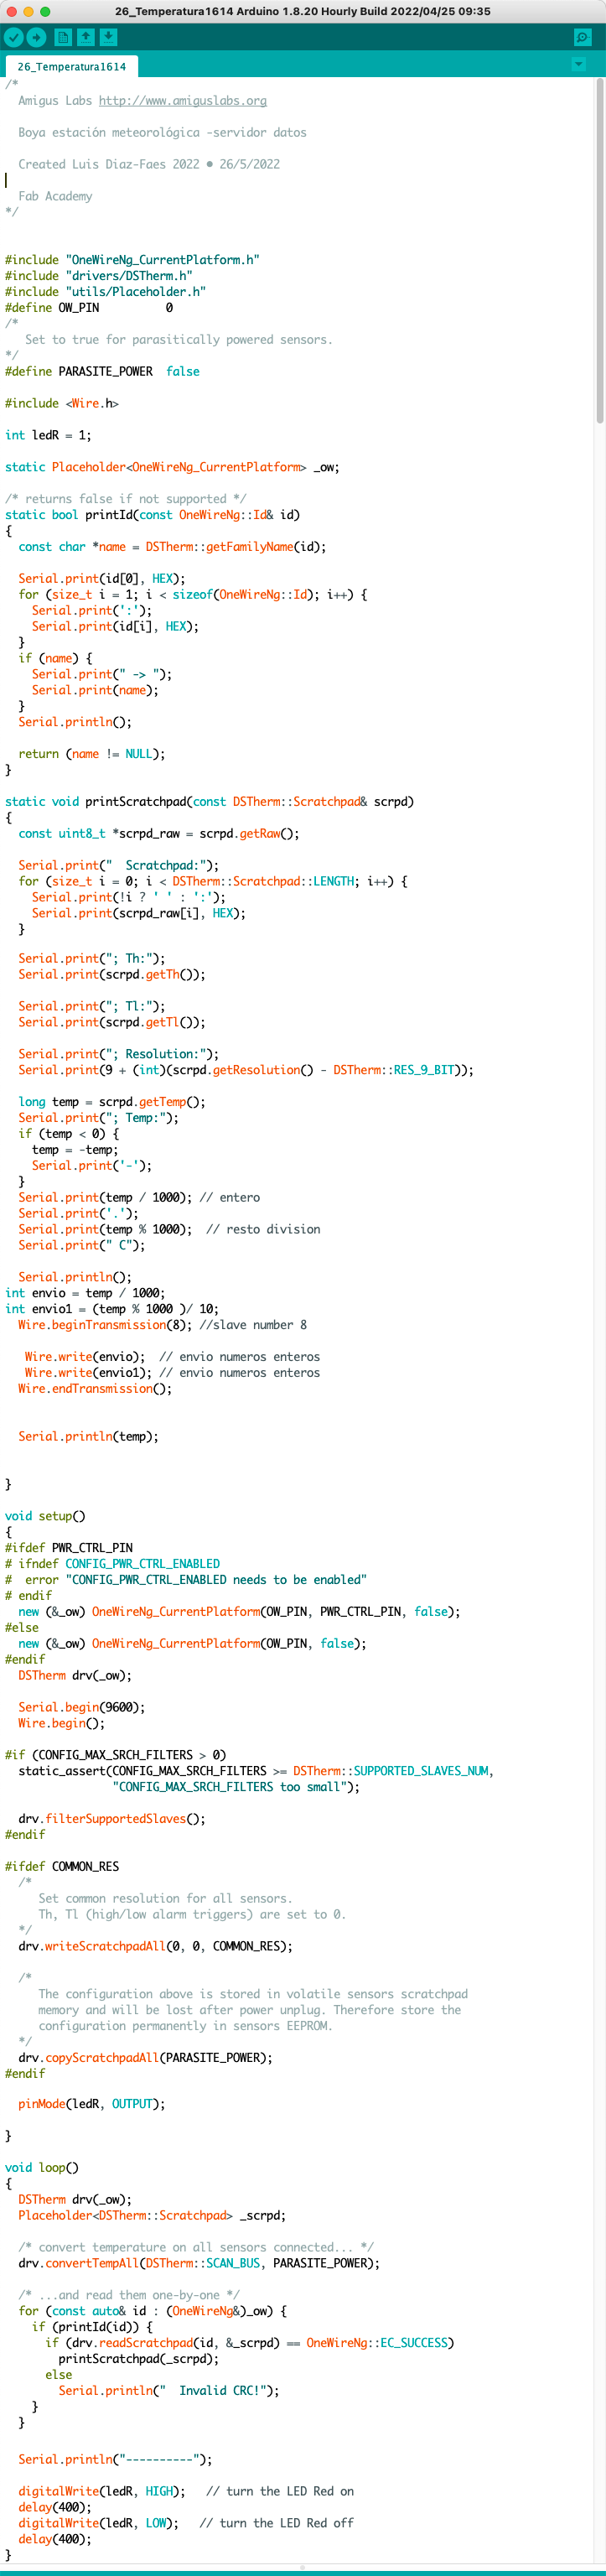
To program the Attiny1614 you need to use a specific library for the OneWire and the temperature sensor.
Through I2C I send the data collected by the Attiny1614 to the Arduino Nano.
System integration
All the electronics are encapsulated inside the buoy to prevent the entry of water or humidity.

Network
Forn now the data sen to a MySQL server with the WiFi network of the beach. The Arduino Nano send a call to a .php file, and send the values of sensors, than store in the database.

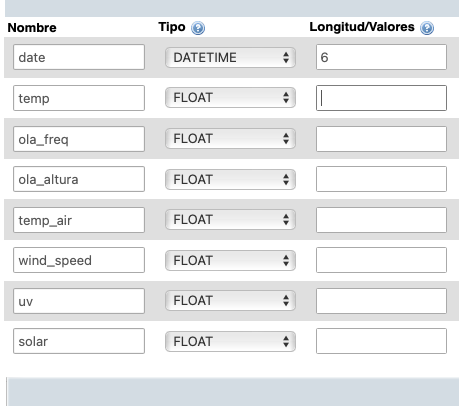
From phpMyAdmin i add a new table to database, and add the necessary fields.
In a next spiral i will add LoraWan support
The data must be sent as far as possible, in order to process it, for this the LoraWan network will be used (Low Power Wide Area Network). In addition to distance, also because of the low consumption that will involve the buoy, and that it will be powered by solar energy.
As Pontes have working a LoraWan network, installed since 2021 by Amigus Labs, in collaboration with Xunta de Galicia, As Pontes City Council and the ICOEume company.

Visualize data
For visualize the data will made a website, for see the current data and history of all parameters. The web will be responsive and work in any device desktop, tablet, movile…
Initialy a simple php for show the last 10 values of database.

In the future a website will show the data, graphs and more info of the bouy and lake.
What have you learned?
The main thing I learned is that I could do it. With the skills I got at Fabacademy almost anything is possible. So I gained a lot of confidence in myself that I could do (almost) anything.
I also learned the skills from Fabacademy and applied them to my project (2D/3D design, cutting, 3D printing, CNC machining, electronic design, production and programming, molding and casting, composite manufacturing…).
Downloads
STL Files
- Boya_arriba.stl (9.9 Mb)
- Boya_abajo_v2.stl (8.9 Mb)
- Boya_top.stl (700 Kb)
- placa_solar.stl (429 Kb)
- placa_solar1.stl (607 Kb)
- Soporte_AntenaGPS.stl (67 Kb)
- soporte_PCBs1.stl (477 Kb)
- soporte_PCBs2.stl (493 Kb)
- tapa_capsula.stl (434 Kb)
- tapa_capsula_superior.stl (9.9 Mb)
Laser Cut Files for EVA Foam
CNC Files
Electronics Files
Source code Files
- Arduino Nano IoT AP code (6 Kb)
- Attiny1614 code (3 Kb)
- Arduino Nano IoT Send to web code (3 Kb)
- Web Page files (6 Kb)
BOM
Assignments links
Many assignments I did during the Fab Academy focused on my project, to move forward with it and eliminate spirals.
- Week 1 - Principles and Practices January 26 2022
- Week 2 - Computer-Aided Design Febrary 2 2022
- Week 7 - Computer-Controlled Machining March 9 2022
- Week 9 - Molding and casting March 23 2022
- Week 12 - Input Devices - Temperature Sensor April 20 2022
- Week 12 - Input Devices - Sensor IMU GY-86 April 20 2022
- Week 13 - Networking and communications April 27 2022
- Week 16 - Applications and Implications May 18 2022
- Week 17 - Invention, Intellectual Property, and Income May 27 2022
Final Projects links
-
Final Project Proposal January 26 2022
-
Final Project Development From January - June 2022
-
Final Project 8 June 2022