9 - Molding and casting
This week we have dedicated it to modeling and casting. I made a small keychain for the promotion of the buoy. A very fun experience!
Summary
This week we have dedicated it to molding and casting. I made a small keychain for the promotion of the buoy.
Assigments
- group assignment:
- review the safety data sheets for each of your molding and casting materials,
- then make and compare test casts with each of them - extra credit: try other molding and casting processes
- review the safety data sheets for each of your molding and casting materials,
- individual assignment:
- design a mold around the stock and tooling that you’ll be using,
- mill it (rough cut + three-axis finish cut),
- and use it to cast parts - extra credit: use more then two mold parts
- design a mold around the stock and tooling that you’ll be using,
Group assignment
The link to Group Assignments of Fab Lab León is this
I am a remote student, and from Amigus Labs (As Pontes, A Coruña) I have done this week’s homework.
Ferris File-A-Wax
Professional jewellers carving wax for lost wax casting models. This unique wax can be carved, shaped & even machined to reproduce the most intricate design details. Ideal for producing a wide range of shapes & finely detailed castings including rings, earrings, pendants, bracelets and more. Each colour is a different hardness grade.
Silicone RPRO20
The silicone is RPRO20 made by Reschimica. It is addition silicone rubber. It hardens in 3 hours at room temperature, has a very high dimensional stability (linear shrinkage 0%) and high technical and mechanical performance (+ 15% of casting compared to other tires). Ideal for making medium hardness professional molds (hardness 21 shoreA) in a simple and safe way.
It is a bi-component addition rubber (base + platinum catalyst) of blue color that thanks to its low viscosity and high elasticity allows copying faithfully even the smallest details. It has excellent resistance to tearing, great resistance to high temperatures and aging and an excellent non-stick effect. The main areas of application are:
-
Mouldmaking and modeling (due to its remarkable reproduction precision, high dimensional stability and high mechanical strength)</br>
-
Artistic ceramics (due to the high dimensional stability, the remarkable fluidity, and the good mechanical resistance)
GÉDÉO RESIN
Two-component epoxy resin system: resin and curing agent. Transparent and solid, perfectly imitates glass paste. Allows the creation of moulds, inclusions up to 2 cm thick for a small volume, coatings or laminates. Intended for experienced and professional users. - Transparent resin, - Simply dosing, - Very solid, - Can be used as a varnish.
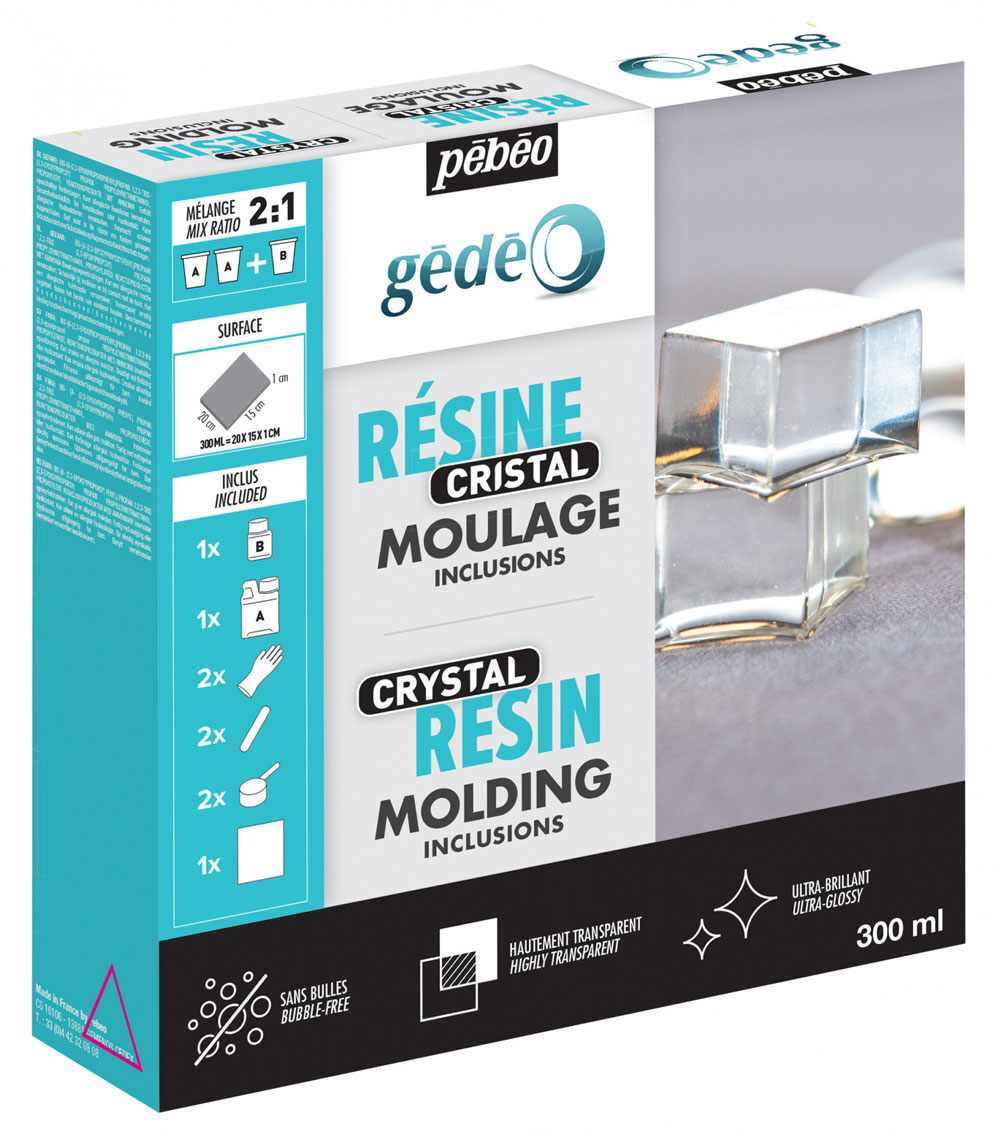
Transparent, solid and easy to use Thanks to its two-component epoxy system (resin and hardener). Surprising and attractive pâte de verre effects. Perfect for making casts, inclusions, tray designs, jewellery, coatings, surface decorations and laminates. Can also be used as a protective glaze.
Working time: 1h45
Setting time: 18h
Instructions:
1.- In a dry and clean container, pour first 1 part of Glaze Hardener B and then 2 parts of Glaze Resin A.
2.- Mix the two components thoroughly until they reach the corners of the container (incomplete mixing does not guarantee hardening, mixing too vigorously will cause bubbles to appear). Transfer the mixture to a second container and mix again to ensure homogeneity of the resin and optimal hardening.
3.- Pour onto the surface of your choice.
4.- Allow to dry for 24 hours in a dust-free environment. Setting time is progressive and variable depending on ambient temperature and humidity.
Safety
To work with silicone or resin, it is mandatory to protect your hands, eyes and respiratory system.

For hands we will use nitrile gloves.
To avoid contact of gases with eyes, protective glasses.
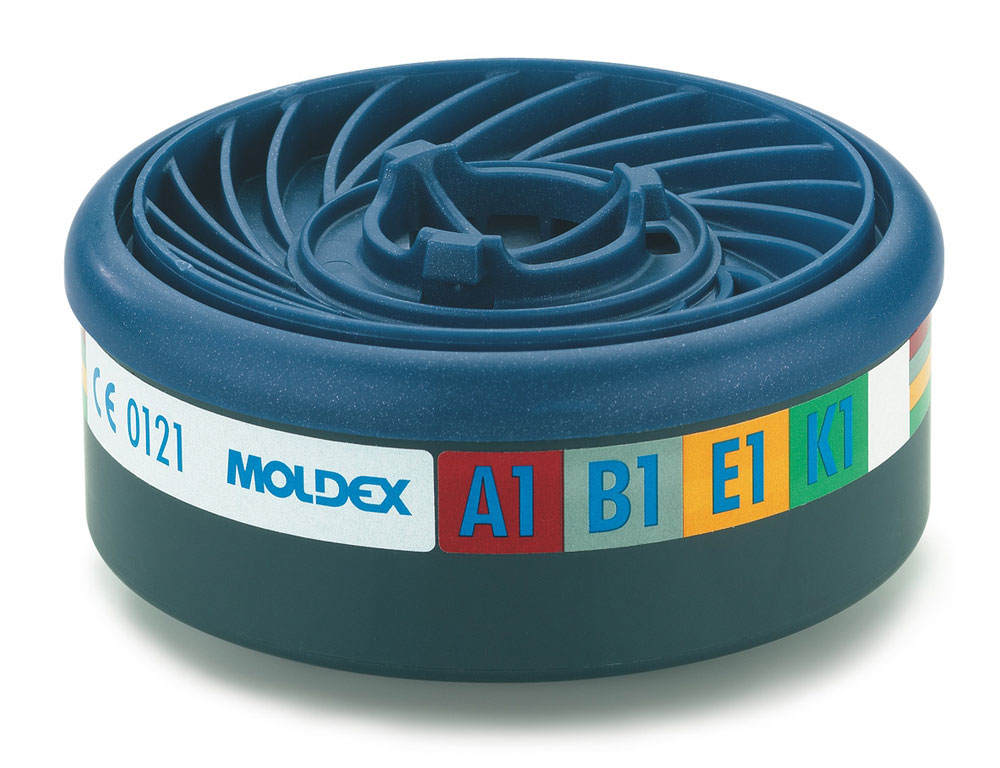
And for the respiratory system, mask with gase filter. Protection class ABEK1 - protection against organic, inorganic and acid gases and vapours as well as ammonia and derivatives
Individual Assigment
To make our mold we will use a SainSmart Genmitsu 3018-PROVer. until now we prepared the milling directly in Easel, since it was only rout and cut, but we don’t have 3D milling options.
The solution will be to use programs to first generate the gcode and then send it to be milled either from Easel or directly by MicroSD on the milling machine.
I will start by making a small design of a test mold to see the work process and then a real project when I see that everything works well.
Mold Test
The first design is a simple recess test, with flat and 3d geometries to see what process to do. I made the model in Cinema 4D.
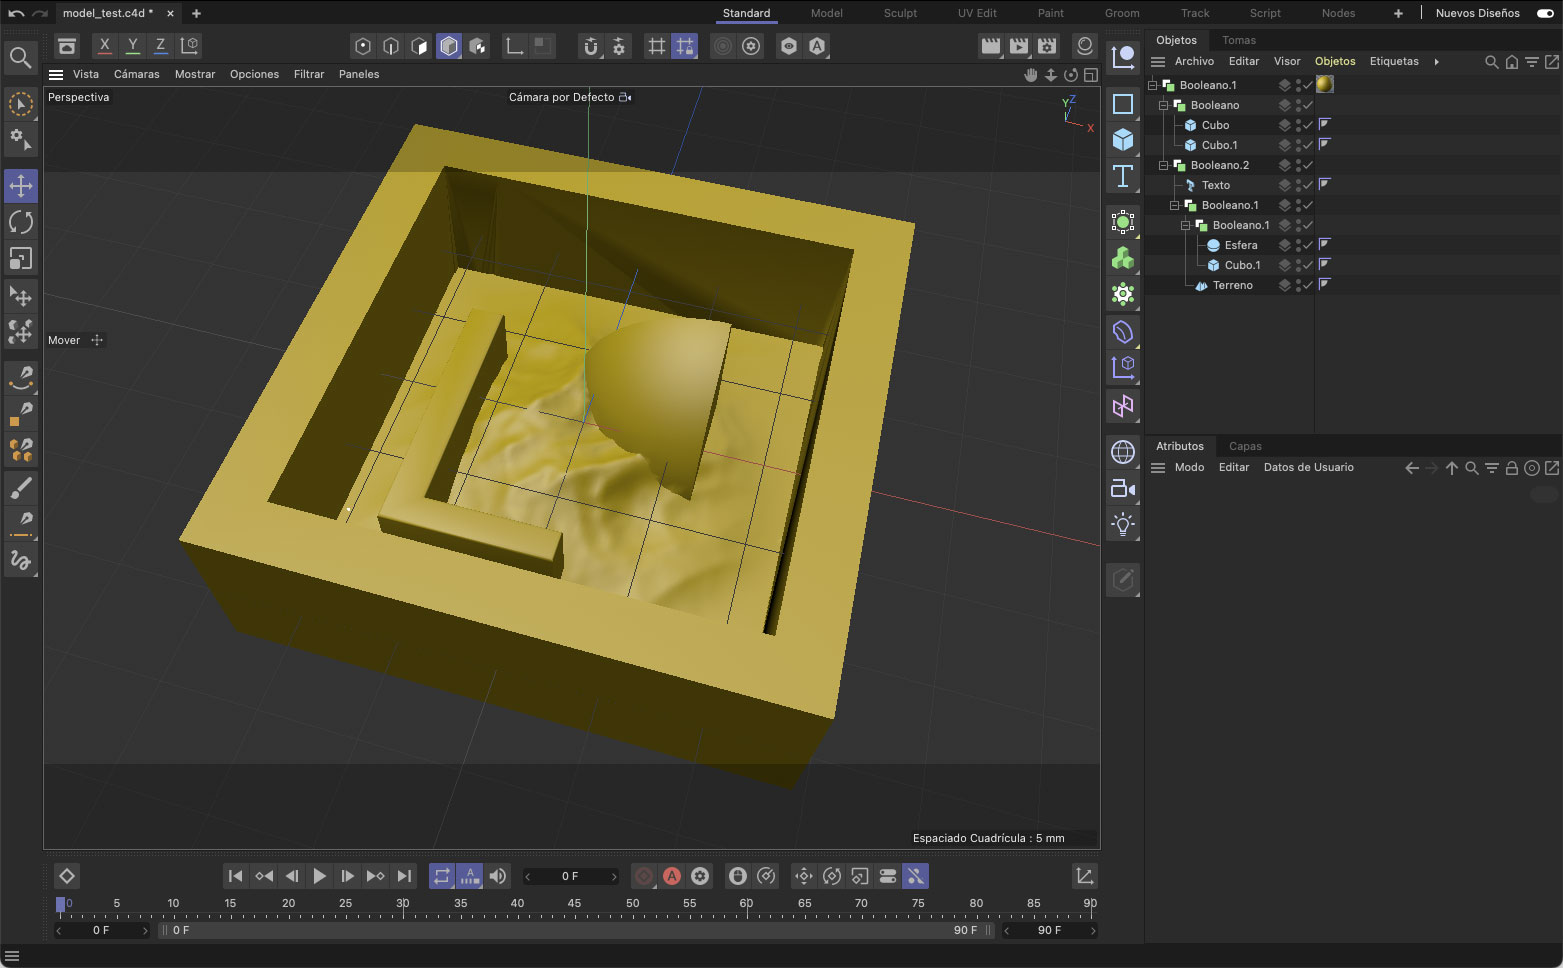
Since I have a piece of polystyrene, a soft material, to do a milling test, I will avoid having problems with the milling cutter in these tests.
I try made the gcode in mods (https://mods.cba.mit.edu)
mill 2.5D stl
First open a server project, gcode “mill 2.5D stl”.
After import the .STL I set the tool diameter to 2mm, the Cut Depth to 2mm and the max depth to 11mm. My stl have a height of 10mm.
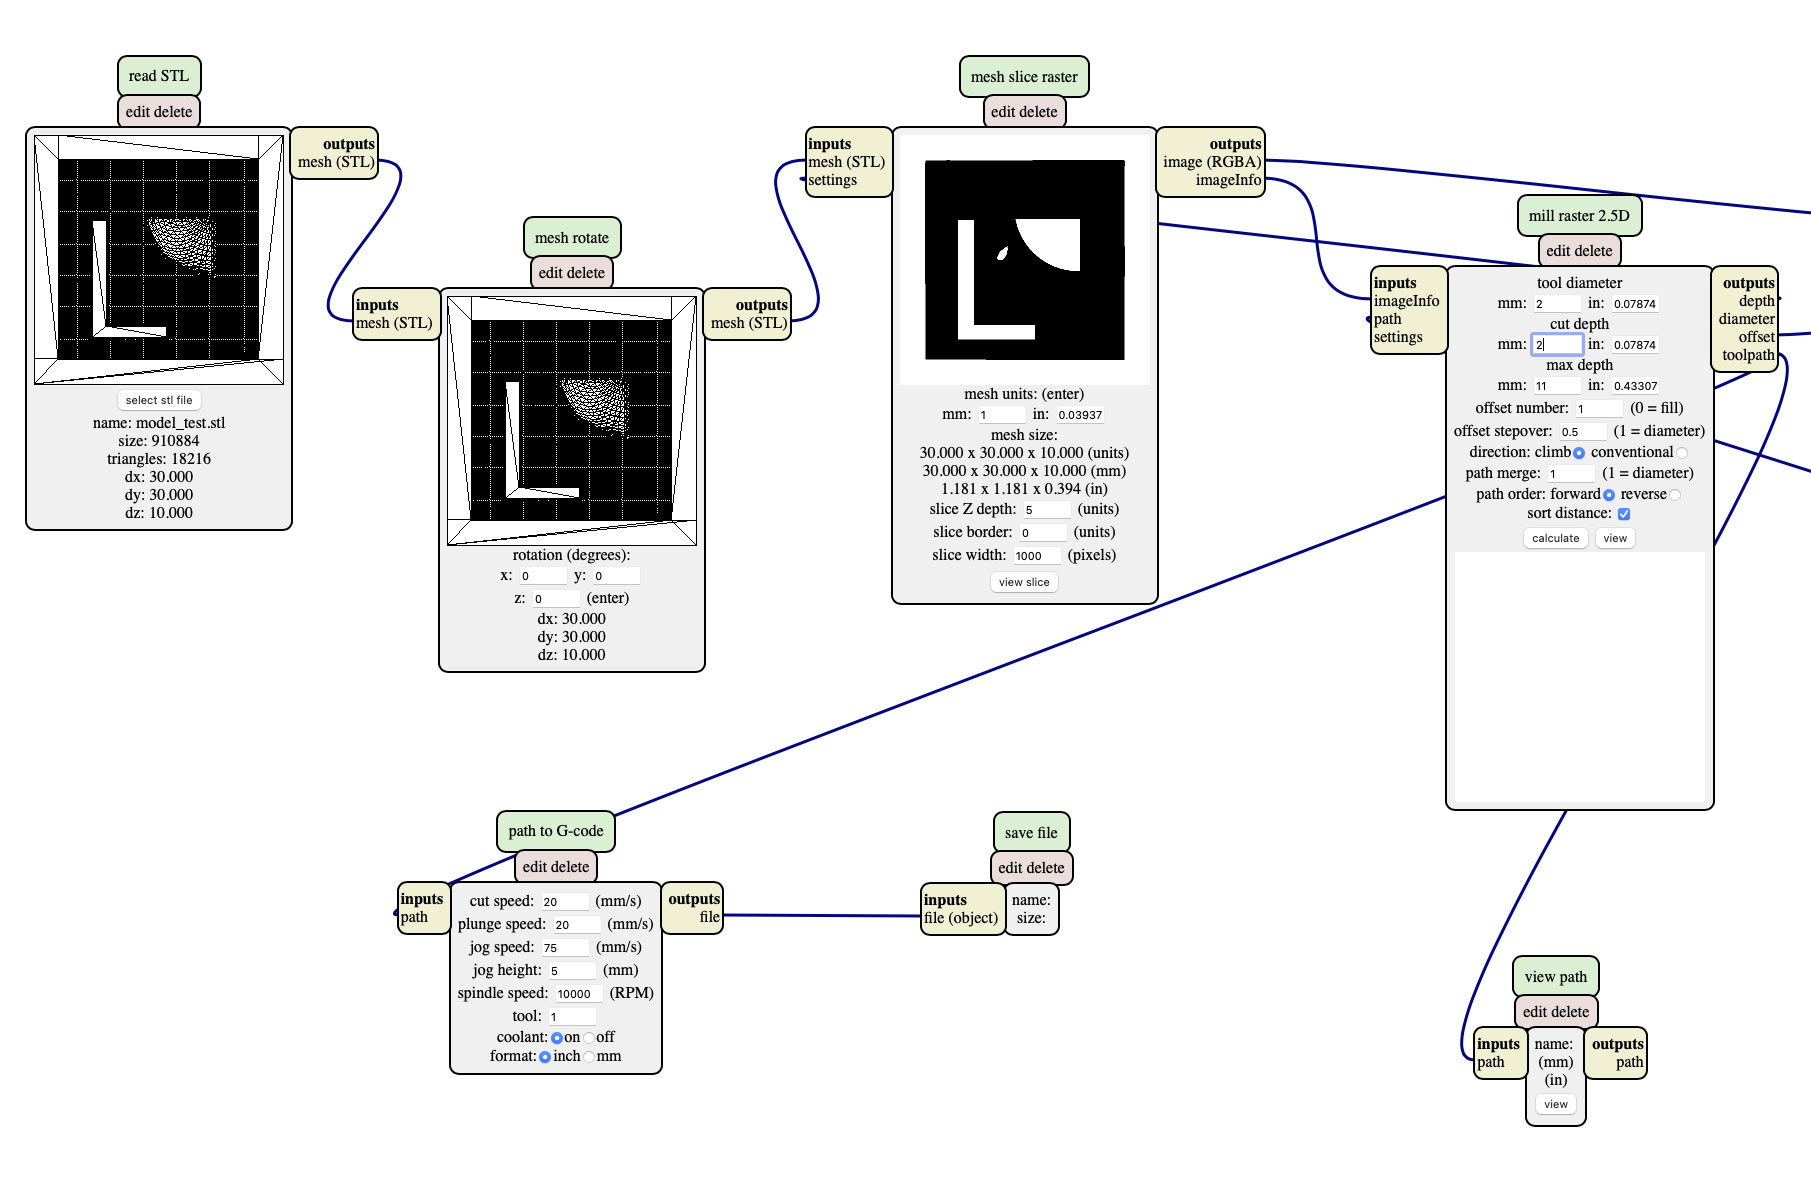
And press to calculate for save the gcode file.
mill 3D stl
I made similar process to get the finish gcode. Now with a program “Mill 3D Stl”.
In mesh height map i set the Mesh Unit to 1mm, and in Mill Raster 3D the tool diameter to 2mm and stepover to 0.2. and calculate for made the .stl.
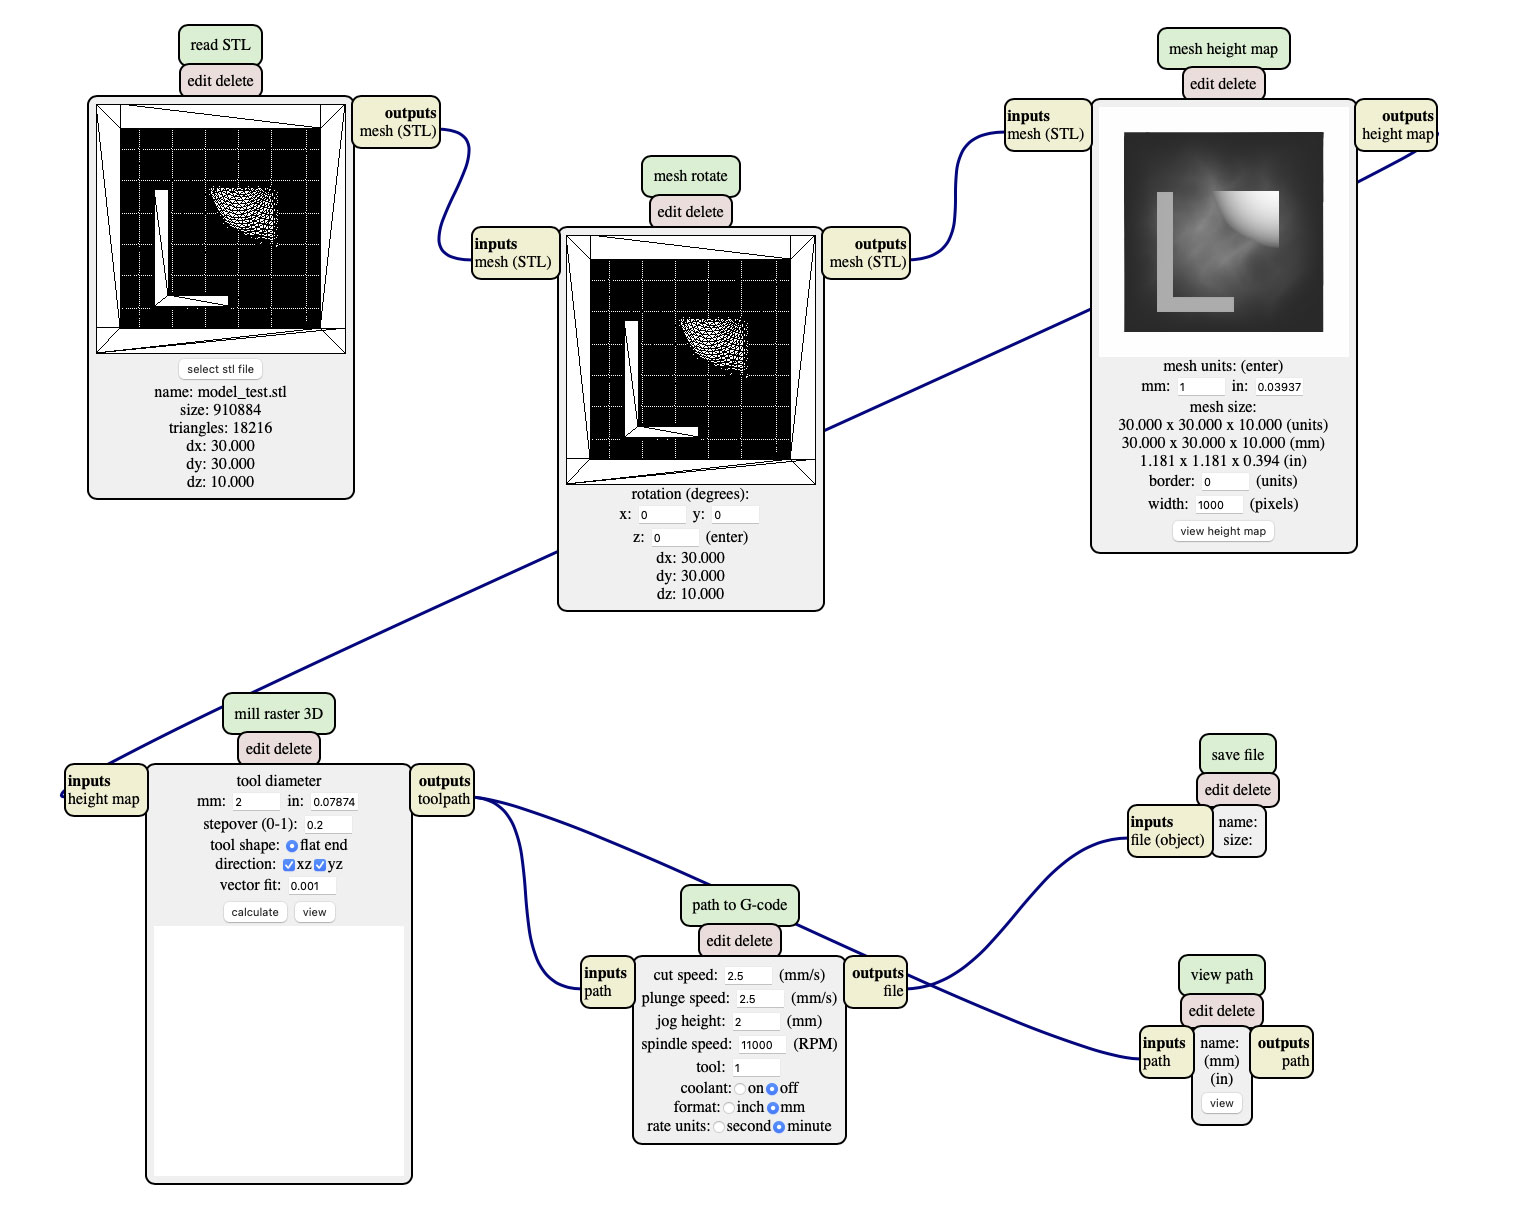
Finally i have to gcode files:
- mesh slice raster.nc
- mill raster 3D.nc
In EASEL I try import the .nc files in a new project.
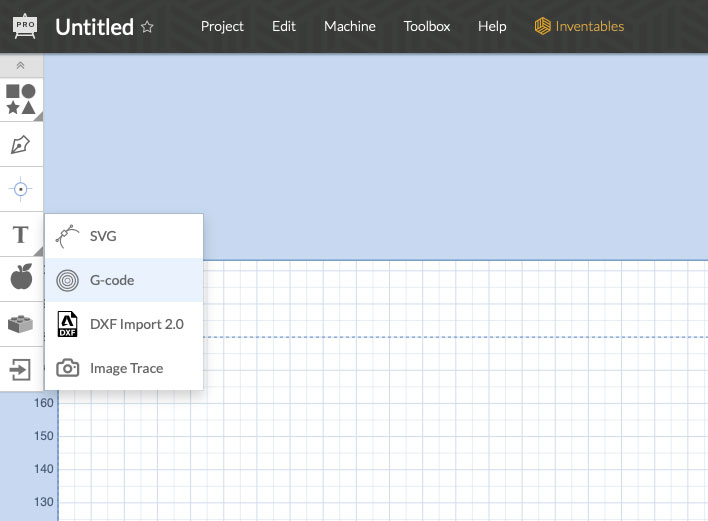
gcode errors
But when try import say errors in gcode:
- G49 (line 5): Tool Length Compensation Cancel
- G80 (line 7): Canned Cycle Cancel
- T1M06 (line 10): Feedrate?¿
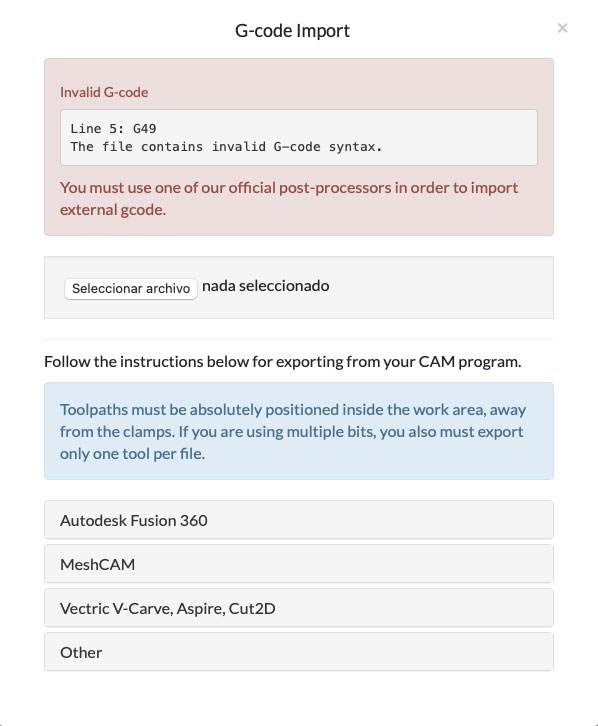
I delete any line and import again until open the gcode.

Finally Easel has imported the gcode, but it is upside down. You could try to fix it by editing the gcode, but I think it’s better to try another option.
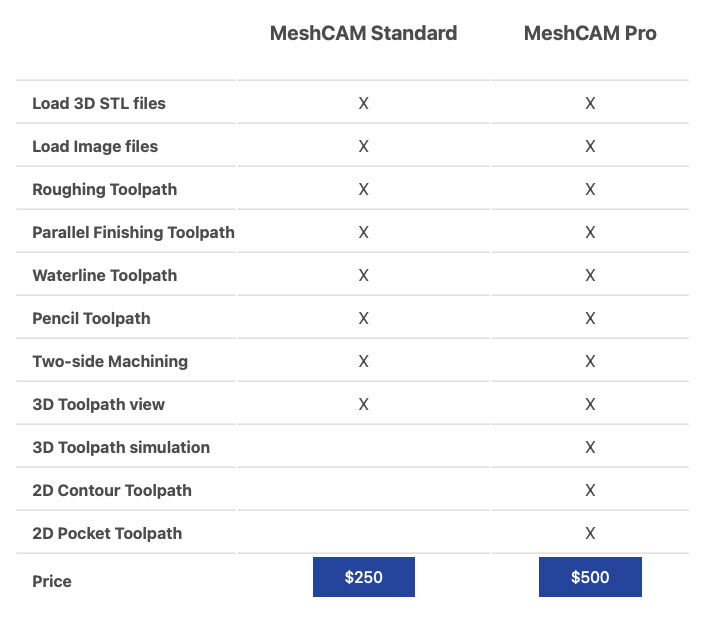
MeshCAM
In Easel help with Gcode talk about a app MeshCAM is compatible con MacOS and have a trial version of 15 day with no limitations.
For doiwnload the trial only need enter your name and email in a form to receive a 15 day activation code. The price os MeshCAM Pro with 3D mill is 500$.
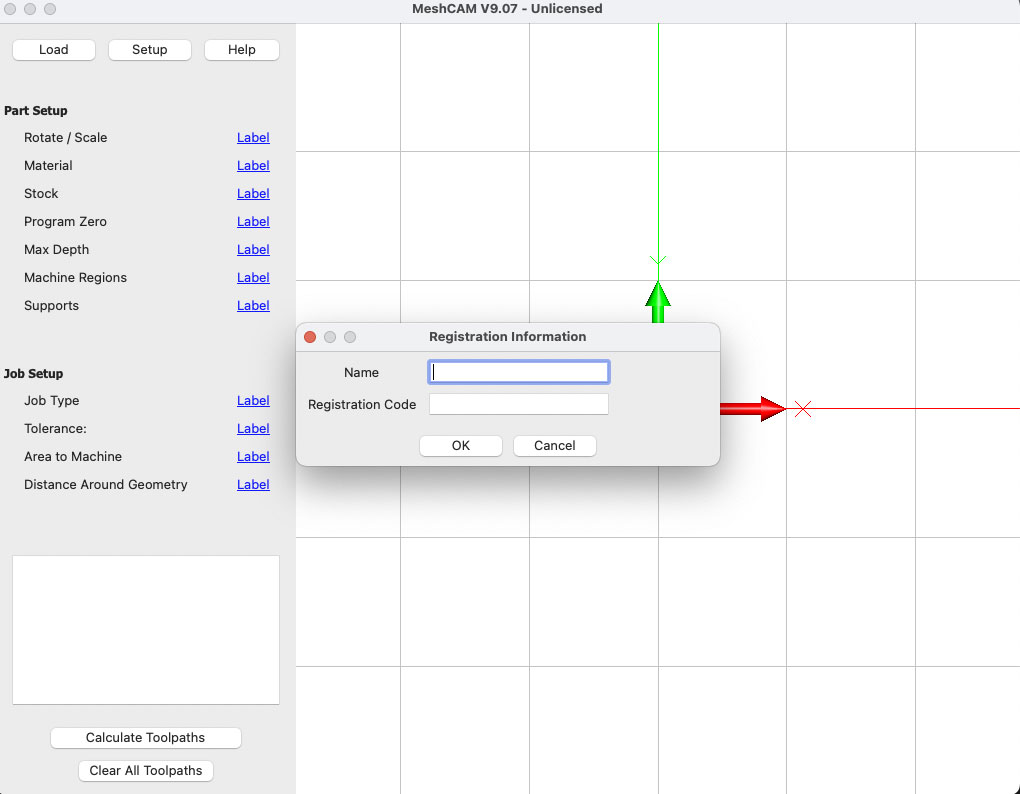
After download amd install (drag and drop in Mac), when open the first time, request the name and serial (you recive by email after send the form) for open the app.
After install, i open the STL file. The fisrt is configure the material. If is necesary rotate the object, and set your home in xyz (Program Zero).
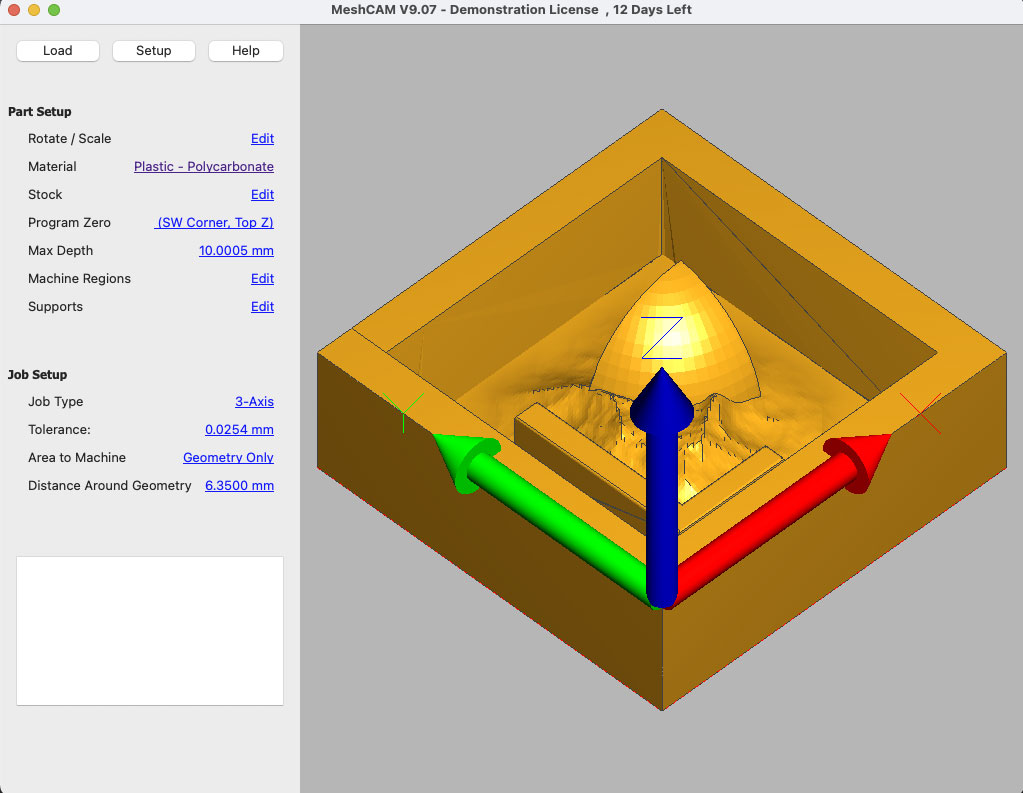
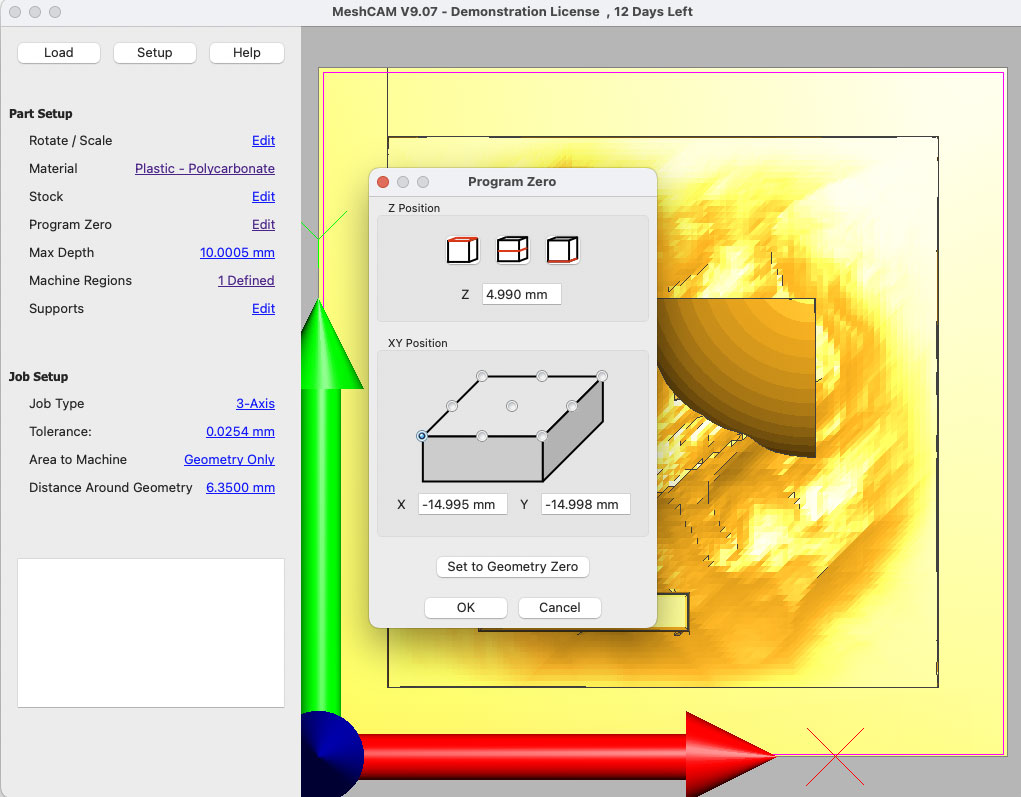
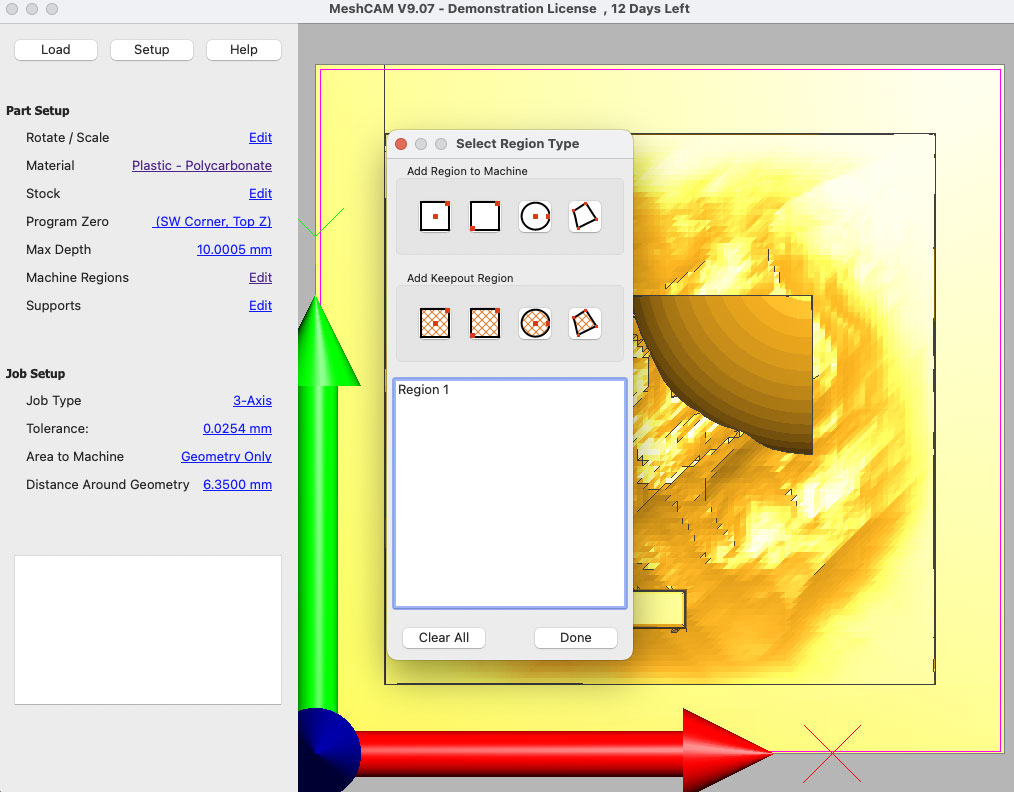
Set the Machine Regions, is the zone will mill, in this case insiteh my object (the red line). If dont select will mill too outside the model, and in this case it is not necessary and it would take a long time.
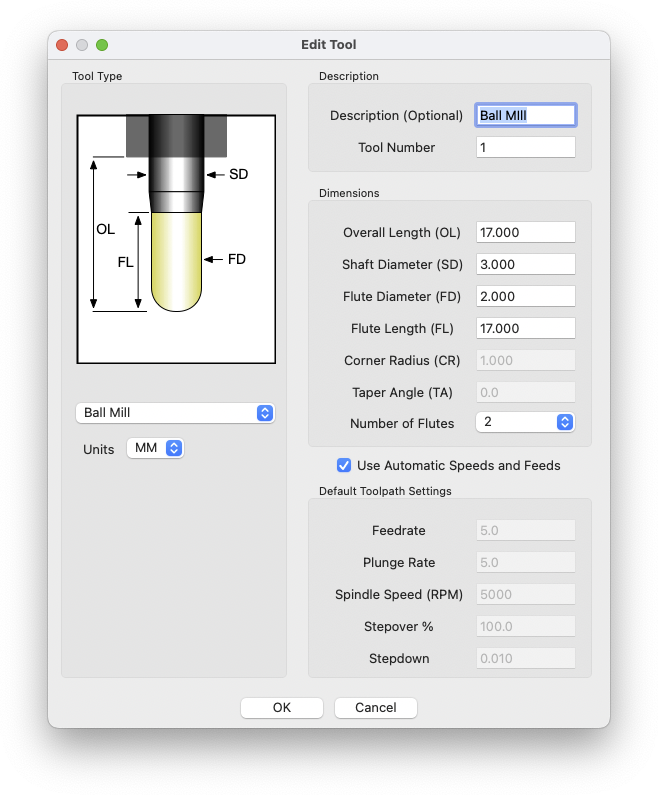
In menu “Job Setup” set the Machine, in this case a Generic 3018 and in List Tools add your mill. in my case a Ball Mill of 2mm
After set all, we can start to made the toolpaths.
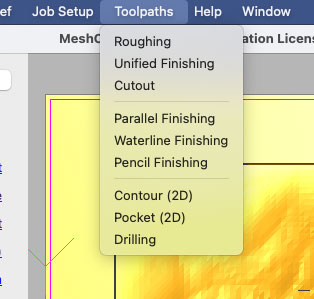
Roughing
The first toolpath is roughing, remove more or less quickly all the excess material.

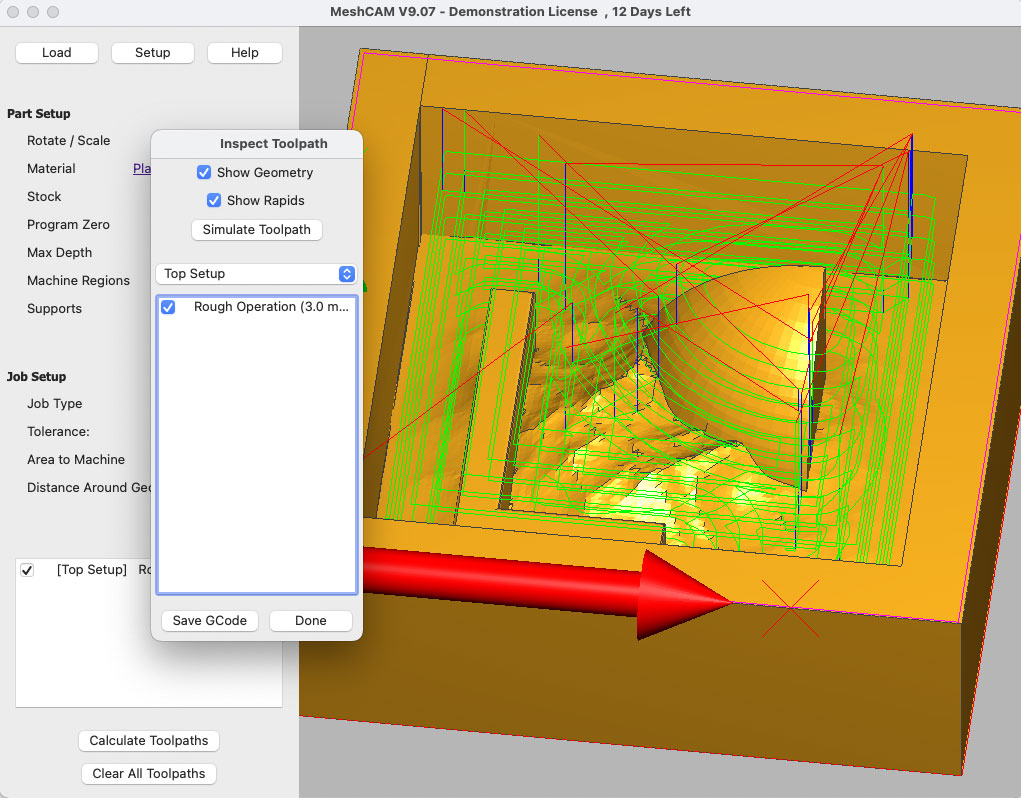
Can save the Gcode from this window.
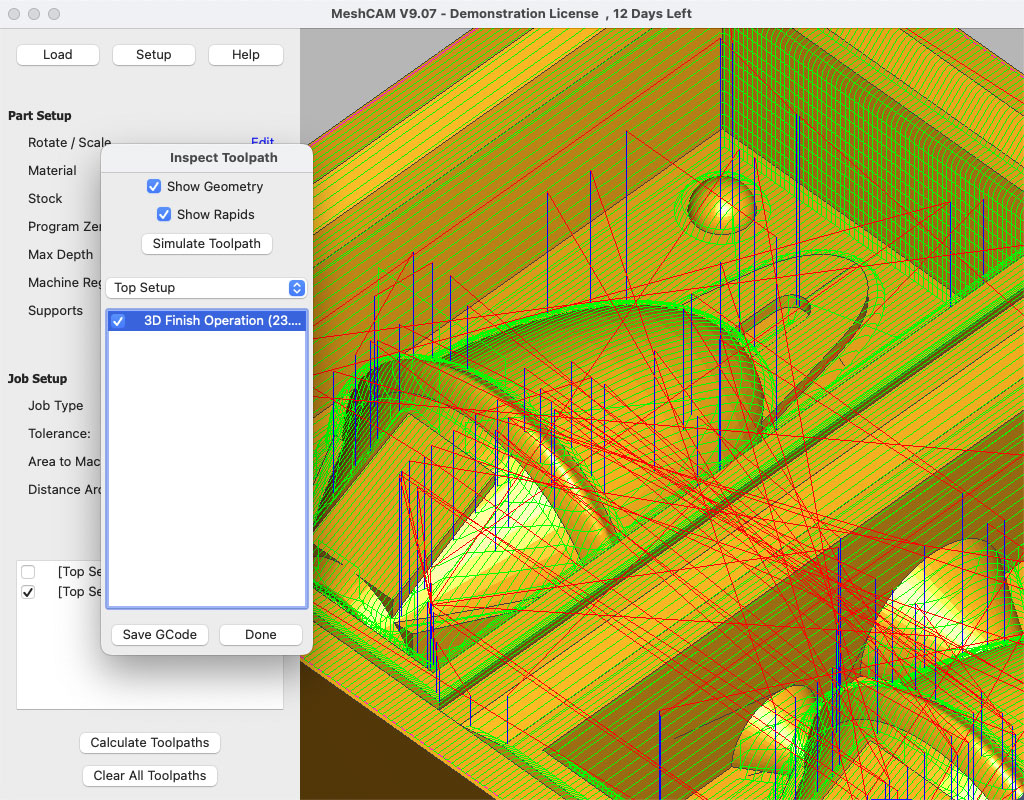
Unified Finishing
After have the roughing, made the unified finishing, adding another toolpath.
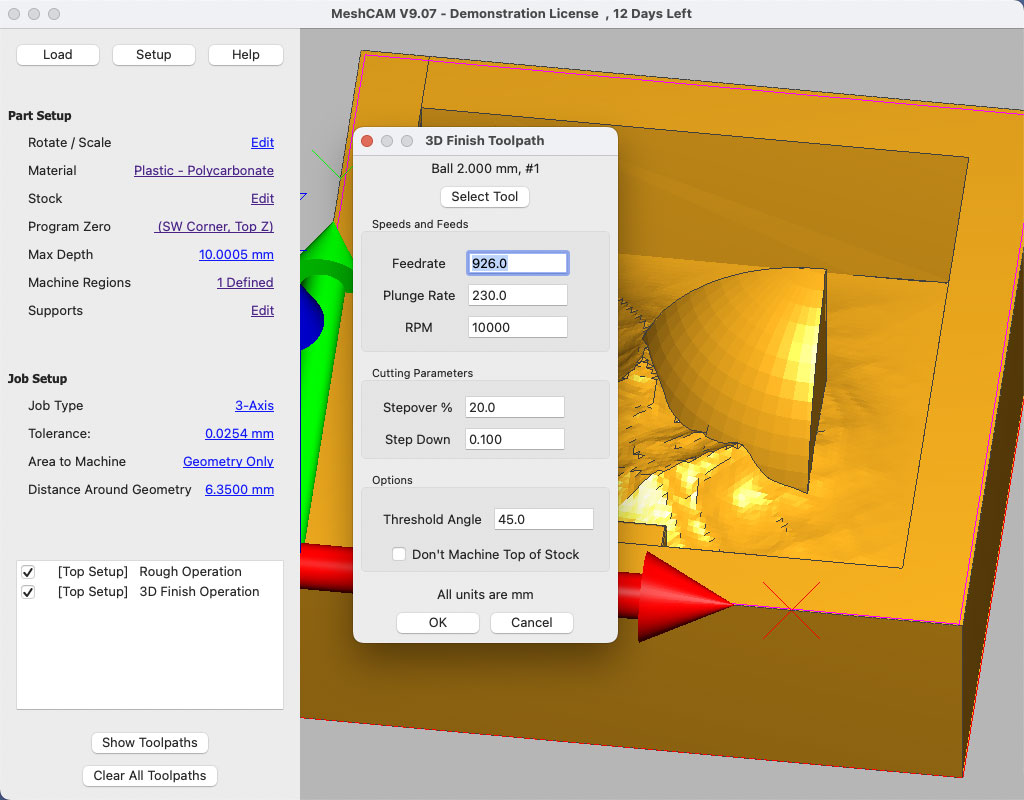

And export the gcode, in my case I export one from roughing and other for unified finishing, for made in Easel two process, only deselect what dont like export and select the active toolpaths.
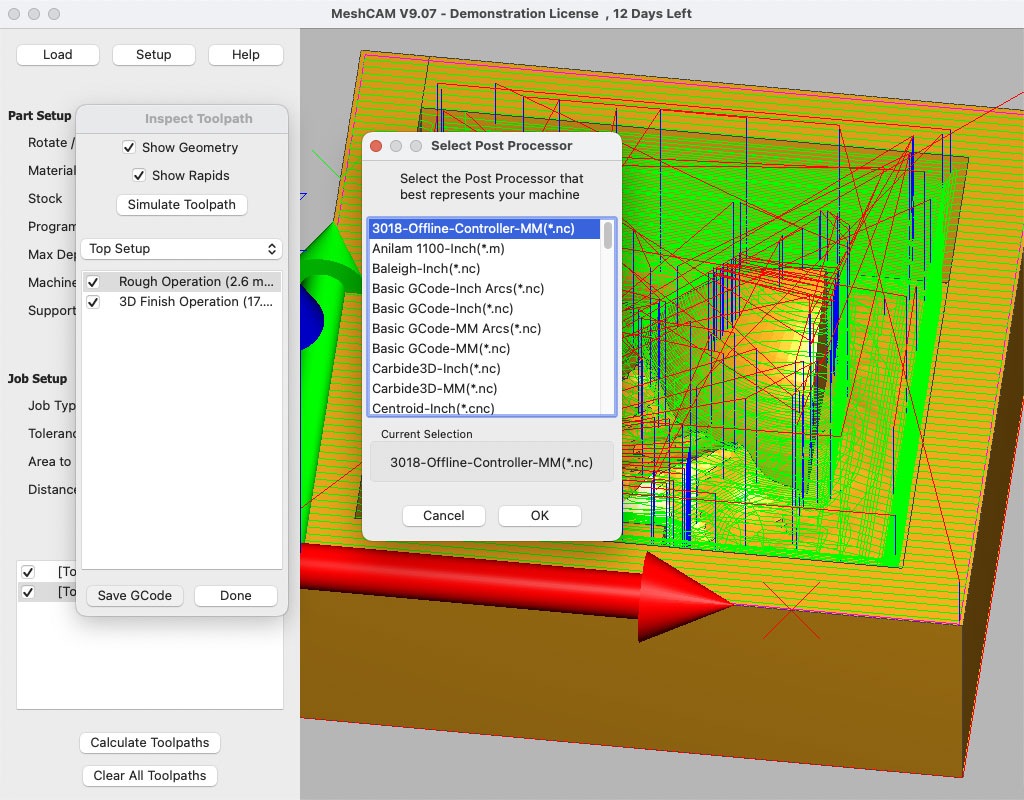
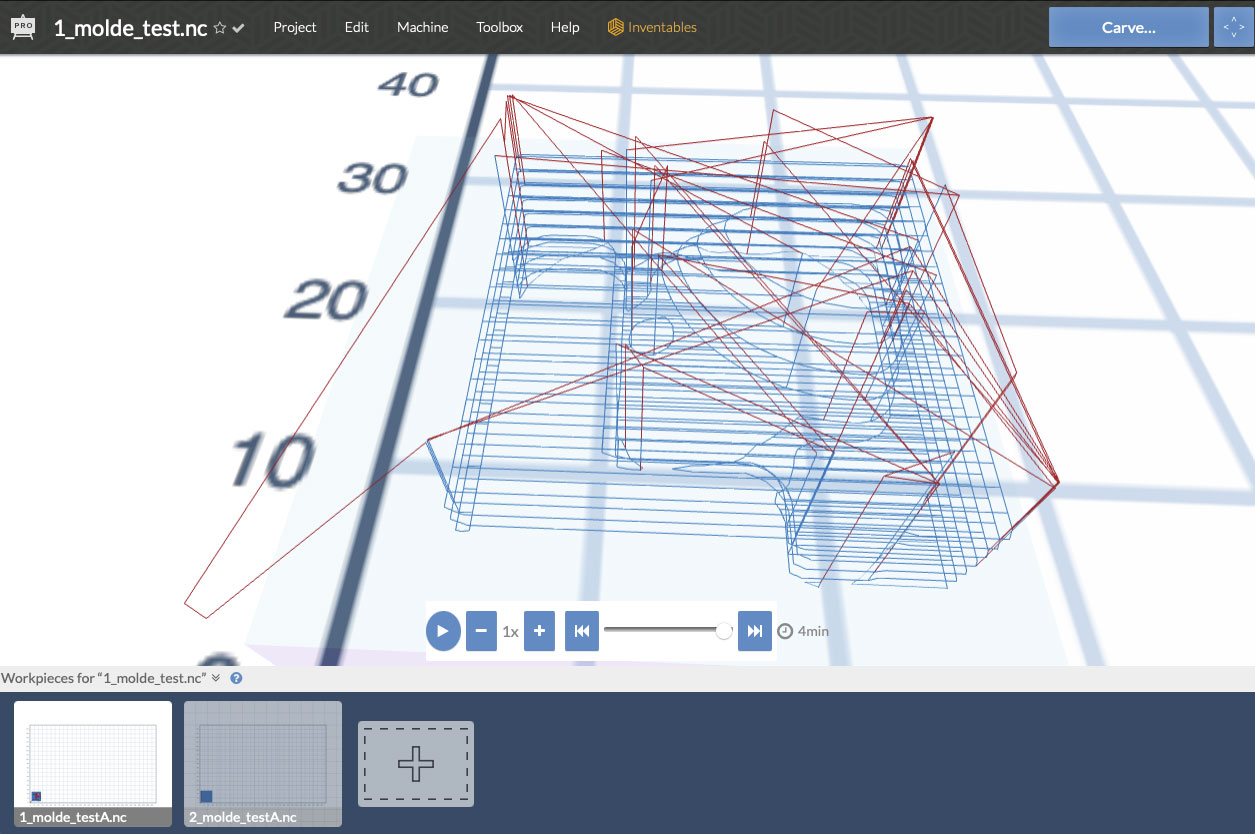
Now in Easel, import the gcodes, and carve….
I made two Workpieces, one for any toolpath, when import to Easel both have same zero home.
Roughing…
… and Unified Finishing
This workflow work good for me, I can start with my mold of this week.
Mold Buoy
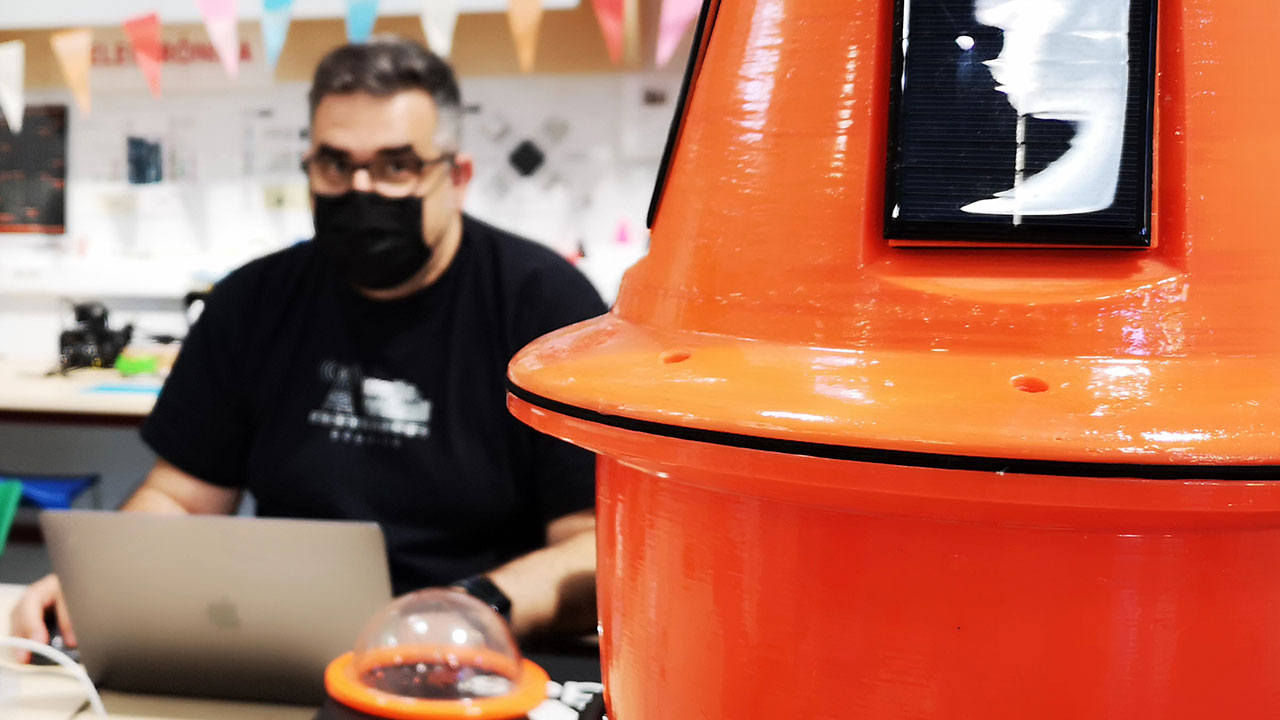
My final project is made a buoy, i think made a simple model for made promotional keychains.
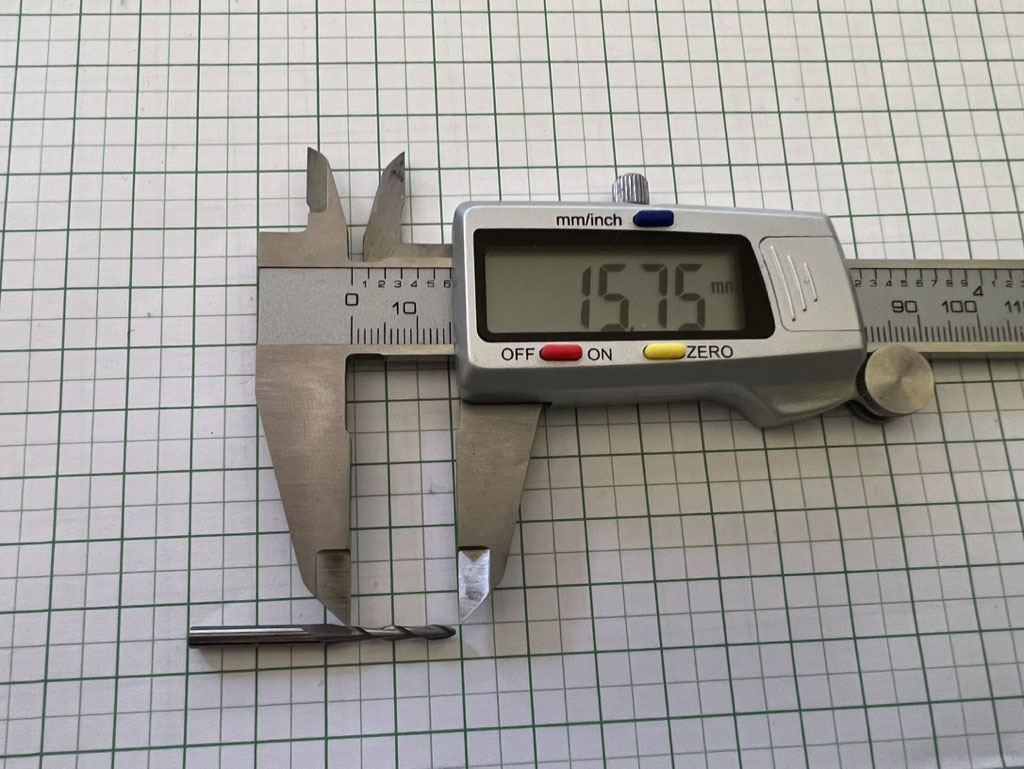
The mill is 15.75mm of long, i cand made max a 16mm of carve. i made the buoy with 12mm of radius, fit in any part of my mold.
The wax for making molds have a dimensions of 91x145x36mm. I only want to use half of the surface, in case there is an error, to have enough room for a second attempt, having a thickness of 36mm and only going down a maximum of 15mm, I can do it at most 4 times, 2 on each side. I have also set a time limit, I don’t want the milling to take a long time.
In total each part of the model will measure 62x38x17mm.
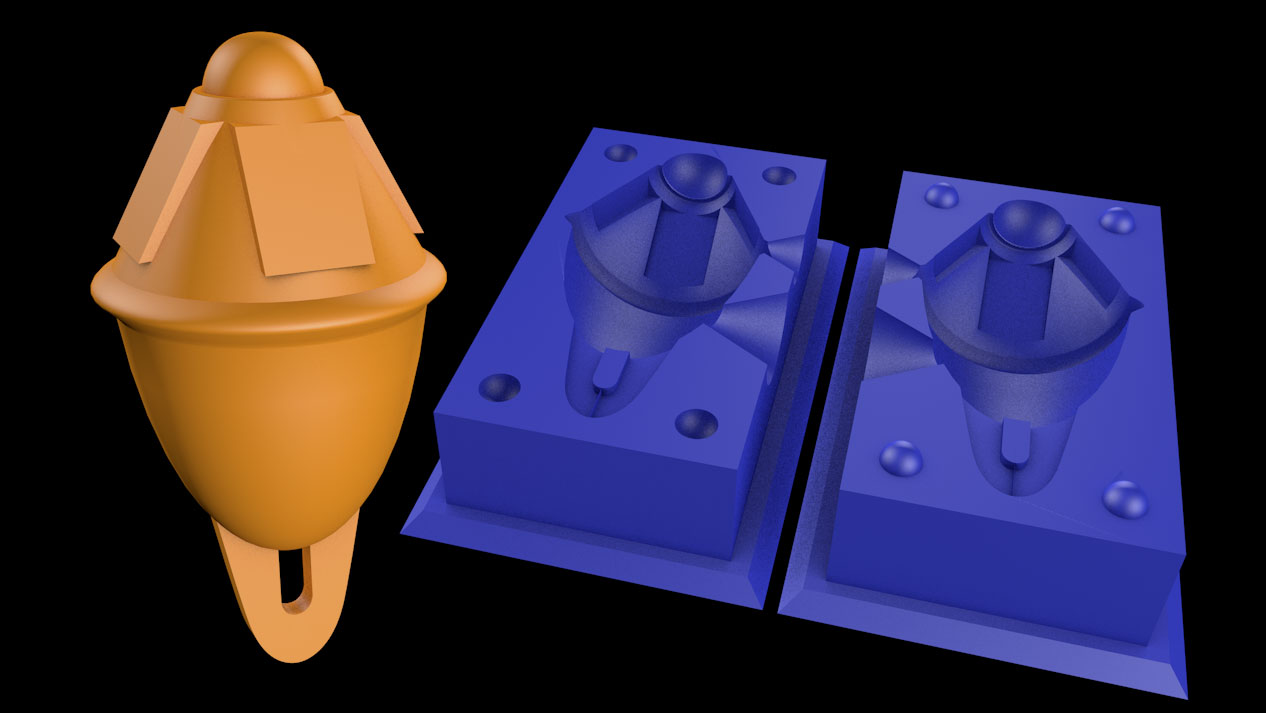
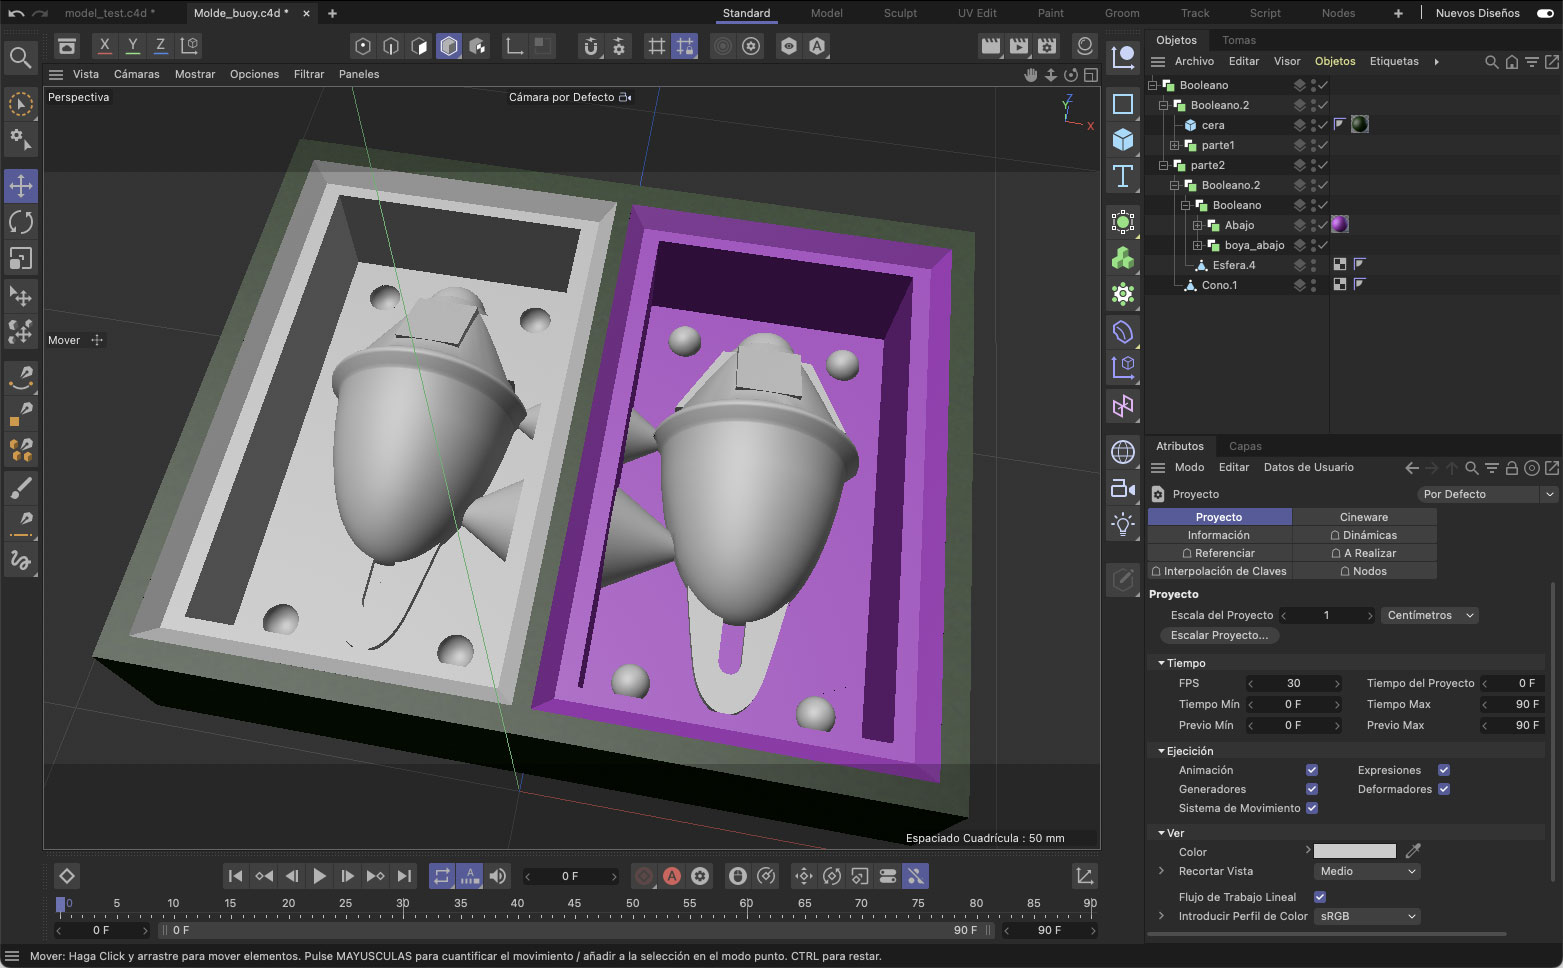
I have left the space between the object and the faces 2.5mm, and the thickness of the walls 9mm.

Once the model is designed, I make the booleans of each part of what would be the mold, and the final mold.
To configure the MeshCam I use the same parameters that I did with the test mold.
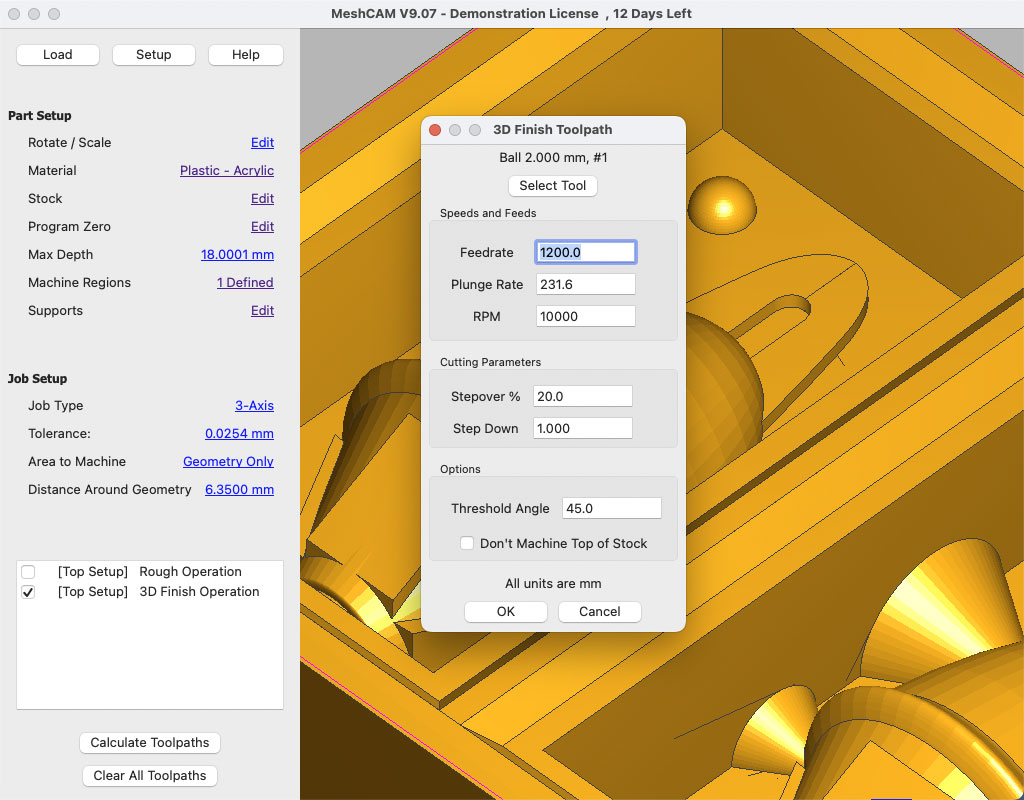
While roughing only takes about 30 minutes, finishing tells me Easel will take 4 hours.
Finally I decide to remove a bit of quality, to save time, so I step down to 1mm and unified finishing will take 1hour 40 min.
I made test with edit the Stepover% 20, 25 and 35, but the diference time is only 20min or 10 min more.
After import in Easel I start to carve. In this case I set a manual zero home xyz.
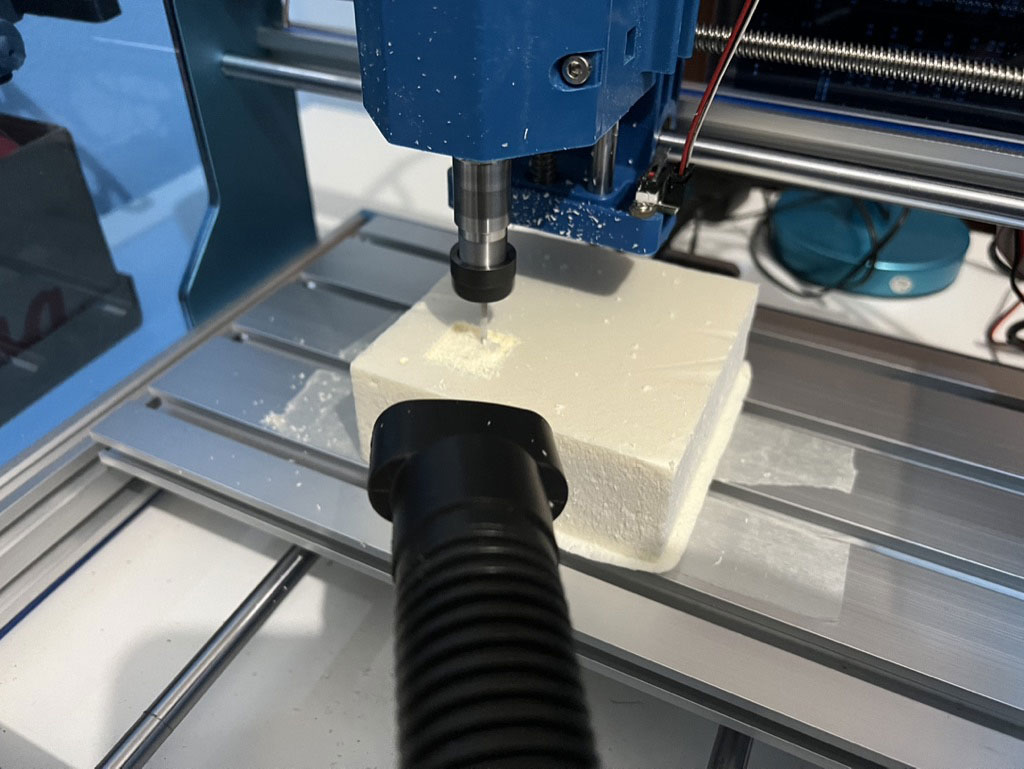
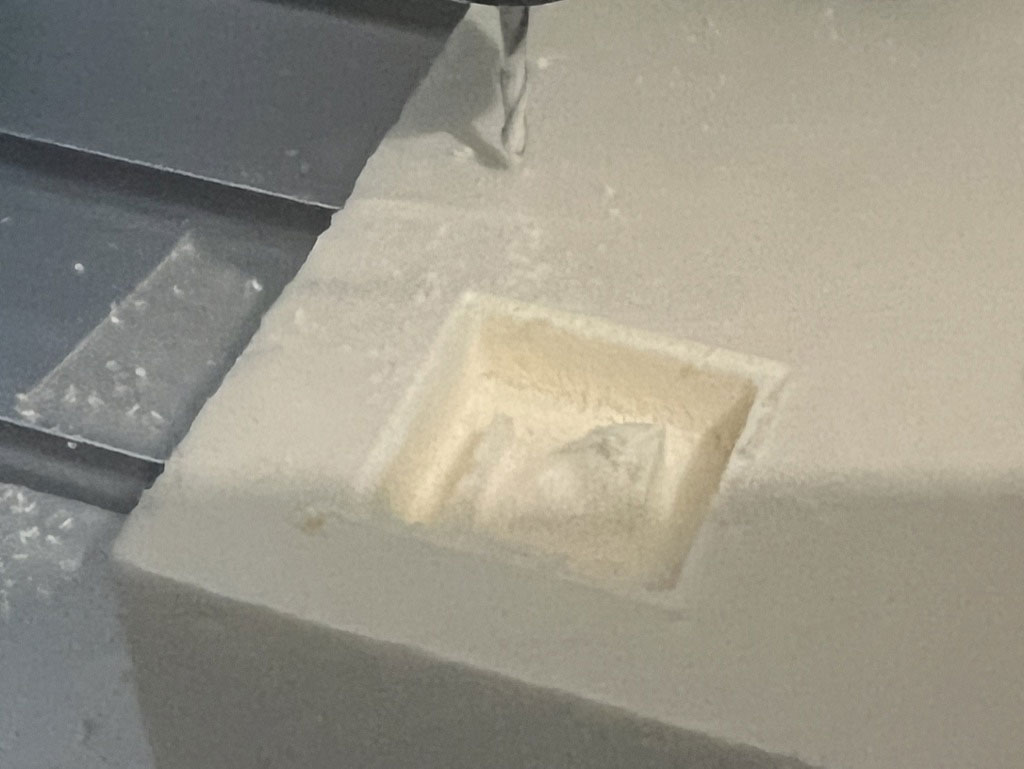
Milling the wax mold

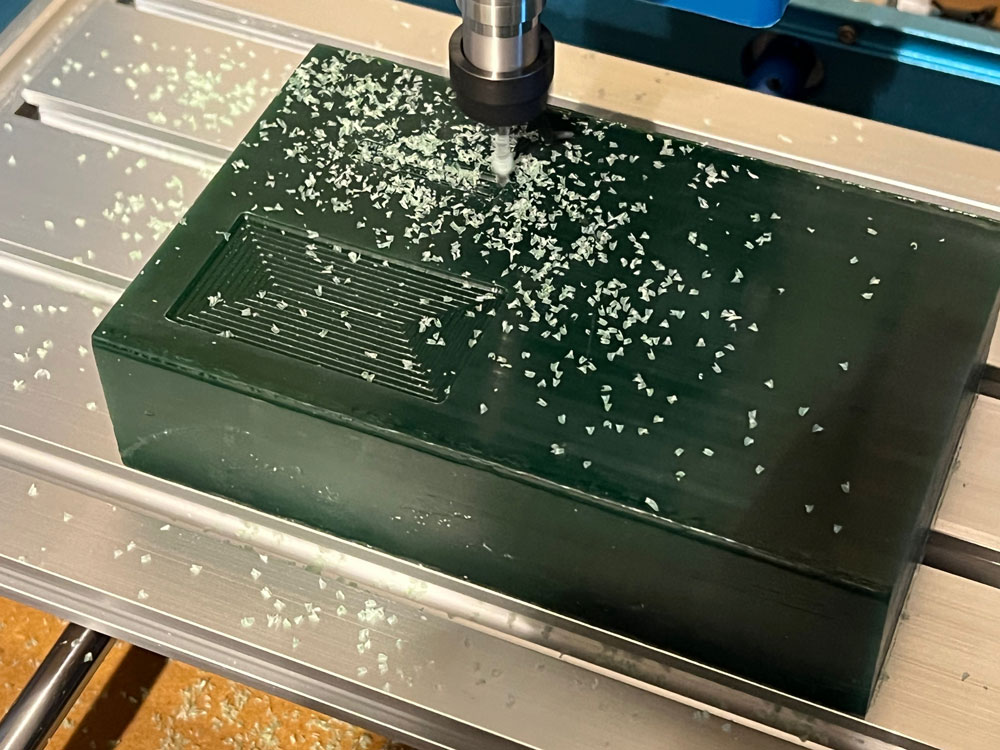
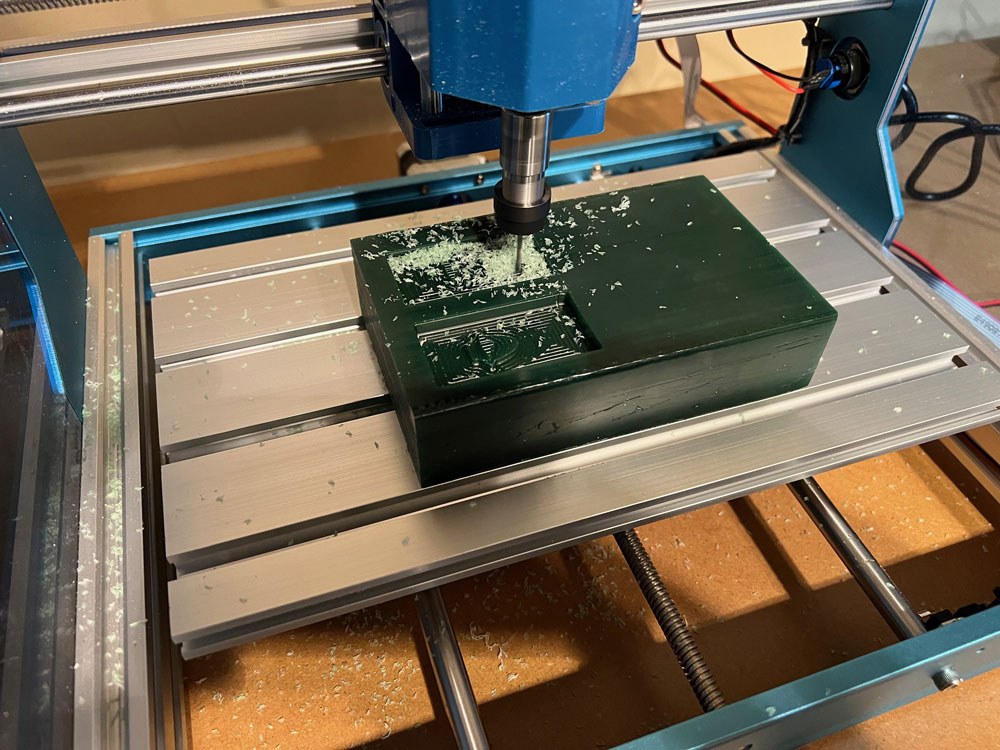
The roughing ended after just over 35 minutes.
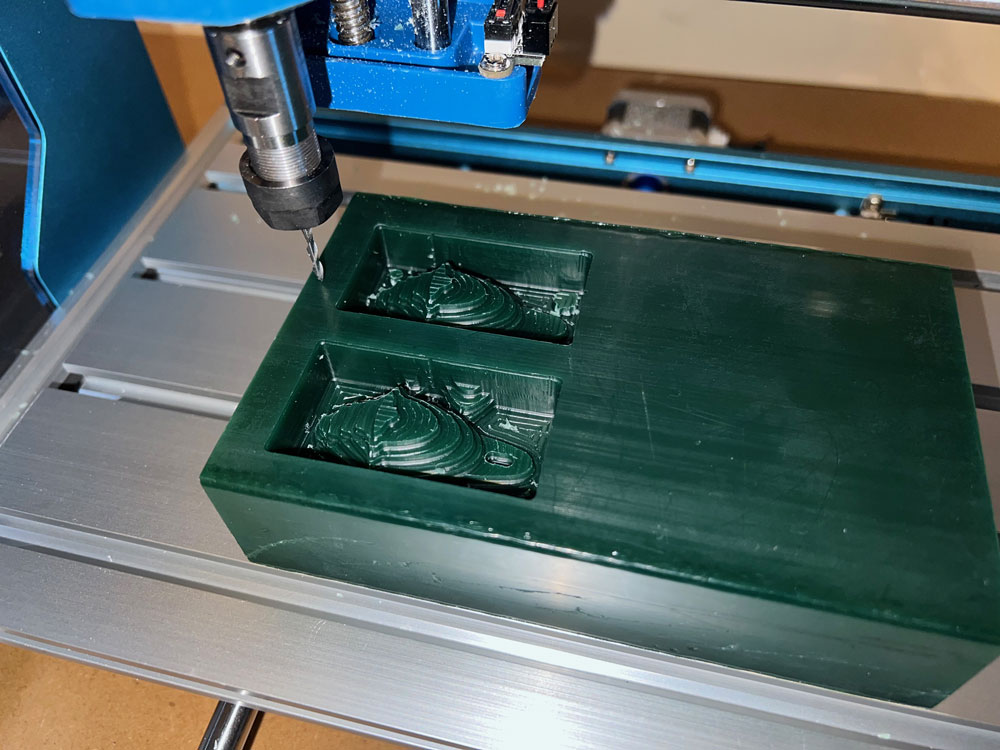
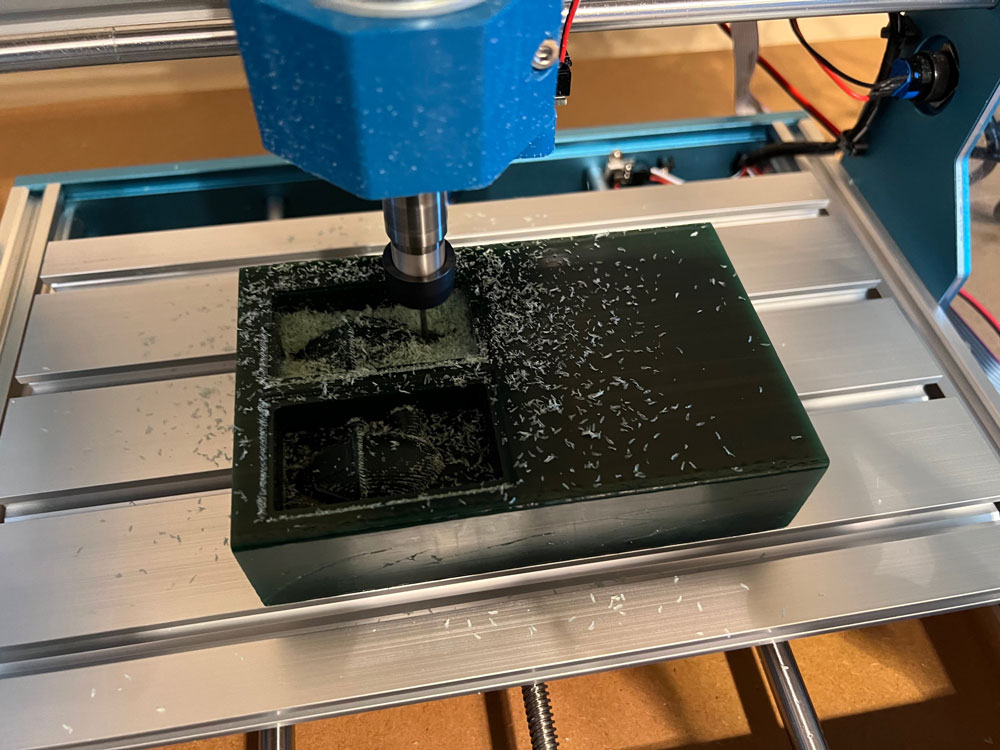

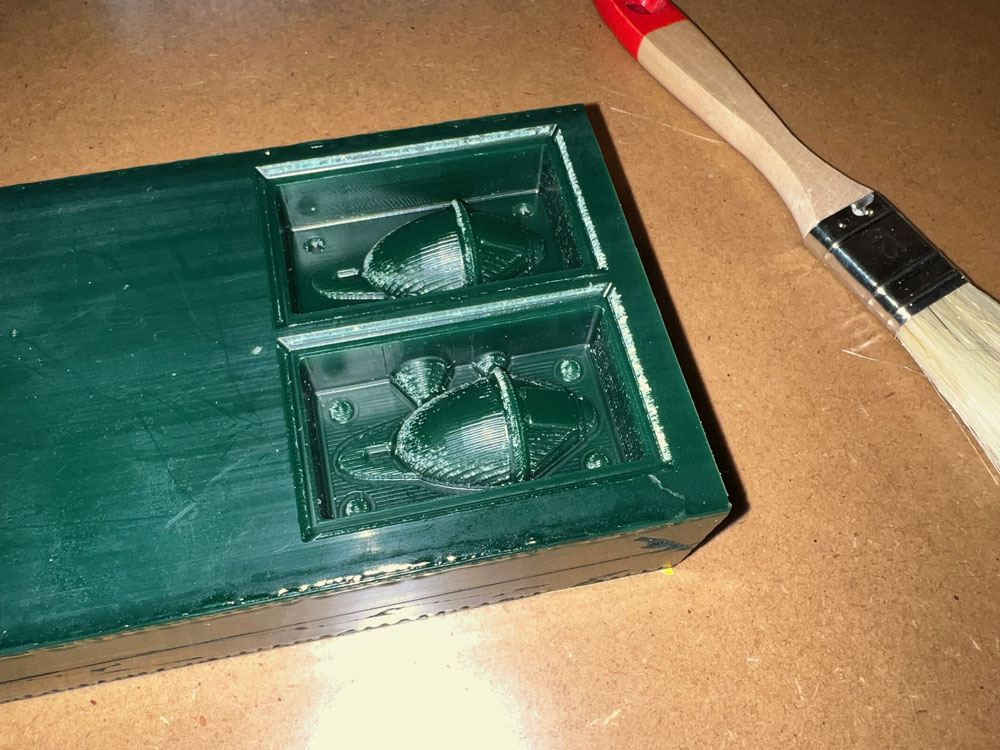
The final finish finished after 1h45 minutes, once the piece was removed from the milling machine, I cleaned it with a little air and a brush.
Seeing it, surely with time I would have made a smoother finish, but this first prototype interests me more to know the complete process.
Casting the flexible mold
Now that the first mold is ready, I continued with the casting of the flexible mold. The material I will be using is RPRO20. Of all the casting materials, this one didn’t seem to smell too strong with proper ventilation. I started by measuring the amount of material needed.
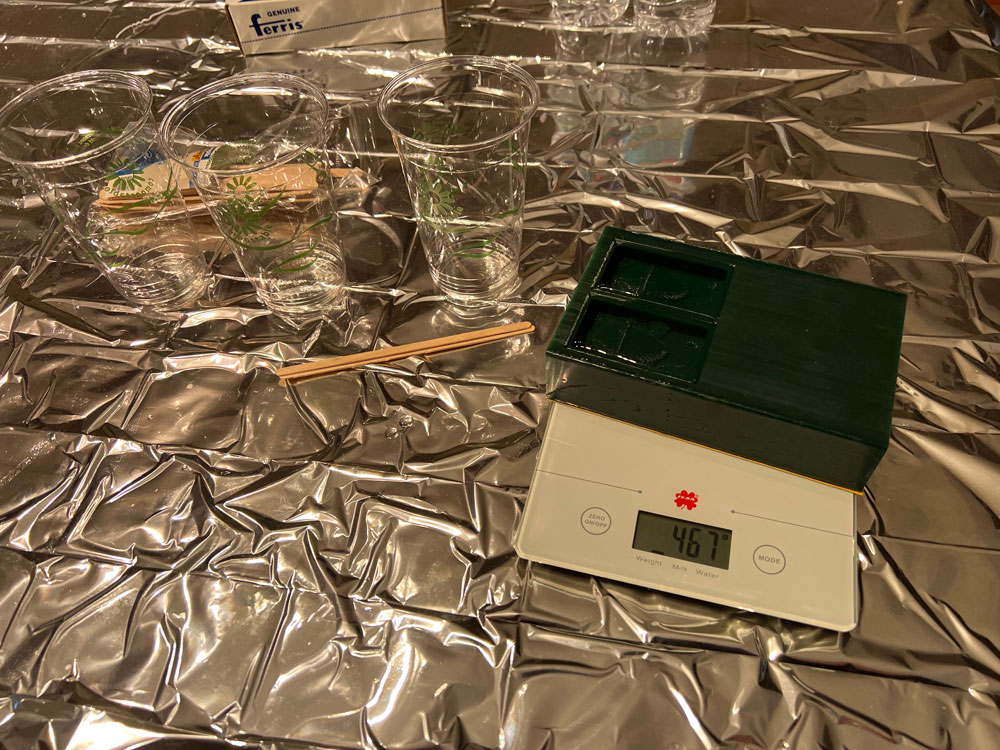
I spilled water when I transferred it from the wax mold to the cup, and added a little extra water to make sure there is enough. The mixing ratio of RPRO20´s Part A to Part B is 1:1 by weight. The total amount of water is 50 grams (467-416gr).
So I’ll need approximately 30 grams of part A and 30 grams of part B.
I will use three plastic cups, one to weigh each part of the components, and finally the third to make the mixture, so I will make a little more silicone, in case it gets lost when moving to the mixing glass and finally to the wax.
I mixed the two materials well to make sure everything is the same color. RPRO20 has a 30-minute pot life, so there’s no rush here.
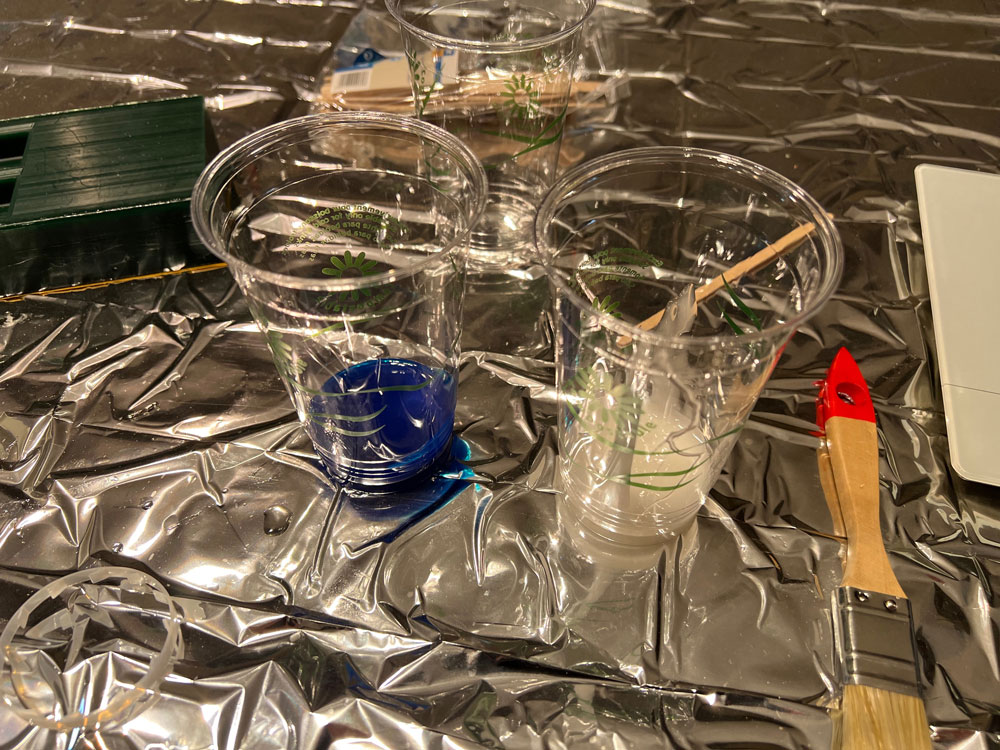
Once the mixture was made, I poured it on the wax, and to eliminate possible bubbles I spent a good while tapping the workbench to eliminate them. I was surprised by the large number of bubbles that came out. I honestly thought it would be one or two big ones and not hundreds of little ones.
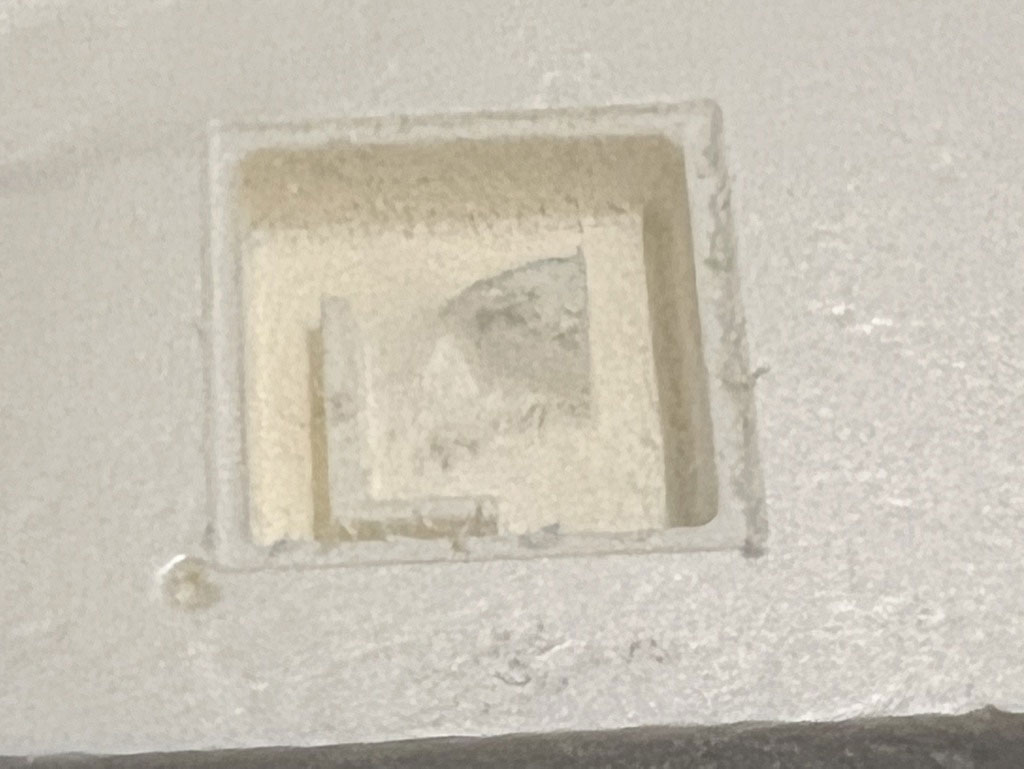
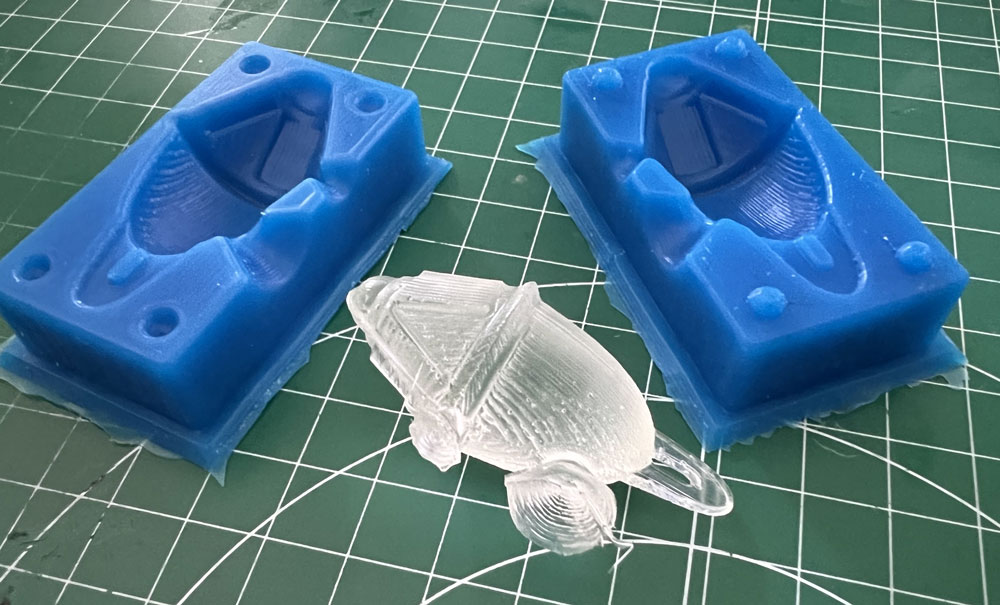
Although in about 3 hours the silicone would be ready, I left it for almost 18 hours, and when I separated it again I was surprised, it came out very easy and perfect!
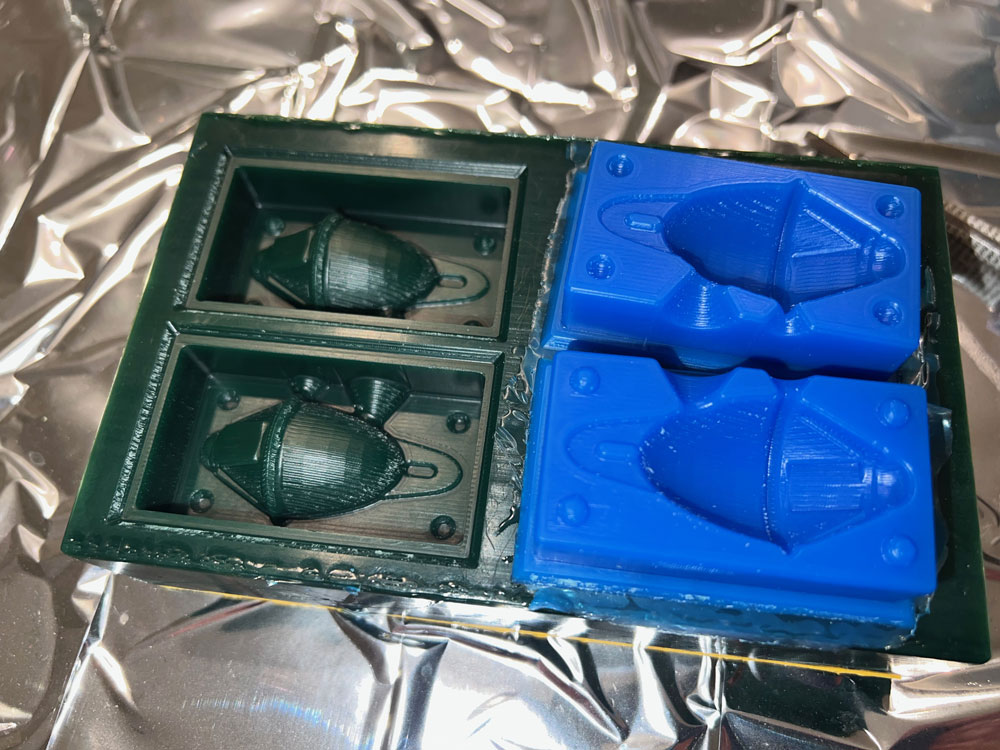
I already have my silicone mold. In this close-up you can see the toolpath created by the machine. I’m positively surprised by the level of detail and precision.

The final cast
For a firts test I made only with water, and made a ice buoy.
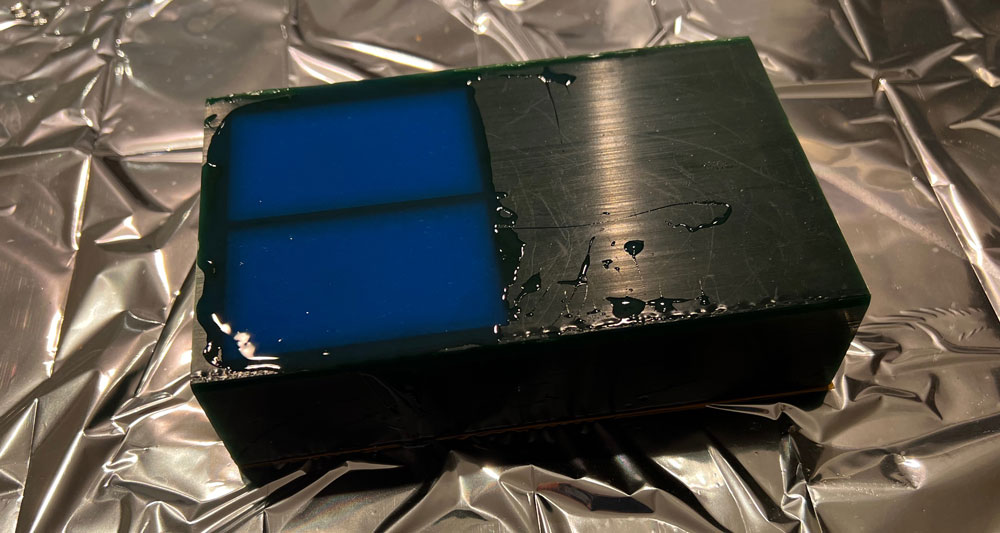
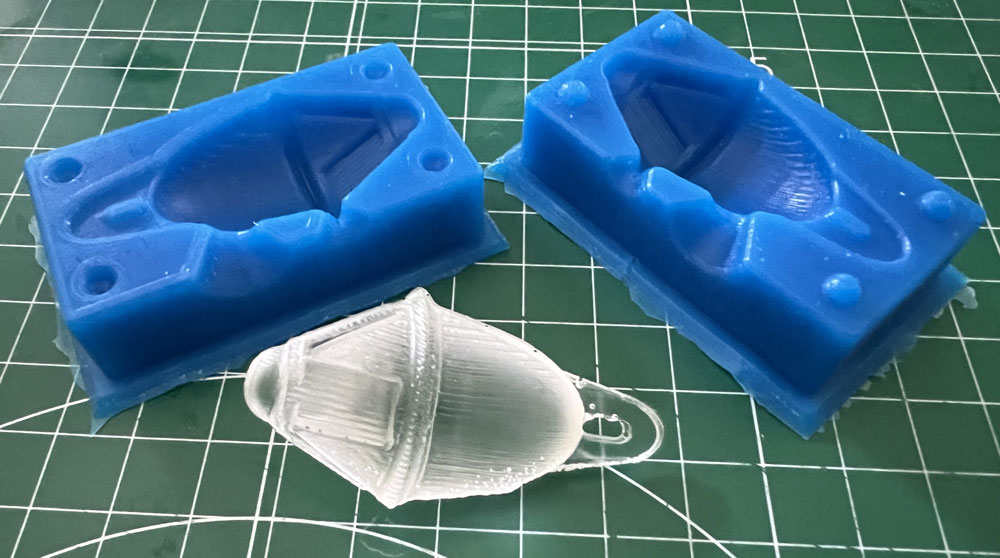
After made the ice buoy, I made the object in resine. In a dry and clean container, pour first 1 part of Glaze Hardener B and then 2 parts of Glaze Resin A.
Mix the two components thoroughly until they reach the corners of the container (incomplete mixing does not guarantee hardening, mixing too vigorously will cause bubbles to appear). Transfer the mixture to a second container and mix again to ensure homogeneity of the resin and optimal hardening.
And wait 24 hours….
The final result, after 24 has been this. I thought it would be much worse, but the truth is that it surprises me how well defined the details are.
Downloads
Explore more like this
17 - Invention, Intellectual Property, and Income
This is the last week before I present the final project, I already have a slide and video proposal of my project.
16 - Applications and Implications
Propose a final project masterpiece that integrates the range of units covered, answering: