2 - Computer-Aided Design
This week we discover the main 2D and 3D design tools and made a model of possible final project
Summary
Design is the basis for digital fabrication. This week we discover the main 2D and 3D design tools.
Assigments
- Model a possible final project.
- Compress your images and videos
- Post a description with your design files on me class page
Image 2D pixels and vectors
For the 2d design we have two ways of processing the bitmap or vectors.
Raster image
By default, the images that we see in print or on our computer are a cluster of dots or pixels of different colors.
If we zoom the image, we can see pixels. When we take a picture, depending on the sensor of our camera we will have more or less information (number of pixels). If we print it, our printer, depending on its quality, will print more or less dots per inch (or centimeter).
When we work with bitmap images, or start a photographic montage, we must start from a document size. It is very important to think about the final support of the file (web, print, email…) since if we need it in a larger size, we will not have that information about the pixels, and we will end up with a scaled image with large pixels.

The first image program I used was Deluxe Paint on the Amiga with indexed colors. Since 1993 I have been using Adobe Photoshop (since v 2.5), although I have sometimes tried to use Gimp to see the differences and to see the advantages of using free software, the truth is that, although the use is similar, for my work I need tools and compatibility with other Adobe programs, and the compatibility of the .psd is perfect (layers, channels, effects, paths…).
I made this example with Gimp about zooming pixels in bitmap images from 2 photos.
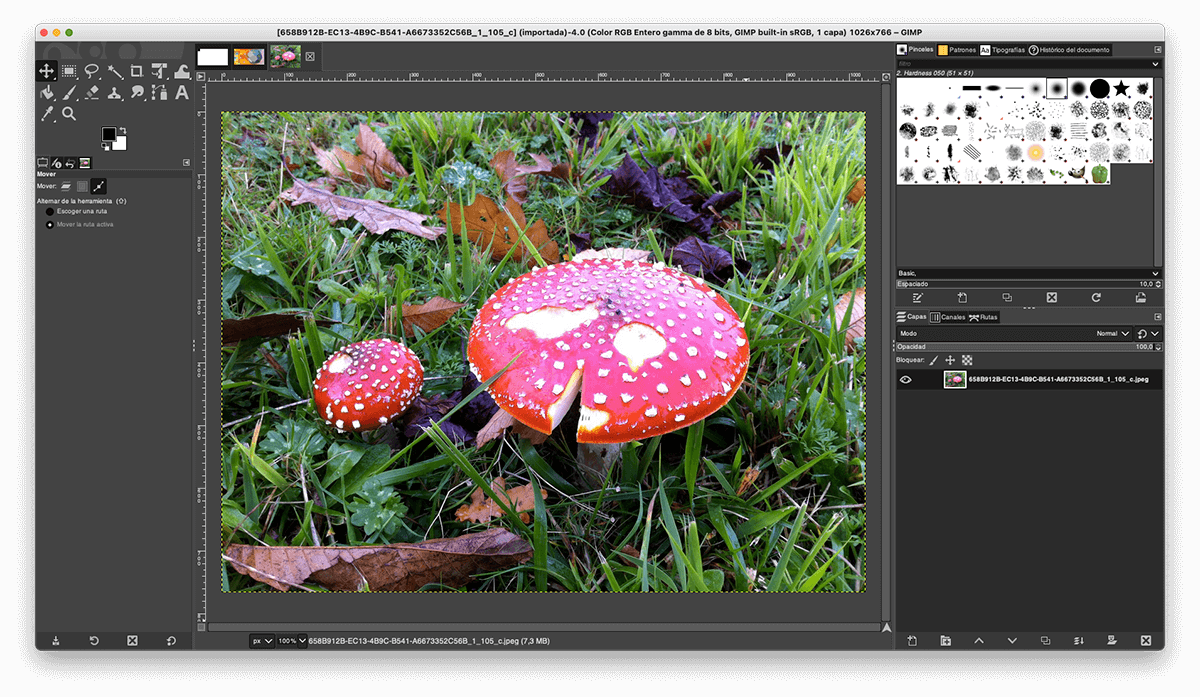
I open the 2 images in Gimp.
One image is a photo of my screen with the iPhone where we can see the pixels of monitor, i made a elipse selection, and copy.

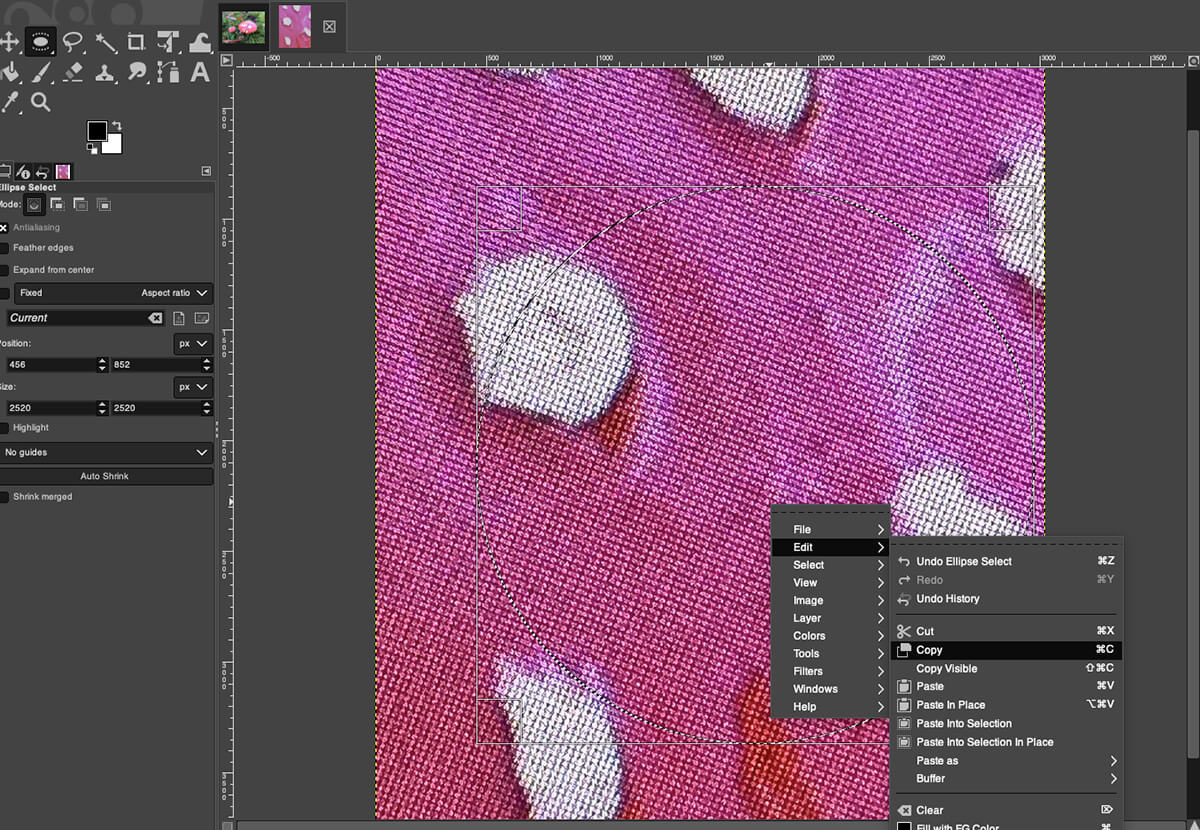
In the original image, i paste in a new layer and apply a shadow effect.

I create a new layer, select again with elipse tool the zoom zone and made a stroke path, same with the two paths draw form small circle to big zoom circle and add the stroke.

Finally I export to jpg, and save the Gimp document.
Oh!, Gimp still only can made documents in RGB, gray scale or indexed colors, but no in CMYK for professional printing, can made separate channels, but with a bit of work.
Vector images
Vector graphics are resolution independent. They use points, lines, curves and polygons to represent images. When resize the lines remain crisp and sharp when the size of the drawing is increased, because they use mathmatical formulas.
In 1993 i start yo use Aldus Freehand, later buy by Macromedia, and finally adquired by Adobe. I use Freehand or Illustrator very years, but for Macromedia Flash, was more compatible Freehand.
After Adobe buy Macromedia, Freehand end the development with MX version.
Actually I use Adobe Illustrator for all vector images. Same Gimp, i open a litle times Inkscape, but I think the performance is better than the commercial version.
I found the use of the default .svg format as an Inkscape file interesting.
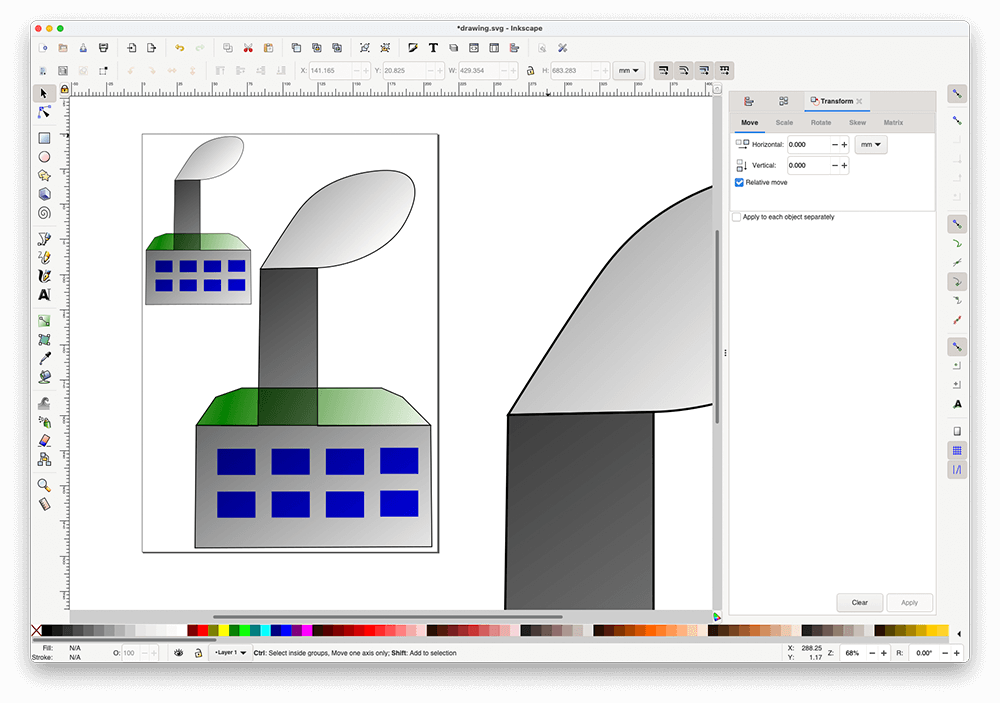
A good of work in vector images vs bitmap are the files are very small.
Are same line 3 and 4?
No, the line 3, is a vector same lines 1 and 2, with diferent stroke sizes.
In the object 4 I convert the stroke to paths, and is same vectors than object 5.
This is very helpfull for use with cut machines, or when scale a vector and like maintain a proportional thickness of the stroke.

3D modeling
Computer graphics is a field that has always fascinated me. As a child, the first 3d animations I saw in the Commodore Amiga were impressive. Small animations or demos that animated a few polygons.
My first tests were with the Amos 3D language, an engine for programming and generating three-dimensional objects, limited by the power of the Amiga.
In 1994 start to learn 3d in Mac, with Strata 3D or Infini-D. Programs that combined modeling and rendering.
In 1995 I discover Electric Image (eias3d.com), a powerful animation and rendering software for Mac, of which I will be a user and developer of procedural shaders for many years. For modeling use at this time Form•Z and EIModeler a robust Nurbs modeling program.
Currently my main work software is Cinema 4D, both for modeling for rendering and animation or 3d print.
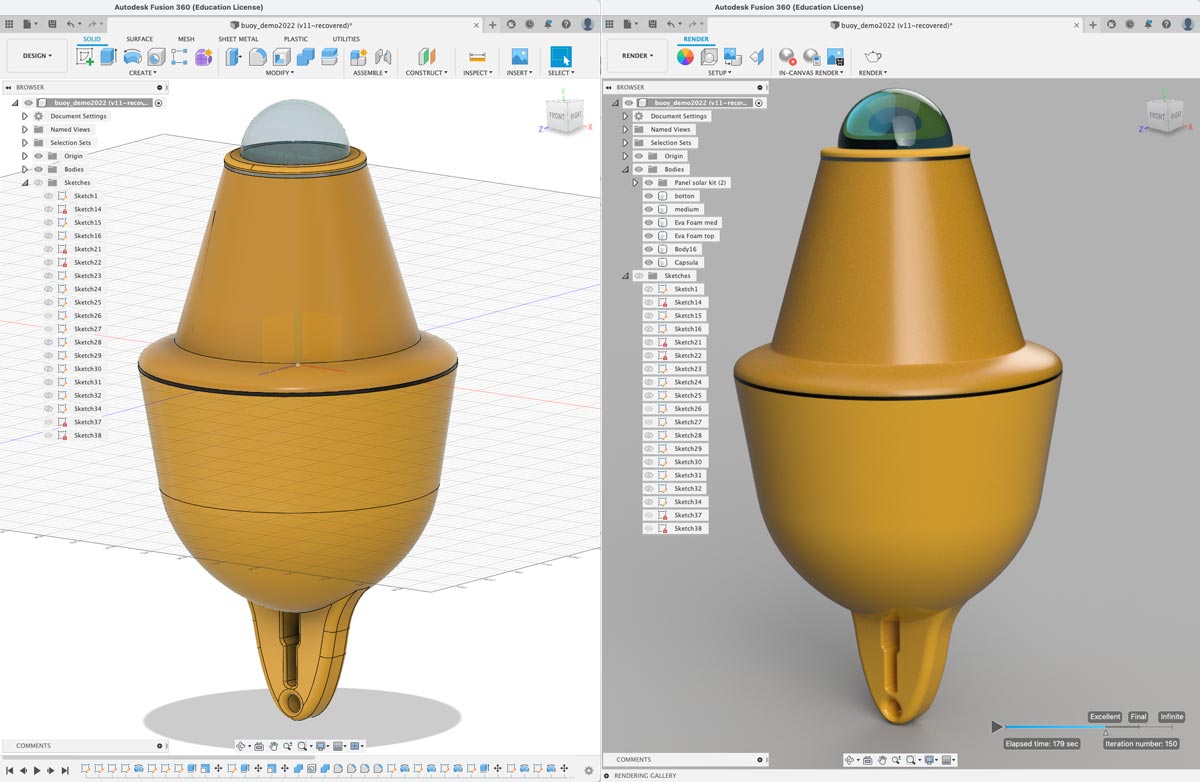
This week i start to learn Fusion 360 (i know a bit of FreeCad, but I´m not happy with the workflow). I will try model my final project in Fusion.
Fusion 360
Fusion 360 is a modeler in CAD from Autodesk.
I start learnig how use splines, sketch dimension, constrains, and use tools than extrude, revolve.
Model a possible final project
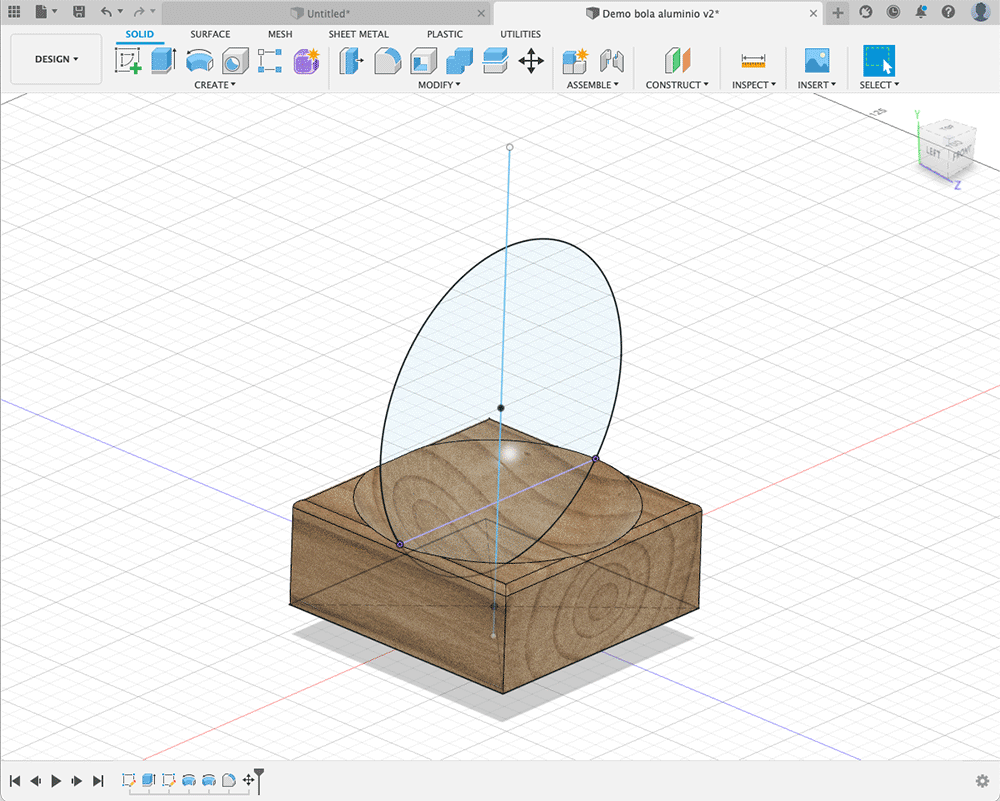
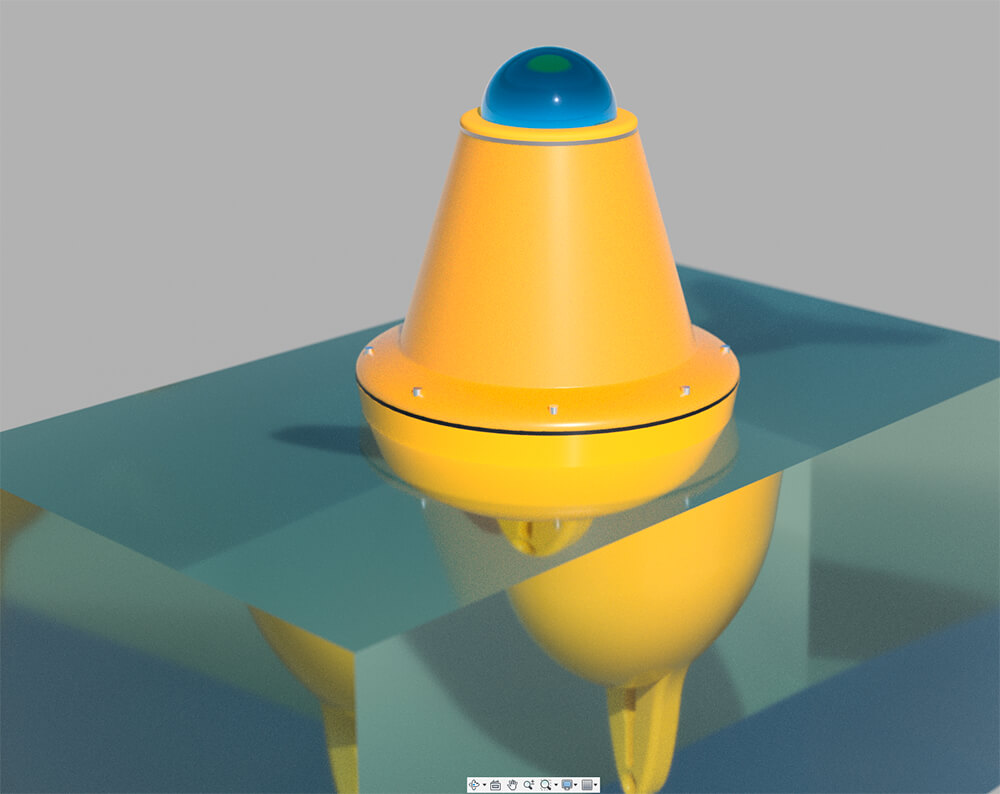
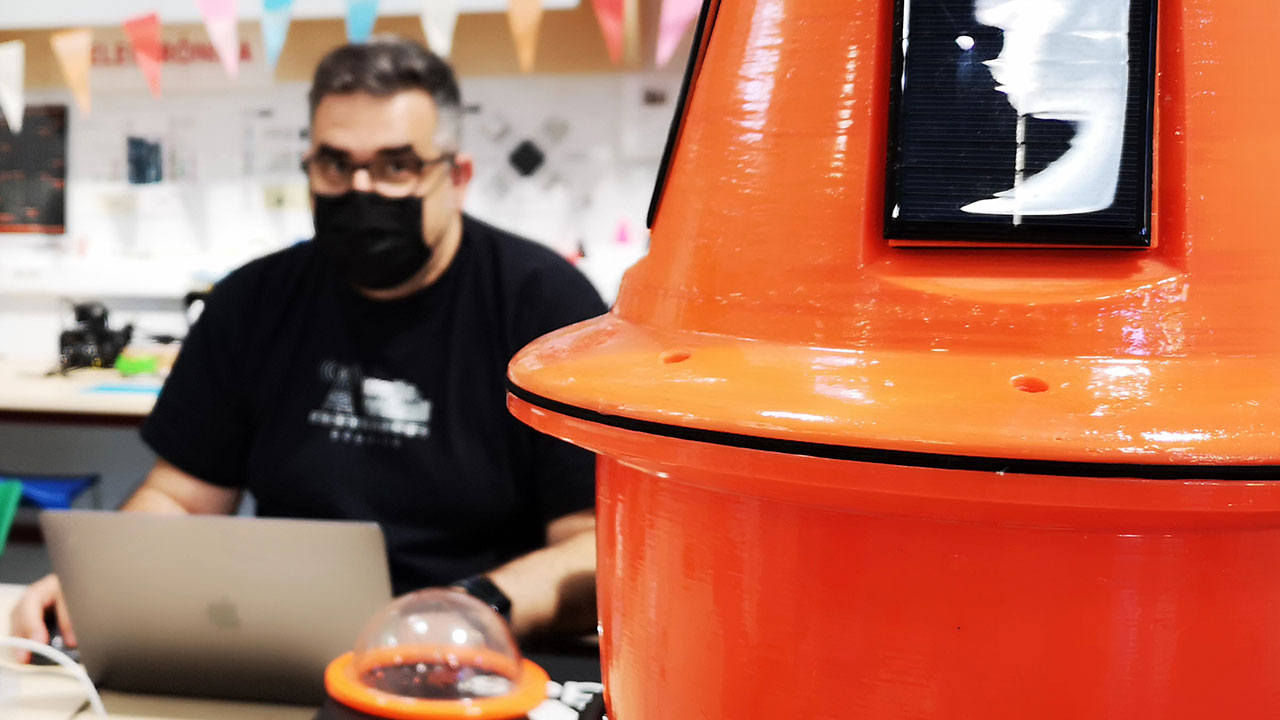
The last year I made a first design of my buoy in Cinema 4D, but I like made again a new model. (Cinema 4d Screenshot)

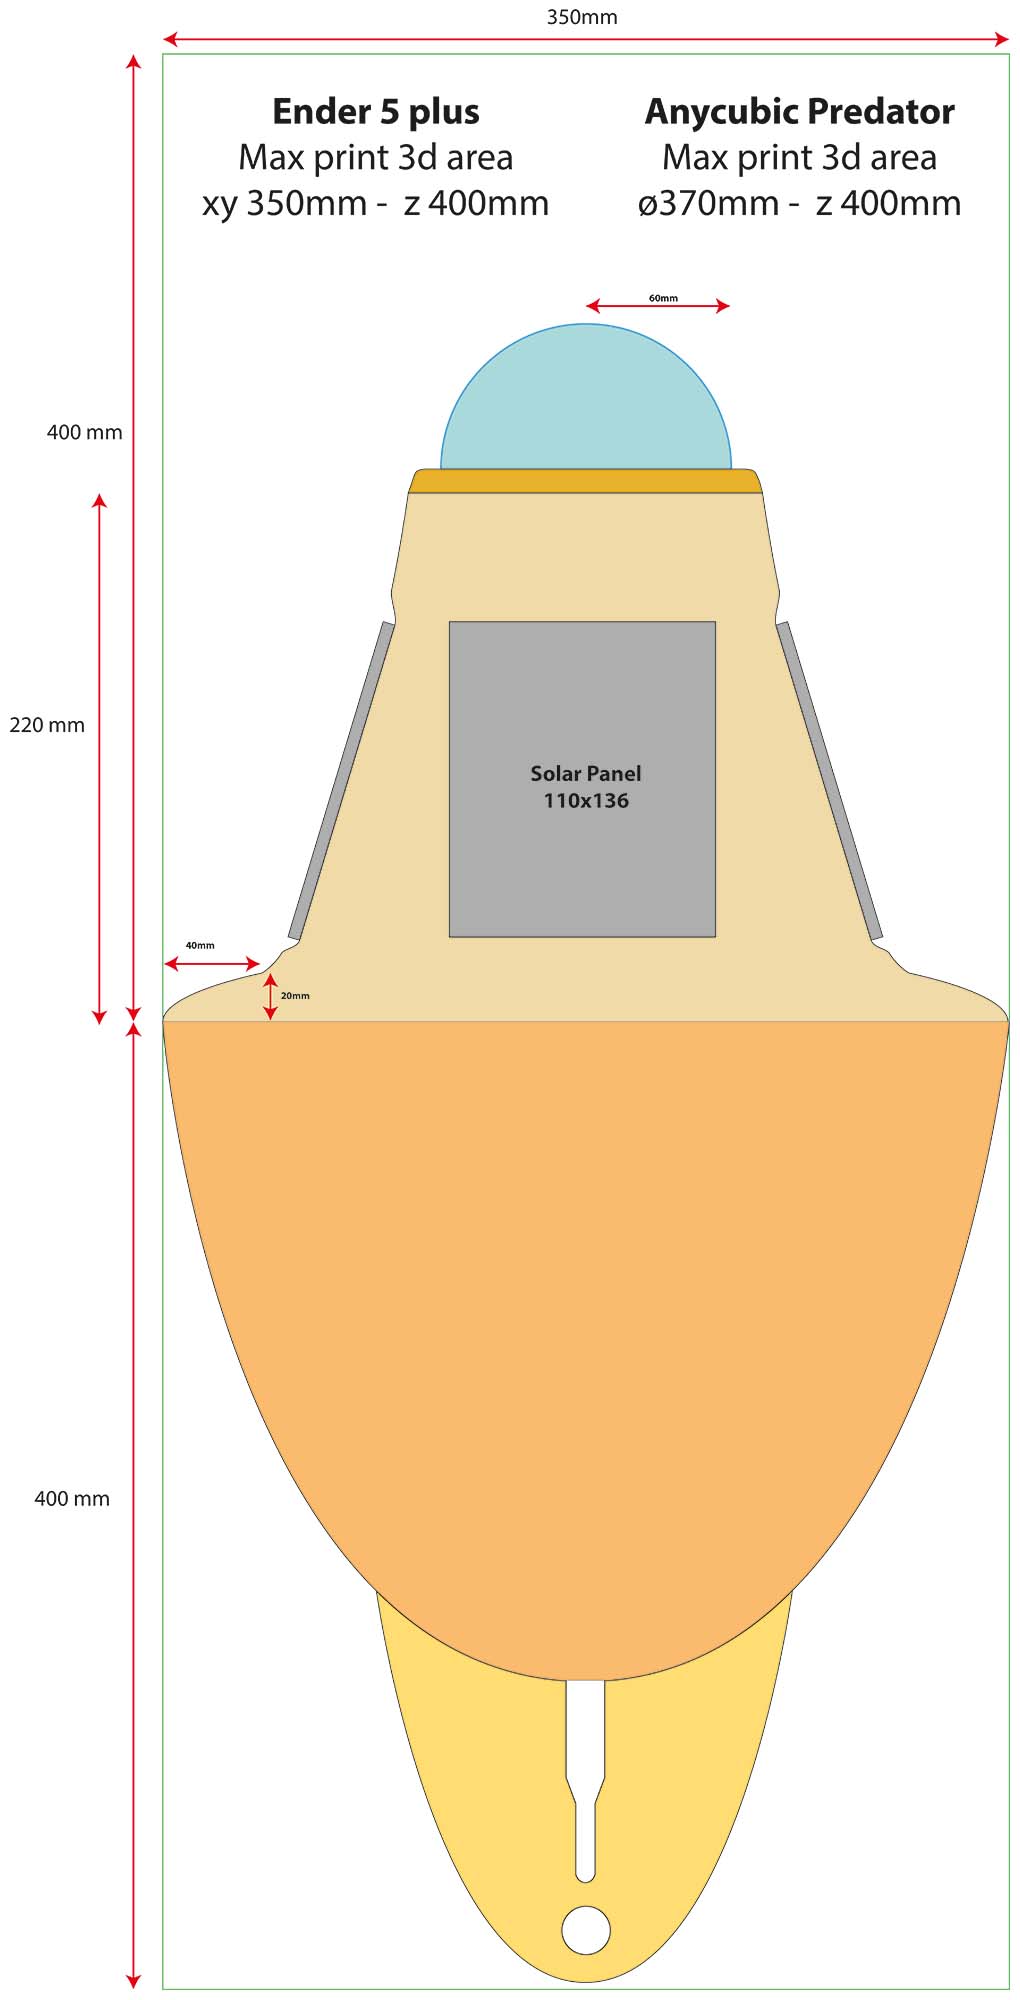
For start, I made a new design of a front view in Adobe Ilustrator. I like made a buoy big but I have a limits for print 3D, with a volume 350x350x400mm, I will separate the project into 2 parts, one the upper part, with the solar panels and electronics, and another, the lower part of the buoy that will be submerged.
In Illustrator I made 2 box for draw inside and with bezier tools I draw the curves.
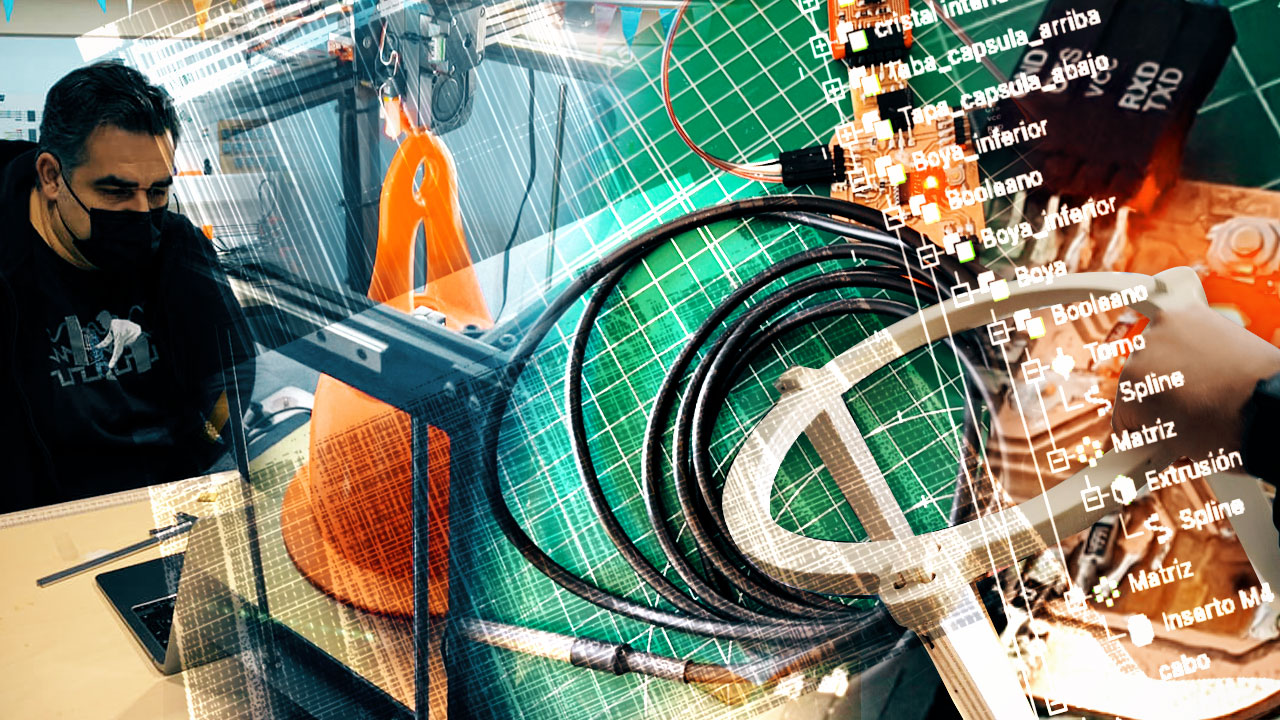
After this, I will made again the splines in Fusion 360, and start to made the volume.


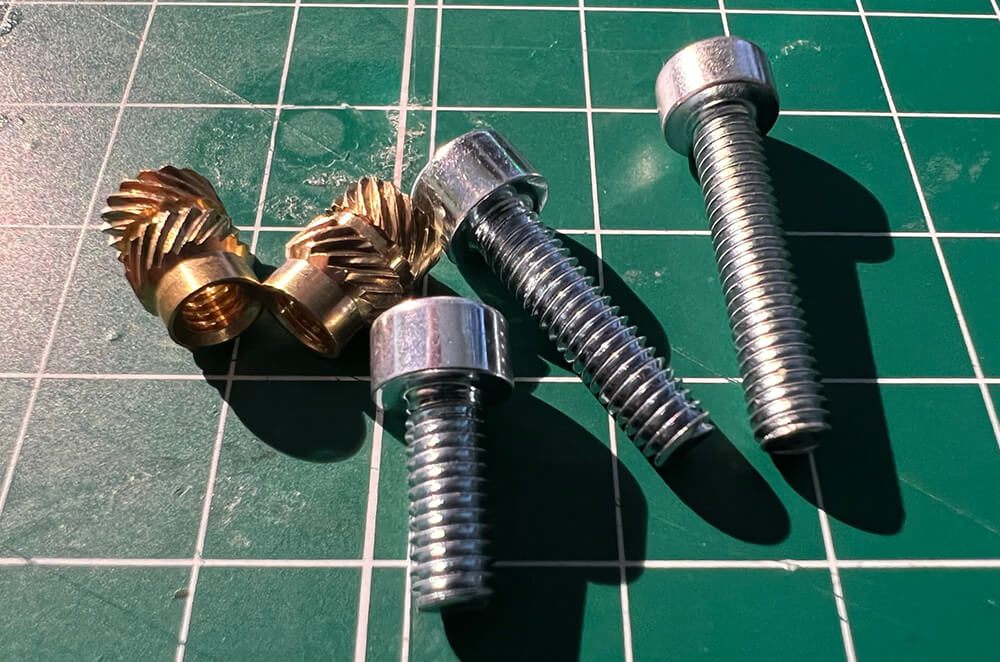
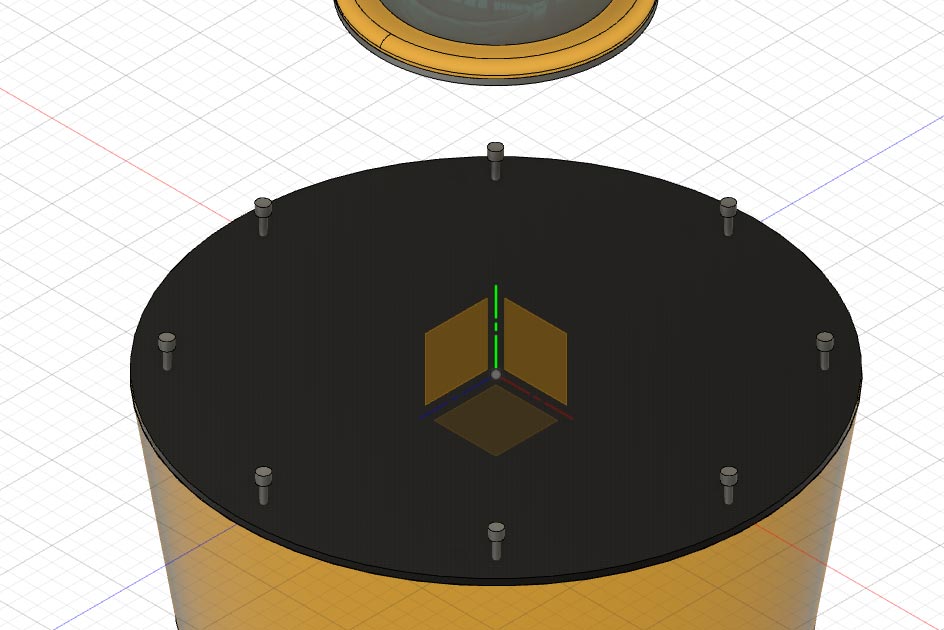
After made a exterior model of the buoy I start to made the holes for the screws and inserts. I was looking for the easy way to clone the screws x times in a simple way, but Move & Clone dont helpme. I asked to my fabacademy colleague Pablo Pastor and he sayme the magic word “pattern”. I need use the Circular Pattern for add this holes. And in a future same for the solar panels.
I have yet the screws and inserts M4 than i will use for made the buoy.

Link to Fusion 360 project:
Render and video
I try the render of Fusion 360, is very good, and fast in my MacPro, but a bit dificult animate.
Finally, I exported the scene to .fbx file format, to open in Cinema 4D and animate.
In Cinema 4D I have all the objects (Fusion 360 bodies) to animate (in Fusion, I need to create components before I start animating each object).
I made two renders, one only the buoy and other with the water. Import the videos to After Effects and made a new composition with videos, and add anim shapes and text layers. For export i use Adobe Media Encoder, and reduce the Target Bitrate (Mbps) to 0,9. The .mp4 final have a size of 1.3MB.
This is the code html for add a html5 video, i add a poster image for show while download the video.
<video width="700" height="525" controls poster="../assets/images/week02/poster-video.jpg">
  <source src="../assets/images/week02/bouy_render.mp4" type="video/mp4">
Your browser does not support the video tag.
</video>
Downloads
Here are the files I created this week.
.stl files of buoy in low polygon:
Explore more like this
17 - Invention, Intellectual Property, and Income
This is the last week before I present the final project, I already have a slide and video proposal of my project.
16 - Applications and Implications
Propose a final project masterpiece that integrates the range of units covered, answering: