WEEK 5
3D SCANNING AND PRINTING
Group assignment:
- Test the design rules for your 3D printer(s)
Individual assignment:
- design and 3D print an object (small, few cm3, limited by printer time)
that could not be made subtractively
- 3D scan an object (and optionally print it)
ASSIGNMENT OF THE WEEK:
Group Assignment:
- Test de design rules or your 3D printer(s)
I did my group assignment with my Artillery Genius Pro printer
The Genius Pro printer is a direct extrusion FDM printer that stands out for its robust design, technical innovations and exceptional print quality. It is perfect for beginners, amateurs and professionals looking for high-quality results at an affordable price. Capable of printing a wide variety of materials, including flexible and specialty filaments, this printer offers versatility and precision. Its solid structure and tempered glass construction platform ensure a stable and quality print.
The Genius Pro is compatible with a wide range of materials, including PLA, ABS, PETG, TPU, TPE, TPC, SOFT PLA, wood, marble, nylon, carbon fiber and special blends. Its 22 x 22 cm tempered glass build platform offers excellent adhesion and makes it easy to remove prints.
To learn more, click here:
Group Assignment
Artillery Genius Pro — Key Features
| Feature |
Specification |
| Brand | Artillery |
| Model | Genius Pro |
| Type | FDM |
| Mechanism | XZ-Y |
| Printing Area | 220 × 220 × 250 mm |
| Resolution | 0.1 mm – 0.4 mm |
| Accuracy | ±0.1 mm |
| Speed | ≤ 100 mm/s |
| Recommended Working Time | ≤ 60 h |
| Number of Nozzles | 1 |
| Nozzle Diameter | 0.4 mm |
| Filament Diameter | 1.75 mm |
| Materials | PLA, ABS, PETG, Wood, TPU |
| Max Extruder Temperature | 275 °C |
| Max Heated Bed Temperature | 100 °C |
| LCD Touch Screen | Yes |
| Filament Sensor | Yes |
| Power-loss Recovery | Yes |
| Includes Filament Rack | Yes |
| Arming Time | 20 minutes |
| Flexible Filament Support | Yes |
| Includes Filament | No |
| Connectivity | USB, SD Card |
| Power Input | AC 220V 50–60Hz |
| Power Output | 600W |
| Machine Size | 43 × 39 × 59 cm |
| Boxed Weight | 11 kg |
The specifications above describe the technical characteristics of the Artillery Genius Pro (build volume, nozzle size, materials, speed, and components).
This is different from its market position.
In the next section, I analyze how this printer compares to others in terms of segment, performance category, and target user.
Market position — Artillery Genius (Pro)
Before testing the design rules, I analyzed where my printer is positioned in the global FDM market.
The Artillery Genius / Genius Pro is generally considered a mid-range FDM printer with a strong
value-for-money profile. It is a classic cartesian “bedslinger” design, focused on reliable standard printing
rather than the newest ultra-fast CoreXY category.
Where it sits in the global 3D printer market (segment overview)
| Aspect |
What it means in the market |
Artillery Genius (Pro) position |
| Market segment |
Entry / Mid-range / Prosumer / Industrial |
Mid-range (good quality at an affordable price) |
| Motion system |
Cartesian bedslinger vs CoreXY (high-speed) |
Cartesian bedslinger (stable and common; not CoreXY) |
| Typical speed tier |
Standard (≈60–150 mm/s) vs High-speed (≈300–600+ mm/s) |
Standard / mid-speed (not a high-speed CoreXY category) |
| Build volume |
Small / Standard / Large |
Standard (commonly around 220×220×250 mm) |
| Extruder |
Bowden vs Direct Drive (better for flexible filaments) |
Direct Drive (good advantage for TPU and control) |
| Target user |
Beginner / Maker / Advanced hobby / Production |
Makers + prototyping |
| Global positioning (simple) |
"Fastest & newest" vs "reliable classic" |
Reliable classic for standard FDM learning workflows |
Quick takeaway: The Artillery Genius (Pro) sits in the mid-range market as a strong,
reliable option for standard FDM printing and prototyping. For ultra-fast production-focused printing,
newer CoreXY high-speed printers (e.g., K-series style) are positioned above it in speed-oriented segments.
Group comparison – My partner’s printer
For the group assignment, my partner tested the Artillery Sidewinder X1.
You can see the complete test results and documentation on her page:
View Sidewinder X1 test results Jorge-Pazos Assignments Week05
Printer Comparison – Artillery Genius vs Sidewinder X1
| Feature |
Artillery Genius (Mine) |
Sidewinder X1 (Partner) |
| Build Volume |
≈ 220 × 220 × 250 mm |
300 × 300 × 400 mm (Large format) |
| Motion System |
Cartesian bedslinger |
Cartesian bedslinger |
| Extruder Type |
Direct Drive |
Direct Drive |
| Max Print Speed |
Standard mid-speed |
Up to 150 mm/s |
| Target Use |
Prototyping & learning |
Large-scale printing & advanced hobby |
| Strength |
Compact, reliable, good precision |
Large build volume, strong components |
| Limitation |
Smaller print size |
Larger footprint, slower heating bed |
Both printers share similar mechanical architecture (cartesian system and direct drive extrusion),
but the main difference is build volume. The Sidewinder X1 is oriented toward large-format prints,
while the Genius is more compact and optimized for standard prototyping tasks.
This comparison helped us understand how printer size and structure influence print behavior,
bridging performance, and material handling.
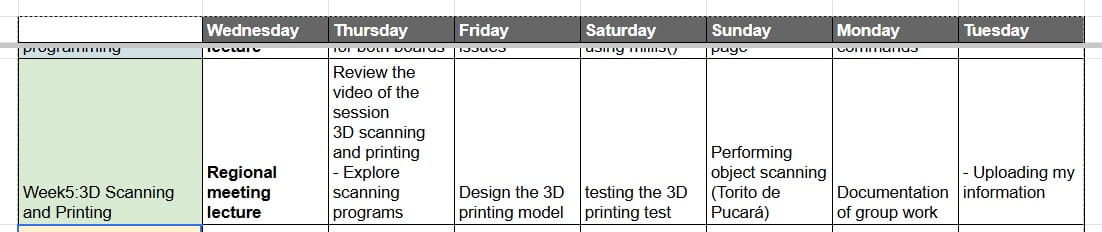
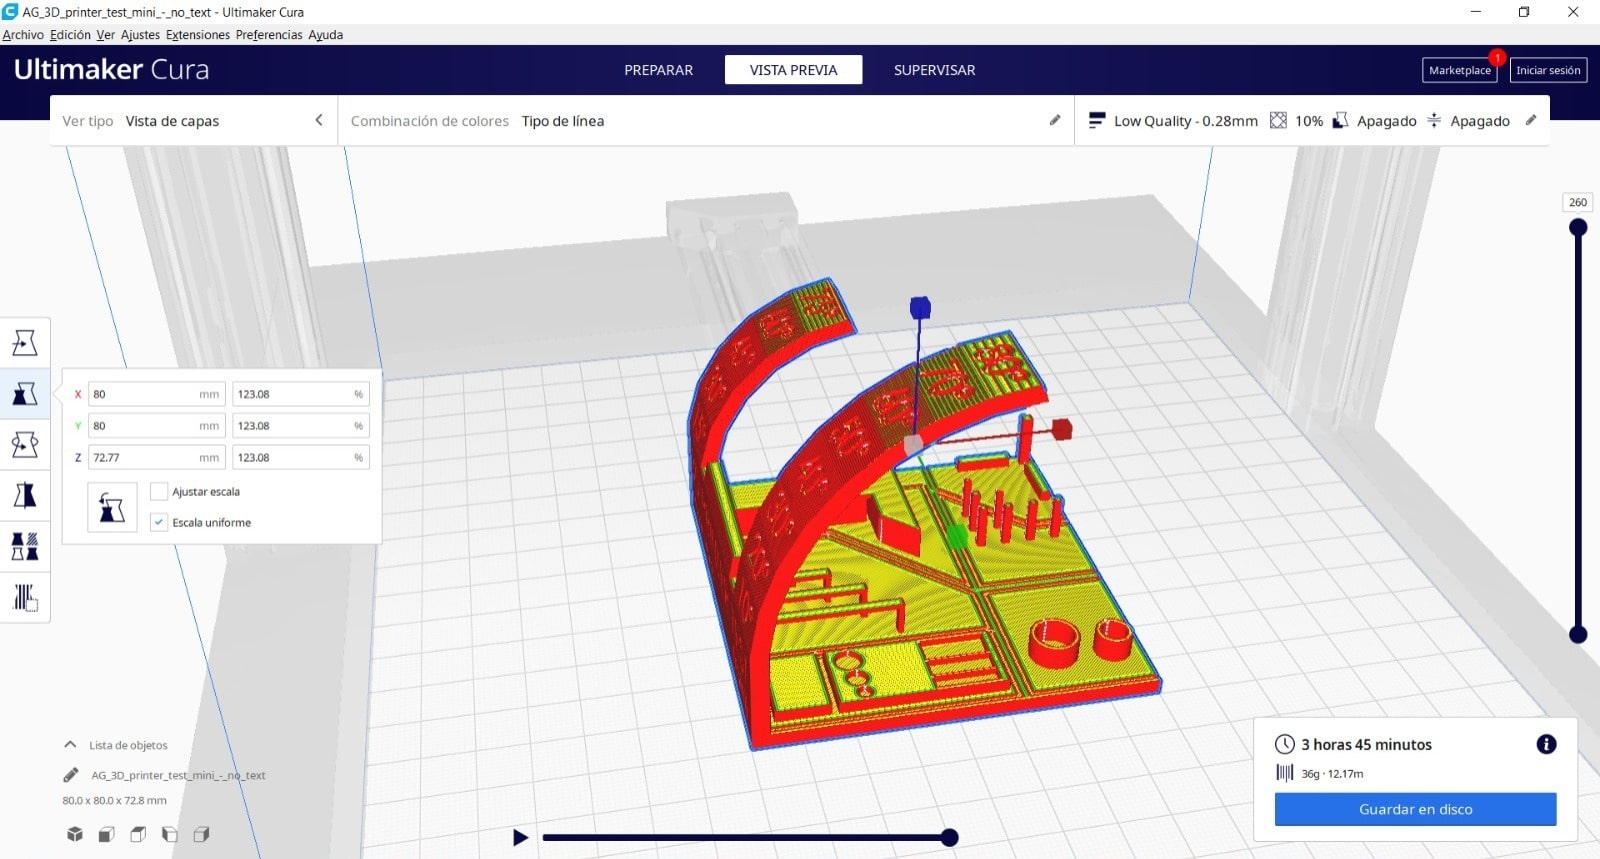
In my case, my partner is in Bolivia so we each performed this task on our machines with this internet test *MINI* All In One 3D printer test de Thingiverse which I opened at Ultimaker Cura.
- Here is the link where you can see the development of the week's
Group Assignment
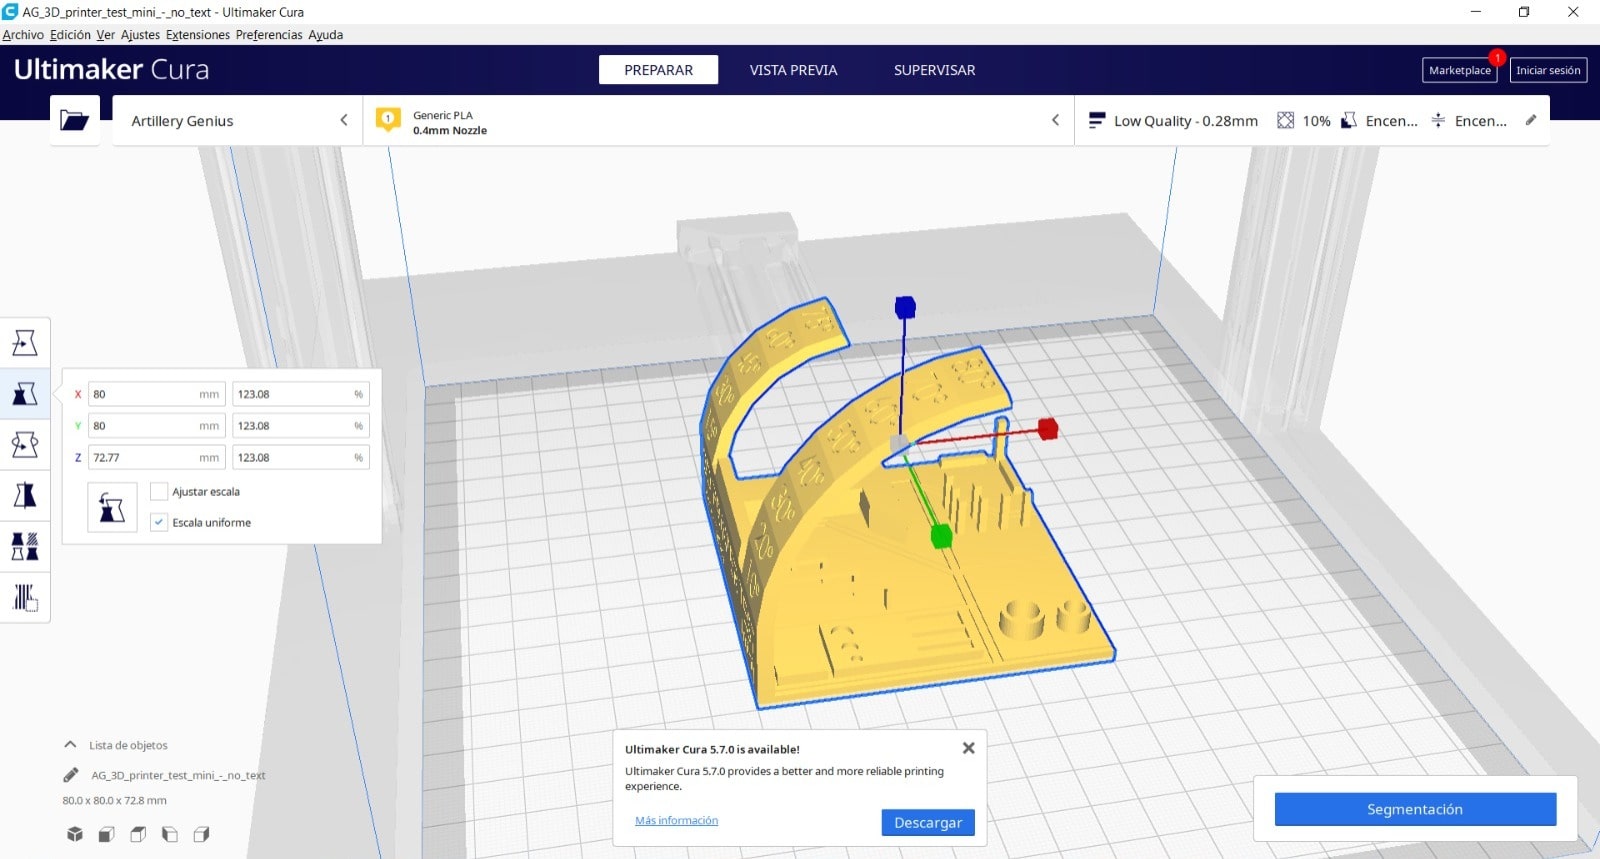
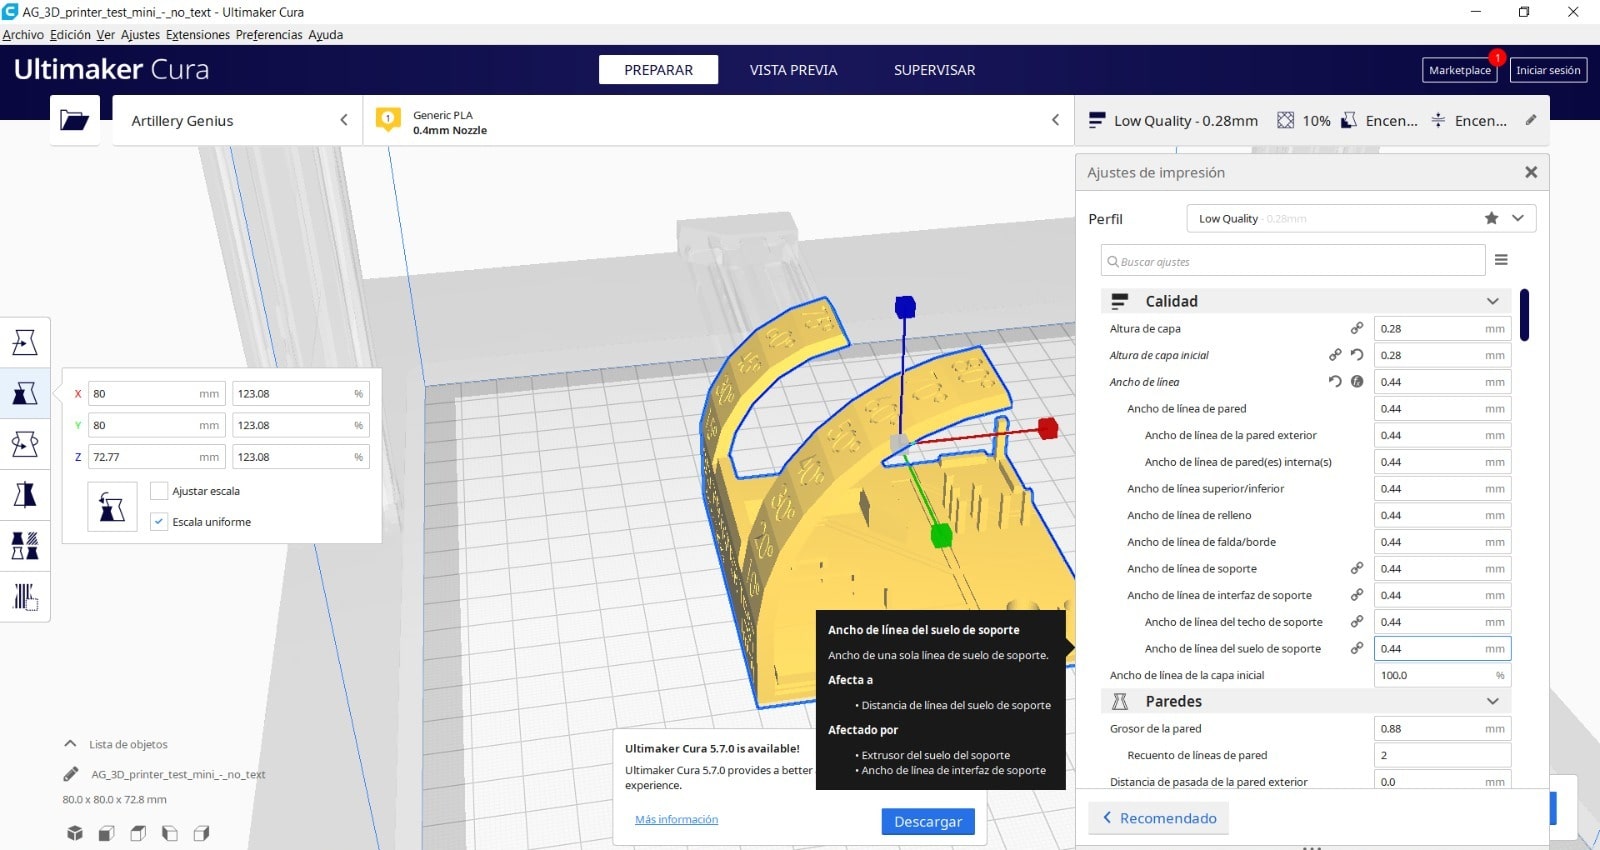
The configuration parameters for printing are the following that appear in the photos.
Then I did Print Segmentation and the time indicated is 3 hours 45 minutes to make the print.
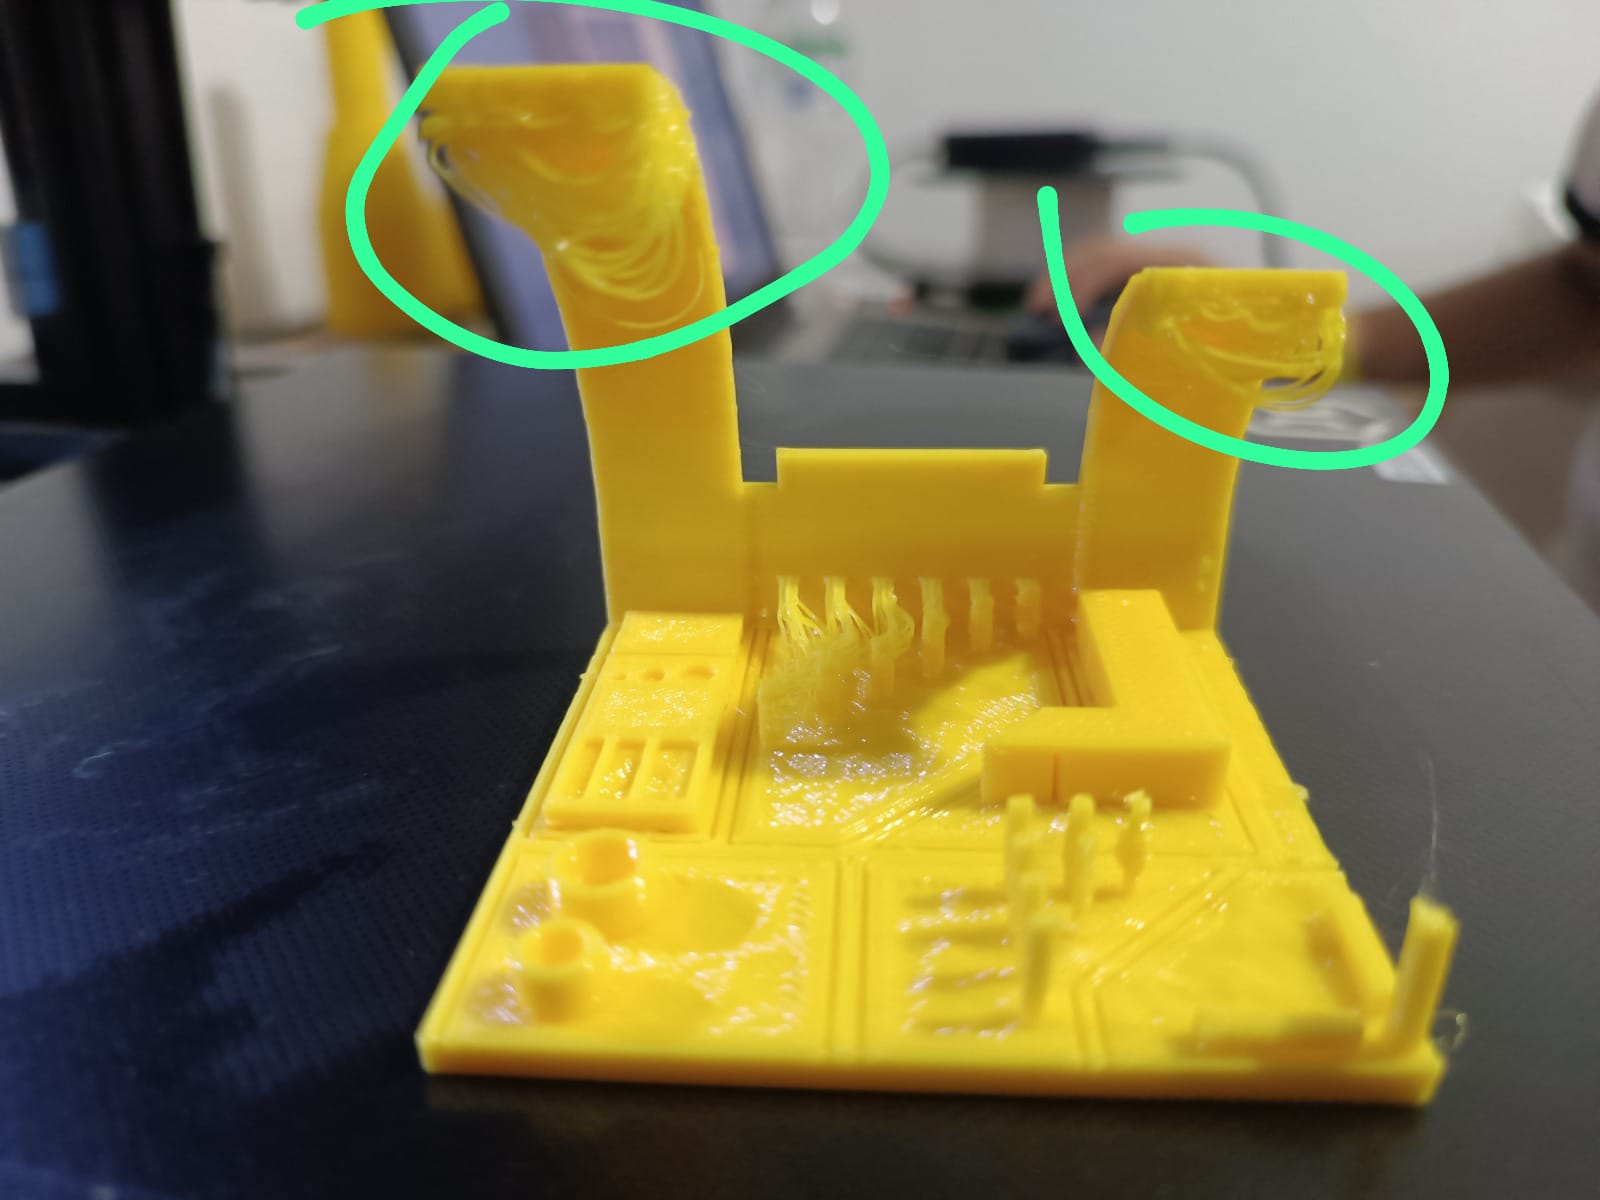
Starting printing

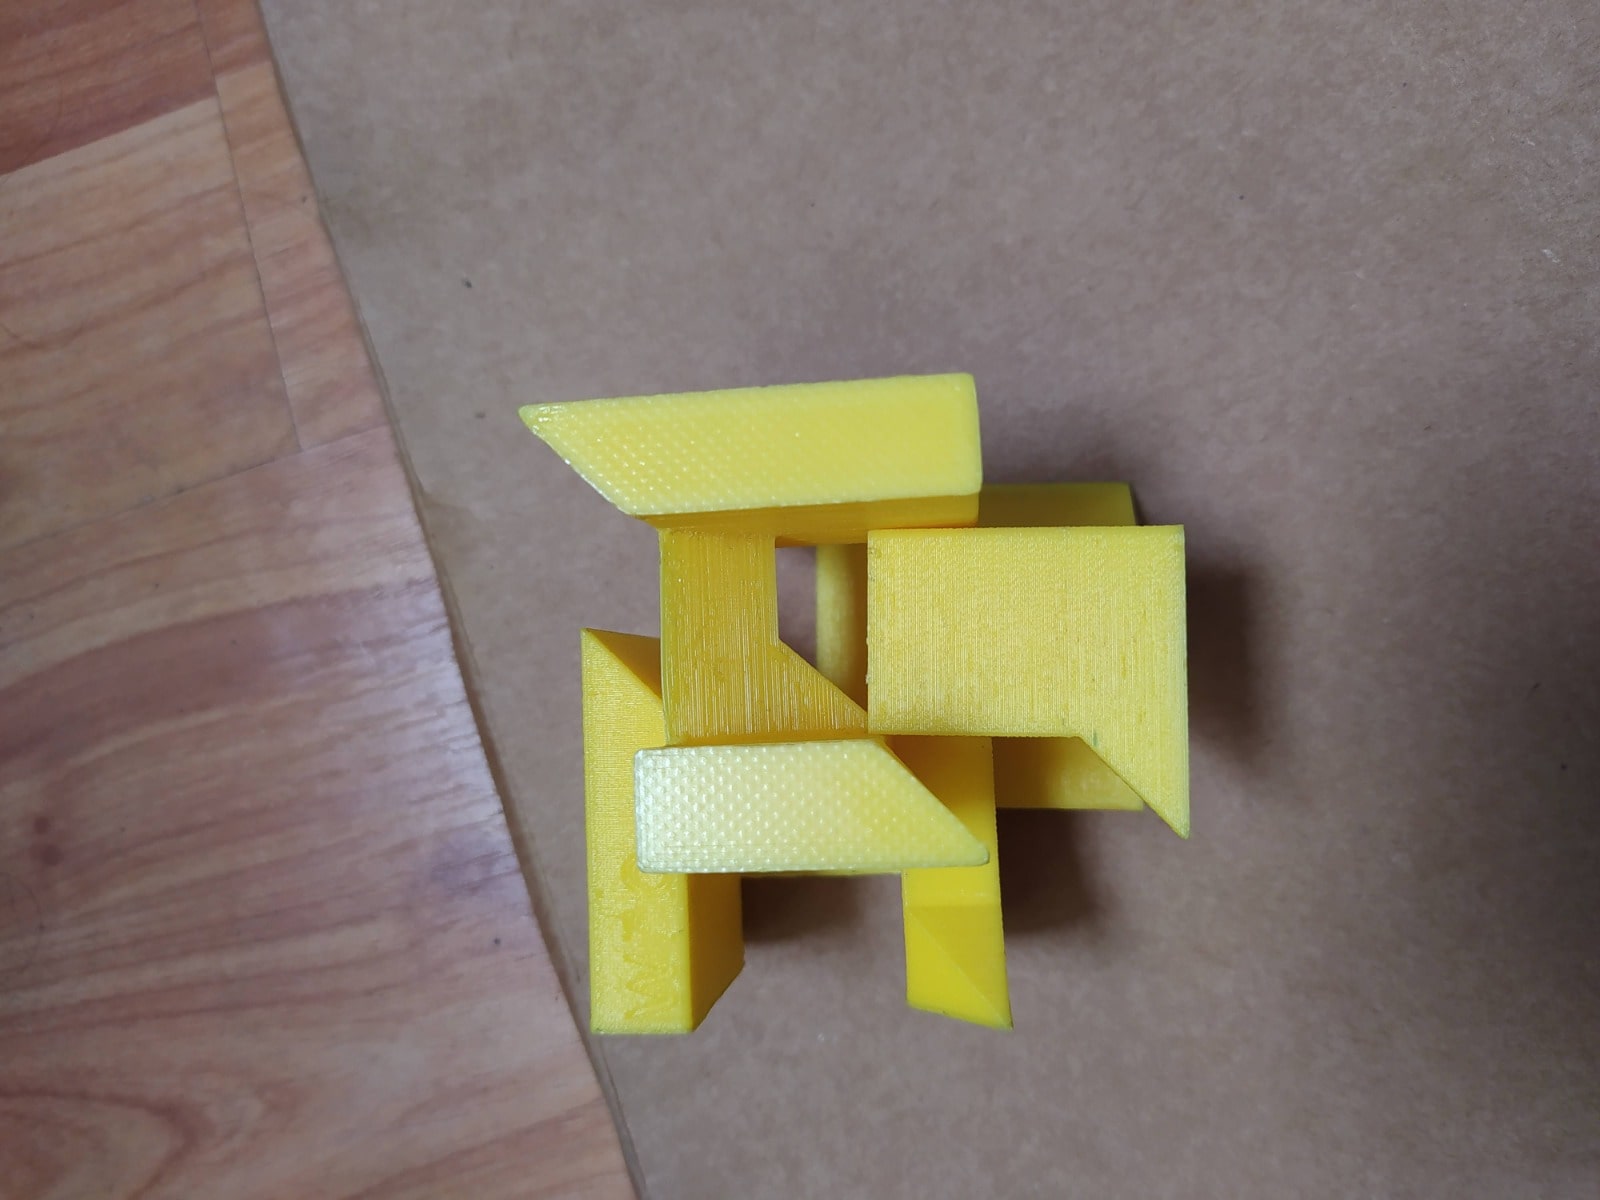
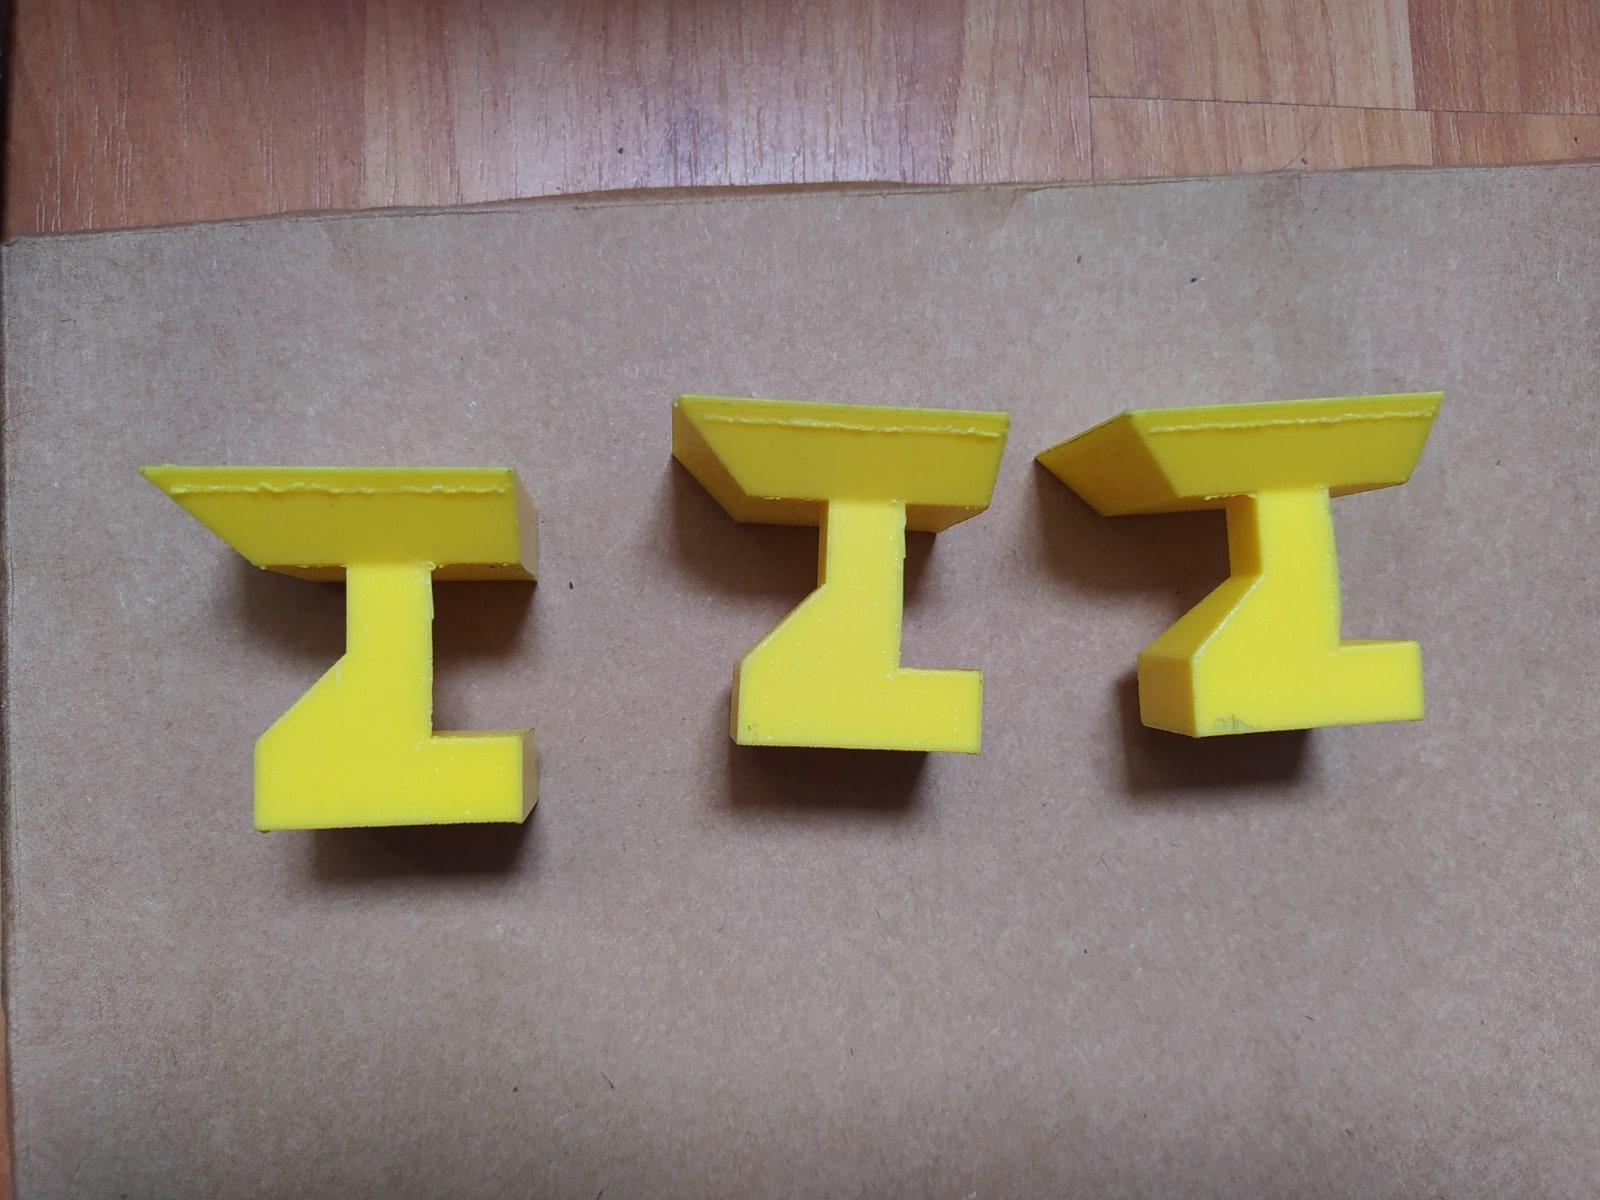
Here I can see that the bridges did not hold up without support.

The projection reached 80 degrees but the finish was terrible.
The mini pillars printed quite well but there are some printing flaws.
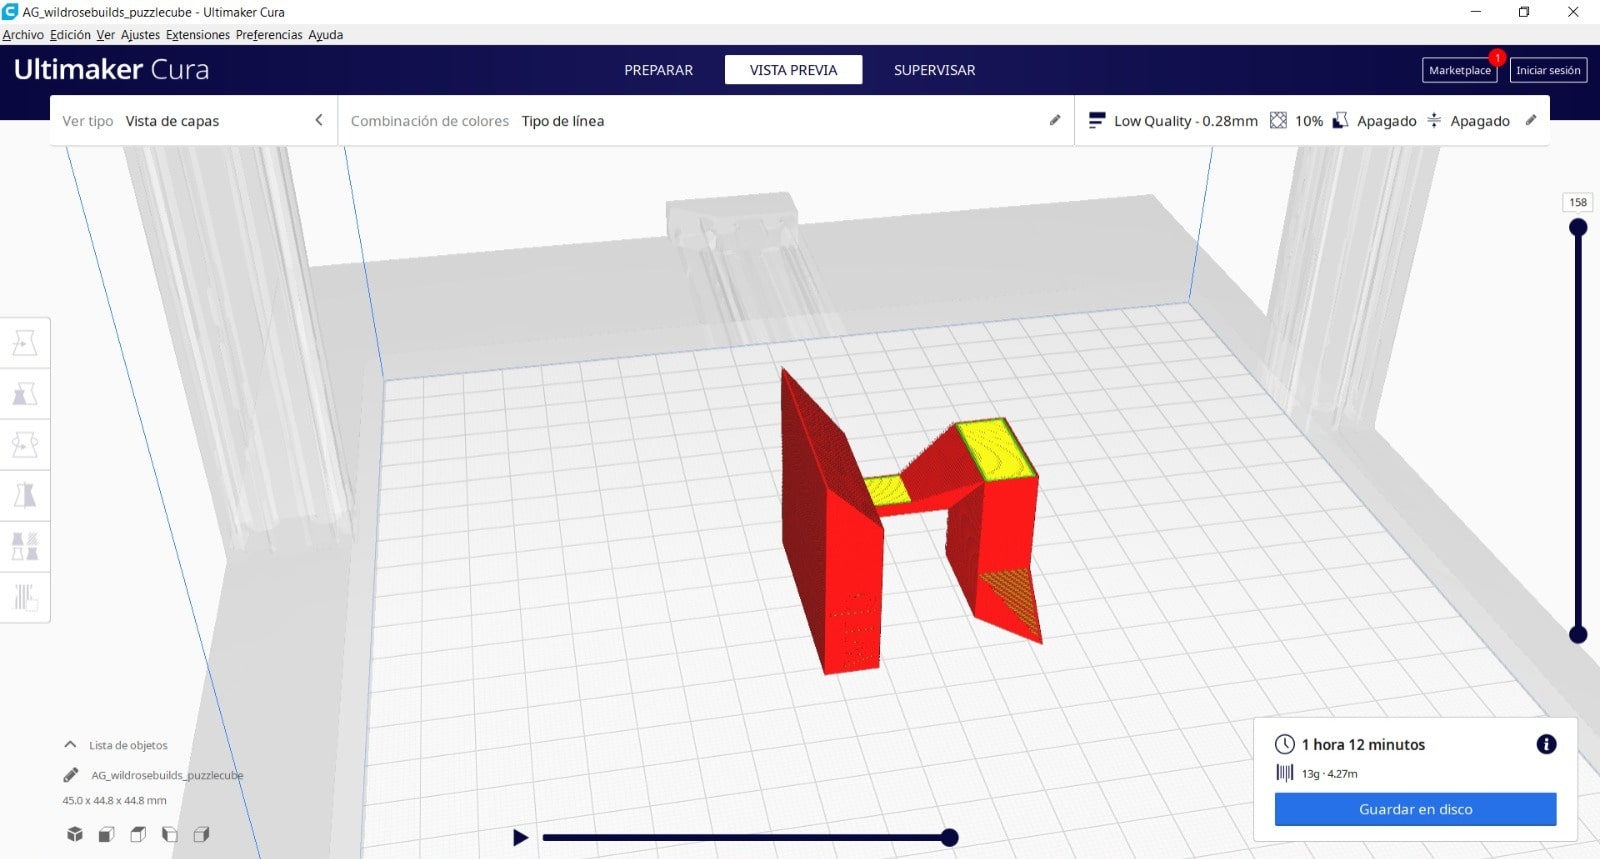
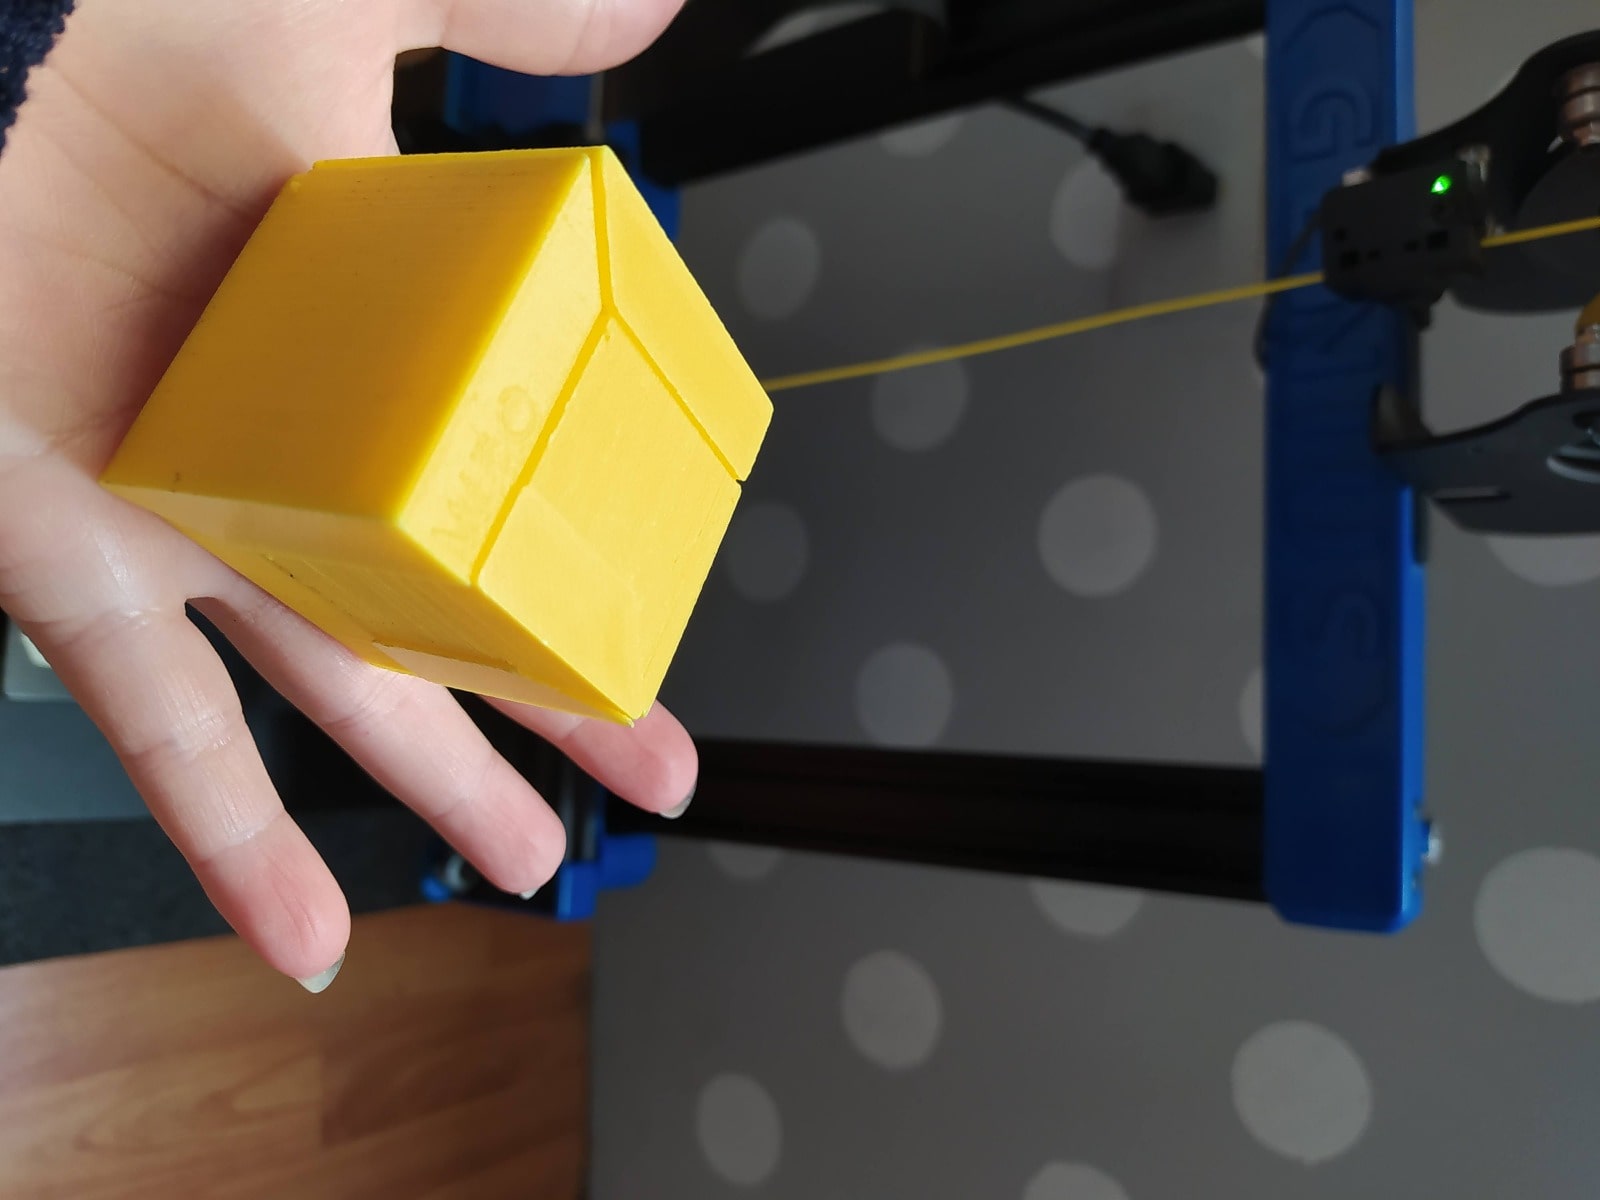
I then printed a cube that does not need supports that I also downloaded from Thingiverse Puzzle Cube (easy print no support)
which I opened at Ultimaker Cura too.
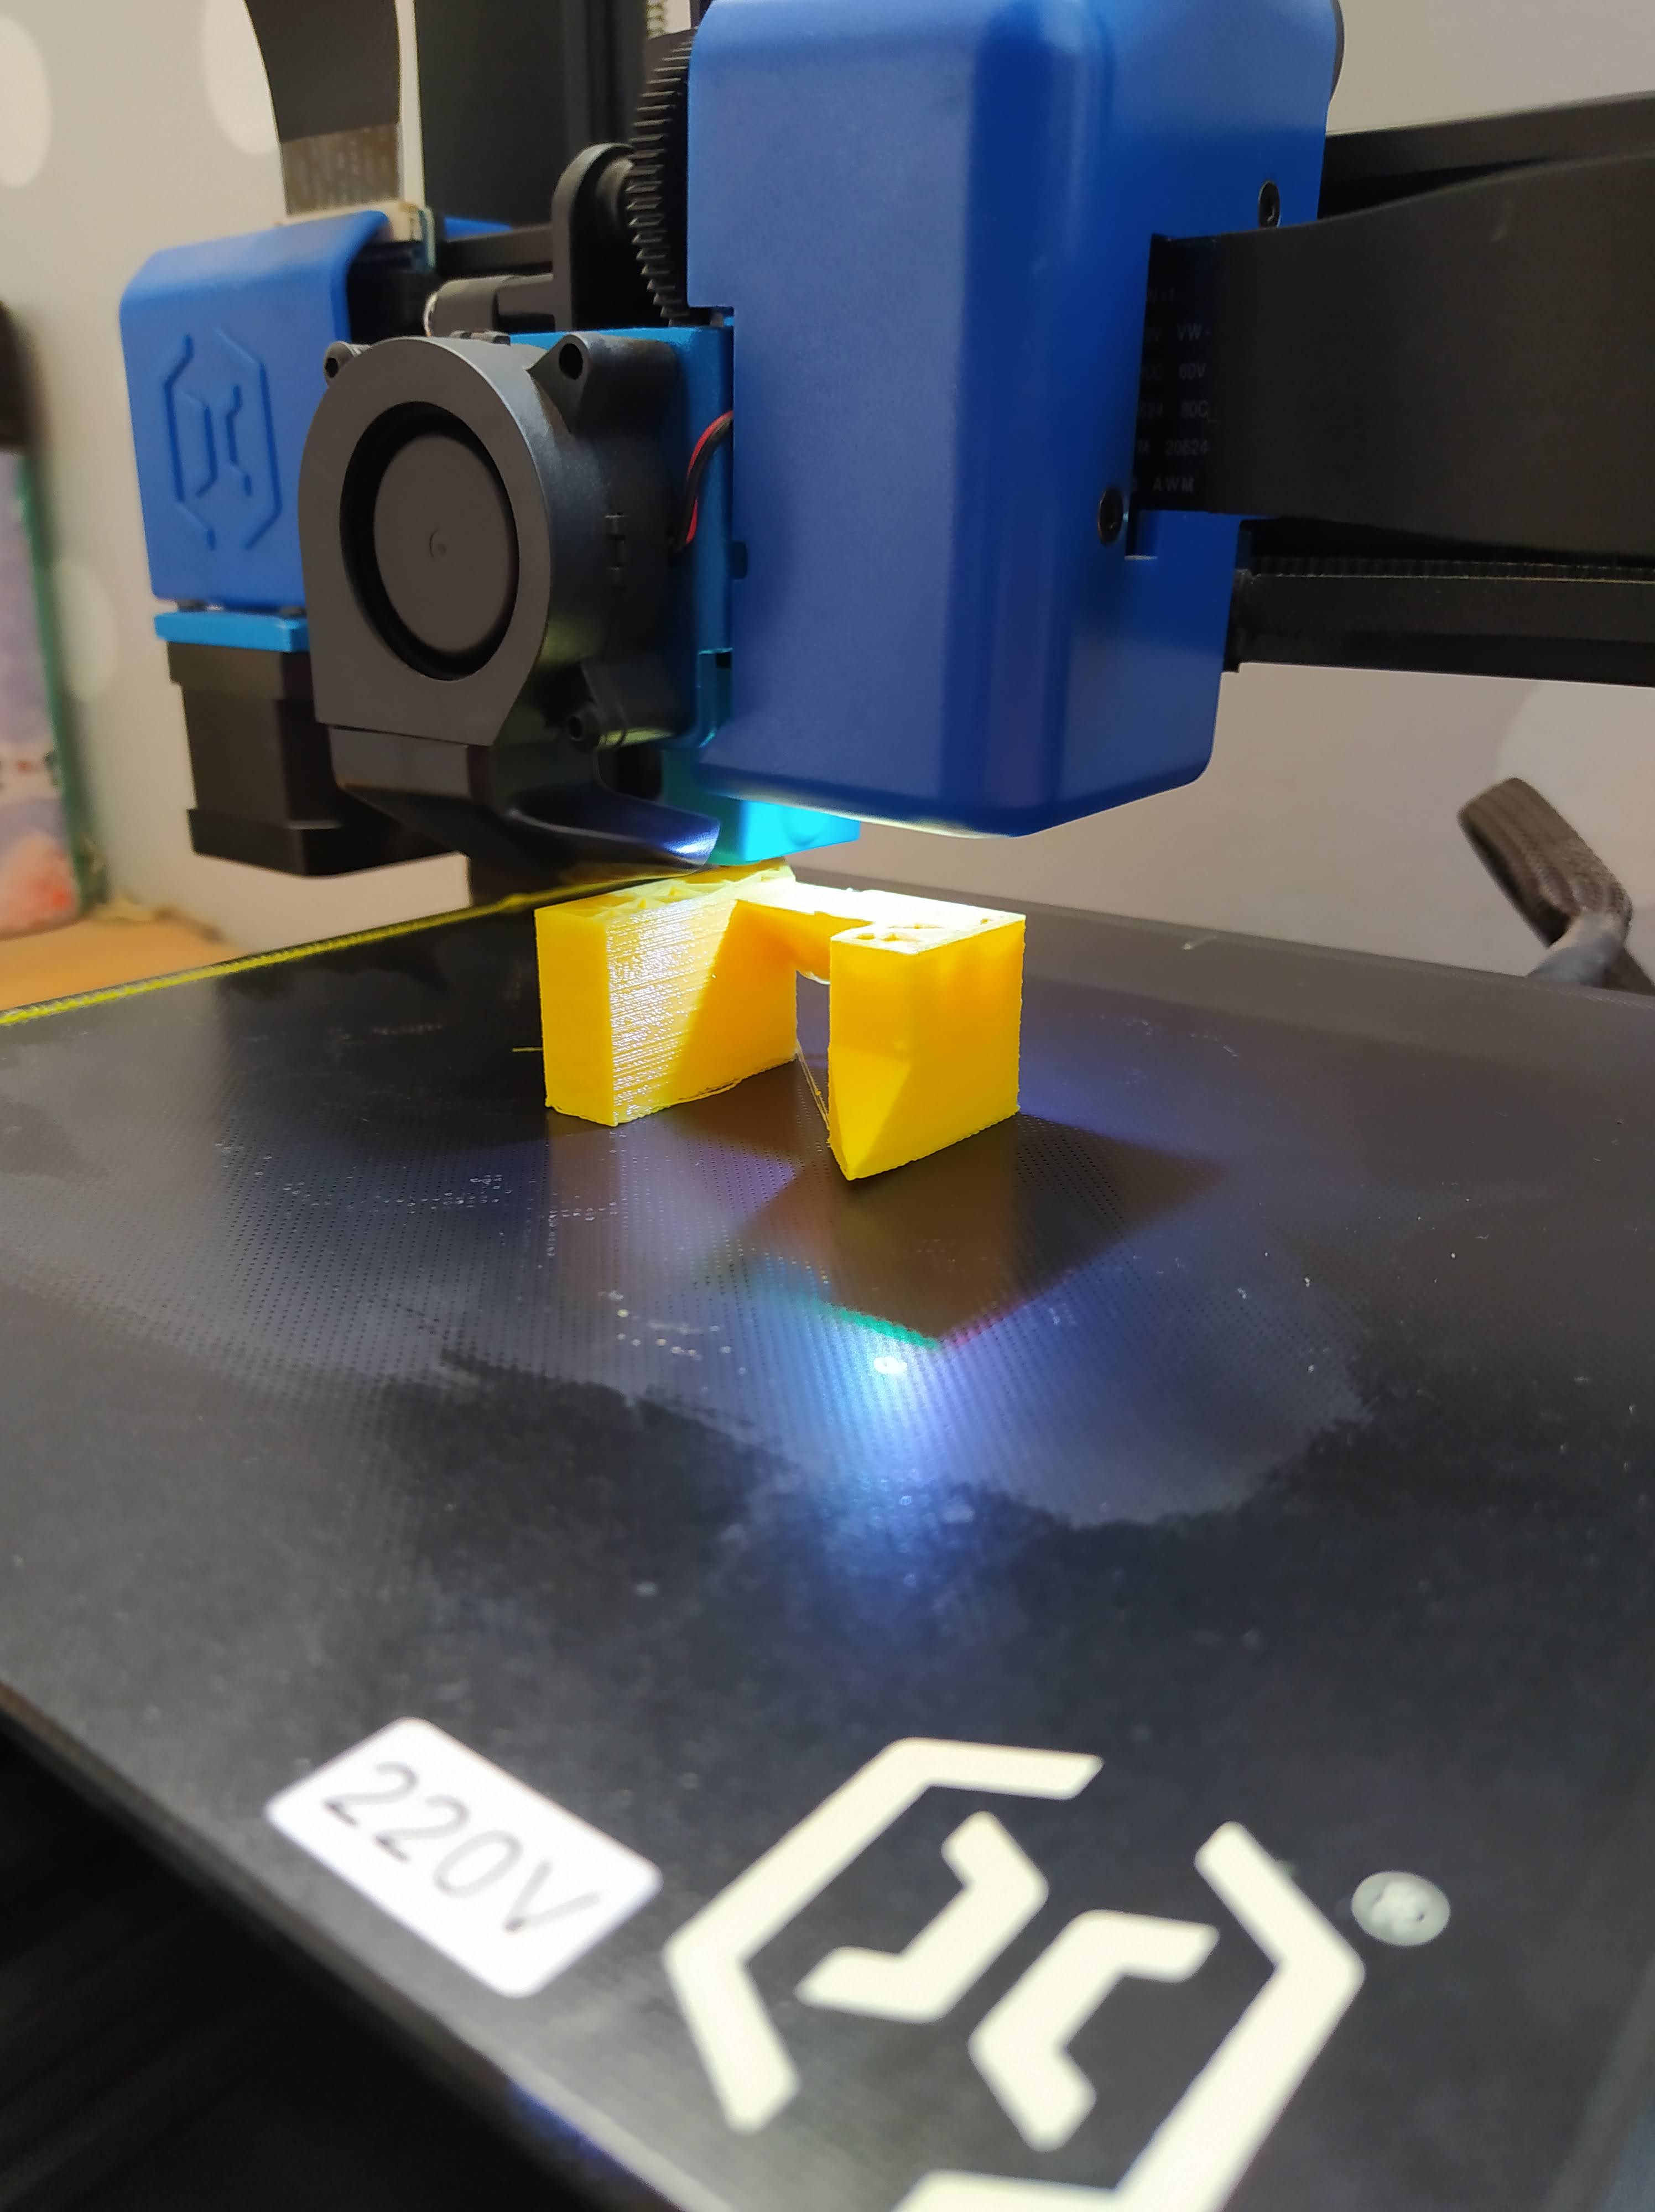
It was interesting to see how each piece is printed, put it together and make it match, it was difficult for me to put this cube together hahaha.
Conclusions
1.-3D printing has been a revelation for me, offering a fascinating way to materialize my ideas into tangible objects.
2.- I am impressed by the versatility of 3D printing technology, which allows me to create a wide variety of objects with different materials and finishes.
3.- I recognize the critical importance of properly calibrating my 3D printer to ensure the accuracy and quality of my prints.
4.- Thanks to 3D printing, I have been able to accelerate my design and prototyping process, allowing me to take my projects to the next level more quickly and efficiently.
5.- I am excited by the ability to customize every detail of my creations with 3D printing, allowing me to tailor objects to my specific needs.
6.- Although I have encountered some technical challenges in my journey with 3D printing, such as the need for precise calibration, I am excited to explore new solutions and continually learn about this ever-evolving technology.
7.- Sustainability is an important concern of mine, and I am committed to researching and using more environmentally friendly 3D printing materials and processes.
8.- In short, 3D printing has opened up a world of possibilities for me, and I am excited to continue exploring and creating with this incredible technology, always making sure to properly calibrate my printer for the best results.
9.- I firmly believe in the transformative potential of 3D printing to democratize manufacturing and enable people to create personalized, one-of-a-kind products.
What I learned from testing the 3D printer
- The printer can handle small pillars correctly but very thin features show minor defects.
- Long bridges without supports tend to sag.
- Overhangs close to 80° are possible but surface quality decreases.
- Print orientation and support configuration significantly affect final results.
- Proper calibration and bed leveling are essential for accuracy.
Individual Assignment:
- Design and 3D print an object ( small, few cm, limited by printer time)
That could not5 be made subtractively.
- 3D scan an object (and optionally print it)
3D PRINTING
CREATING MY OBJECT IN TINKERCAD
For this part of the task I used an ARTILLERY GENIUS printer that has the following characteristics:
-min.jpg)
I used the free program that is online called TINKERCAD to be able to design my object that contains a sphere inside that cannot be done in a subtraction process.
-min.jpg)