3D Scanning and Printing
Week 5
Group assignment:
- Test the design rules for your 3D printer(s)
Group 1
Group 2
Group 3
Group 1:
- Hans Moncca
- Maryori Vasquez

3D PRINTER
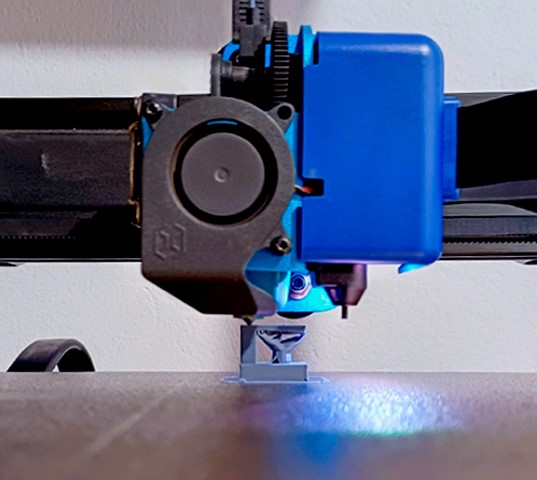
The 3D printers that we have at the Cientifica del Sur University are the PRUSA I3 MK3 that have the following technical specifications:
| PRINT VOLUME: | 11,025 cm3 (25 x 21 x 21 cm o 9,84 x 8,3 x 8,3 in) |
|---|---|
| ENERGY CONSUMPTION: | PLA Settings: 80W / ABS Settings: 120W |
| SUPPORTED MATERIALS | PLA, ABS, PET, HIPS, Flex PP, Ninjaflex, Laywood, Laybrick, Nylon, Bamboofill, Bronzefill, ASA, T-Glase, |
| PRINTER DIMENSIONS: | 7 kg, 55 x 40 x 50 cm; 21.6 x 15.7 x 19.6 in |
TEST THE DESIGN RULES
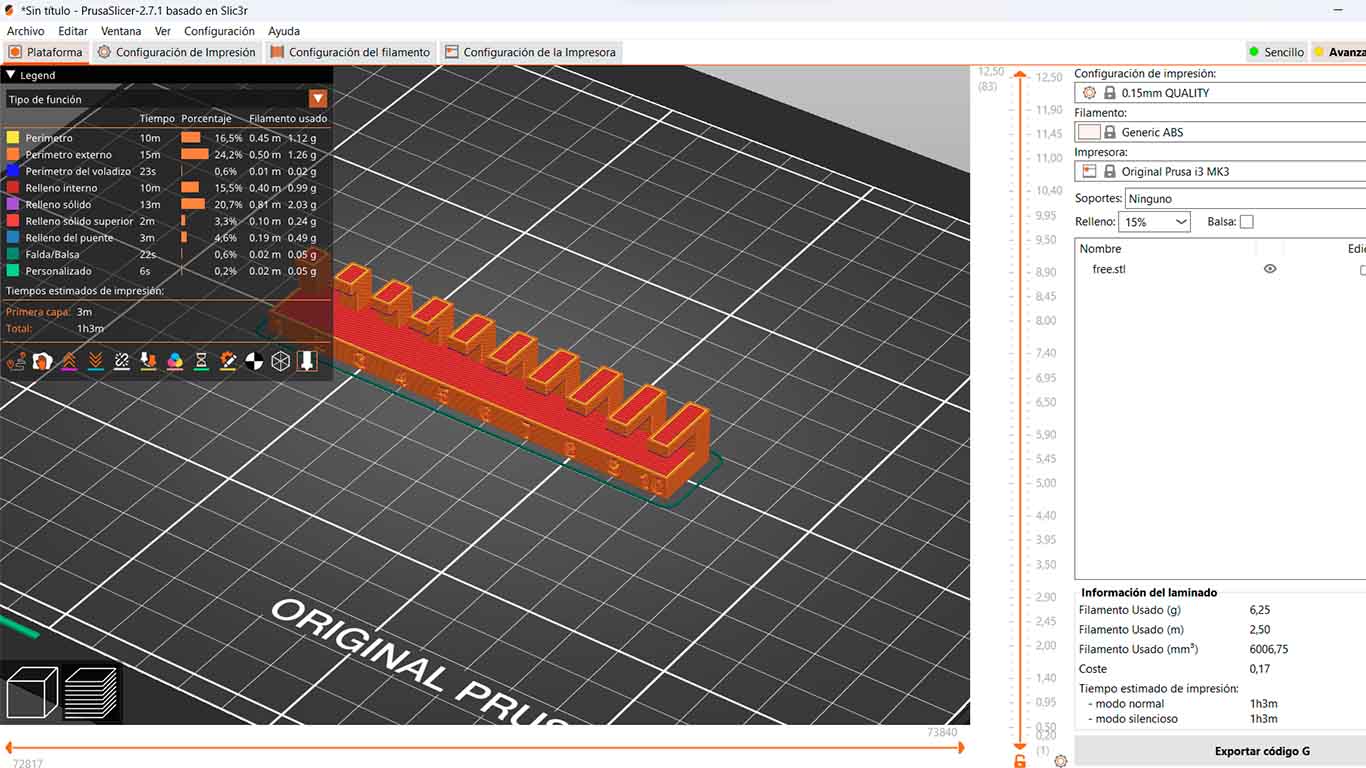
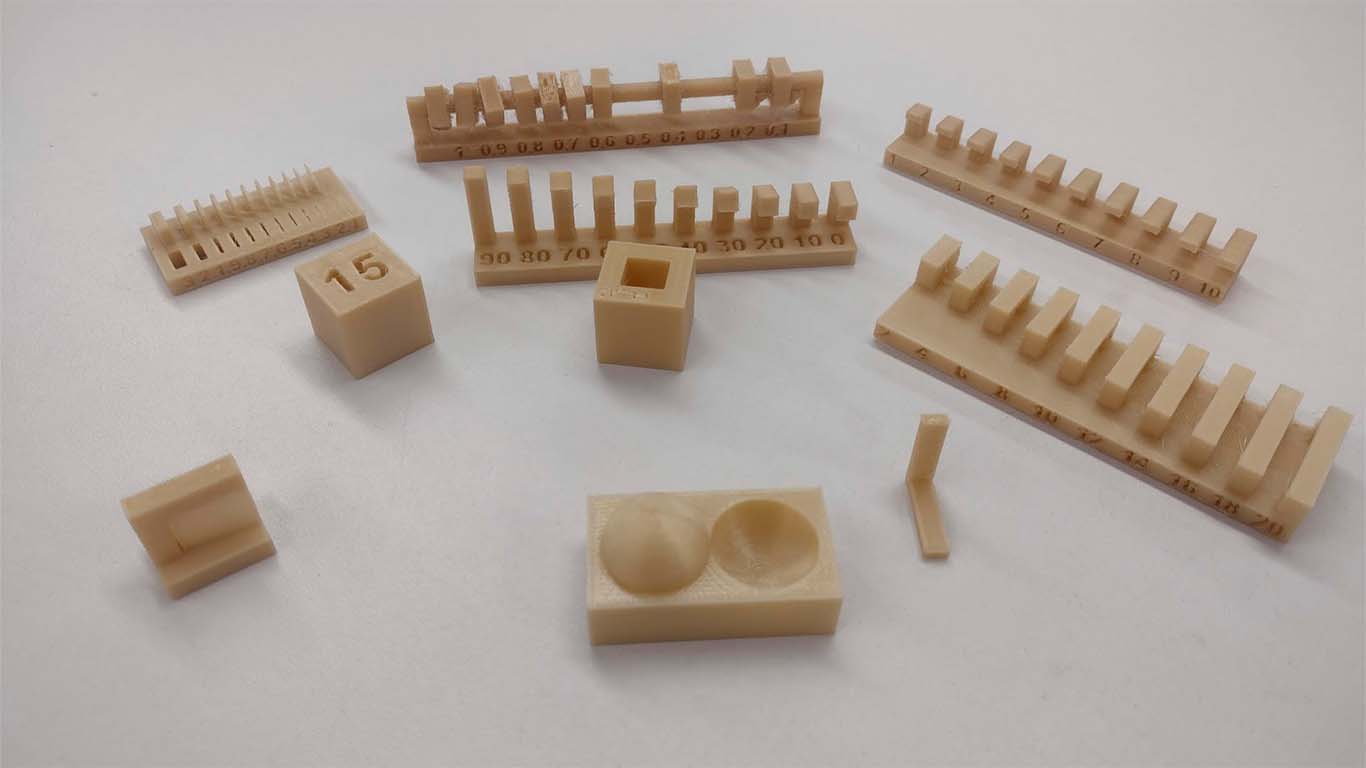
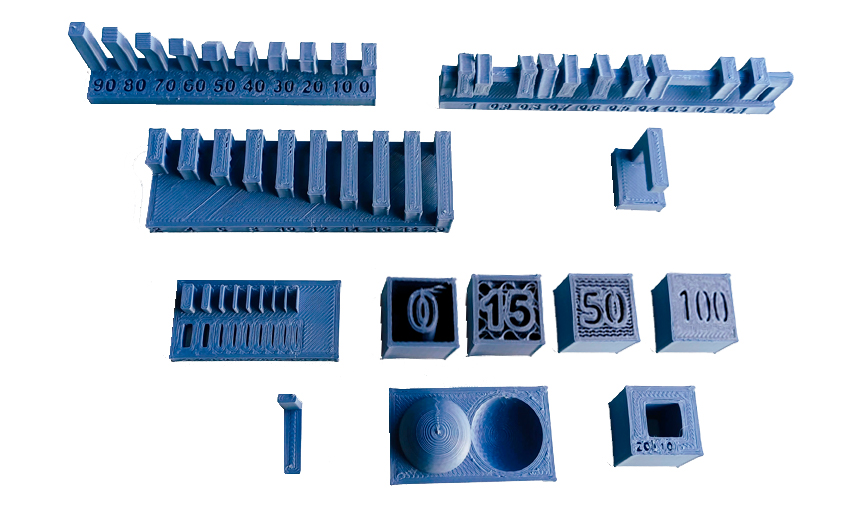
Together with my friend Maryori we decided to do all the tests that Neil proposed and that we can find on the assignment page and see if both printers have the capacity to perform them. Once downloaded, we proceed to perform them without supports and see if all the tests can be carried out by the PRUSA I3. For the tests I will show the steps that are carried out in the PRUSA SLICER software and how we obtain the result of each test.

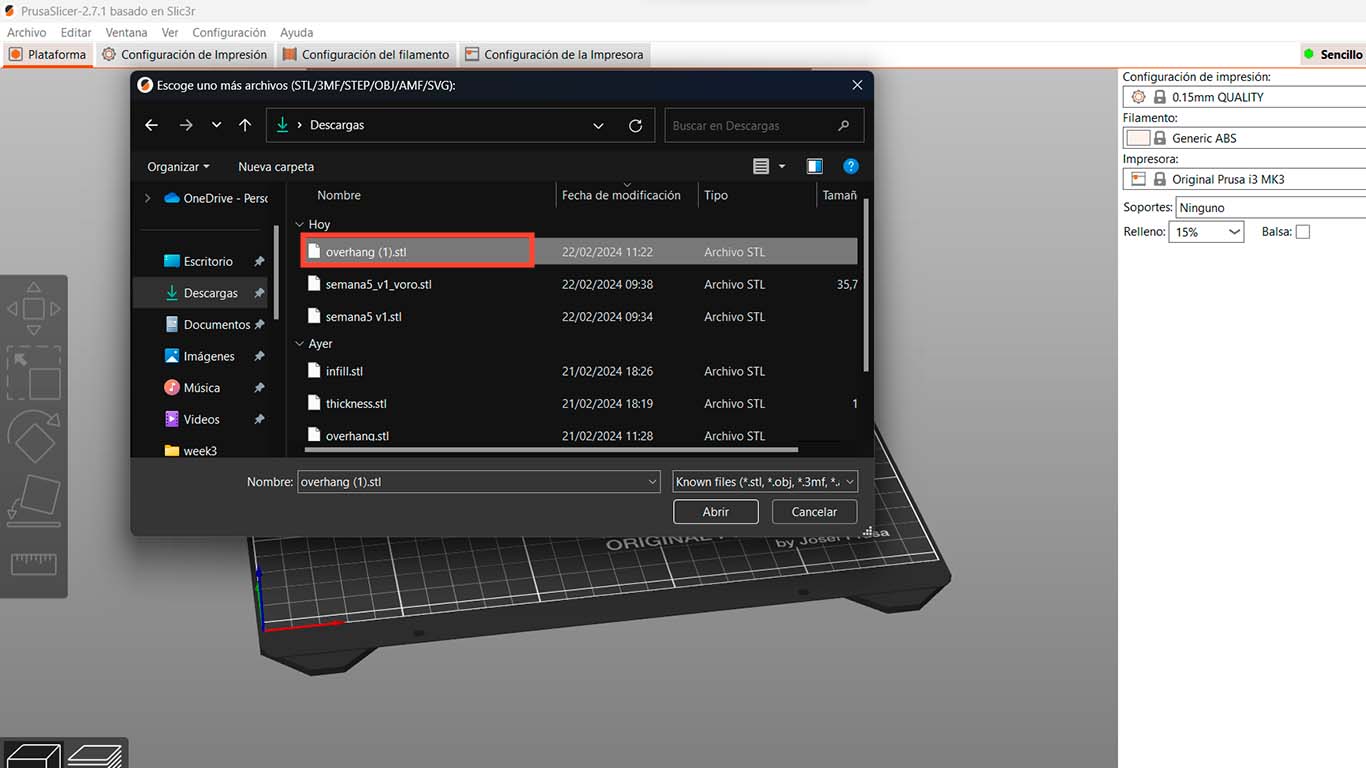
First, we open the PRUSA SLICER program and go to "FILES" then "IMPORT" and choose "IMPORT STL" which in this case we have all the references in this extension. We will repeat this procedure in all the tests for this group assignment. On the other hand, for the following tests we use the PLA FILAMENT with a plate temperature of 60° and a nozzle temperature of 250°

TEST SUPPORT
The next 2 tests are about seeing the support generated by the program itself to be able to carry out the 3D modeling that we have. Here I show the 3D in the software with the settings mentioned above and its result with the 3D printer.
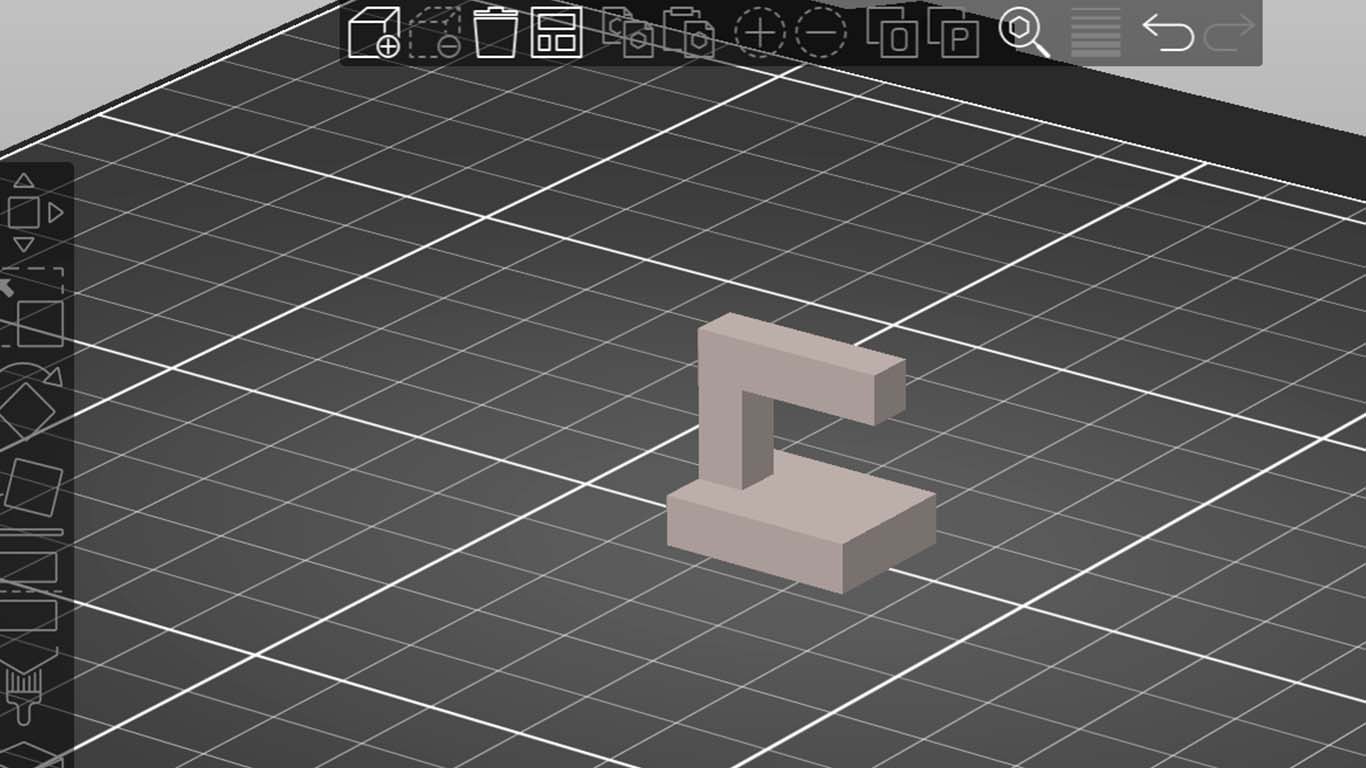
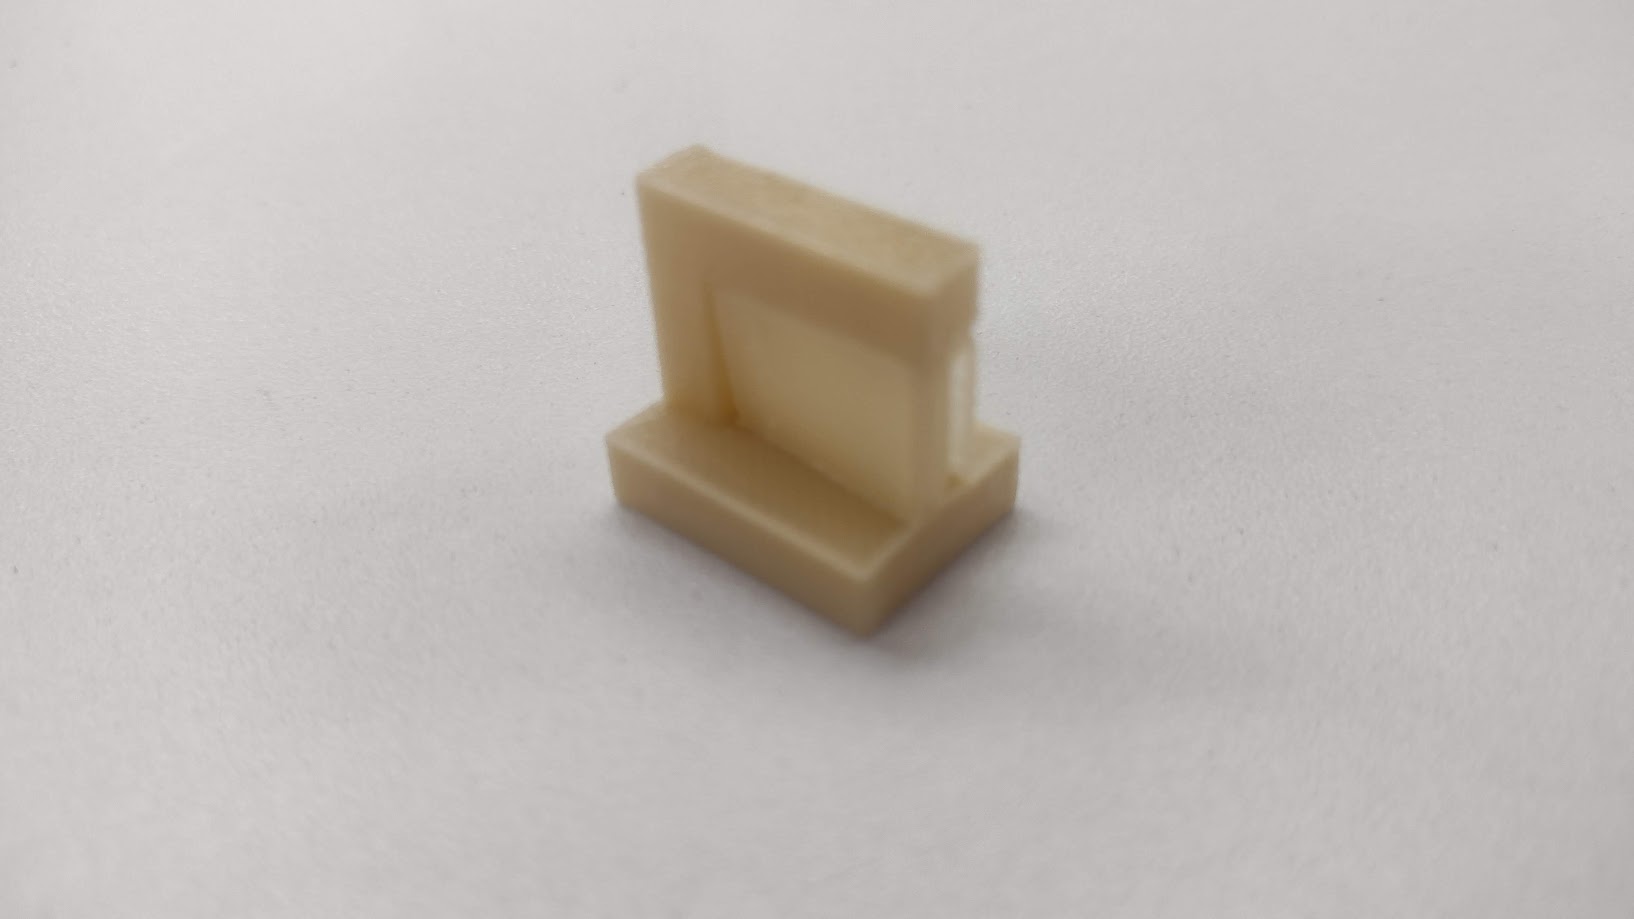
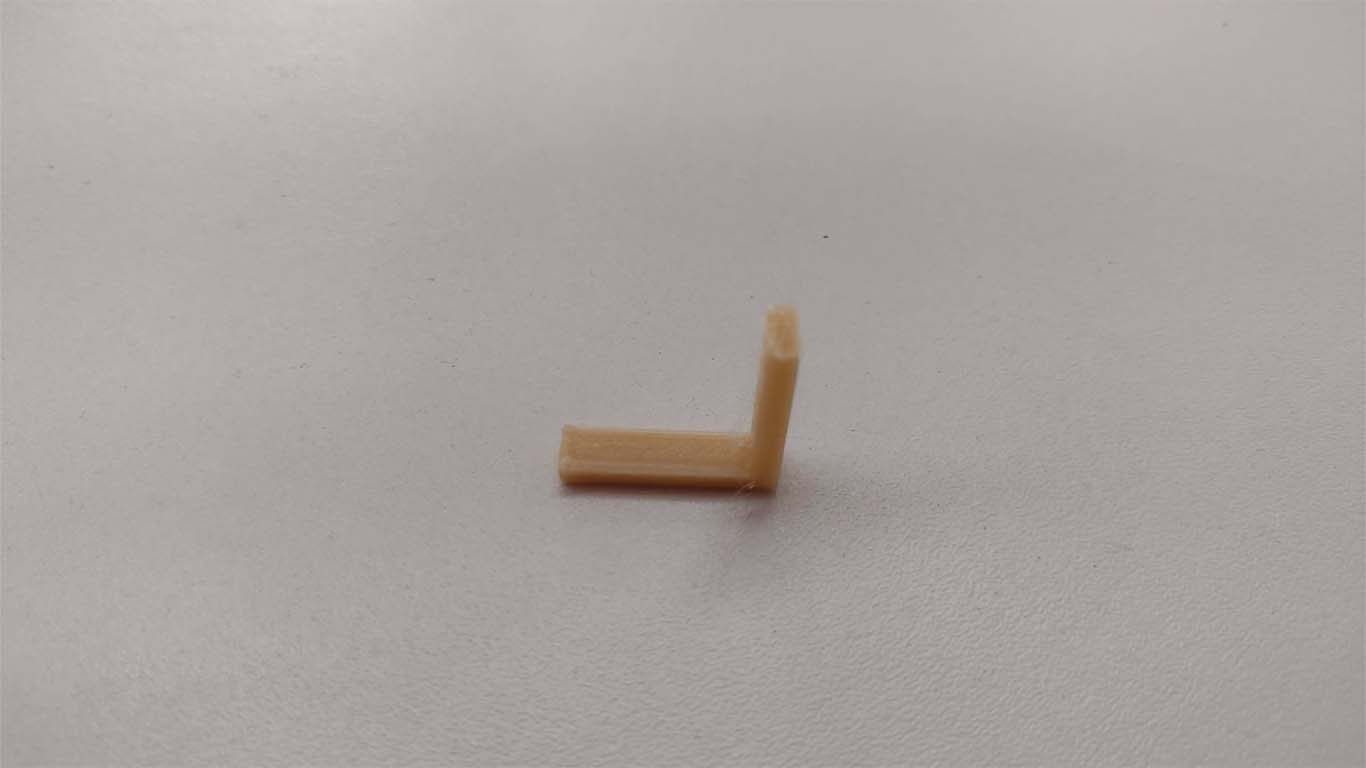
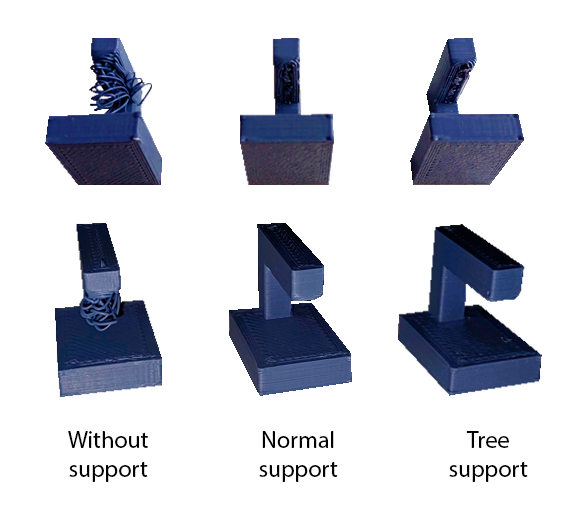
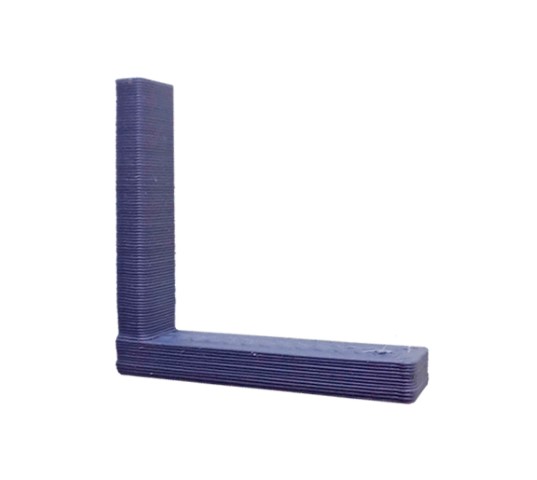
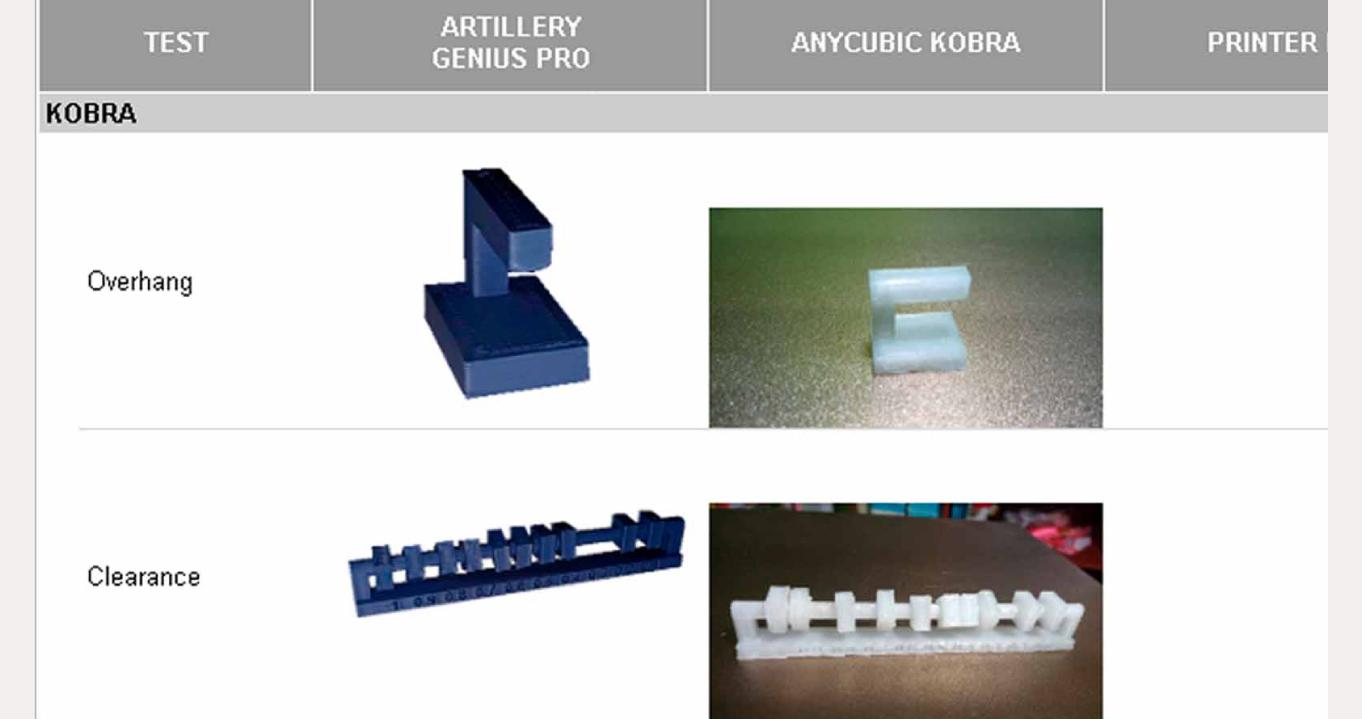
TEST OVERHANG
The following test presents an inverted L-shaped modeling where supports are generated that can be generated in the software we use to be able to print it in 3D. Here I show images of the generated supports and the printed result. The objective with the printing was to obtain the result without excess material and the shape to be correctly printed on both vertices and sides. Also, when removing the supports, do not affect the shape of the volume.

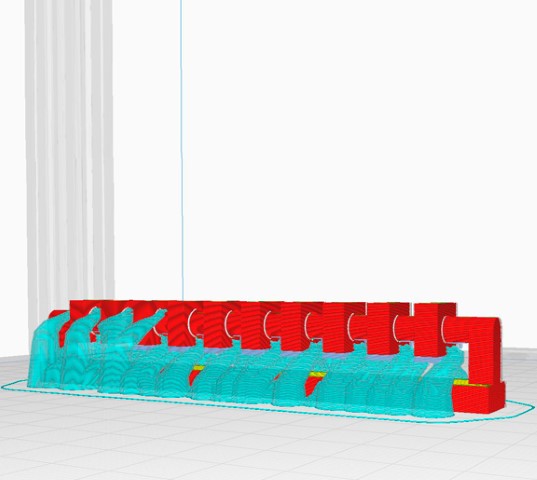
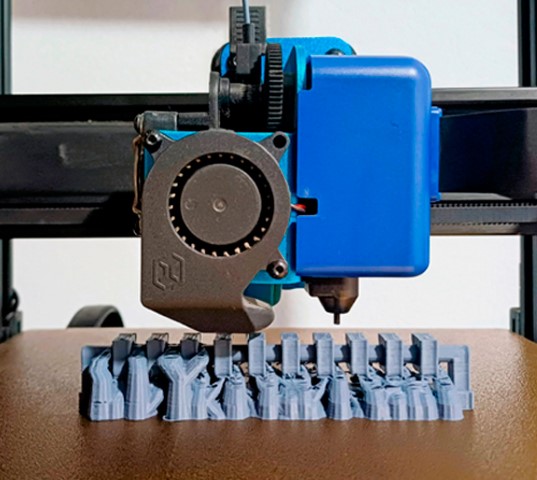
TEST CLEARANCE
The following test is complex because the modeling requires that the rectangular volumes be able to move and have the appropriate separation to be able to remove the supports and obtain the result. We were able to clean it and see that the 3D printer was able to do it. In addition, we wanted to identify the level of cleanliness in the impression for the test, so we chose to use tree supports so that they touch the impression as little as possible and are easier to remove. In the result, we were able to remove the supports however the cleanliness in the print was not adequate because we identified that the layers of the print were not filled.


TEST UNSUPPORT
For tests without supports, the idea is to see if the machine can perform the modeling without the help of supports to pass the configuration test. Here I show how in each test the PRUSA I3 will pass the test in almost all of them, however some models are cleaner and others a little dirty for the same impression.
TEST ANGLE
The first test without supports is the angles, where the modeling presents volumes that change their angle. The 3D printer was able to achieve a good result according to the reference presented in class. With the test we wanted to know how far the printer can print without supports at different angles. Thanks to the result we identified that we did get a good result but the detail of the print (vertices) was not so neat.
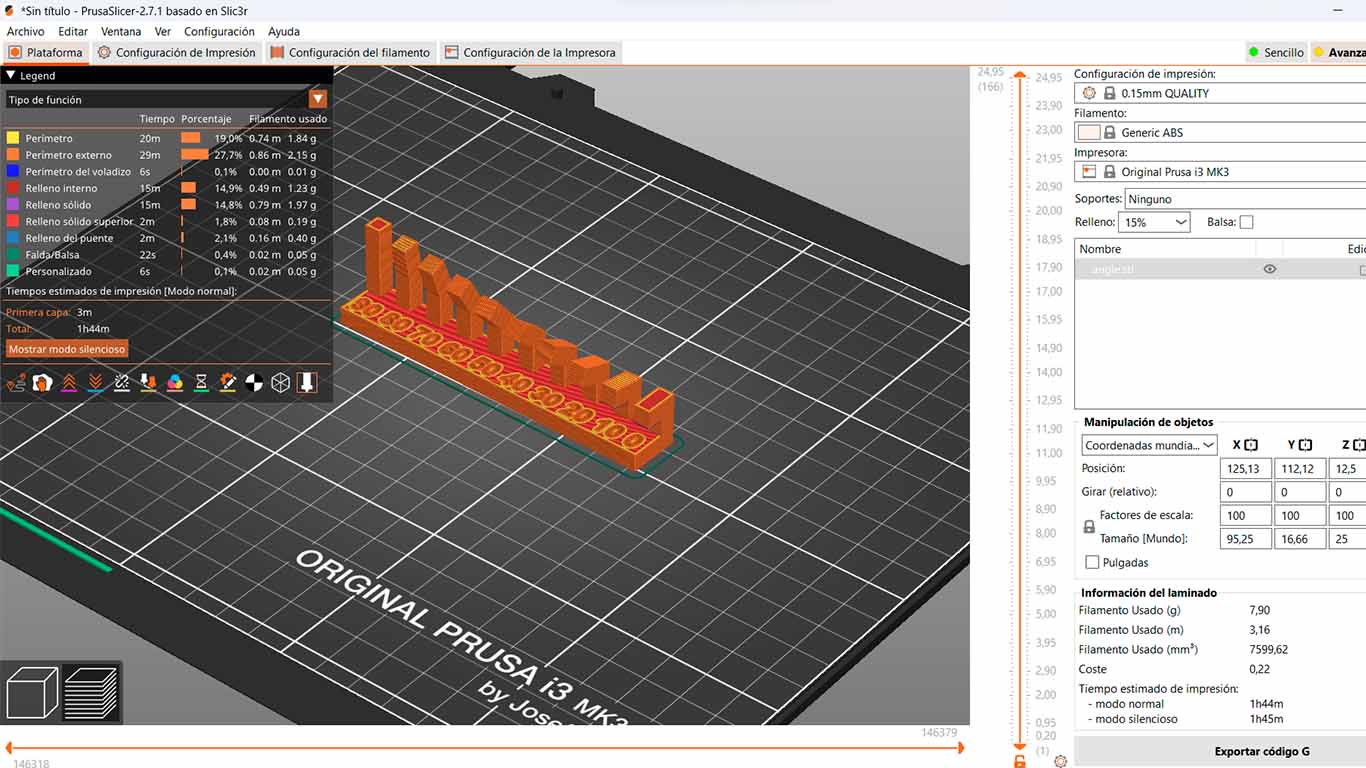
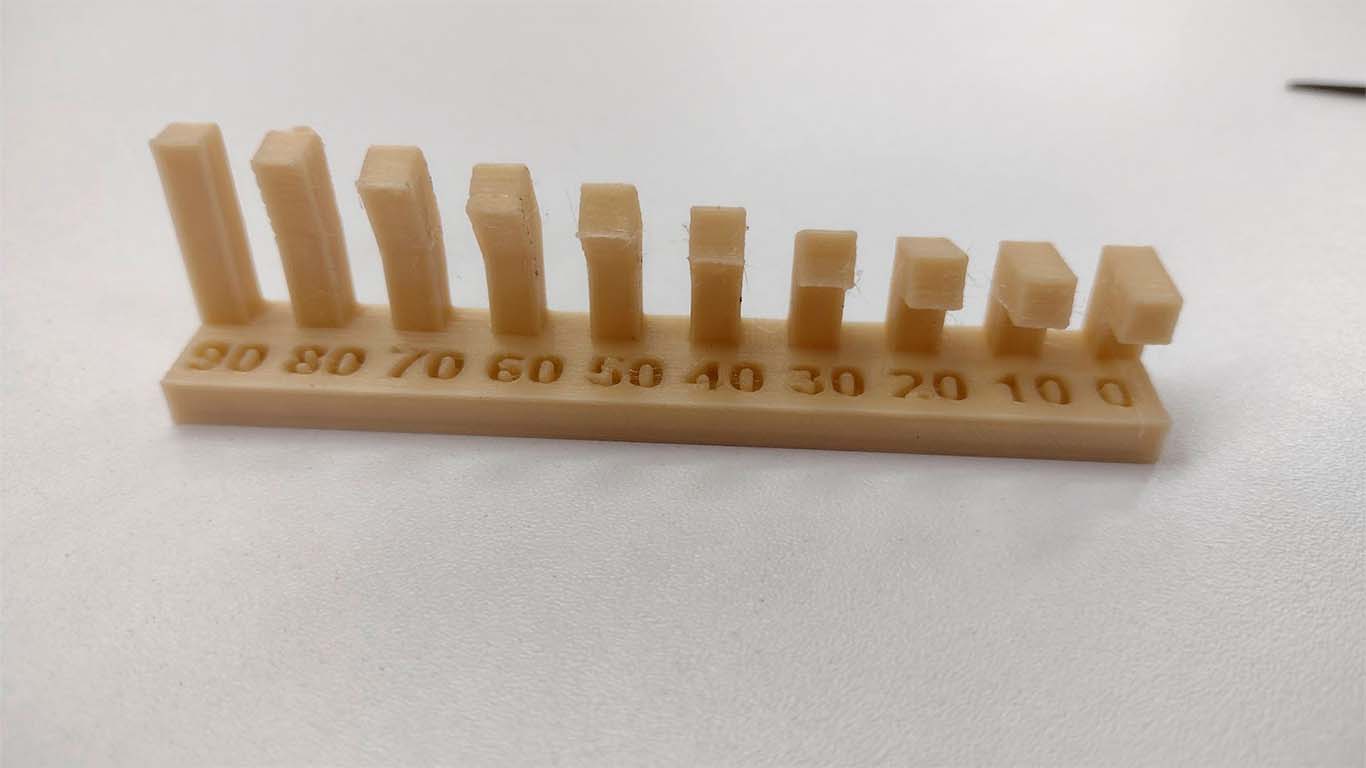
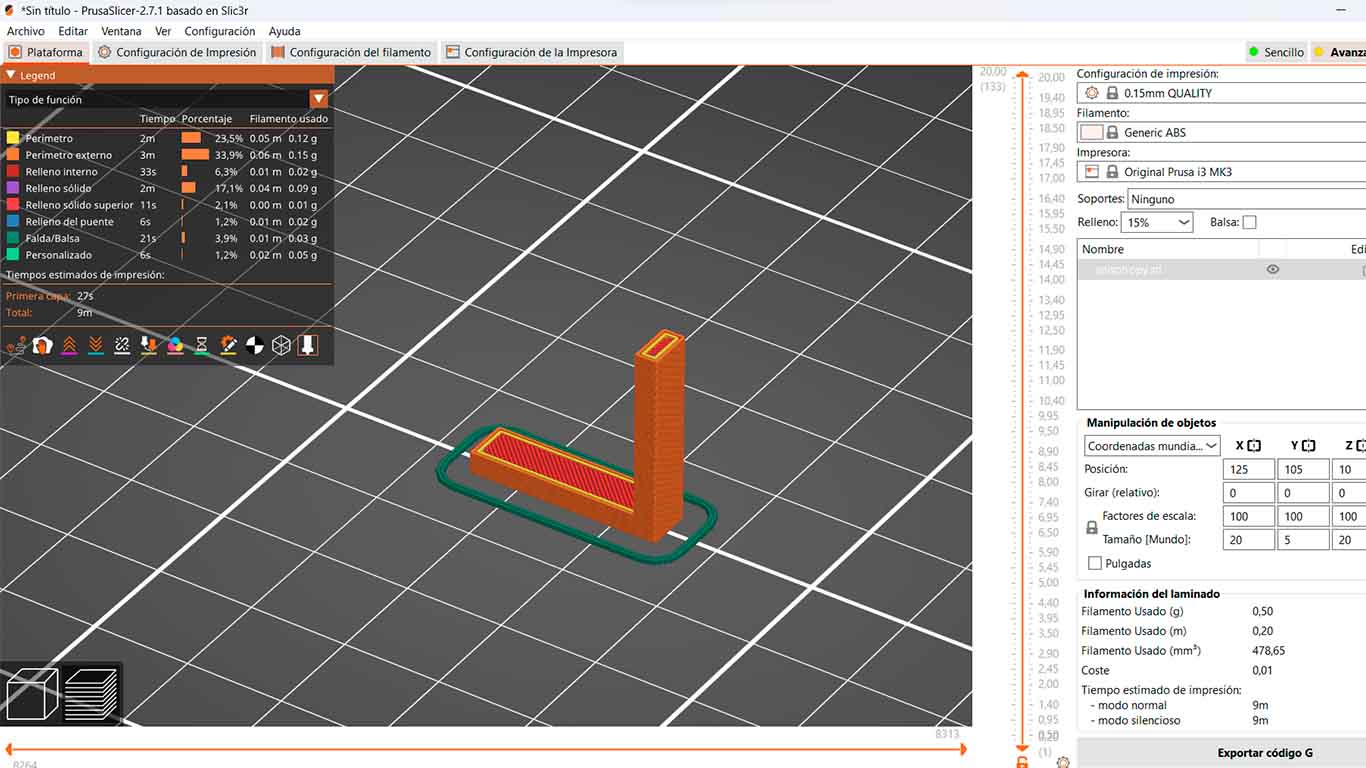
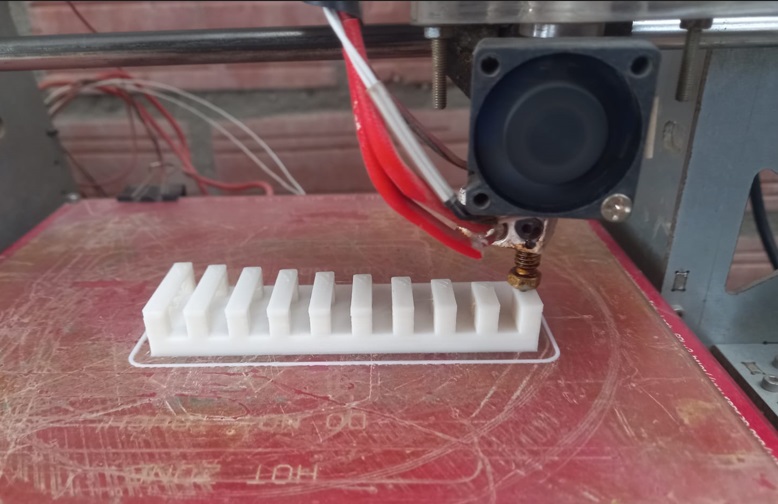
TEST OVERHANG
The second test is very similar to the previous one but the modeling presents a right angle where the flying distance of each prism increases. The result came out well and similar to the reference in class. In the next test, we change the printing speed so that the cantilevers can cool down enough to be stable to receive the next layer.
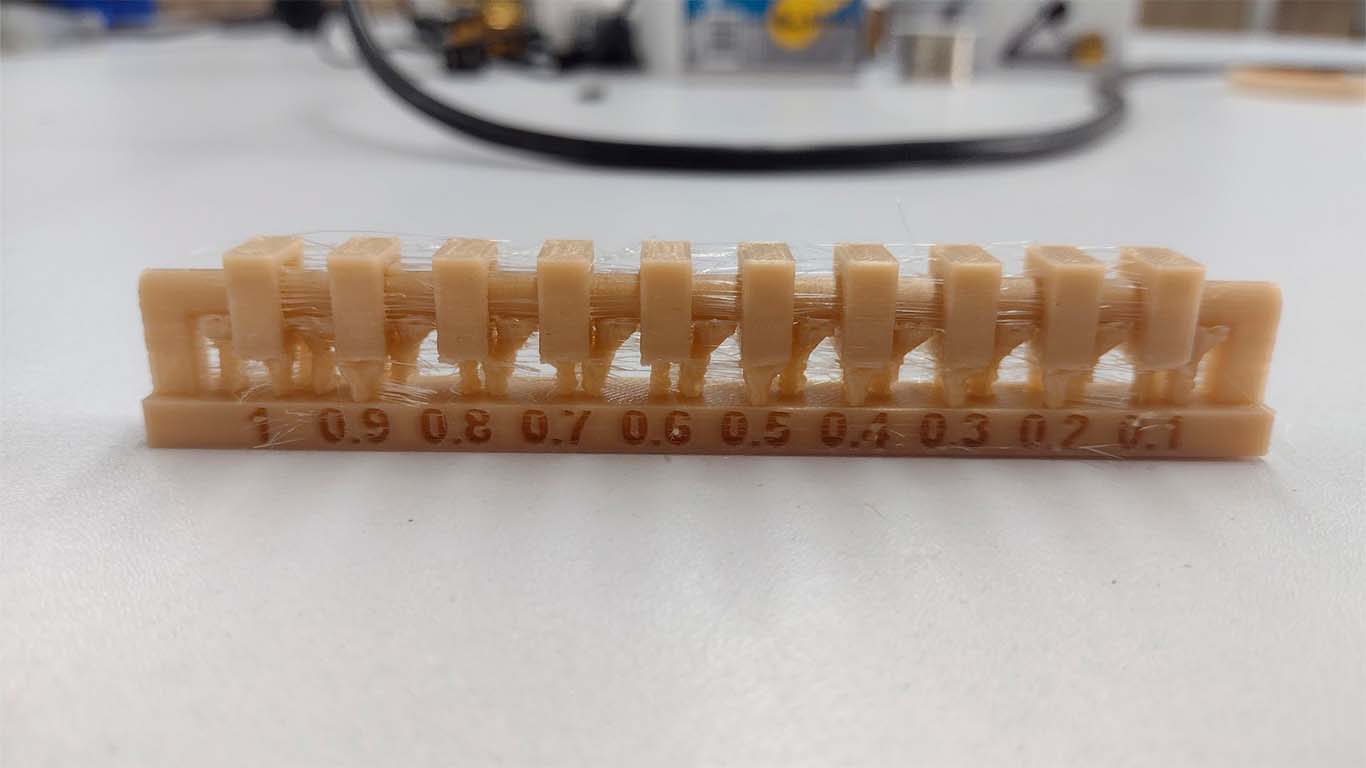
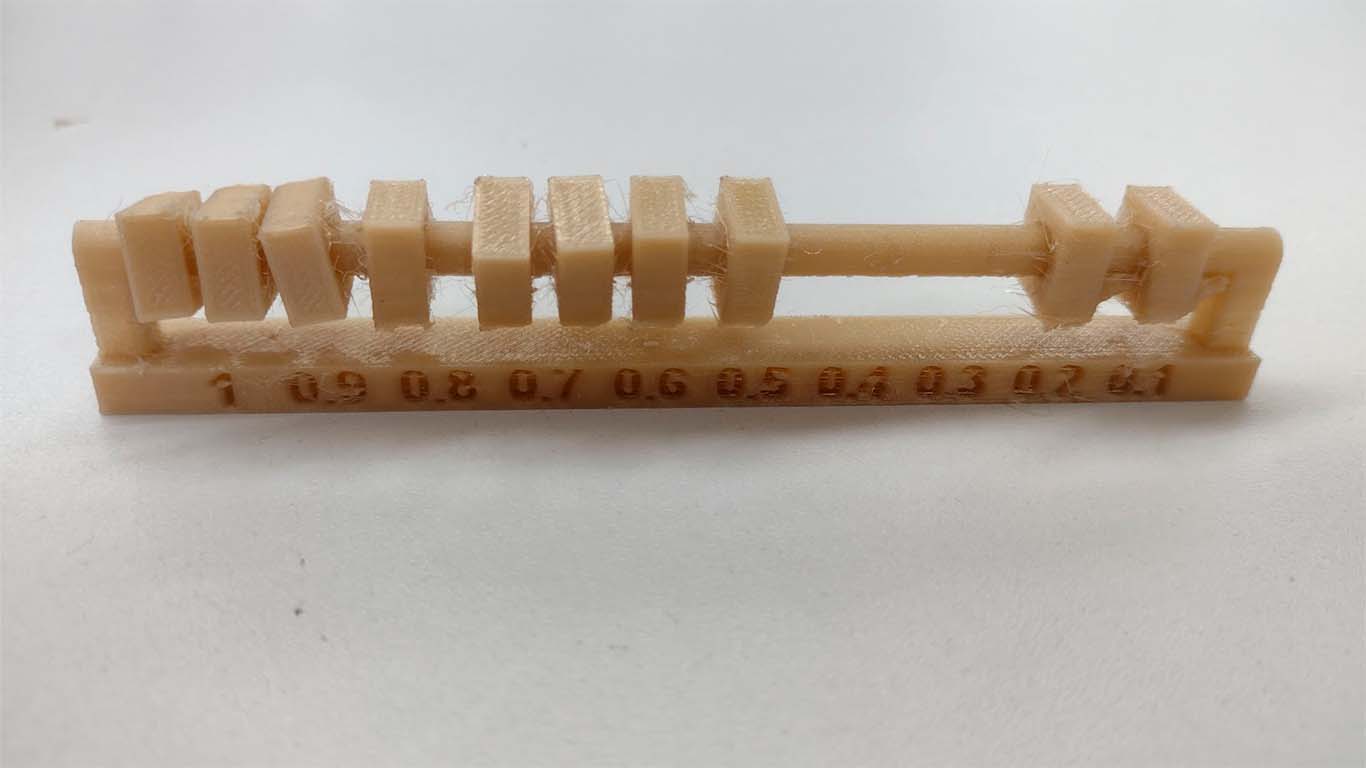
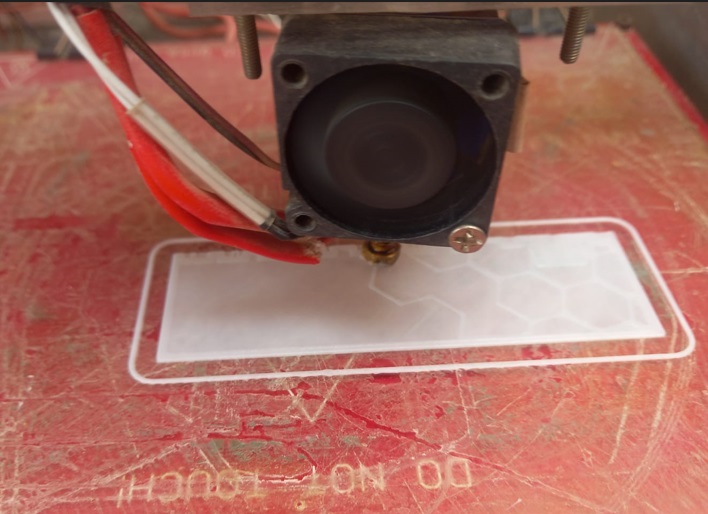
TEST BRIDGING
The next test has the concept of porticos where the modeling varies the distance between the supports and in the end achieve a bridge to see if it is possible. The result came out well with a lot of filament around it but after cleaning it a little you can get the result. To obtain the test result, we lowered the extruder temperature from 200° to 230° and also slowed down the speed to achieve the overhangs in the first layer (so that they cool down faster as they come out of the extruder).


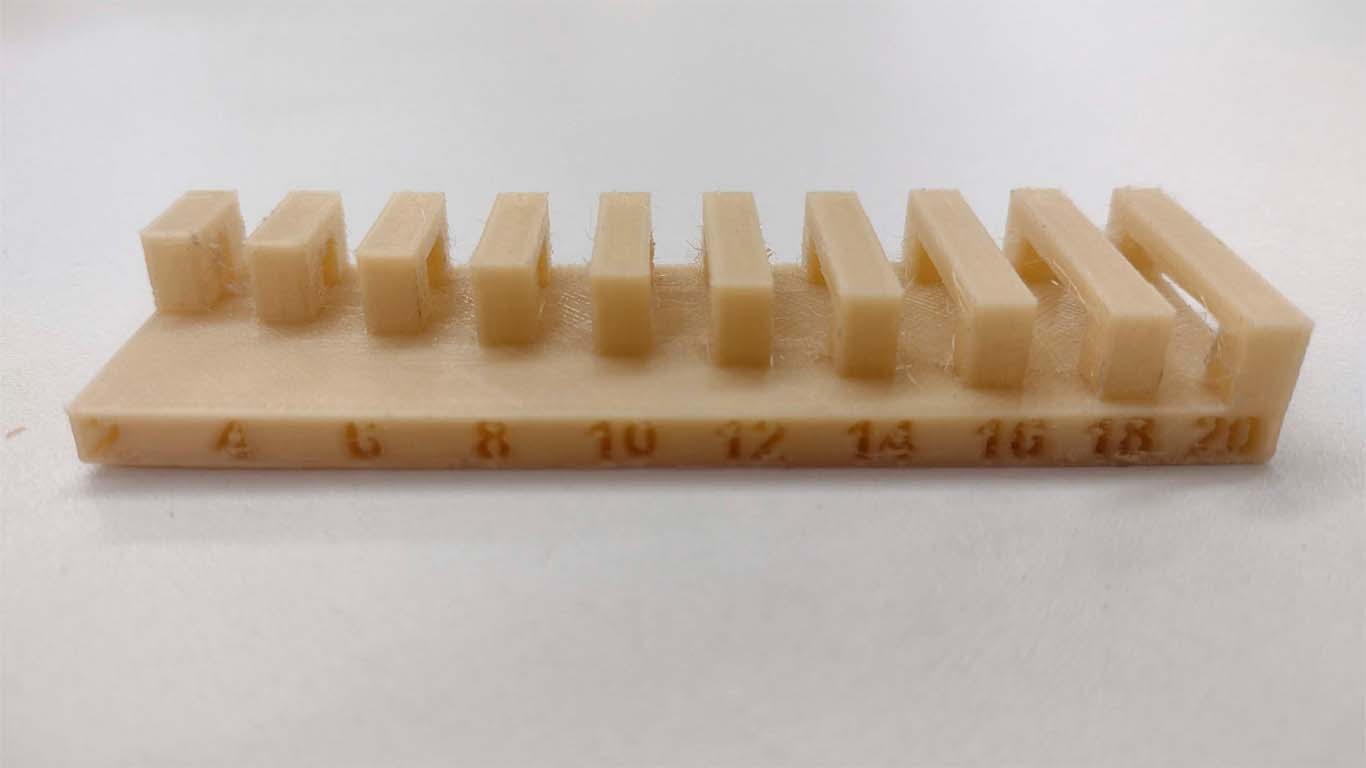
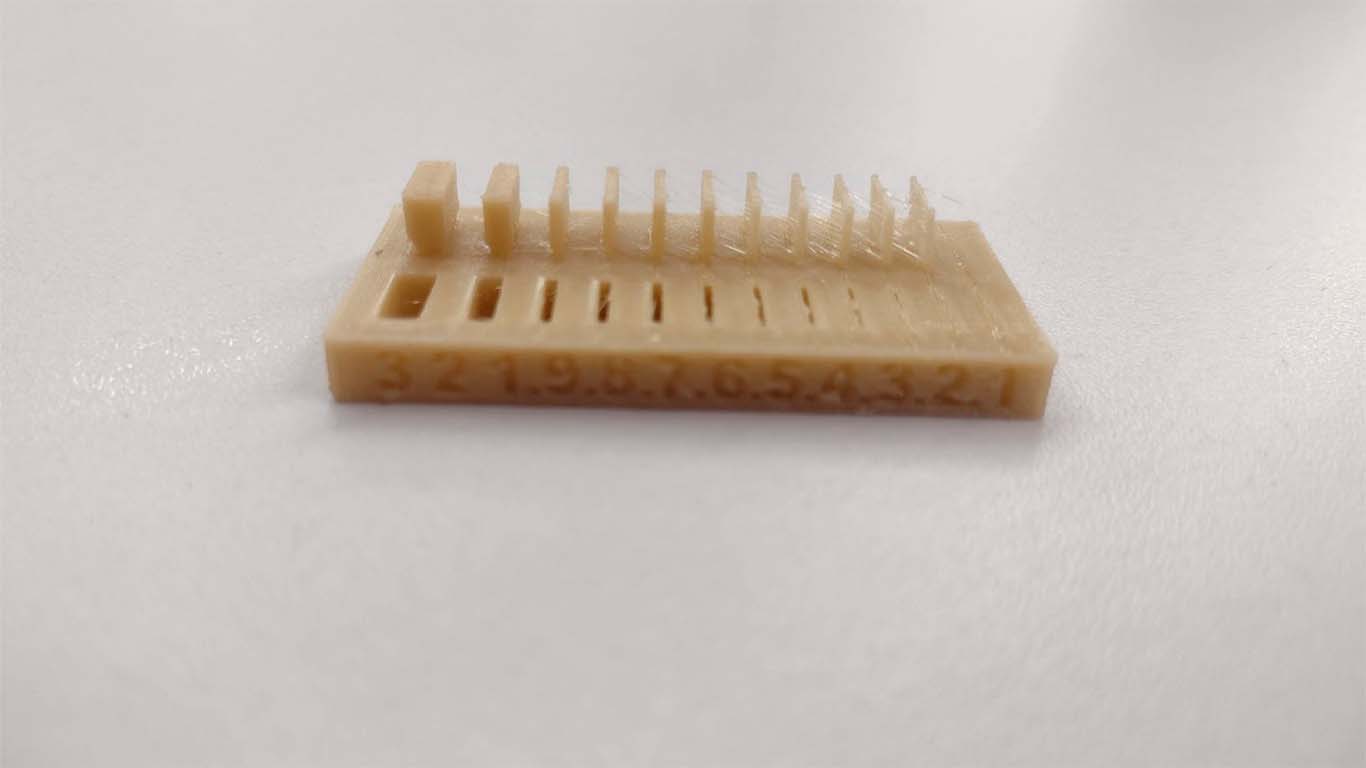
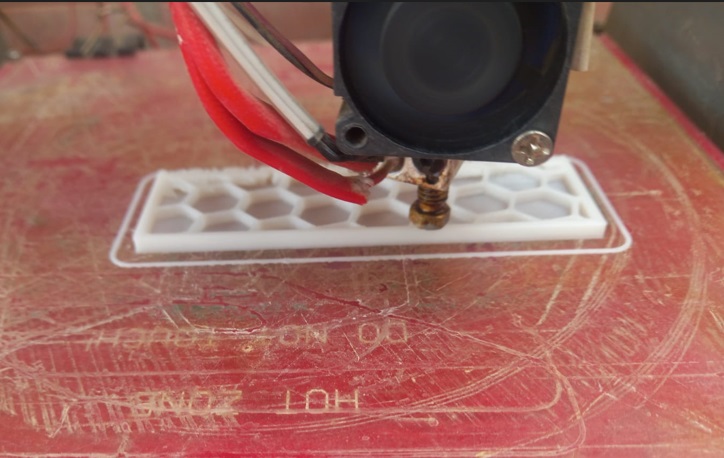
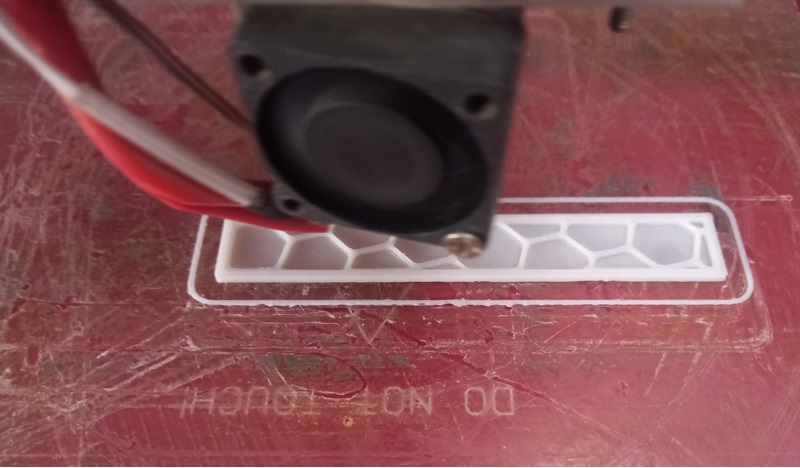
TEST WALL THICKNESS
The next test shows small rectangular holes as small walls on the other side. The printer was able to make the print as found in the modeling, only there is a lot of excess filament and it did not come out as clean as the reference. In addition, we calibrate our printer with the temperatures recommended by the filament so that we ensure that the printing is achieved with the correct values and we do not have difficulties around. Likewise, we cover our printer so that we do not have sudden temperature changes and we can make the printing of the thinnest possible wall.


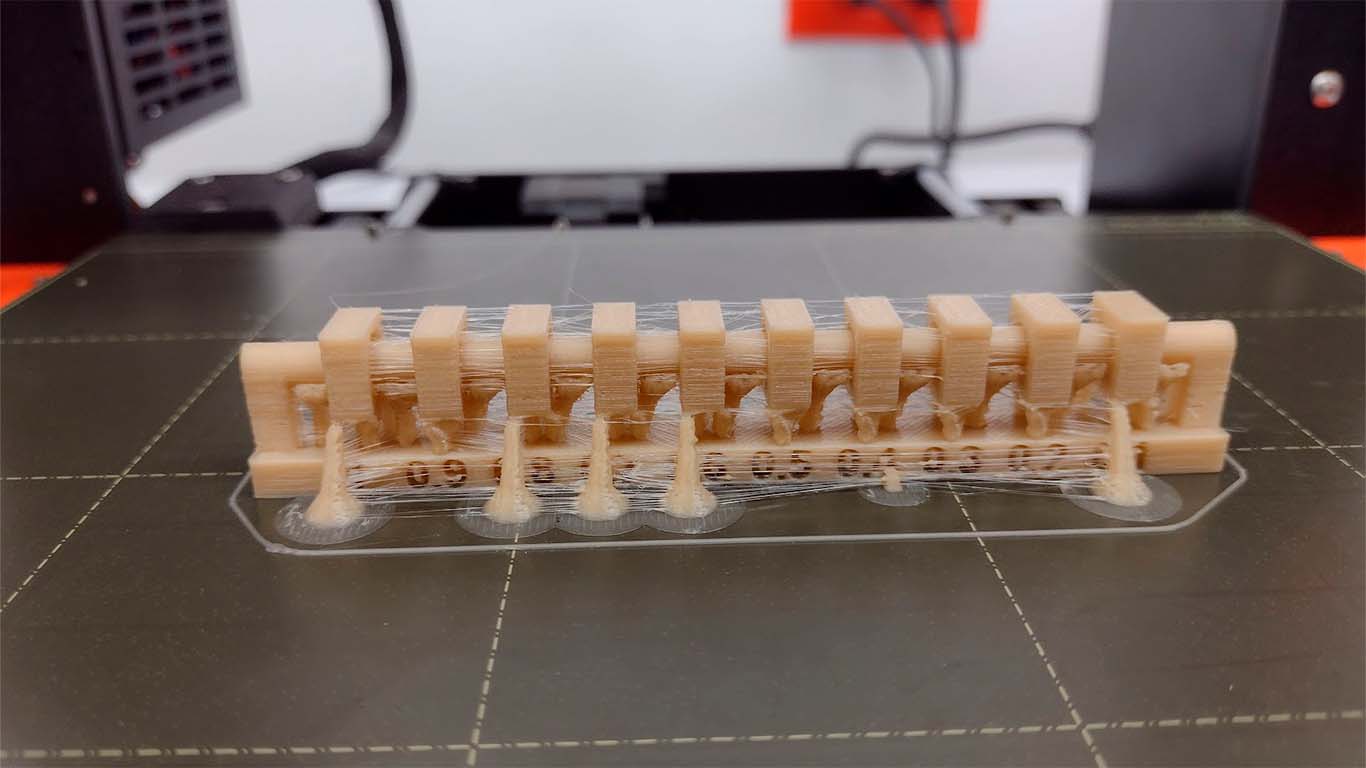
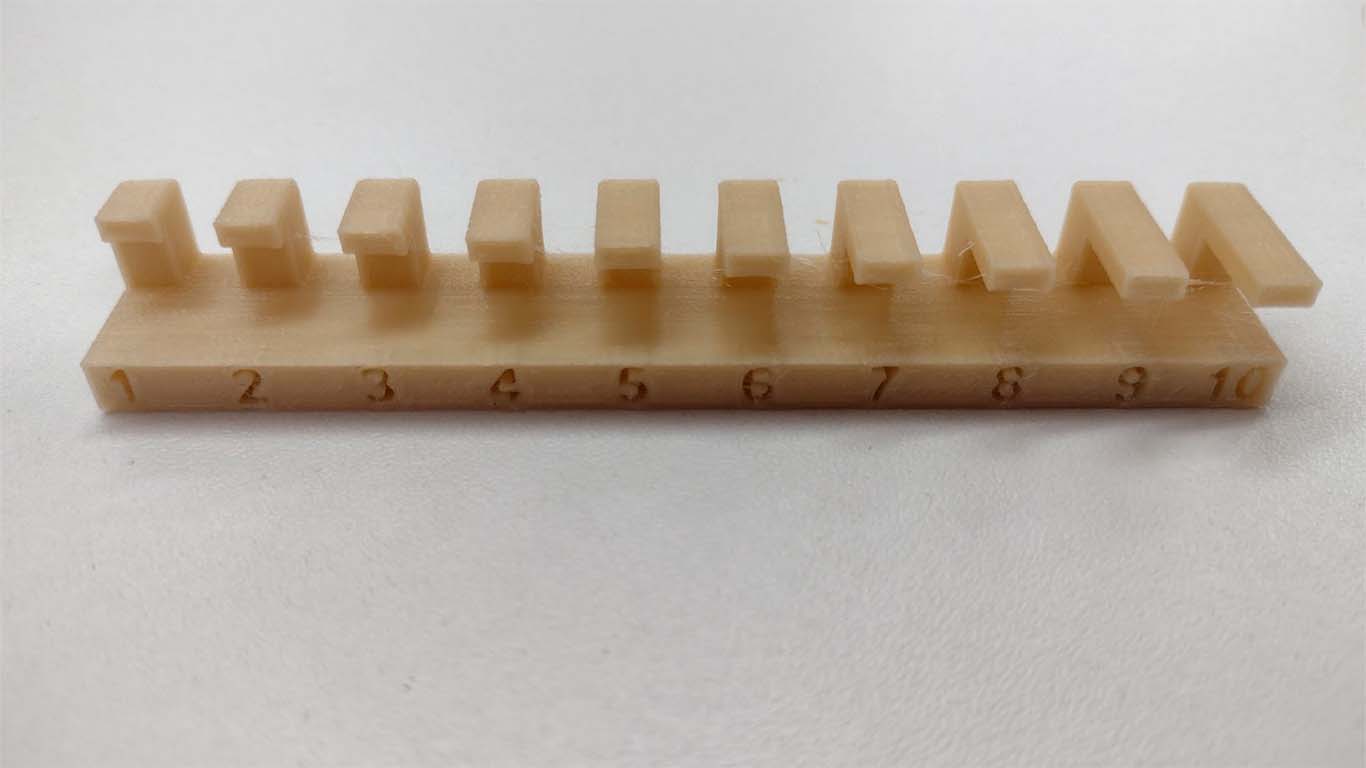
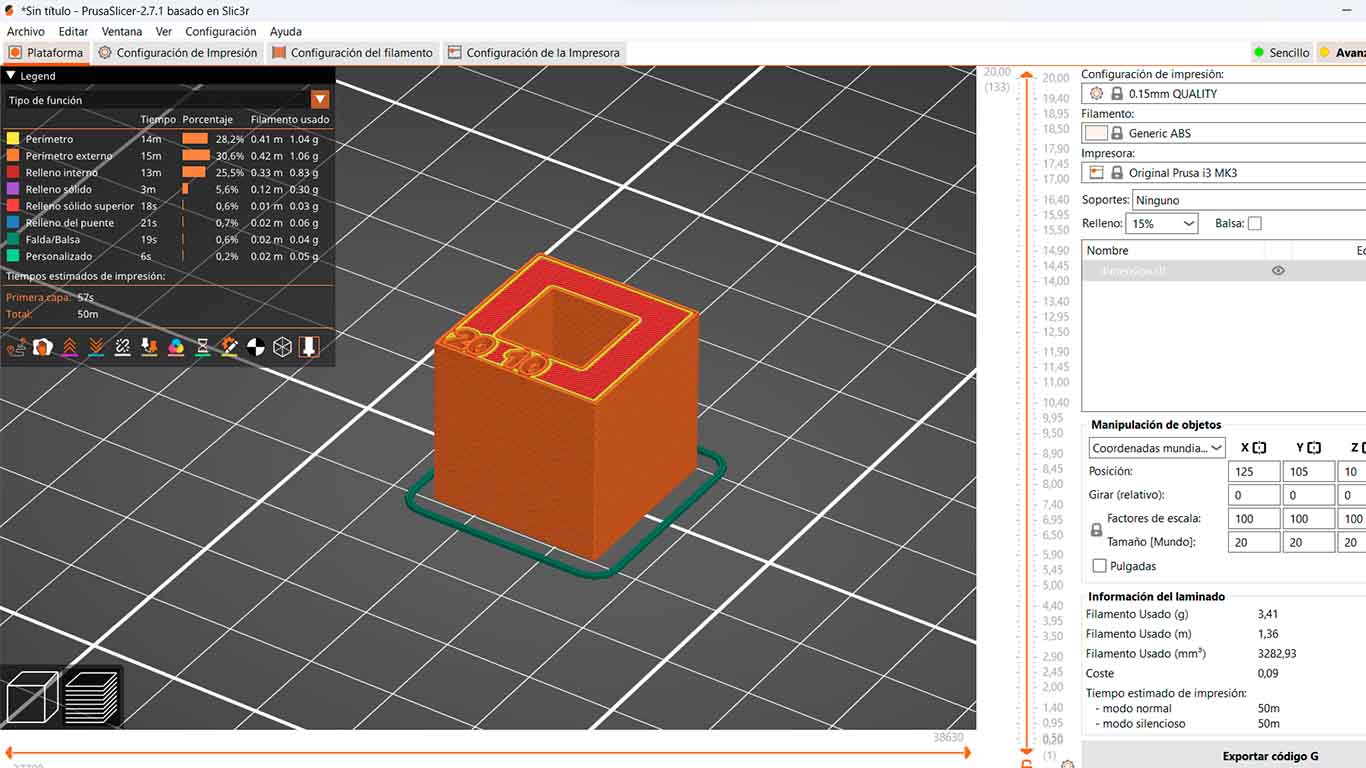
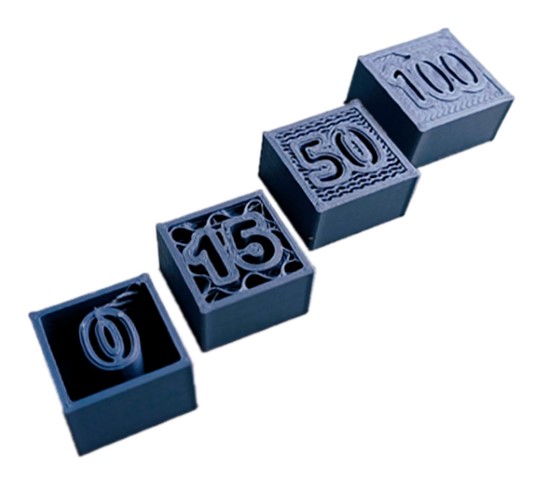
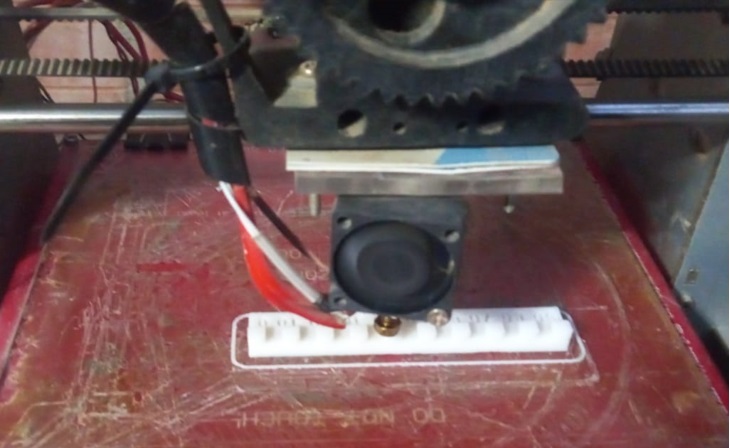
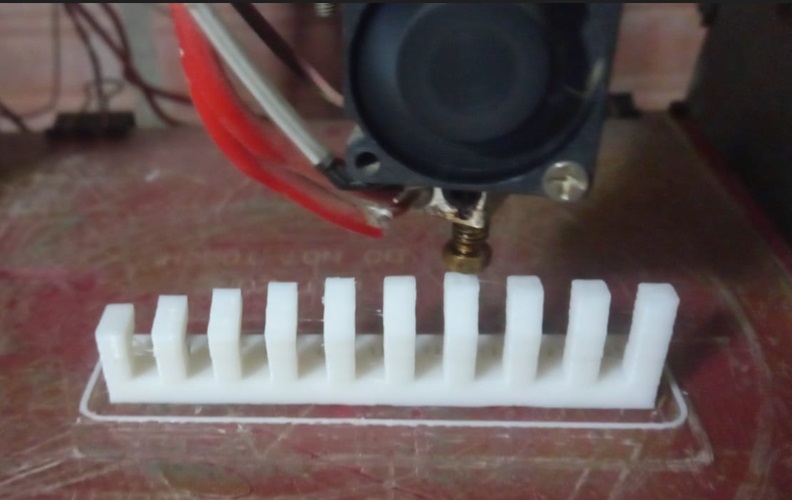
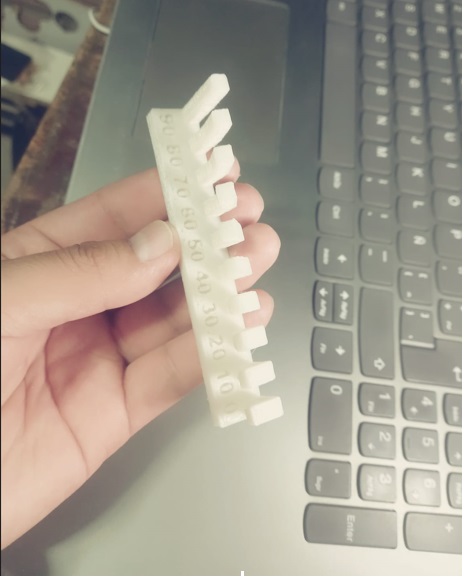
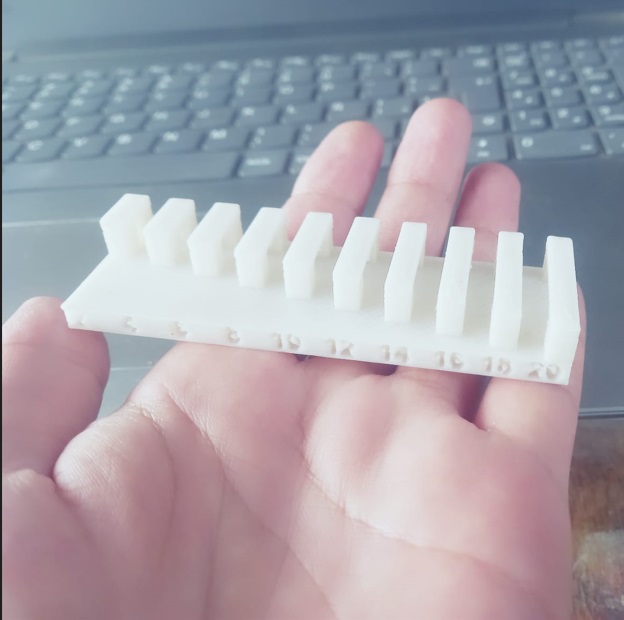
TEST DIMENSIONS
In the test we were able to print the model clean and according to the reference, however the numbers found were not so clear. We wanted to achieve a tower print that defined in the last layer the numbers marked on the model, although it was achieved, the numbers are not clear despite the high temperature.

TEST ANISOTROPY
This test is the smallest, fastest and the printing result came out very well compared to the class reference. We secure the print with balsa so that the tower type print does not move or drag when printing.
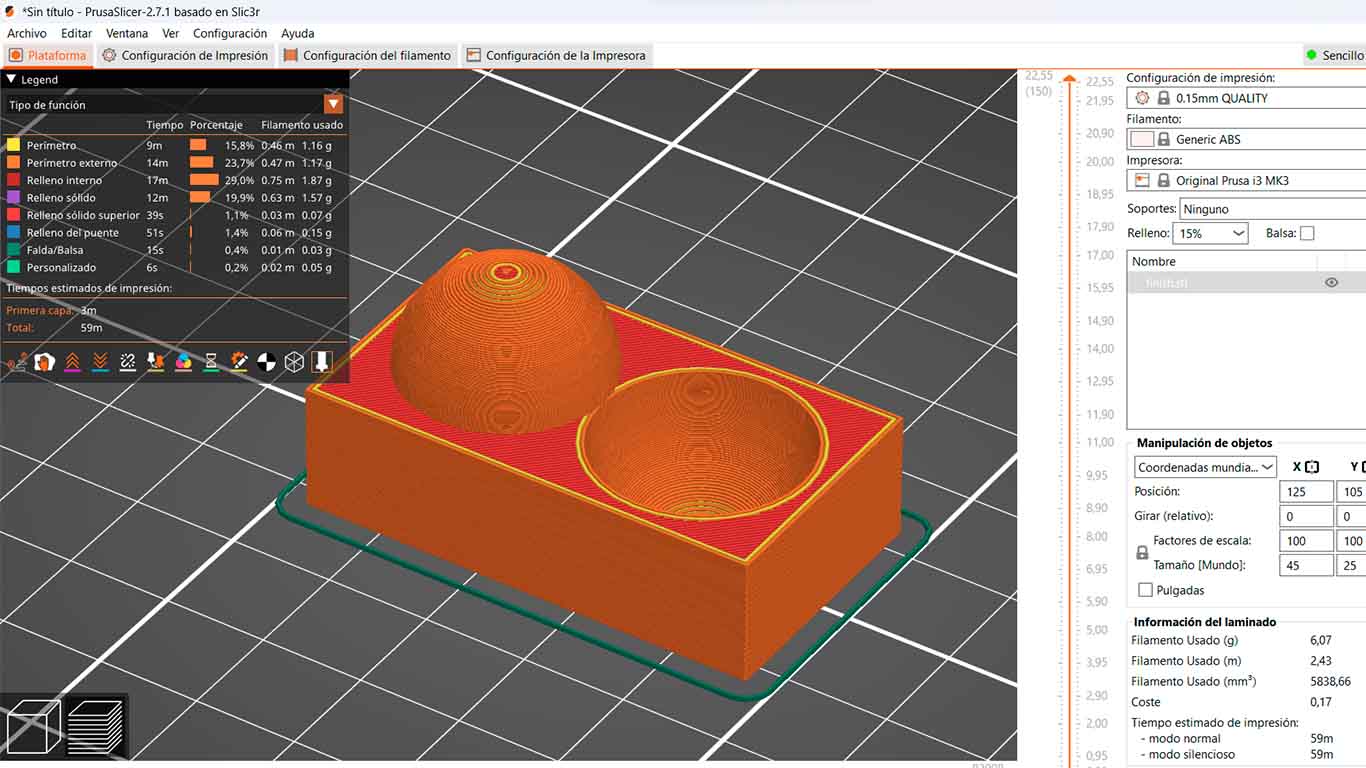
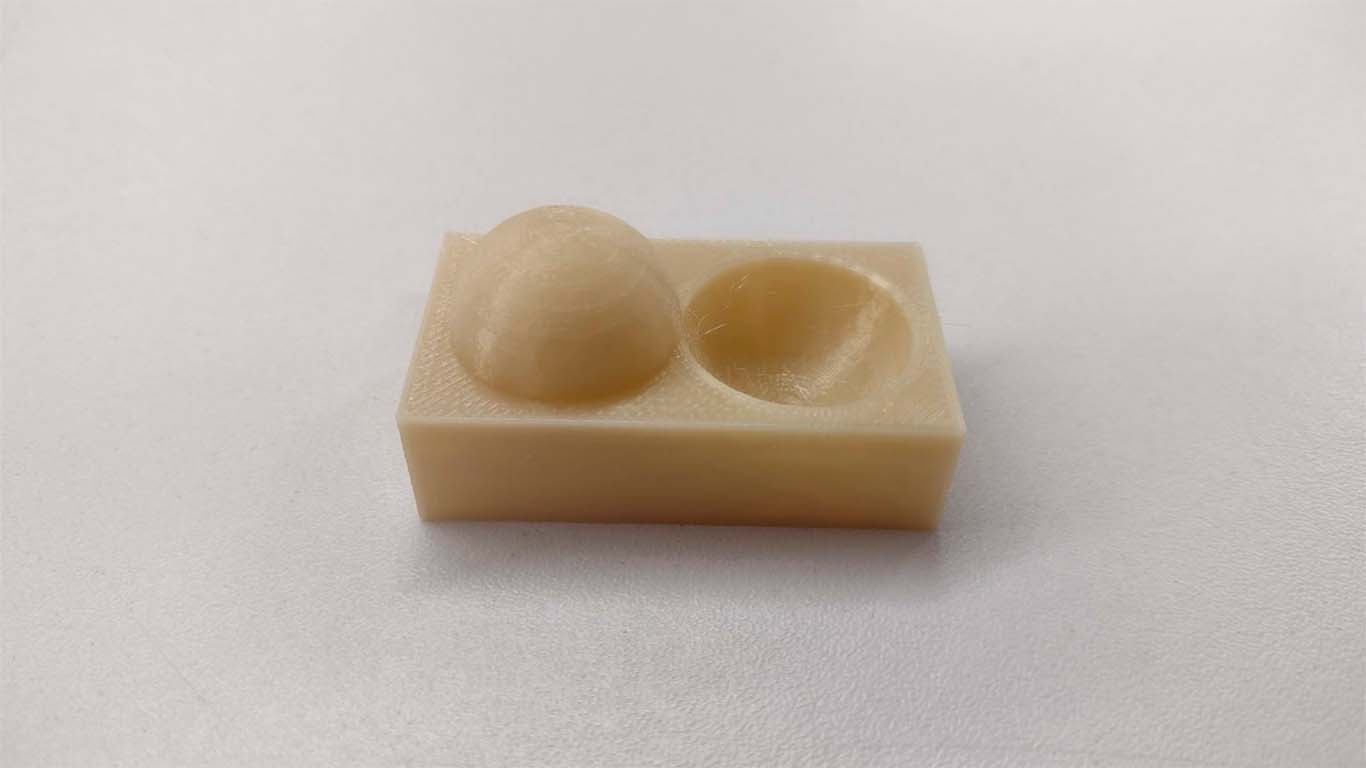
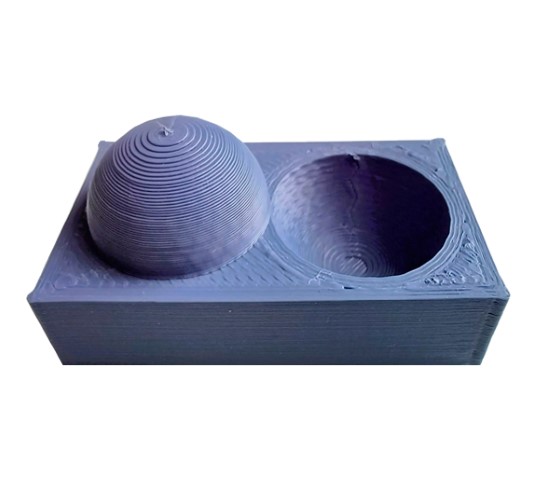
TEST SURFACE FINISH
The next test was about seeing the finish and changing the figure from orthognal to sphere that the 3D printer was able to make and obtain a good result. In order to achieve the highest and deepest points of the shape, the temperature is varied to a further 20° degrees to achieve the smoothest possible shape.

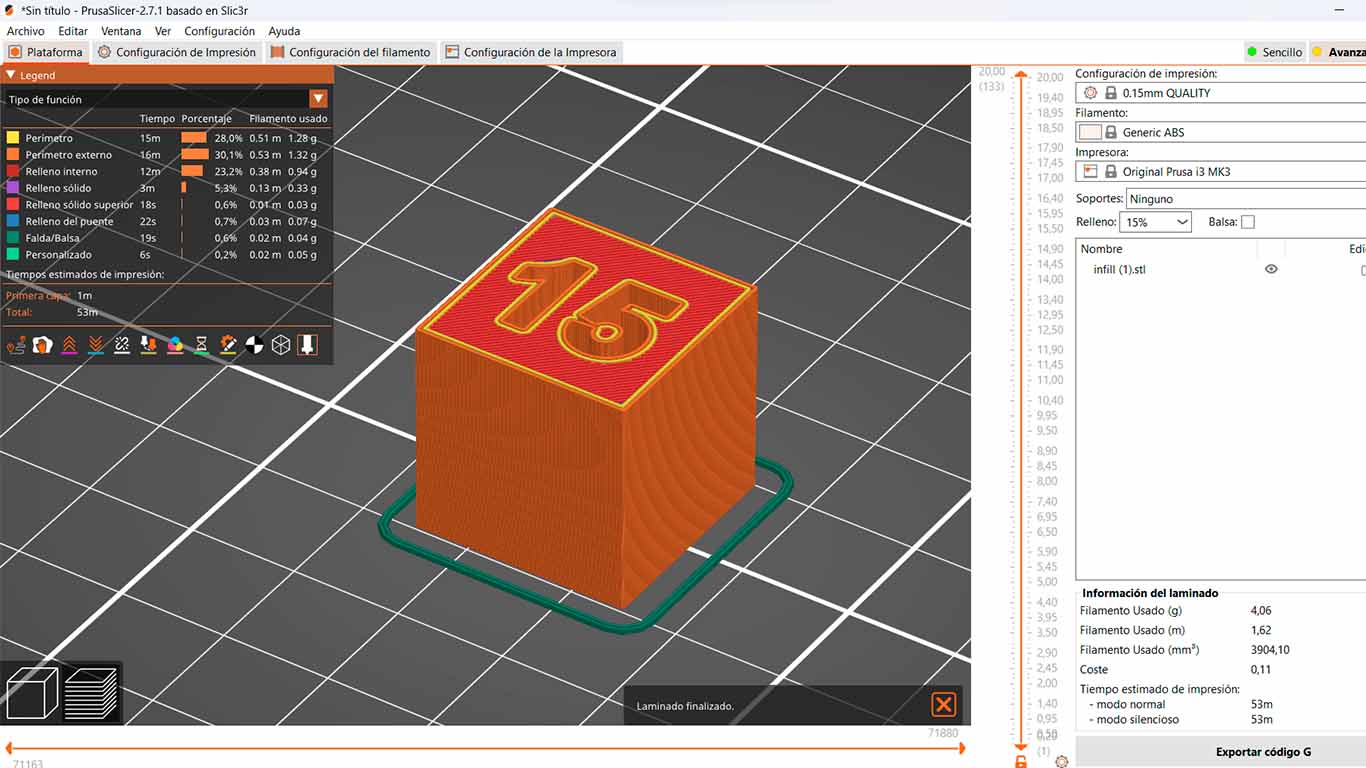
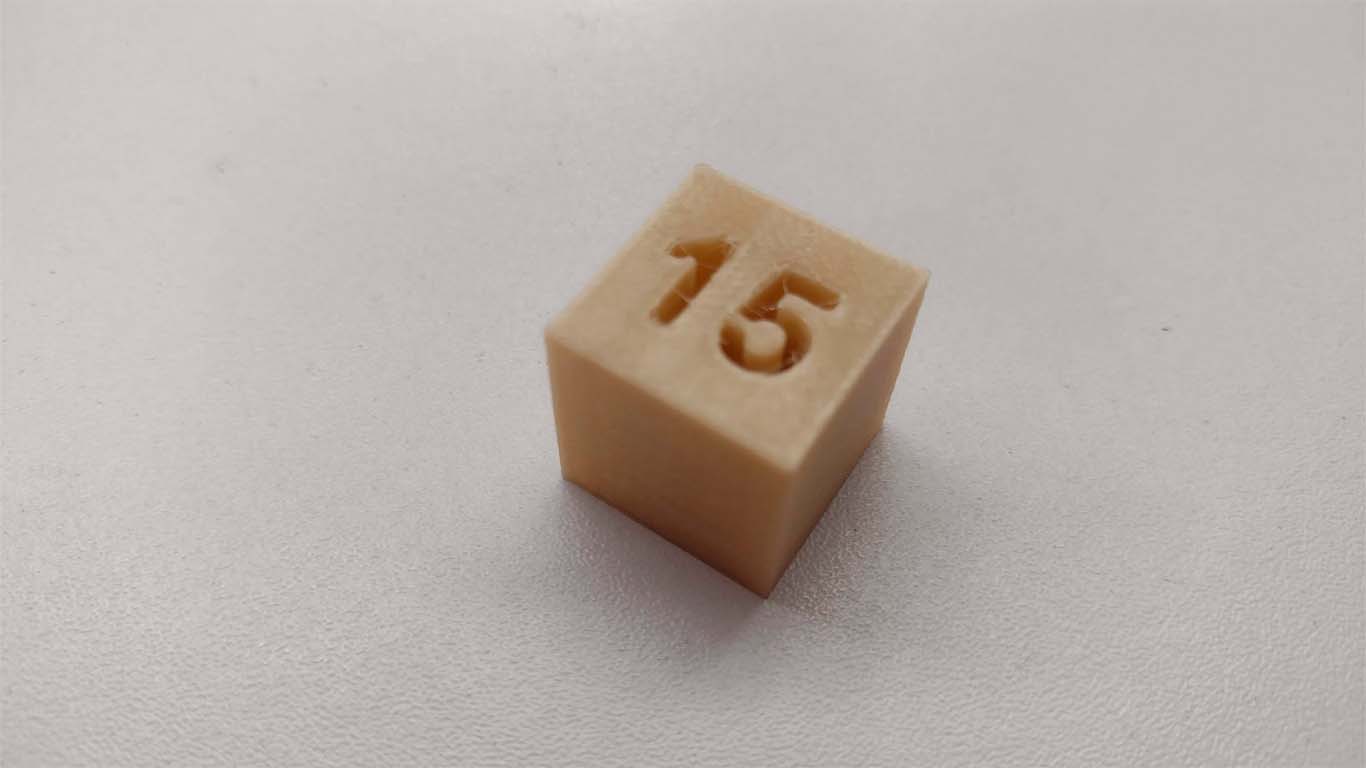
TEST INFILL
And the last test, the 3D printer was able to perform and have good detail in the finishing of the test. The number 15 is seen very clear and clean throughout the depth of the cube. For this last test we kept a temperature from the previous test so it didn't come out very clean inside the number and there was a bit of overrun inside it.
Group 2:
- Maria Angela Mejia
- Cristian Loayza
- Silvana Espinoza
- Jesus Lucero
- Wilber Giron
- Renson Samaniego
Print Test
For this group task, we decided to manufacture the tests on different 3D printers in a distributed manner and then compare the performance of each machine.
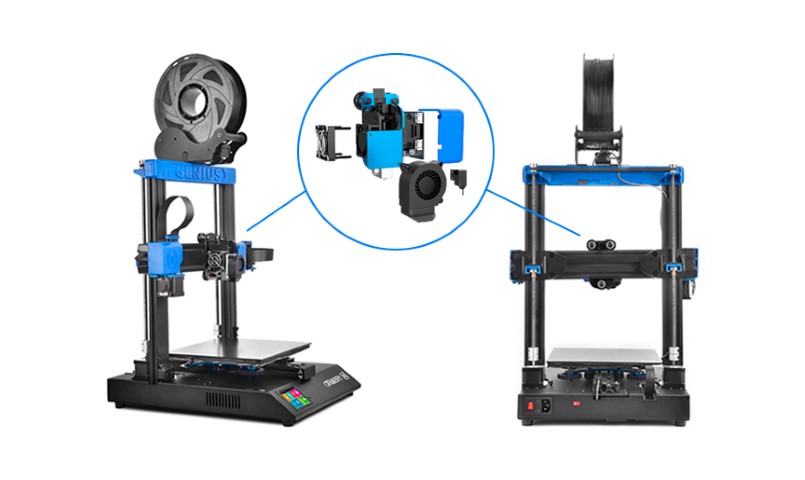
3D Printer
In my case, I performed the tests on the Artillery Genius Pro. This machine has a working area of 220mm x 220mm x 250mm, print speed of 60mm/s to 150mm/s, a 0.4mm extruder, a maximum power consumption of 10V 500W (with the heated bed on) and an XYZ print resolution of 0.05mm, 0.05mm, 0.1mm. The slicer program used was the Ultimaker Cura version 5.5.0.
Supported Tests
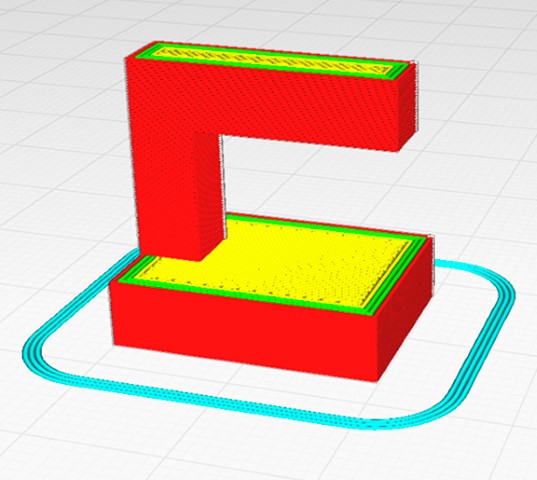
To manufacture a three-dimensional object, a 3D printer deposits material layer by layer. As a result, each new layer must be supported by the layer beneath it. A model will likely drop or even topple if its overhang is unsupported by anything below, so extra 3D printed support structures will be necessary to ensure a successful print. Support structures are a necessary evil in 3D printing. On one hand, they are essential for models with complex overhangs or bridges. On the other side, they raise material prices, require additional post-processing effort, and may harm the surface of the object. Consequently, getting the supports right is critical when 3D printing intricate models. That is why it is vital to perform these support tests prior to applying them to the model.
First, the hangover test was done. A version was made without supports.
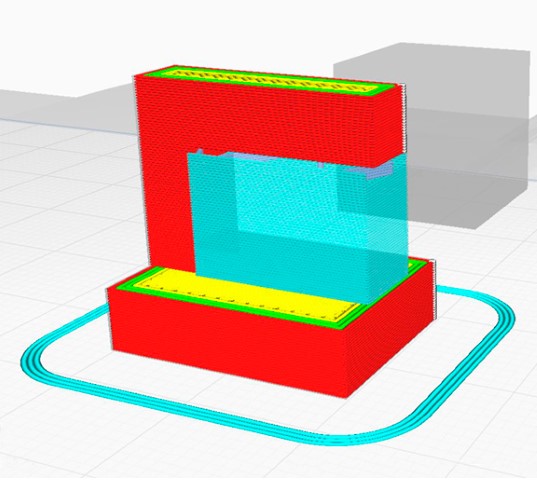
The second version was made with normal supports.
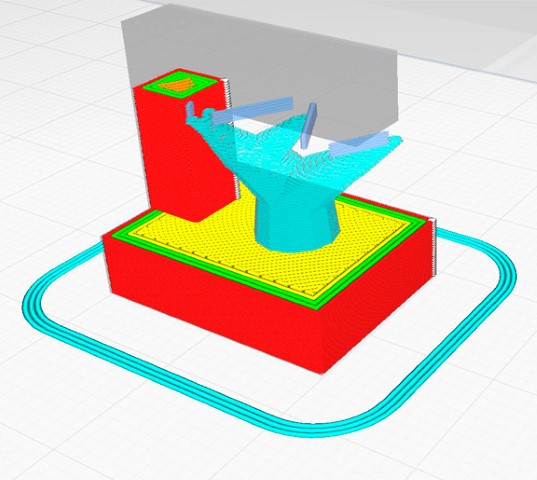

The last version was made with organic supports.
Finally, the following parameter was obtained to work with supports that can be easily removed. I went through this guide to arrive at these parameters.

Then the clearance test was performed to measure the minimum gap printable for this machine. For the Artillery Genius Pro, the minimum possible gap is 0.3mm.
Unsupported Tests
From what we have seen before, it is ideal to work without supports. How is it possible? I think the key is in the design, which is made specifically for production with a 3D printer without supports. The tests without supports carried out were: angle, overhang, bridging, wall thickness, dimensions, anisotropy, surface finish and infill.
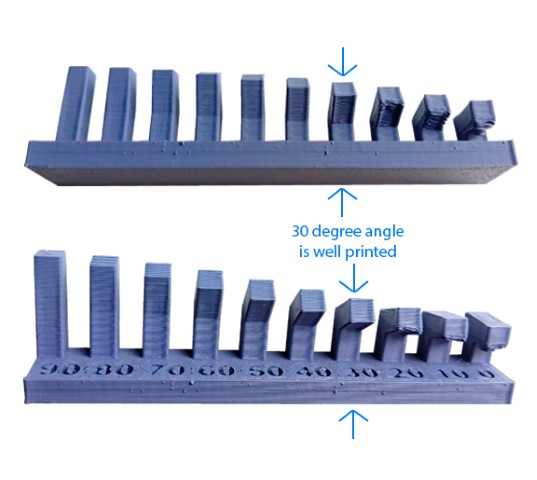
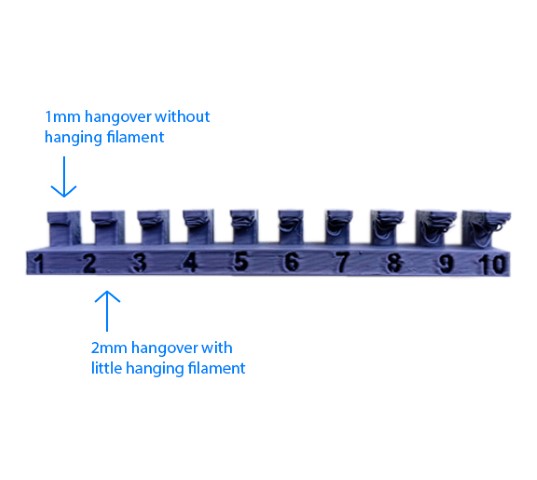
Angle test: the minimum angle that prints well is 30 degrees | Overhang test: the maximum distance you can print without supports is 2 mm.
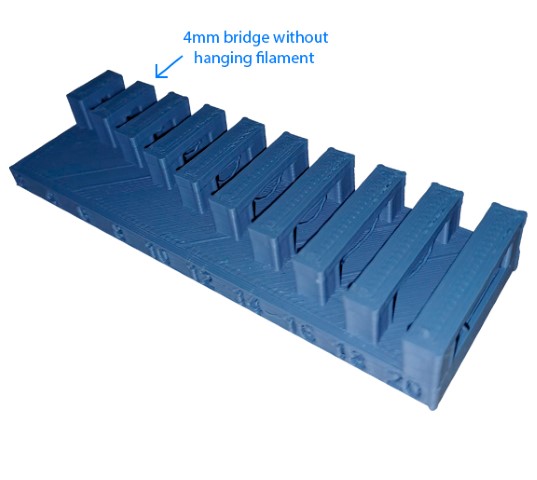
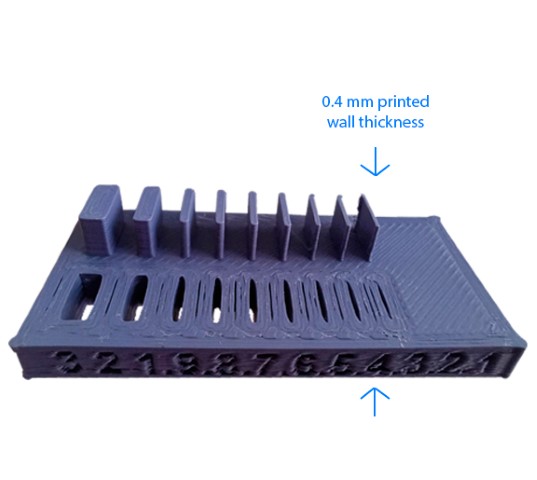
Bridging test: The maximum bridge that can print without generating hanging filament is 4mm | Wall thickness test: The thinnest wall that can be printed is 0.4mm.
Dimensions test: the measurement with which it is designed is the one that is printed | Anisotropy test: in the vertical sense, the model remains quite uniform, but in the horizontal sense some variation is observed in the first layers.

Surface finish test: The surface flattened over the top and the layering became more evident providing restrictions on the allowable surface angle | Infill test: the choice of the different percentages of infill will depend on how resistant the part to be manufactured is needed.
Working with my Fab Academy colleagues - this time applying distributed manufacturing - was very interesting. Each one shared their experiences on different 3D printers and materials.
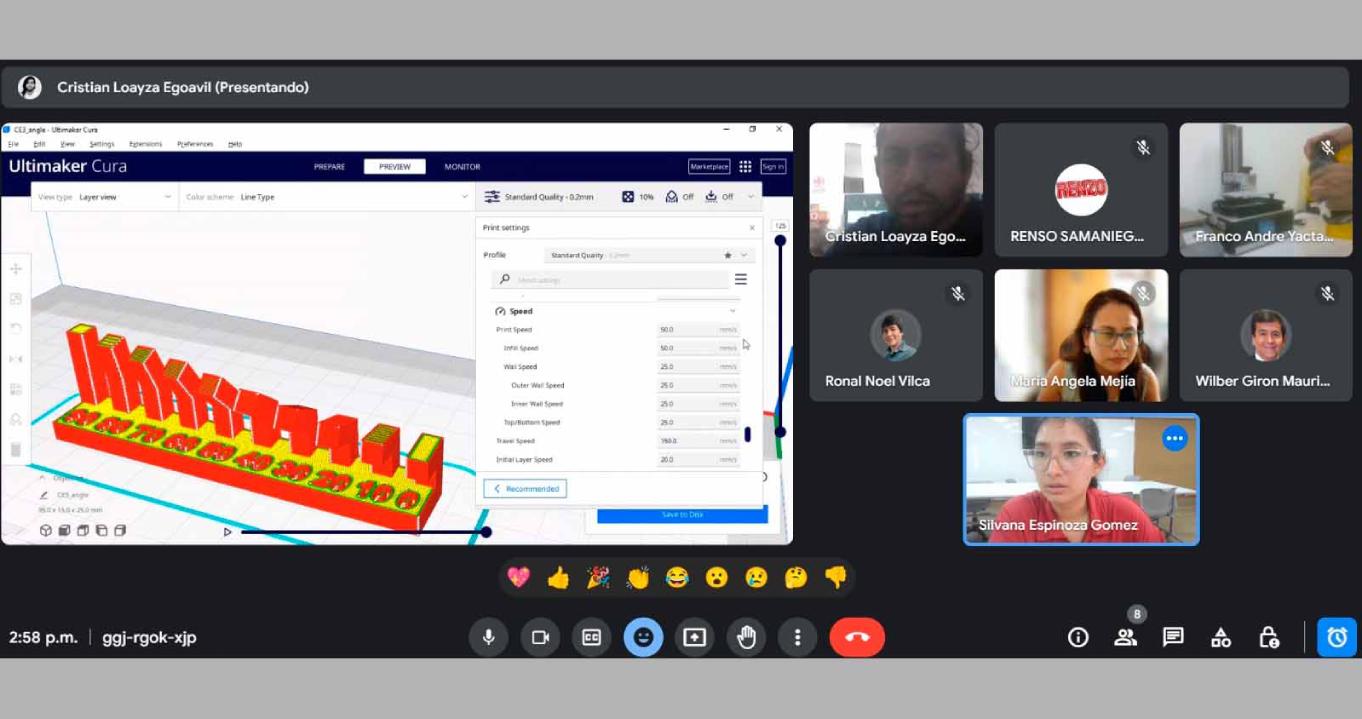
Cristian Loayza Egoavil
test the design rules for your 3D printer(s)
To perform this group assignment, we printed on different locations and 3D printers in a distributed way, and then we could evidence and compare the results.
by testing different materials and printers we can notice that there is variation in the results given by the different configurations.
We were able to optimize the printing time of the models as they were printed at the same time and in different places.
Use two 3D printers to do both tests.
The first was the Creality Ender-3 that is in the fablab ifurniture
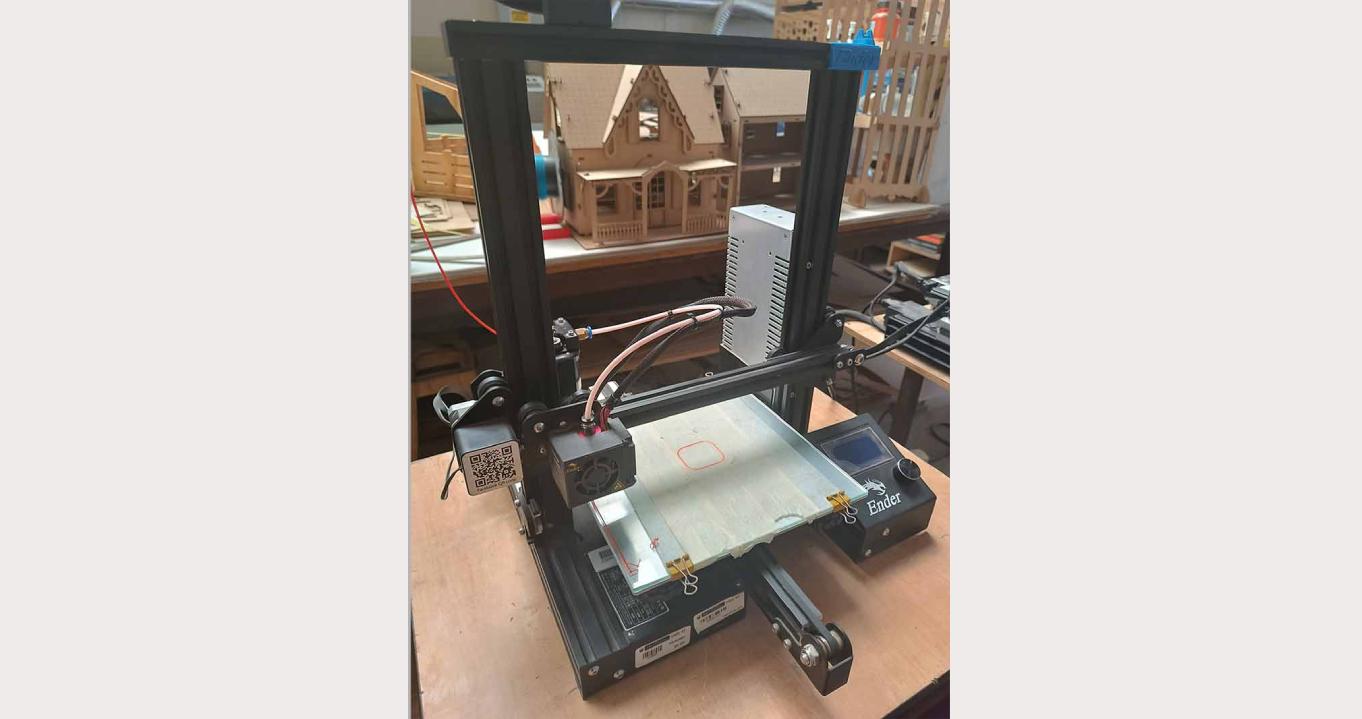
The second was the Creality Ender-3V2 that is in the fablab ifurniture

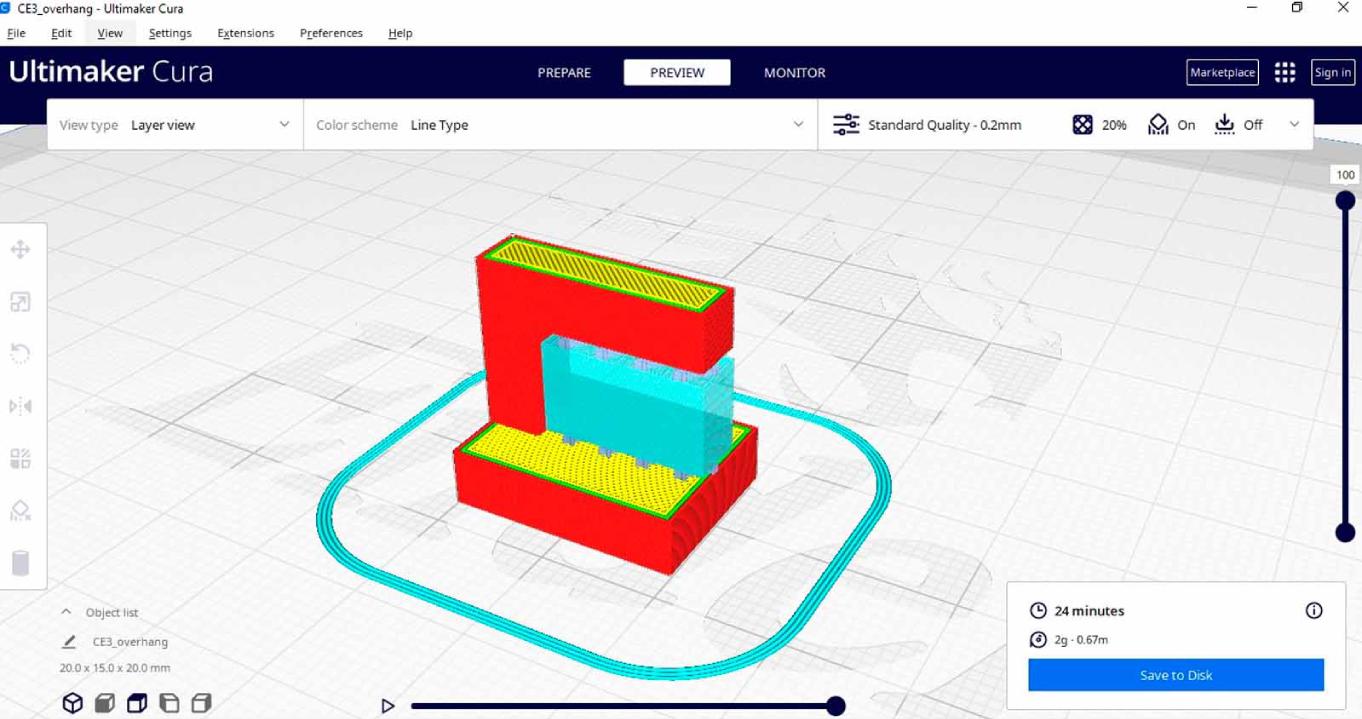
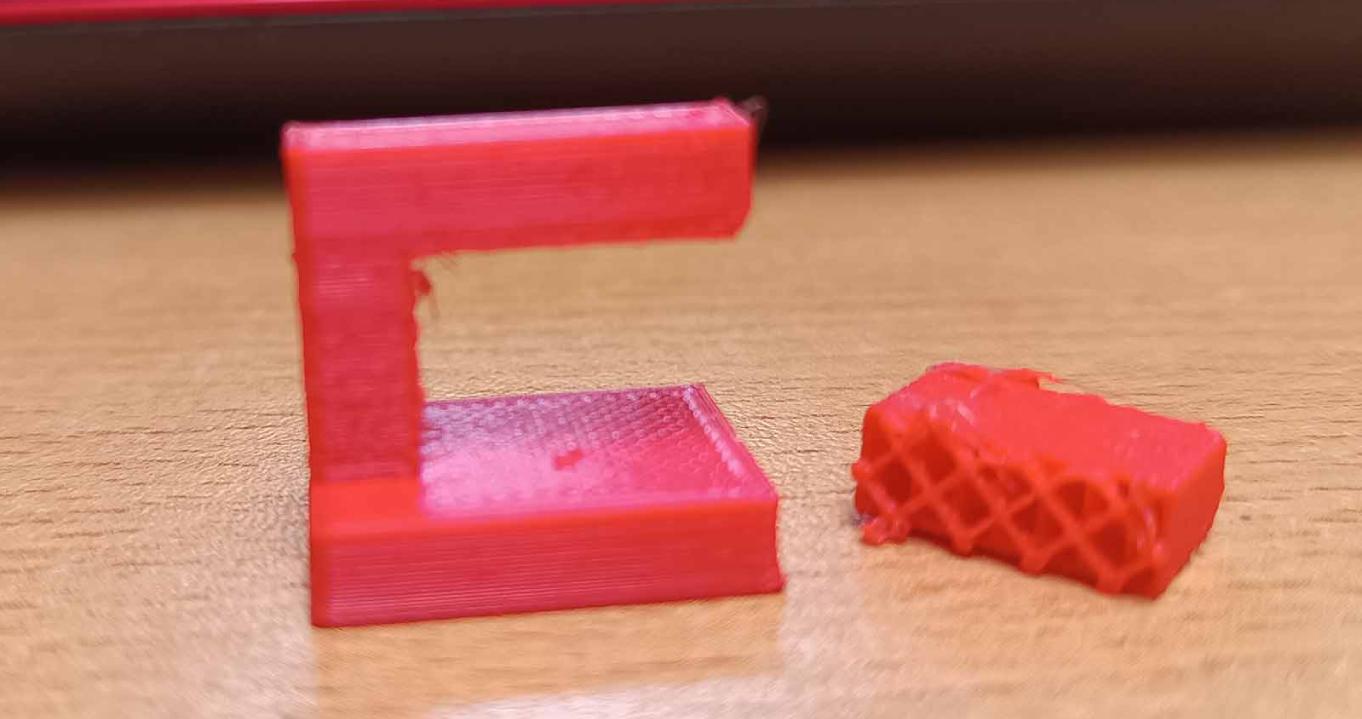
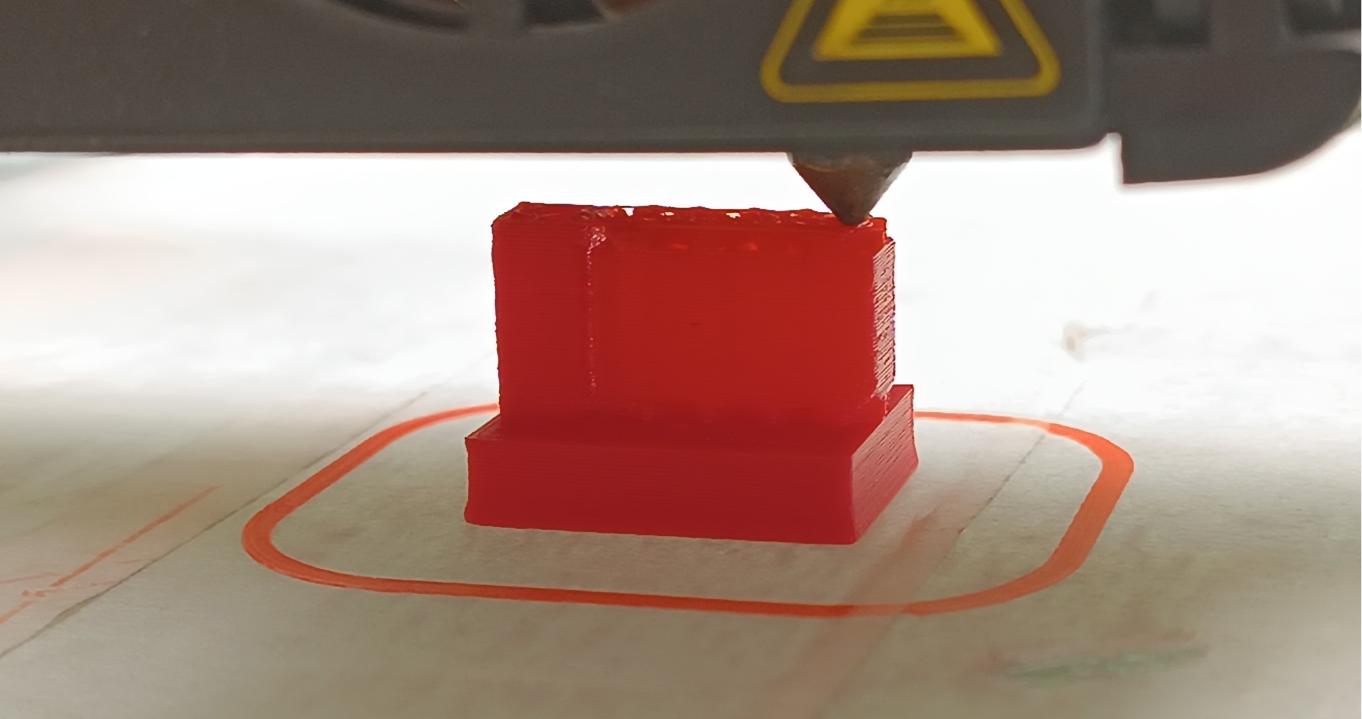
Test overhang with support in the Creality Ender-3
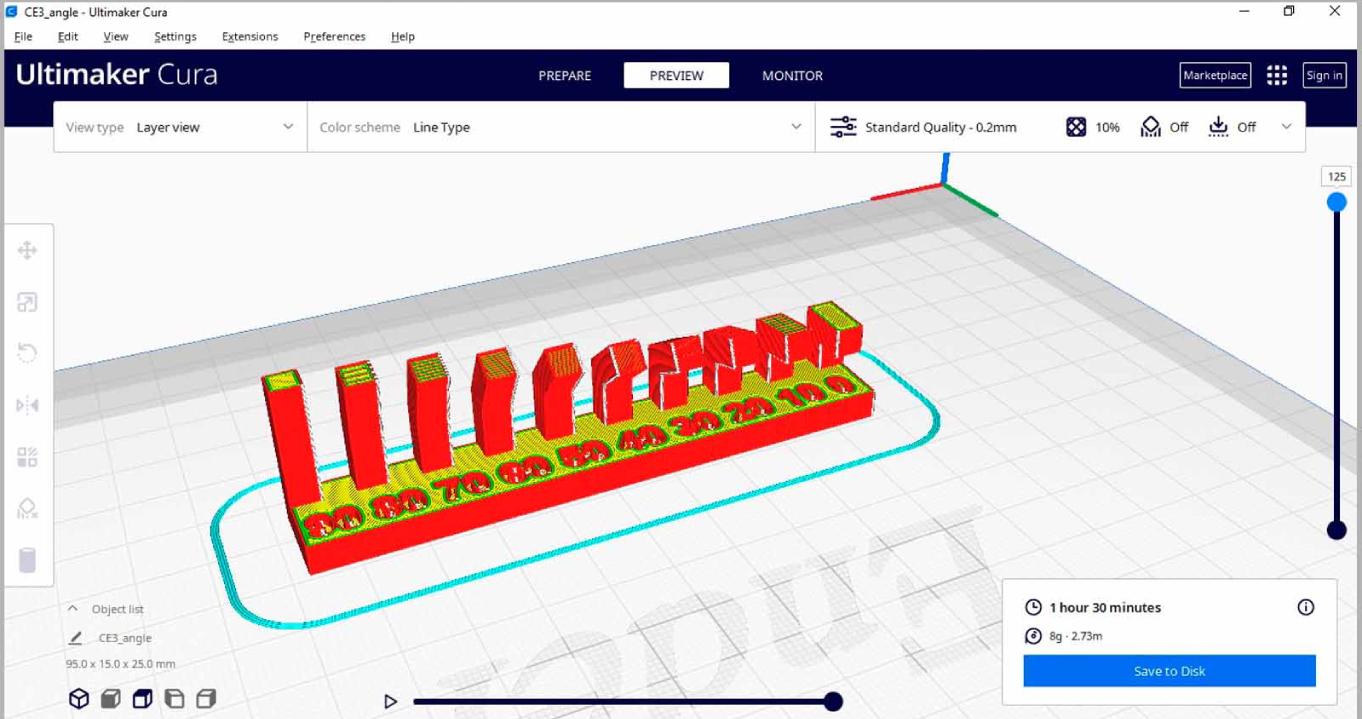
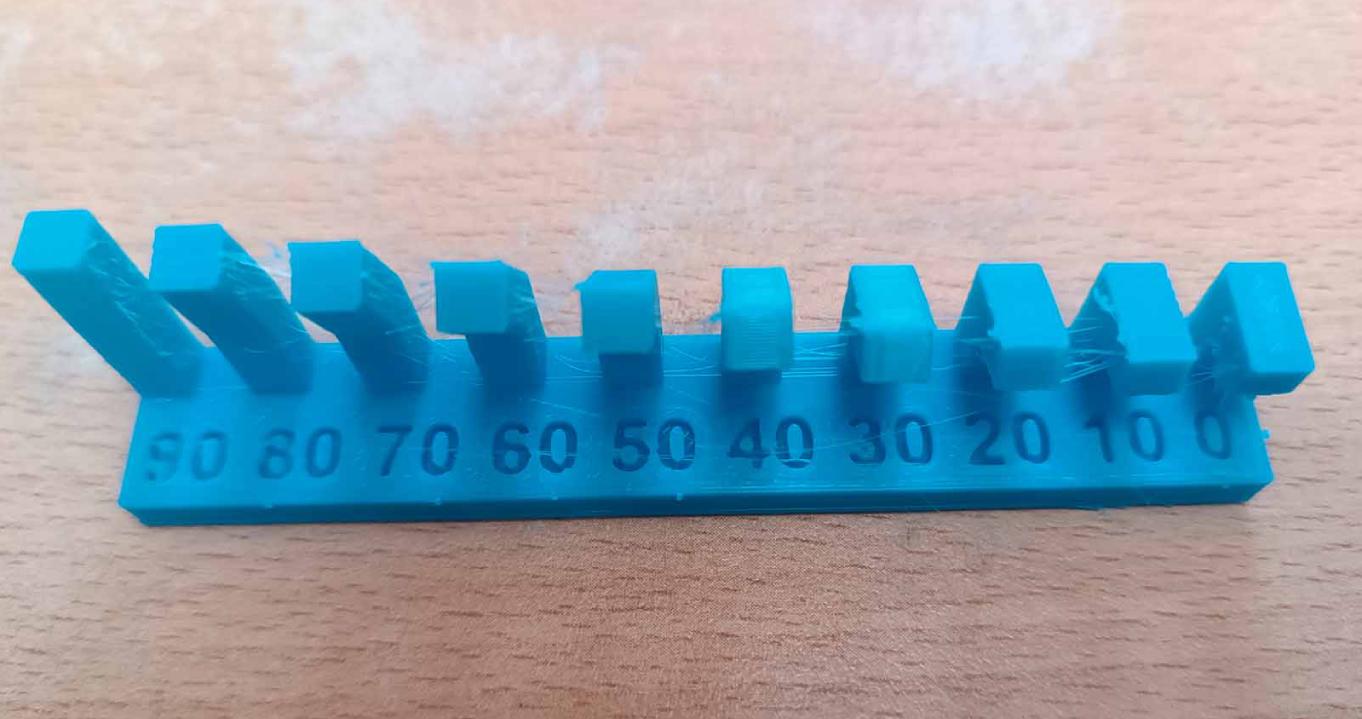
Test angle unsupported with support in the Creality Ender-3V2
This is the result using red PLA, the printing time was 24 minutes.
This is the result using sky blue PLA, the printing time was 98 minutes.
Other group results using different printers and files.
Other group results using different printers and files.

Conclusions:
- The 3D printer must be well calibrated.
- 3D printing an efficient and precise process.
- Print quality may vary depending on settings.
- It is a very good option for rapid and personalized prototyping
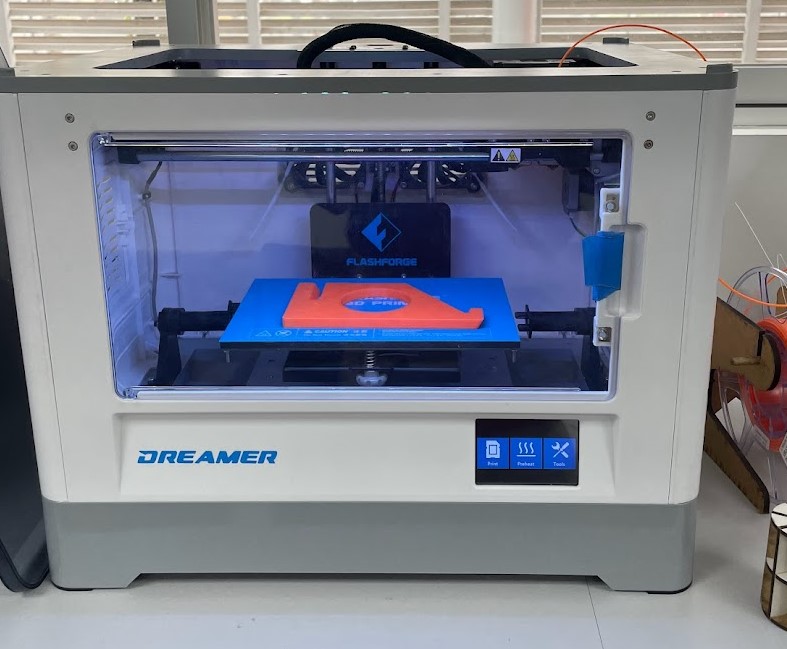
FLASHFORGE DREAMER
Characteristics
- Dual Extruder
- Better print effects
- Temperature auto-regulation
- 230*150*140(mm)Build Volume
- Touch Screen
- 120℃ Heating Build Plate
- Matching with multiple slicers, FlashPrint, Simplify3D, Slic3r, Skeinforge, Cura.
In my case, I performed the tests on the FLASHFORGE DREAMER.
Supported Tests
To manufacture a three-dimensional object, a 3D printer deposits material layer by layer. As a result, each new layer must be supported by the layer beneath it. A model will likely drop or even topple if its overhang is unsupported by anything below, so extra 3D printed support structures will be necessary to ensure a successful print. Support structures are a necessary evil in 3D printing. On one hand, they are essential for models with complex overhangs or bridges. On the other side, they raise material prices, require additional post-processing effort, and may harm the surface of the object. Consequently, getting the supports right is critical when 3D printing intricate models. That is why it is vital to perform these support tests prior to applying them to the model.
First, the hangover test was done. A version was made without supports.
The second version was made with normal supports.
The last version was made with organic supports.
Finally, the following parameter was obtained to work with supports that can be easily removed. I went through this guide to arrive at these parameters.
Then the clearance test was performed to measure the minimum gap printable for this machine. For the Artillery Genius Pro, the minimum possible gap is 0.3mm.
Unsupported Tests
From what we have seen before, it is ideal to work without supports. How is it possible? I think the key is in the design, which is made specifically for production with a 3D printer without supports. The tests without supports carried out were: angle, overhang, bridging, wall thickness, dimensions, anisotropy, surface finish and infill.
Angle test: the minimum angle that prints well is 30 degrees | Overhang test: the maximum distance you can print without supports is 2 mm.
Bridging test: The maximum bridge that can print without generating hanging filament is 4mm | Wall thickness test: The thinnest wall that can be printed is 0.4mm.
Dimensions test: the measurement with which it is designed is the one that is printed | Anisotropy test: in the vertical sense, the model remains quite uniform, but in the horizontal sense some variation is observed in the first layers.
Surface finish test: The surface flattened over the top and the layering became more evident providing restrictions on the allowable surface angle | Infill test: the choice of the different percentages of infill will depend on how resistant the part to be manufactured is needed.
Working with my Fab Academy colleagues - this time applying distributed manufacturing - was very interesting. Each one shared their experiences on different 3D printers and materials.
Ronal Vilca Apolin
Testing design rules for 3D printers is essential to validate and optimize designs before final printing. These tests help identify potential problems, reduce errors and costs, improve the efficiency of the printing process, and facilitate continuous learning in designing for 3D printing. In short, they are essential to guarantee quality, precision and efficiency throughout the 3D printing process.
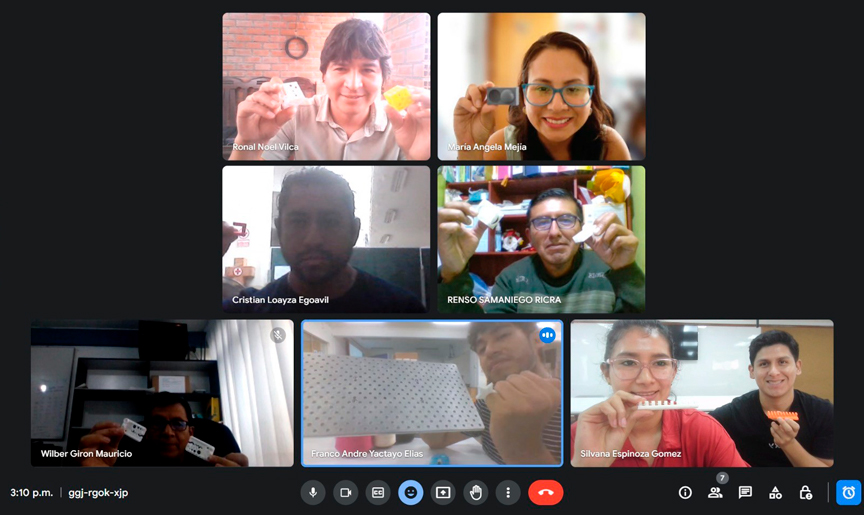
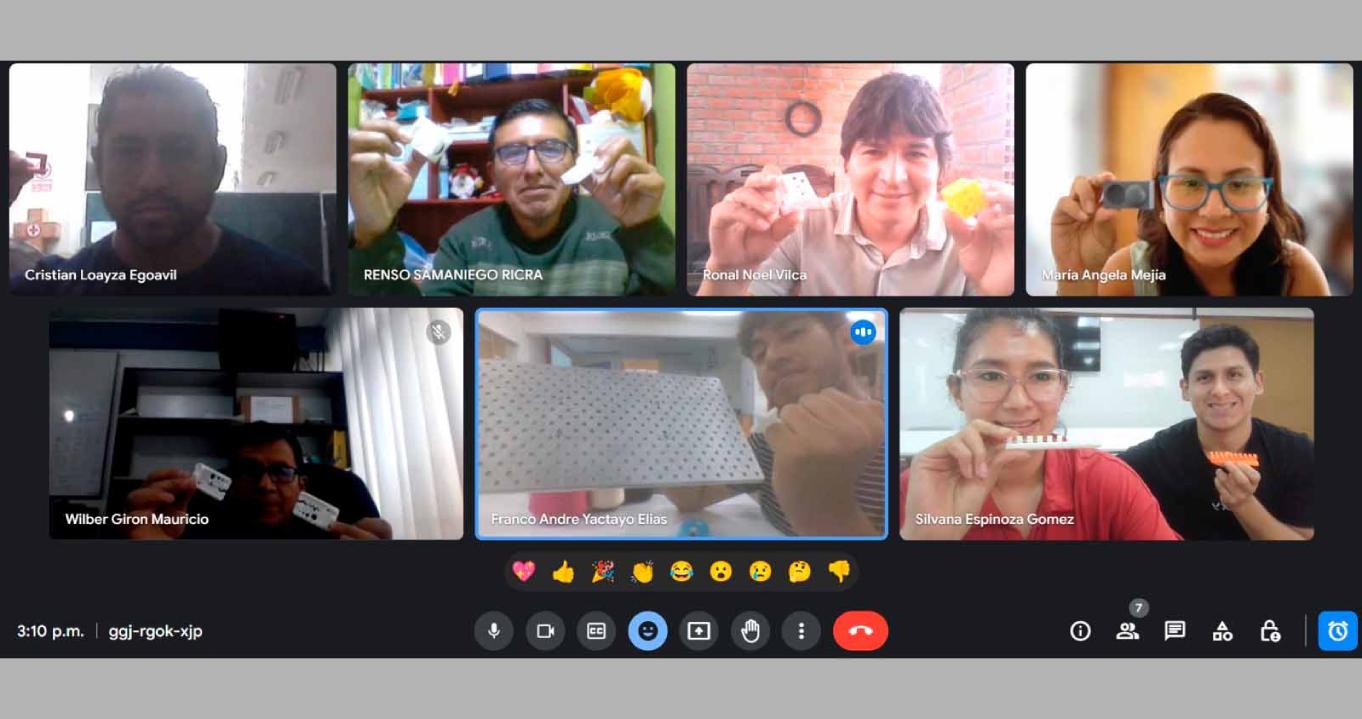
- As a Fablab Perú team, we have met to discuss the printing and parameters that we must consider when using our printers, as well as the care necessary to keep them in optimal conditions. To enrich our discussion, we downloaded the STL files of the class available at the following link:3D Scanning and Printing.
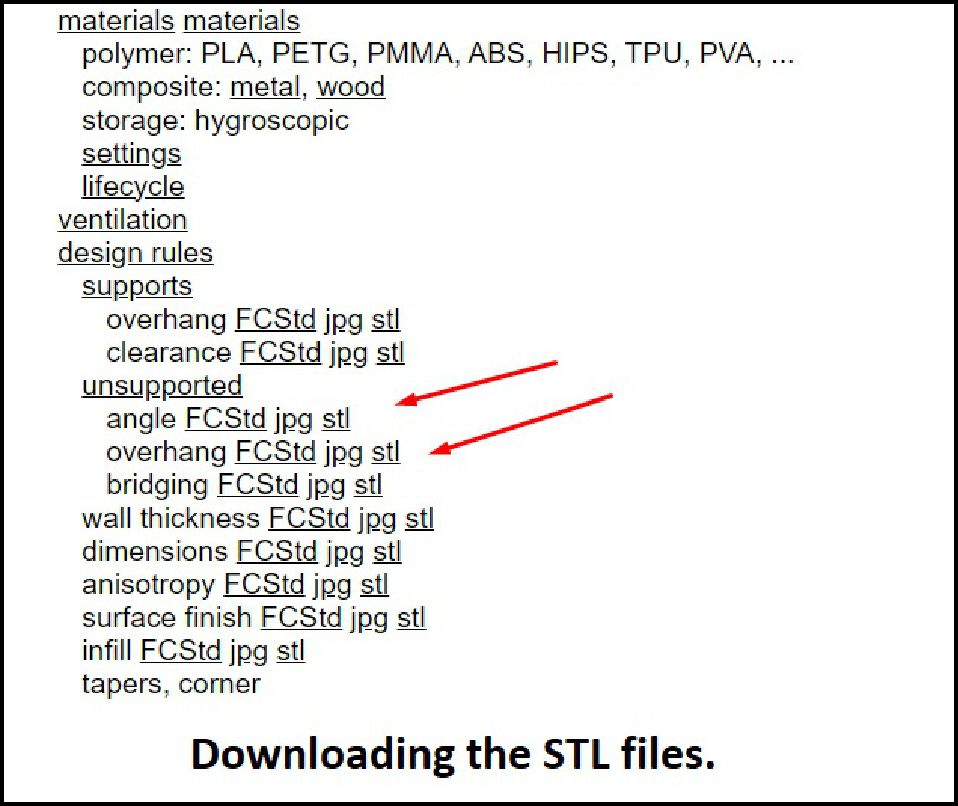

With enthusiasm, our team decided to get to work, or rather, machines to work! We all set about printing the downloaded STL files. Personally, I decided to put the 3D printer I built at home in Huánuco Peru to the test. It is exciting to see our creations take physical form through this printing process.
Bridging printing with PLA
Angle printing with PLA
The following images show examples of bridging and angle printed with PLA material using the 3D printer I built.
The file was shared among the entire team to ensure that everyone has access to the prints made on the different machines.

Once the prints were finished, we decided to collect all the files in a shared folder. In this folder, we gather all the prints made on the different machines by our team. This action allows us to have an organized and accessible record of our collaborative work.