2. Project management
The objectives of this week were to build a personal website, upload it to the class archive and work through git tutorials
Version Control Systems (VCS)
Version control systems are a category of software tools that help a software team manage changes to source code over time. Version control software keeps track of every modification to the code in a special kind of database. If a mistake is made, developers can turn back the clock and compare earlier versions of the code to help fix the mistake while minimizing disruption to all team members.
The benifit of VSC is summarized in
- A complete long-term change history of every file. This means every small change made by many individuals over the years could be tracted. for example creation and deletion of files as well as edits to their contents, you can also know the author, date and written notes on the purpose of each change.
- Branching and merging. Having team members work concurrently is a no-brainer, but even individuals working on their own can benefit from the ability to work on independent streams of changes.
- Being able to trace each change made to the software and connect it to project management and bug tracking software such as Jira, and being able to annotate each change with a message describing the purpose and intent of the change can help not only with root cause analysis and other forensics.
Build A Personal Website - Using HTML and CSS
To accomplish this objective, I started by searching about a method to build a website and I found one using Adobe Dreamweaver, so I download the application. As beginner in this area I must search a lot about what is HTML and CSS codes that I will use to create my website. I understand that the html is a shortcut for “Hypertext Markup Language.” Which used to create webpages while, CSS Stands for “Cascading Style Sheet.” Cascading style sheets are used to format the layout of Web pages. They can be used to define text styles, table sizes, and other aspects of Web pages that previously could only be defined in a page’s HTML.
To create my fablab website I had to first create a folder to save everything that is related to my website in it. Then we start by creating an HTML file by saving the file with the following order “file name.html” using Dreamweaver and CSS file by also saving the file with the following order “file name.html” , then start codding both HTML and CSS files
Code Example
HTML code
Lets start with html codding, once you save your html file this code will appear automatically
<!doctype html>
<html>
<head>
<meta charset="utf-8">
<title>Untitled Document</title>
</head>

<body>
</body>
</html>
Then some modification should be added to this code to create the desired website Here the modification that I have done on it
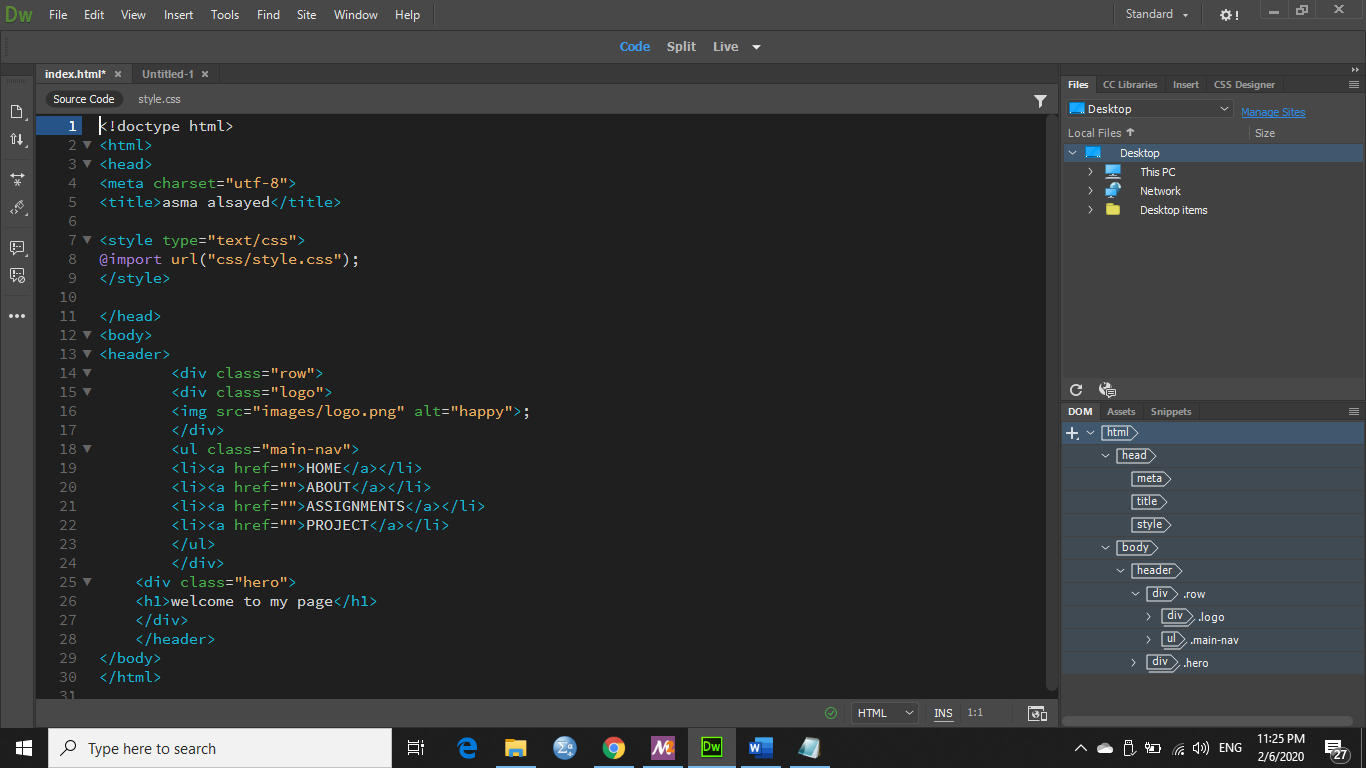
- Line 5 : used to change the website title.
- Line 7,8 and 9 used to link the the css file with the html file.
- Line 14, 15,16 and 17 add the web site logo in my case I added my name as a logo.
- Line 18 till line 24 used to create the navigation bar the words that are written in white could be changed deepened on your needs.
- Line 24, 26 and 27 used to write the sentence in white which also could be changed.
CSS code
Moving to CSS code, to format the html file here is the formatting that I used where each sentence between the brackets describe the formatting that I used for the name mention above the brackets.
*
{
    margin: 0;
    padding: 0;
}

header
{
    background-image: url("../images/what.jpg");
    height: 100vh;
    background-size: cover;
    background-position: center;
}

.main-nav
{
    float: right;
    list-style: none;
    margin-top: 30px;
}

.main-nav li
{
display:inline-block;
}

.main-nav li a
{
    color:white;
    text-decoration: none;
    padding: 5px 20px;
    font-family: aladin;
    font-size: 15px;
    font-weight: bold;
}

.logo img
{
    width: 250px;
    hight: auto;
    float: left;
    position: relative;
    margin-top: 30px;
}

body
{
    font-fimaly:monospace;
}

.row
{
    max-width: 1200px;
    margin: auto;
}

.hero
{
    position: absolute;
    width: 1200px;
    margin-left: 60px;
    margin-top: 0px;
}

h1
{
    color: white;
    text-transform: uppercase;
    font-size: 50px;
    text-align: center;
    margin-top: 275px;
    font-family: "Arial, Helvetica, sans-serif";
}
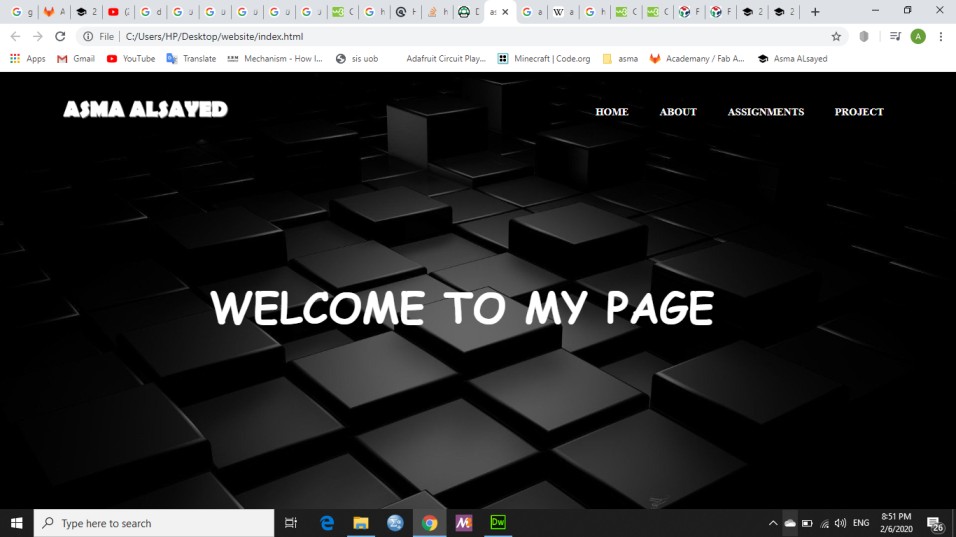
The results that I have achieved from both HTML and CSS is shown in the picture below
Build A Personal Website - Using MKDocs
MkDocs software is free and open source, it is a way to document Markdown files into a static website. The Markdown files for the website are simple text and images. The text file versions are tracked rather than document files such as Microsoft Word. This approach works for many documents that benefit from navigation and web integration.
Markdown is a way to style text on the web. You control the display of the document; formatting words as bold or italic, adding images, and creating lists are just a few of the things we can do with Markdown. Mostly, Markdown is just regular text with a few non-alphabetic characters thrown in.
Here’s an overview of Markdown syntax that you can use
- For headers
# This is an <h1> tag
## This is an <h2> tag
###### This is an <h6> tag
- Emphasis
*This text will be italic*
_This will also be italic_

**This text will be bold**
__This will also be bold__

_You **can** combine them_
- Images

Format: 
After I am done with HTML and CSS, I decide to edit the ready templet that I already have to build my website as it is much easier and does not consume time as much as HTML. In order to work in GitLab I have to go through the following steps:
1. Download Git bash for windows.
Download and install it with default settings.
2. Generate a SSH key.
Working with Gitlab repository needs to identify yourself to GitLab using username and password. An SSH key is an alternate way to identify yourself that doesn’t require to enter the username and password every time. So, to generate SSH code for my laptop I type the following code to first change the saving direction to the desired folder and then generate the SSH code.
$ cd fablab
$ ssh-keygen -t rsa
3. Add the SSH key to GitLab website.
Then in gitlab, open the setting > SSH keys > paste your key in the “key area” > press add key > SSH is added successfully.
4. Clone the raspatory to the laptop.
In order to clone I have to go to GitLab, open the project and found the clone button, click on it and copy the HTTPS link and paste it as the Shown below
$ cd git clone https://gitlab.fabcloud.org/academany/fabacademy/2020/labs/bahrain/students/asma-alsayed.git
5. Setup the identity.
$ cd ~/asma-alsayed
$ git config --global user.name "asma.alsayed"
$ git config --global user.email "my email"
$ git config --global push.default simple
Next I start to apply some changes in the templets to edit my about me page, add my week assignments and the home page so to upload these changes to my website the following code must be used
$ git pull // to pull the changes
$ git add --all // to add all the changes
$ git commit -m "message" // to write a comment
$ git push // to push all the changes
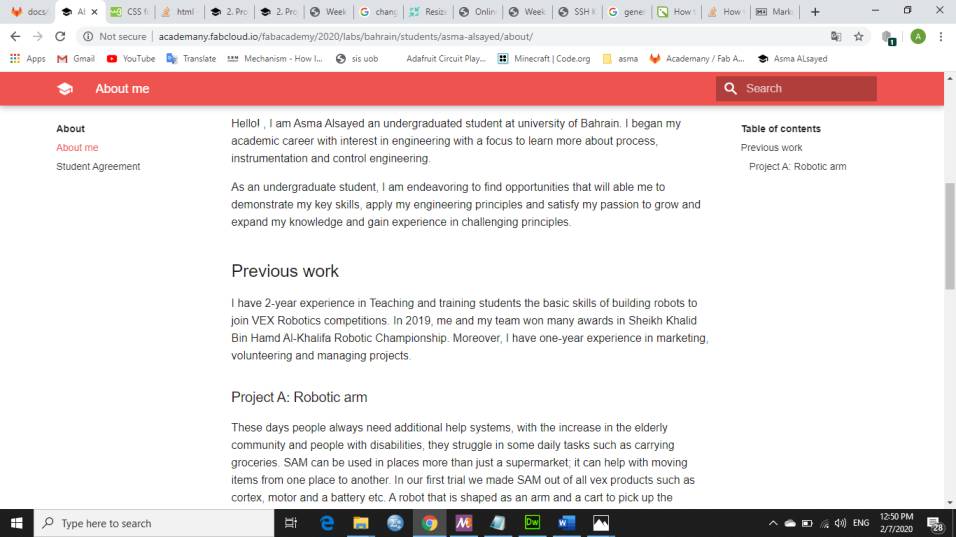
The results from my edditing is shown in the figure below, I found the formating codes in markdown cheat sheet and stackoverflow the links for both websites are povided in the useful links section. As you can see from the pictuer below that the ebsite is divided into navgation bar which includes Home, About, Assignment and projects. The website also includes a search box to tap and found what you are looking for and finaly a table of content for each assignment.