Week 2: Personal web page
I believe no-one should start anything from complaining. For this reason I will say that your teaching assistants are able to fix anything! I had slight problem with access to GitLab. Fortunately and finally I was granted access and here we go.
Fab Academy requires a place, where my personal development may be visualized. It may be understood as interface. Very handy way is to create personal web page, such as this one.
First of all some skills in HTML coding (as some people do not hesitate to call it programming are required. We have been granted access to already prepared template. However, I did not liked it. I decided to use some other template, as those are easily accessible and license is Freeware. You may notice copyrights at the bottom of every web page.
You may be interested in couple links, where one I used is in bold:
HTML5
I had a bit of knowledge in this matter before. I already had to design couple web pages. Because of this fact I decided to use free templates with already created .CSS files. HTML is fairly easy. You are using brackets just like in TEX languages
. Google is very helpful in this, as you may find almost everything. Couple examples how to use HTML5 are shown below.
Attaching images: <img src="example.png" />

                      Writing in bold: <b>TEXT<b/>

                      Creating lists: <ul>LIST GOES HERE<ul/>

                      Writing such boxes: <code>TEXT<code/>

In my case I mainly had to do the following steps:
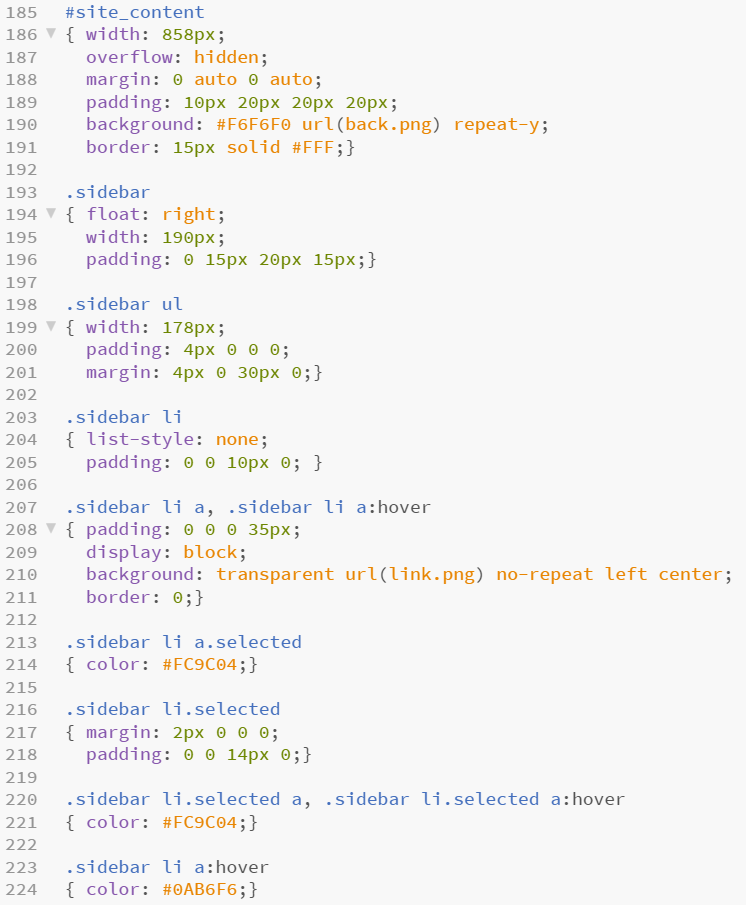
- Play with CSS to change background graphics
- Edit web page templates and rearrange tables, remove unwanted parts
- Edit CSS file to create highlighting of menu on the right side
- Define couple elements such as tables (in CSS)
I believe the most difficult part was creating interactive menu for assignments. I used a bit of my understanding in HTML. I'm glad that I really didn't need to define everything from scratch (thanks to template). If you are looking for tutorials, references, examples and exercises in HTML. You should pay a long visit to w3schools.com In most cases I was using this website to manage with issues and fix javascript.
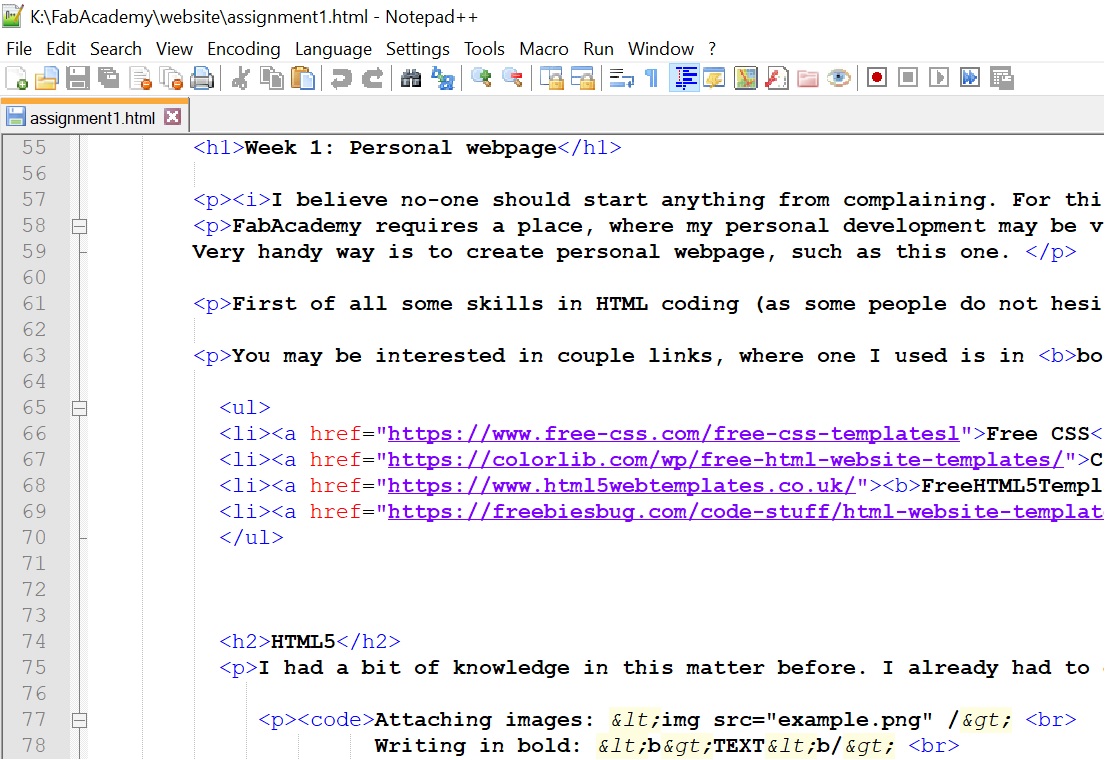
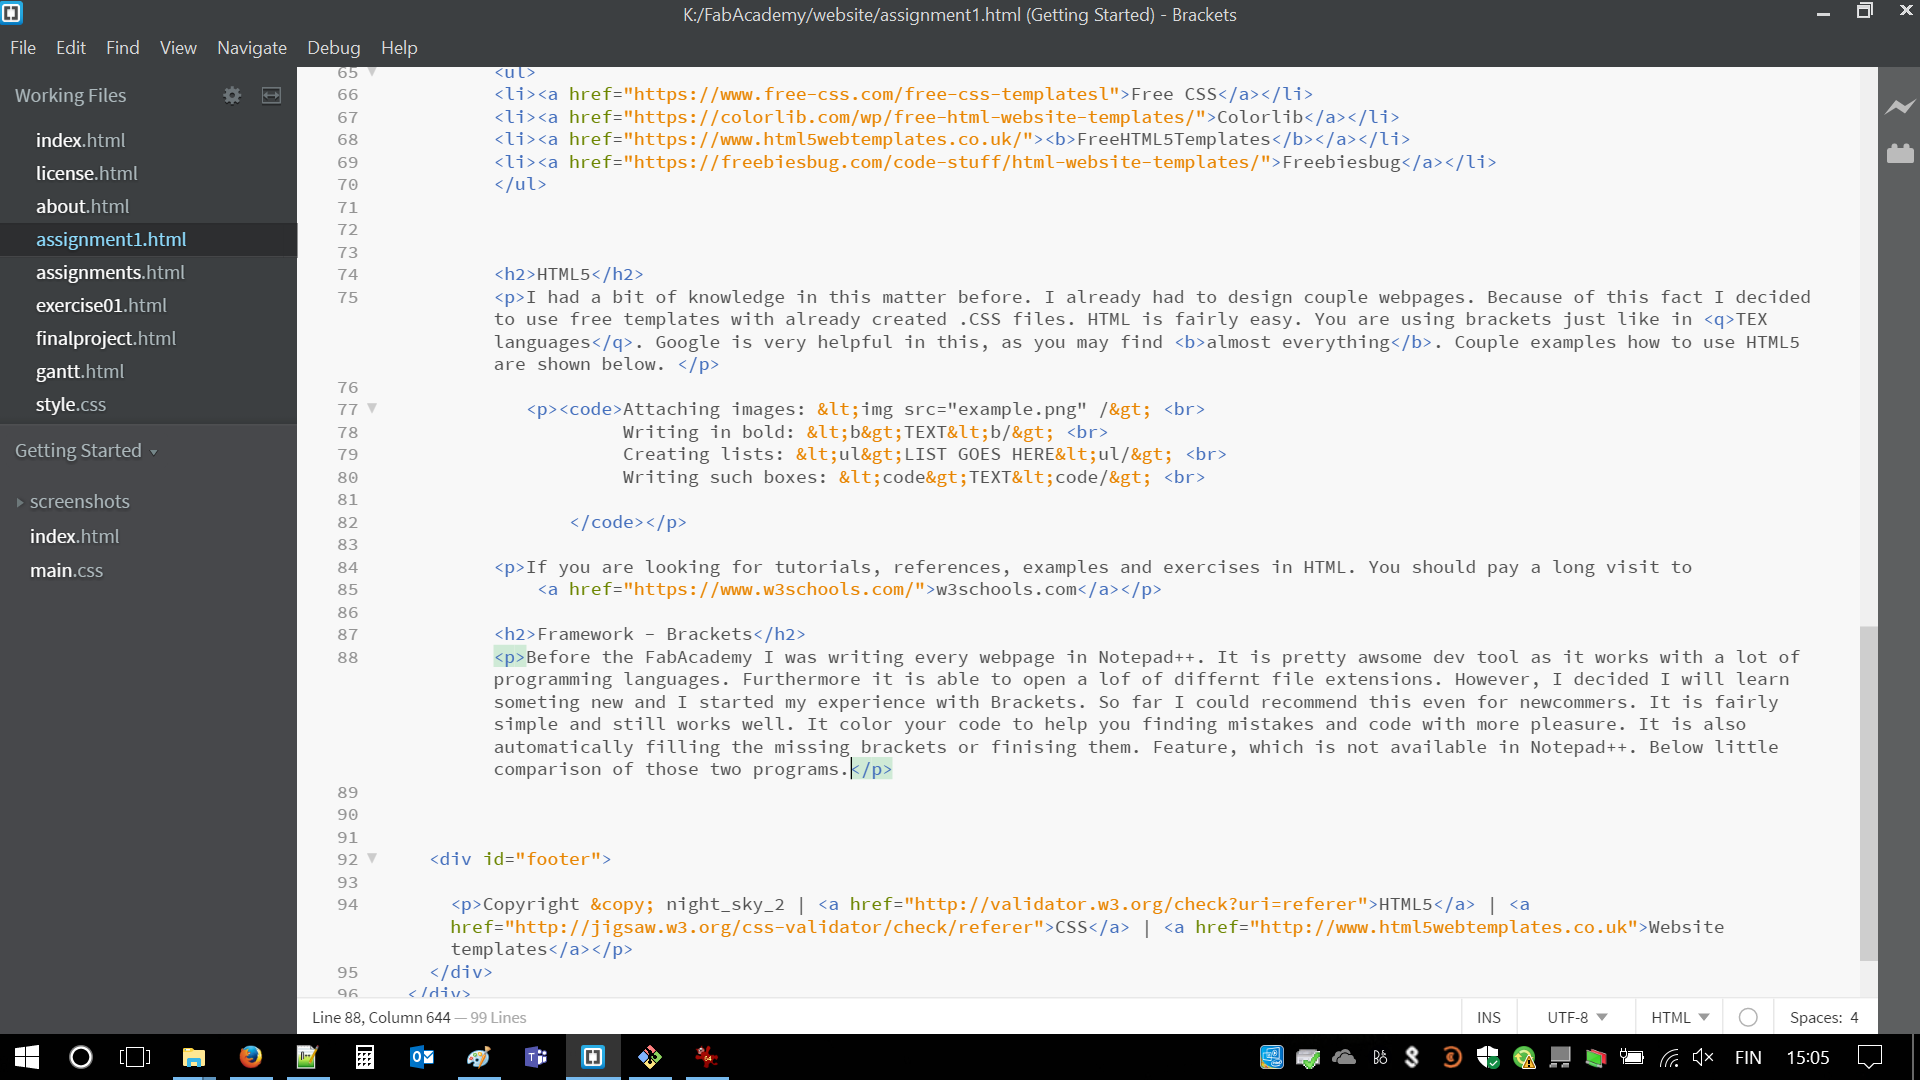
Framework - Brackets
Before the Fab Academy I was writing every web page in Notepad++. It is pretty awesome developer tool as it works with a lot of programming languages. Furthermore it is able to open a lot of different file extensions. However, I decided I will learn something new and I started my experience with Brackets. So far I could recommend this even for newcomers. It is fairly simple and still works well. It color your code to help you finding mistakes and code with more pleasure. It is also automatically filling the missing brackets or finishing them. Feature, which is not available in Notepad++. Below little comparison of those two programs.
GIT - or how to 'push' your files onto the server
Git is a version control system. Gitlab provides remote storage of repositories. In addition, it provides deployment service to host websites. The sites content has to be stored in a GIT repository before it is deployed. Pushing synchronizes your local repo with the remote repo. If you have proper configuration files in gitlab (.yml file) when you push content to the repository it will deploy the site.
The best/most efficient way to use GIT is a console, where you define, what would you like to do. List of must-know parameters, when you are setting up your git is shown below.
          git config --global user.name "MY_USERNAME"  (setting Git)

          git config --global user.email "my.email@oulu.fi"  (adding email address)

          ssh-keygen -t rsa -C "$your_email"  (creating ssh key)
Last command ssh-keygen -t rsa -C "$your_email" is quite important. It creates SSH (Secure shell key), which is used for safety reasons. This line is just part of a process. In general, there will be two keys(strings of numbers and letters) generated. One is public, used by the server, and second more important is private - associated with user side. Public key is door and private key is single piece of key able to open this door. Well, it is kind of simplified version of what is happening.
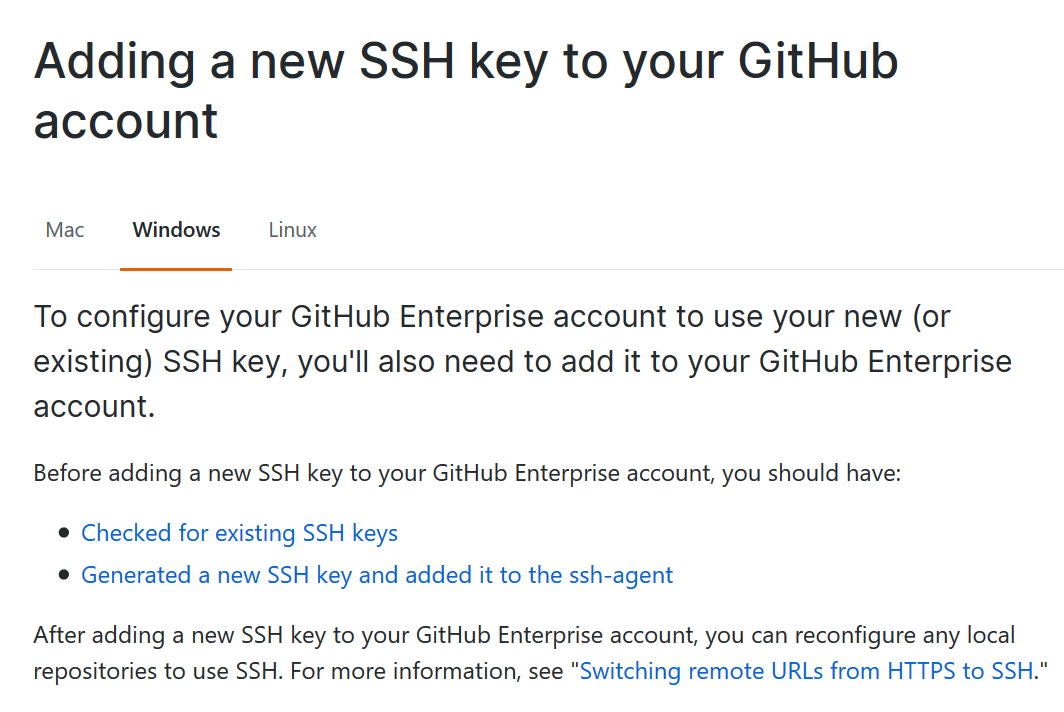
There are two really nice guides from GitHub Help Center, those are visualizing how to proceed with the process:
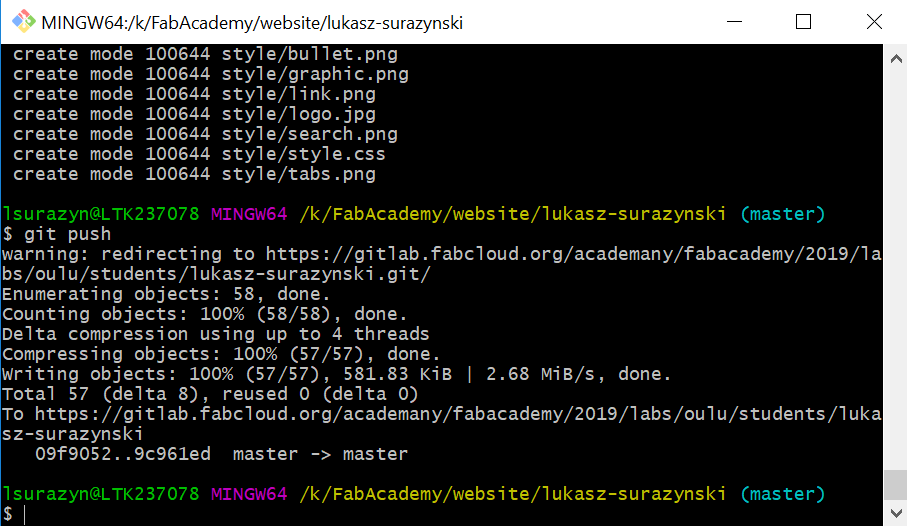
After everything is secured and you have everything working it is time to upload repository. This is procedure to upload your files. An example procedure:
git status - check your files status (anything to be added?)
git pull - fetch from and integrate with another repository or a local branch
git add . - Add file(s) content to your repository
git commit -m "description" - record changes to the repository, argument 'm' will add message
git push - update remote refs along with associated objects (start uploading)
git status -double check if everything went as planned
Maintenance
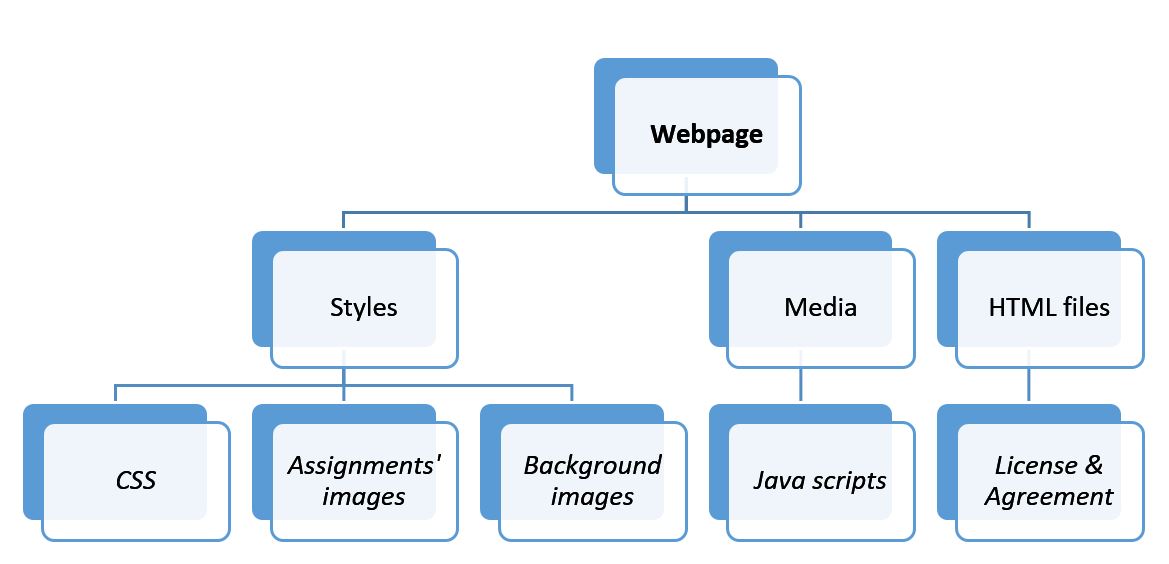
We can also calling it updating your web pages. GIT is also used or responsible for that part. With it you should remove (git pull) and again (git push) your updated files. Most likely you would like to check (git status) from time to time. Despite of updates you may, e.g. copy files with (git clone). Other valuable formulas and their explanation may be found there : GIT Documentation Structure of my web page might be described with tree chart. I'm trying to keep it clean and simple.
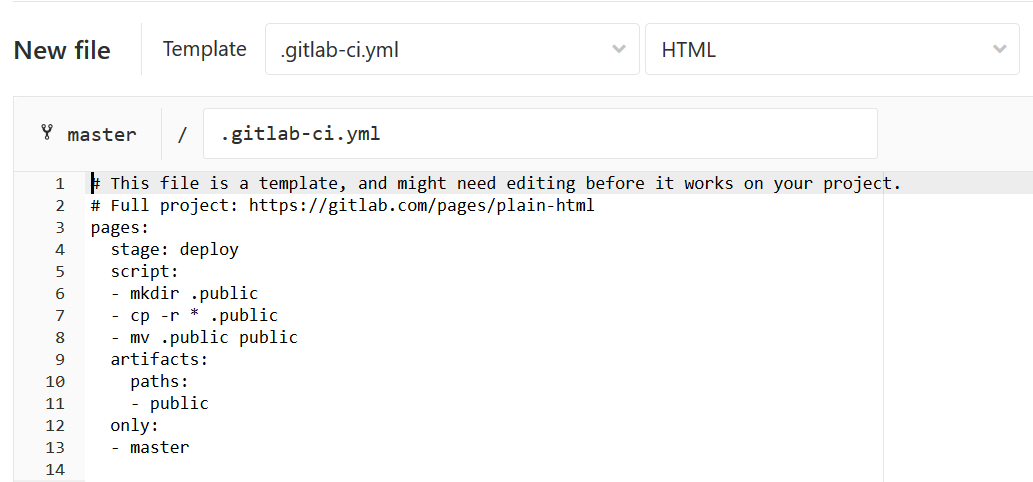
Troubleshooting
I fortunately did not have this problem as one of the teaching assistants told me about this issue. Nevertheless, .gitlab.ci.yml, Gitlab Continuous Integration configuration file was outdated. This file role is simple - it is taking the content of your remote master branch and deploys it in a Web Server (nginx). It has to be replaced/updated by performing given steps. In order to fix it you should create new file in your repository folder. Below, visualization how new and corrected file should look-like.