
Assignments
- Make an in-circuit programmer by milling the PCB
- Program it
- Try other PCB processes
Vector file generation
I chose to make the FabTinyISP circuit. I used Inkscape to generate the vector file to mill the FabTinyISP.
| Vector file generation with Inkscape | |
|---|---|
| Importation of PNG files Traces and Outline cutout - (file > import) |  |
| Vectorization of PNG files - (path > Trace Bitmap) - Use of brightness cutoff and adjustment of threshold to get a clear image | 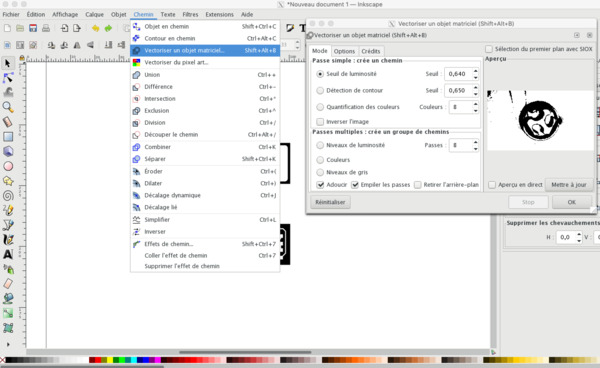 |
| Removal of the original PNG files - The created vector image is above the original PNG. You have to move the new image and delete the original image - (select it > delete) | 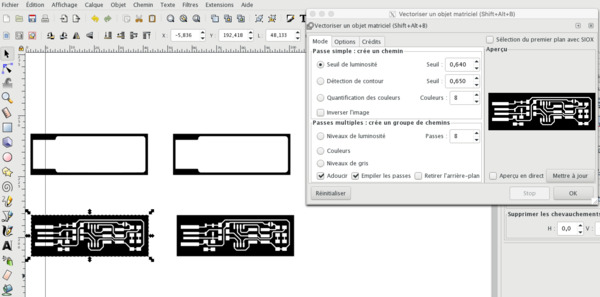 |
| Outline view - To see the paths as they are (without strokes and fill) - (select paths > view > display mode > outline) | 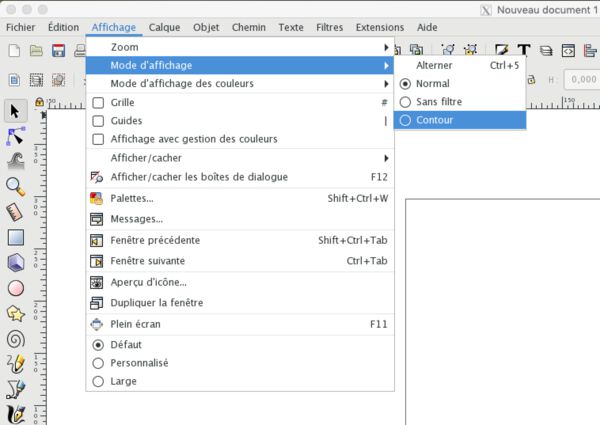 |
| Align and distribute - To center the paths (traces and outline cutout) - Select paths - object > align and distribute - relative to: selection - click “center in horizontal axis” and “center in vertical axis” | 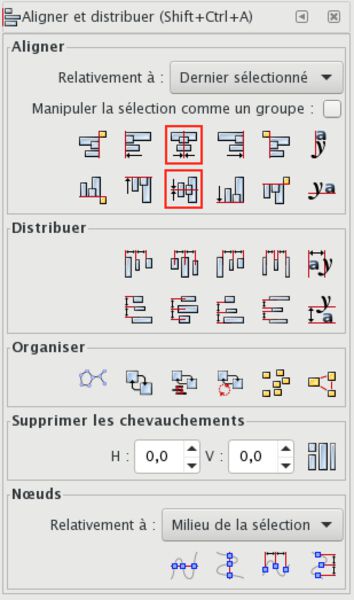 |
| Final result - You can group the paths (select it then ctrl+G) | 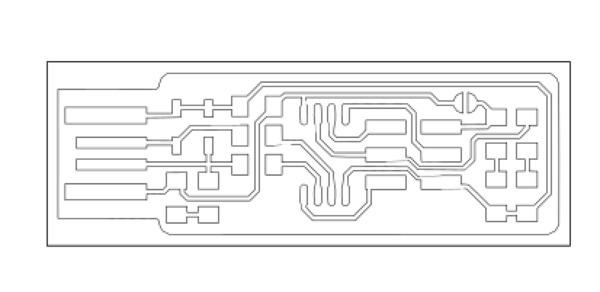 |
Milling
My colleagues, Simon and Adrien have each chosen a different machine to mill the PCB. However these 3 machines are part of the Fab Lab machine stock, it was a way to compare their ability to mill the same PCB.
Simon this one :
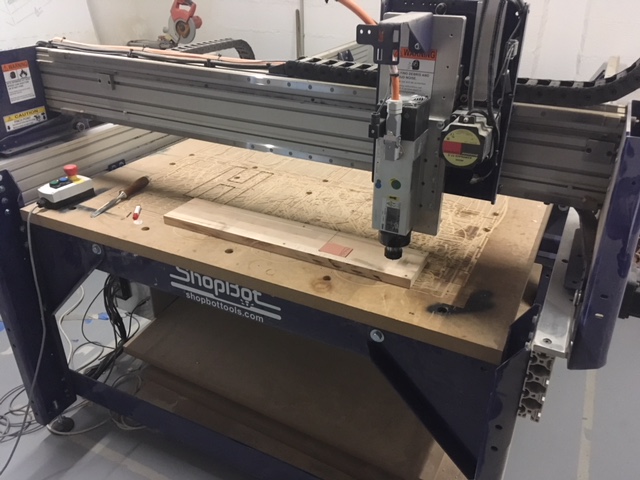
(a little big !!)
Adrien this one :
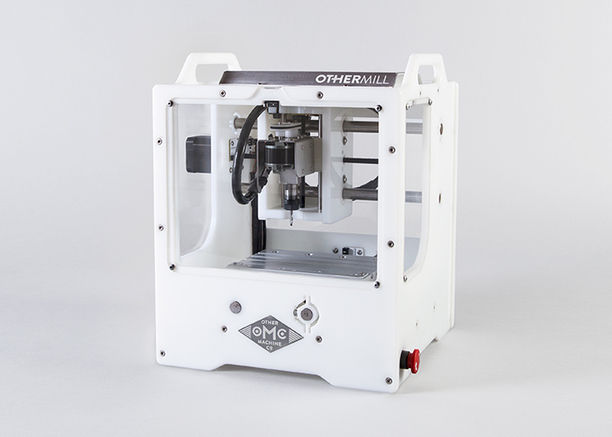
(made for that !)
I decided to opt for this milling machine :
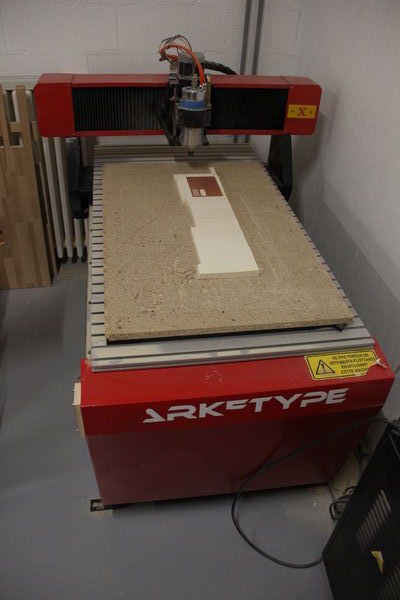
(between the two !)
CNC specifications
- Model: Arketype CNC 6090
- Work area : X : 600mm Y :900mm Z : 150mm
- Machine dimensions : 900X1200X1700
- Spindle : 2.2KW, 24000tr/m (liquid-cooled)
- Milling accuracy : 0.05mm
Process
| PCB milling | |
|---|---|
| Surfacing the PCB support - To mill on a perfectly flat surface i milled a rectangle of my blank PCB dimensions in a piece of wood | 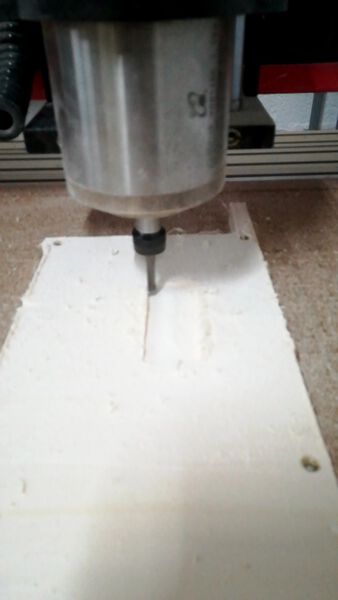 |
| Fastening blank PCB - I used double-sided tape to position the PCB plate | |
| Z probing - Our CNC machine is equipped with Z probe, so i used it to set up the Z level |  |
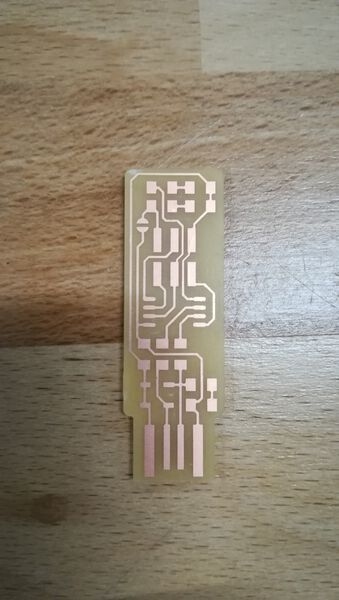
| Milling - I used a 1/64” end mill to mill and a 0,8mm end mill to cut the PCB - Tool paths were generated with Vcarve, 0,1mm engraving depth pocket tool path milled from the traces vector file, and 1,7mm cutting depth profile tool path from the outline cutout vector file - Feed rate: 300mm/min | 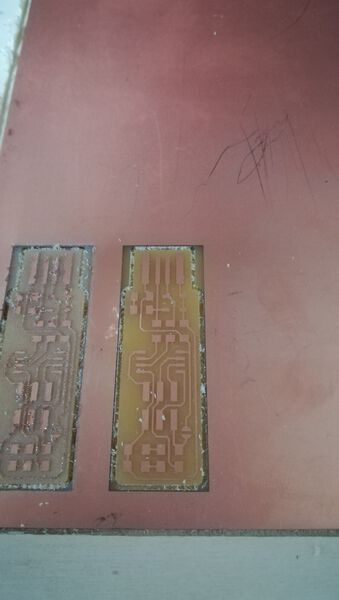 |
Final result:
Soldering
I learned how to weld with Adrien who has a good experience in the field. So I followed these tips.
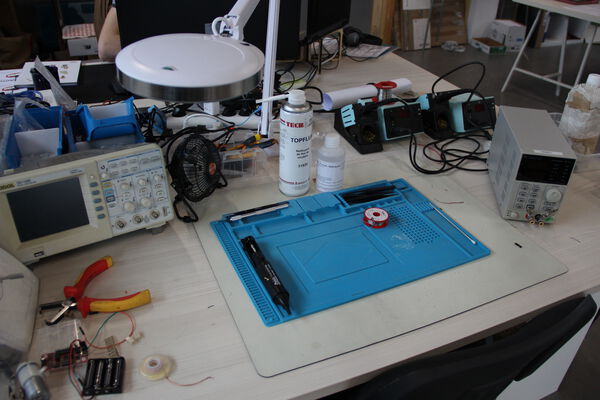
I used this workspace:
Process
| SMD components soldering | |
|---|---|
| The USB pad, LEDs and resistors | 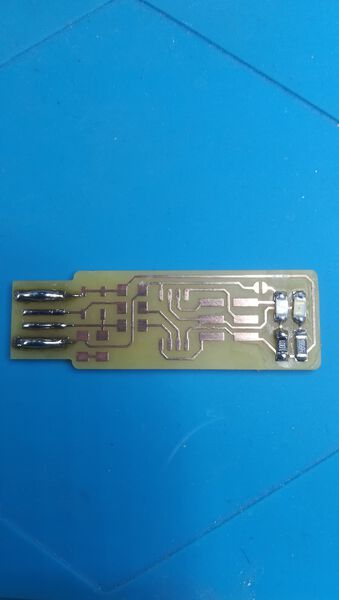 |
| The zener diodes, resistors and capacitor | 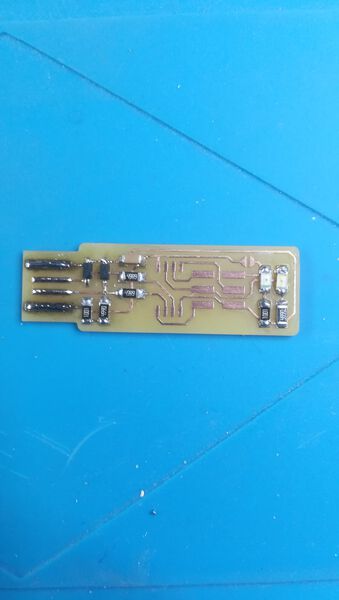 |
| The ATtiny45 |  |
| The pin header | 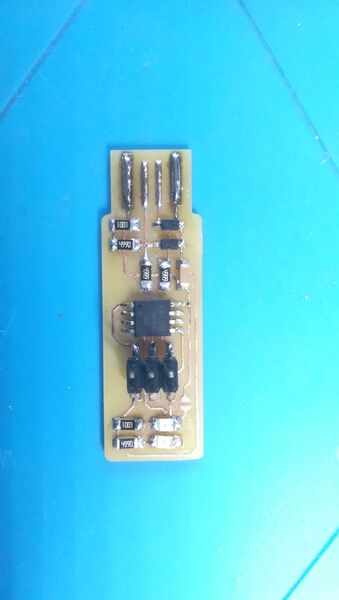 |
Note
I encountered some difficulty with USB pad (burn marks). Tin did not cling to copper. I degreased the PCB to the soap and used welding flux, and then it has much better.
Programming
I followed this procedure step by step.
Testing
I checked the continuity of the traces and it looked good so I plugged it on my USB port.
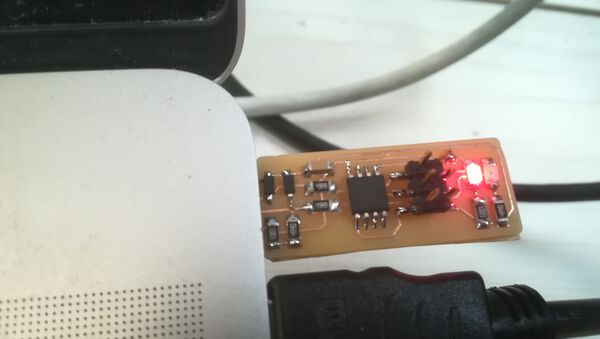
The red LED lit up !!
Process
I used my Macbook pro to program the FabTiny ISP.
Necessary software
- Avrdude (for programming AVR microcontrollers) installation
Bens-MacBook-Pro:fts_firmware_bdm_v1 ben$ brew install avrdude
- GCC (to compile C code) (It took very long time !!) installation
Bens-MacBook-Pro:fts_firmware_bdm_v1 ben$ brew install avr-gcc
- Crosspack environment installation
Bens-MacBook-Pro:fts_firmware_bdm_v1 ben$ brew tap osx-cross/avr
Firmware building
-
I dowloaded and extracted the firmware.
-
Then i built the hex file
Bens-MacBook-Pro:fts_firmware_bdm_v1 ben$ make
- I used this USBtinyISP AVR Programmer to flash the ATtiny45. I checked in the Makefile if the programmer was the good one “PROGRAMMER ?= usbtiny” (it was adapted for my programmer so I didn’t have to change it)
ATtiny45 programming
-
I plugged the USBtinyISP AVR Programmer and my FabTinyISP to it
-
I tried the make flash CL
Bens-MacBook-Pro:fts_firmware_bdm_v1 ben$ make
But i received this error:
avrdude -p attiny45 -c usbtiny -P usb -e \
-U flash:w:fts_firmware.hex
make: avrdude: No such file or directory
make: *** [flash] Error 1
SOLUTION
To solve it I found this method which explain how to change the profile of the terminal in adding “/usr/local/bin” to the path
Bens-MacBook-Pro:fts_firmware_bdm_v1 ben$ echo 'PATH=$PATH:/usr/local/bin' >> ~/.bash_profile
I retried make flash CL and it worked, I received:
avrdude -p attiny45 -c usbtiny -P usb -e \
-U flash:w:fts_firmware.hex

avrdude: AVR device initialized and ready to accept instructions

Reading | ################################################## | 100% 0.00s

avrdude: Device signature = 0x1e9206 (probably t45)
avrdude: erasing chip
avrdude: reading input file "fts_firmware.hex"
avrdude: input file fts_firmware.hex auto detected as Intel Hex
avrdude: writing flash (2472 bytes):

Writing | ################################################## | 100% 3.67s

avrdude: 2472 bytes of flash written
avrdude: verifying flash memory against fts_firmware.hex:
avrdude: load data flash data from input file fts_firmware.hex:
avrdude: input file fts_firmware.hex auto detected as Intel Hex
avrdude: input file fts_firmware.hex contains 2472 bytes
avrdude: reading on-chip flash data:

Reading | ################################################## | 100% 4.20s

avrdude: verifying ...
avrdude: 2472 bytes of flash verified

avrdude: safemode: Fuses OK (E:FF, H:DF, L:62)

avrdude done.  Thank you.
Setting the configuration fuses
Bens-MacBook-Pro:fts_firmware_bdm_v1 ben$ make fuses
I received:
(...)
avrdude: safemode: Fuses OK (E:FF, H:DD, L:E1)
avrdude done.  Thank you.
I checked the USB ports to see if my FabTinyISP works as USB device:
  Bens-MacBook-Pro:fts_firmware_bdm_v1 ben$ lsusb
  Bus 020 Device 002: ID 05ac:0274 Apple Inc. Apple Internal  Keyboard / Trackpad  Serial: D3H51928X11GHMFAQ4ES
  Bus 020 Device 016: ID 05ac:8290 Apple Inc. Bluetooth USB   Host Controller
  Bus 020 Device 029: ID 1781:0c9f 1781 USBtinySPI
Blowing the reset fuse
Bens-MacBook-Pro:fts_firmware_bdm_v1 ben$ make rstdisbl
I received:
  (...)
  avrdude: safemode: Fuses OK (E:FF, H:5D, L:E1)
  avrdude done.  Thank you.
Disconnection of the VCC from the Vprog
I removed the bridge on the solder jumper to disconnect the VCC from the Vprog pin. Then I rechecked the USB ports to see if my FabTinyISP works as USB device:
  Bens-MacBook-Pro:fts_firmware_bdm_v1 ben$ lsusb
  Bus 020 Device 002: ID 05ac:0274 Apple Inc. Apple Internal  Keyboard / Trackpad  Serial: D3H51928X11GHMFAQ4ES
  Bus 020 Device 016: ID 05ac:8290 Apple Inc. Bluetooth USB   Host Controller
  Bus 020 Device 029: ID 1781:0c9f 1781 USBtinySPI
IT WORKS ! (but i need to program a board to be sure… coming soon!)