
Class Assignment #
9
Molding+Casting
i finished a very uninteresting test, after being really excited and starting with a very ambitious raw chocolate molding idea... i have had some unique shapes in mind and even bought leaf gold last year because i wanted to do my own raw chocolate molds... this assignment gave me the green light to experiment in that way... however the shapes that i wanted were not happening... after nearly a day's worth of trying to get them in several programs (123D Design, Sketchup, Openscad, etc.), i was told by a very wise man "stop cutting bait so quickly- if you are looking for a program to work exactly how you think you will never get anything done... find a program that you can work with and stick around long enough to figure out how to make it do what you want it to do." so back to the antimony drawingboard.
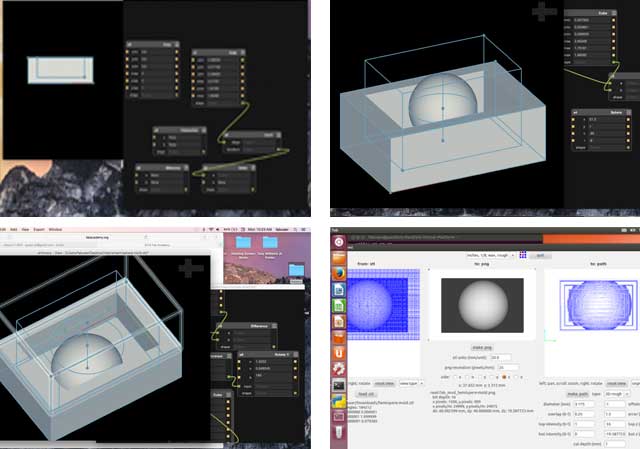
i decided to do a test- a small sphere... i created 2 cubes and got the difference between them to create the cavity, then inserted a sphere. After thinking about the tool i realized i would really come out with a rounded cylinder, so decided to chop it in half and make a hemisphere, making the top of which slightly lower than the height of the outer cube rim. i saved as an .stl and then opened it up to translate into an .rml in the fab modules. First did the rough mil, and was pleasantly surprised to see the machine account for what it had done already and the finished mill took only 8 seconds more.
Click here for the file.
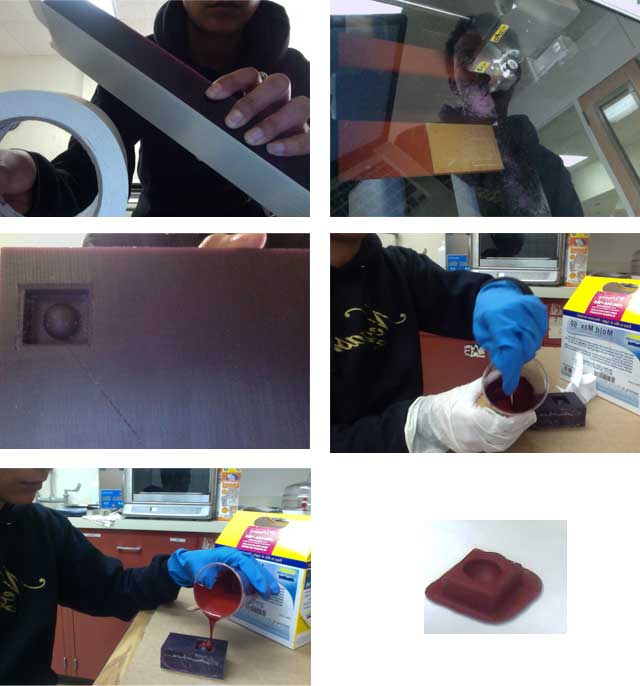
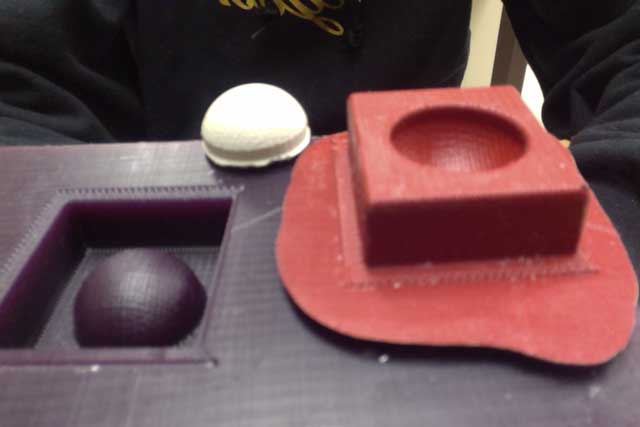
Using carpet tape, stuck the machinable wax onto the plate inside the Modela, had to re-calibrate for the height of the wax, chose a 1/16 bit endmill, and milled out a couple. i noticed that the size was about 1/3 of what i thought it would be based on the fab module translation from units to mm. After successful milling, read the instructions and used MoldMax 60 to create the flexible mold. It took 24 hours to cure, and (after a long, sleeples night) voila!

Next we mixed the Hydrostone, by weight according to the instructions, slowly filled the mold and only had to wait about an hour to get the cast hemisphere! i think it could dry a bit more and then the bottom could be sanded. Its so much less exciting than what i had planned, but i am happy to have gone through the process completely. It gave me the confidence to try and make a lotus-shaped candle holder... Again- really excitedly i spent a couple hours with antimony to create what i think is a cool design...
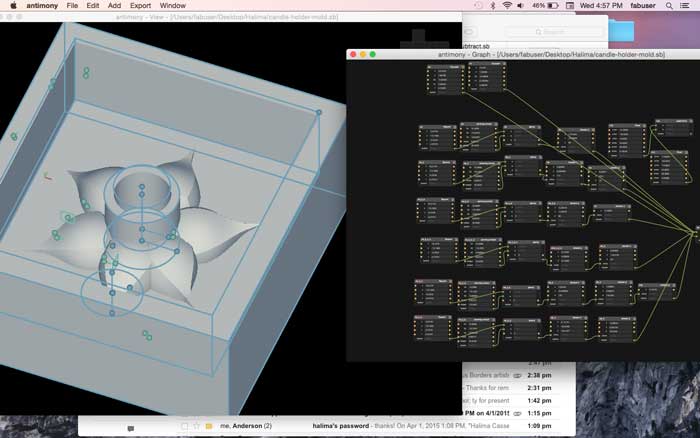
but alas... by then end of the day all the computers had turned against me, programs repeatedly stopped responding, Modela only wanted to make 2mm objects, i became frustrated beyond belief, and all i have to show is the roughed out super-small version of milled wax... perhaps i will circle back next week.
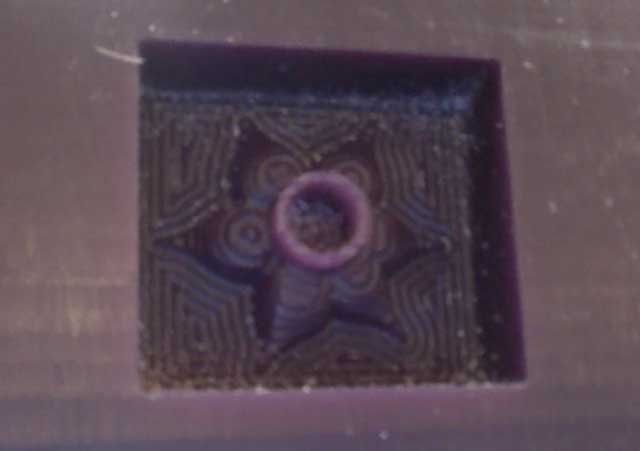
Here is this file.