Make Something Big!

This week we were charged with making something big. Big being a relative term, I decided to interpret that as the size of a piece of furniture. I will make some bar stools on the ShopBot. The ShopBot (at right) is as big as a small car and likes to work with sheets of plywood or similar dimensioned material. I first had to schedule a 3 hour class at the TechShop to use the tool. This was tough, but finally found a class in San Jose, CA (2 hours away). I decided to book the ShopBot for right after the class in San Jose, since the SF TechShop was tied up until early April. I guess Silicon valley likes working with small stuff and not big stuff, the ShopBot there is wide open for scheduling!
The work flow for my design is as follows:
- Come up with a low resolution prototype in a tool I am familiar with: I sketched it on paper. Low resolution means, very little of my time from concept to version 0.01 of the idea.
- Now that I have the idea, formalize it a bit more and do some research on stools. What are the standard heights etc. These stools need to fit under a bar height counter. What is bar height, what is the height of a bar stool etc.
- Search for examples. ShopBot's website has some great designs to serve as examples. My design was created by taking an existing design and tweaking it to my needs. This design was tweaked using ShopBot's software PartWorks directly. Partworks is a very straightforward tool which is used to take a design and create the path files necessary for the ShopBot to make it's cuts. The design could have been created in many tools including Inkscape and Adobe Illustrator, AutoDesk Inventor, etc.
ShopBot's Partworks Software in Action

Partworks is a fairly intuitive tool and with the mouse over help I was well on my way. The creation of the paths was a click away. I resized the stools to take into account the thickness of the plywood and also increased their height and changed their edge look a bit.
The ShopBot Tool Interface Software
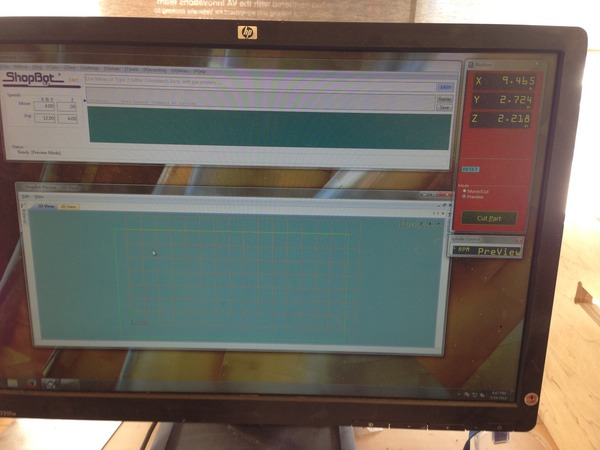
Used to calibrate the X-Y-Z. This will also set the speed of the mill etc. There is quite a bit more to this tool that I would like to learn.
Loading the Plywood
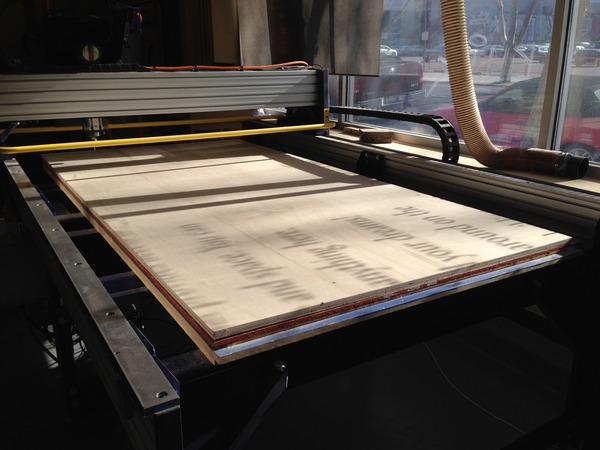
I set the plywood with brass screws onto the cutting surface. There were two sacrificial boards in place so I felt comfortable moving forward and leaving them there to protect the machines surface. This turned out to be a mistake. The boards were old and warped slightly which gave me an uneven surface. We use brass since it is a soft metal the will be more gentle on the end mill if I accidentally cut into them. I used a screw in each corner and on the long sides in the middle. Next time, I will use more screws and put in my own sacrificial board.
The Cut Begins...
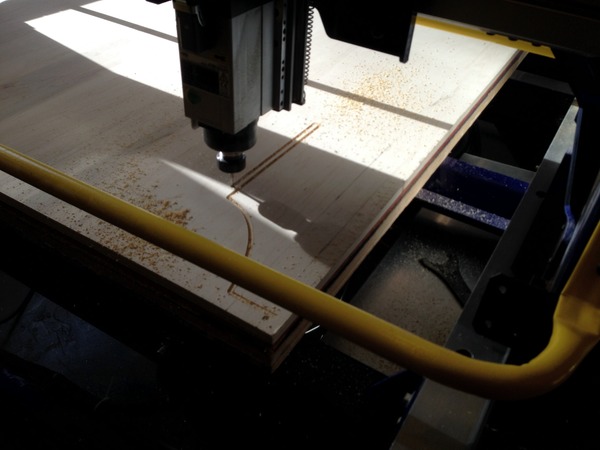
Mesmerizing. Looks very good on top. On the bottom, I should have used more screws and had it penetrate further. The tool interface sends out a warning about depth of cut, but now I know it is ok to go a few extra hundreths of an inch, or even more, to get a good finish on both sides.
The Cut Continues...

Assembly of the Stools
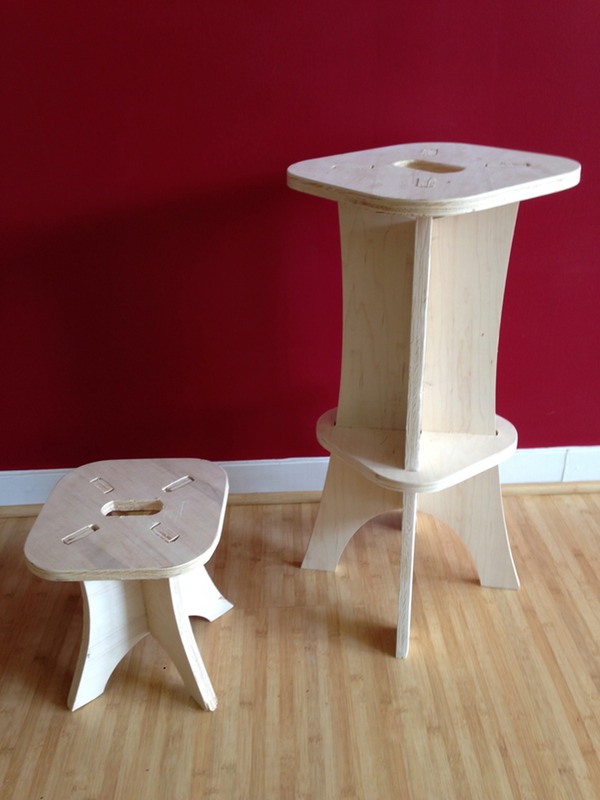
Since the ShopBot did not fully penetrate the material in all locations due to uneven surfaces, the assembly required some sanding and filing to get the slots to be the right thickness. Once this was done the pieces came together nicely! I am considering a new stool design and also seeing how the Twing from an earlier week might come out at a large scale.