Assignments:
read a microcontroller data sheet
program your board to do something, with as many different programming languages
and programming environments as possible
Learn about AVR
As start of this week, I tried to understand what Makefile and C code do by reading Datasheet.
When I seached about each commands and parameters in source code, Searching with Google is useful but sometimes it was convenience to check it in Terminal especially about Makefile commands.
For example, I found this line in Makefile...
avr-gcc $(CFLAGS) -I./ -o $(PROJECT).out $(SOURCES)To check how "avr-gcc" command works, type command name with "--help" or "-h" then it shows like below...
$ avr-gcc --help

Usage: avr-gcc [options] file...
Options:
  -pass-exit-codes         Exit with highest error code from a phase
  --help                   Display this information
  --target-help            Display target specific command line options

  --help={common|optimizers|params|target|warnings|[^]{joined|separate|undocumented}}[,...]
                           Display specific types of command line options
  (Use '-v --help' to display command line options of sub-processes)
  --version                Display compiler version information
  -dumpspecs               Display all of the built in spec strings
  -dumpversion             Display the version of the compiler
  -dumpmachine             Display the compiler's target processor
  -print-search-dirs       Display the directories in the compiler's search path
  -print-libgcc-file-name  Display the name of the compiler's companion library
  -print-multiarch         Display the target's normalized GNU triplet, used as
                           a component in the library path
  -print-multi-directory   Display the root directory for versions of libgcc
  -print-multi-lib         Display the mapping between command line options and

  .....
These lines explain usage and bunch of options the command can take.
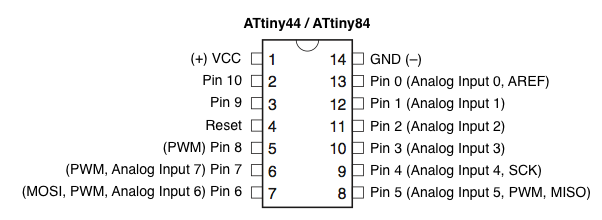
Fuse, setting of AVR, was one of things I have to learn.
Thanks to Bas, manager of fablab Reykjavik and electronics guru, I got to hear about "Fuse Calculator"
It is a web application genarating the actual hexadecimal representation of the fuse like "0x5e" from setttings as you like and visa versa.
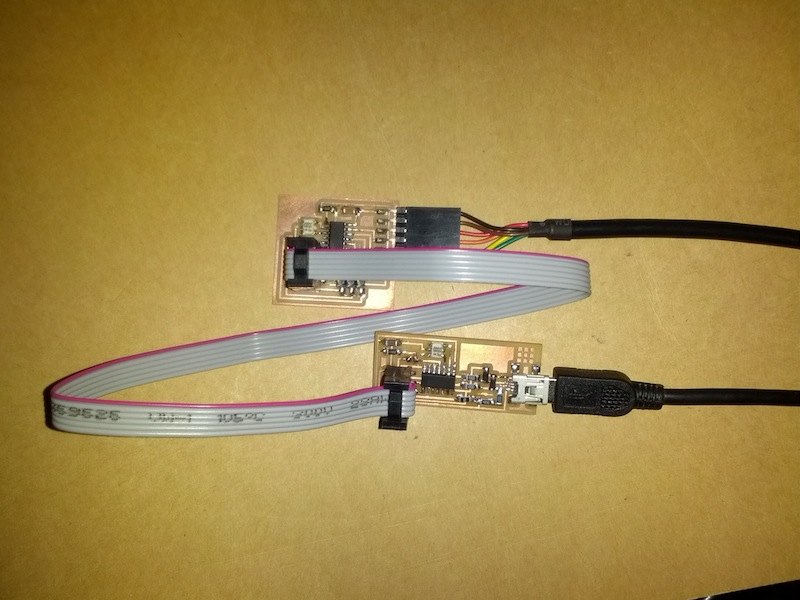
Programming the board with C compiled by GCC via FabISP to echo keyboared input.
After reading Makefile and C code, I program it to my board without any changes to check how it works and my board works collectly or not.
I connected like the photo below...
I downloaded term.py
Then moved to directory which contains makefile and C code and typed commands in Terminal like below
$ make -f hello.44.led.switch.c.make

$ sudo make -f hello.44.led.switch.c.make program-usbtiny-fuses

$ sudo make -f hello.44.led.switch.c.make program-usbtiny
Uploading was successfully done.
Next step was sending character with term.py. But to do this I had to know which serial port my board connected.
To check that on OSX, type
$ ls /dev/tty.*

/dev/tty.Bluetooth-Modem   /dev/tty.Bluetooth-PDA-Sync
/dev/tty.LED-VISOR-LED-VISOR   /dev/tty.usbserial-FTFBF4UI
There are FTDI so I choose it as port for term.py
$ python term.py /dev/tty.usbserial-FTFBF4UI 115220Yes, my board reacted as example
Rewriting source code in C by using GCC and Fab ISP
Since my board has two LED and two button, I wanted to make left LED turning on when left button is pressed and right side alike.
I tried to do so by rewriting C code but it didn't work at first programming via FabIsp.
The problem was I thought input pin receives "1" when button is pressed but it's wrong in schematic of circuit I used.
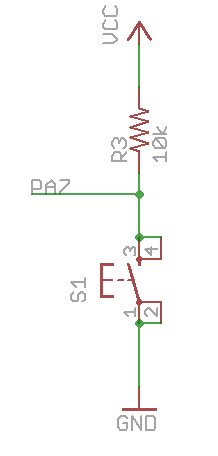
In this case, Input is "1" when botton isn't press, and it become "0" when it's pressed.
And my code setecting press was turning on when IT'S NOT PRESSED.
if pin_test(PINA, pin_swt_left){
    TURN ON LED
}
so I rewrote code from above to below.
if( pin_test(PINA, pin_swt_left) == 0){
    TURN ON LED
}
Finally patience solved problem. the Video shows how it works. You can download MY CODE if you want.
Running blink example by using ArduinoIDE with FabISP
I also tried to program with ArduinoIDE to check a defferent enviroment.
Because of good tutorial by High-Low Tech Group MIT, It went well.
One of nice points of this tutorial is they figure out pin assaignment.
I just followed the tutorial then my board started blinking. Very handy.
One-Line music with AVR
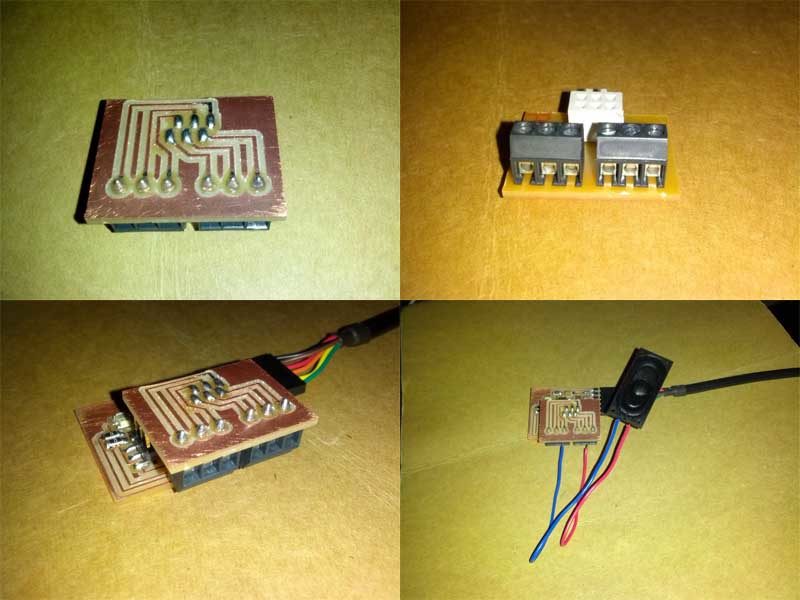
I made another shield with terminal blocks which connected with VCC, GND, PA2, PA3, PA7 and PB2 and put 8 ohm speaker to it.
I used to make one-line music project with Arduino few years ago and now it's time to make it with AVR.
One-line music is the code generating music from one formular and the conter of processer. A number of counter increasing by "++" and only one formular cause addictive noisy soundscape. I found nice tutorial to make it with AVR but the tutorial uses Arduino library and other AVR chip not ATtiny44 so I tried to modify the code.
Since I rewrite the code for other chip without Arduino library, There were a lot of things to learn especially I struggled with TIMER0 and TIMER1 of ATtiny44. As result I realized that writing code to output PMW from detailed setting not like typing only "analogWrite();" offers more flexibility.
Here is the video showing the result. and the code can be download from HERE.
the sound contains many noise but beat and tone are recognizable. enjoy.
Refference
- Engbedded Atmel AVR Fuse Calculator
- Programming an ATtiny w/ Arduino 1.0
- Data sheet of Attiny44