Output Devices
2. Program it to do something.
Speaker
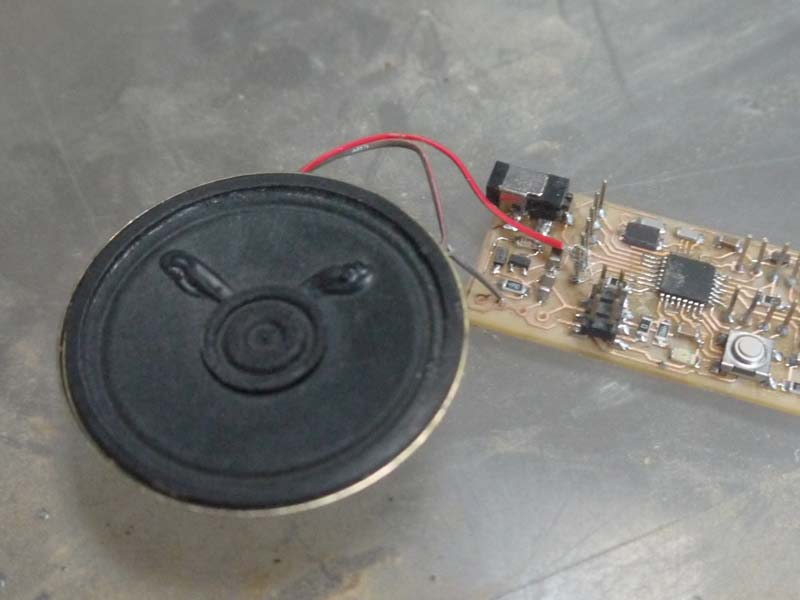
In preparation for FAB9's Musical Instrument competition I wanted to learn about playing tones on a small speaker. I am working on a dedicated circuit for this instrument using an ATTiny and several switches that all share a single input pin. Provided that only one switch is pressed at a time I can tell which one it was by using a different value resistor between each switch and the data line.
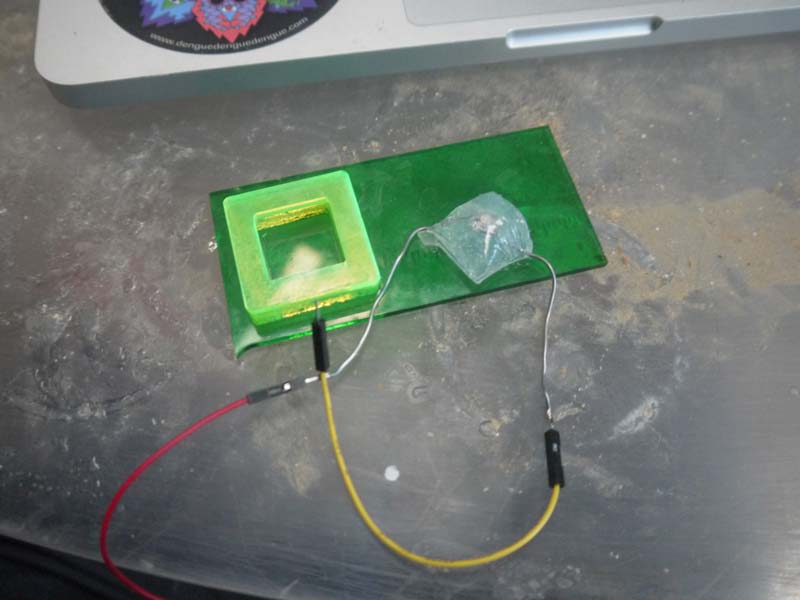
The instrument will be entireley encased in silicone, something which I realise isn't very FAB friendly due to the parts not being accessible but it is something that I have been wanting to experiment with for a long time. In order to actually make some sound the front of the speaker will however be exposed.
Yes, that's a stock Arduino in the video. Apologies. I didn't have the Fab Arduino to hand at this point.
Below you can see the test mould that I lasercut for the silicon button along with the speaker I will be using. Right now it is being powered without any sort of amplification directly from the output pin, this is probably an aweful idea in the long term but it is sufficient for my requirements right now.
# Code adapated from http://www.arduino.cc/en/Tutorial/PlayMelody

# Tones
#define  cT     3830    // 261 Hz
#define  dT     3400    // 294 Hz
#define  eT     3038    // 329 Hz
#define  fT     2864    // 349 Hz
#define  gT     2550    // 392 Hz
#define  aT     2272    // 440 Hz
#define  bT     2028    // 493 Hz
#define  CT     1912    // 523 Hz
// Define a special note, 'R', to represent a rest
#define  RT     0

// Use a PWM pin (digital 9, 10 or 11)
int speakerOut = 9;
int DEBUG = 1;

void setup() {
  pinMode(speakerOut, OUTPUT);
  if (DEBUG) {
    Serial.begin(9600);
  }
}

// Set overall tempo
long tempo = 10000;
// Set length of pause between notes
int pause = 1000;
// Loop variable to increase Rest length
int rest_count = 100;

// Initialize core variables
int tone_ = 0;
int beat = 0;
long duration  = 0;


// MELODY and TIMING  =======================================
//  melody[] is an array of notes, accompanied by beats[],
//  which sets each notes relative length (higher #, longer note)
int melody[] = {  CT,  bT,  gT,  CT,  bT,   eT,  RT,  CT,  cT,  gT, aT, CT };
int beats[]  = { 16, 16, 16,  8,  8,  16, 32, 16, 16, 16, 8, 8 };
int MAX_COUNT = sizeof(melody) / 2; // Melody length, for looping.

// PLAY TONE  ==============================================
// Pulse the speaker to play a tone for a particular duration
void playTone() {
  long elapsed_time = 0;
  if (tone_ > 0) { // if this isnt a Rest beat, while the tone has
    //  played less long than duration, pulse speaker HIGH and LOW
    while (elapsed_time < duration) {

      digitalWrite(speakerOut,HIGH);
      delayMicroseconds(tone_ / 2);

      // DOWN
      digitalWrite(speakerOut, LOW);
      delayMicroseconds(tone_ / 2);

      // Keep track of how long we pulsed
      elapsed_time += (tone_);
    }
  }
  else { // Rest beat; loop times delay
    for (int j = 0; j < rest_count; j++) { // See NOTE on rest_count
      delayMicroseconds(duration);
    }
  }
}

void loop() {
  // Set up a counter to pull from melody[] and beats[]
  for (int i=0; i<MAX_COUNT; i++) {
    tone_ = melody[i];
    beat = beats[i];

    duration = beat * tempo; // Set up timing

    playTone();
    // A pause between notes...
    delayMicroseconds(pause);

    if (DEBUG) { // If debugging, report loop, tone, beat, and duration
      Serial.print(i);
      Serial.print(":");
      Serial.print(beat);
      Serial.print(" ");
      Serial.print(tone_);
      Serial.print(" ");
      Serial.println(duration);
    }
  }
}
Hello LCD
I also made the Hello.LCD board in preparation for the networking week, I ended up making three boards before I could get it to work. Unfortunately I don't have a video of the demo C app running on it but I will get it on here as soon as possible.
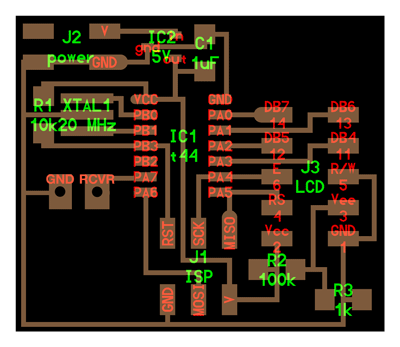
I modified the original hello.lcd board so that it could receive data from another board.


- Computer-Aided Design
- Computer-Controlled Cutting
- Electronics Production
- Computer-Controlled Machining
- Electronics Design
- Molding and Casting
- Composites
- Embedded Programming
- 3D Scanning
- 3D Printing
- Input Devices
- Interface and Application Programming
- Output Devices
- Networking and Communications
- Machine Design
- Applications and Implications
- Project Development
- Final Project - Beehives