Molding and Casting
2. Machine it.
3. Cast parts from it.
Due to the amount of time it takes to mill a mould we were strongly encouraged to start milling as soon as possible this week. I knew in order to have something completed this week I should stick to a simple design, and with Easter around the corner I thought I'd try and go down the chocolate route.
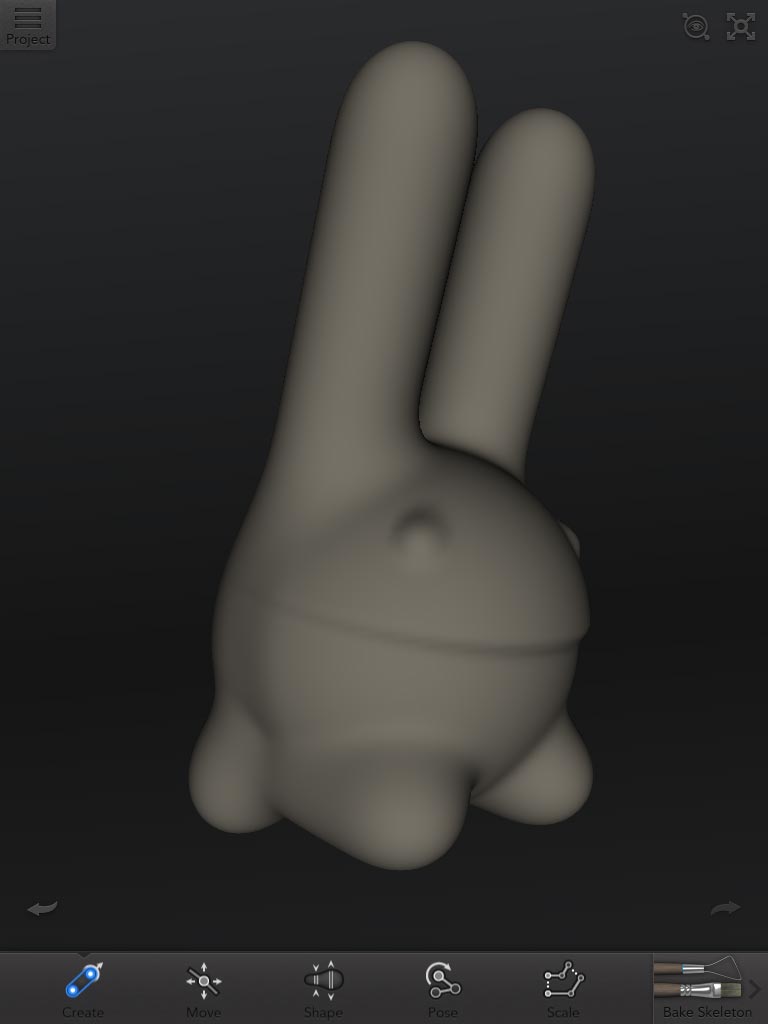
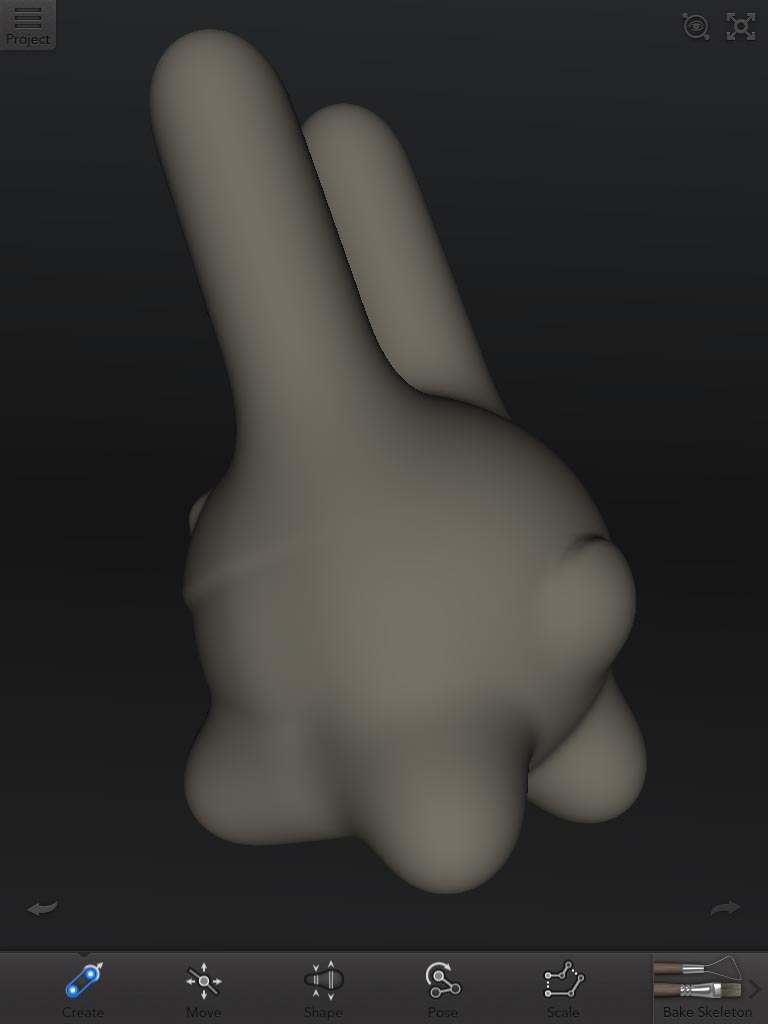
I wanted to try something different for my design this week and decided to use my iPad instead of the standard keyboard/mouse combo. A quick browse on the App Store later and I had half a dozen apps to try. After playing around with them all my favourite by far was Autodesk's 123D-Creature, it was very intuitive to use and within about 15 minutes I'd made a model I was happy with. After consulting with our in-house moulding gurus (Evan and Natassa) I realised my first design had impossible features. I went back to the drawing board, this time constantly rotating the model and considering the angles of approach for the milling bit.
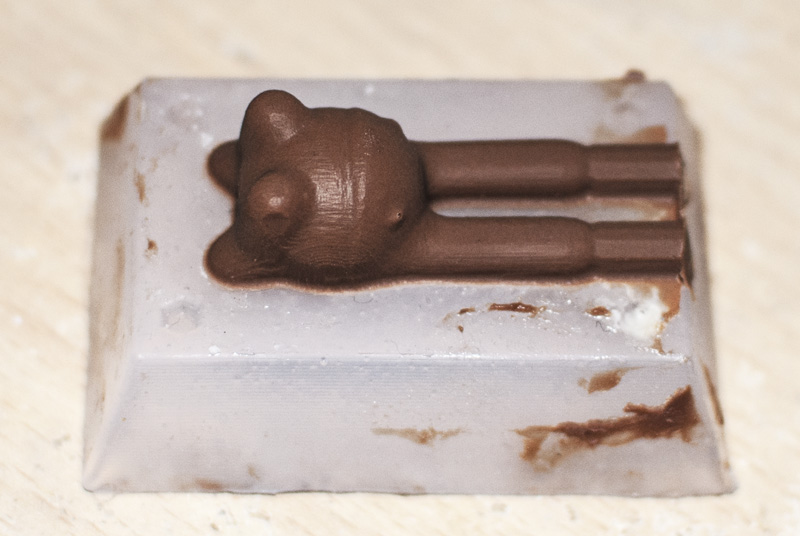
My final design was this strange looking Rabbit.
Working with OpenSCAD
I exported the model to .stl and imported it in rhino. Evan, an American OpenSCAD whizzkid, had written a python tool to convert a .stl to a mould with registration points. I am still going through the code but will comment it and put it here once I'm happy that I could actually replicate it.
Once openscad generated the .stl for the two moulds, I imported them into rhino to position them at 0 on the z-axis. I found that the beta version of Rhino 5 for mac had a terrible time doing this simple task. After 10 minutes of trying I conceded and together with José Pablo we acheived it in 30 seconds on Windows.
The .stl was imported into Fab modules and I did a rough cut with an 1/8" rounded drillbit and then a fine cut with a 1/16" bit. The process probably took about 4 hours in all.
We also had tutorials on how this could be done with both Rhino and RhinoCAM. RhinoCAM looked like an incredibly powerful plugin, the simulations alone were far and above what I thought we'd be able to do on this course. I will definitely look at using it on future projects.
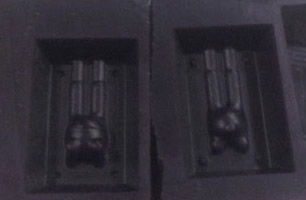
Making the Silicon Mould
I used the Sorta-Clear 40 silicone mix as it is declared 'Food safe'. To get the right consistency I mixed part A to B in the ratio 10:1. I left it in the lab over the weekend and came back to find it had dried perfectly. There were some bubbles inside the silicone but nothing on the suface.
Filling with Chocolate
-
 The chocolate can become overcooked extremely quickly
 -
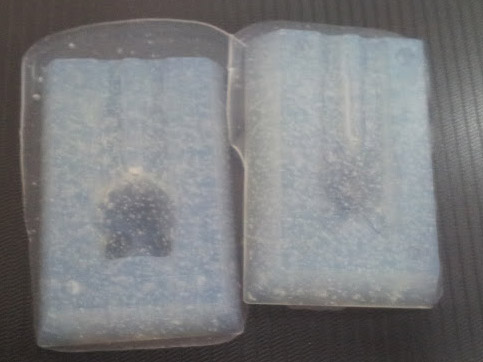
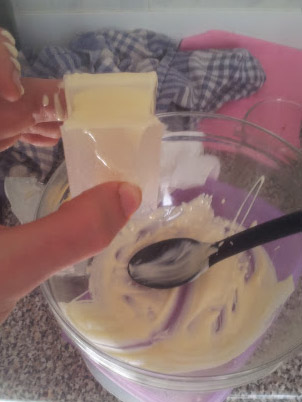 White chocolate in the mould
It took me a lot of attempts to get this part right. In order to get the right consistency of chocolate I recommend you do the following things, you should not need to add milk or cream etc if you follow these steps -
Chocolate Melting Tips
- Buy good quality cooking chocolate (I used the cheapest chocolate I could get, this was a bad idea)
- Melt over the lowest heat you can in a Bain-Marie Use a microwave instead if you like (lowest setting, stir every 15 seconds), but I got much better results with the stove.
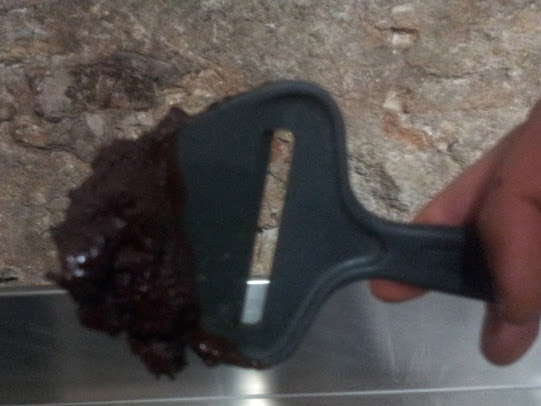
- Use a glass bowl with the Bain-Marie, don't let the water in the pan touch the bowl, stir with a plastic spatula. When I used a metal bowl I completely the chocolate every time (see picture).
- The second that the chocolate is completely melted, remove it from the heat and continue to stir
- Pour it into your mould. If it is sticking in the funnel and not filling the mould you can poke it through with a cocktail stick. Once filled I wrapped the mould in tape and stood it in the top of the freezer for 15 minutes to set.
Final Results
I'm quite happy with the way things turned out this week although it was a bit of a nightmare to photograph the fabbits because they would start to melt as soon as I touched them. I think this might be because of the quality of the chocolate I used but it has definitely made me think more about moulding and I am sure that I will revisit this area of fabrication very soon.

What Next?
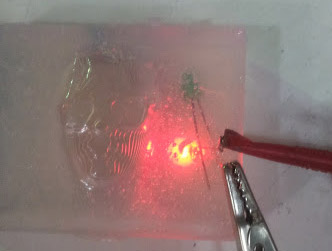
With my leftover silicone I wanted to see if it would be possible to completely encase an electric circuit inside it as I assumed that it would be nonconductive. I put some LEDS inside the mould and let it set, then managed to light them with some external power. Apart from heat dissipation issues I think that it looks like it might be possible. I'd like to make something that was completely water resistant and self powered, e.g. a solar powered sensor box that could be placed inside an aquarium.

- Computer-Aided Design
- Computer-Controlled Cutting
- Electronics Production
- Computer-Controlled Machining
- Electronics Design
- Molding and Casting
- Composites
- Embedded Programming
- 3D Scanning
- 3D Printing
- Input Devices
- Interface and Application Programming
- Output Devices
- Networking and Communications
- Machine Design
- Applications and Implications
- Project Development
- Final Project - Beehives