Computer-Controlled Cutting
We've started playing with machines! This week we were challenged to design and make (a) A vinyl sticker for our laptops, and (b) a Press-fit kit out of 6mm corrugated cardboard.
I'm still very much a beginner in the realm of 3D design so I opted to work on my vinyl sticker first. Falling into the category of a stereotypical Mac geek, I wanted something to complement the ever-glowing logo on the back of my lid. After a bit of looking around, I thought that a lot of the current offerings were quite primitive. If possible, I wanted to try and create something a bit more complex.
My initial plans were to take elements from something ornate like this Owl (by the talented Hydro74).
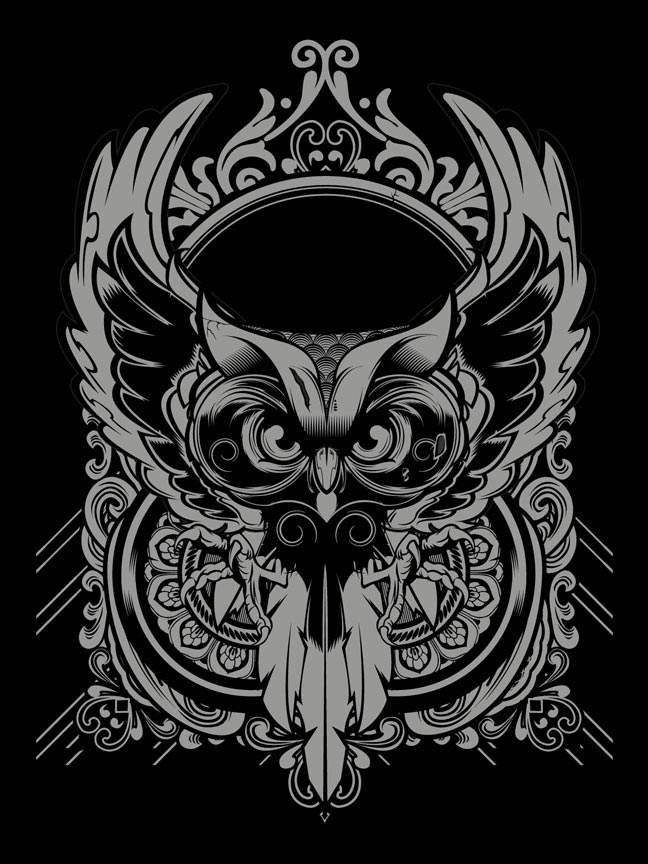
However, I quickly realised that this wasn't a great plan for vinyl as it would be incredibly painstaking to pick out all of the individual pieces in the design.
I was told that I could laser-etch the lid at some point so with that in mind I settled on something a bit more straightforward for now...
-
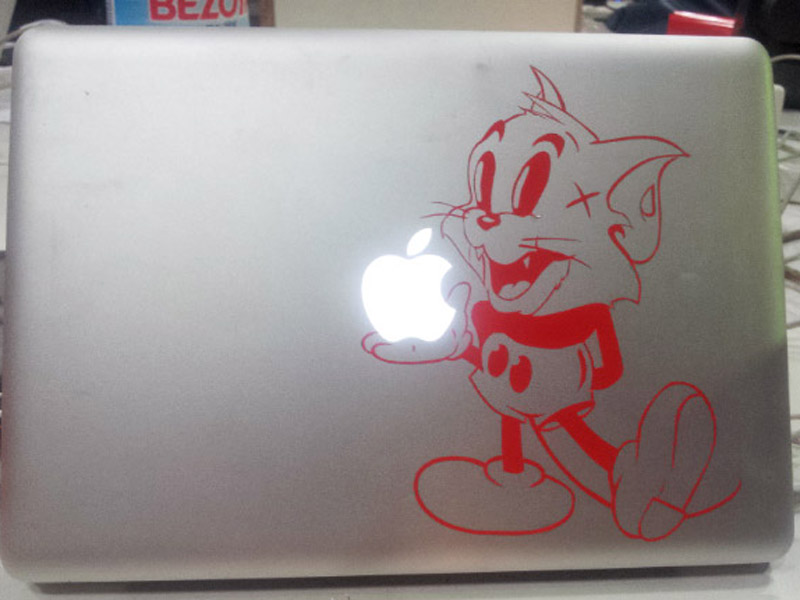 The final outcome, it was very fiddly to peel and place!
 -
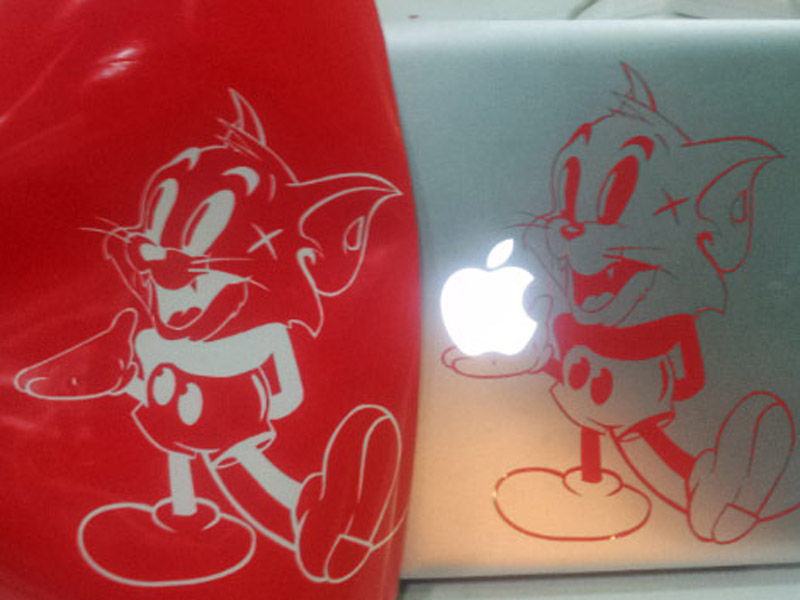 The positive and negative
 -
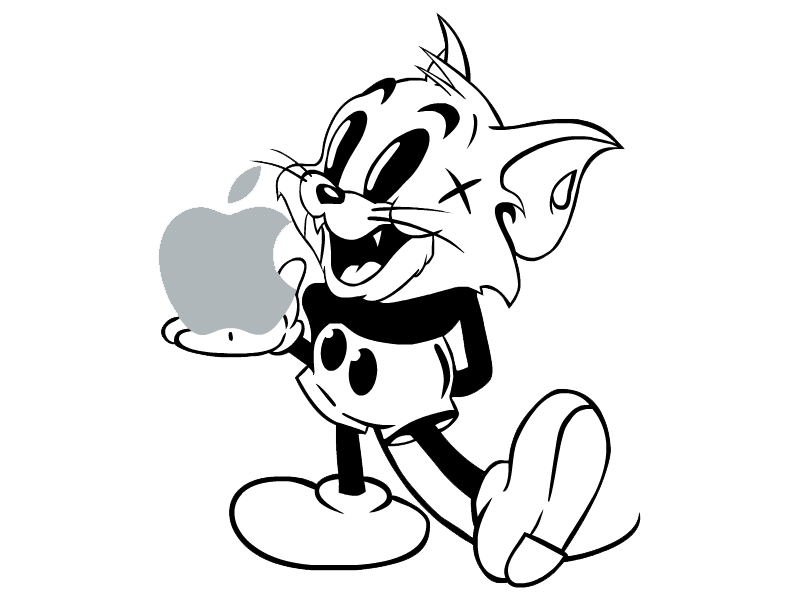 The vector I designed, with a mockup of the Apple logo to ensure it fitted correctly when cut.
The original mashup/image was also by Hydro74, I could only find small bitmaps of it where it was a photo of sticker stuck on a wall. So I had to distort it back into the right shape and then trace the lines I could pick out.
I first tried to trace it with Inkscape as we were advised to use open-source software whenever possible. I spent a few hours tracing and although I learnt a lot using the software I knew I'd be quicker with tools I'm familiar with. In the end I opted for my (unconventional) drawing tool of choice, Adobe Flash CS6. My flatmate lent me her Wacom tablet and, after some tweaking of the bezier curves, I had a passable vector trace in about 20 minutes.
I think my colleagues now assume I'm in some sort of romantic relationship with the Vinyl cutter as I am constantly standing near it or obsessing over it, it's definitely a love-hate situation.
Fab Modules and CUPS
I finally got round to installing the Fab Modules this week. It went without a hitch, on both Ubuntu and OS X.
I'm used to being spoilt by the convenience of package managers, so when I couldn't use my trusty homebrew to install CUPS drivers I followed the instructions that were in the INSTALL.txt file. This caused a myriad of problems. I ended up using Ubuntu all the time as the CUPS drivers kept meddling with my system files.
After a few slip ups I managed to cut the correct size using fabmodules, although I did find one little 'bug' pop up a few times for people -
If you are exporting a black and white png from photoshop, make sure you use Save As and not Save to Web. If you don't do this, fabmodules will assume that you are using 72DPI, in my case I was using 500DPI so the image cutting area was significantly enlarged. Also ensure that there is no transparency in your image, all areas should be black or white as transparency causes strange box shapes to be drawn for the cutting path.
After untangling the pile of spaghetti of vinyl that I cut I managed to get something that resembled the original image stuck onto my lid. If I was to do this again I'd definitely opt for a shape with thicker and simpler lines!
Press-Fit Rocket
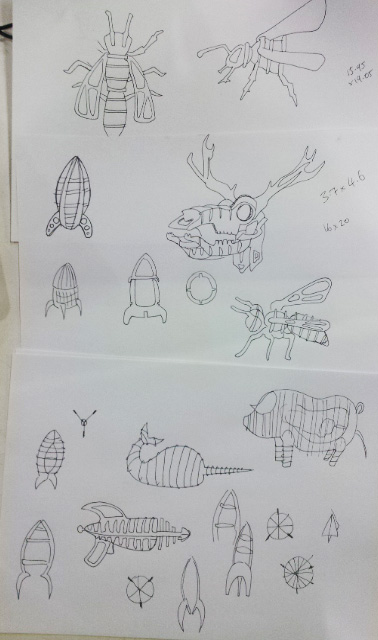
The issues with CUPS drivers on my Mac set me back a couple of days this week as I needed to reinstall the OS a couple of times. I had lots of grand ideas for what I'd like to do, ranging from a wall-hanging octopus iPad holder, to a ray-gun to a wasp.
I found Pinterest to be a great resource for making visual bookmarks of what I liked and I made a 'board' here - Press-fit ideas
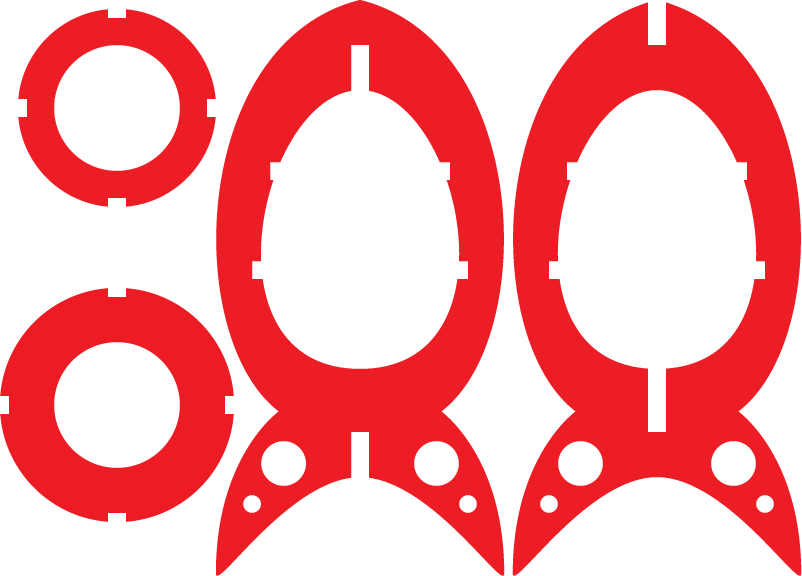
After some quick doodling in the lab I decided that a simple rocket structure might be a good project for my first ever endeavour with the laser cutter. So I made a parametric design in Inkscape which I could then import into Rhino.
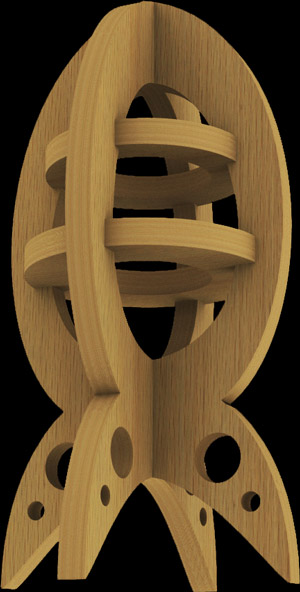
And below you'll see a rendered mockup, my first ever render! In wood because I couldn't find any corrugated cardboard textures (yet). After doing this I laid the pieces out on a single plane, like the red image above and exported to an AutoCAD format so that it could be formatted and subsequently read by the laser cutter.
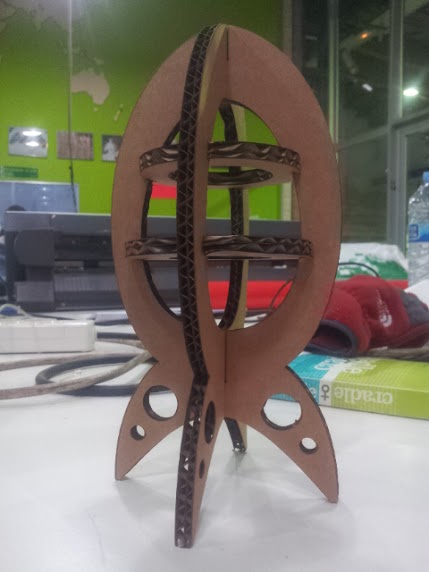
After hastily sending my design to the server and cutting the rocket, I realised there were some fundamental flaws in my original design. Namely that I couldn't fit the two main parts of the structure together without slitting something! I suppose this demonstrates my naivety with 3D modelling. Thankfully cardboard is relatively forgiving and I was able to make an invisible slit in the structure and then force the circular ribs into place. I look forward to revisiting work with the laser cutter and hope to make a more impressive press-fit structure before my time is up on this course.
What Next?
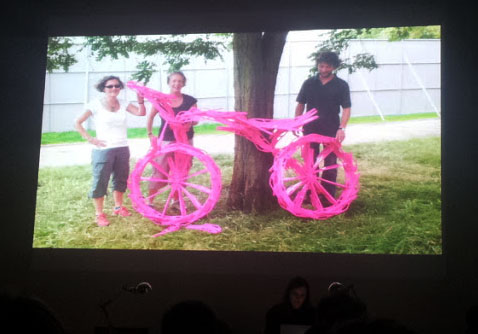
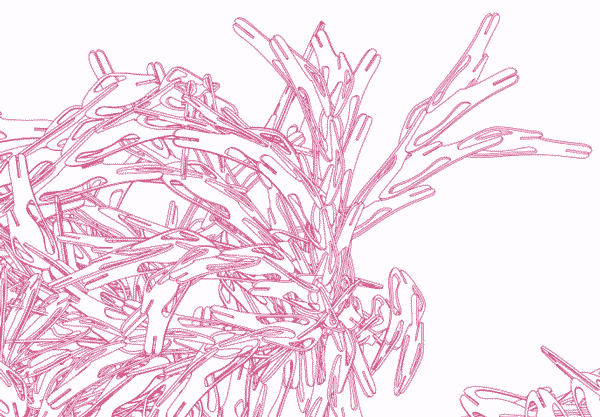
Alisa Andrasek gave a lecture at IAAC last week, which concluded with details on her work on Bloom - an interactive art project based on a single piece of plastic that has three different points of attachment. I was fascinated by how diverse the structures were that it could create. She told me that when they were designing the shape, they modelled some of the possible recursion trees with Rhino (I assume they used it in combination with Grasshopper or a similar tool). Initially I wasn't too excited about the idea of creating an abstract shape as I felt a lot of the structures looked quite alike, but after seeing her work I am keen to explore what I could potentially create.

- Computer-Aided Design
- Computer-Controlled Cutting
- Electronics Production
- Computer-Controlled Machining
- Electronics Design
- Molding and Casting
- Composites
- Embedded Programming
- 3D Scanning
- 3D Printing
- Input Devices
- Interface and Application Programming
- Output Devices
- Networking and Communications
- Machine Design
- Applications and Implications
- Project Development
- Final Project - Beehives