
Juan Ranera
Fab Academy 2013 Participant
Output devices
The assignment in the last week was add an output device to a microcontroller board and program it to do something.
This week I've decided to control a motor with an Arduino board using
"PWM" signal, because my final project have four motors and
is very important to me to Know more about how to control a motor through Arduino board. There are a lot of samples and tutorials about control
motor with Arduino and my colleague and me decided to test a simple circuit with a Mosfet.
This tutorial explain very well a similar circuit.
Also I've used a "Processing" as interface to change the motor speed with the mouse
movement because I really liked the experience of last week and I wanted to learn more about it.
Circuit scheme:

MotorPWM is connected to digital output pin 9 and the ground is connected to the ground of Arduino board. Vbat is connected to a power supply with 12V, because is the voltage of the motor.
The motor I've used is the same model that I will use to move the platform of my final project. It can rotate at 120 rpm and has a power of 40 Watts. You can find more features "here".
Image of the motor:

I've started to design the board that will move the motors in my final project. I will use more powerful mosfet and gate drivers to ensure correct switching. In a few days I'll upload the new design, in the section of the final project.
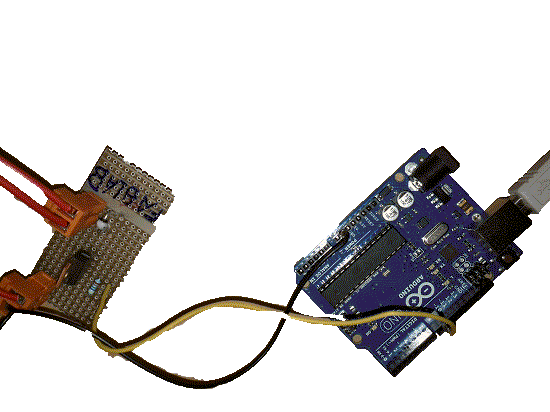
Image of the prototype board with mosfet:
Processing code:
/*
April 2013
By Joan Ranera
Fablab 2013
*/

import processing.serial.*;

import cc.arduino.*;

Arduino arduino;
PImage img;
PFont font;
int zero_zone  = 20;

void setup() {
  size(512, 512);
  arduino = new Arduino(this, Arduino.list()[0], 57600);

   font = createFont("SansSerif",1);
  textFont(font,20);
}

void draw() {

 background(constrain(mouseX, 0, 255));

//Neutral zone: the engine is stopped in this area (protects motor sharp changes)
 if ((mouseX < 255 + zero_zone) & (mouseX > 255 - zero_zone)){
      arduino.analogWrite(9, 0);
      arduino.analogWrite(11, 0);
 }

//Half of the screen to the right, you can move an engine through output
pin 9 Arduino UNO
 if (mouseX >= 255 + zero_zone){
    arduino.analogWrite(9, constrain(mouseX, 255, 512));
    arduino.analogWrite(11, 0);
  }

//Half of the screen to the left, you can move another engine
through output pin 11 Arduino UNO
  if (mouseX < 255 - zero_zone){
    arduino.analogWrite(11, constrain(255 - mouseX , 0, 255));
    arduino.analogWrite(9, 0);
  }

  //Print my name
  textFont(font,20);
  text("Juan Ranera",330,438);
  textFont(font,20);
  text("FabLab 2013",330,458);
}
In the video you can see the voltage and current in each momente through the power supply and the PWM pulses through the oscilloscope.