
WEEK 07 : MOULDING AND CASTING
Design Brief for Moulds
The assignment this week was to "design a 3D mould, machine it and cast parts from it". I have become accustomed to using Rhino 4.0 on windows to create models and wanted to continue to do so. Designing the mould had its own particularites and protocols to consider. Listed Below:
The Design has to:
The Mould has to:
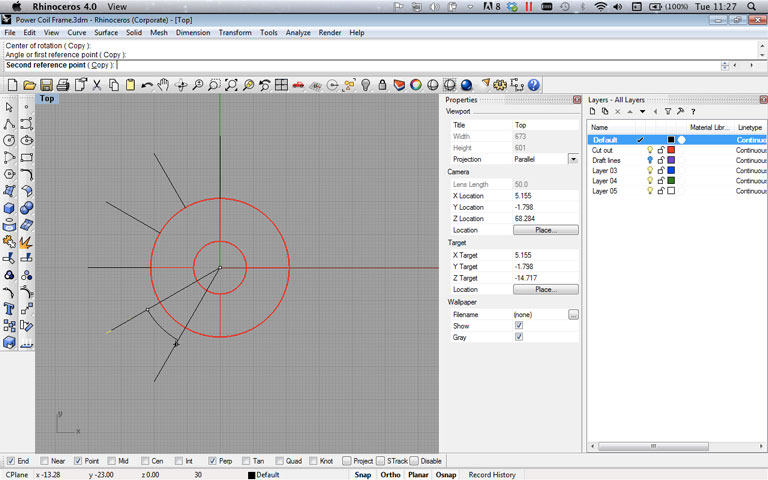
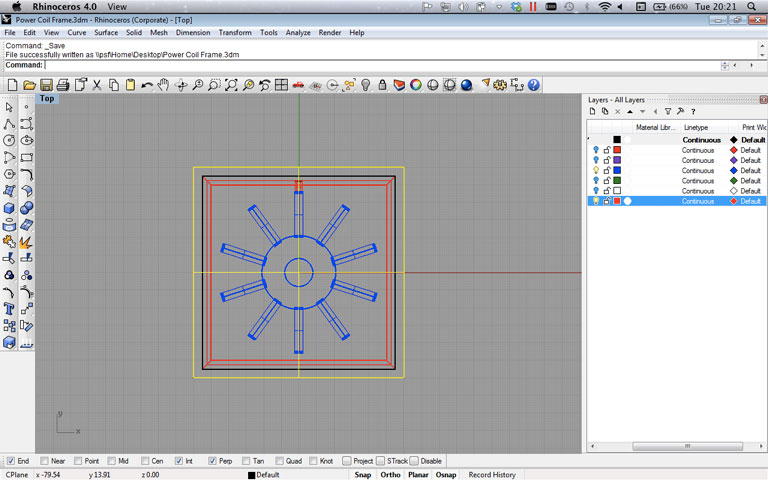
Component / Object design : Power Coil Spool
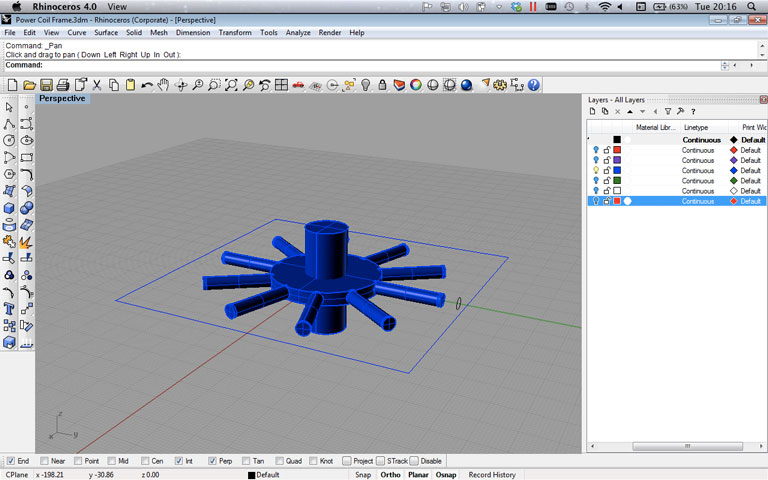
It occured to me that the mould and casting process has benificial properties that should be taken into account when deciding on a design. This is to say that the counter-mould produced can be re-used multiples of times over, the object then should be something that you would wish to be replicable and not a one off. I have decided to make a power Coil Spool (a part of the Major Project). This will house copper wire and will be a main component of the modular dynamo system. It will be a stationary core of the dynamo but should be heavily durable and robust enough to withstand the impacts and jolts that occur during a cycle ride. Ultimately it will also have to be water proof and easily cleaned.
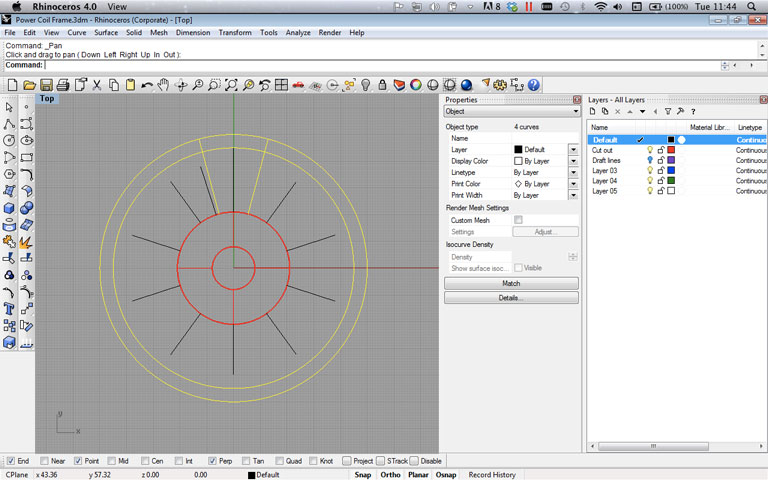
I found that my design was becoming rather complicated. That the necesities of the desin itself worked against the moulding process and that compromises would have to be made. I removed unnesasary parts of the design and told myself it would have to be an assembly kit with multiple parts.I removed the stops at the end of each spoke so that i would not have to design-in air release holes on each one.
Tool Paths and Gcode
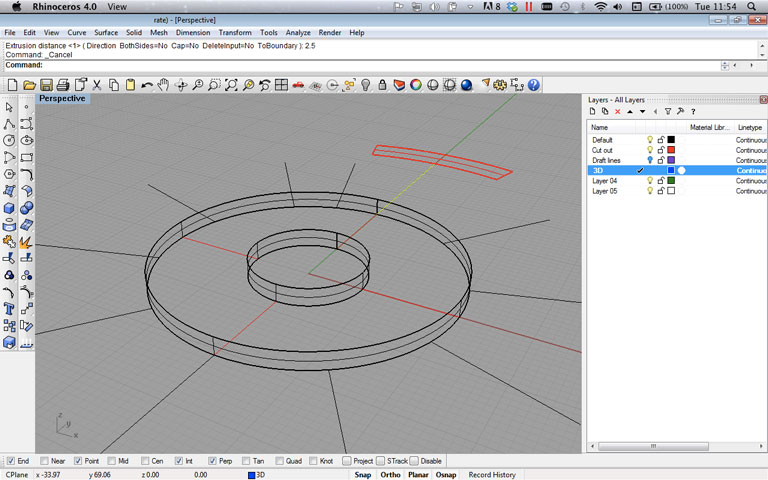
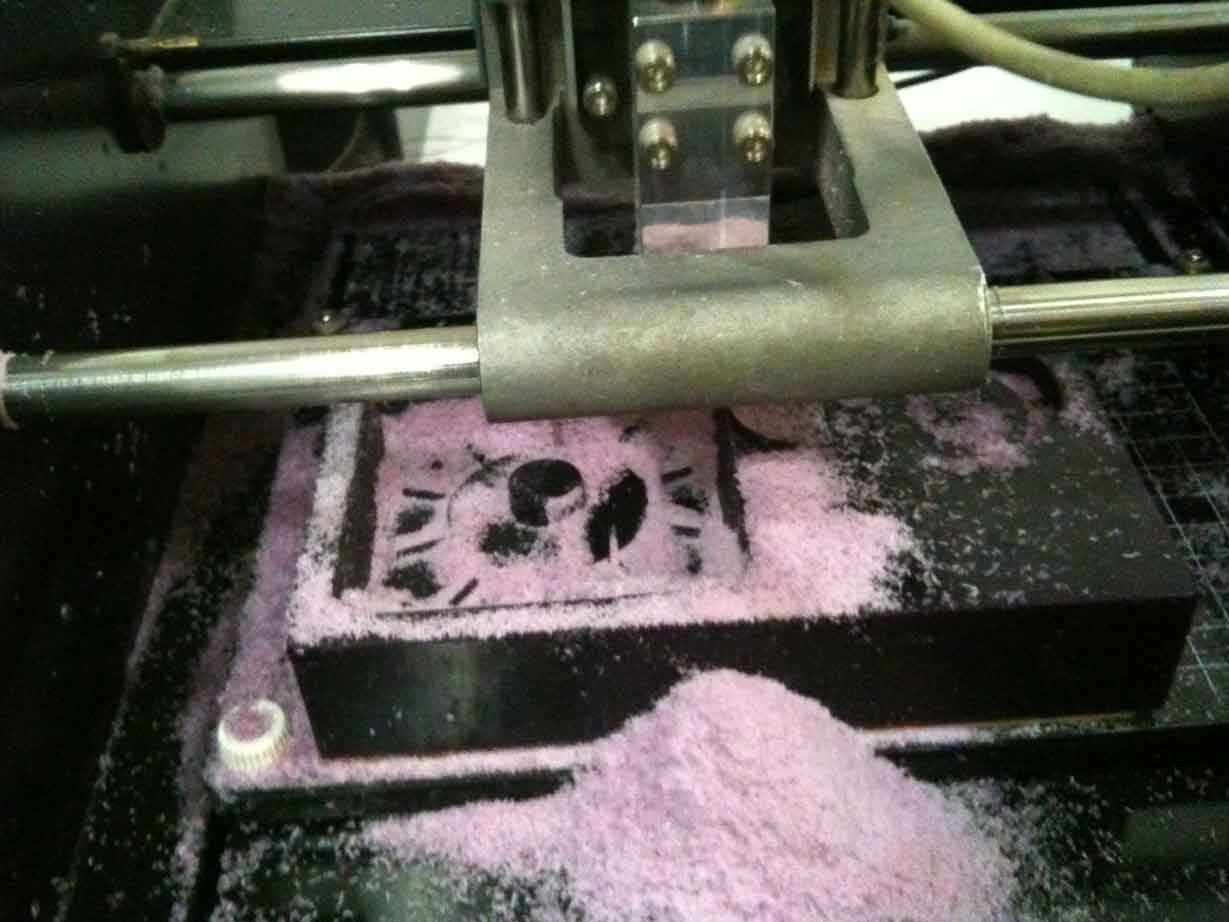
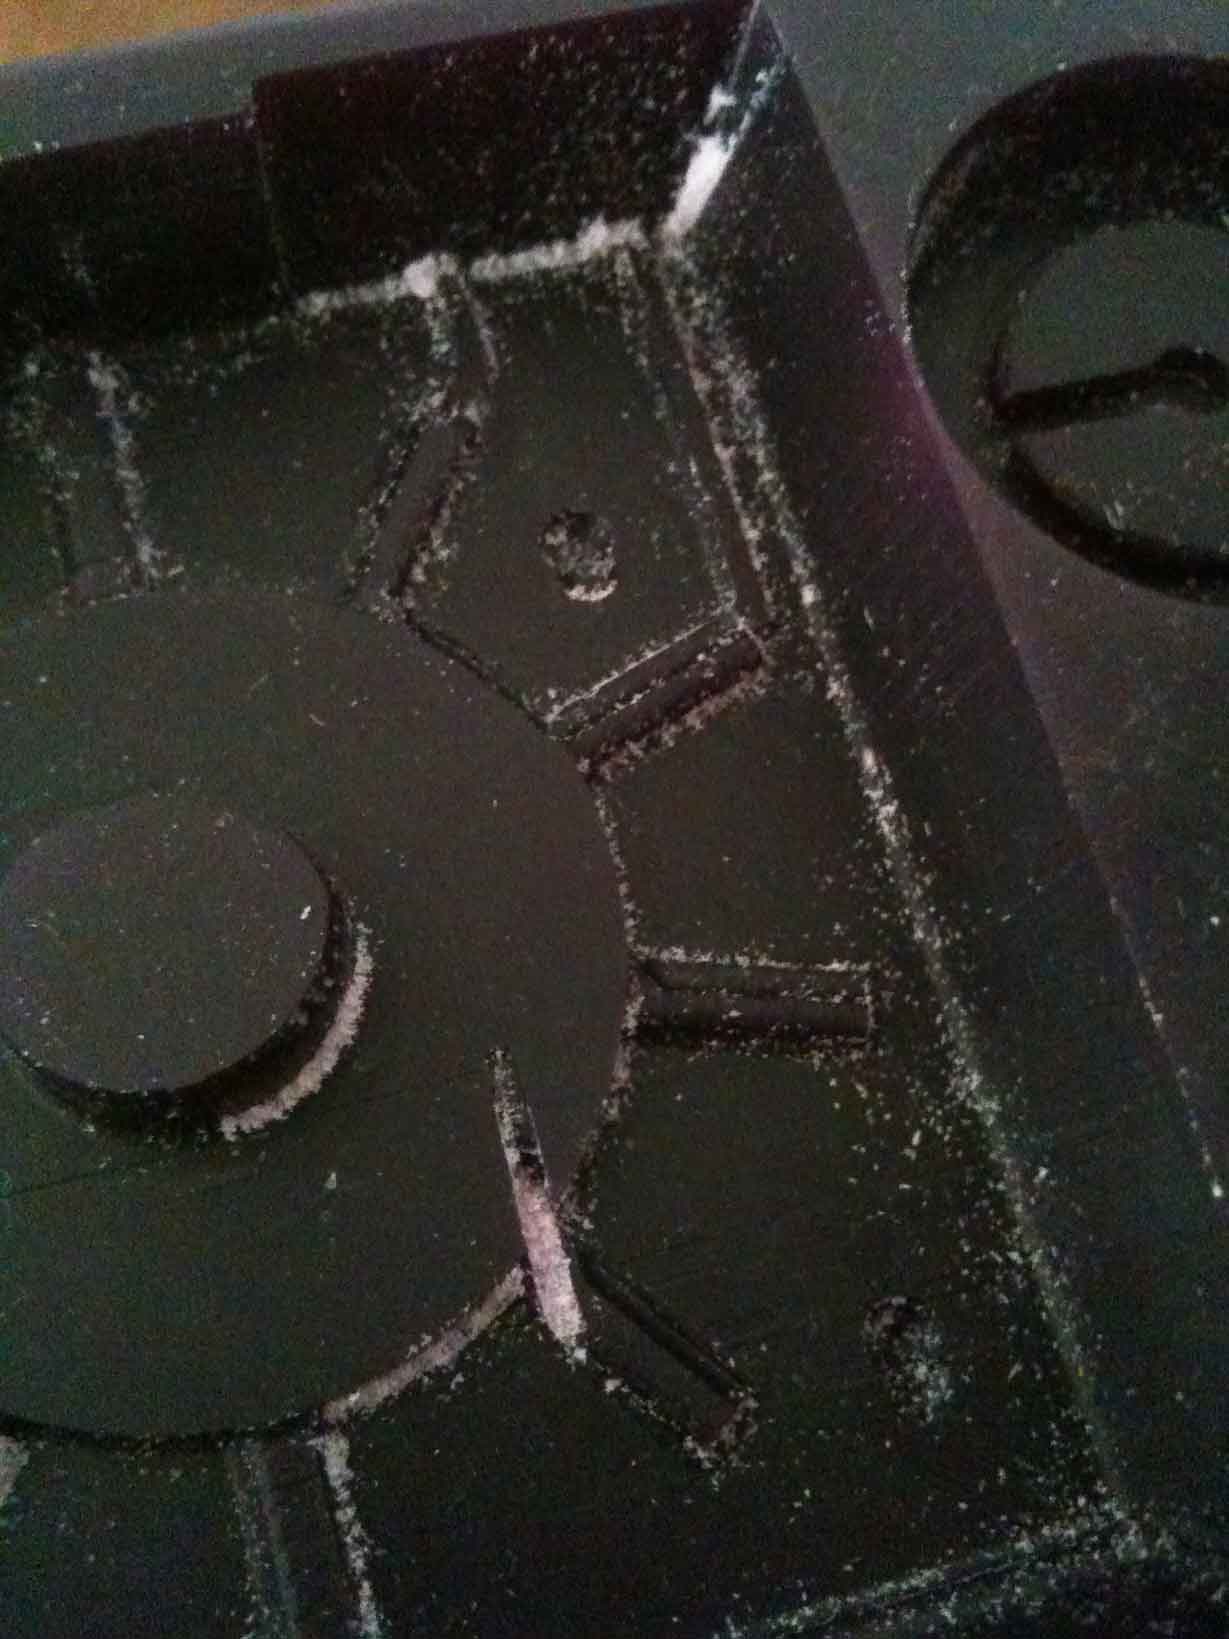
Considering the tool paths and getting the bits and measurements right was crucial to a successfull and uneventful machine job. We had had a lecture on the use of Rhino CAM but settled for using Fab Modules to generate readable Gcode and machine paths. I had exported my model as an .stl and generated the .png file using Fab Modules but luckily and unhappily after starting the machine process i found that the design was being printed at both at twice the expected scale and at 0. Z axis which was above the machineable wax block. After several redesigns i got it to work, However i had noticed on close inspection after the event that the entire design was slightly stretched. ... bummer!
Milling Problems
Several things went wrong during the milling process. The rough cut went without fault but the second finishing pass took took hours and hours to do complete! I am still unsure as to why this was. Also it seemed that the Roland i Modela had a jolt or the bit dropped lost its tracking during the last quarter of the process. This meant that all cuts it made after that point had been shifted up the y axis about 2mm
Oomoo. A hard to soft process.
Registration point / Mould / Counter Mould. Hard to soft processes. Blow mouding, Vacum moulding, Soft Moulding, Flashing, Really important to do small tests for a big casting with mixes. Bubbles are the enemy. .. machinable wax ... positive side .. Negative side = counter mould. Materials!!! "UMU" , Lost wax casting. Grenade lamp. polyeurothane rubber, polyeurothane plastic, polyeurothane foam. Drystone. Tooling!! Important... Drill bit collision!! refined of heavy bit selection. Variables Determining depth! Length Blade / Cutting Length / Total Length / Distance from Chuck. Rhino CAM (post processor) Horizontal buffing.. multiple passes. Presix Milling Machine. "Shopbot Milling Machine" Diameters, CNC .. xyz axes .. png can work colour gradient to step levels through greyscale .. .stl Binary / (text)
KEY RESOURCES:
Week 7 Class Lecture : Mouding and Casting
Week 7 Homework Review
Week 7 : Bubbles in my oomoo!