Computer-controlled cutting.
This week there were two assignments. One was to produce something with the vinyl cutter. In this case that would be a sticker of sorts. The other assignment is a bit more in depth, and requires you to create a snap-fit kit using the laser cutter.
Vinylcutter:
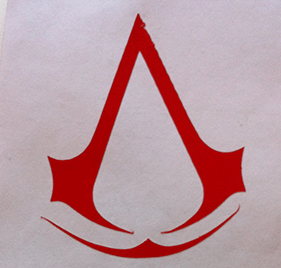
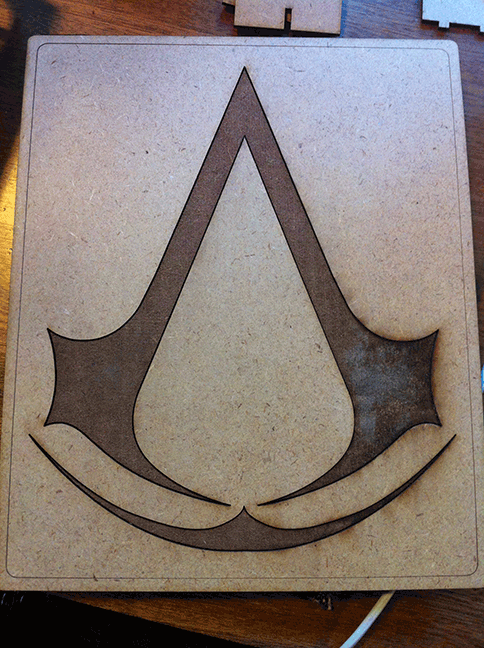
For the vinylcutter, I settled on designing a logo to be cut out as a sticker. I popped into Adobe Illustrator and ended up re-creating a logo of a popular franchise (if you must know, it's a logo from the Assassin's Creed game series).

After creating the logo, I popped a piece of vinyl into the vinyl cutter and fiddled with my settings a little. After a small test to check the force and depth of the cut I sent the logo through and ended up with this cut:
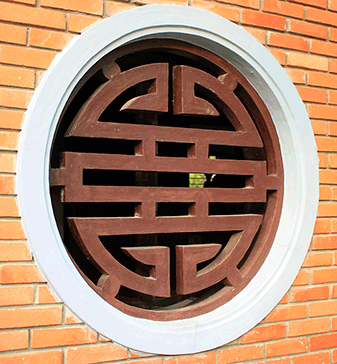
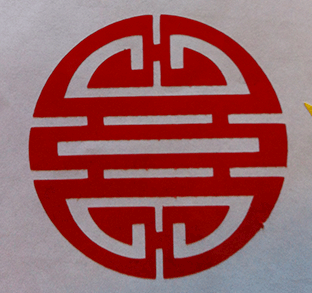
Feeling pretty confident with the vinylcutter, I overlapped a little and took a piece I created for the laser cutter, and decided to let the vinyl cutter have a go at it as well. In this case, it's a pattern that's very common in Asia, that I also created in Illustrator. As a base I used a picture I took while traveling.

Again, I loaded it up and used the standard printer driver to send it to the vinyl cutter, where the result was quite pleasing.
Now that I'm a little more familiar with the vinylcutter, I intend to cut out one of these on a larger size, so I can get used to some of the settings more. I found that it's a little hard to figure out how deep to set the blade sometimes, as the test cut comes off easily, but some of the edges on the designs end up a little jagged and hard to pull off.
Computer-controlled cutting:
For this assignment, we were to create a snap together kit of sorts with the laser cutter.
Recommended was to use an application that allowed for parametric adjustments, so I started in Inkscape. Unfortunately, even after making a few clones I couldn't get the hang of Inkscape, and after talking to the coordinator, I decided to return to Illustrator and create my design in that application.
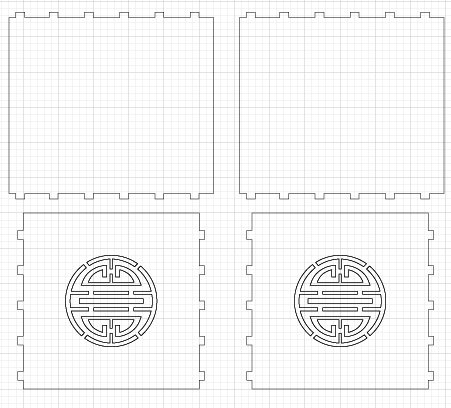
My initial idea was to construct a little house, but I wasn't sure if this would end up being too hard to do. Most ideas that were thrown around were for small modular lego-like pieces. So I started designing a few of those, and ended up with a nice set.
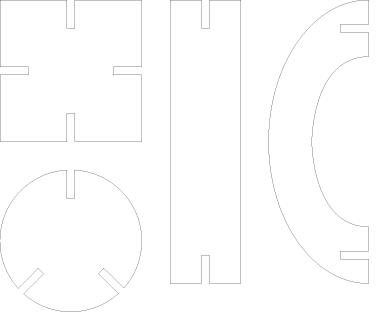
I took this design to the laser cutter, and used the default printer driver. The material I chose to use was 3mm thick MDF, as I like the texture and sturdyness of the wooden material.
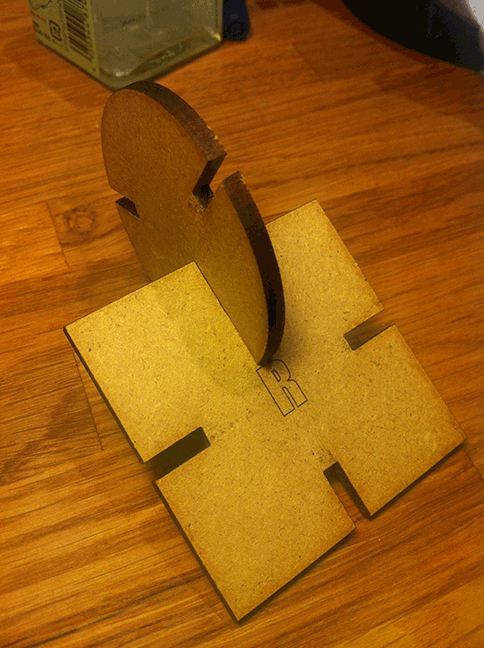
In a daring move, as I loaded up the files to start the cutting process, I added a letter R to one of the shapes I was going to test cut. I gave it one of the other colour settings, so that it would be etched in instead of cut out.
I wasn't the first one to do my test cut, so thanks to Maurice op de Beek we figured out that the laser takes about 0.1 mm of material off of the edge. For the indentations that would mean that 3 mm (the thickness of the MDF) would become 3.2 mm. This would make the designs very loose, and unable to fit together properly. To compensate, I adjusted the width of the indentations to 2.8 mm. This is where a parametric design would've probably been helpful, but it wasn't that cumbersome to adjust in Illustrator.
I ended up with these test pieces, and they fit together very snugly, so that would be a success:
After cutting this test, I got back onto the idea of creating a snap together house. Fitting the shapes together is fun, but I didn't feel it's what I wanted to create (although I fully intend to cut out more of these shapes to fit together a structure).
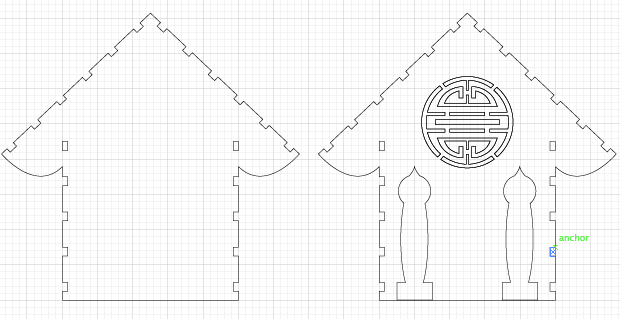
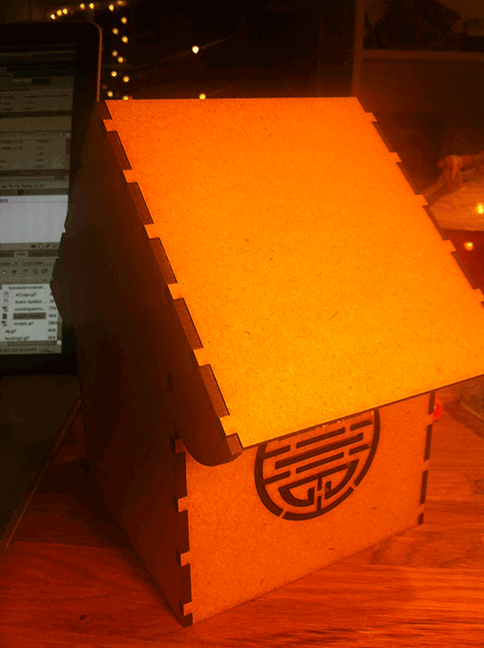
I started designing, and ended up with a little house that looked a little like a temple. I incorporated the asian pattern that I also used on the vinylcutter, to be laser cut out from the sides of the walls. I also added two 'columns' to the design, on the sides of the 'entrance', to be engraved into the wood.
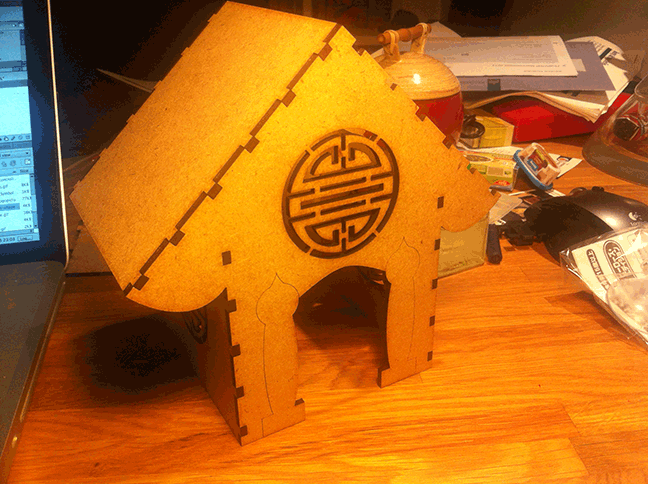
I was very happy with how the design turned out, and I sent it to the laser cutter. I was very pleased with the result, especially with how well the symbol was cut out.
Unfortunately I needed to make one more adjustment to one of the roof tiles. I didn't take into account that there would be an overlap in the nook of the house, so there's a 3 mm overlap (the thickness of the MDF). I will fix this shortly.
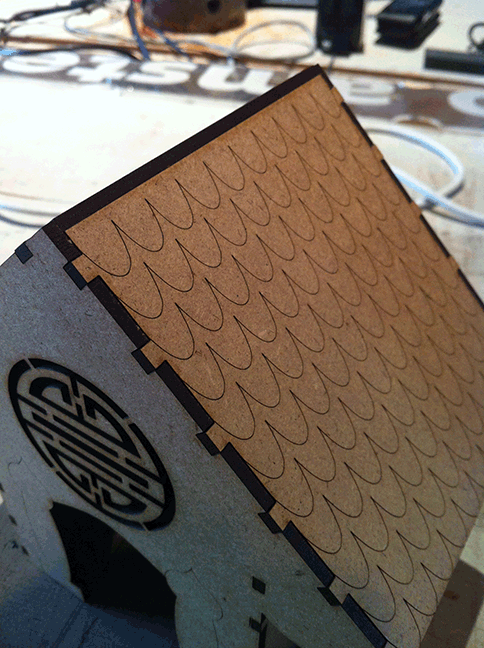
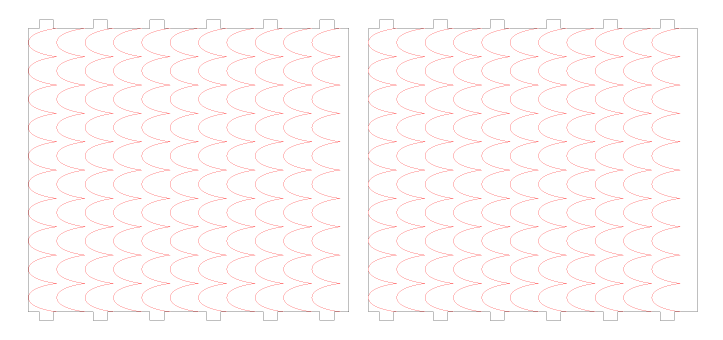
Here is the final version of my little temple (fellow students have dubbed it the 'doghouse' though). As you can see, the rooftiles don't overlap anymore, and they fit snugly. Since I was working on the roof tiles anyway, I figured I'd add some shingles to them with an engraving. The engravings were also created in photoshop, a simple stroked path copied to fit over the entire roof. Here's the design for the roof:
After all this, I was still itching to do some more lasercutting. I still had all the snapfit shapes worked out, so I copied those over to the laser printer and layed out a number of them to be cut.
[Insert picture of cut snapfit shapes here]
I didn't think of anything specific to build with these shapes, so I just started fitting them together in various ways. I noticed that because I didn't chamfer the notches in the shapes, it was a little harder to get them to fit together occasionally, and that there was some quicker wear & tear on the corners.
I ended up with these shapes, something that vaguely resembles a fairly interpretive tree and a less than round structure (which does actually roll for a little if you give it some momentum!
[Insert picture of created snapfit shapes here]
I still had some time left, and I wanted to try out some more cutting. In this particular case I wanted to see how a larger engraving turned out. I grabbed the video game logo that I re-created and sized it up a little in Illustrator. As it was explained to me, all I had to do was change the colour to a different one from the RGB spectrum so that i could match up the settings in the printer driver for the laser cutter. I chose to make the logo (and a little edge that I added) in red, to be engraved. Then the edge to be cut was black to be cut out.

I ran into a few snafus when I sent this over to the laser cutter. All of these lead directly back to me unfortunately. First of all, the sheet of MDF that I cut and engraved this on was not entirely straight, and I didn't use the proper weights to weight it down. The result is that one side of the engraving is a little burnt (you can see this on the right of the logo in the picture below). Another mistake I made is that I actually still had a 0.001 mm stroke in black around the logo that I forgot to remove. Because of this the laser cutter of course went on to cut out the entire shape out of the MDF after engraving.
I got a little lucky, because the board was a little bent, it didn't manage to actually completely cut through, so it's still stuck to the board mostly (this can be seen in another picture below)
[Insert picture of back of board to show faulty cut]