Week topic
"The multimeter is very handy, the oscilloscope is a disaster to work with (but sometimes you have to)"
This week I got my 3D printer and small milling machine. The printer I have to let go for a whole week as we focus on electronics design. The CNC is not ready yet for home use. We wait for Henk to test it.
In the meanwhile the cold has returned, the corona is still here and national elections are on their way. It is hard to remember that there is an outside world sometimes. Also because I am almost living in my workshop now, which is starting to take shape rather nicely.
And it is Phils Birthday, so we ate pink cakes in class.
Local notes
We are going to focus on electronics design. That means design our own board. Milling and stuffing. Keep in mind that if you are going to use your own machine, you need to make a level-bed. Also the machine-bit are a little different then the two-flutes in the Roland.
Most softwares that Henk tried work. But there were no end-stops... so Henk ordered them and he's gonna test them out. We wait for Henks results.
The week after, we are going to make something large. With the shopbot. We need to make something big. We get one plate of 122x244. But we can decide how thick it will be.
Erwin advices to buy filament from 123-3d.nl. I am doubting if 3dprinthings.be is not better as they have a lot of recycled filaments.
Small introduction to micro-electronics by Henk
Henk gave a presentation on electronics. He shared the powerpoint documentation with us over Mattermost. I will use his images here to clarify my notes.
A Circuit
This is a closed loop that electrons can travel in. Electrons flow = current.
Power sources Batteries and sockets. Plus = V+ GND = Minus Volt is difference between the two
Power supply | DC vs AC - Direct current (Batteries) - has no current, goes in one way. - Alternating current (Socket) - Has a frequency, goes in both ways.
How to measure voltage Your best friend is the multimeter.
Henk show various multimeteres. NOTE When using one; always put on the GND first!
You can also use it to measure resistance.
You can't use a multimeter in a circuit to measure volts and ohm as you also measure all the things around it. You can use it to measure continuity.
the Simplest Circuit
Current = I (Ampere) Resistance = R (ohm) Voltage = V (volts)
R = V/I
We have a special resistor; the ZERO ohm resister. W use this in circuits to bridge over traces; it is a piece of wire.
We make circuits that are "slopes with control". So all electrons don't just fall down.
Power | Watt If the power is higher then the spec of the component, it will burn.
P=VI V=RI
P=(RI)I = R*I
The Simplest Circuit + LED non-ohmic: no resistance... You have to make sure that the push is not to hard (not over 1.8 and) and not too little.
You can use an LED calculator.
You can also lower volts if the ohm is really high. But sometimes some other parts need high voltage and you can only use one powersource.
To Control the LED We add a board to "The simplest circuit + LED". This way we can control wat comes out of it.
We are going to make an Hello world board.
We use a
- ATTiny,
- resistor
- capacitor
- pins out and in
- Resonator / crystal
There is a nice overview of all the components in Henks slides.
For example you can see the ATtiny44 with al its pins. Some pins can translate digital to analogue.
Pins There are two header pins. We are going to use the FTDI pins, not the ISP pins.
We use the Arduino ATtiny44 microcontroller. They use a differetn naming scheme. Make sure to check the translation!
Power Signal This is a scematic Make sure that all VCC and all GND is conected.
Spare component - capacitor Capacitor collects electrons, when full releases them. It is an energy source, but not a battery.
You have non-polorized and polirized versions.
We use very small version. They are measured in Farad. Capacitors can be used to level out noise.
Crystal / Resonator Resonators = (crystal + 2 capacitors) (The new Attinies have these on board.) These are a critical part of the microcontroller circuit; they provide the clock signal. (check slides) Nice video[ children clock]
How to read a schematic This can be confusing. Check the table on abbreviations. You label your components with letters and numbers to tell them apart.
Voltage Notes There are many different ways to annotate; but we often put all the minuses at the bottom and all the pluses on top.
Nets and Junctions A little dot means that a junction is connected. This is important in case lines cross each other.
Net Names You can also use tags to connect two points. So you do not have to draw a wire.
Resistors in series or parallel In series you can add them. But in parallel you have to do some calculations.
Hello ECHO assignment
- Get components
- Design the design
- design the board
- make the board
- profit
Regional notes
- Jeff scanned using phone and used Meshroom to make a nice model
- About the first layer: do it slow and make the layer height bigger
- Ferdi on inverted kerf: this is always 0.4mm
- Check the guiter cap of Lucia: that would be nice to have
- I want to see how to make scans at home... maybe Lucia docs work...
Global notes
Inspirations from around the world
- Also nice docs on scanning at home is here
- Do the banshee test.
- Clearance tolerance! That is the proper word for inverted kerf.
- Timberfill is really nice
- Watch debugging video
Lecture Electronics
- Observe the operation of a circuit board
- make an hello world board.
- add a few components that do different stuff (blinking, buttons etc.)
Crash introduction into components
In the inventory there is a digikey section, which we are going to go through
- Wire
-
AWG; what are the wires parameters?
-
Resistors are mostly used regulate the current. Current limiting resistor.
I=V/R
Capacitor C=Q/V (or CV=Q)
Lets current go through when voltage changes fast.
You have them polarized and non-polarized
We don't use the smallest available so you can drill paths underneath it.
you use them as - filter to reduce noise on the line - extra battery
Polarized capacitors are good for some small amount of energy and fast use of the energy.
Crystals and resonators
These start to move depending on the frequency of the energy going through.
You use them to tell time.
You always need to use them with capacitors.
resonators are a god second.
Inductors V=LÍ
We use inductors to block high frequency noise. It cleans up the signal.
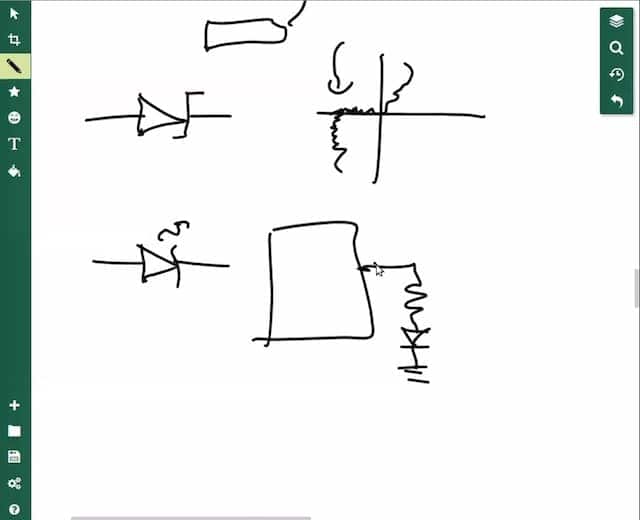
Diode
Prevents the current from going backwards. To block a signal
Note, it is important how you put them!
There is two kinds of diodes we use in particular.
-
Zener Allows for backcurrent to flow.
-
Light emitting diode They have limits on power and current they can handle
We care most about color and brightness of the diode.
Transistors
We use Mosfets.
What happens in the mosfet; there is a gate, drain and a source. They have parameters we care about: - maximum current in handle. - rds: the relation between drain and source - these help us to translate digital signals into actual work
Regulator
The regulator make sure that the voltage is adjusted to the microprocessor. A regulator always need a capacitor next to it. Otherwise they do not work.
op-amp
You use them in a network. They amplify signal. But many microprocessors have them build-in.
Probably not going to use them...
Microcontroller
We need to understand these better. It is a whole universe of stuff. Here comes the datasheets...
Circuits
We need hierarchial parametric drawings.
We use libraries for footprint. We do not draw these ourselves.
- you make a schematic how components go together
- put components on the board. Put the ones that belong together close to each other.
- routing: you need to check where all the traces go. There are auto-routers, but probably you can do this manually better.
- Enforce the design rules! (Think about trace thickness and such.)
Making the PCB's with software
KiCad and EAGLE
KiCad This is a set of smaller programs in one bigger program.
You use them in sequence to design the tool, place components and export the result to mods.
NOTE it is hard to go back into the program...
EAGLE By autodesk. It works really well with Fusion360. Neil says it is a good thing to use when you already have fusion.
Libraries
There are a great number of parts available in those libraries. The KiCad library is maintained. The eagle library not.
Digi-key also has a great Library on all the parts they use.
All big vendors make libraries to make it easy to use their parts.
homework
We need to connect a powersource to a controller. And add a diode to the controller.