10. Mechanical design
- design a machine that includes mechanism+actuation+automation
- build the mechanical parts and operate it manually
- document the group project and your individual contribution
The assignment this week requires that we build a machine that includes (i) mechanism, (ii) actuation, and (iii) automation. Lennard, from Ingegno Lab, had a old prusa printer stopped and he wants to do something with the pieces of the 3D printer. We decided to use the important parts of his old printer to create a 2D drawing machine. The design of this drawing machine was split into two parts: (i) drawing the necessary parts to make the supports for the machine and (ii) finding the correct firmware to upload the board for making the drawing machine to work.
The main parts reused was:
- 2 NEMA 17 stepper motors
- 2 endstops
- the power supply
- mini RAMBo 1.3 board
- LCD screen
- 6 roller bearings
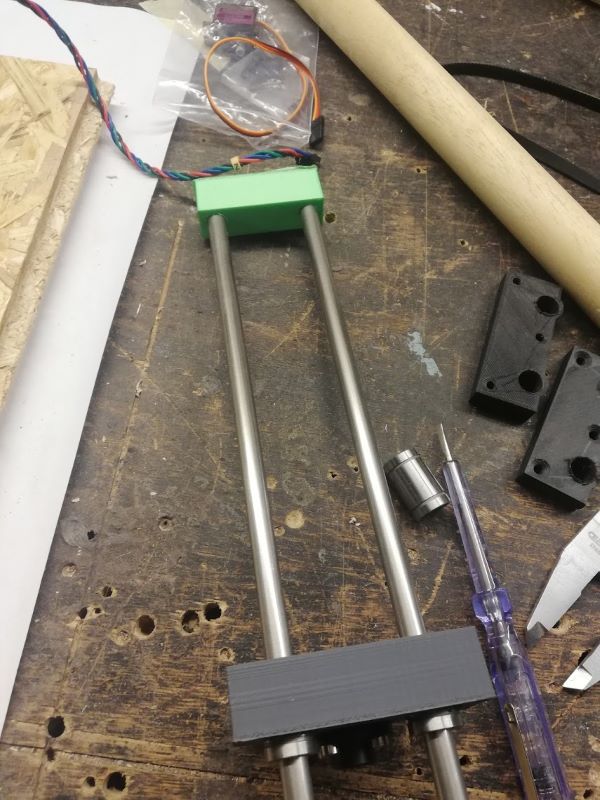
- 4 steel rods
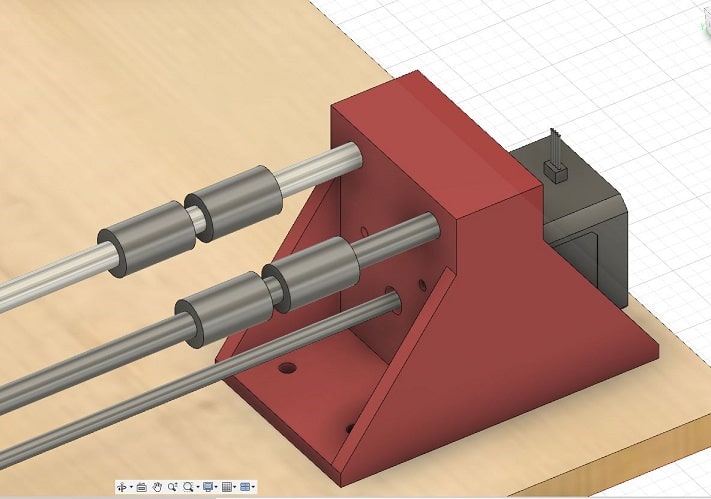
Draw parts of machine
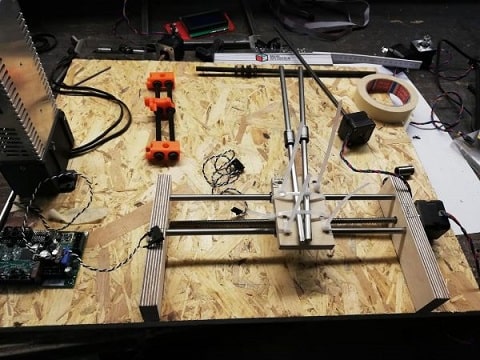
Prototype
Before manufacturing the parts we made a prototyped the machine with wooden parts. This was an important step to know the dimensions of the machine and also which parts will be necessary to be made. I did this to know the dimensions and which parts I needed to manufacture.

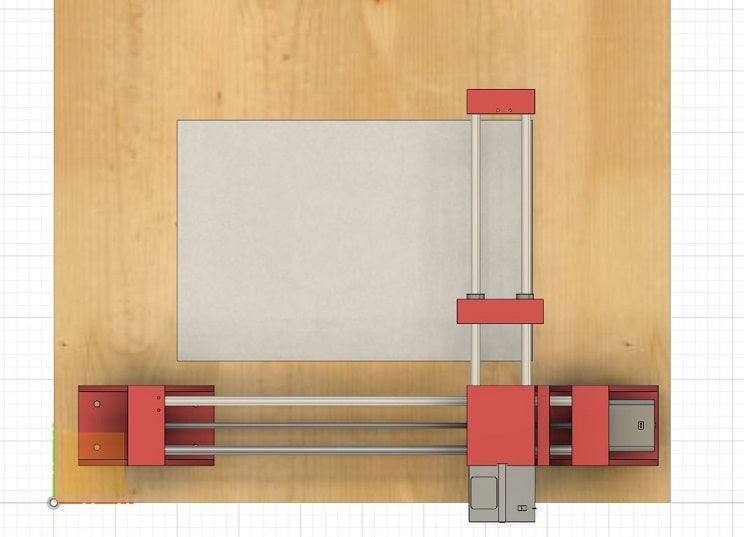
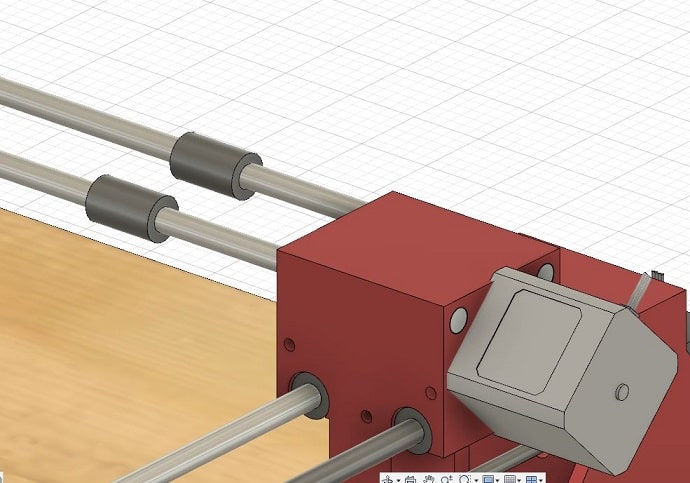
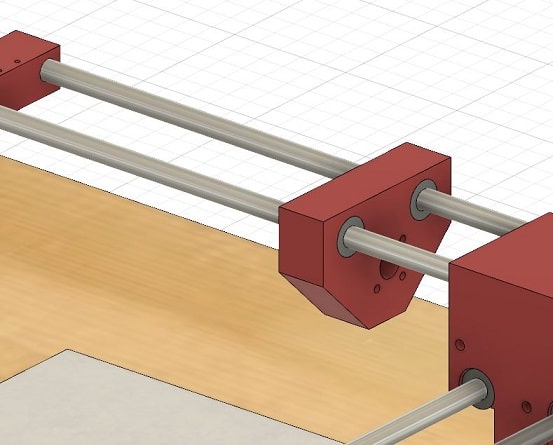
Fusion
Lennard has experience in drawing in fusion360. He focus on drawing the machine while I focus on the software necessary to run the machine (expained later).

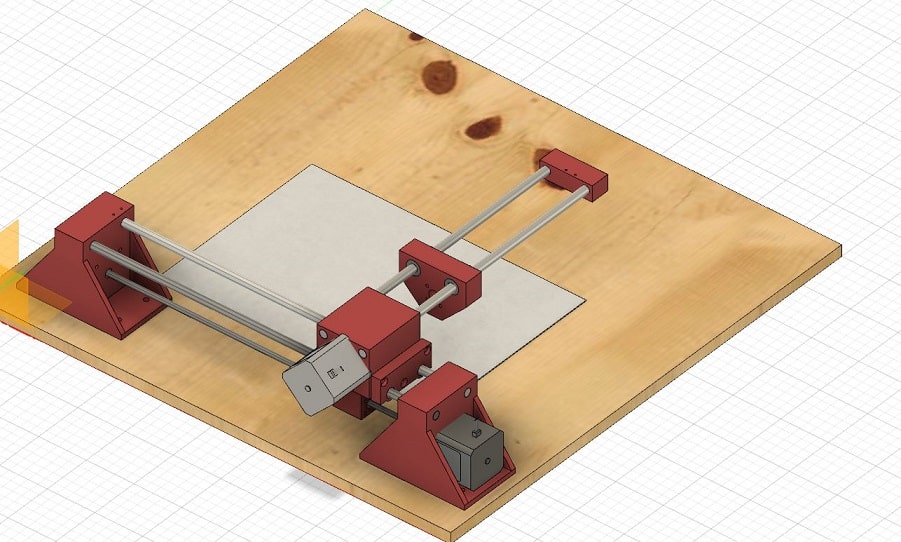
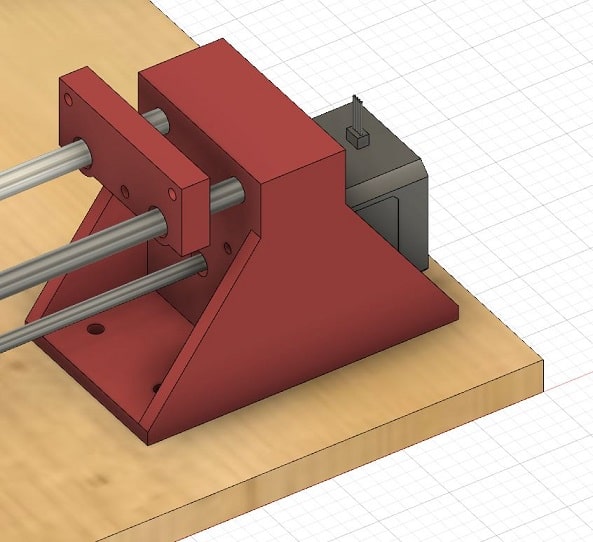
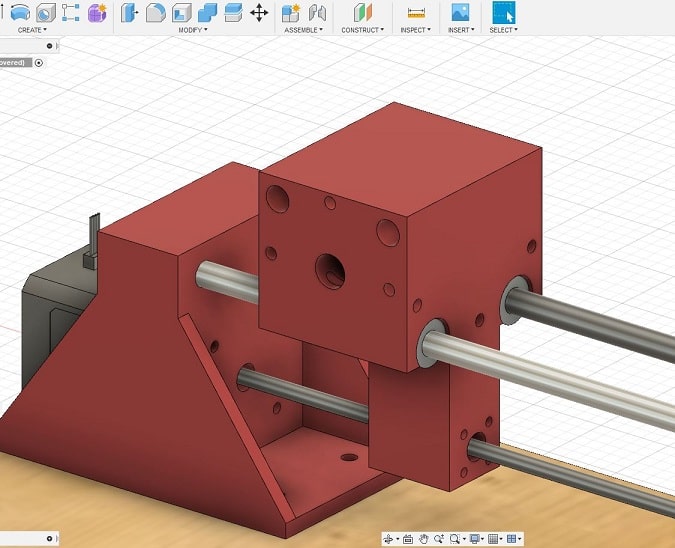
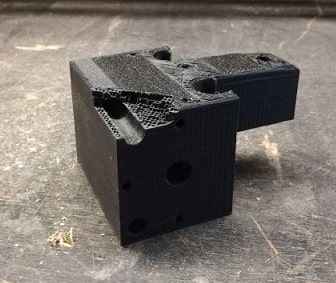
After drawing the necessary parts to design the machine, we needed to make them. Lennard has extra printers at home, so he also printed tha parts using a Ender 3 printer with the following settings:
- layer height 0.1mm
- infill 50%
- print speed 50mm/min
The first trial of printing the parts of the machine, one of the parts broke when he inserted the steel rod. This part was printed using an infill of 30%, which was not strong enough for this machine.
LENNARD: How did you solve this problem?
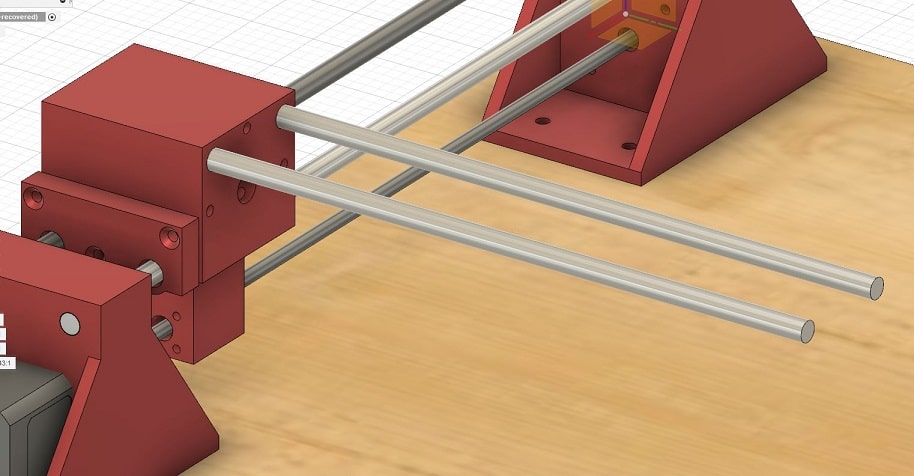
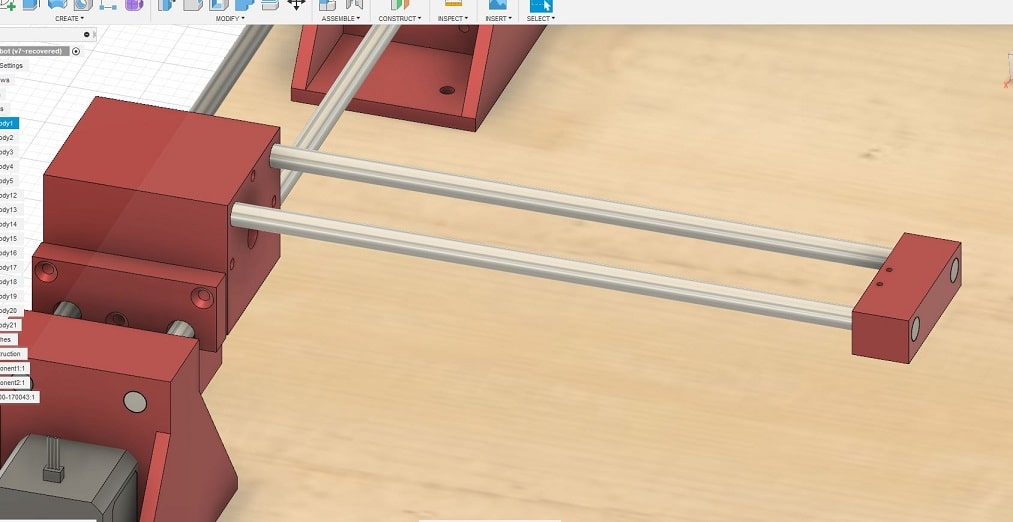
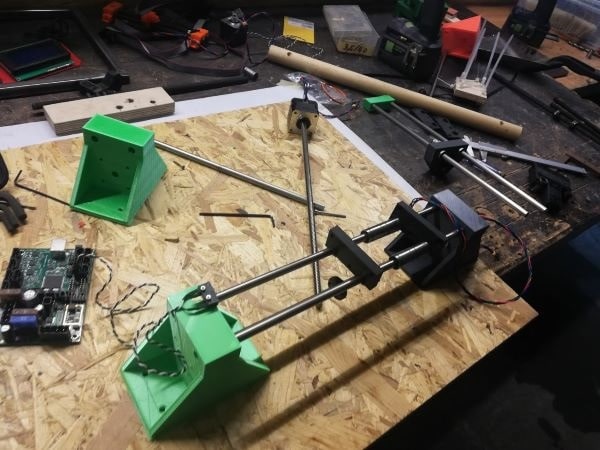
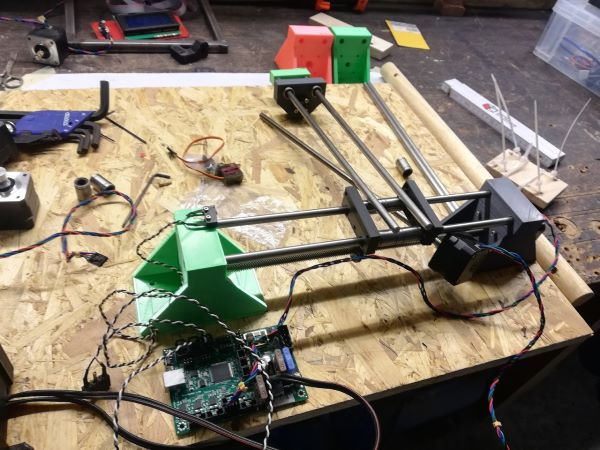
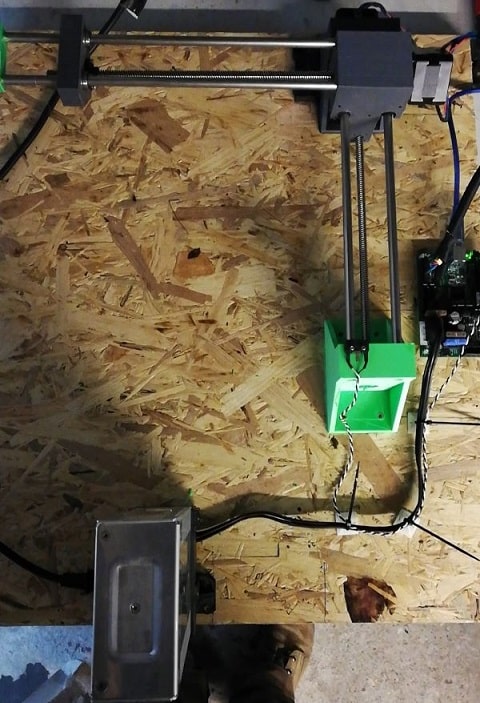
Assembling
After finishing to print the parts of the machine, we assembly it.
Setup board - Firmware
My contribution in this assignment was related to the firmware used by the machine. As I have some experience with software, I could dedicate to find the firmware that would enable we use the rambo board to operate the drawing machine.
Rambo board
The board we have available was the MiniRambo 1.3 that was designed for 3D printer. It is not a problem adapt this board for a drawing machine, since we will need two axis (the z-axis can be ignored) and we need a signal to pull up and down the pen.
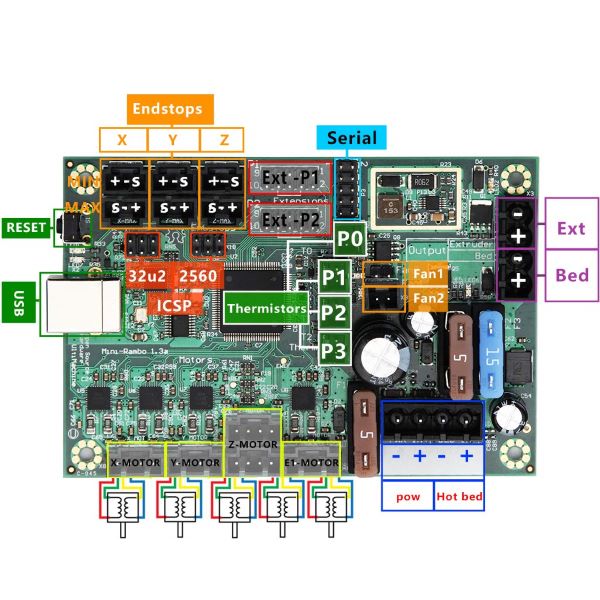
The schematic of the board shows in detail what it can offer. We connect the motors in the correct place (X-Motor and Y-Motor). Z-Motor will not be used, so it will not have any connection. We also connect the two ending points (X and Y). Initially we connect also the LCD, but it was removed since we were not using it.
Firmware
There are different types of firmwares for Rambo board (see here), most of them basically implements the necessary functionality to operate the drawing machine. I have tried to upload most of them and none of them was working as I expected.
Marlin (normal)
The first one I have tried was the Marlin. I have tried to follow up the tutorial How to Setup the Rambo for Your 3D Printer. I thought it would not be a problem setup the board for 3D printer, and just ignore the Z-axis later. However, this firmware had several compile errors that I rather ignore and tried another firmware.
Repetier
This firmware sounded good, it has a website where you can generate the configuration file and firwmare files for your board (here). The sources of the firmware is available at Git (here). There is even a Arduino plugin for it (here). However, it was not possible to load the code in the board due some integration errors. When selecting the correct board in the configuration file, it was not possible to flash the firmware in the board due several compilation errors.
Gerber CNC
Gerber is a well-known format used by many types of machine, such as laser cut and milling machine. There is a firmware for rambo that is based on Gerber CNC. The details in how to setup can be seen here and here the source code. At this moment we disconnect the LCD from the board because it was issuing a very annoying bip noise. We tried to send code via Serial from ArduinoIDE, but it did not take any effect in the board. The motors did not move sending simple compands to move it. We tried to use another software to send code to the board, but again did not work.
Marlin V1CNC_MiniRambo
After a long search on the Internet, we found the old versions of V1 Firmwares. On this list we found a version of firmware Marlin for MiniRambo board, the Merlin V1CNC_MiniRambo. This version was personalized to work specifically with CNC generated code. It uses the Marlin firmware adapted to CNC for MiniRambo board. Here you can find the latest version of this adapted version of this firmware. We used the V1CNC_MiniRambo-2.0.7.2-src.zip firmware to setup the board.
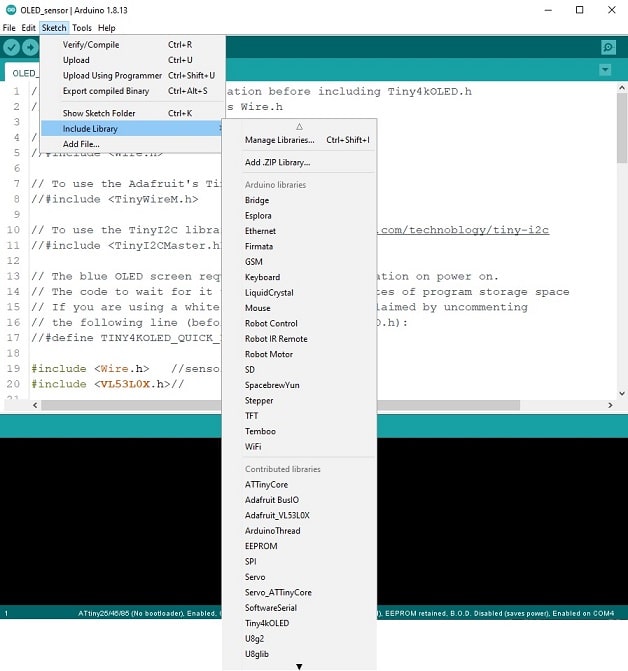
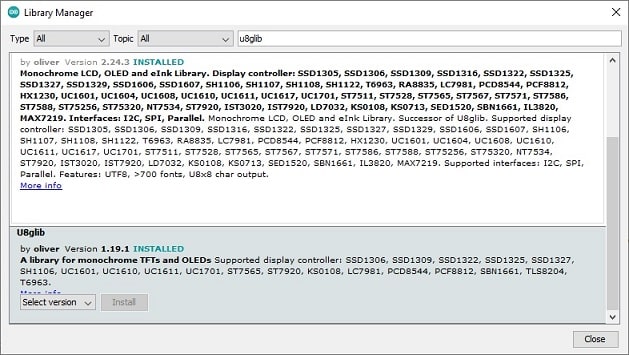
Initially, it was not possible to compile this firmware because our enviroment was missing the constant define U8G_ATOMIC_START. After installying the library U8Glib, from Arduino IDE libraries manager (menu: Sketch > Include Library > Manage Libraries…) this error was fixed and we could compile the firmware.
Generating the GCode
We have tried different alternatives to generated GCode for the drawing machine. Inkscape there is a functionality to export the drawing for GCode. Unfortunatelly this functionality is not stable and do not generate a good NC file for the drawing machine. The extension for Inkscape, named Unicorn, sounded good alternative solution. However it has several errors with the newer version from Inkscape and Python. Seems python does not find a module defined in the same directory of the extension.
We found and tested the online tool JSCut. With this tool it was able to generate the gcode file converting the SVG image drawn in inkscape. More info about it can be found in this tutorial.

For sending code to the machine, initially we tried to use the repetier host. However, we thought it would be better to use a generic tool, since this one was designed to work together with the repetier firmware (that we could not load in the MiniRambo board).
We installed the CNCjs software to send code to the board. This is a very good tool to send NC files for different types of machine and firmwares. It has support for sending the file to merlin firmware and we could take advantage to send the gcode to the drawing machine (download)
Openning the software CNCjs, open a Merlin Firmware connection with the MiniRambo board (using the correct USB port). Load the gcode file into the CNCjs, check if the image correspond to your drawing. Click in the start button and the drawing machine should operate drawing your image.