2. Project management
This week I worked on defining my final project idea and started to getting used to the documentation process.
Setup environment
Before starting documenting the steps taken in the assignments, it is importante to configure the environment with the necessary tool for it.
Version control
The software used for version control by Fab Academy is Git. They suggested to install Git Bash for getting used with the git commands. As I already use daily Git in my work, i choose to install the Github desktop. It provides the same commands in the Git Bash but it also includes a nice user interface for managing the documents in our repository. You can download the Github Desktop (here).
Clone the repository
After installing correctly Github Desktop, it was create a local repository for the personal web site. The following command creates the local repository in your computer. You can execute this command line, you just need to use the correct path for the Git program. Note that you should open the command prompt in the desired folder that you want to store the local repository.
> git clone https://gitlab.fabcloud.org/academany/fabacademy/2021/labs/ingegno/students/cristiano-lemes.git
Using the Github Desktop, you can follow the steps:
-
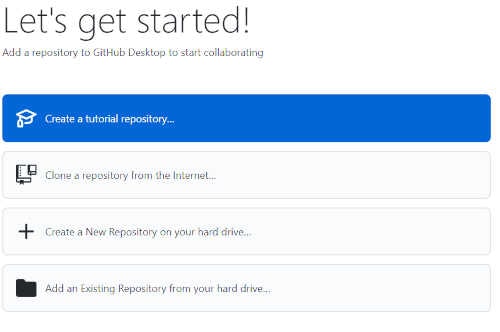
Open Github Desktop, bellow the initial page.
-
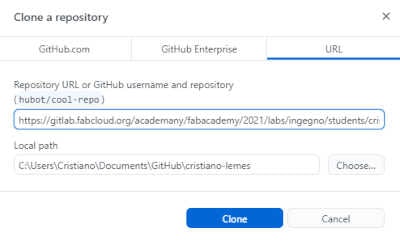
Click in button Clone a repository from the internet…, the follow page should open.
-
Enter the URL of the repository and the local path where you want to store the local repository, and click Clone.
-
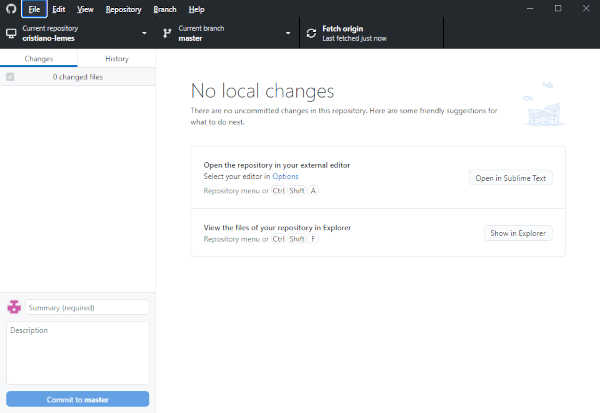
The following page should open after download the repository.
Markdown website tool
MkDocs is a tool that enable to generate a website from the scratch, but also it allows to execute a local server to host the website in a local machine. This enable to do and see quickly changes in the website avoiding the need to push the changes to Git all the time you update something in the website. I have installed MkDocs to be able to install and execute the local mkdocs server for the FabAcademy website. I performed the following steps:
-
First installed python 3.9. Download the file (here) and when you execute the installer do not forget to select the option to add Python (and its dependencies) in the PATH variable of your operation system (I installed on Windows).
-
Tried to upgrade the module pip from python using the command below. However It did not work because of directory permission to save the files in the operation system.
> pip install –upgrade pip
-
This command make the module pip unstable, and I had to download the file get-pip to re-install this module. Open the command prompt, select the folder where you download the file and execute the command bellow. It will download the latest version of pip, so it is not necessary to upgrade it.
> python get-pip.py
-
Install the module MkDocs. You can check if the installation worked correctly.
> pip install mkdocs
> mkdocs –version #to check if the installation was successful
-
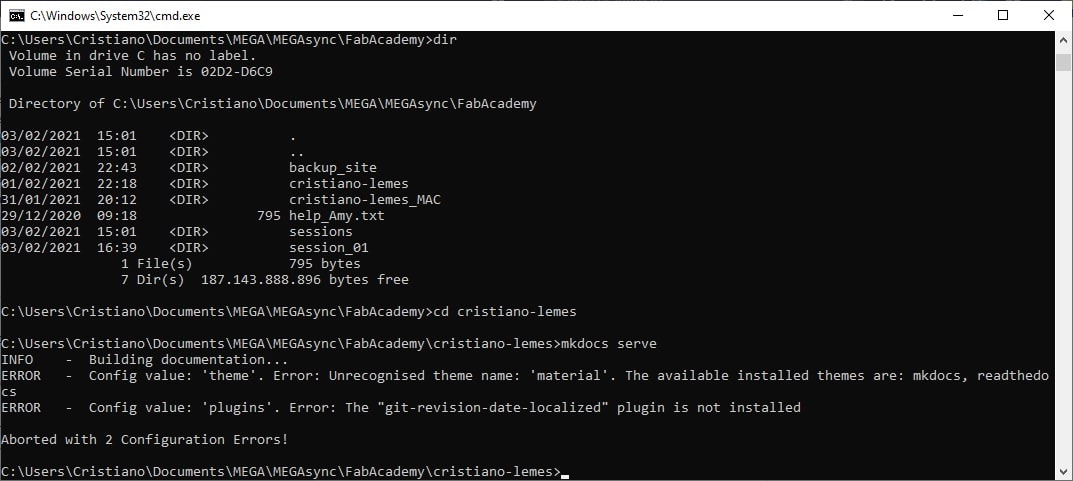
Run mkdocs in the root folder of your website (where you clone your fabacademy repository). Open the command prompt, change the directory folder, and run the following command. The first time I tried to run in my own website, I got an error of theme and plugin not installed (see image bellow).
> mkdocs serve #into the root folder of the website repository.
-
So, before go further, I have create a website example site_example just to check if the mkdocs were able to create the local server for the website. Open a command prompt and execute the command bellow.
> mkdocs new site_example
-
In the command prompt move to the folder site_example from the website create in the step 6. Execute the command bellow. The website should be available in the link http://localhost:8000/. The link should open an empty web site.
> mkdocs serve
-
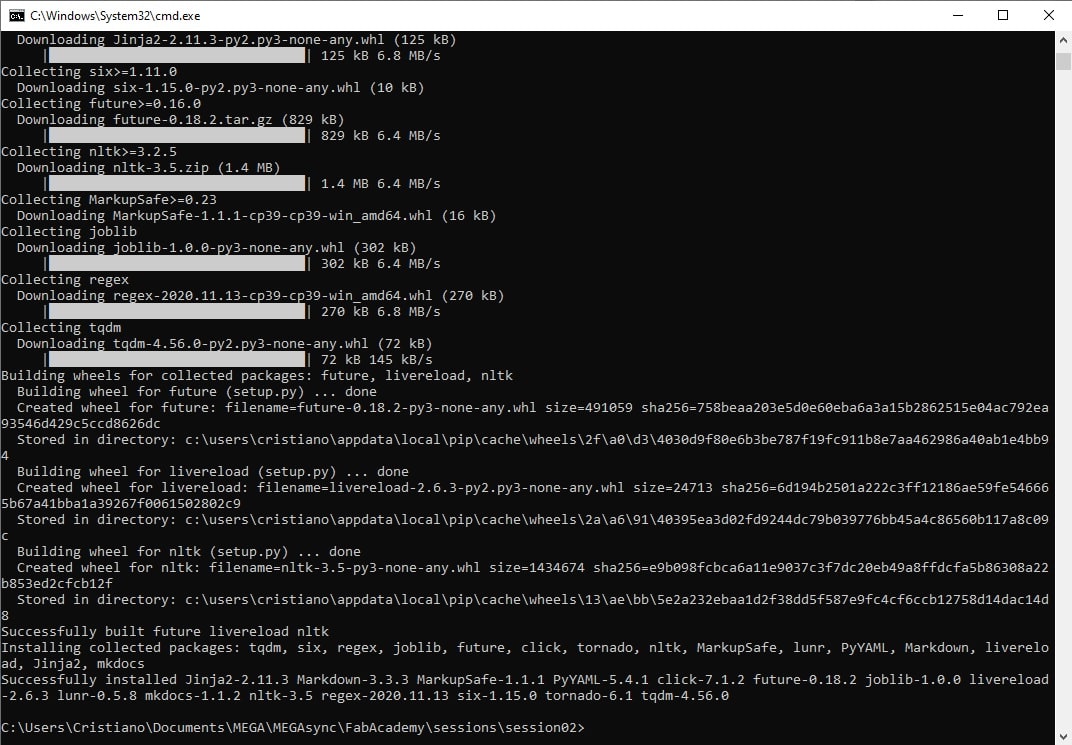
The errors in the step 5 was due to some modules missing in the mkdocs tool. Then, I have installed the theme material and the plugin git-revision-date-localized using respectively the commands bellow:
> pip install mkdocs-material #install theme material
> pip install mkdocs-git-revision-date-localized-plugin #install plugin git-revision
-
I tried to execute the step 5 again, but I still got an error. Mkdocs was missing the GIT executable in the variable Path of Windows. I have added the variable GIT_PYTHON_GIT_EXECUTABLE in the environment variable from windows with the path to the git executable.
-
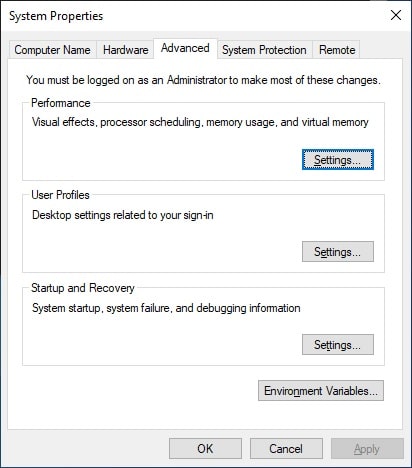
Open the System Properties window. Open the Explorer, right click in your computer in the left side, and select Properties and then click in the link Advanced system settings.
-
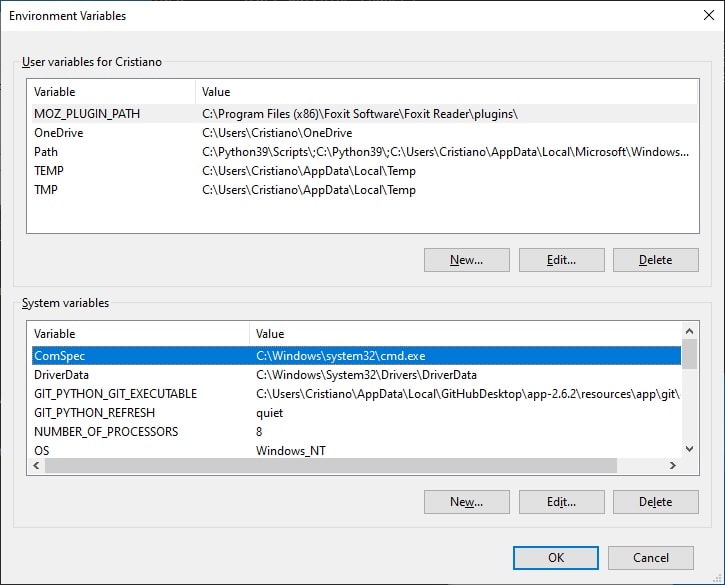
Click in the Environment Variables button, the follow window should open. Create a New variable with the name GIT_PYTHON_GIT_EXECUTABLE and the path to the location where Git is installed in your computer (for me: C:\Users\Cristiano\AppData\Local\GitHubDesktop\app-2.6.2\resources\app\git\cmd)
-
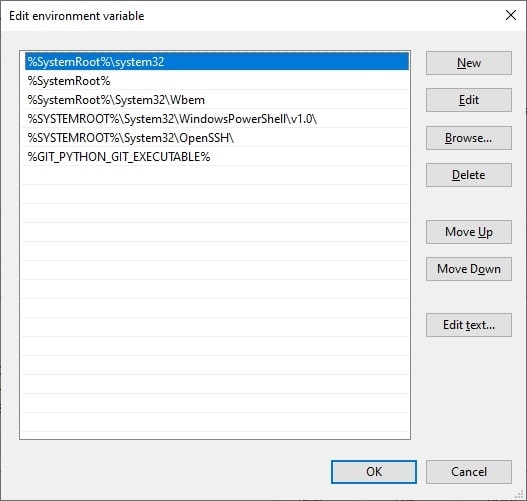
Find the System variables Path and click in edit. Add a entry to the variable GIT_PYTHON_GIT_EXECUTABLE then the command prompt are able to find the git command installed in your computer.
-
Website template structure
FabAcademy provides a basic template website that can be edited in the way the student wants to contain details of the activities develop during the course. I decided to not spend many time in changing the view of the website in order to focus on the content. I also prefer to spend the time developing the activities of the course, than changing something that I have experience and work daily.
Bellow you can see the structure of the template website. The file mkdocs.yml contains the configuration of the website. You can add different view template, change title, and characteristics of the template. In this file I have added personal information, such as site_name, description, and author. I also included a different icon (that appears in the web browser title bar) for the website (theme > favicon). All files that begin with .git are files of control used by Git, and for now will not be changed. The file README.md is used by Git repository that when open in the browser will show its content.
cristiano-lemes/
|   docs/
    |   about/
        |   agreement.md
        |   index.md
    |   assignments/
        |   week01.md
        |   ...
        |   week20.md
    |   files/
        |   .gitkeep
    |   images/
        |   week01/
        |   |   assignment-photo.jpg
        |   avatar-photo.jpg
        |   favicon.svg
        |   sample-photo.jpg
        |   sample-pic-2.jpeg
    |   projects/
        |   final-project.md
        |   sample-project.md
    |   index.md
|   .gitignore
|   .gitlab-ci.yml
|   README.md
|   mkdocs.yml
|   requirements.txt
The content of the website is located in the folder docs. When accessing the website, the first page loaded is index.md. Every folder inside of docs that has at least one .md file will became a menu in the top menu bar. If the folder has more than one .md file, there will be a link to them in the left side of the page. The webside can access images located anywere in its root directory (where it is located the file mkdocs.yml), since it used the correct path to it. As a best practice, images should be added in its respective folder name. General pictures can be located in the images folder, and sub-folder can be created to add pictures for each week assignment. Files can be added in its respective folder name as well, following the same best practices used by images.
Website development
The browsers cannot interpret files with extension .md, hence the files from the template need to be converted to a type that can be interpreted by the browsers. The file that any browser can intepret is HTML. Many tutorials are available all over the internet explaining the standart used in the World Wide Web (www). It is not the scope of this course cover it.
Git repository used by FabAcademy website template has a service that turns markdown files into websites and hosts them for free on the internet (GitHub Pages). All .md files pushed to the repository become available as a webpage of my website after the service interpret the files. However, the process of pushing the files changed to see the result in the webpage may take some time. As I did want to see the changes done in each page instantly, I installed the Markdown website tool (explained previously) and before starting to update the website, I run the command mkdocs serve in the root directory of my website. The website become available immediatelly under the link http://localhost:8000/. Any change in the files or even in the directory (by adding new files) of the website is detected by the tool and the page is refreshed and the changes are shown in the browser. I used Chrome as browser because of personal preference.
The website was edited using the text editor Sublime. This editor is open source and license free and allow you to edit several types of file, including markdown file (extension .md). I have included more information about me (menu: About > About me) and the steps taken in this first assignment. I have added a personal picture at About > Student and a welcome picture of my home country in the first page. I have included a brief overview of the final project that I intend to achieve in the Fab Academy. However, this is not a fixed idea and if a better one arrise during the course, I will decide which one will be presented in the final project. The images was compressed using the website Optimizilla.
Update repository
Once you have made changes in your website, it is very easy to upload the code into your repository. Using the GitHub Desktop, you can verify the files changed and a comparison with the previous version present in the repository. This is equivalent to execute the following command in the command line in the root folder of your repository cloned:
git status
Once you are sure it is everything fine, you can commit the code, adding a meaningful message (red box). The message might help in the future to stack trace specific changes done in the website. Clicking in the button Commit to master (yellow box), will internally execute the following command:
git add <new files added>
git commit -m "<your message>"
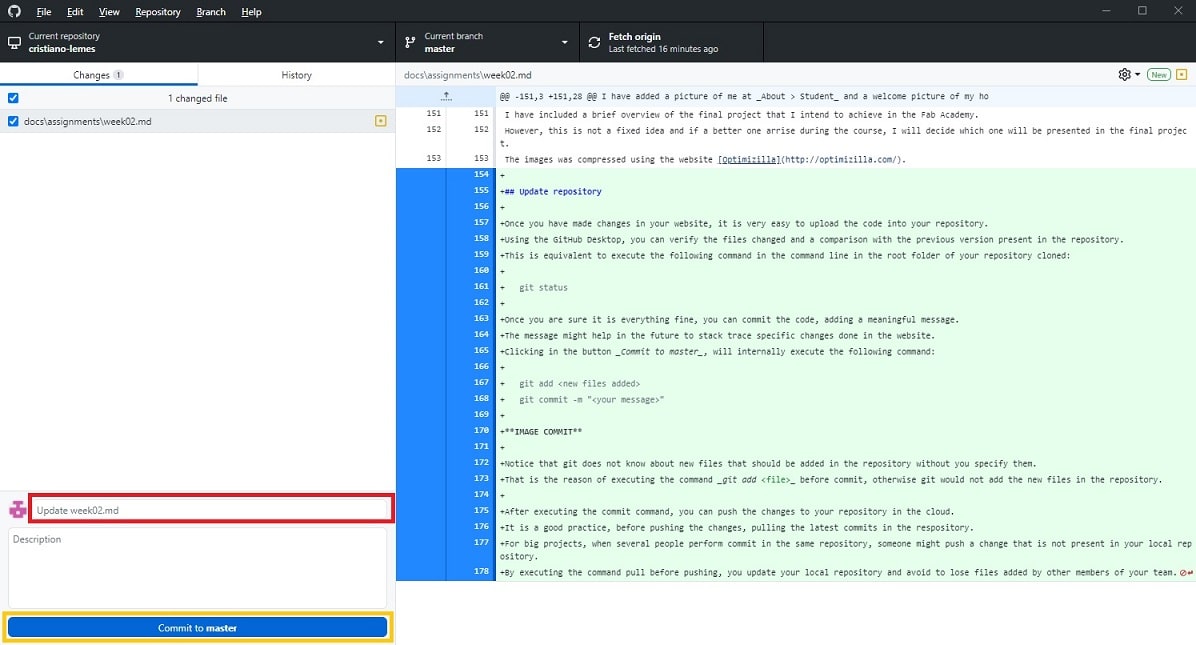
Notice that git does not know about new files that should be added in the repository without you specify them.
That is the reason of executing the command git add
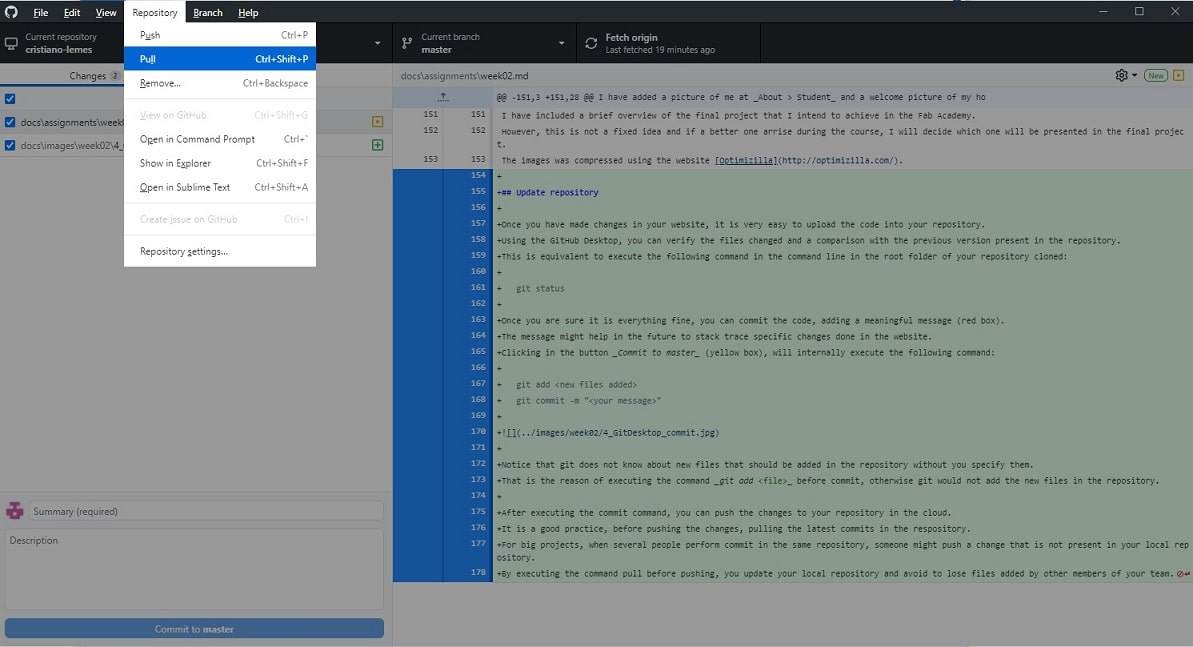
After executing the commit command, you can push the changes to your repository in the cloud. It is a good practice, before pushing the changes, pulling the latest commits in the respository. For big projects, when several people perform commit in the same repository, someone might push a change that is not present in your local repository. By executing the command pull before pushing, you update your local repository and avoid to lose files added by other members of your team.
Then you can push the changes in your repository using the button Push origin (green box). You will see in this button how many commits you are pushing.
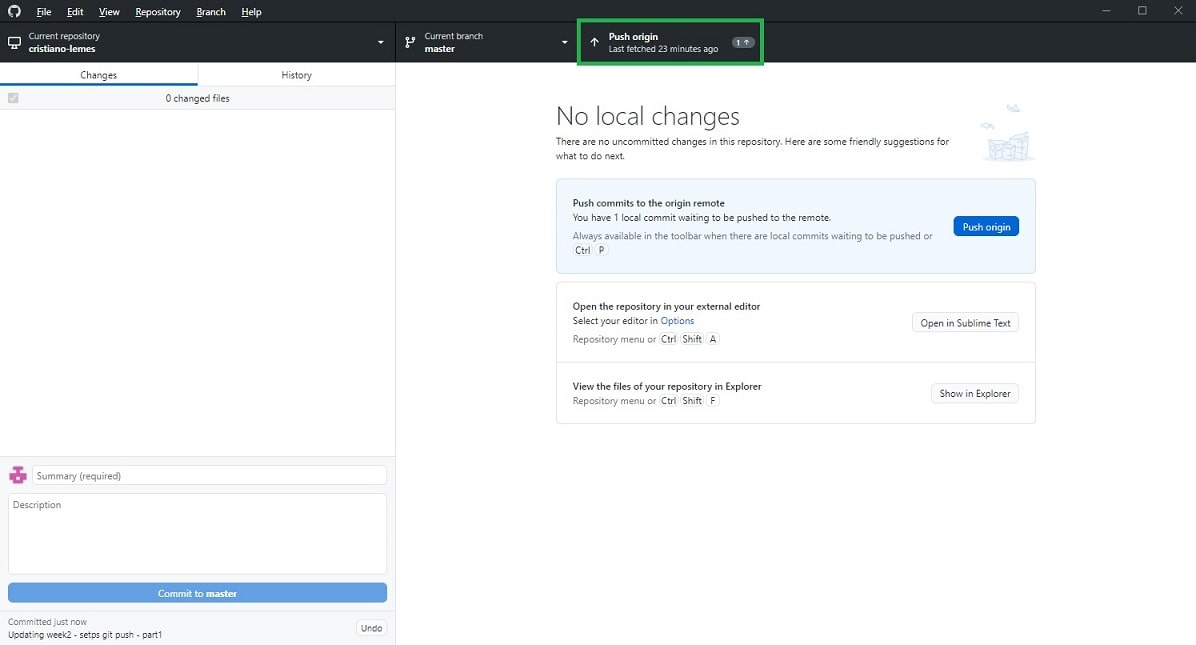
You can check the history of commits using the tab History (blue box). You will see the latest commit in your local repository that is present in the cloud repository. As well as, the local commits that still need to be pushed to the cloud.
