Assignments
1. Principles and practices
2. Project management
3. Computer Aided design
4. Computer controlled cutting
5. Electronics production
6. 3D Scanning and printing
7. Electronics design
8. Computer controlled machining
9. Embedded programming
10. Mechanical Design
11. Input devices
12. Molding and Casting
13. Output devices
14. Networking and communications
15. Interface and application programming
16. Wildcard week
17. Applications and implications
18. Invention, intellectual property and income
19. Project development
14. Networking and communications
Assignment:Group assignment:
Send a message between two projects
Individual assignment:
design, build, and connect wired or wireless node(s) with network or bus addresses
Planning
So as explained in the lecture, this is how the nodes should be connected to the master.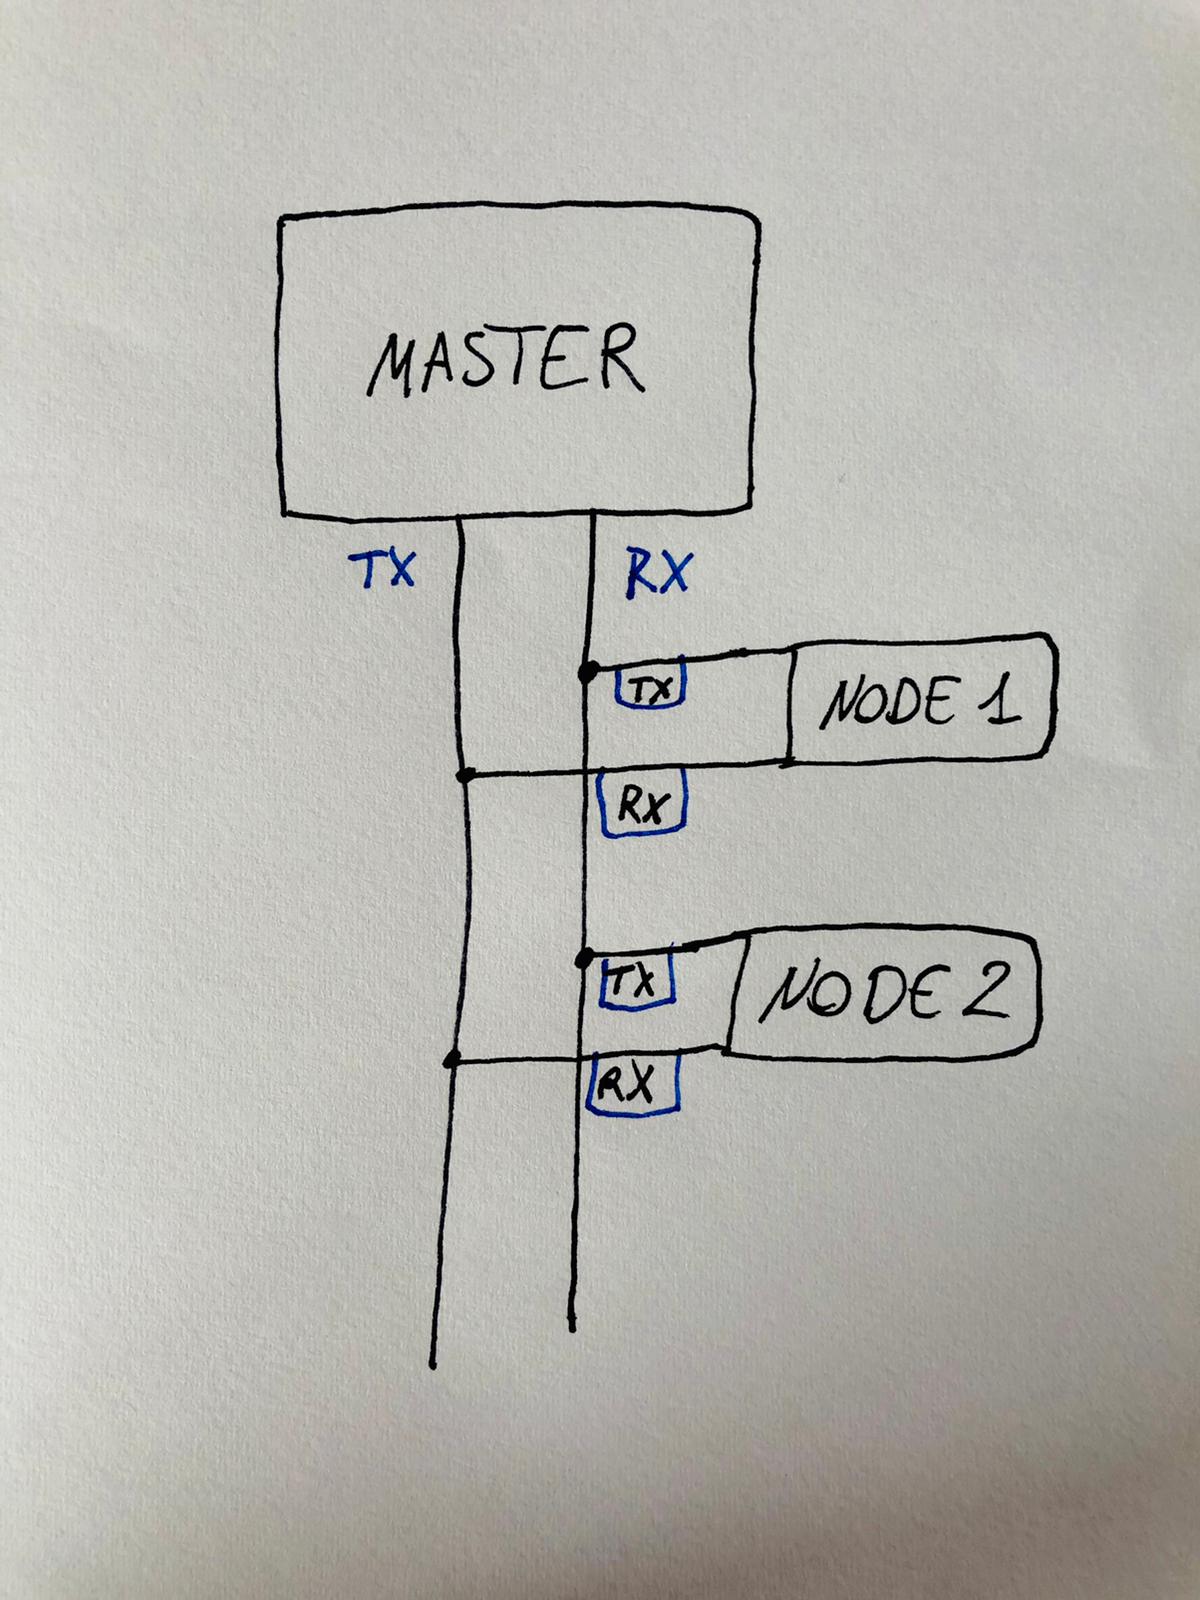
To test a connection first, I decided to throw onto an arduino board some code:
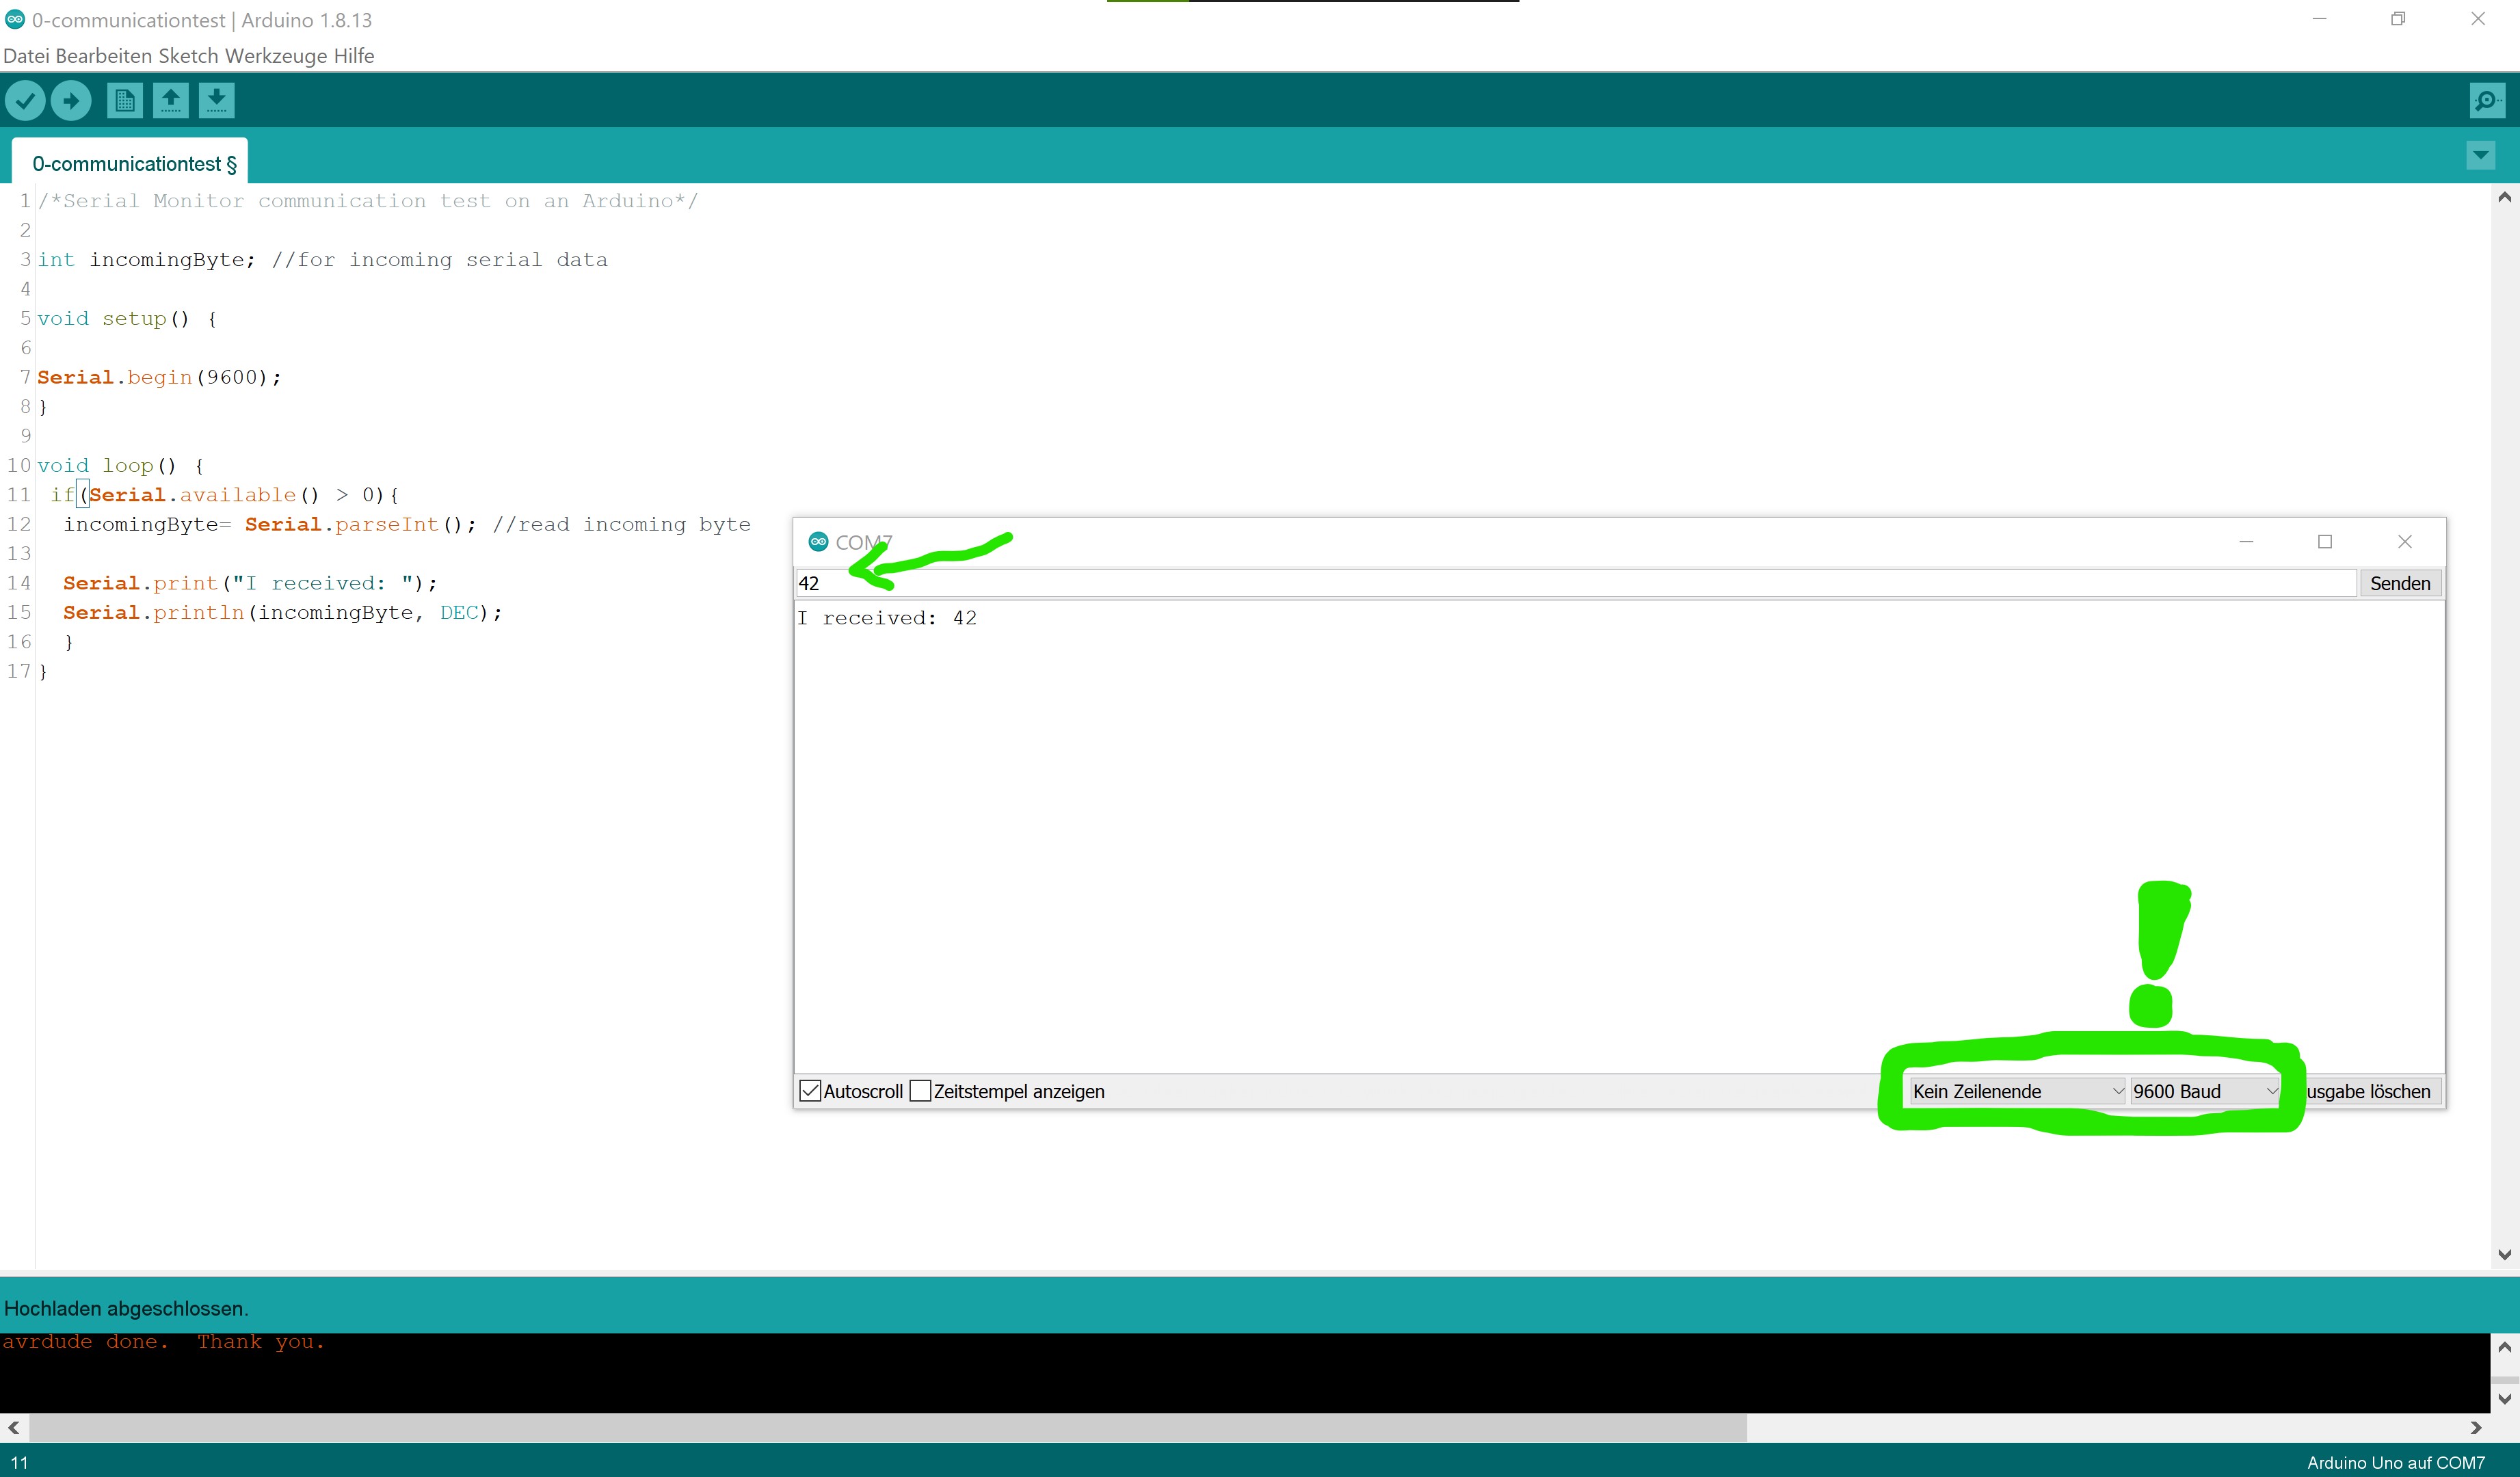
As you can see when I type in a number, the board tells me the number it recieved. As always, check if the BAUD rate is correct. So far so good. Then I tested it on the dupe. It also worked fine. I didn't need to declare my RX and TX pins since my board should work like the original arduino. My setup was this:
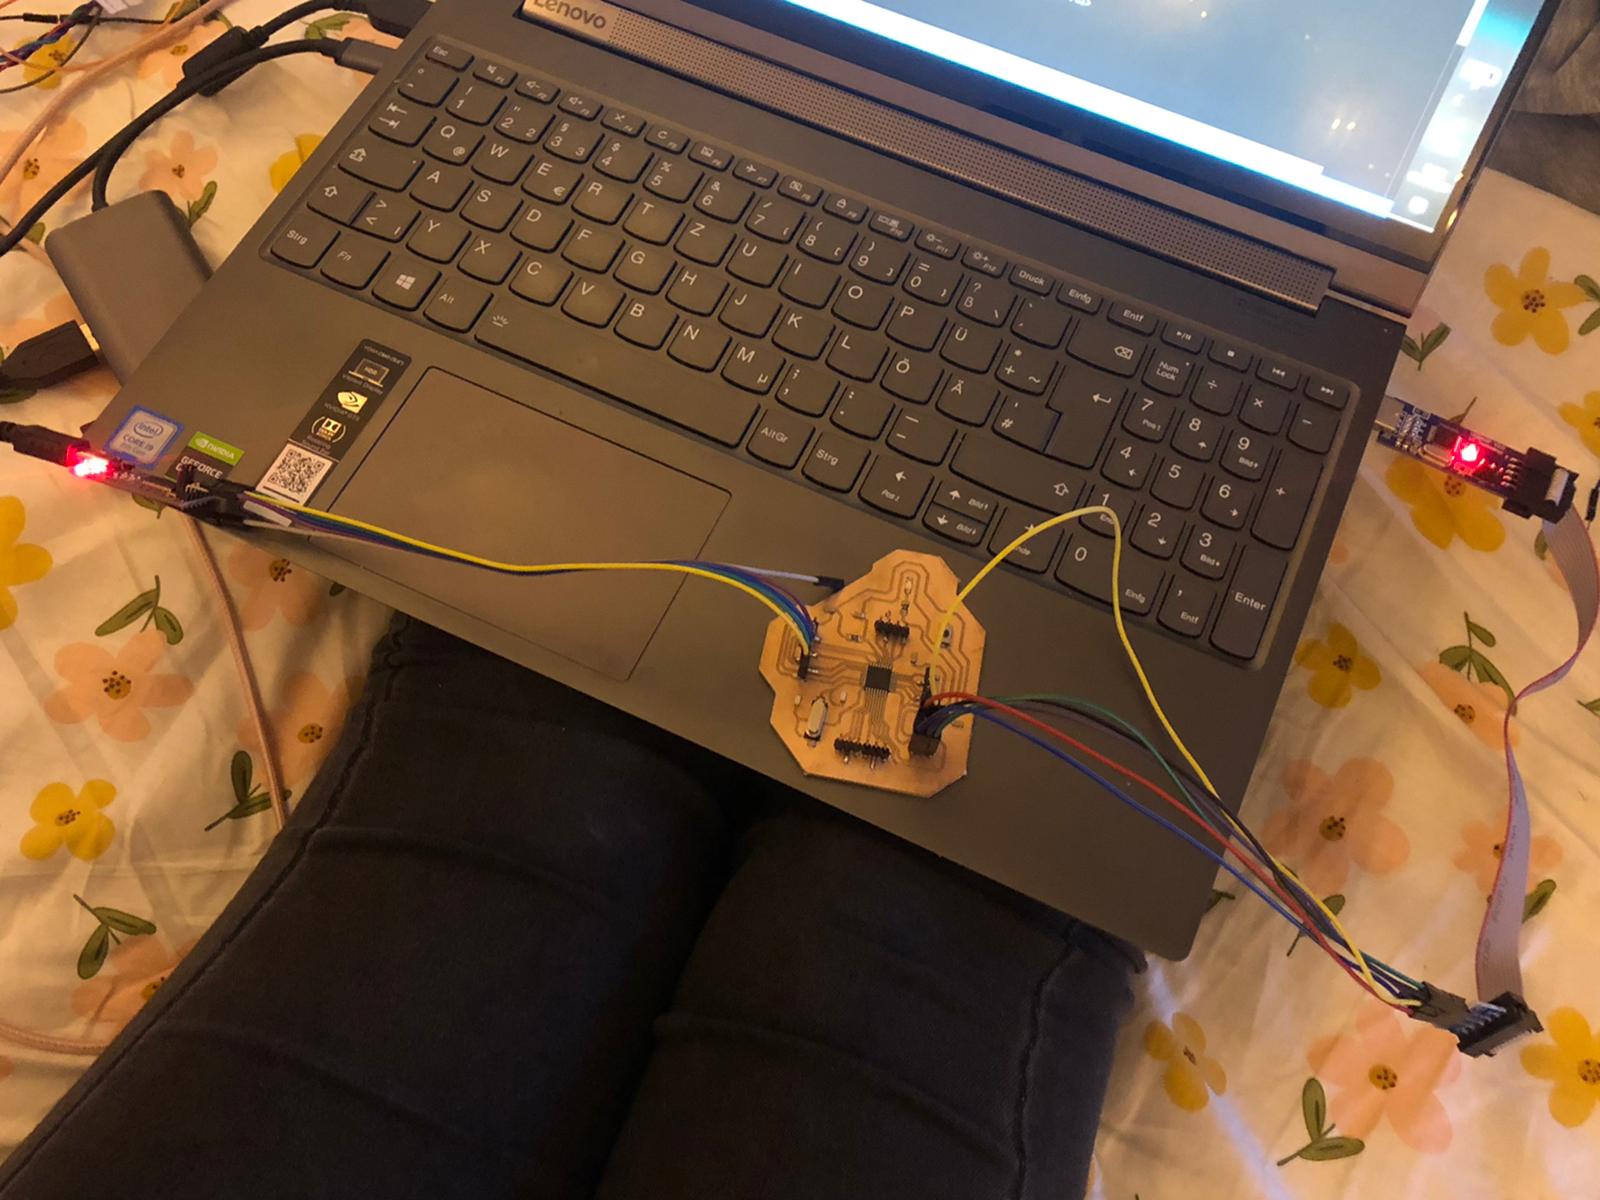
As you can maybe recognize I connected the following:
- The ISP pins on the board to my programmer
- The RX, TX, GND and VCC pins to my USB to TTL Serial Adapter
Programming
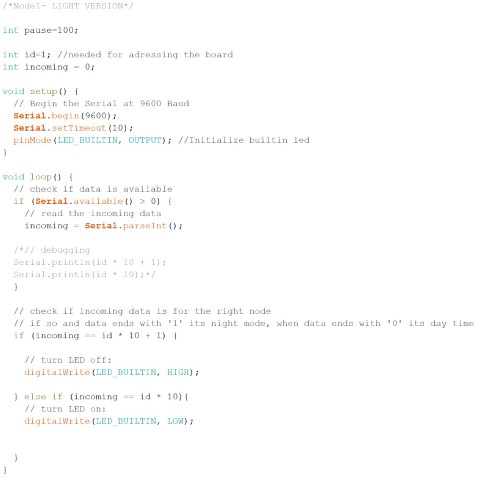
Since that worked, I decided to use that "arduino dupe" board again to make the first node out of it. I gave it the ID 1, which I'll need for adressing the board.The idea was that if the incoming data (you'll see it in the input node) is sent by the input node, the board will check if the number is it's number and then do something. In this case it's turning the led on. But only if it's bright outside.
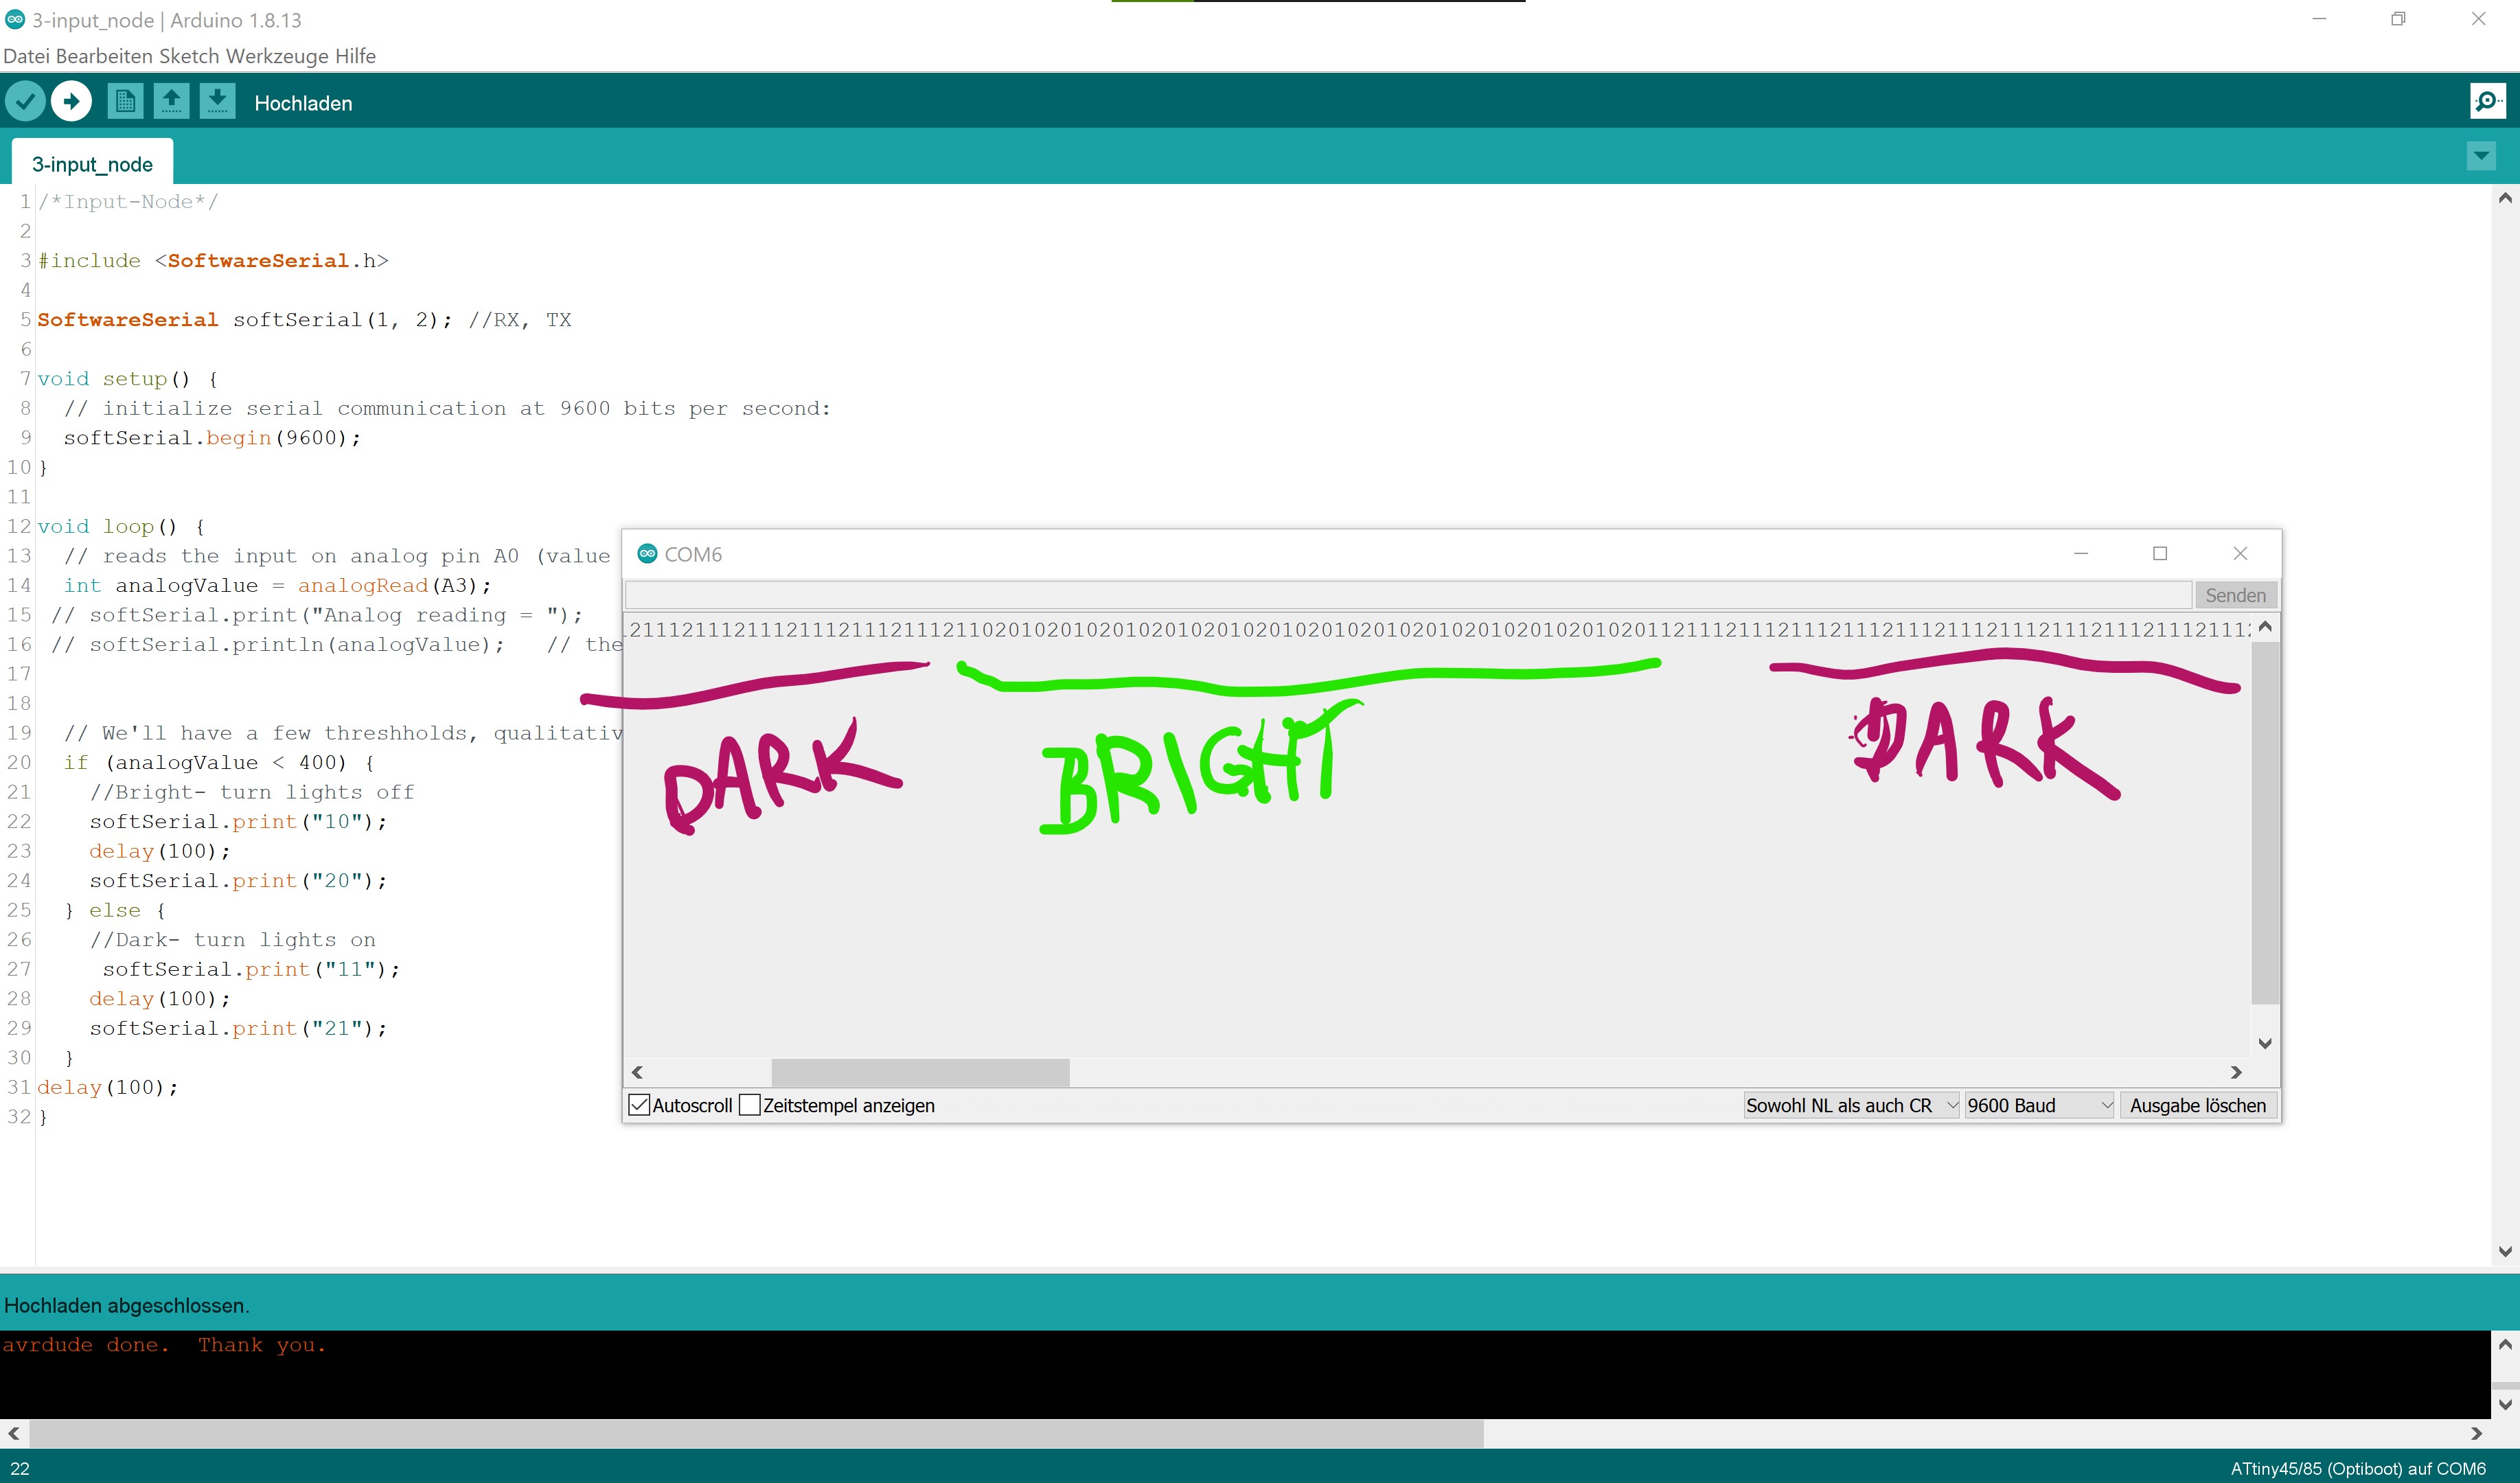
Then I added my neopixels to the game. It works similar to the LED just with neopixel code. I did that with my final in mind. After that, I did the same with my input board. Just the connection, not the code! I just used my code from my input week and altered it to this week. You can see it in the Downloads. I let that board throw out some numbers on the serial console. It should print "10" when it's bright and "11" when it's dark. The first number represents the board ID (which is important for later when we want to add a second node) and the second number is for light and dark.
After that, I just tested those two (as you can see in Testing). Now to add a second node, we just need to make some fine alterations. The second board is getting a different ID and I altered the if statement to recognize the "2".

Testing
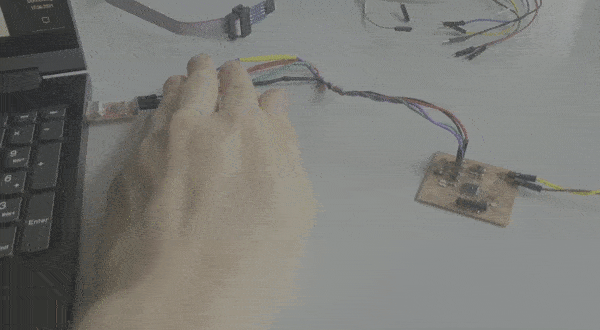
So first test was to test, if the first node works with an input board. Here you can see what it looks like if I put it in the dark and add light.
And here you can see the opposite: I put it in the usual daytime light and made it "dark" using my finger.

It works perfectly!
It also worked with my neopixels! Now it just needs a lil more power (ampere) to actually make them the right colors.
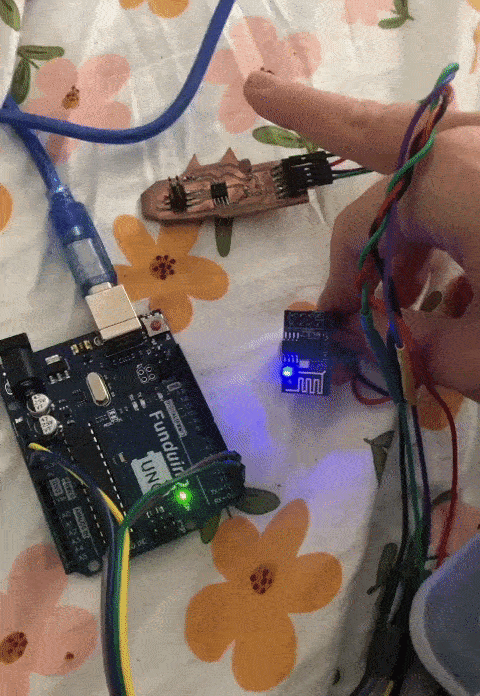
Well I forgot to test it with the second node and my main board is currently drying in my main tree (see final if you're confused), that's why I used an Arduino and an ESP8266 to test it with my input board.
Here we gooo:
What I have learned from this
I learned so much stuff and I loved it! I learned:- That boards can actually communicate via serial
- That bluetooth is basically serial
- That programming it is not as hard as I thought
Problems
My main problem was that I didn't know how to start and what kind of communication I should choose. I decided on serial communication because I already knew how to write stuff in the serial console lol.Group Assignment
For the Group Assignment we used Jonas Hello World board and my input board. My input board had the same code as before and Jonas board got the code from my Node 1.This was our setup:

The result!