Seventh Week

Seventh
class

Seventh week in the Fab Academy and this time we have to make a human scale design, I am excited about this week as I have never handled a large machine before and I have never worked with wood in large designs so it is being a great new learning experience.
We don't have a ShopBot in our lab so we ventured to get one, first it takes us a long time to get the tools but still our job is to solve it so thanks to the team and their predisposition we always innovate solutions for everyone. Next I will describe the step by step of what happened this week, I recommend once again to keep moving, in case you haven't managed to have a complete lab you can use the alliance with some people that count with what you need and contact them, always working as a team helps a lot. Great team Fab Lab Lima! 😍


Me


My experience

A new place


I find it very interesting to start in the world of machines (mechanics), carpentry and to test the knowledge we acquired in previous weeks such as electronics. To solve this week's assignment the Fab Lab Peru team has moved all over the place. We do not have special machines for this work in our lab because it is a small space but thanks to our colleague Stefany Casanova we have managed to recycle one that does the same job. Also thanks to Stefany's brother we are working in a very nice workshop located in the district of Barranco - Lima, this is a very spacious art workshop that contains many tools with which we have been able to work, definitely the team is very grateful to work in this place. Here I show you some pictures. πŸ₯° (Detonador)


Near the sea of Barranco πŸ₯°


Barranco - Lima


Taller Detonador


Taller Detonador


Taller Detonador


Taller Detonador


The machine


The machine we have at our disposal is a very old one, it was created for a thesis of a person 20 years ago and thanks to Stefany Casanova who was the one who brought it to the workshop is that we will use it, it is interesting to see all its features because they use many components and connections that could be replaced by a card as in the current machines, here I attach some pictures. πŸ˜ƒ


Machine


Machine


Machine


Machine


Electronic connections


Electronic connections


Self-tapping screws


Sacrificial bed profile


Bolting down the sacrificial bed


Bolting down the sacrificial bed


Drill bit


Drill bit


As this machine is quite old, we first had to get it to work, so we made some adjustments and revisions to both the mechanical and electronic parts. After many tests we managed to get it to respond to our computers. Here is a moment of happiness when I was able to control it from my laptop. 🀩


But none of this was easy! Below I will show you the whole adventure of the configuration we needed to do to make this machine work. It has been a terrible and beautiful adventure. πŸ˜† All this was possible thanks to many people, among them our partner Juan Casanova (Stefany's brother) for helping us with the GCODE issue.


10

First Assignment

Grupal Assignment

As a group task this week we are asked to perform the safety training of your lab, test eccentricity, alignment, speeds, feeds, materials and machine trajectories. As we have an old machine we put our knowledge to the test to get to know it during this week. Here I will tell you how it went. πŸ’ͺ

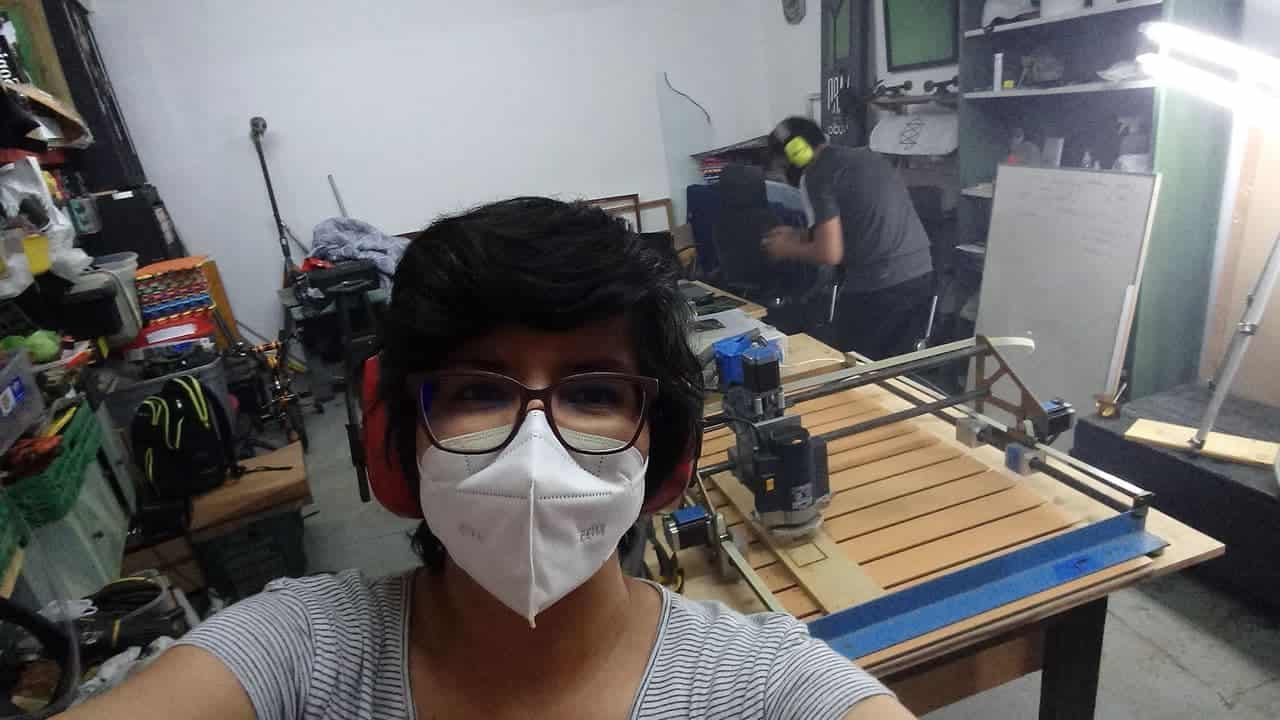
Working at Detonador Art Lab

Grupal

As I mentioned at the beginning, our team has recycled an old machine, this machine needed an important test because we did not know if it was going to work for our work. The first thing we did was to get the necessary implements, tools, electronic components and also the material. All that we have achieved has been by moving among our contacts since in our laboratory there was nothing to do the work of this week.

Something very particular was that I had the opportunity to coordinate with Vaneza Caycho who is part of Team Fab Lab Peru, Peruvian entrepreneur and CEO of IFURNITURE, thanks to her we managed to have material for our first tests, she works with wood and in her house she had a room with many plates that I could go and take them to our new workspace. Thank you very much Vaneza!. πŸ₯°


Super Team Fab Lab PerΓΊ.


Exploring


To start with the operation of the machine we first install it on a table, then we screw a sacrificial bed and adjust it well so that the cables do not collide. We checked the power supply and the connections of all the jumpers I had on the arduino board, this contained a CNC shield that can handle 3 stepper motors (pap/stepper) independently (X, Y, Z) and 1 additional motor (A) as a duplicate of any of the above. To start with the test we made the test connection with the GRBL Controller and CNCjs program, these allows us to generate the movements of the axes of the hand router. But before that we used a new drill bit, we changed it because the one that was installed was a bit old. Here I show some pictures.


New drill bit


GRBL Controller


CNCjs


CNCjs


Unfortunately we did not manage to move the machine 😒, there was something that was missing, for this we deduced that it could be the connection of the laptop with the program with which we were controlling the machine so we resorted to the driver installer, the drivers are programs that serve as intermediaries between Windows (or another operating system) and the devices or hardware components of the PC. They are necessary for printers, scanners, the graphics card, sound card, network card, motherboard, etc. to work. And for Windows or other programs to understand them.


Installing drivers


Installing drivers


After gaining access from a computer we realized that the X and Y axes moved perfectly but the Z axis presented problems. The motors we have are quite old but very good, we investigated about them and concluded that maybe the Z axis motor is being insufficient for the movement that our work needs. We decided to do a deeper investigation and we took out the motor that we thought was giving us problems, here are some pictures.


Researching the engine


Researching the engine


As a result, we felt that the motor power was insufficient and that when calibrating in the Z-axis the motor had to be pushed a little. When we tried again with CNCjs we were able to get it to move better and get it down to the wood, this was achieved when we changed the displacement measurement in the Z-axis, the smaller the distance, the better it responded. After performing this test we performed the first test on a small wooden board.


Machine cutting


Machine cutting


Machine cutting


Machine cutting


Happy team


Happy team


The material


Thanks to Vaneza Caycho, CEO of IFURNITURE, member of Fab Lab Peru, who is in Jordan at the moment, we were able to recycle material, we went to her home to pick it up so we could do our work, in Lima we could get wood planks but it was going to be quite expensive so we decided to recycle and reuse it for our tests and design. πŸ₯°


Gold mine


Relocation


Wood in my hands


We are ready


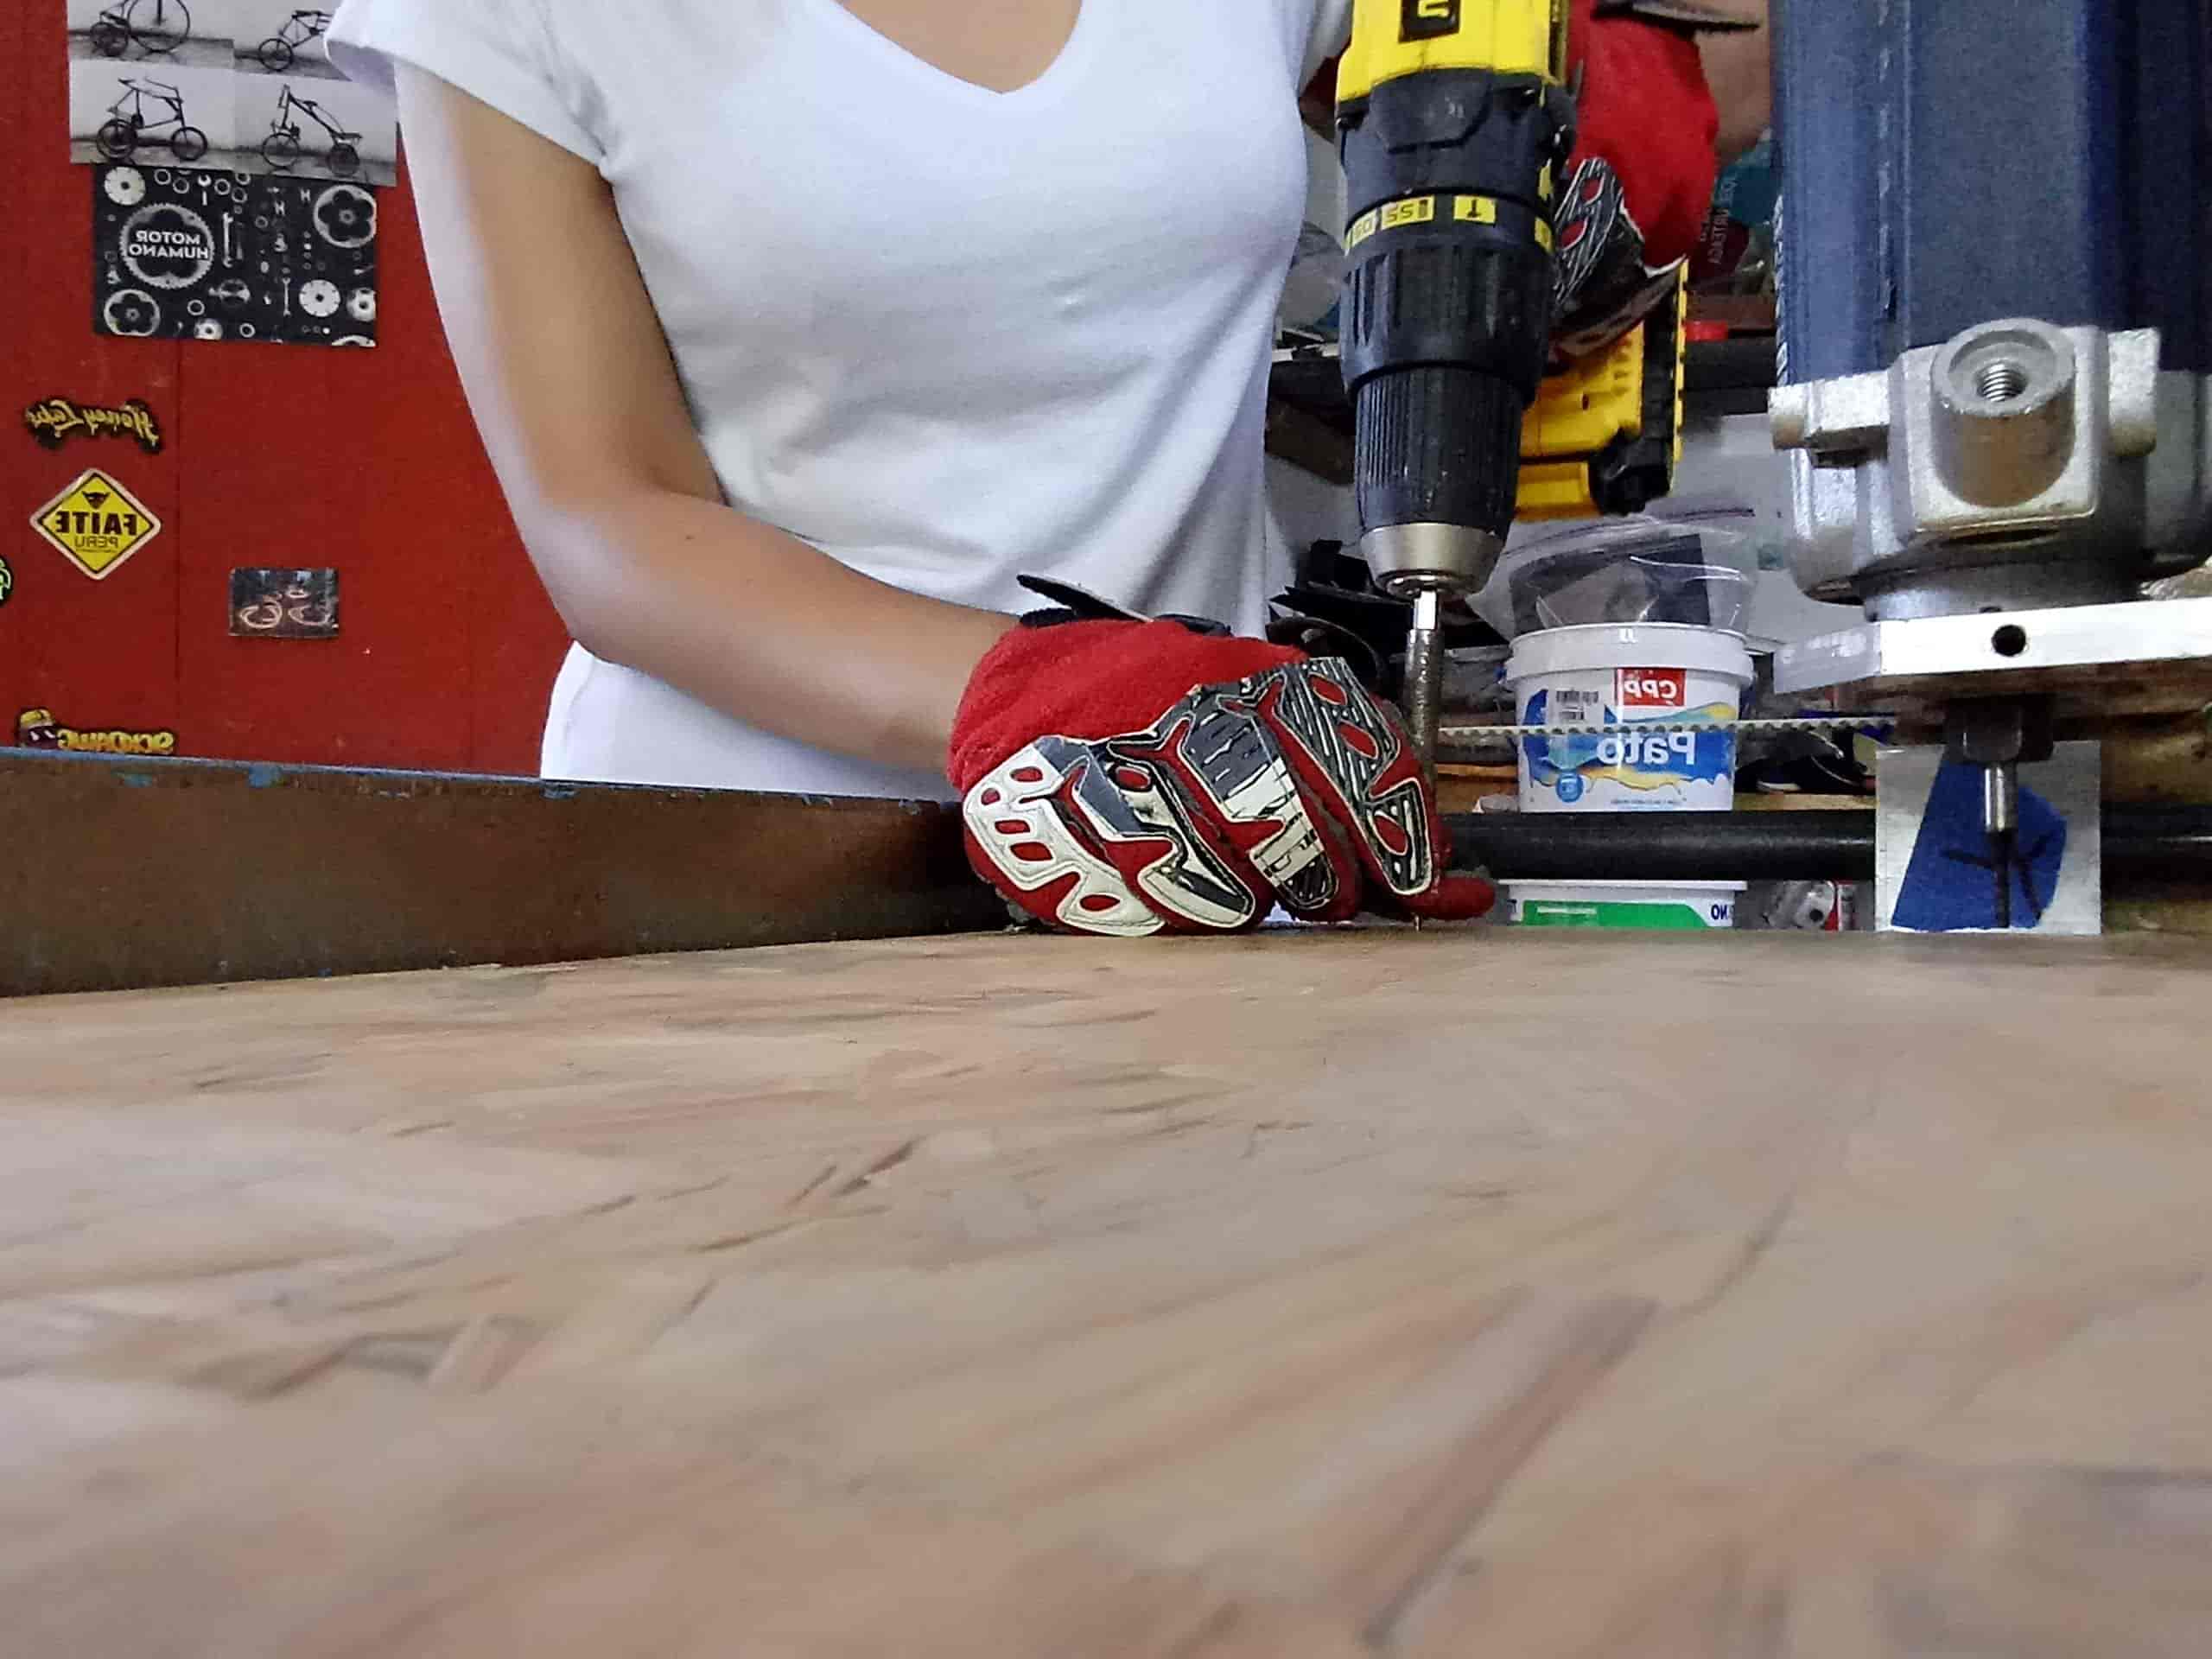
To perform all the work in the workshop we use the sanitation protocols and also the necessary protective equipment, it is the first time I have worked with wood on this scale so I was very excited about all the new things I was learning, here I show some pictures about the installation process of one of the new phenolic planks. πŸ’ͺ


Glasses


Tools


Removing the wheels


Removing the first test


Removing the first test


New material ready


Software


In our case we use different programs, each member of the team ventured to perform tests on different ones in order to test the machine and, above all, to learn. In my case I explored the Aspire program, I found it quite interesting and good, there are many tutorials on the internet that explain a little of its operation, then I show some pictures of my exploration.


Interfaz


New document


Geometry


Characteristics


Drill bit type


Name of document


3D


Simulation


So with this program you not only configure the piece to be cut but you can also visualize a simulation of the cut, you can determine the number of passes that the machine will make and even give some settings for the type of material to be used, I highly recommend it. πŸ’ͺ


10

Second Assignment

Individual Assignment

As an individual task we are asked to design, mill and assemble something big, in my case I chose the idea of not only designing something simple and easy but also useful, it is important to make our creations serve and help other people so in this section I will tell you what I did.πŸ˜ƒ

Working at Detonador Art Lab

New design
in a big scale

As a team we chose to be practical, we do not have a high performance machine and there are several of us who have to divide the work, as the machine took us a long time to put it in good condition and work, we chose to do a joint project, this full-scale design is to condition our workspace, our roof does not have a structure that allows the entry of light and air properly so we chose to design and install a skylight. πŸ₯°

To make the work really individual we started to design in different 3D programs and to discuss about the final shape that our project will have, next I will show you some of the ideas we had and the process we had to follow to optimize the time we have to accomplish our work.


Design in progress


The design


To decide the design we based our decision on the skylights of Barranco, this city has a characteristic architectural design that works with wood and that inspired us to choose the shape and size of our structure. Below I also show some of my drawings. πŸ™‚


Barranco - Lima


Barranco - Lima


Barranco - Lima


Barranco - Lima


Barranco - Lima


Barranco - Lima


Our space


Our space


Our space


Our space


Proposal


Proposal


Proposal


Proposal


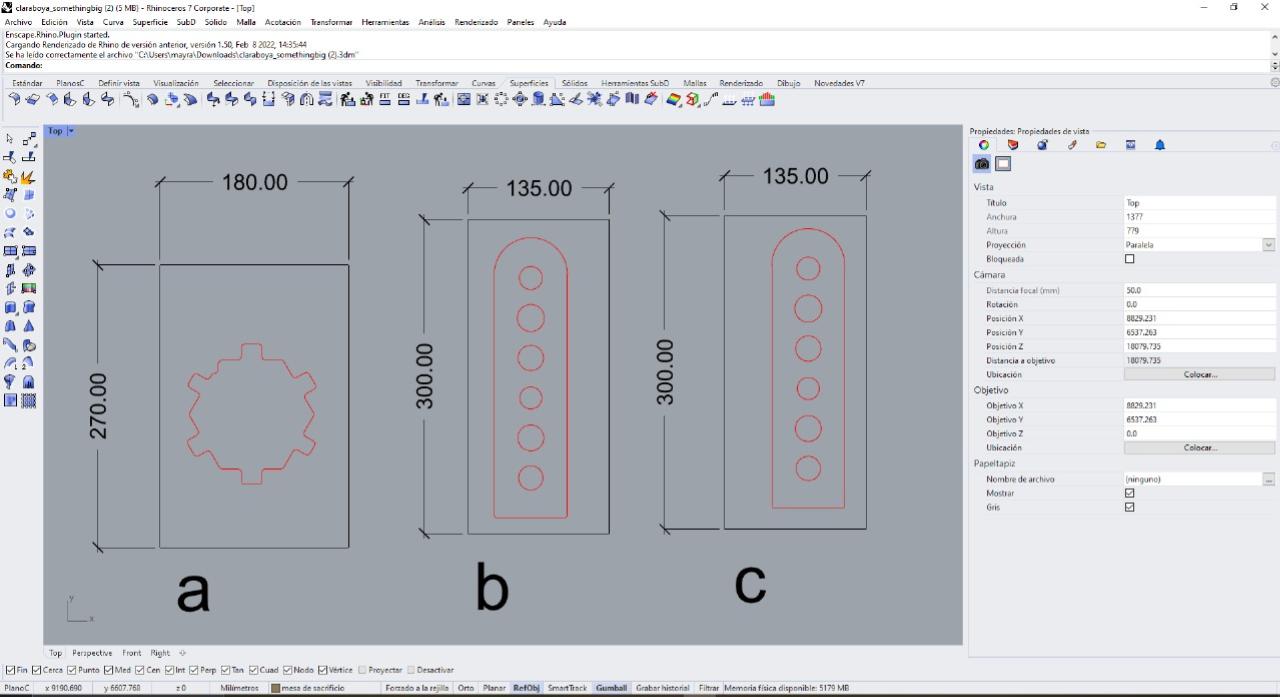
In my case I was in charge of making the proposals in FreeCAD, it was interesting to see how a 2D design, transferred to 3D and then sent to the machine can be manufactured on a large scale. I really like the process and I think that a lot of things can be done with this type of machines. Thanks to the team work we did design tests also in Rhino, here I show some pictures of the process.


FreeCAD


FreeCAD


FreeCAD


FreeCAD


Rhino


Rhino


In this process I also ventured to learn the handling from the ArtCAM and GRBL controller programs because when we made the configurations these were the programs that finally facilitated the handling of the machine, below I share my step by step to understand how to send a file to cut.


New


Import


Centre in page - mm


Transform vector


Put zero


Good location


Material Setup


Profiling tool


I create a new one


Characteristics of my drill bit


Select the new


Add ramping moves


Write the name and put now


Save Toolpath


After having the file ready in artcam we go to GRBL Controller to locate and calibrate the position of the start of the milling machine, with this program I learned how the information is sent in text to a machine, the G CODE, it is interesting to see all this process to understand the system. Here I show some images before the shipment of the wood piece.


Exploring GRBL


First step


Machine recognition


Connection ready


File ready to cut


Cutting on the way


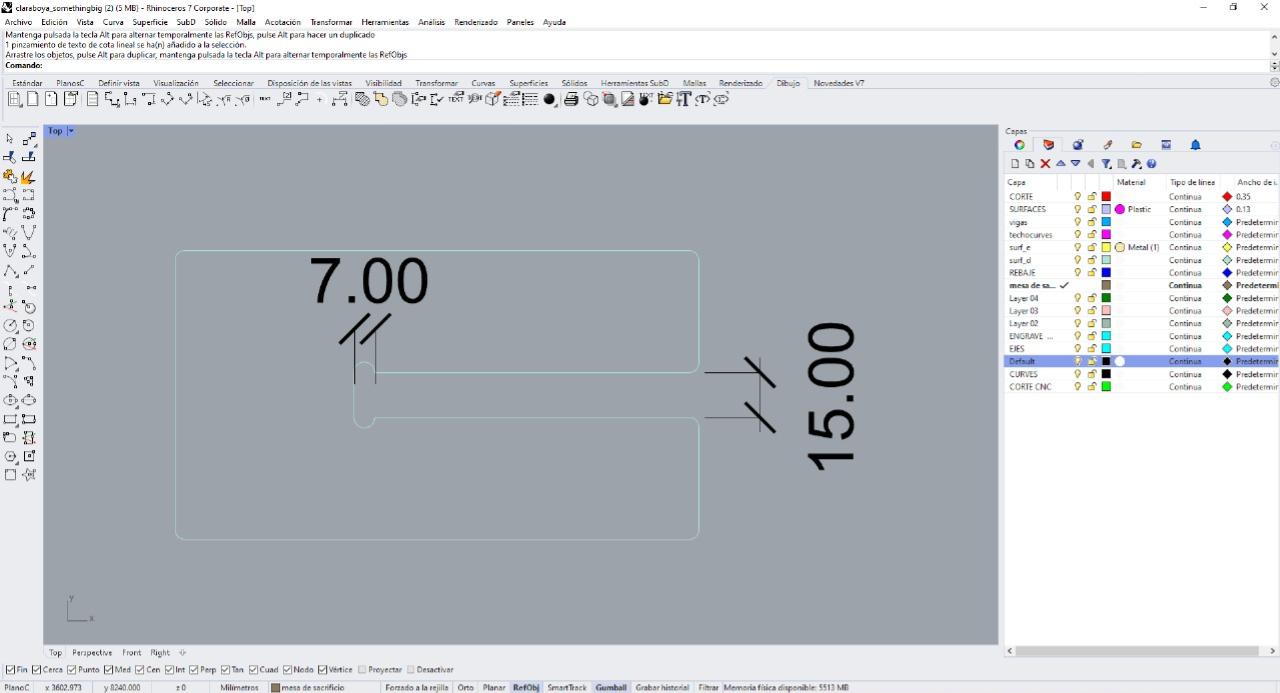
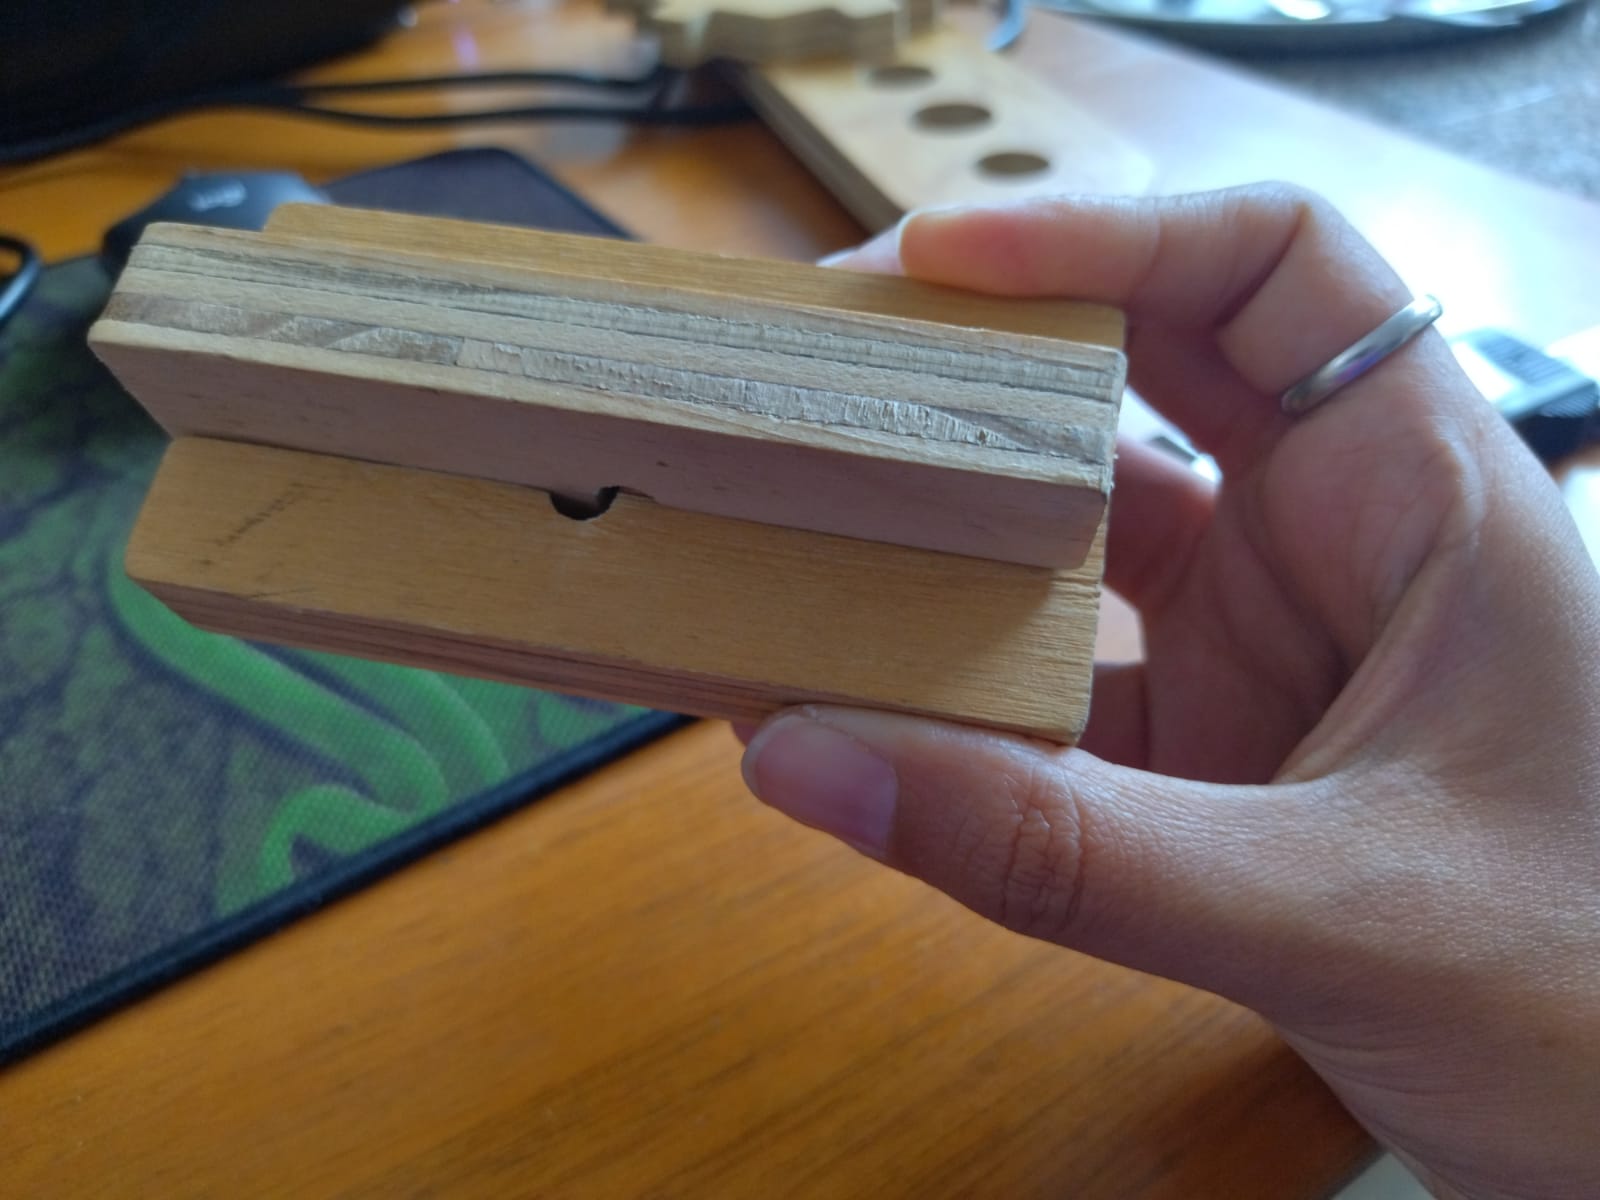
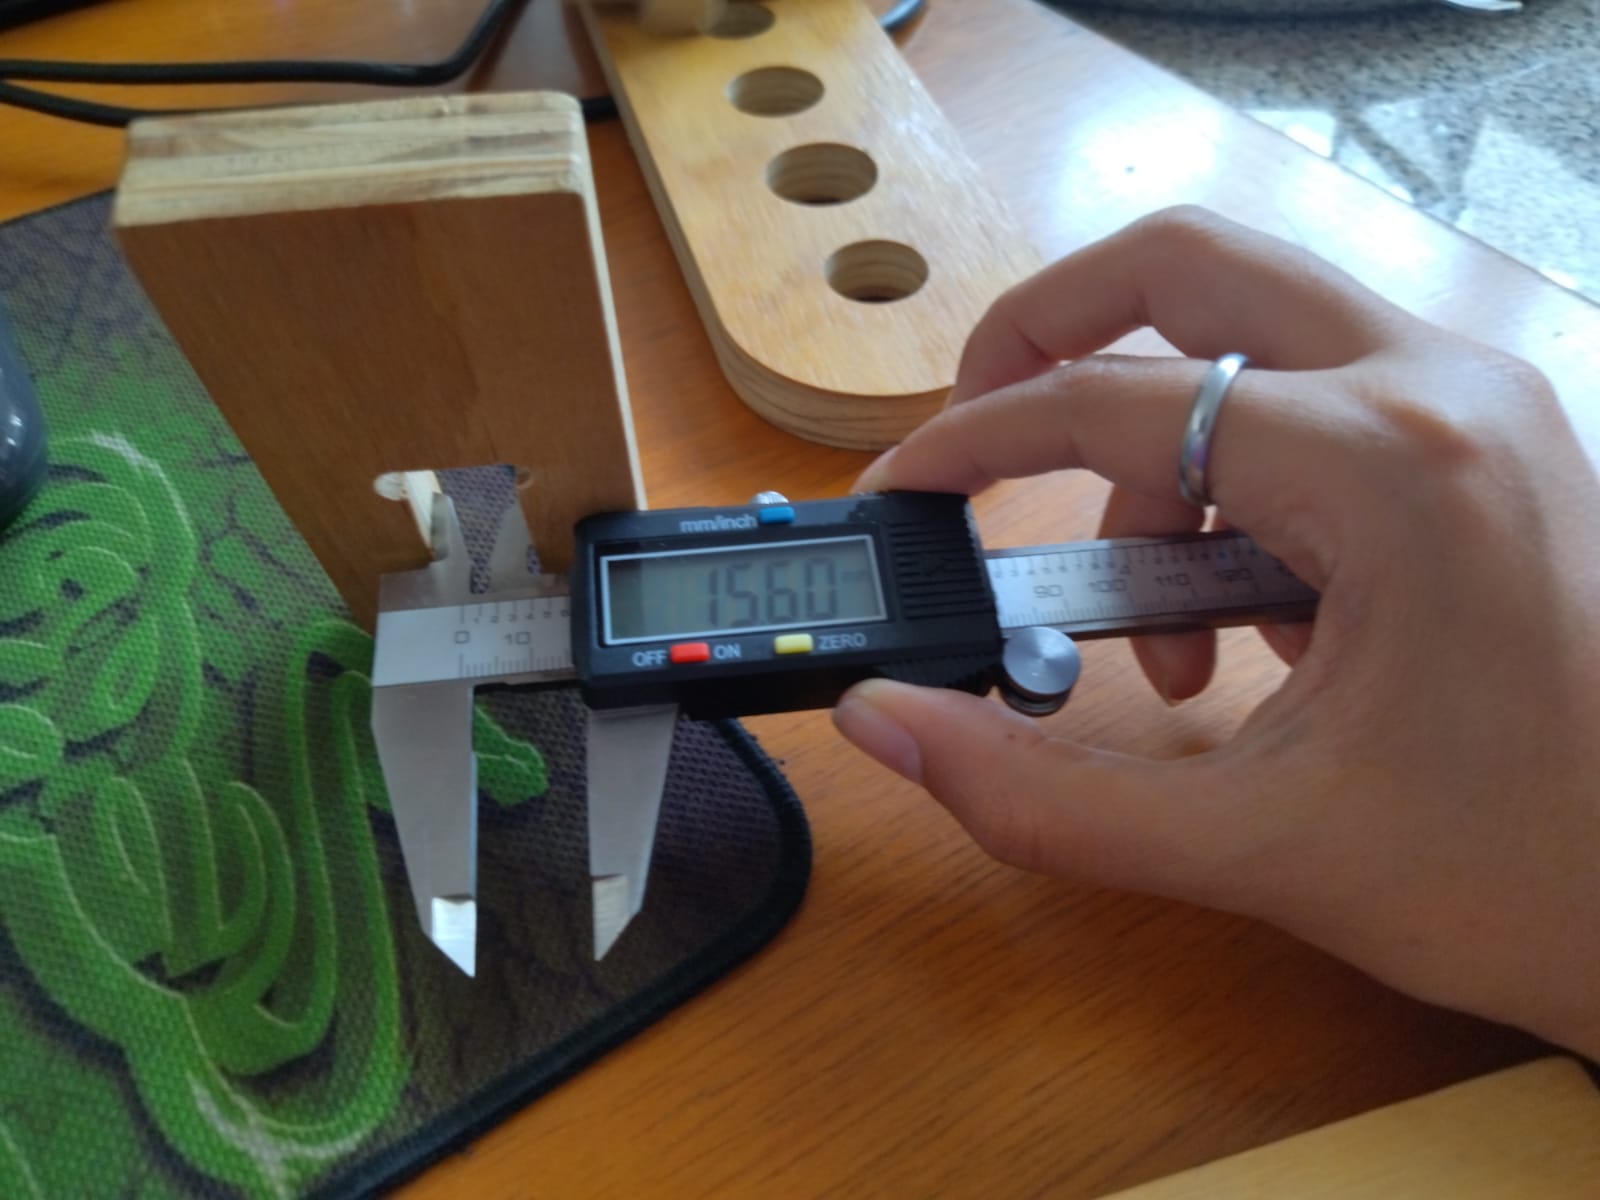
In the meantime, and before sending the pieces to be cut, we made a test of the insets to be able to define the thickness of our drawings, our material is 15 mm thick so it was important to know through the tests and then send the final file.This is how we realized that when we sent the parts to be milled, the machine actually removes more material than estimated. Our design had a 15 mm slot, but after milling it, it measured 15.60 mm, as shown in the picture.


Test design


Test design


Manufactured test


Manufactured test


Joints


Joints


First piece


First piece


First piece


First piece


The collaborative design process has made it possible for each of us to apply the co-creation of a project that will serve us all, we are still working on completing all the pieces, having only one machine we adapt to its speed but we are constantly moving forward. Here is a picture of me testing one of the formats on the ceiling of our Fab space.


Pieces


Pieces


Test on the roof


Finally, after managing to fabricate all the parts, our skylight was complete.


Complete pieces


Assembly


Claraboya


Claraboya


Best team


At last!


Digital Woodworking


This week has been very difficult but I've had such a good time that I've been able to learn a lot and not feel stressed, here I share with you a video that I thought of editing while I was cutting some of my pieces. πŸ₯°


Download the files here


Proyecto Claraboya
Ventana