5. 3D Scanning and printing
This week was interesting, we did 3D printing and scanning. 3D printing is a process of additive production by which we obtain a physical object from digital design. Subtractive manufacturing is a term for various controlled machining and material removal processes. Final parts are shaped by removing material through cutting, boring, drilling, and grinding. There are several 3D printing technologies (SLS, FFM, SLA…), I used a 3D printer based on FDM technology. Fused deposition modeling, or FDM 3D Printing, is a method of additive manufacturing where layers of materials are fused together in a pattern to create an object. The material is usually melted just past its glass transition temperature, and then extruded in a pattern next to or on top of previous extrusions, creating an object layer by layer. One of the biggest advantages of FDM 3D printing is scalability and complexity of the object. Complex object can be easily scaled to any size. One of the most often referenced downsides of FDM 3D printing is part quality and time to print.
Group assingnemt
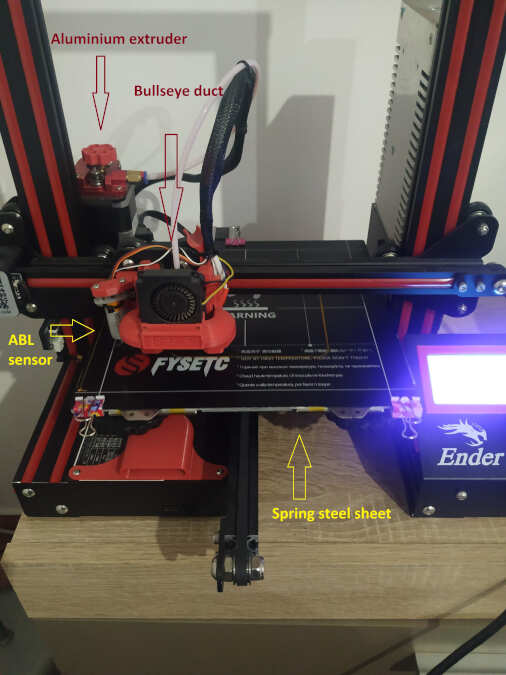
For the group task we had to test the design rules of our printer. I used an FDM printer Ender 3 from Creality. Ender 3 has a print size of 220x220x250mm and heated bed. It comes with bowden extruder. The printer has a new mainboard (SKR mini E3), aluminum extruder, flexible steel sheet for easier removing finished parts and other visual improvments.
I decided to print the so-called All in one 3d printer test. I found it here. This test includes: support test, scale test, overhang test, hole test, diameter test and bridging test. I downloaded the stl model and loaded it into the Cura. Ultimaker Cura is one of the most popular slicing software for 3D printing. The first time the Cura is started, we need to select the printer we will use. I chose Creality Ender 3. Some of the parameters that I set in Cura for printing are:
- standard quality of 0.2 mm layer height and 100% infill
- 45 mm/s printing speed
- Temperatures 220℃/60℃ (nozzle/bed) and no supports
I use orange PLA (1.75mm diameter) to print all the model, except benchy. I used red PLA for benchy.

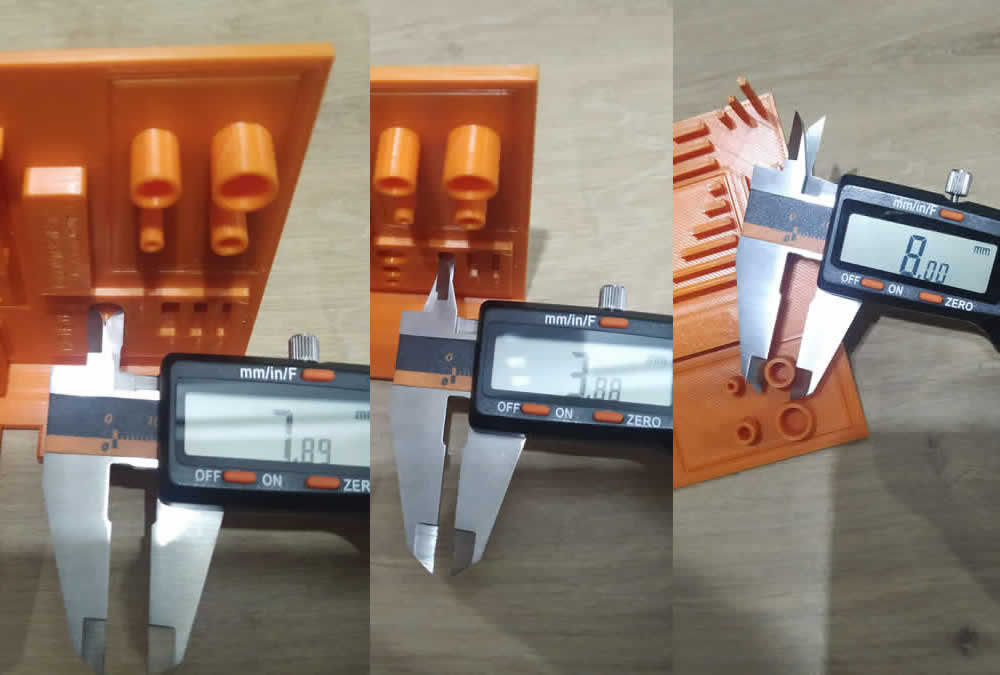
When all the parameters are set, click on the slice. This allows us to see the time it takes for 3D printing and material consumption. Also, when I click on the slice button, a file is saved. Then I save it on the sd card and then put in the 3D printer. On the 3D printer via sd card I load the sliced file and printing starts. The following pictures show the results I got.
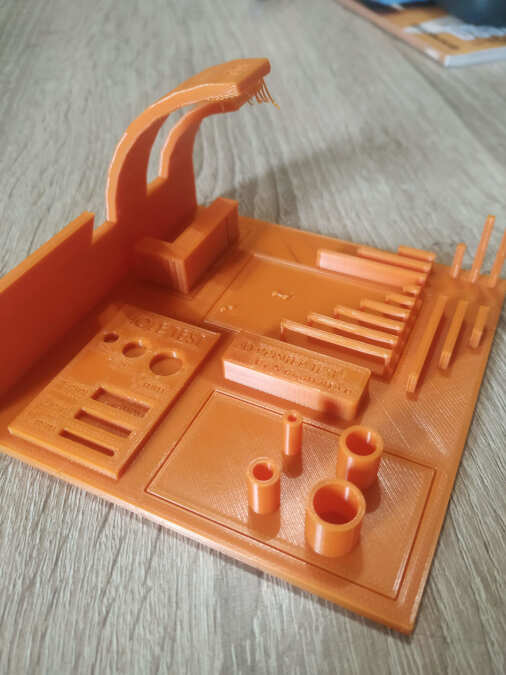
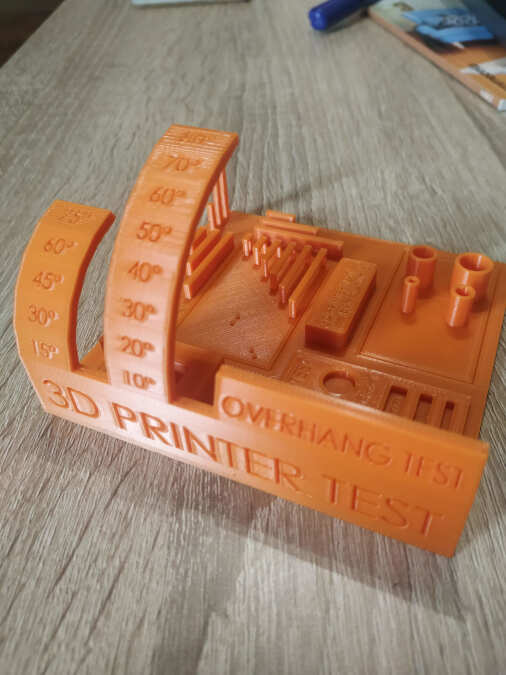
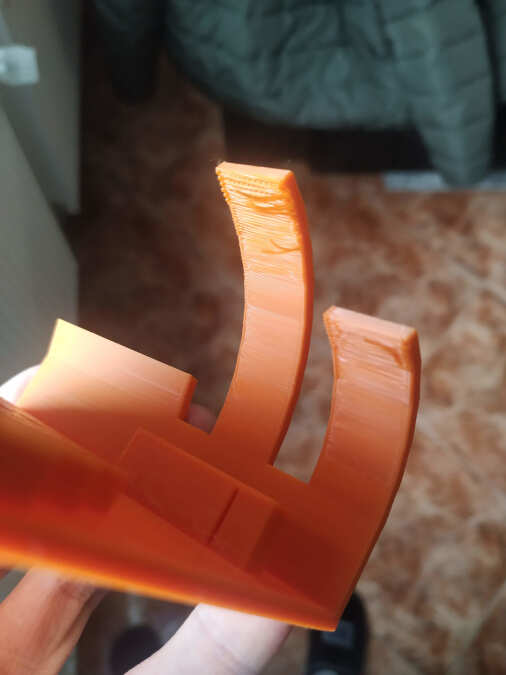
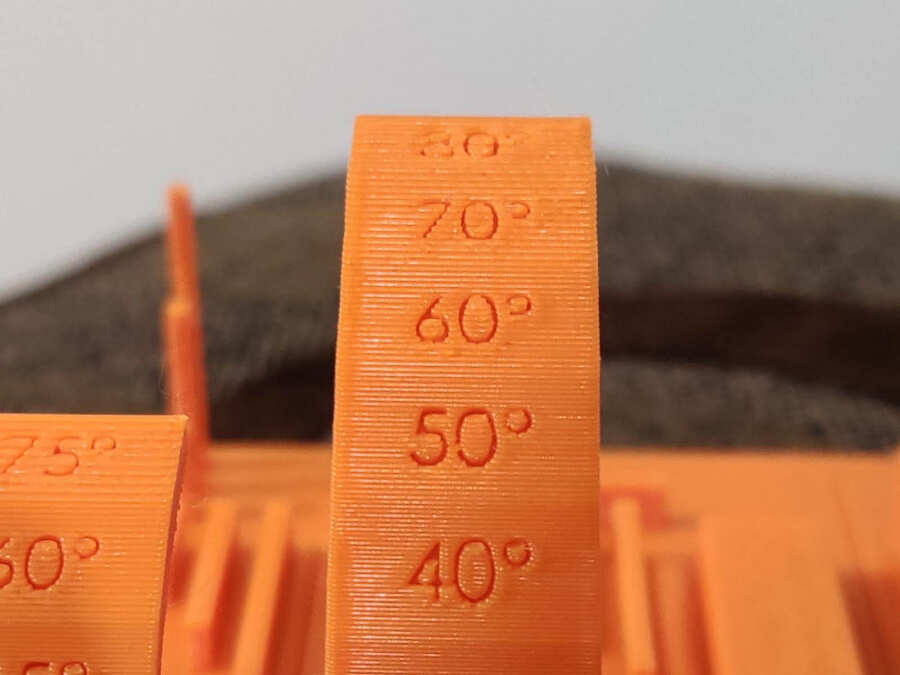
The part has a nice surface finish, nice bridging capabilities. No stringing issue. Overhangs goes up to 80 degress (some sagging present) and the numbers is easily readible. Up to 60 degrees is somewhere best. Maybe a little ghosting (around numbers). As for the dimensions we have an average of about 0.13mm offset but it’s not consistent. On some measurement it’s completely accurate.
I also printed and probably the most famous benchmark for 3d printers, benchy. I found it here. Results can be seen here.
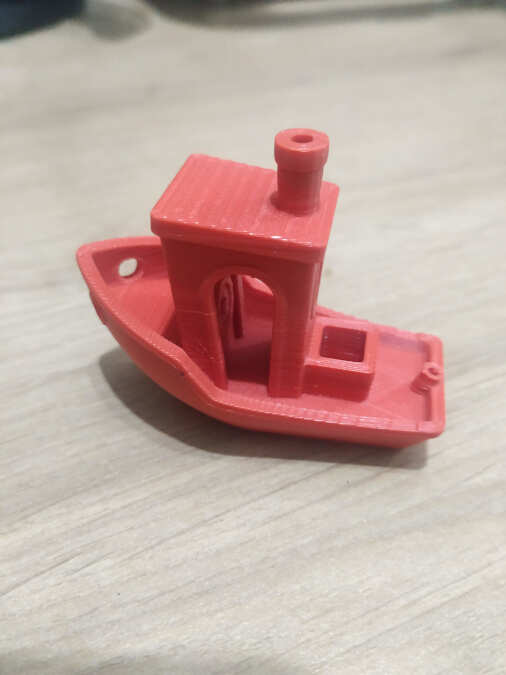
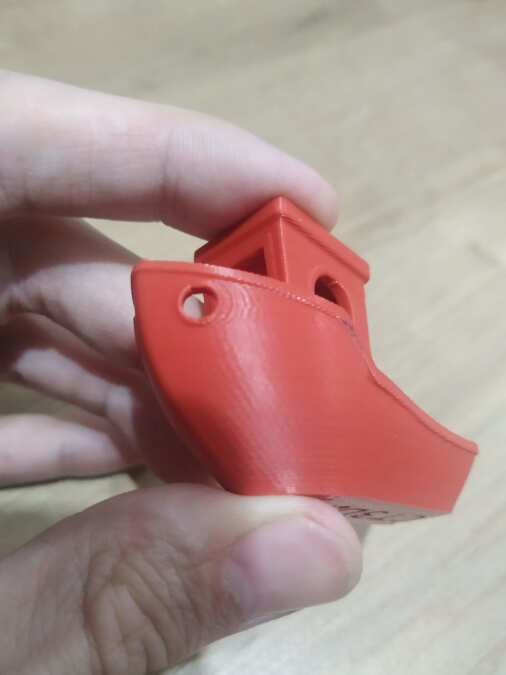
You can also notice a nice surface finish and maybe a little ghosting or ringing (around the circle area).
Design and 3D printing
For the individual task we had to design and 3D print an object (small, few cm3, limited by printer time) that could not be easily made subtractively. I decided to design and 3D print the bearing. I started by drawing the layout of the bearing in cross section. For the outer and inner part, I used the revolve command around the z-axis.
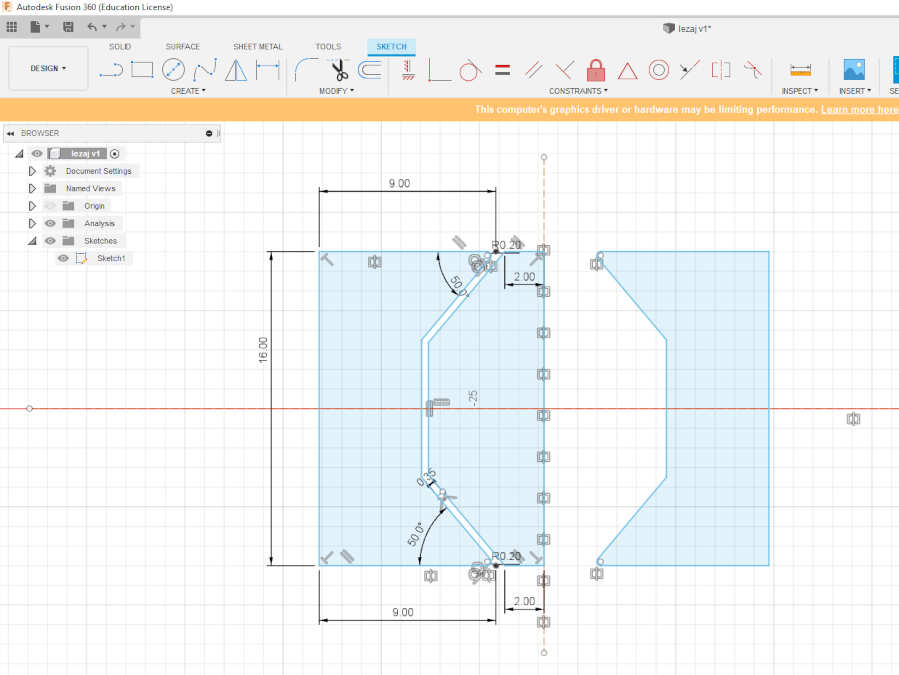
For the middle part I drew half and used revolve around its axis to be symmetrical. After that I used a circular pattern to get everything in place. I put 0.35 mm between the parts so that it doesn’t stick when printed. I think it can go even less to get even better accuracy.

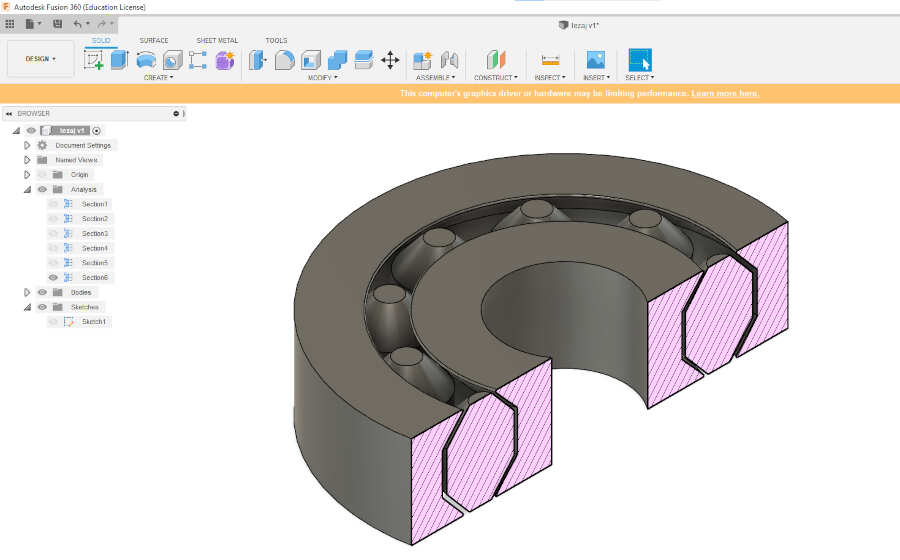
Here you can see the circular cross section of the bearing (I used the section analysis command).
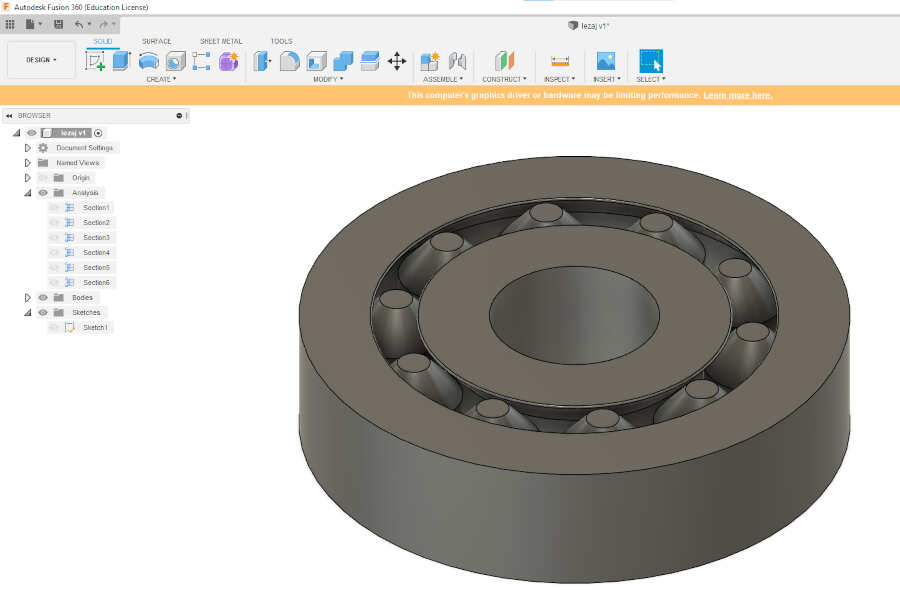
Full 3D model
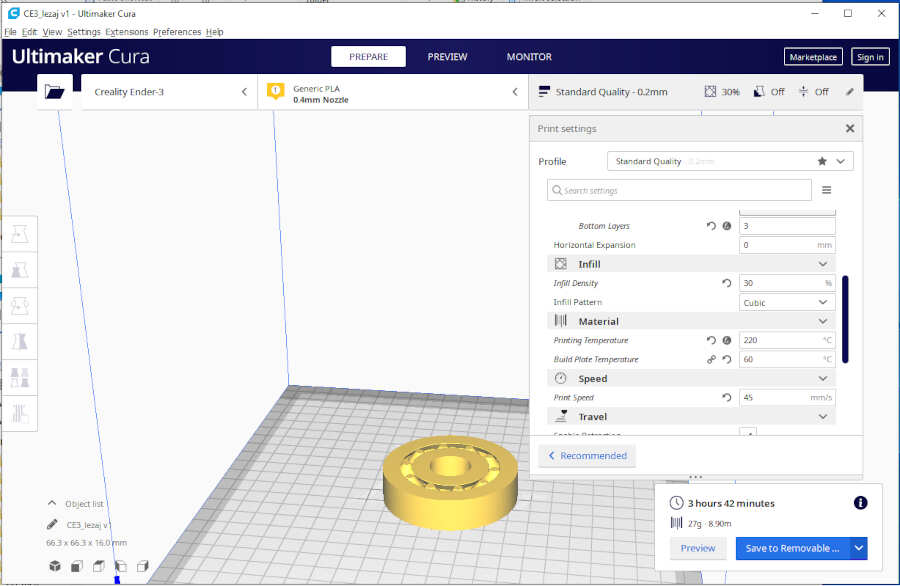
After I design the bearing I saved it as a stl file. I loaded the stl file in Cura and set the parameters for printing. Cura has recommended parameters that we can use and if necessary change a little. I used similar parameters as in the first print, infill density I put 30% and clicked slice. Time required to print was just over three hours. I got a functional bearing which you can see in the picture.
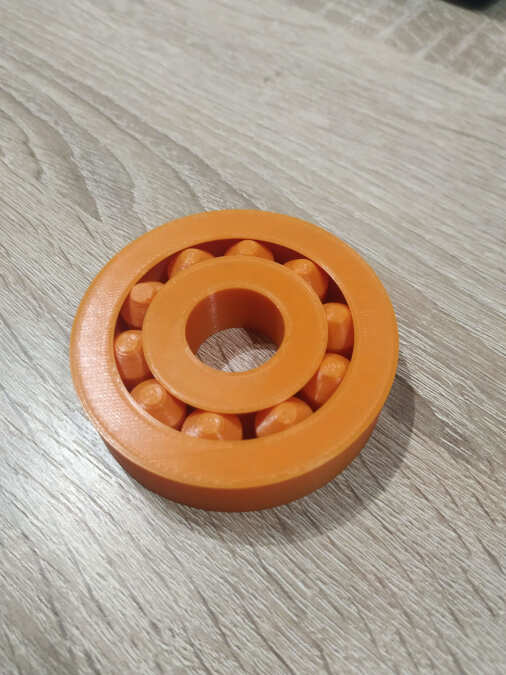
In this example we can see the advantages and disadvantages of 3D printing. This bearing has overhangs and nested parts. The advantage is that we can make this bearing from one part to be functional. To make the same kind of bearing by subtractive production, they would have to use several production processes and eventually assemble a functional bearing. The disadvantage of 3D printing is the print details (especially with FDM printers), and sometimes the time it takes to print. For prototyping a 3D printer is useful, while for series production they would probably have to turn to subtractive production.
3D scanning
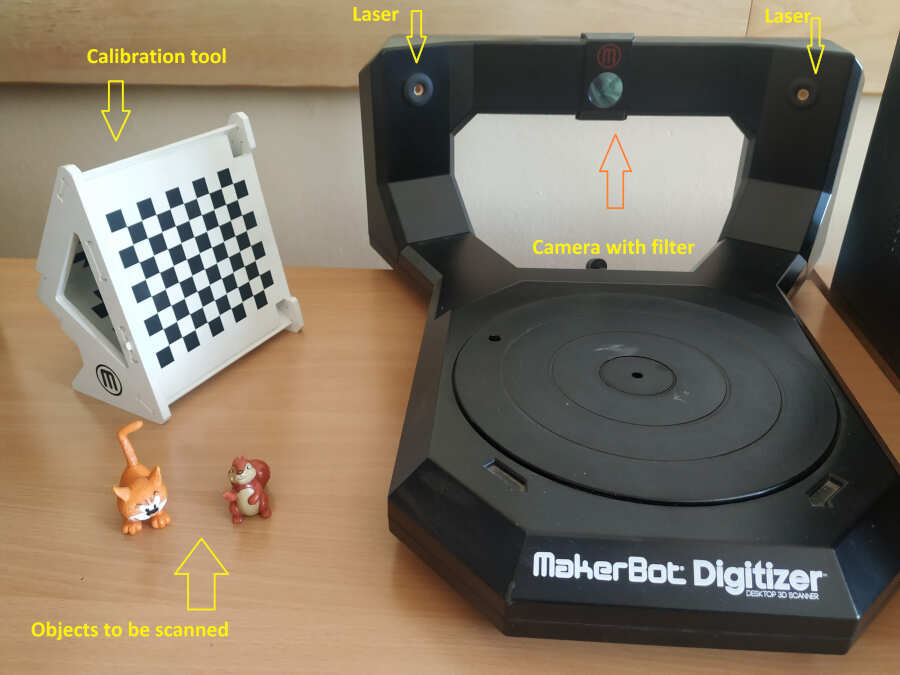
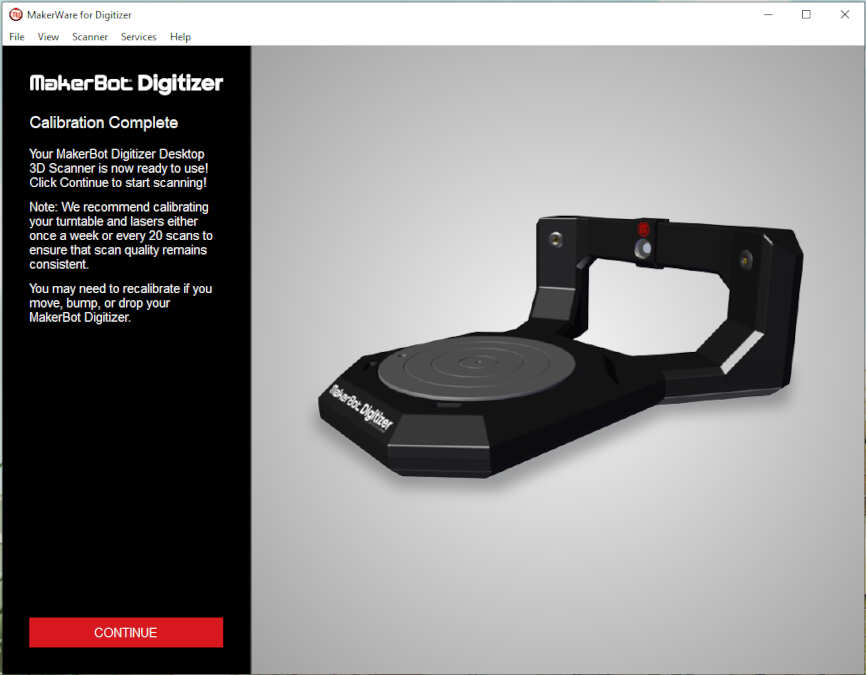
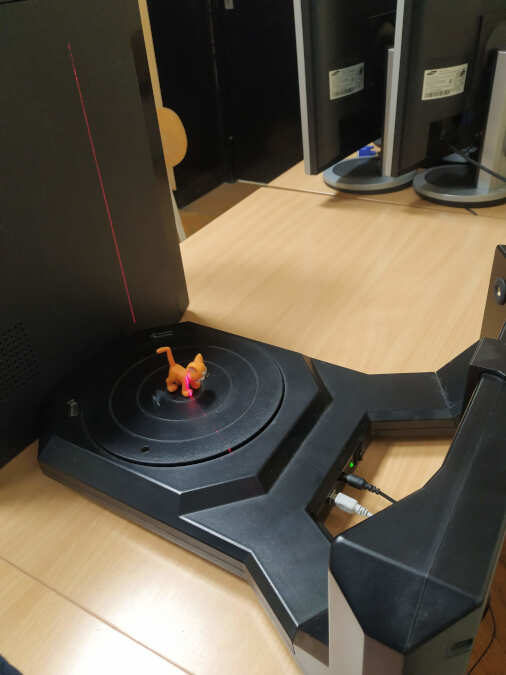
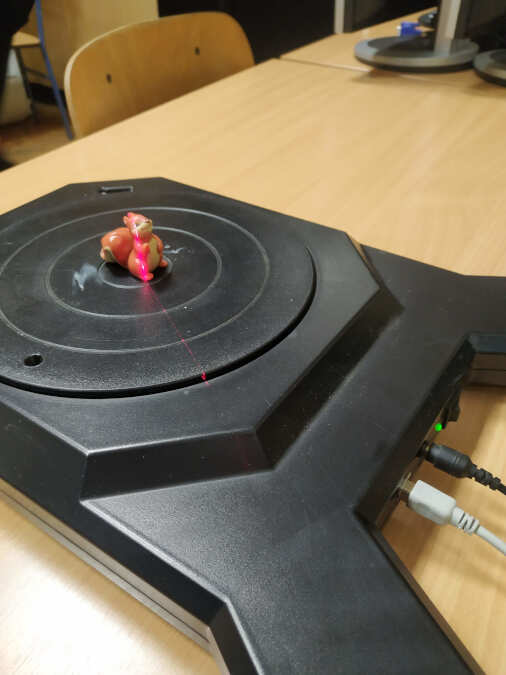
The second part of the task was to scan something on a 3D scanner. 3D scanning is the process of analyzing a real-world object or environment to collect data on its shape and possibly its appearance (e.g. color). The collected data can then be used to construct digital 3D models. A 3D scanner can be based on many different technologies, each with its own limitations, advantages and costs. I used the MakerBot Digitizer 3D scanner. The MakerBot Digitizer 3D Scanner creates a 3D model of a physical object by taking a quick sequence of photos while the object rotates on a turntable. To accomplish this:
- The scanner has two lasers that are mounted on the left and right corner of the Digitizer that allows it to perform a linear scan that determines the profile of the object. The camera will then take a series of photographs of the object.
- MakerWare software for Digitizer combines the photographs and the linear scan to create a scatter plot.
- Once the scan is complete, the MakerWare software will then generate a 3D mesh from the collected data. It will then send the mesh directly to the 3D MakerBot printer via MakerWare, share it through a sharing site like Thingiverse, or can be edited with a modeling software (this scanner can be used with most modeling software). In addition, the Digitizer has a dimensional accuracy of up to 2mm.
I downloaded and installed MakerWare for Digitizer from here (MakerBot official site). Before 3d scanning, it is first necessary to calibrate the 3d scanner with the calibration tool. Calibrate camera, turntable and align lasers. I followed the instructions in the software which are very clear. There are letters on the calibration tool that need to be rotated according to the instructions.
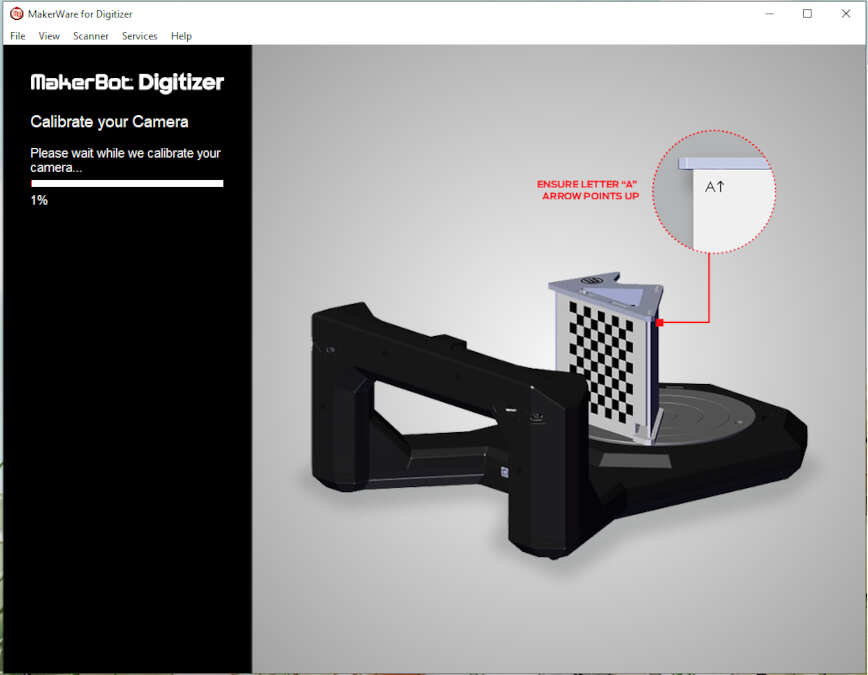
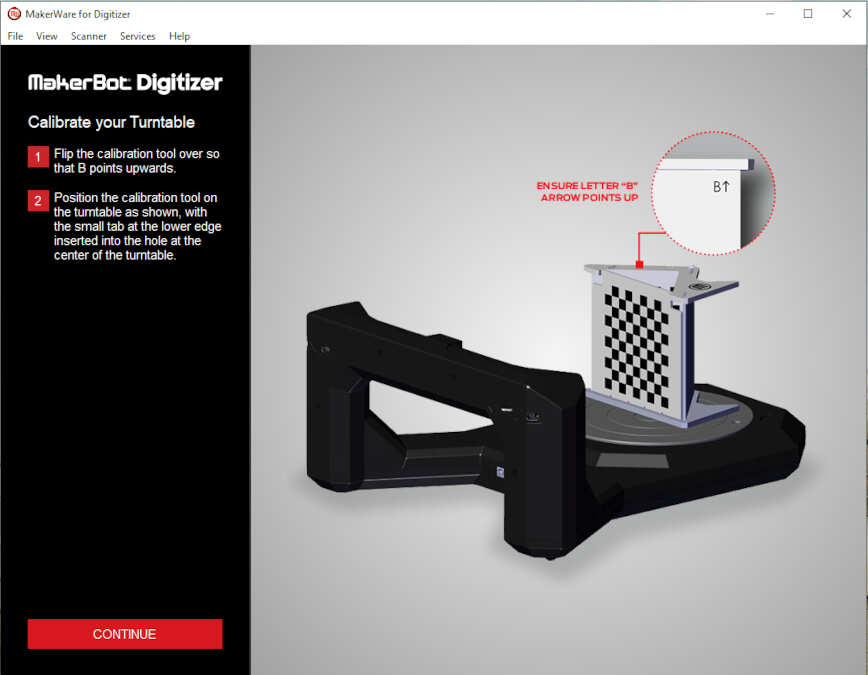
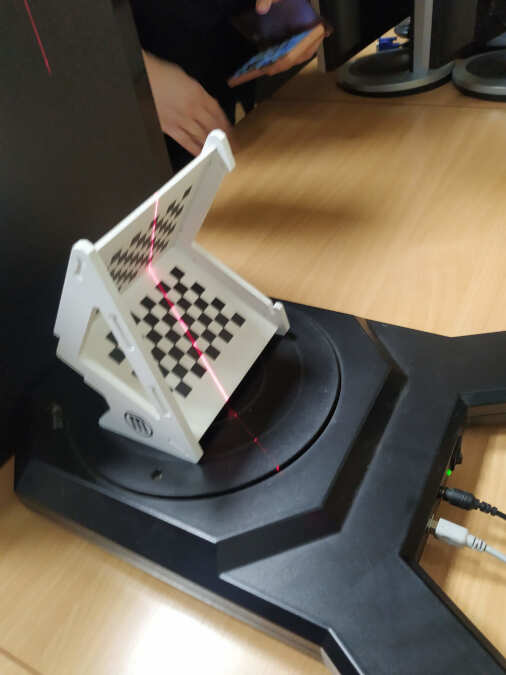
If the calibration is successful we will get a confirmation. The first time I did the calibration it was not successful so I tried again. After the second attempt, the calibration was successful.
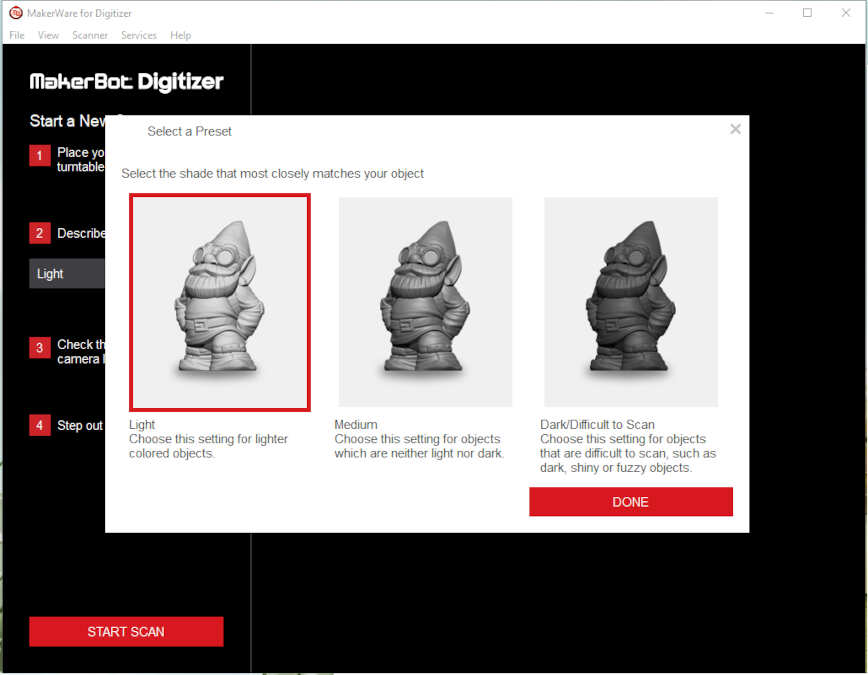
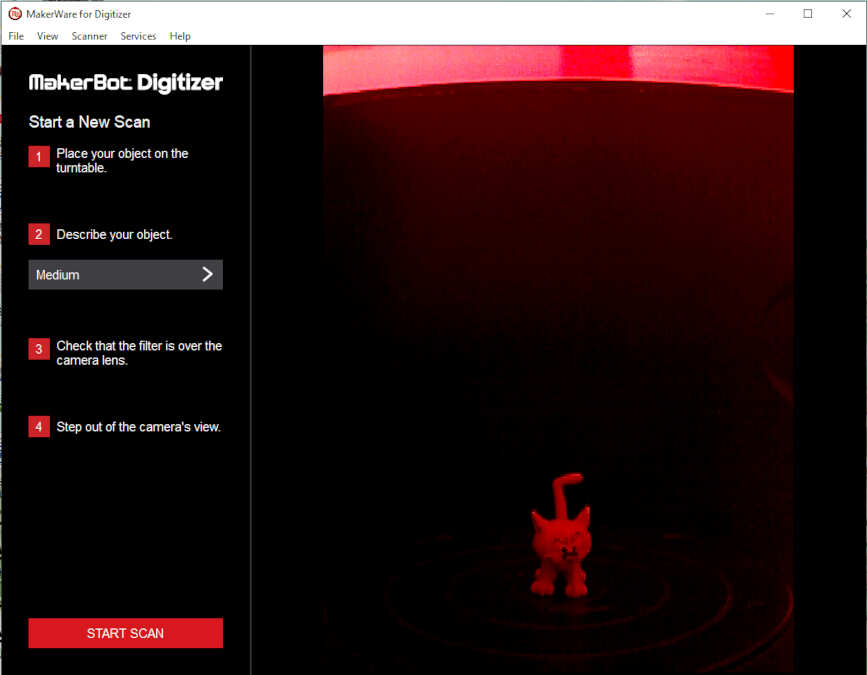
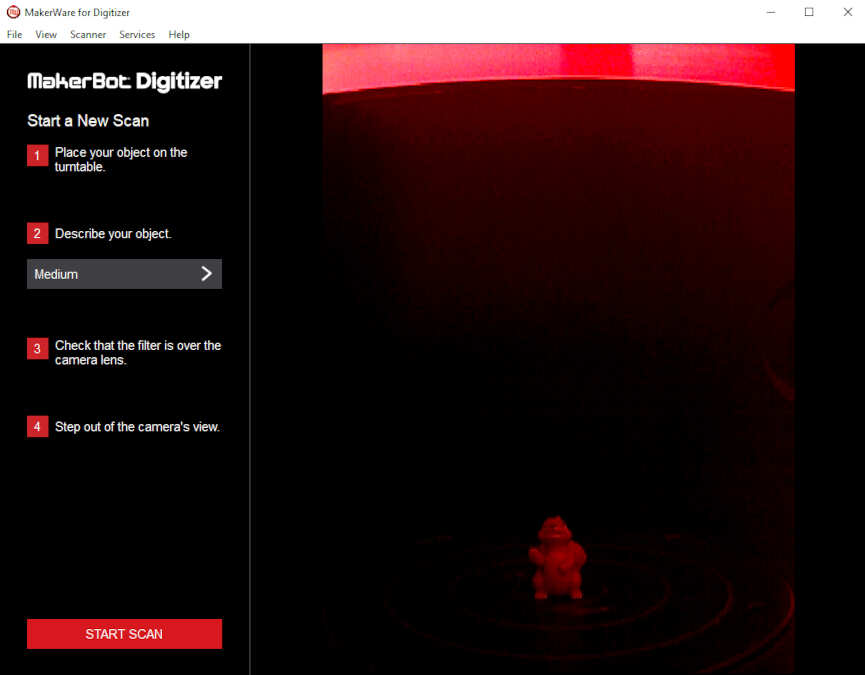
The next step was to scan some objects. I happened to have a cat and a squirrel :). I decided to scan both so I could see how it would turn out. I thought the cat would be harder to scan, but in the end they both turned out well. We must select a preset before starting the scan. We need to select a shade that closely matches my object. I choose light preset for the cat and medium preset for the squirrel.
I decided to try scanning in a dark and light environment. In the back I placed a black background. I set it so that it does not scan anything from the environment background. The end results did not differ too much. I think it’s just important that the light isn’t aimed directly at the camera.
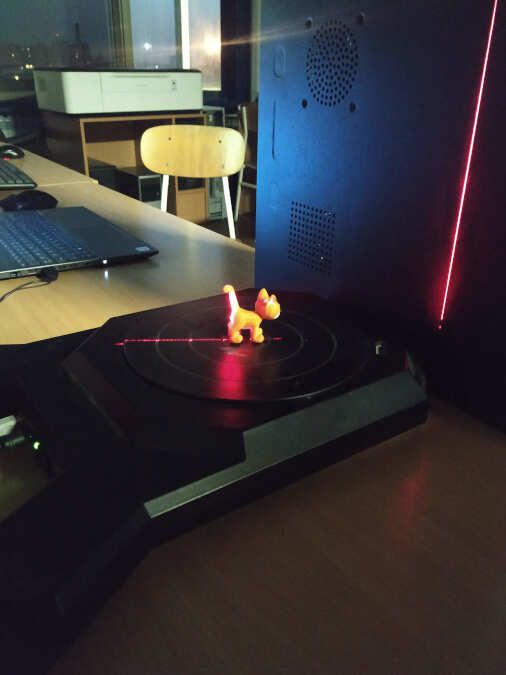
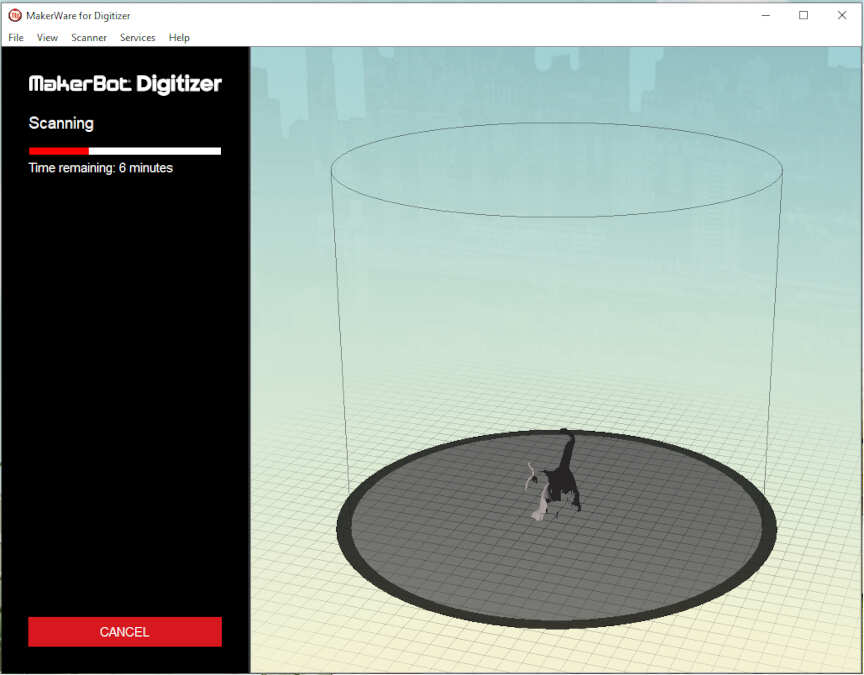
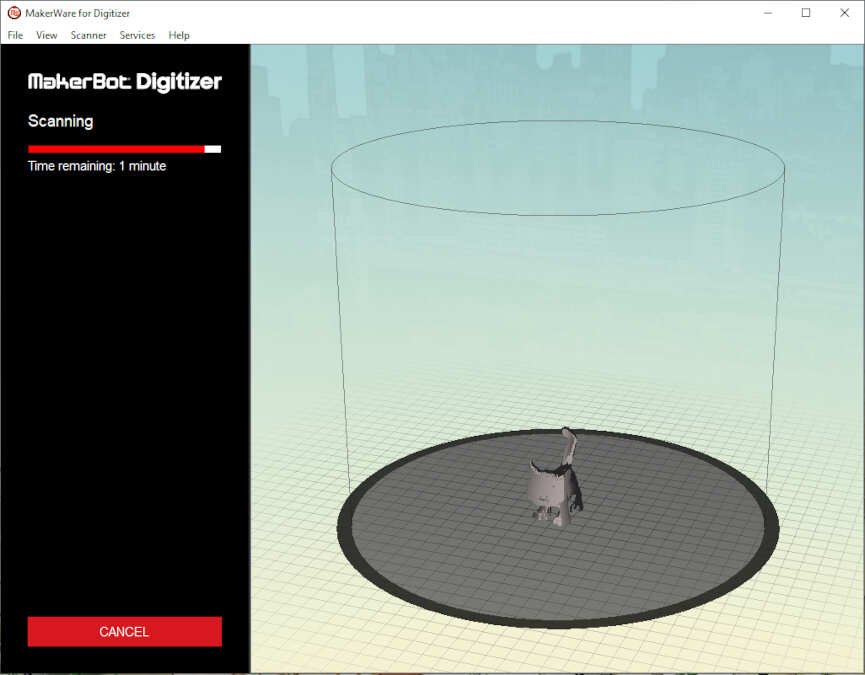
This is how camera sees the objects.
After I set everything up I clicked on start scan. It took 9 minutes for both objects to complete the scan.
After the scan was complete, I saved the objects as stl files (there are other extensions). You can see the results below.
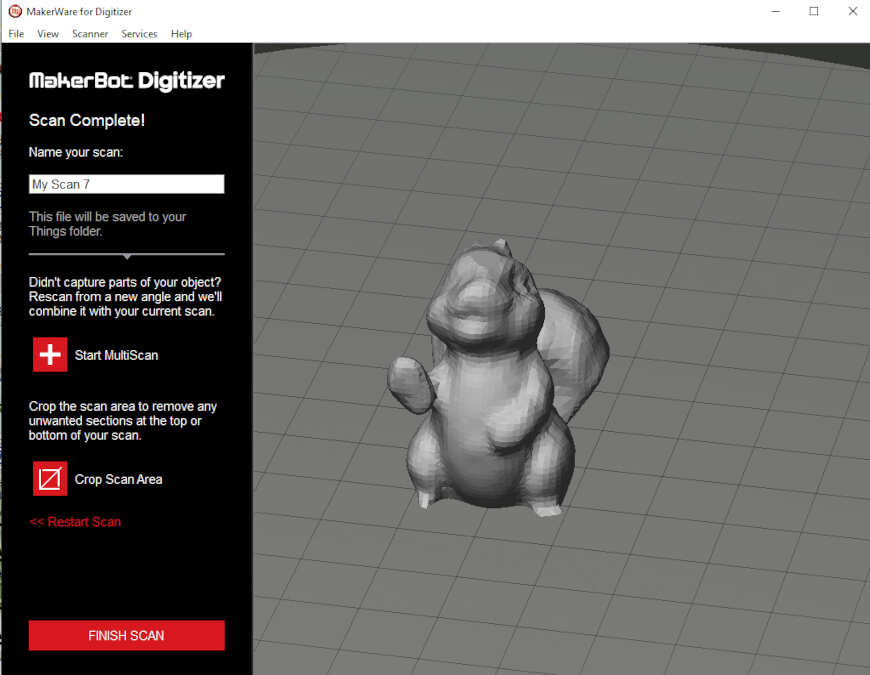
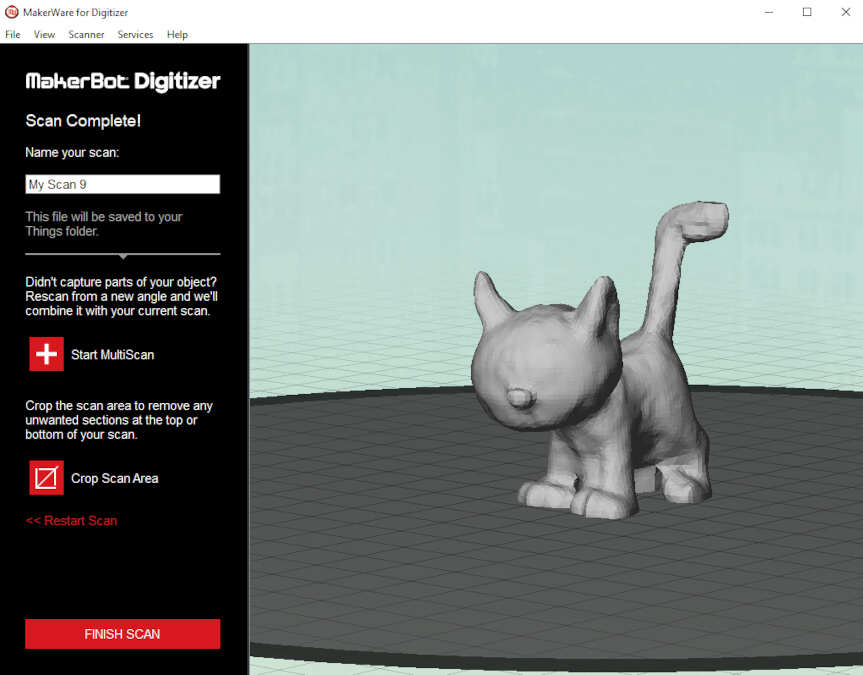
Here you can see 3D model of scanned objects.
In the end, I decided to print out the squirrel and compare it to the original. I loaded the scanned stl file in Cura, I used the same parameters as for the bearing. You can see the results below.
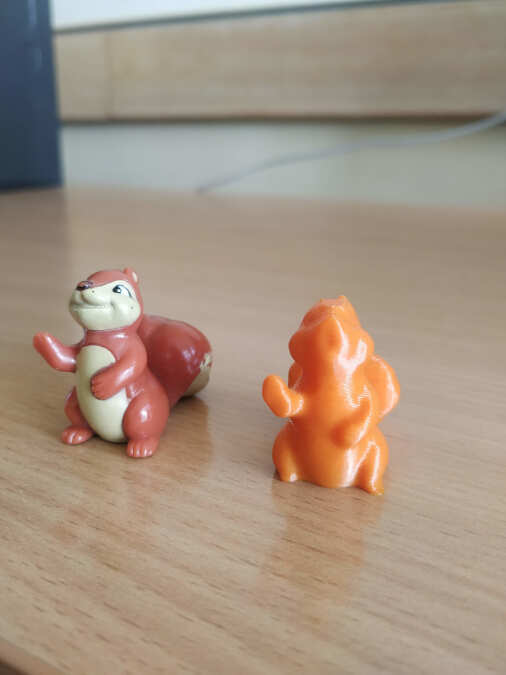
The differences I noticed were on the legs, feet and tail.
Conclusion
3D scanning seems very interesting to me but it also has its limitations. I had to scan the squirrel twice because the first time the hand was not scanned. The position of the object itself affects the scan. It is recommended to always put the object in the middle. If the object is not centered, errors in scan result may occur. I definitely plan to explore other possibilities of 3D scanning In the future.