W15 - Molding and Casting
1. Weekly Assignments ( -> what I did this week )
-
Individual assignment
-
Design a 3D mould around the stock and tooling that you’ll be using, mill it (rough cut + (at least) three-axis finish cut), and use it to cast parts.
( -> I made a clear small object in which a LED lights up the bubbles and tool marks. )
-
Group assignment
-
Review the safety data sheets for each of your molding and casting materials
- Make and compare test casts with each of them
Have you?
Questions from “Fab Academy 2020 Assignments and Assessment 
( -> my answers )
-
Linked to the group assignment page ( -> yes )
-
Reviewed the safety data sheets for each of your molding and casting materials, then made and compared test casts with each of them ( -> yes )
-
Documented how you designed your 3D mould and created your rough and finish toolpaths for machining, including machine settings ( -> yes )
-
Shown how you made your mould and cast the parts ( -> yes )
-
Described problems and how you fixed them ( -> yes )
-
Included your design files and ‘hero shot’ of the mould and the final object ( -> yes )
2. Group Assignment Link
3. Works, steps and some details
1) Planning
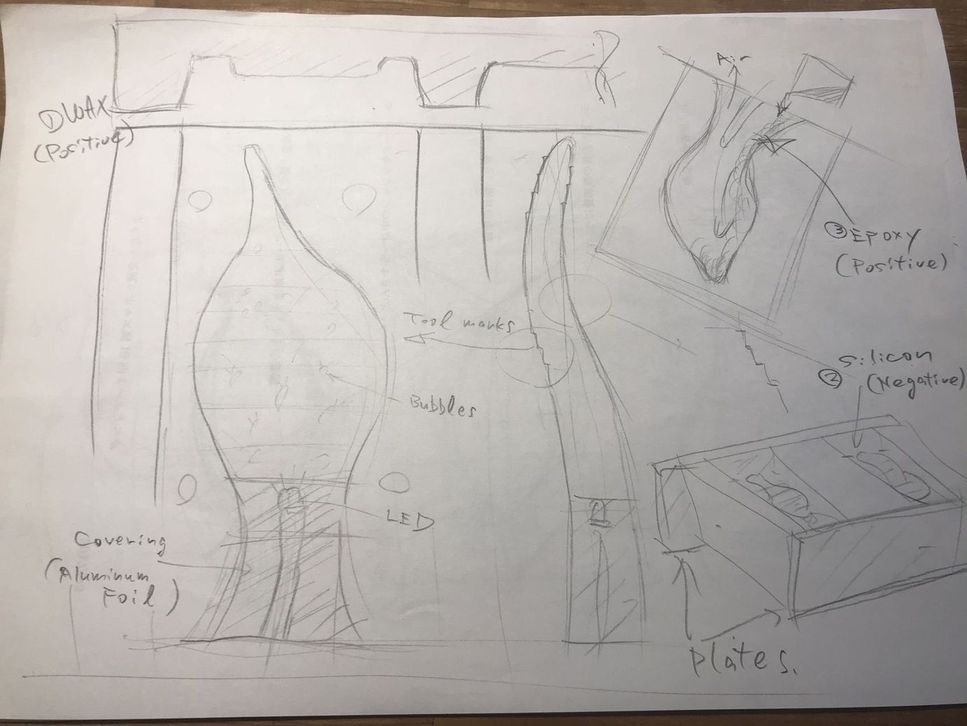
Through the engine development in my previous work, I made several kinds of casting products such as Aluminum sand-casting, Aluminum diecasting. etc, this time I planned to make something different, which has a kind of taboos for the ordinary casting technic for mass-production.
By the way, Ryukyu glass is one of the unique craftwork which has some amount of bubbles in it. I was inspired by this.

So, this is “Bubble leaf”.
(1) transparent material ( epoxy ), which contains bubbles
(2) slightly inclined curved surface, which might cause slight tool marks ( steps )
(3) LED in the bottom part, which lights up the above bubbles and tool marks.
(4) parting line which divides upper & lower patterns is curved, not straight. ( generally, pattern suppliers are reluctant to do this. )
So, the key is the amount and distribution of the bubbles.
I plant to check them with small test pieces.
( probably, the tilt angle of the molding patterns need to be changed during the curing process. or, rotation might move the bubbles to the center. )
2) modeling by fusion360
| product | |
|---|---|
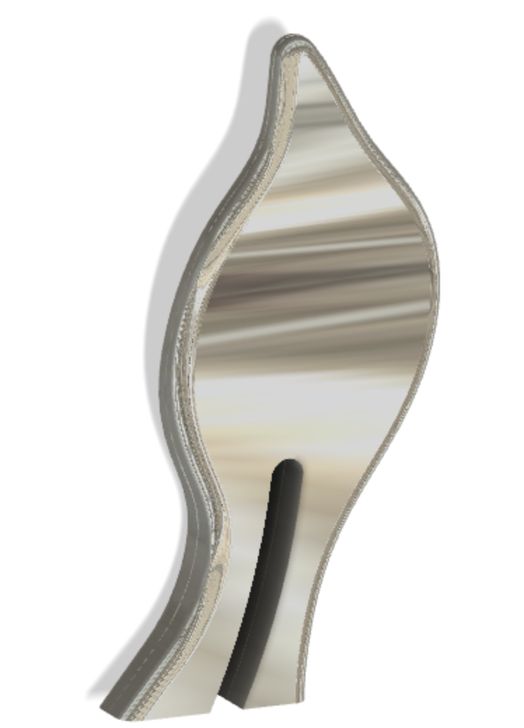 |
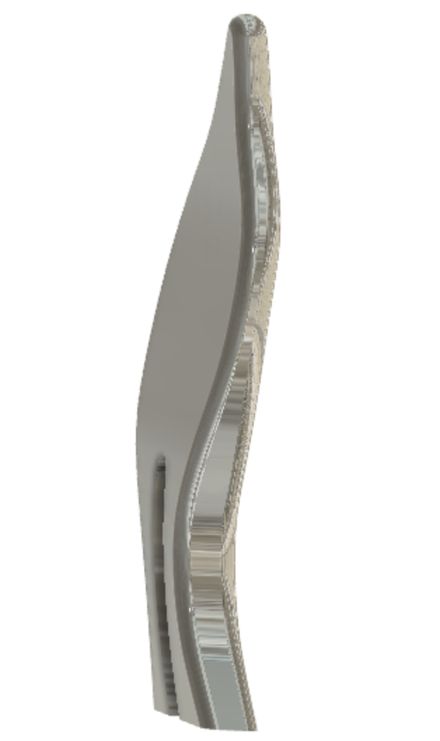 |
| pattern for wax ( positive ) | |
|---|---|
 |
 |
I eliminated the walls on the sides of the molding pattern ( Y- direction ), and planned to attach some plates on them when I pour the epoxy resin. This is the way to maximize the product in the limited WAX dimension.
3) CNC data preparation
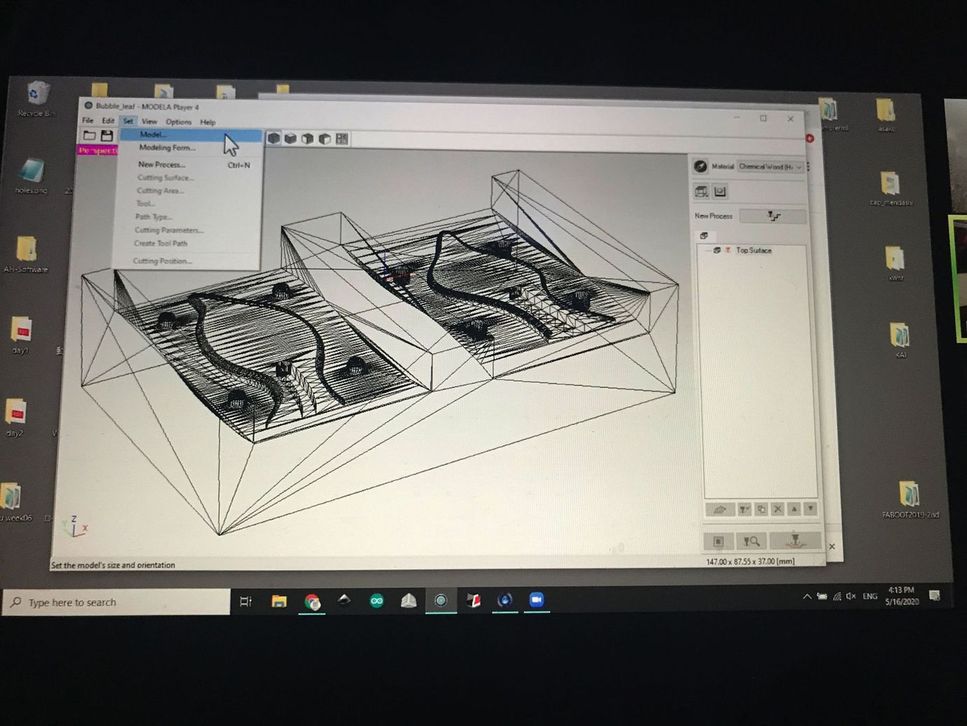
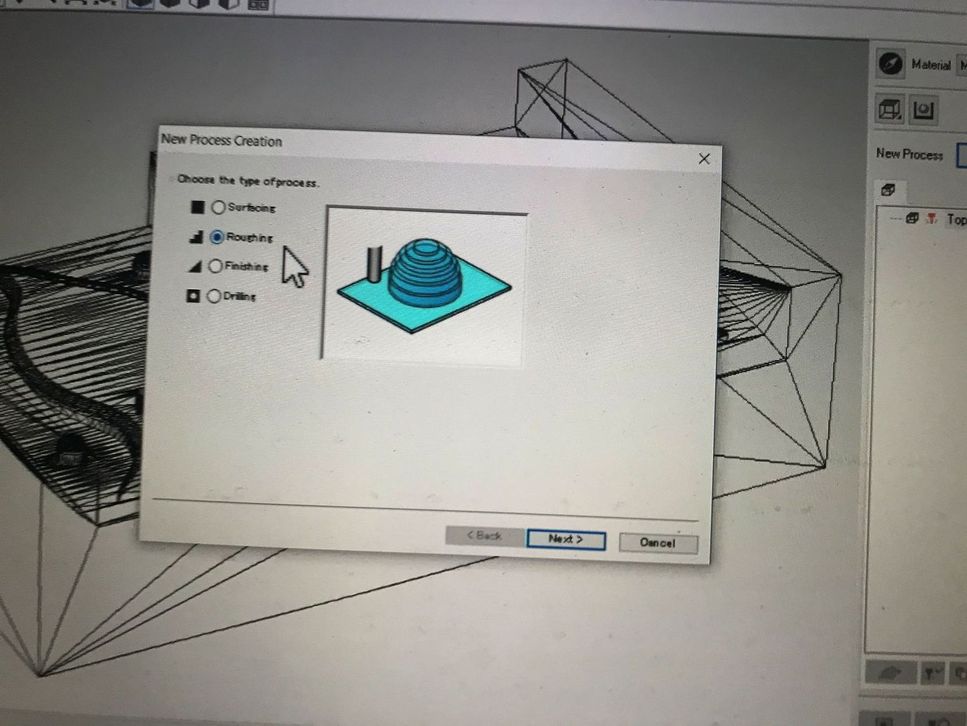
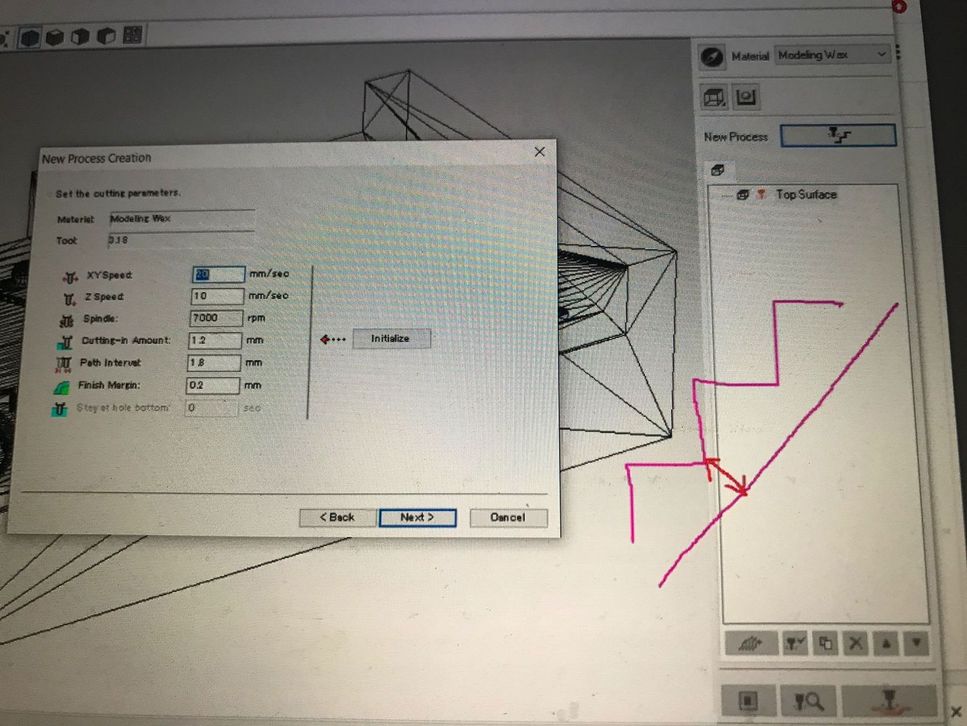
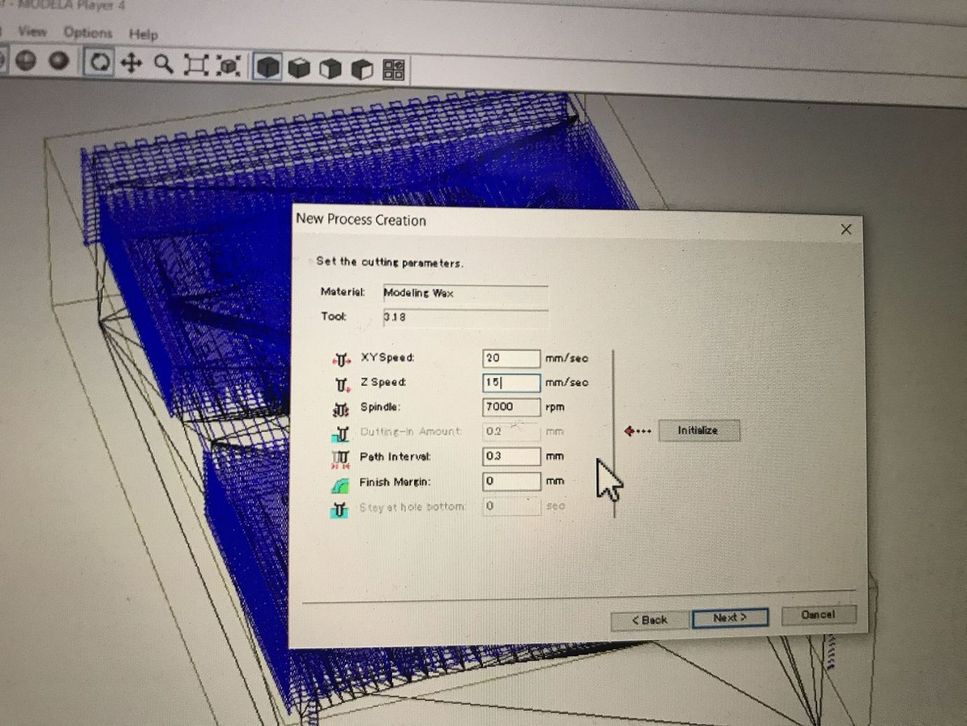
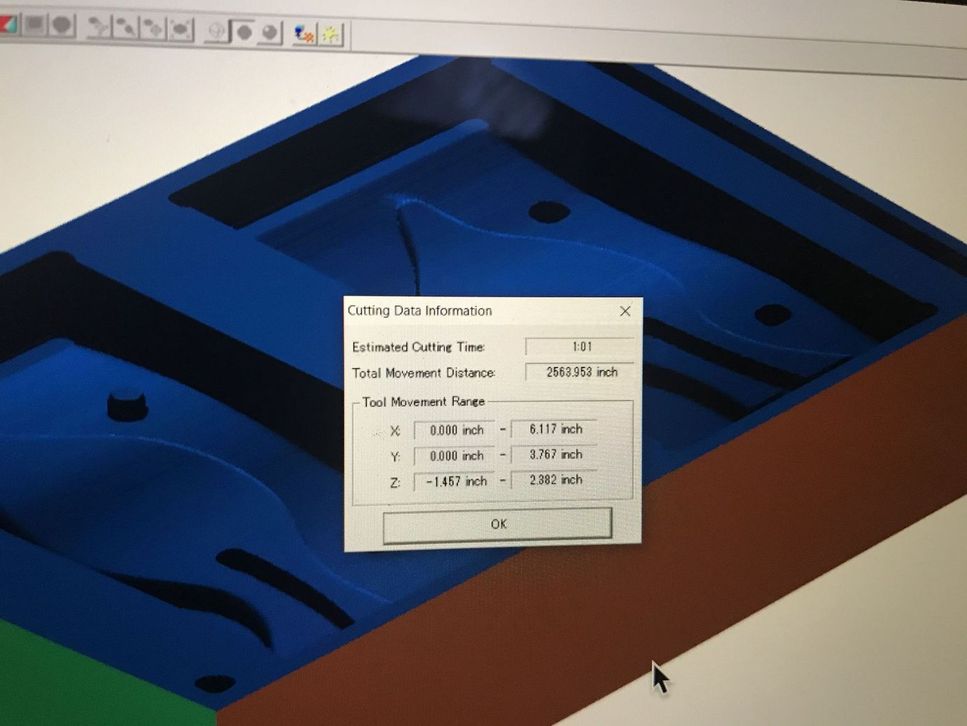
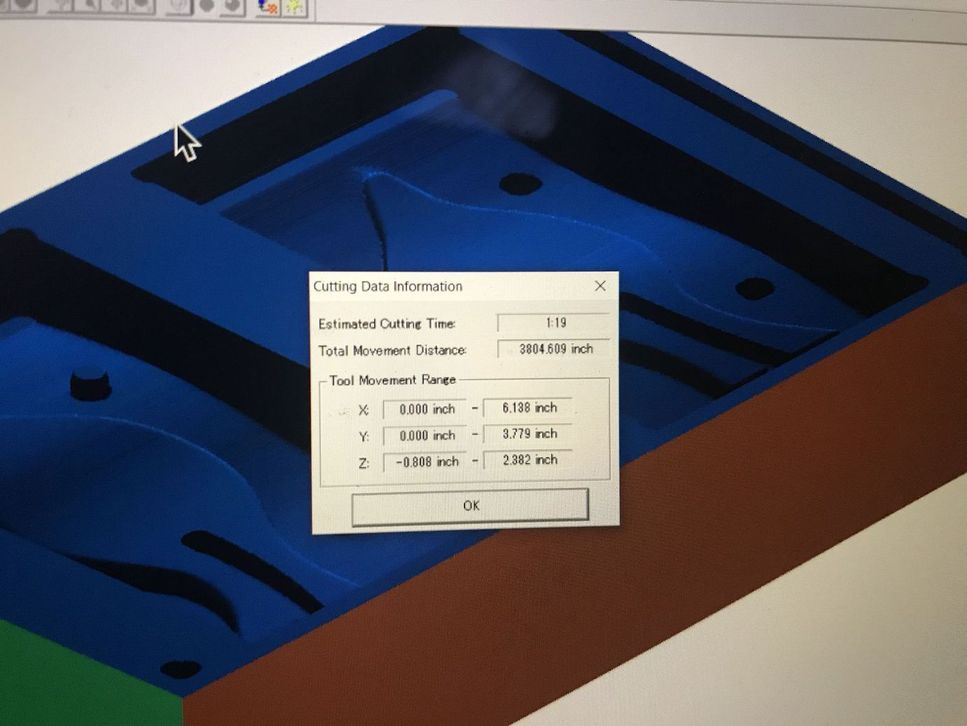
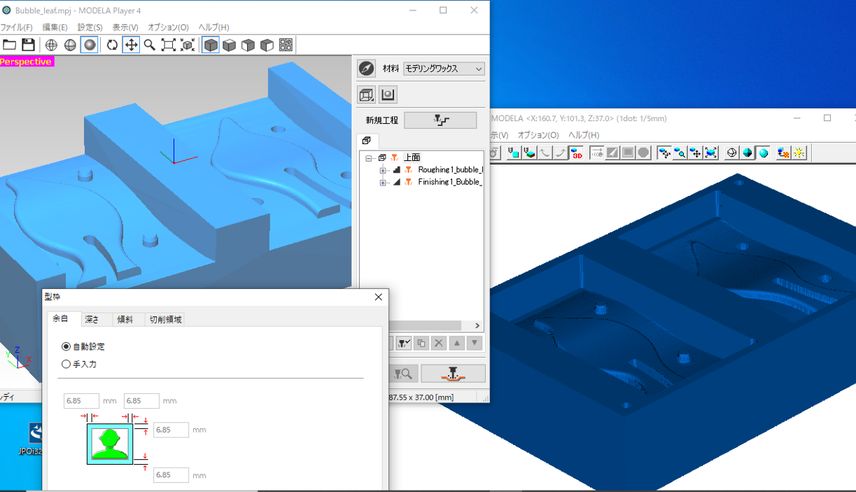
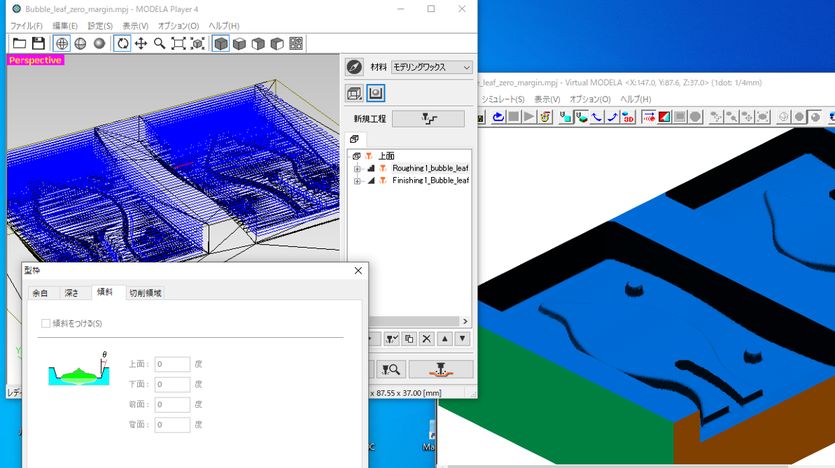
I used MODELA Player 4, via Zoom (during remote local session ( 2020/05/16 )).
 |
 |
| parameters for rough cutting | parameters for finish cutting |
|---|---|
 |
 |
| about 1 hour for rough cutting | about 1 hour for finish cutting |
|---|---|
 |
 |
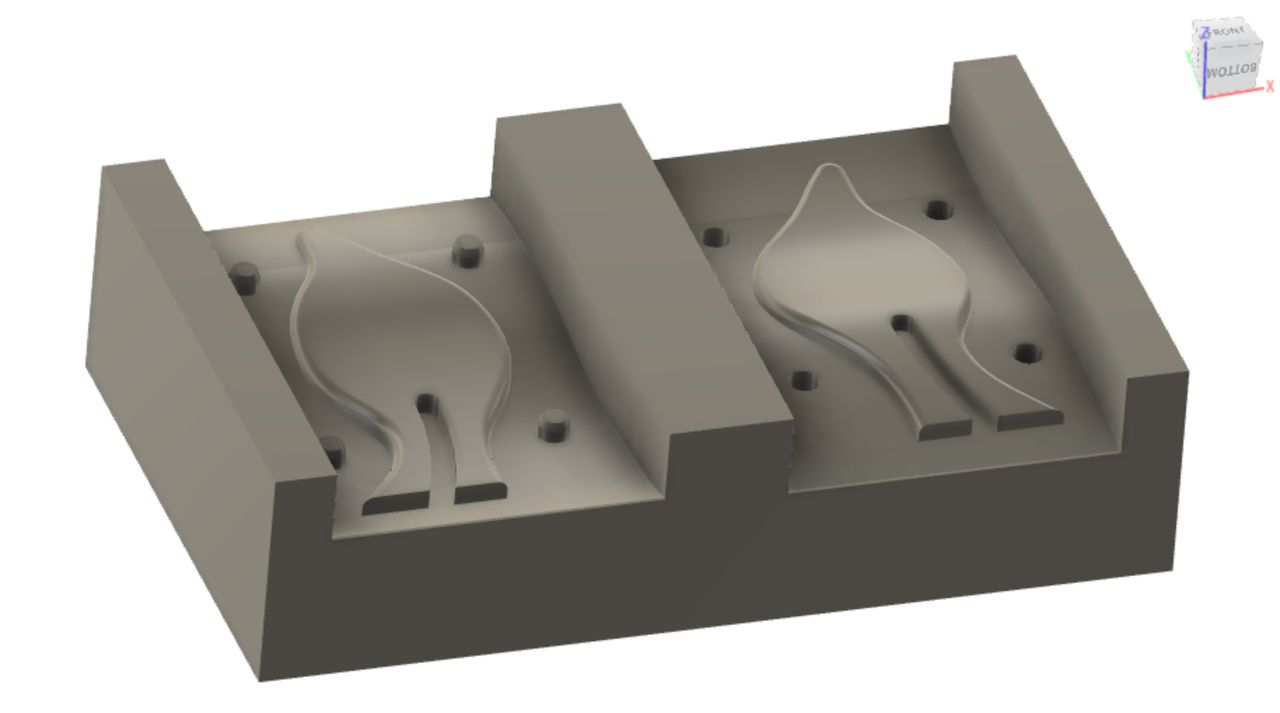
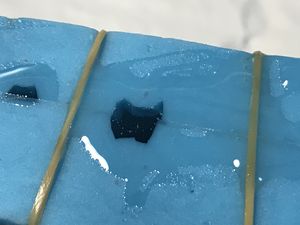
But there was a problem that unnecessary walls remained on sides of the molding pattern ( Y- direction ).
Because, if the thin and weak wall remained, some portion of them would be destroyed during the rough cutting and/or finishing process, and would cause issue like spreading wax debris on the finished surface.
After the remote local session, I installed MODELA Player 4 on my MacBook Pro ( Parallels desktop + windows10 ), then retried the parameter settings ( margin & draft of modeling form ) to remove the unnecessary walls.
And it was successful. ( 2020/05/16 )
| reduced the margin of modeling form | set the draft of modeling form to be zero |
|---|---|
 |
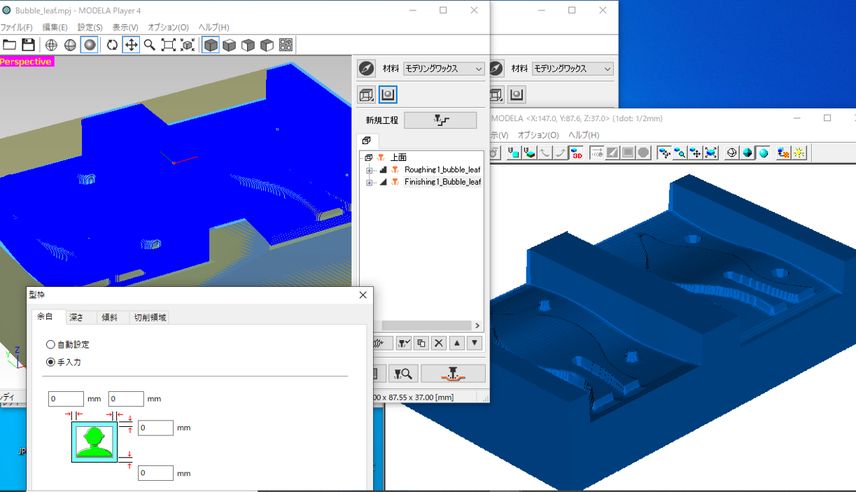 |
But next day ( 2020/05/17 ), the wall appeared again, even if I set the draft parameters as zero.
( I’ll retry later, and if necessary, I’ll modify the fusion360 data. )
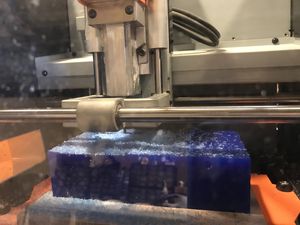
4) Machining the mold by CNC
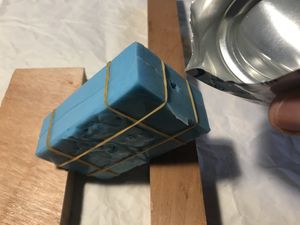
On 2020/06/27, I made the molding pattern using “Ferris File-A-Wax Blue” on CNC, SRM20.
To avoid the “unnecessary walls” described above, I extended the Y-direction of fusion360 model so that it became larger than the wax size ( and, larger than the Cutting Area in MODELA Player 4 ).
The updated items in Fusion360 model are as follows.
(a) Y-direction length
| Y-direction length ( 2020/05/16 ) | Y-direction length ( 2020/06/27 ) | |
|---|---|---|
| Fusion360 model | 87.55 mm | 97.55 mm |
| Cutting Area in MODELA Player 4 | 90.52 mm | 97.56 mm ( 48.78 mm x 2 ) |
| ( WAX length (measured) ) | ( 88 mm ) | ( 88 mm ) |
| “walls” condition | 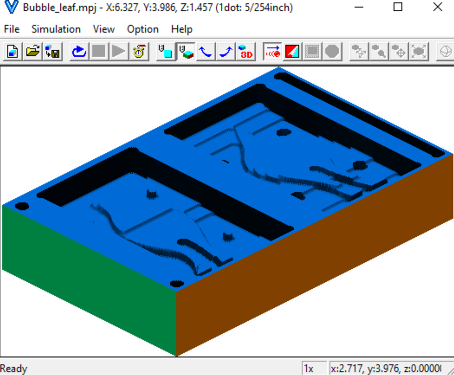 |
 |
(b) “volume check” component to calculate the molding pattern ( silicon ) amount
| 128 cc, for the molding pattern | 128 cc, for the product |
|---|---|
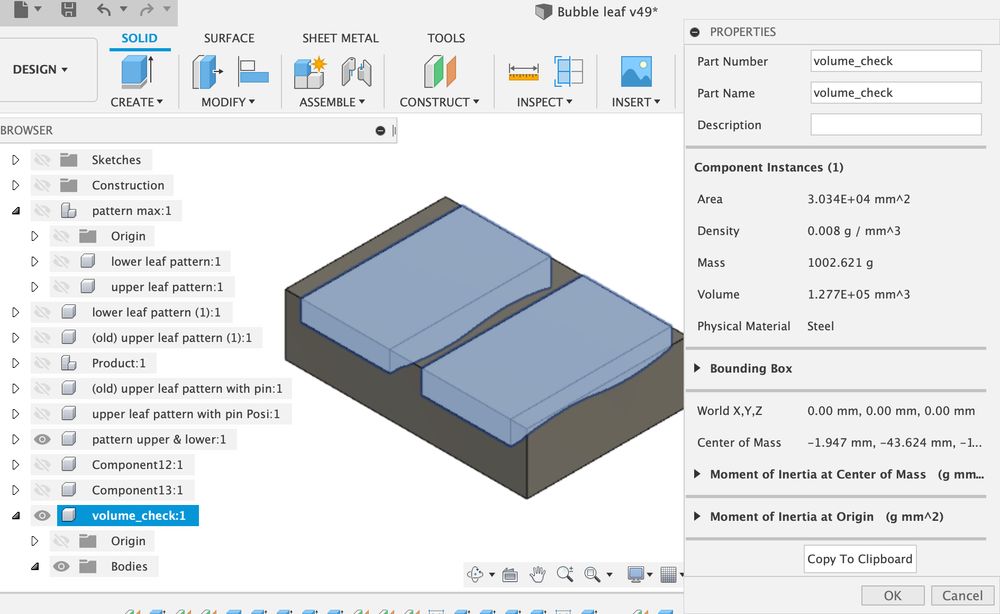 |
 |
Fusion360 model preview is shown blow.
The product and the molding pattern are not placed in parallel, because I started the product modeling with “Y-up” orientation, then placed the molding pattern as “Z-up” orientation to create the CNC tool path.
( “Open in Fusion360” button might not work on some browsers. To download the 3D model, please use the links in “5. Links to Files and Code” on the bottom of this page. )
Then, I used “MODELA Player 4” to create the tool path.
The parameter settings for CNC are shown in the table below ( same as those on 2020/05/16 ).
| rough cutting | finishing | ||
|---|---|---|---|
| Tool Type | Square | Square | |
| Flute Diameter | 3.18 mm | 3.18 mm | |
| Path Type | Contour Lines, Up Cut | Scan Lines | |
| XY Speed | 20 mm/sec | 15 mm/sec | |
| Z speed | 10 mm/sec | 10 mm/sec | |
| Spindle rotational speed | 7000 rpm | 7000 rpm | |
| Cutting-in Amount | 1.2 mm | N/A | |
| Path Interval | 1.8 mm | 0.3 mm | |
| Finish Margin | 0.2 mm | 0 mm |
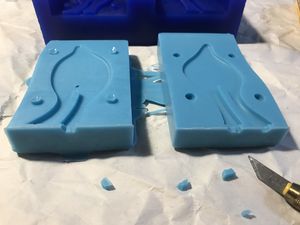
| “wall” did not appear. | |
|---|---|
 |
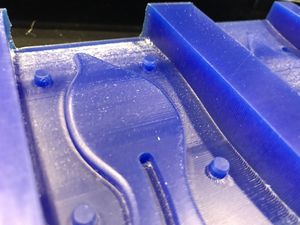 |
| cleaning with detergent | |
|---|---|
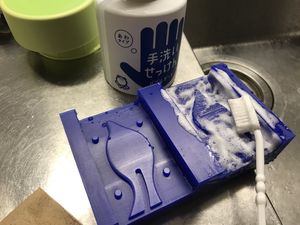 |
 |
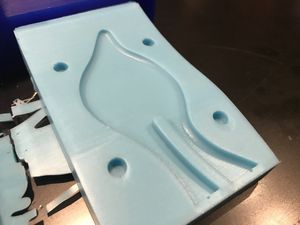
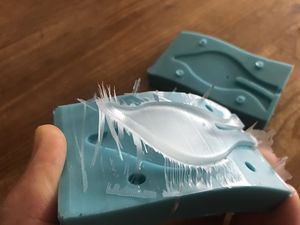
5) Molding
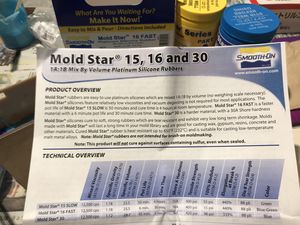
Mold Star™ 16 FAST was used.
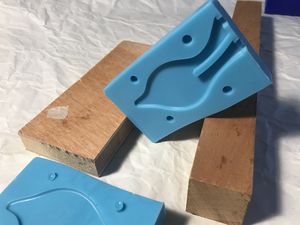
| mixing and pouring MDF plates were attached on the sides of WAX |
after curing, molds were almost fine. |
|---|---|
 |
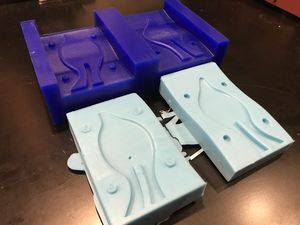 |
| but, air bubble was found on one side. | |
|---|---|
 |
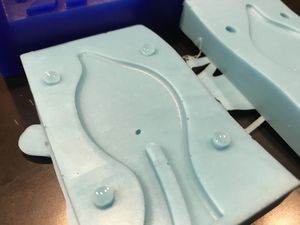 |
6) Casting
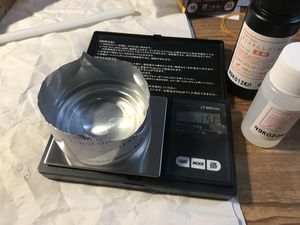
I used “Cristal Resin NEO”, which is one of the epoxy resin for crafts.
Color: Clear
Pot Life: 70 minutes
Cure Time: 36-48 hours ( 25 degC / 100g )
Mix Ratio By Weight, Resin : Curing agent = 2 : 1
| cut the pieces, to make pouring & air vent holes |
tilt the molds for better air vent |
|---|---|
 |
 |
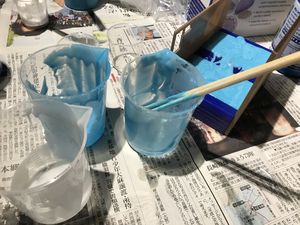
| weigh the Resin and Curing agent weight ratio is 2 : 1 |
mixing, and making “air bubbles” ! |
|---|---|
 |
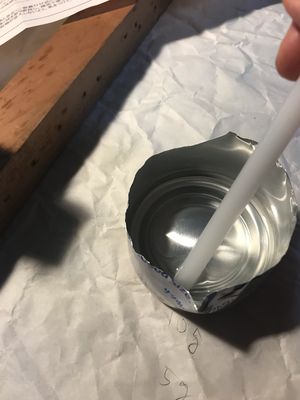 |
| pouring | small air bubbles are coming up |
|---|---|
 |
 |
| after 48hours of curing time, | took the epoxy from the mold |
|---|---|
 |
 |
| after deburring work, | blue LED was set in the slit. |
|---|---|
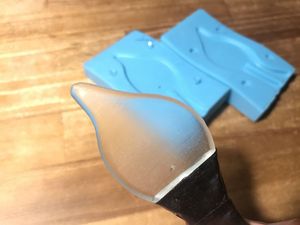 |
 |
4. Important Learning Outcome
1) It was enjoyable process to make a casting model. It’s a brain training to imagine positive & negative shape. And, the “combine” command of 3D CAD is a powerful tool to make it.
2) MODELA Player 4 is simple tool, but the function seems to be limited. So, I’ll try fusion360 CAM if its needed.
3) As I planned, “LED in the bottom part, which lights up the above bubbles and tool marks.” was realized.
4) Epoxy is transparent, beautiful and good for this kink of craft. And, long curing time is suitable for avoiding the air bubbles.
5) So, the air bubbles were not as big as I expected this time. If I try next time, it’s better to improve the mixing process to get more air and/or use short-time curing materials.
5. Links to Files and Code
fusion360 model
“Bubble leaf v48.f3d” download
CNC files
“Bubble leaf_pattern_longer_upper_lower.mpj” download
Rough cutting / Finishing .prn files ( “荒削り1.prn”, “仕上げ1.prn” )
“Bubble_leaf.mpj” ( 2020/05/16 file, for reference ) download
“Bubble leaf_pattern_longer_uppe_rev2.mdt”
6. Appendix
“Cristal Resin NEO”