10 - Moulding and Casting
Negative or Positive
Tools & Assignment
 Updated for 2019 evaluation standards!
Group assignment
- Review the safety data sheets for each of your moulding and casting materials
- Make and compare test casts with each of them
Individual assignment
- Design a 3D mould around the stock and tooling that you’ll be using, mill it (rough cut + (at least) three-axis finish cut), and use it to cast parts.
Learning outcomes
- Design appropriate objects within the limitations of 3 axis machining
- Demonstrate workflows used in mould design, construction and casting
Have you?
- Explained how you designed your 3D mould and created your rough and finish tool-paths for machining
- Shown how you made your mould and cast the parts
- Described problems and how you fixed them
- Included your design files and ‘hero shot’ photos of the mould and the final object
- Reviewed the safety data sheets for each of your moulding and casting materials, then made and compared test casts with each of them
FAQ
Q. Should I read the MSDS and TDS this week?
A. Yes, always.
Q. I want to only make a wax mould, and cast something in it. Is that acceptable?
A. Only after you learn and go through the 3 step process. To break the rules, you have to master the rules.
Q. Can I 3D print the mould? Can I do a laser-cut?
A. No, for this assignment you must mill the mould using a CNC milling machine. After fulfilling the requirements, please go ahead and experiment other techniques for fabricating moulds.
(No 2016 documentation to copy here ):
A 2019 Remake
No preambles and standard beginnings, this week was completed but never document back in the days. From this week on, my 2016 documentation becomes scarcer and scarcer by the week, but my memory from then hasn’t faded.
Moulding & Casting: A Modern Approach
When we choose to use moulding and casting, over alternative small/medium scale object creation methods (eg. 3D printing),
we do so on one basic premise: The overhead cost, be it time or money, of creating a mould doesn’t outweigh the fast re-production speeds once a mould has been made
Meaning we have a trade-off, if we wish to produce a single part, 3D printing maybe the way to go. However, if we wish to produce tens, or hundreds, of a given part moulding would be faster on the long-run.
At least, this is what people would like you think…
Doing Things A Little Different
On Thursday, the day after the lecture, Emma round us up and brought us to a local hardware store to buy some smooth-on:
-> VytaFlex™ 30
We got three different types of smooth-cast, for different curing times, I used the smooth-cast 300: MSDS
Smooth-Cast Specifications
| Spec | Value |
|---|---|
| Color | White |
| PotLife | 3 10 minutes |
| Cure Time | 10 minutes |
| Mix Ratio By Volume | 1A:1B |
| Mix Ratio By Weight | 100A:90B |
As for the vytaflex, we only had one kind: MSDS
VytaFlex Specifications
| Spec | Value |
|---|---|
| Color | Off-White |
| Pot Life | 30 |
| Cure Time | 16 |
| Mix Ratio By Volume | 1A:1B |
| Mix Ratio By Weight | 1A:1B |
As well as some wax blocks:
We got the blue kind.
The premise was, that the VytaFlex would be used for the moulding material, it’s flexibility makes it nice to take off parts. While the Smooth-case (as implied by the name) would be the casting material.
This is where I thought I’d do things differently, I knew the other students would cast hard parts, but I figured inverting the materials for moulding and casting would leave me with nice rubber parts, which cannot be 3D printed!
Yes, ok you can print in flexible materials, but it’s a pain. Also, flexible materials (like TPU) isn’t rubber, which just can’t be 3D printed because the rubber fibers, once heated, don’t realign as desire when cooled.
Now the question was, what should I make?
A Cute Miniature
Going back to my trusted Fullmetal Alchemist I always had a weakness for chibi Alphonse Elric.
I’m sure designing this in Antimony will be a breeze 
Designing The Mould
People seem to get mixed up about negatives and positive.
Conceptually it’s pretty hard to think about an object as the absence of it from some space. So, having a step-by-step process to create the designs, as a paradigm of thought, is really helpful.
So, the first step, is to design the final part you want to create.
Noting that the ‘mould of the mould’ is just the part itself, cut in half along a mould line.
This means that once we created our part, we need to cut it in half the best we can. In Antimony, this doesn’t mean actual cut in half, we can just create a cubic shape and cover one half of the model, take the difference, add some fittings & we get our model. We must also keep in mind to create a funnel through which the casting material will pour into.
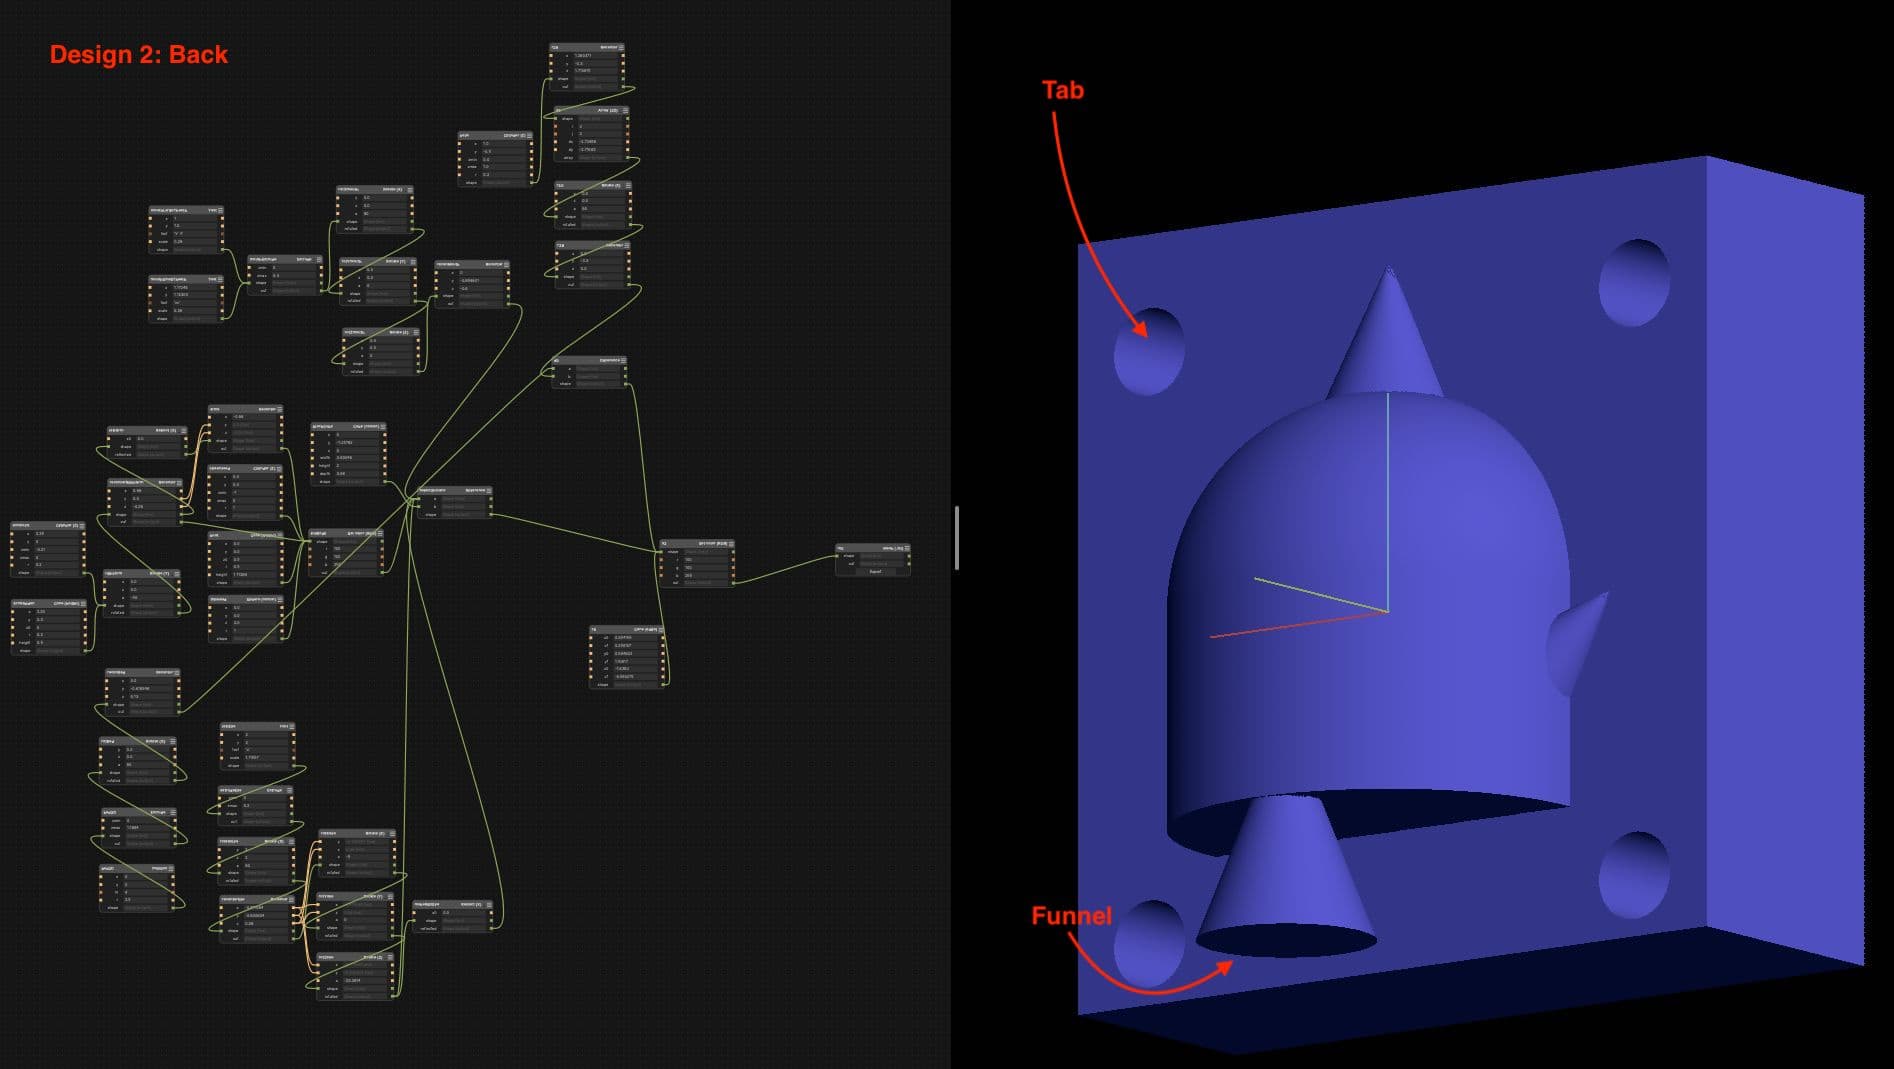
Here are the results:
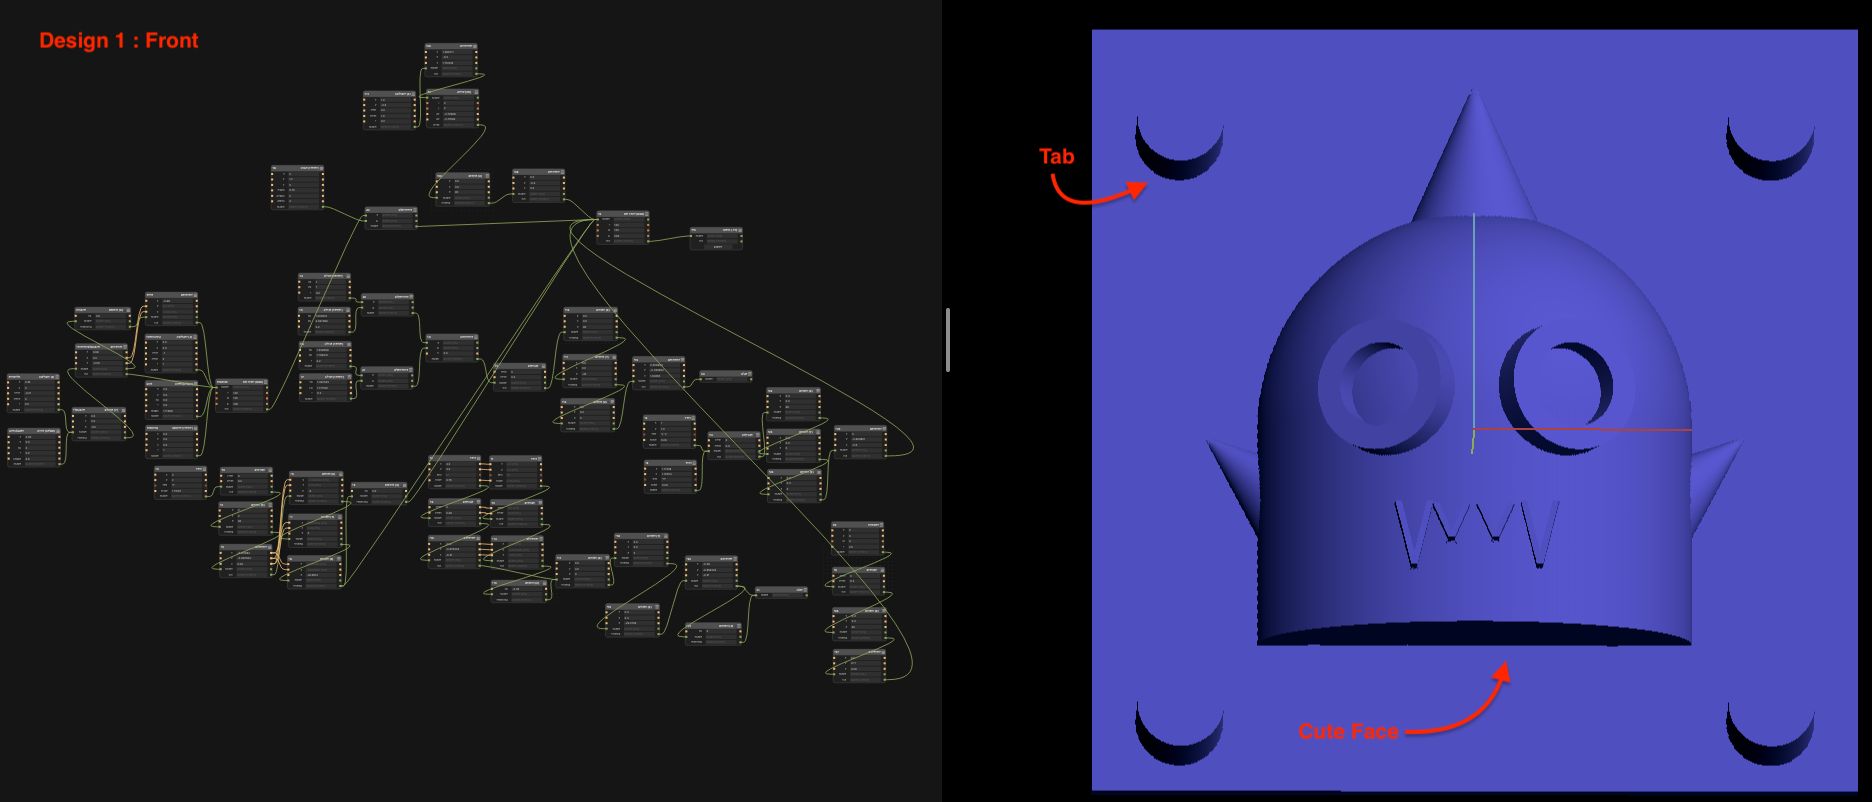
When exporting the .stl files, turning on detect experimental features will yield really good results here (a resolution of 150 will do).
As you can see in the above images there are two different graphs, they both the same design using two different methods,
in practice the ‘front’ & ‘back’ come from the same design file.
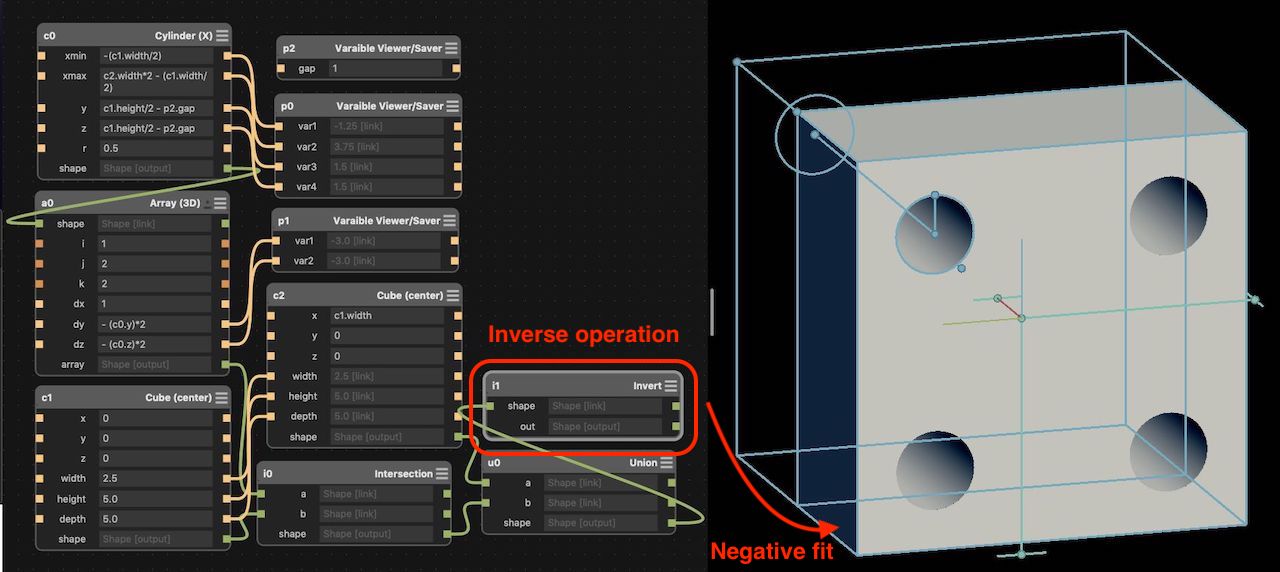
The only difference between front and back is that before exporting the file as .stl, the cube with the fittings is inverted using invert.
This is best explained by a simpler example, below you can see a parametric press-fit kit.
The variable saver/viewer is a non-standard node which I created for this demonstration, it’s functionality is very basic, it just displays the resultant value, I also use it to do maths sometimes (self connections are allowed here because they are just datum points).
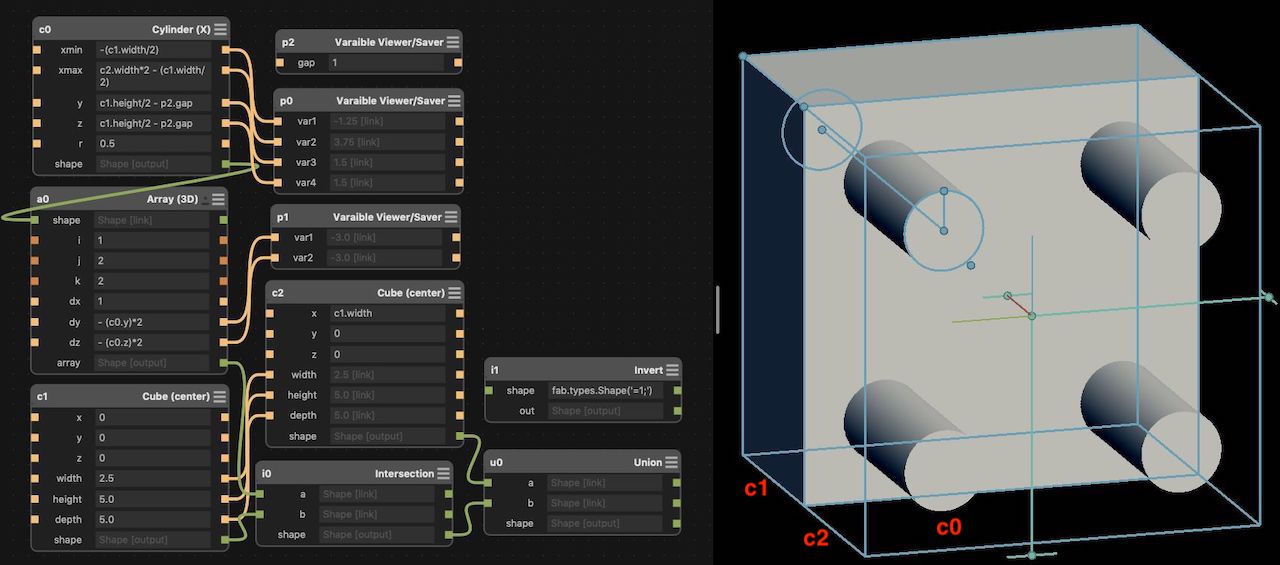
 One risk of this design is having too tight tolerances, but if you set
 cut on the outside for the holes and cut on the line for the tabs in PartWorks should fix this.
This will cause a loose fit but that’s good enough for what they are used.
Your part just sits inside that cube, center on the middle line between the two cubes.
I included all 3 files because they are interesting, but the new variant is a lot better (smaller) for the part.
Tests
As I made the design I realized that the dimensions of the wax block weren’t quite right for my model, but before melting the wax down and creating a different shaped block I decided I’d do some test cuts.
The first two models I made to cut into the wax were a half-sphere and a small scale version of the final figure. The half-sphere cuts I made were to test the rough and finishing toolpaths too see if I like the surface finish or if it would require a higher definition.
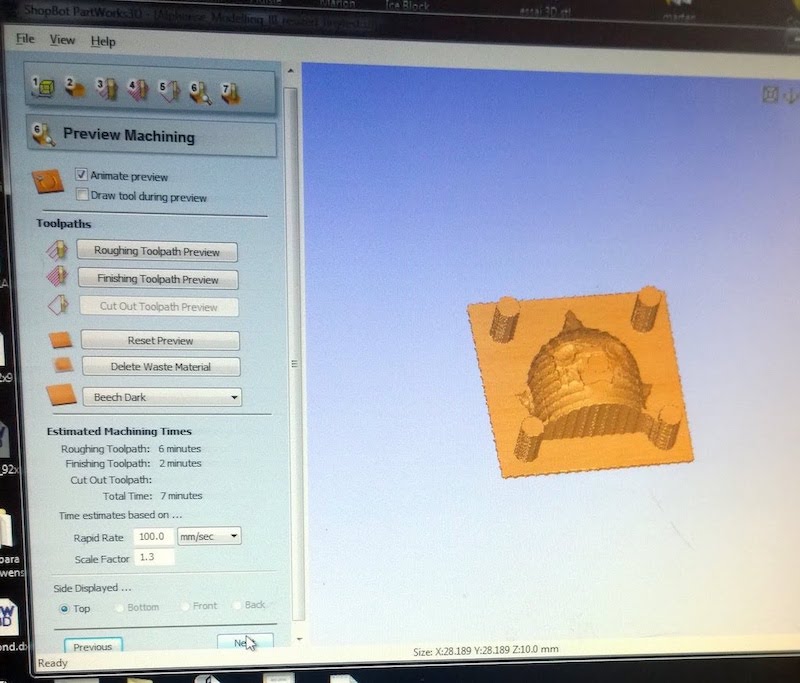
PartWorks 3D
First thing do do is pop the model into 3D PartWorks. As I mentioned in week08 PartWorks has now been replaced by VCarvePro
Here I scale down the model as mentioned above.
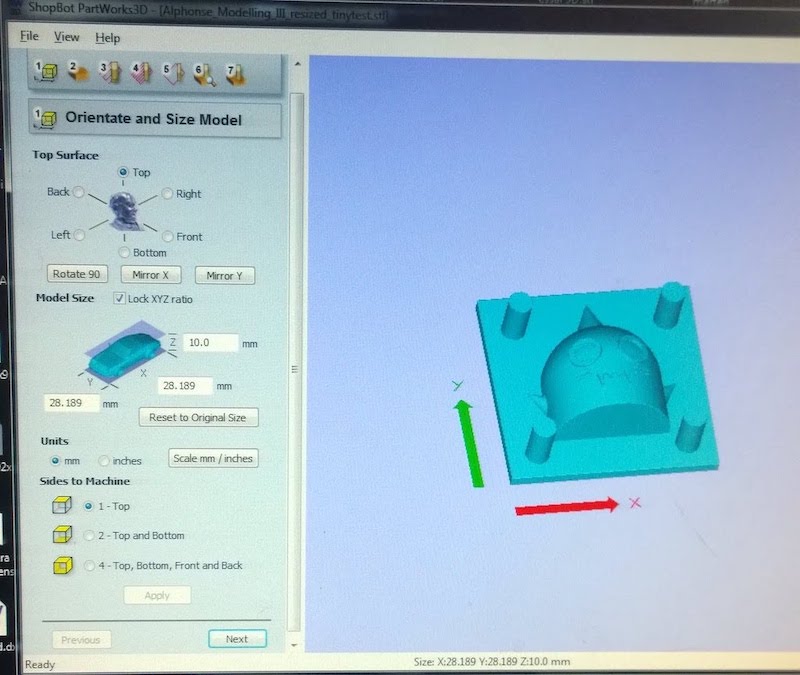
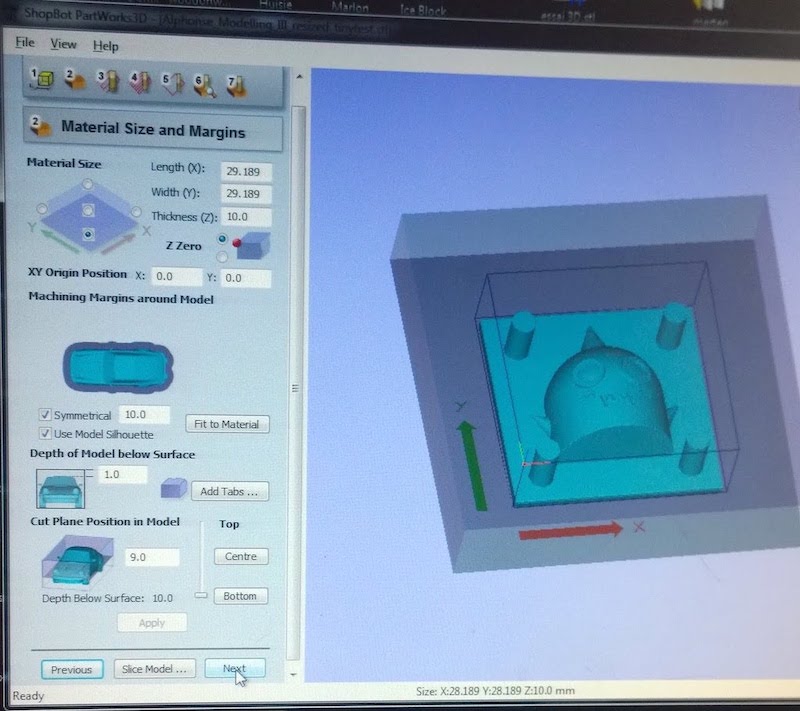
Insert size of wax-block (working area).
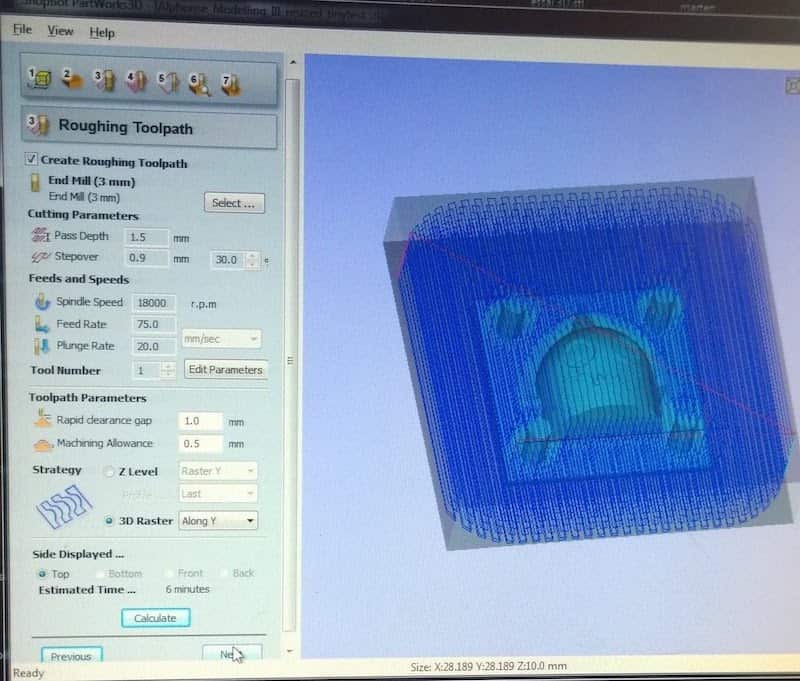
Define roughing toolpath.
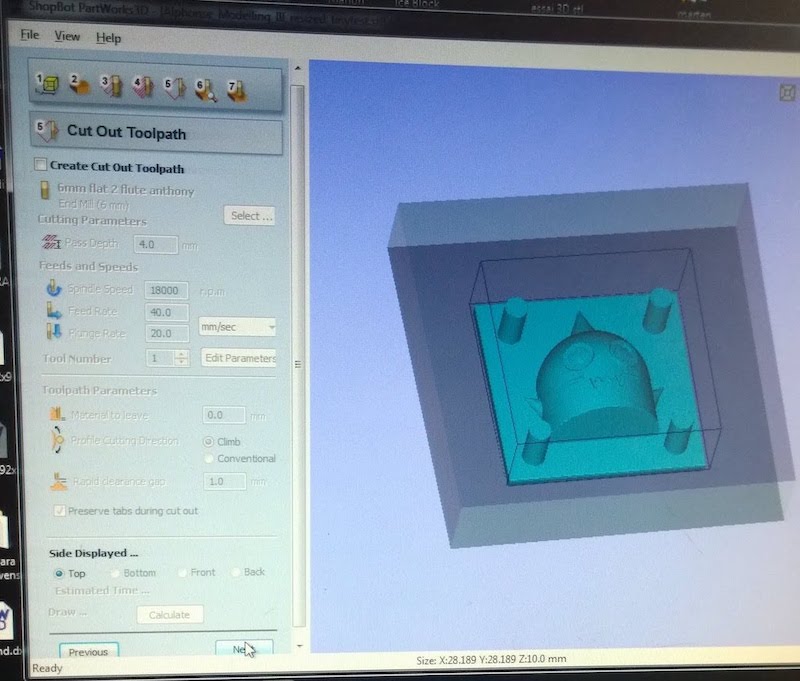
Define finishing toolpath.

We don’t need a cut out toolpath because we will use the edges of the wax block for keeping in the casting material.
We can see threw the preview that at this small scale the miniature will come out with pretty bad detail, but that’s fine since this is just a test.
ShopBot
We then load the part onto the shop-bot software and setup the machine.
ShopBot Settings for Tests
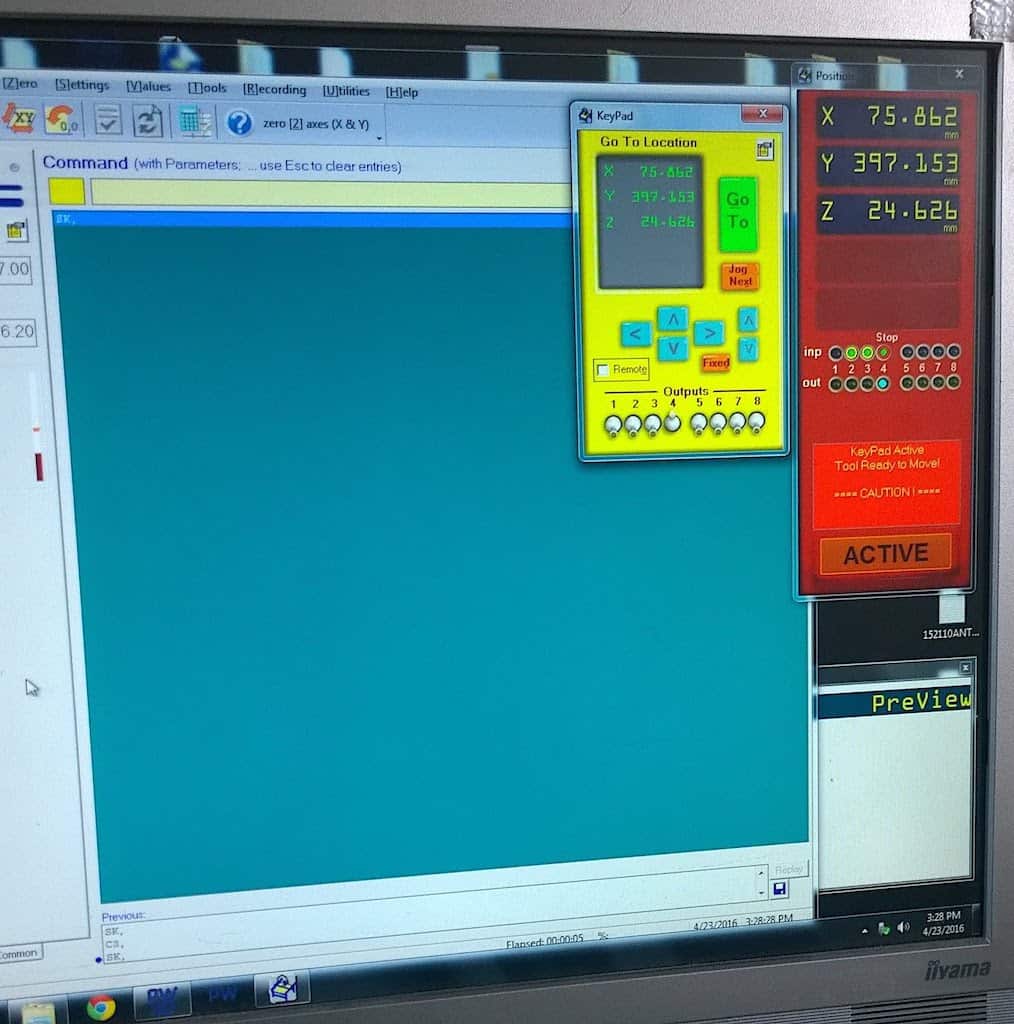
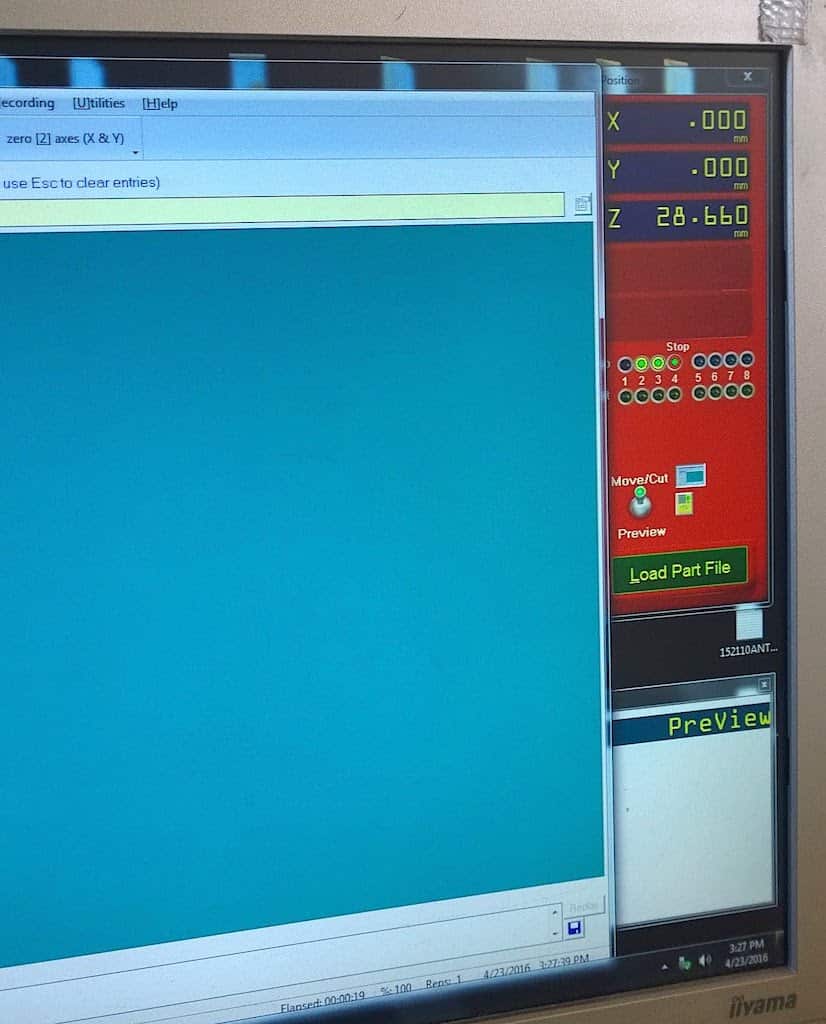
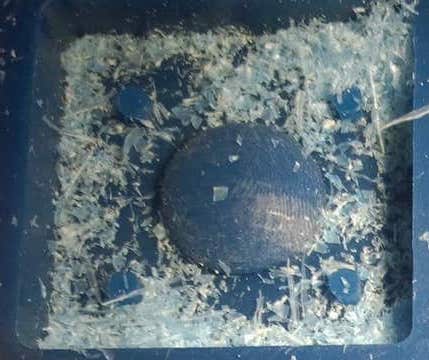
Below we see the roughing toolpaths running over the wax for the miniature test.
Results
From the sphere we can see that the surfacing finish will be a bit rough, but good enough for my pursues.
Sphere
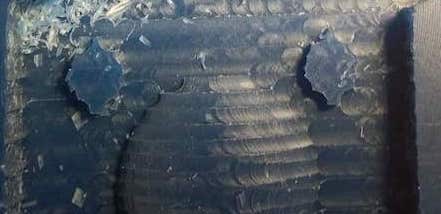
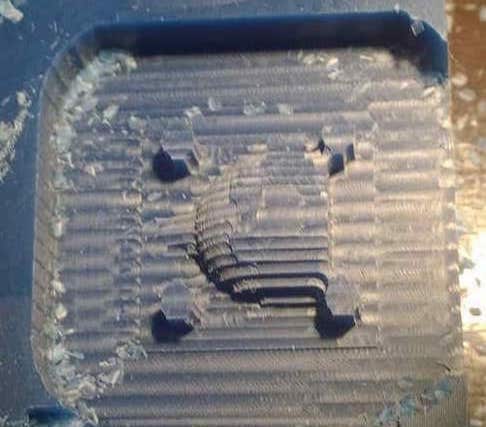
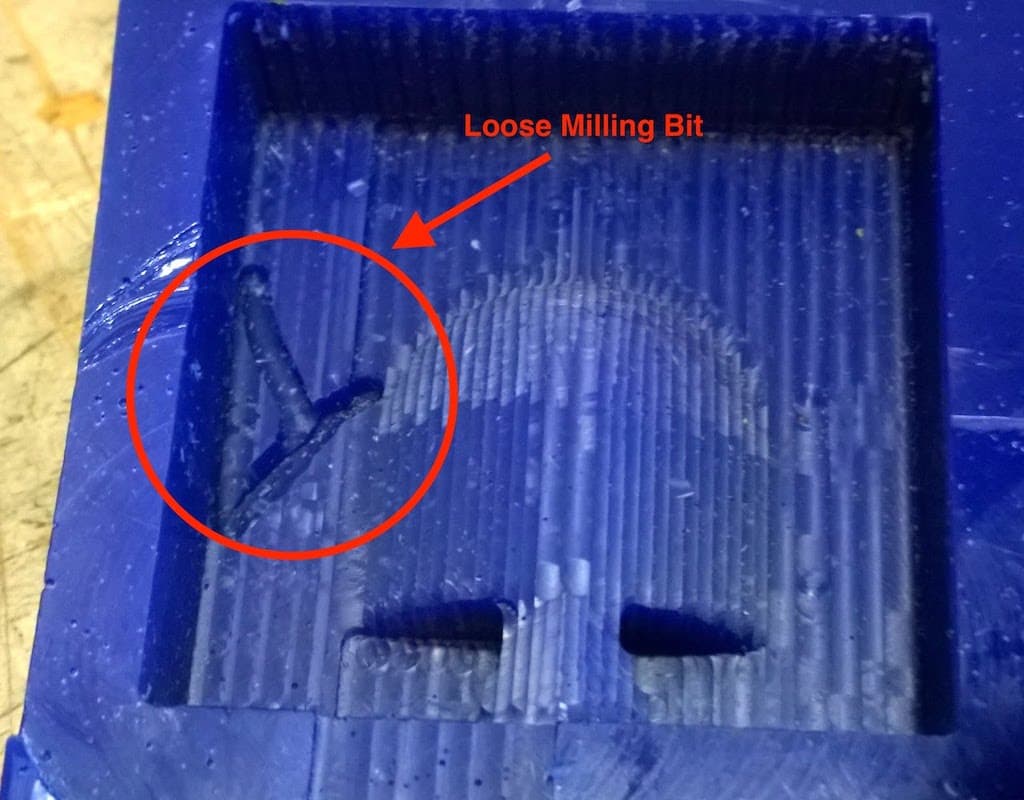
This small miniature instead is really food to see the limits of using a CNC machine to produce moulds, as can be noted, one of the tabs was snapped clean off by the tool while it was moving.
Whereas the fine features on the face are totally missing! But we expected that from the tooling preview in PartWorks. Its always surprising how well the PartWorks simulation manages to approximate real results.
Small Miniature
Melting (Twice) Some Wax
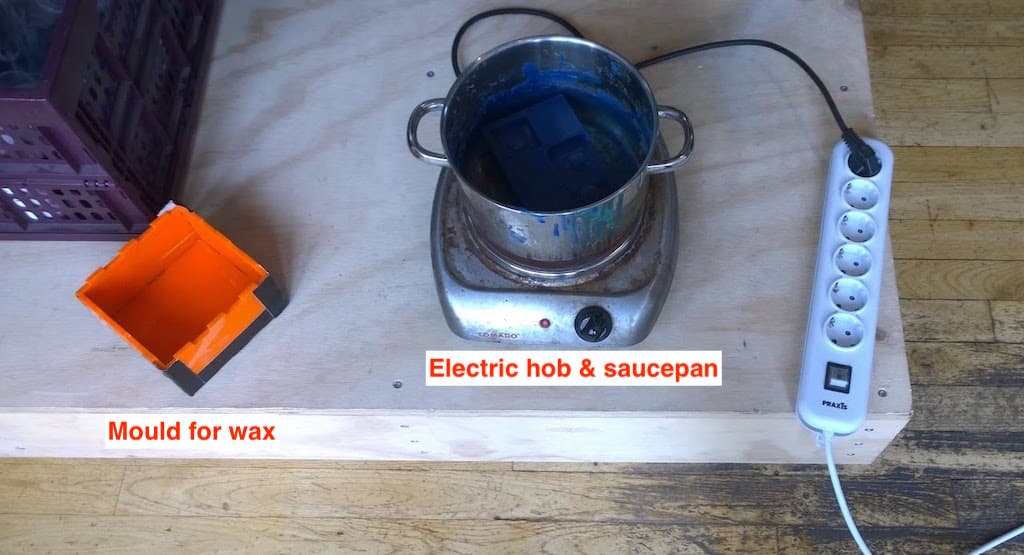
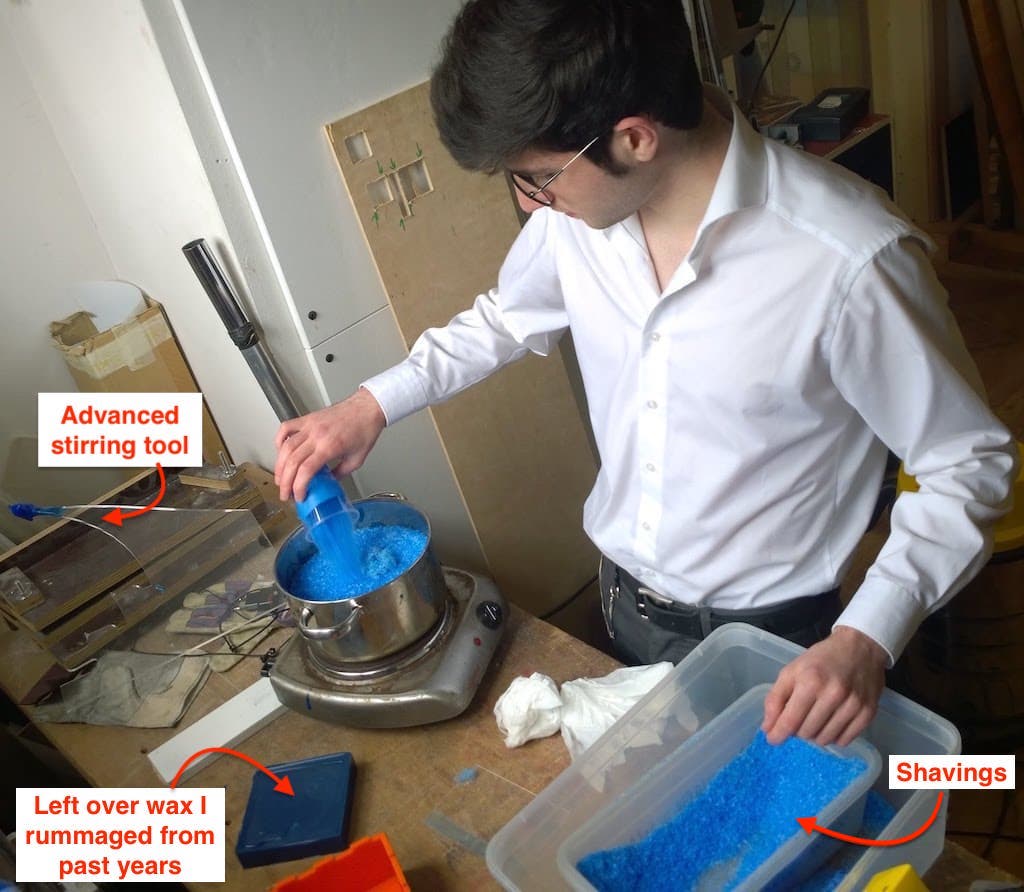
On the basis of having used up all my wax and needing a shallower, less wide form factor (as well as personal amusement) I set out to melt some wax.
The setup is pretty standard, you get a saucepan & an electric hob, make sure you’re in a safe area and well ventilated room and you dump the wax (and wax shavings) in the saucepan until it melts.
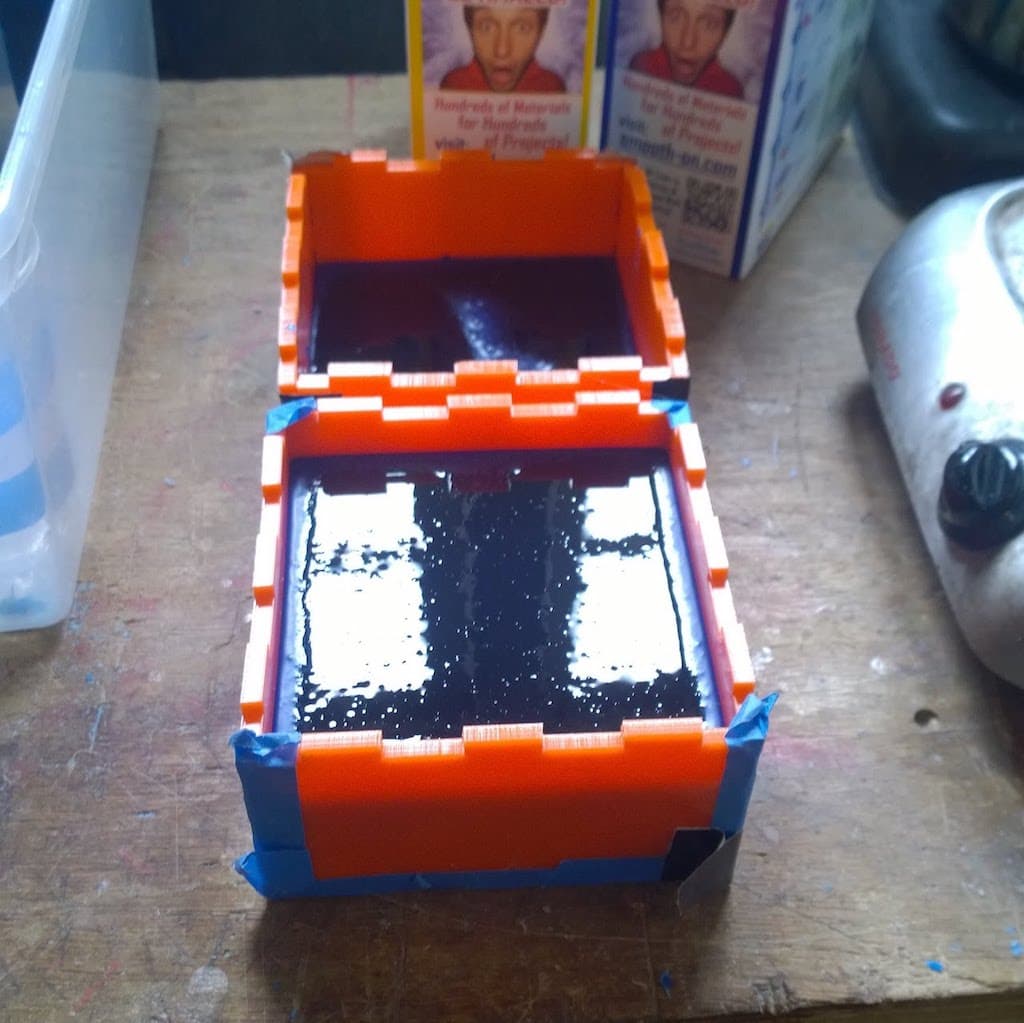
Ironically, you’ll need a mould to cast the wax, any squared container will do, I used some acrylic plates connected by duct-tape.
Throw in your wax parts and shavings:
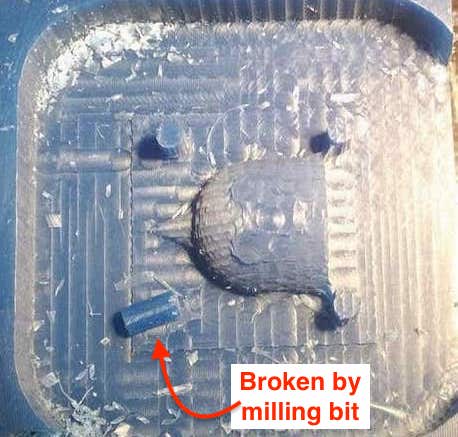
Good-bye tests 
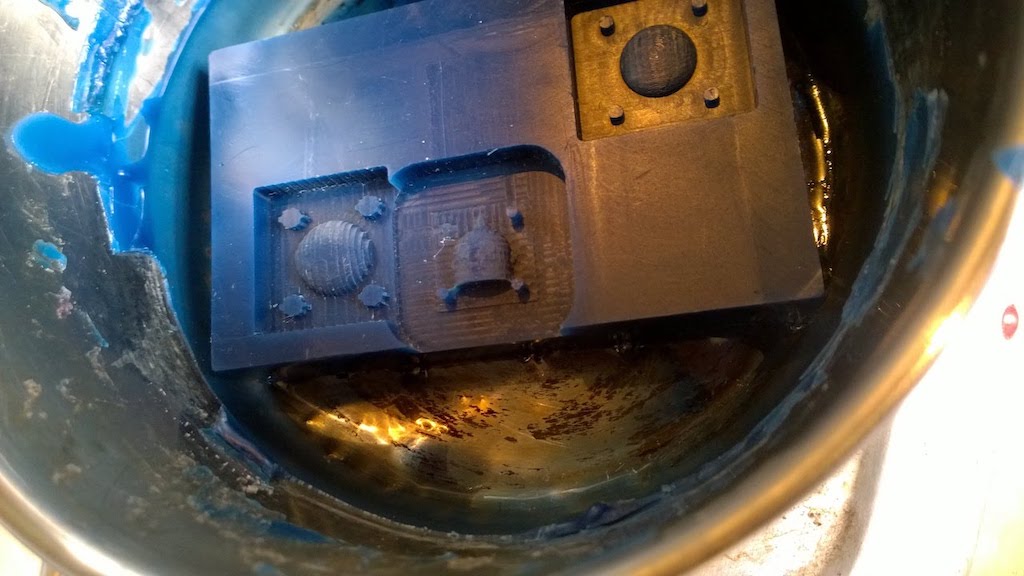
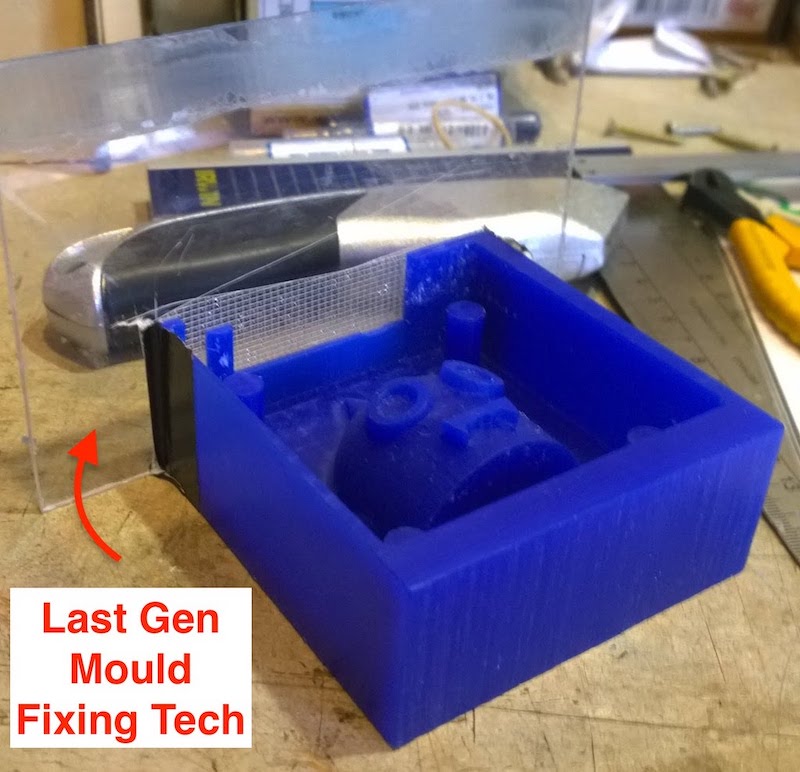
Once the first wax blocks had cured (cooled down), I actually started milling the full part, but I hadn’t screwed in the milling bit tight enough, meaning it came loose half-way threw the roughing toolpath of the back, this is how it looked and where the result ended up.
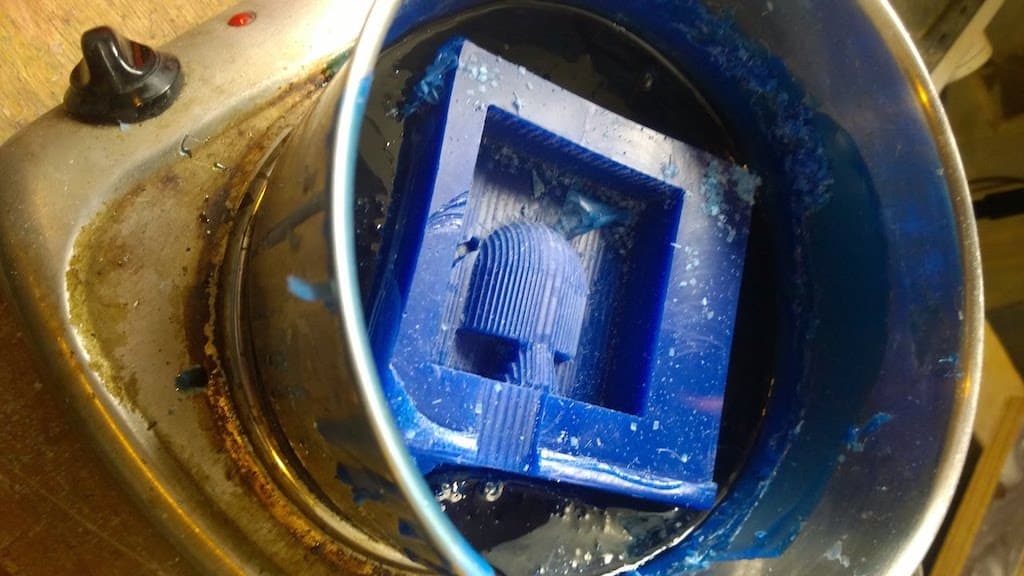
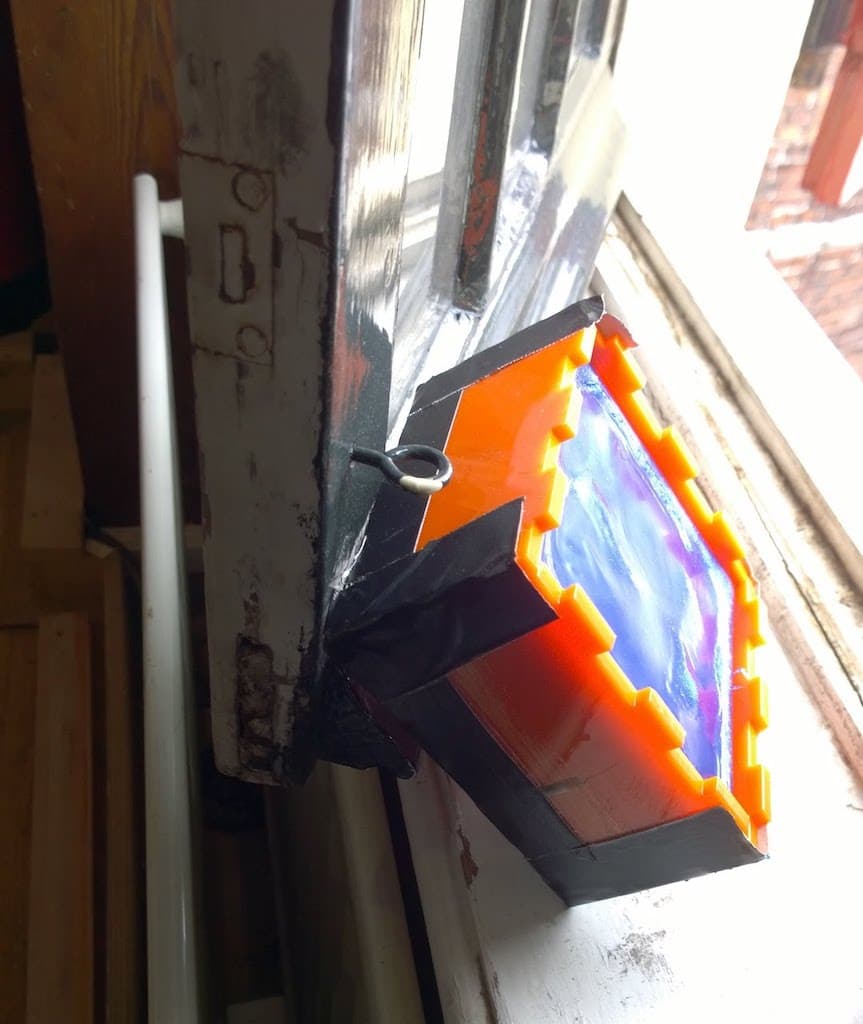
Once melting is done, we can pour the wax into the respective moulds, and set them to cool
Milling The Full Part
The setting up process is identical to the test-cuts, the only exception is the requirement of a surfacing job, to make the surface of the wax block even; this is achieved by running the milling-bit over the surface once.
Here is the ShopBot going on the finishing toolpath of the back:
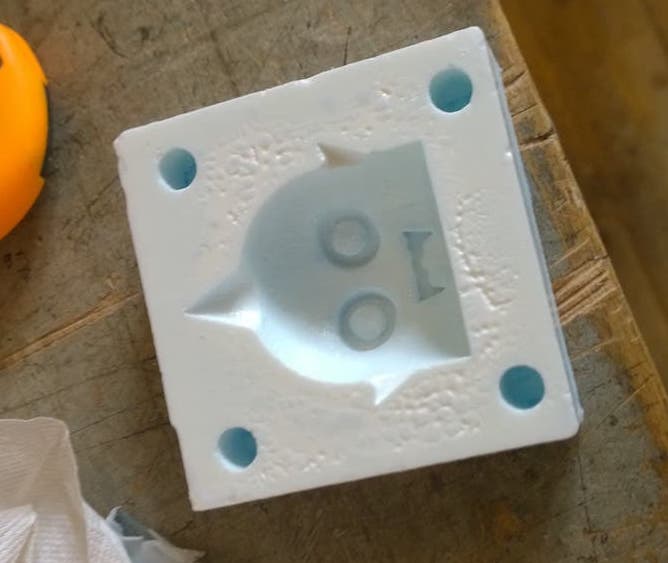
And this is how they came out:
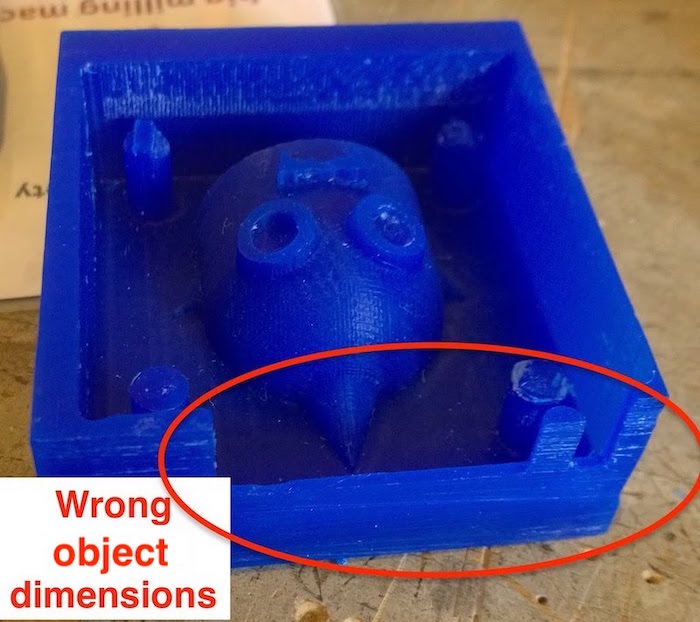
As you can see, on the first run I had gotten the dimensions of the miniature wrong and needed to fit the larger cut in the rest of the block, leaving me with a gap, a fix was pretty easy.
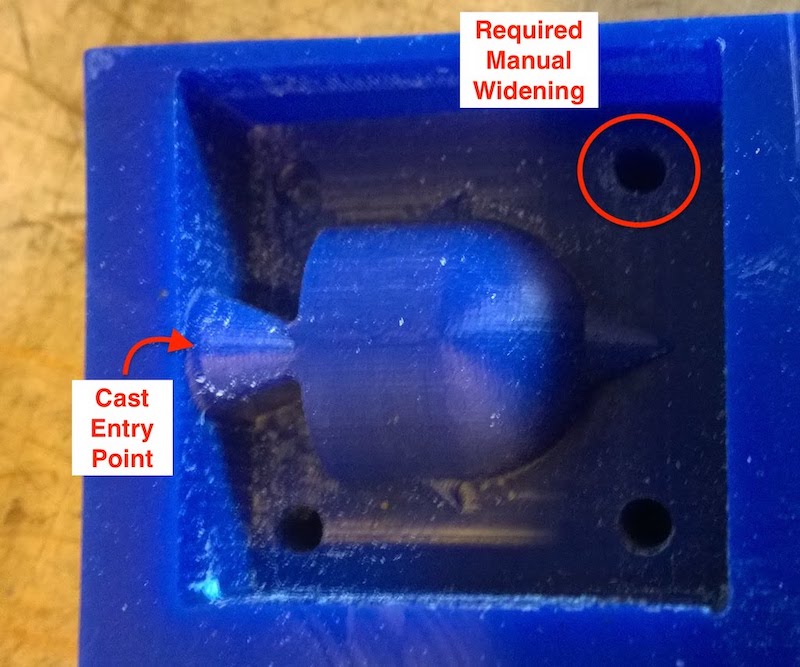
We can also notice that the funnel hasn’t got the same shape as the original file design file, because the tool can’t do undercuts, but that was intentional.
Time to cast some hard plastic.
Casting The Mould
I chose the fastest curing resin of the 3 available; 3 minutes after mixing that thing was going to be almost as hard as rock.
Who doesn’t like some thrill?
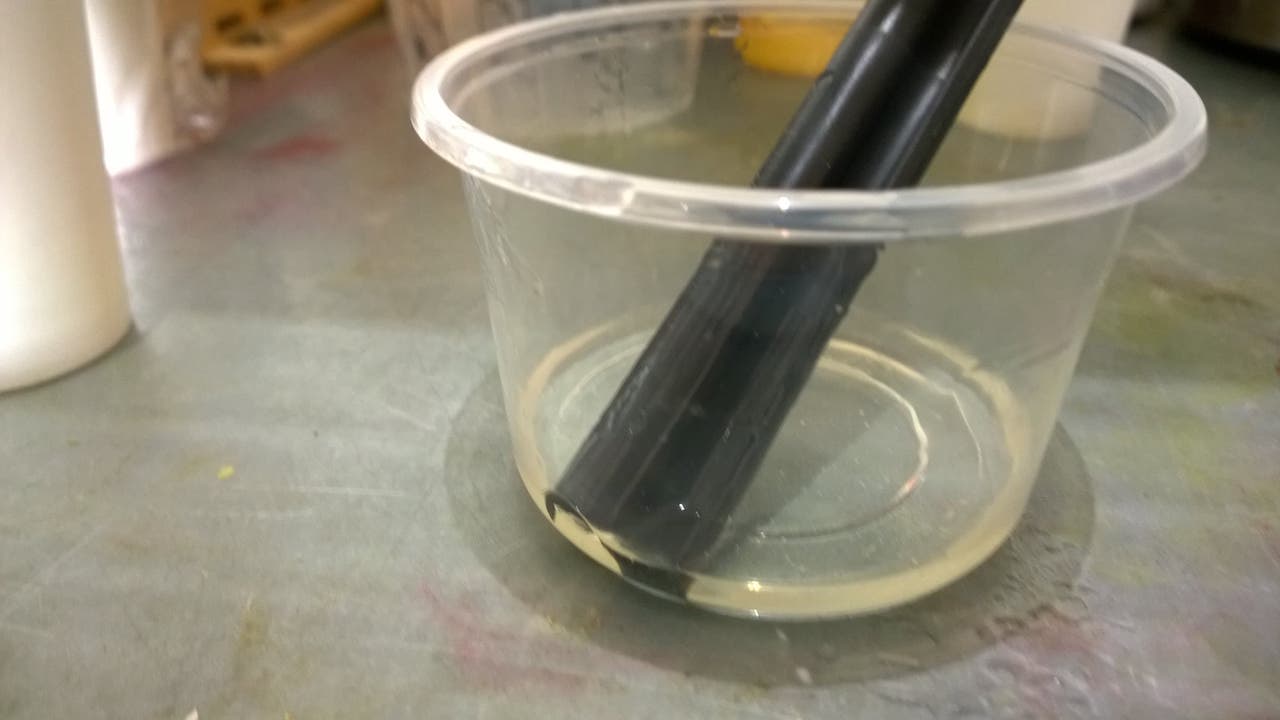
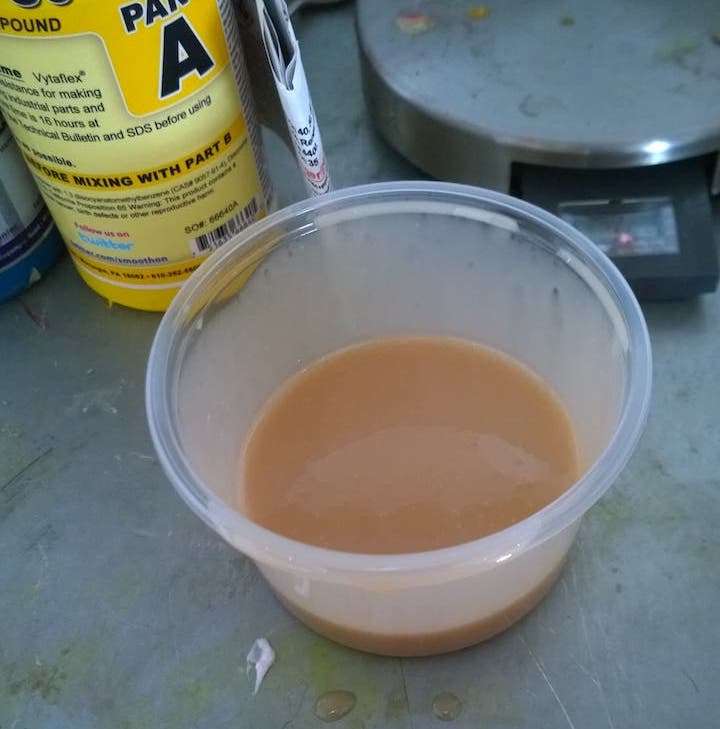
We get a beaker and a scale, we need to mix equal parts (in weight, not volume) of the base (A) and the setter (B), also we should know how much resin we need in total.
We can check the volume needed by filling the mould with water, then pour it into the beaker that will hold the resin and leave a mark a little above the water level (to be account for lost liquid and possible contraction).
When then mix the two parts:
My Mixing Pot
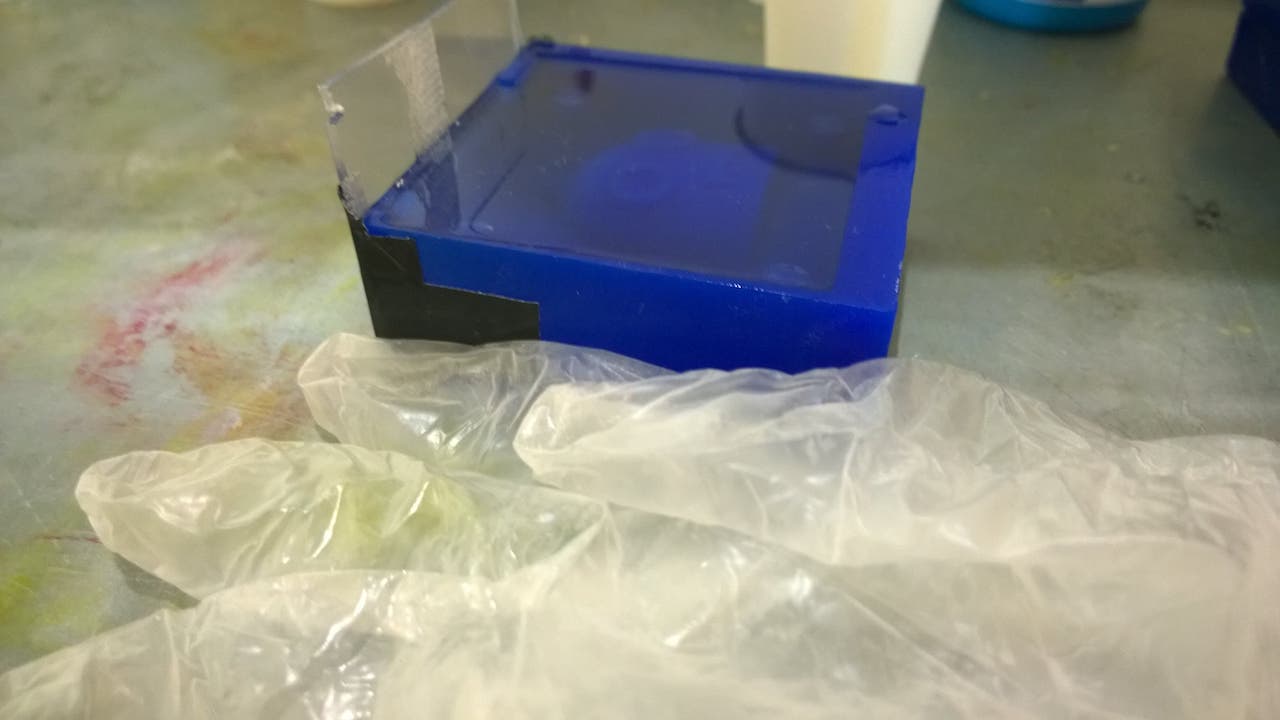
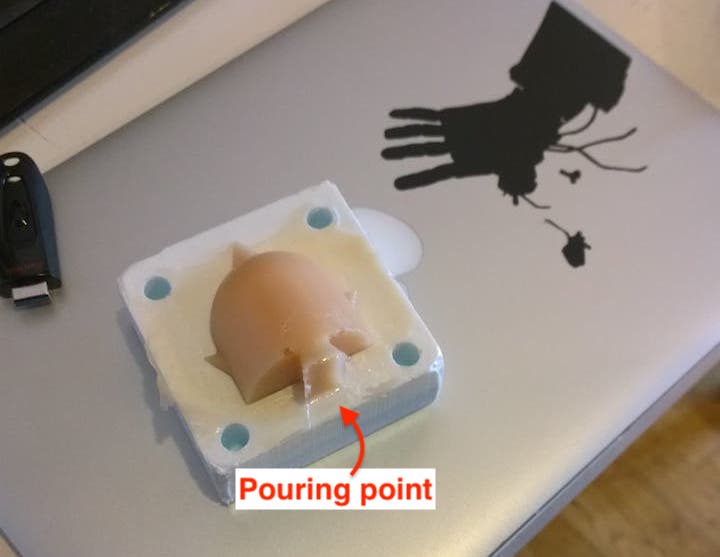
I sprayed a small amount of universal mold release on the wax before pouring the mixture.
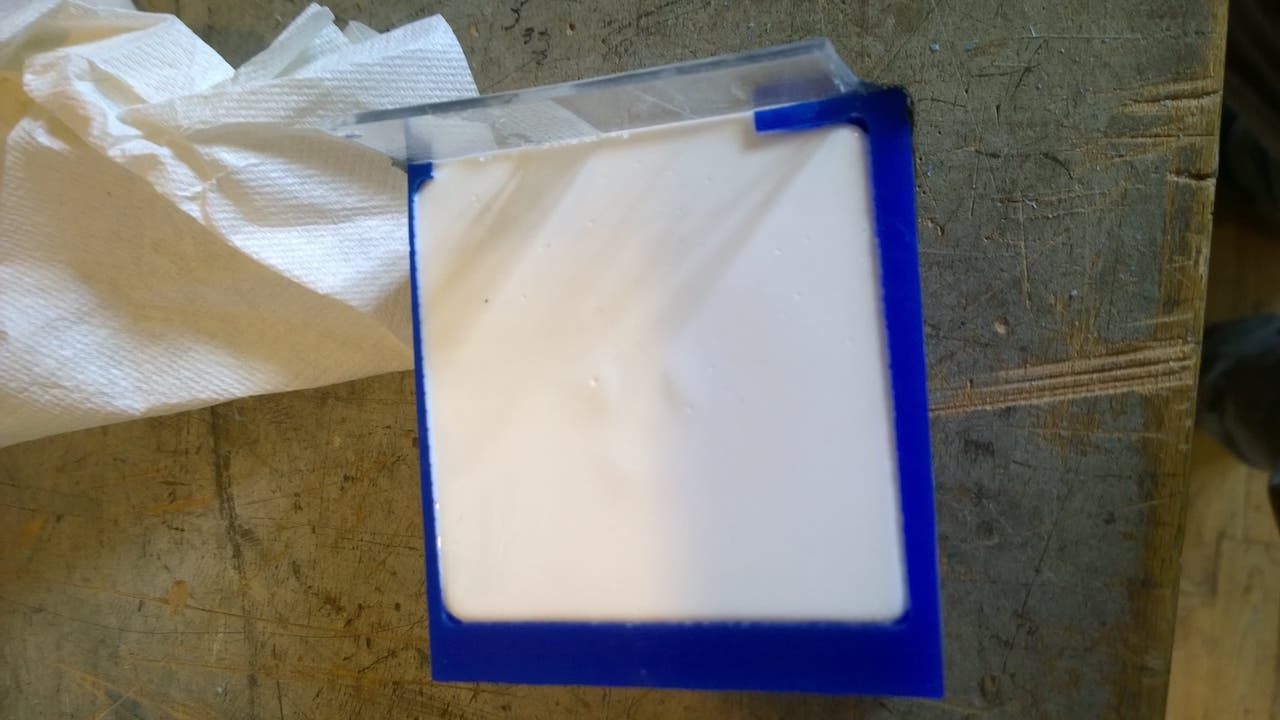
Mixture poured into the front mould
The Cast Curing At An Incredible Speed (Real Time Video)
Front
Back
The official curing time of this casting material (Smooth-Cast 300) is 10 minutes, meaning we could take it out after that time has passed, but I decided to leave it for the day and do the rubber casting the day after.
Hardened Cast
The fast cure times are good for creating many parts, as you would if I had done the rubber first, then you could pop-off the part sooner then I will be able to by using rubber.
If you made a part every 15minutes, you could create 96 in a day, while with the rubber casting you can only make 1 part and 96 moulds.
However after 24h, you will be producing a part every 15 minutes as well, while the smooth-cast would double it’s output to 2 parts per 15 minutes.
I tried figuring the maths out on that one but it’s not as simple as I thought,
basically the parts production progression for smooth-cast is:
$$
96 + (96*2) + (96*3) + (96*4) + … + (96*d)
$$
where d is number of days passed
Whereas for the rubber it’s:
$$
1 + 96 + (96*2) + (96*3) + … + (96*(d-1))
$$
where d is number of days passed
Meaning that the difference between the produced numbers gets exponentially larger as time progresses, as rubber is 1 day behind.
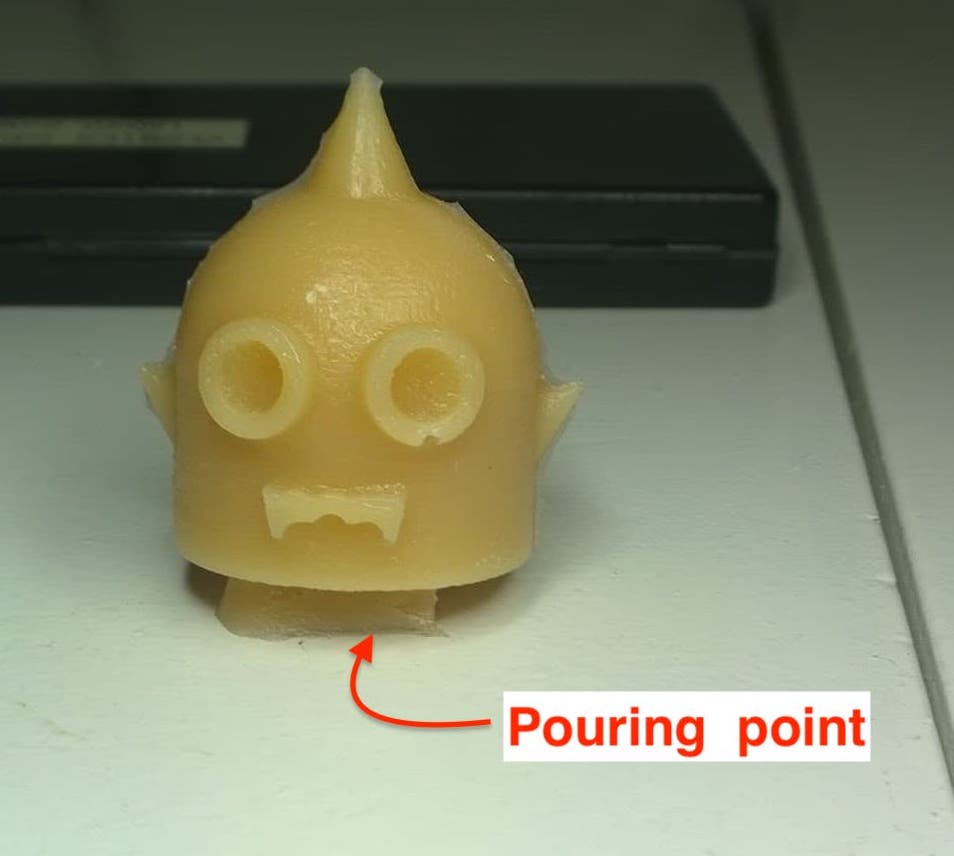
Once detached from the wax
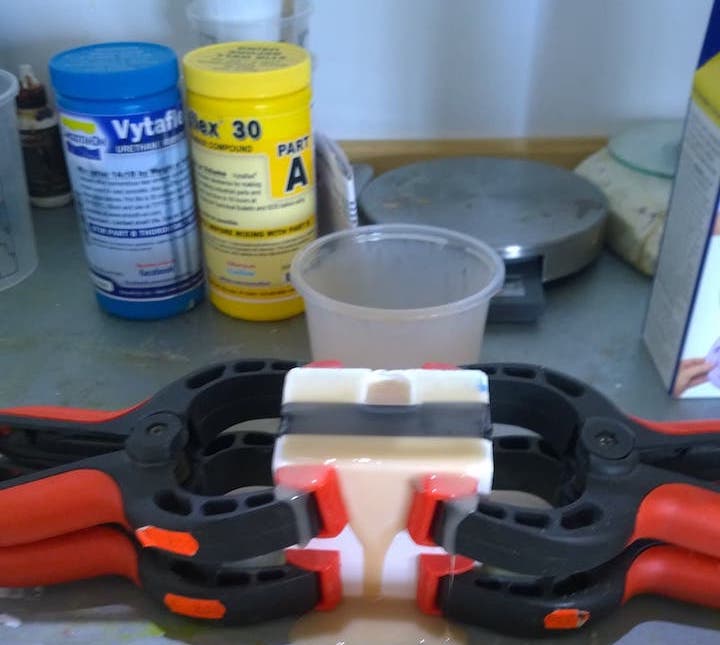
With the rubber it’s the same story as the the smooth-cast, mix the two parts, then pour into the pour-hole in the closed mould.
Using clamps ensures that there is minimal flashing of the rubber from the mould line. You should probably use a funnel… I didn’t.
After one day of curing we can easily remove/cut off the excess rubber.
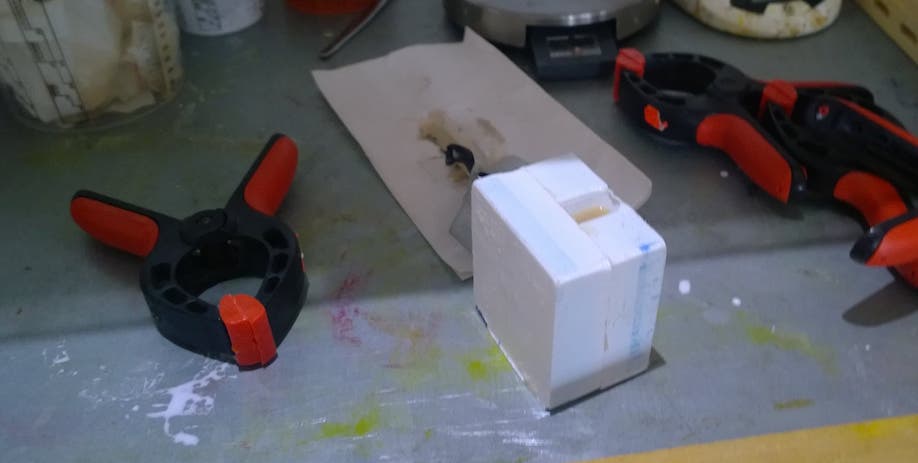
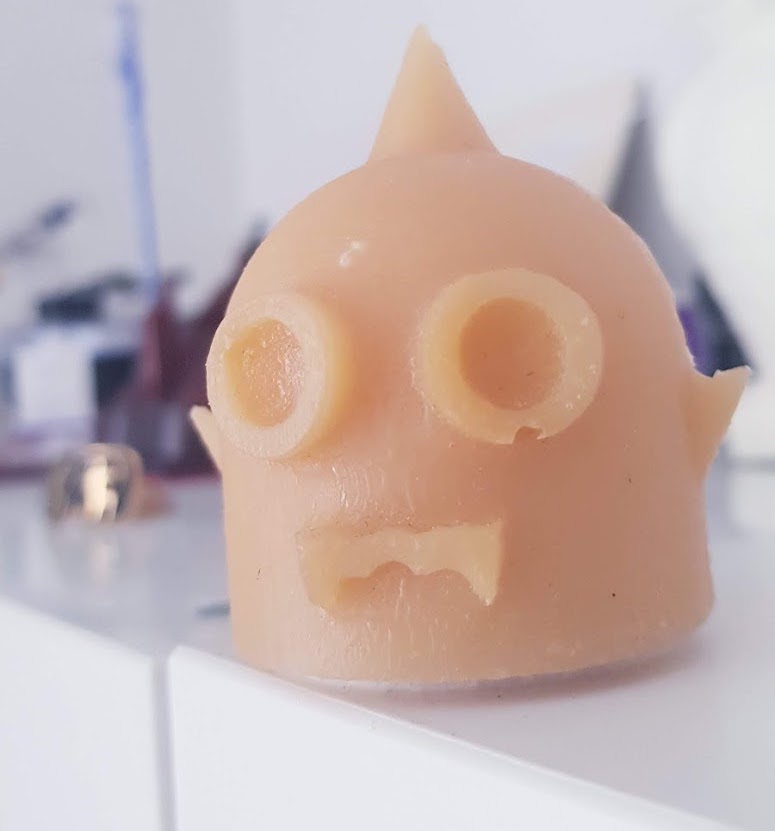
Finally we can free Alphonse from his rubbery prison :)
Flashing
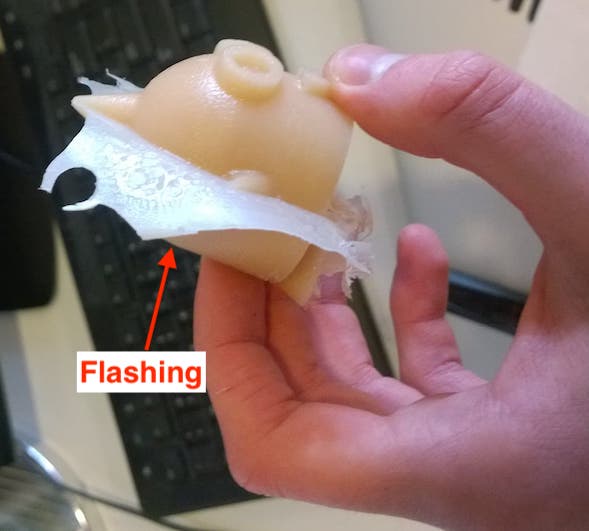
The flashing is easy to remove using an precision knife
Even after 3 years, my little friend is still part of the decoration in my Manchester flat.
Download The Files
-> Antimony Design Files .zip (new = back view; old = front view)