Week 10: Molding and casting
It is time to transform couple stripes of depilation wax (necessarily with hair) and plastic bags made from polyethylene into pieces of art. With a bit of imagination and engineering skills it might turn into terminator parts or movie props. In general previously gained skills in 3D designing and milling are necessary. I doubt in 3D scanning for molding purposes but if someone is crazy enough s/he will succeed.
I think I never found any hair in my wax bricks but you never know...
Group Assignment
Standard crew: Gleb, Marjo, Perttu and me
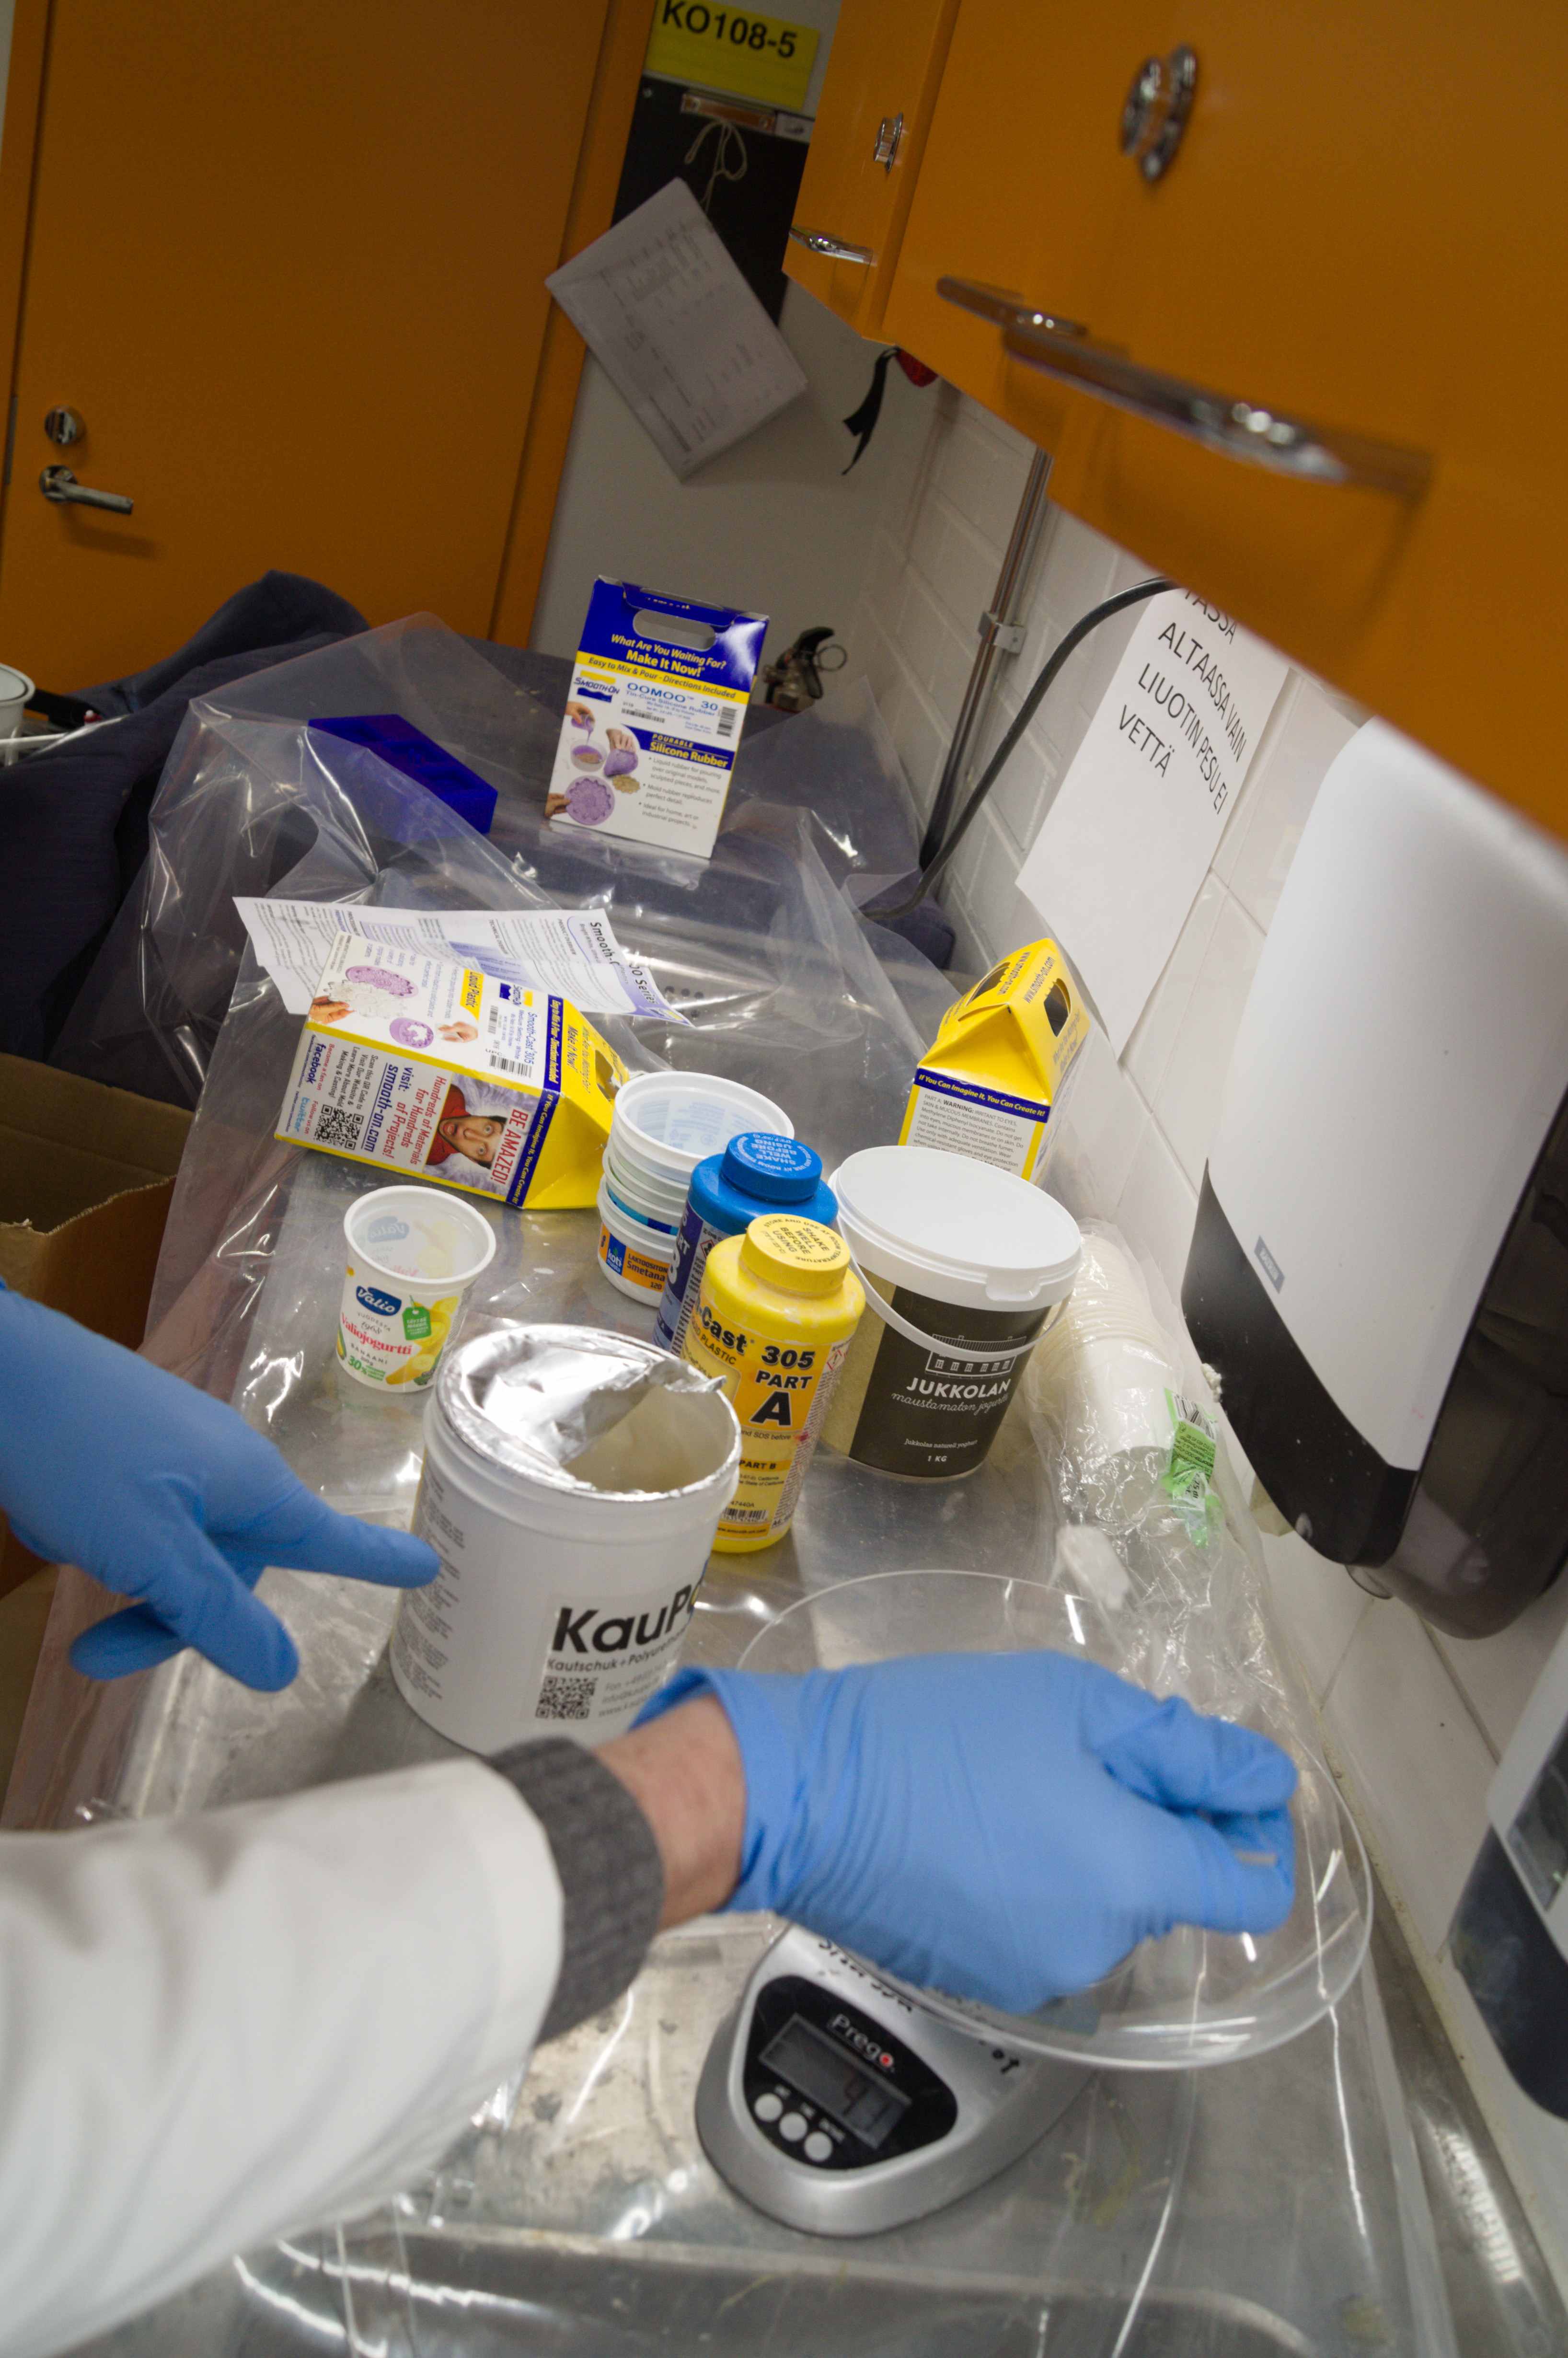
Paying subscribers might notice that we created some sort of a tribe (our group). Let me present the things, which we will use or make this week.
 |
 |
 |
 |
We have reused previous year students molds. It was very good and informative way of teaching. We learned everything, which may go wrong and all limitations by molding in a group under Ari guidance. About the vacuum pump I can say it sucked poorly but at least it was small. Anyway, turning complaining mode off I have to say that it was sufficient for our molds.
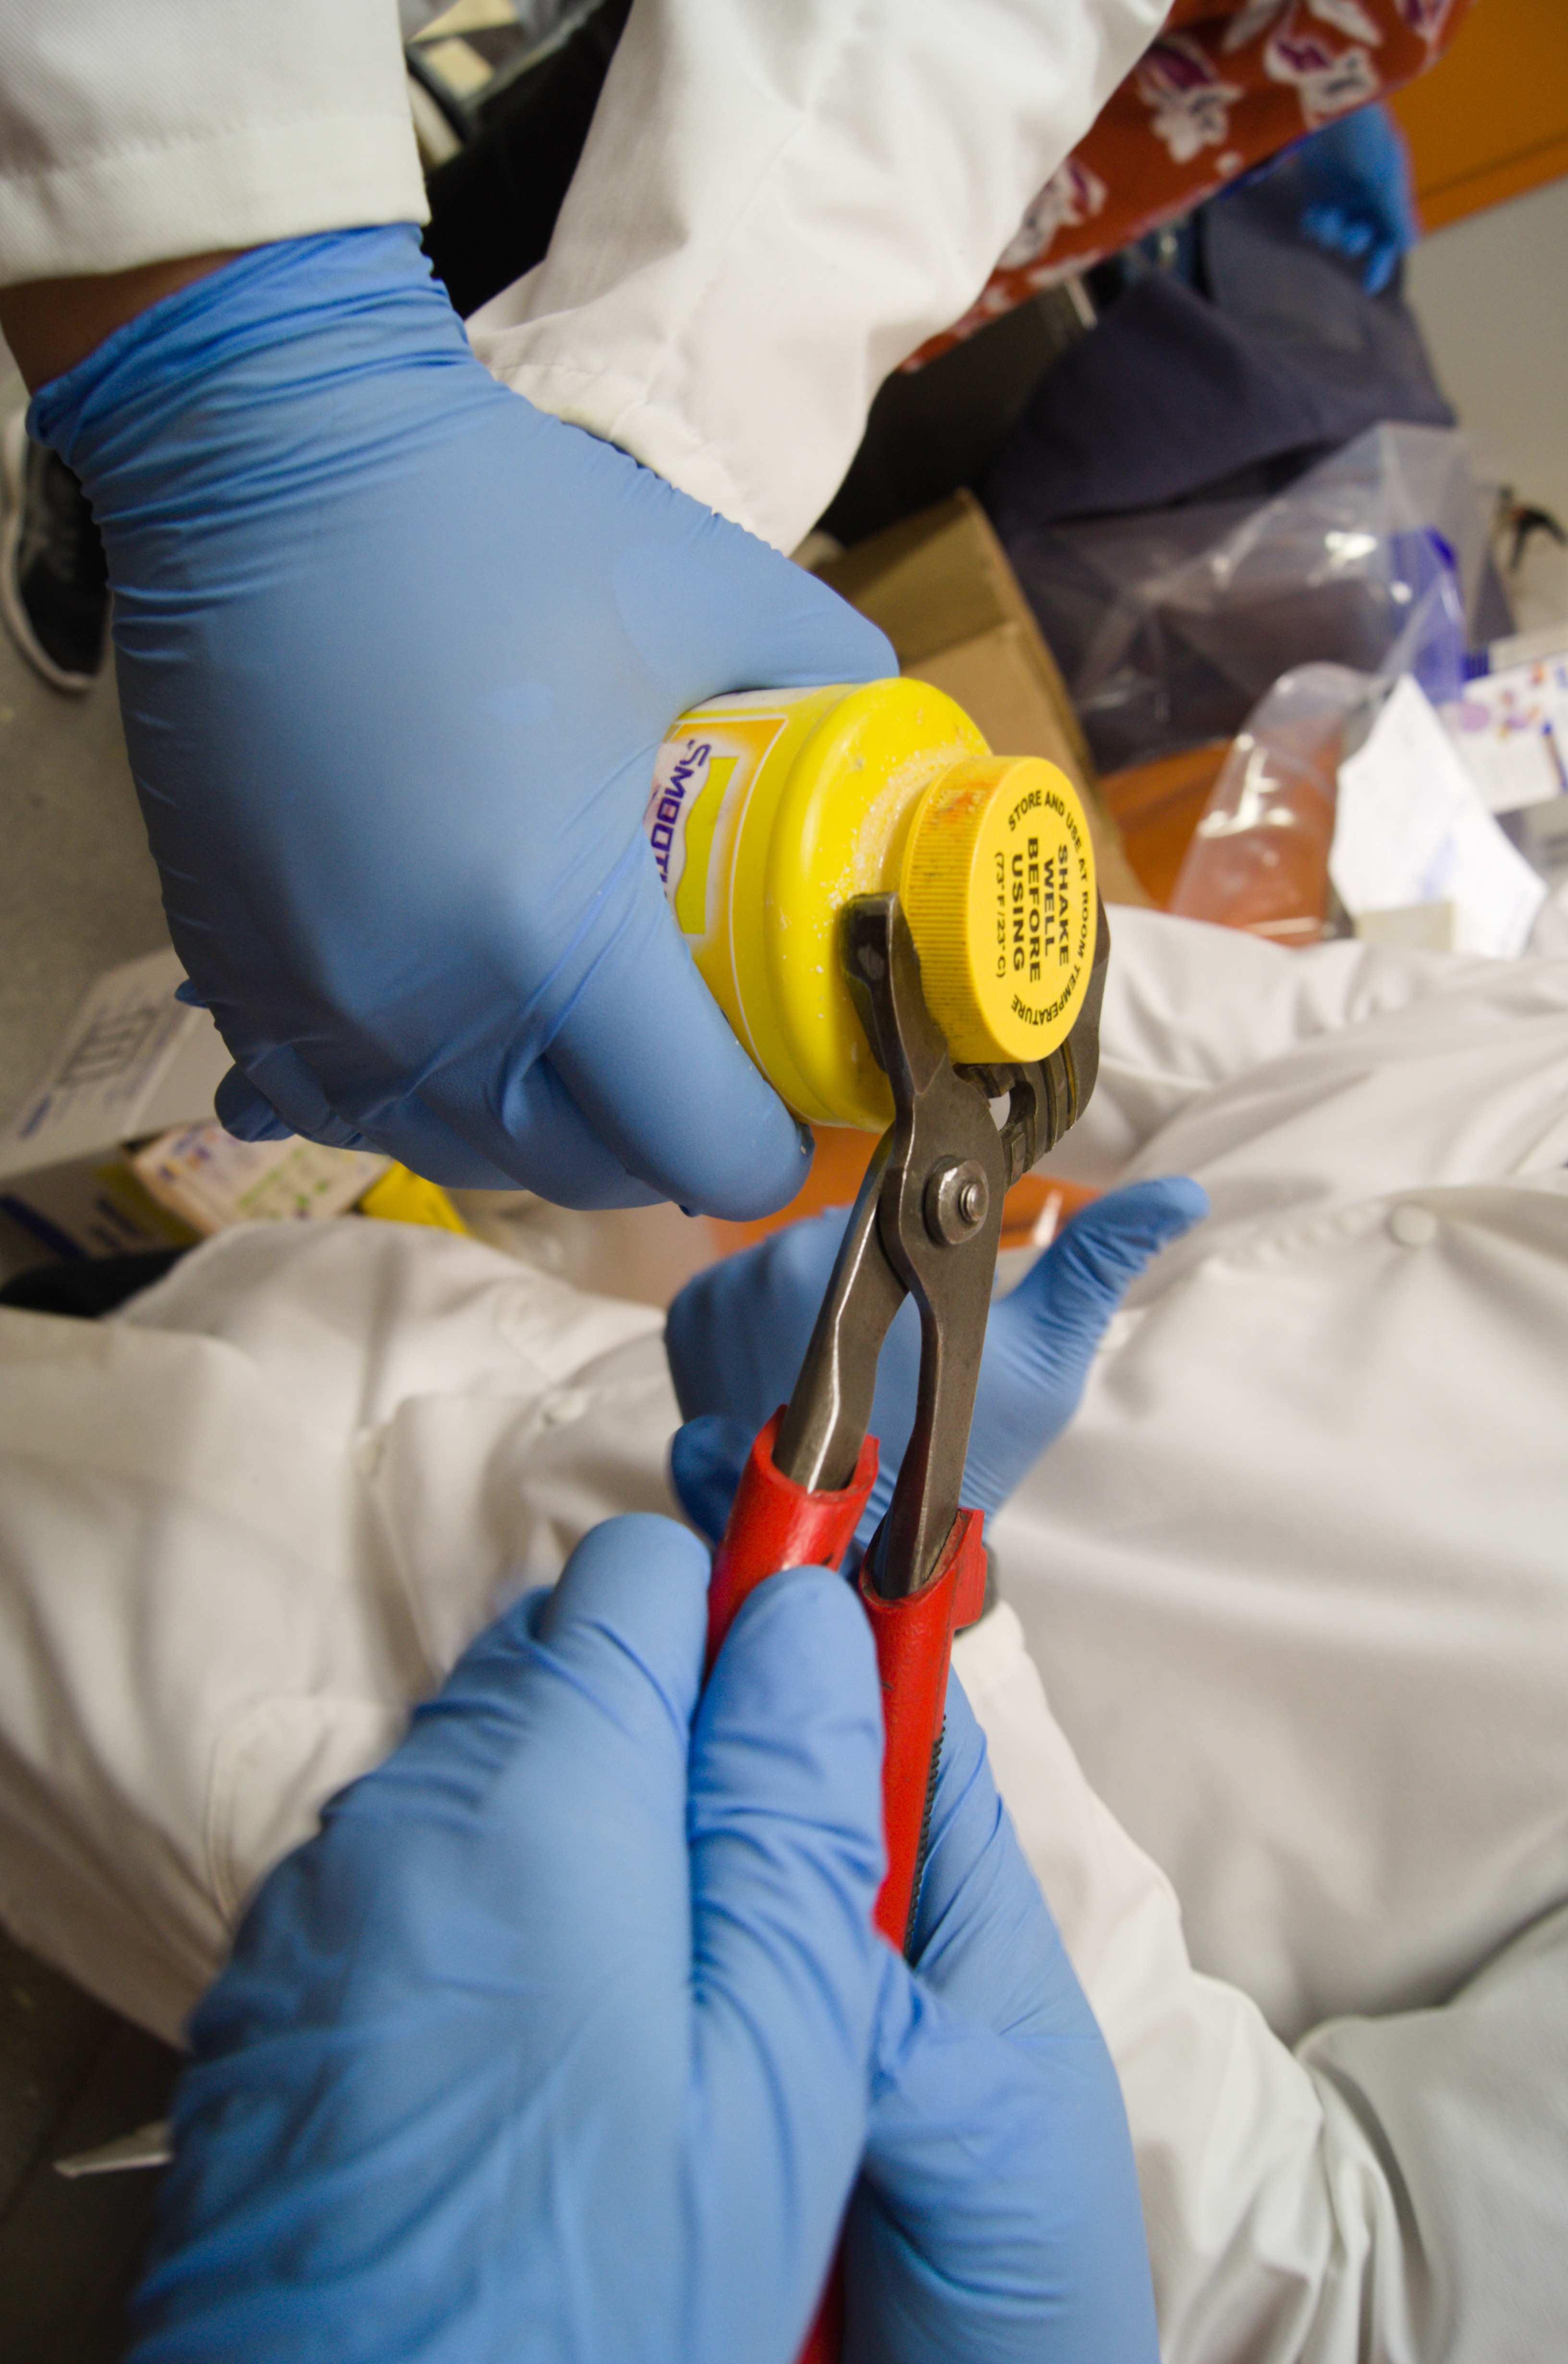
After working with weight and different substances I can easily find new job in drugstore. If not then the plan is to dominate the "Crystal Blue" market (with a little wink to the reader). During the group work we found a real Excalibur. A bottle, which no one could open with hands. In the end we managed with some tools. We are primates, evolution.
I bet you are now wondering how I was able to make photo and opening at the same time
Now I bet you are checking the photo once again
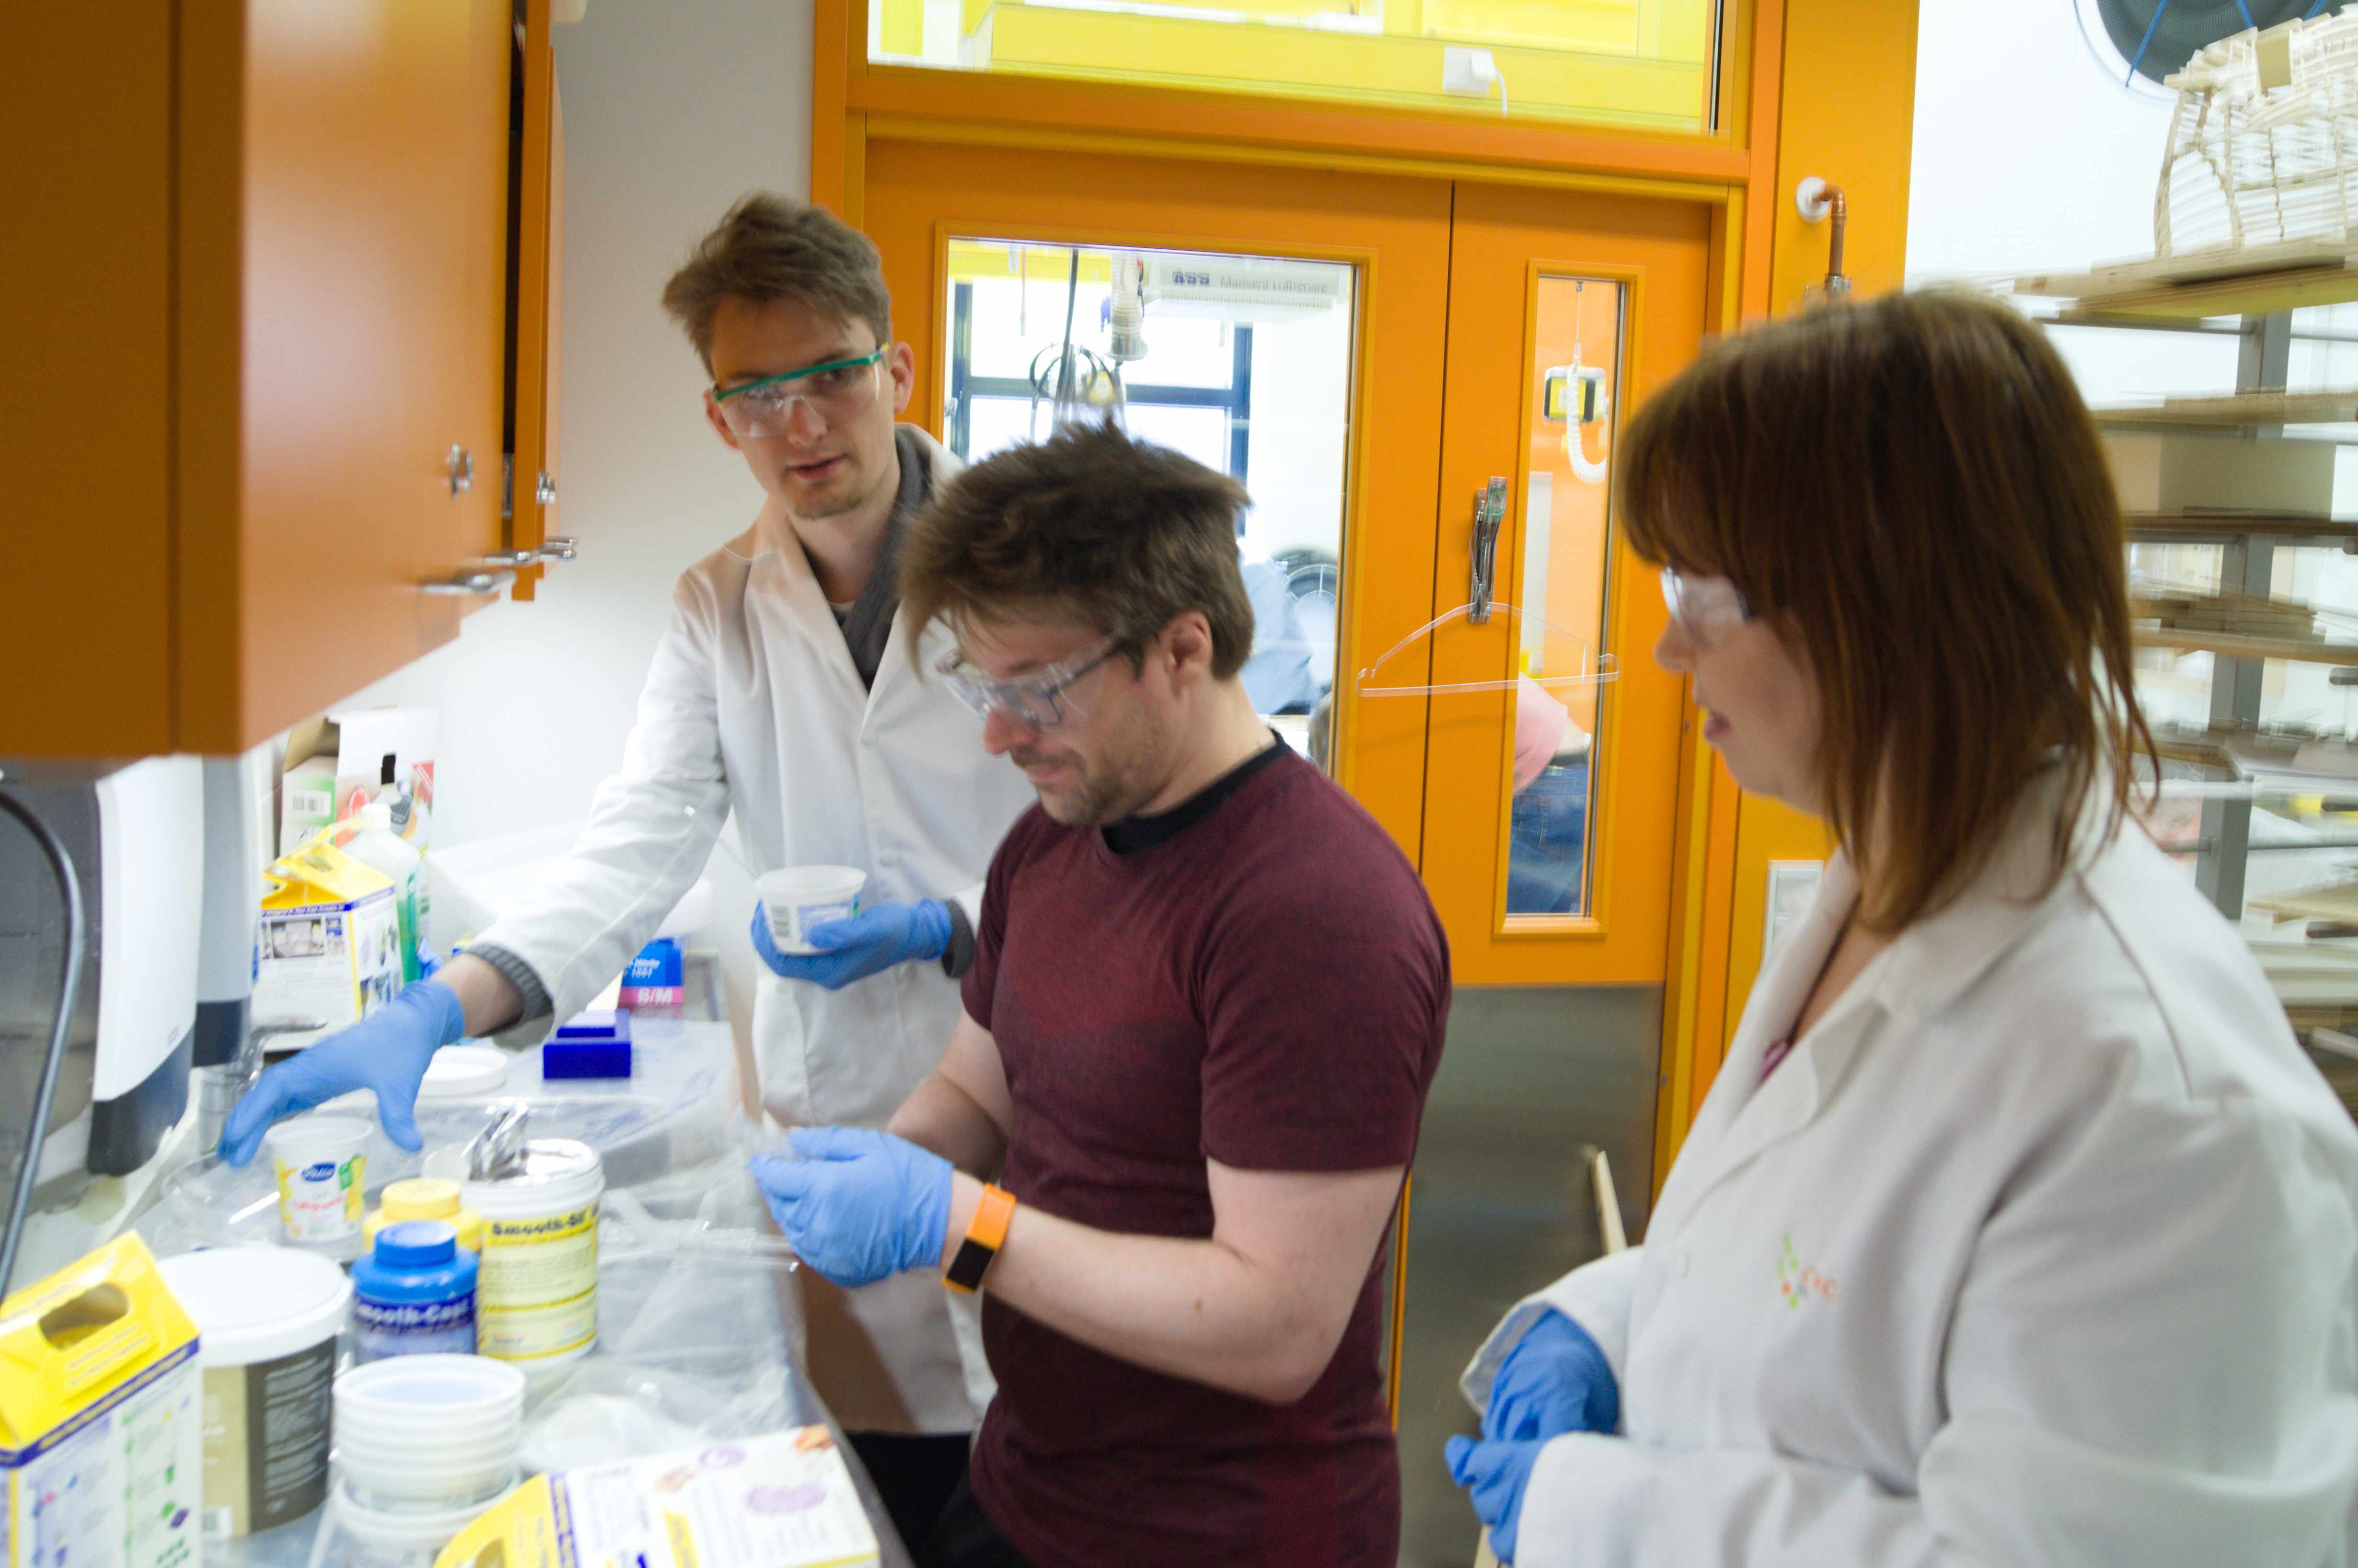
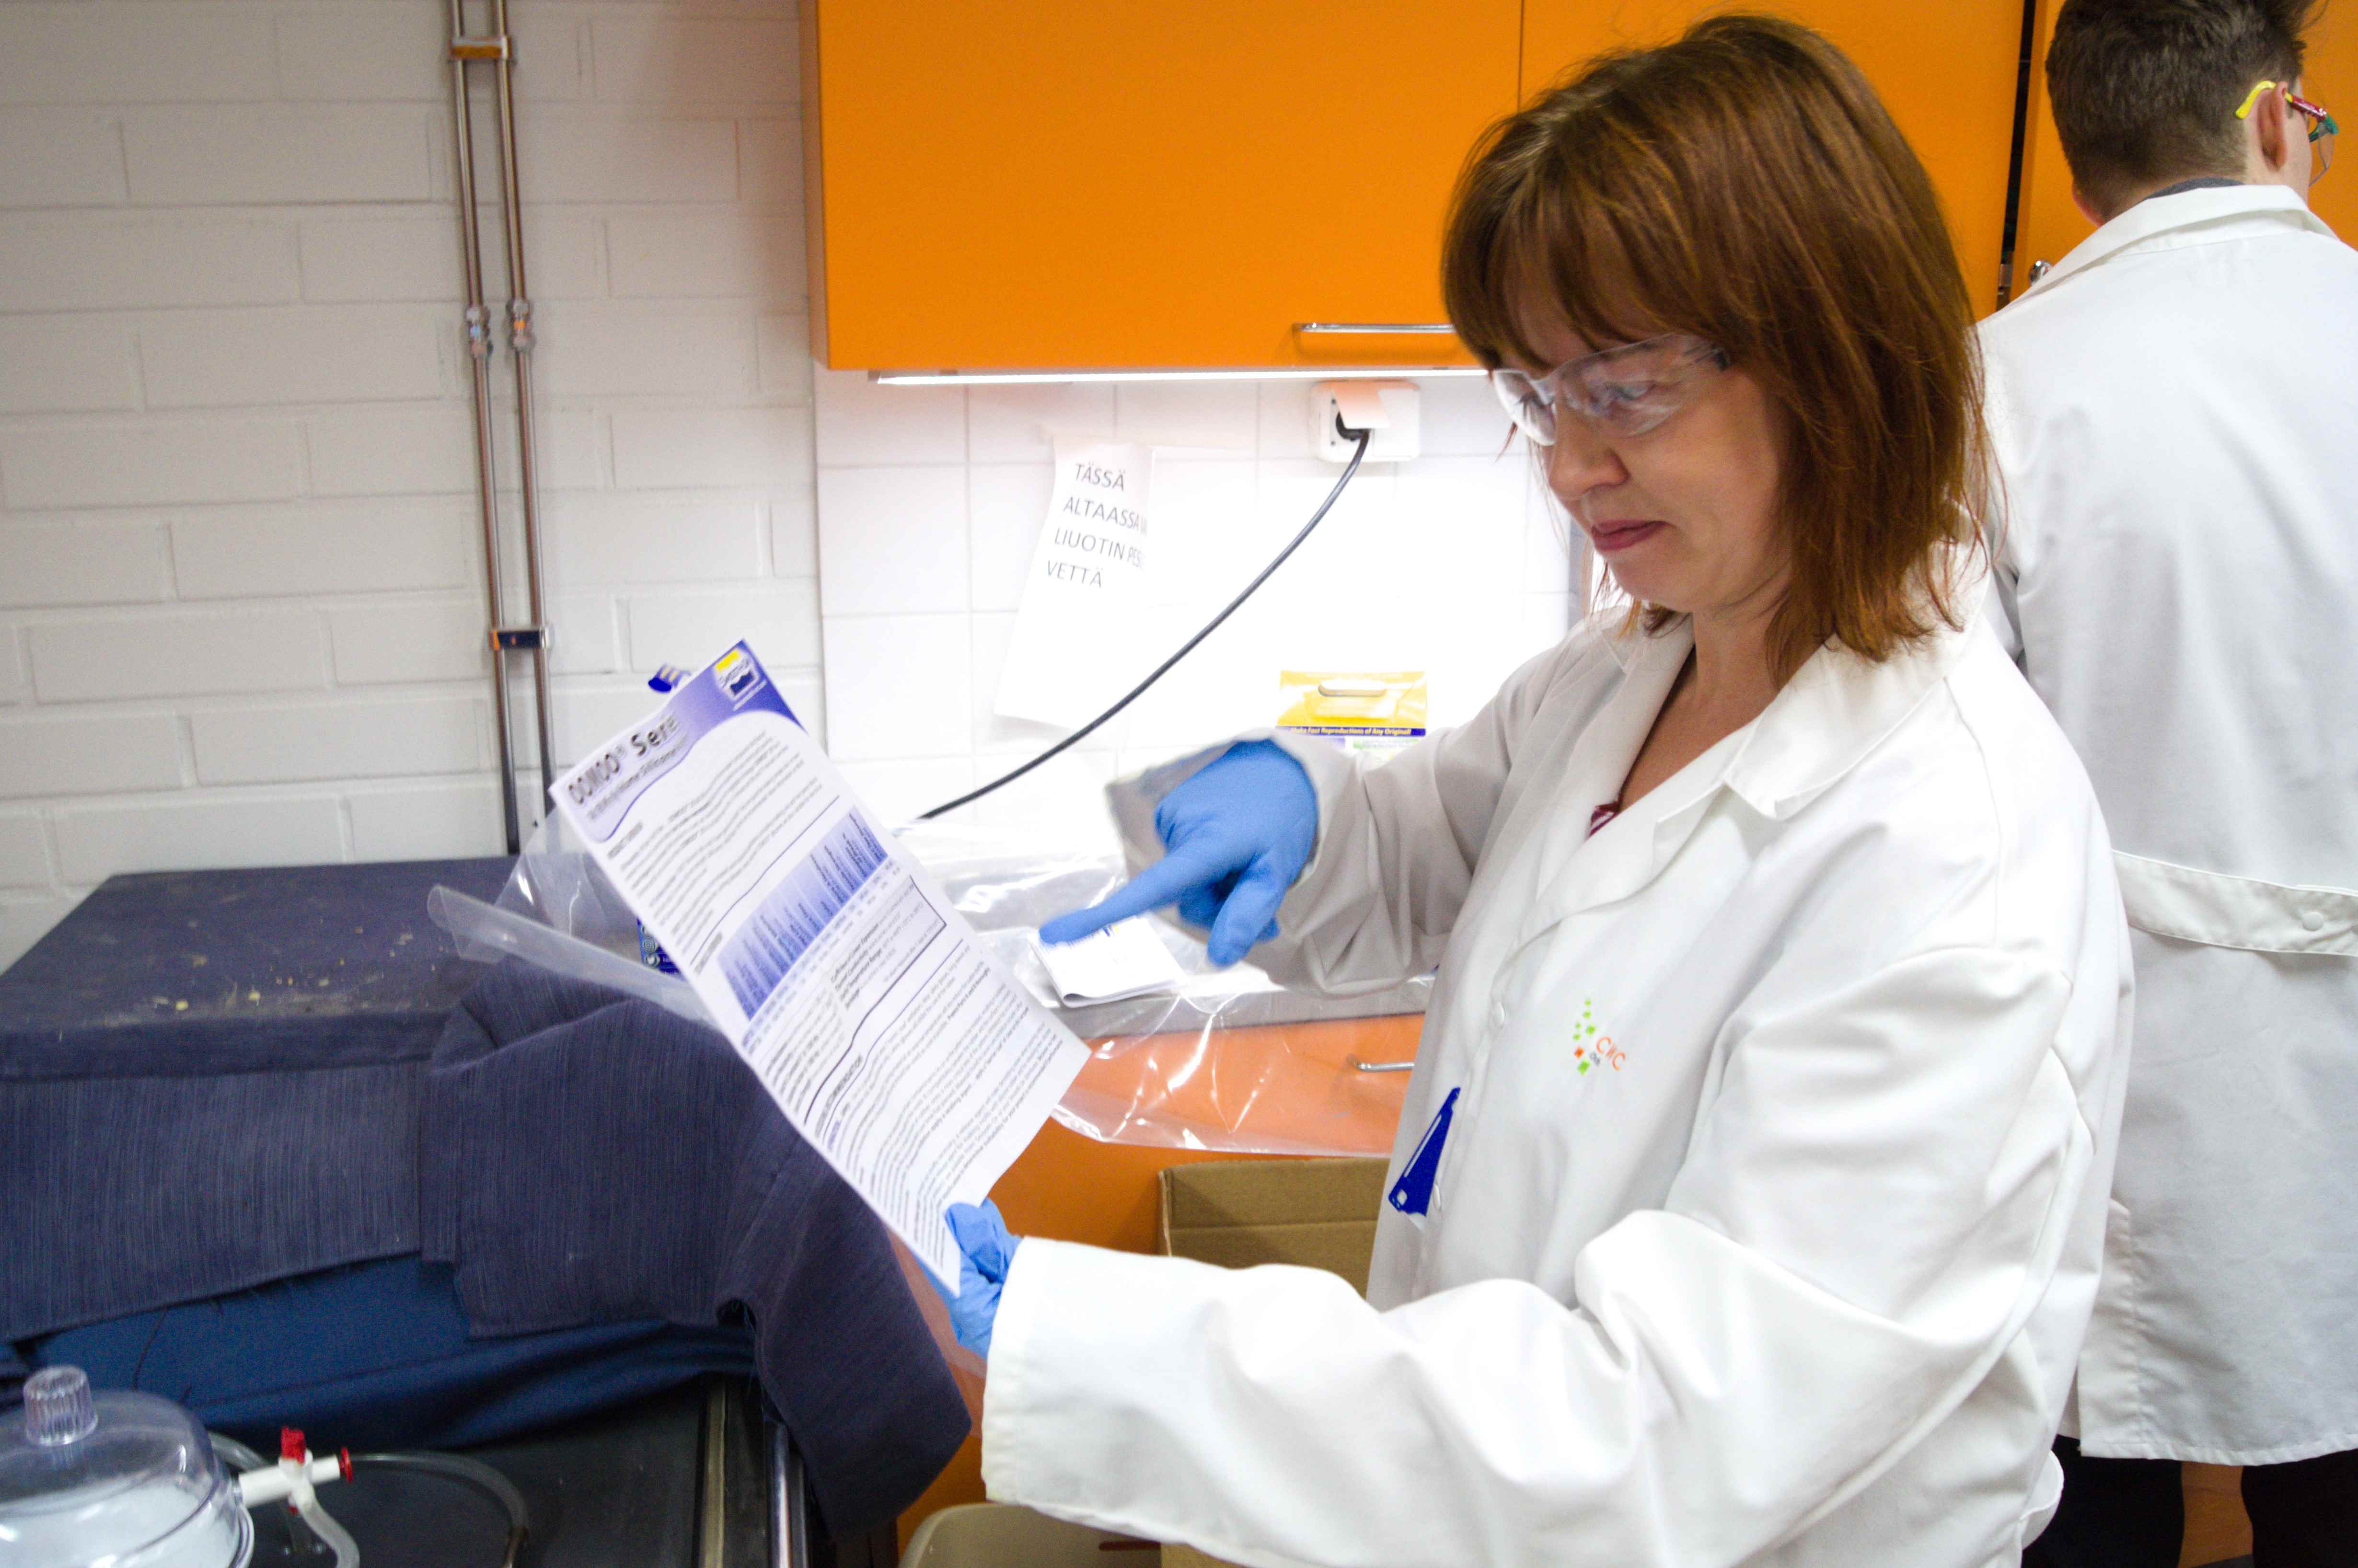
It was just introduction till now. The most important thing is always safety. We might work with a bit nasty materials until they are not hardened. We were working in protective glasses, gloves and white uniforms.
We also read safety notes and manual for each material we were using. We took safety precautions very serious as we didn't want any allergic reactions and issues. Perttu, also advised to create a plan, what we will do step by step. Almost like in chess, five moves ahead. I liked the idea and I decided I will mention it here.
Safety precautions for Smooth-Cast 305 (wasn't used): Safety datasheet regardless
- Handling Precautions: Minimize breathing of vapors and avoid prolonged or repeated contact with skin. Wear proper protective equipment. If ventilation is not sufficient, wear proper respiratory equipment. Avoid moisture contamination.
- Respiratory Protection: Follow OSHA respirator regulations 29 CFR 1910.134 and European Standard EN 149; wear an MSHA/NIOSH or European Standard EN149 approved respirator.
- Protective Clothing/Equipment: Wear chemically protective gloves. Wear protective eyeglasses per OSHA eye and face protection regulations
Regarding respiratory Protection regulation, it mainly says (from OSHA respirator regulations 29 CFR 1910.134 ) " shall be accomplished as far as feasible by accepted engineering control measures (for example, enclosure or confinement of the operation, general and local ventilation, and substitution of less toxic materials) " and " A respirator shall be provided to each employee when such equipment is necessary."
Safety precautions for OOMOO 30: Safety datasheet
- Precautions for safe handling: Use good general housekeeping procedures. Wash hands after use
- Respiratory Protection: Should a respirator be needed, follow OSHA respirator regulations 29 CFR 1910.134 and European Standards EN 141, 143 and 371; wear an MSHA/NIOSH or European Standards EN 141, 143 and 371 approved respirators equipped with organic vapor cartridges.
- Hand Protection: Wear any liquid-tight gloves such as butyl rubber, neoprene or PVC.
- Eye Protection: Safety glasses with side shields per OSHA eye- and face-protection regulations 29 CFR 1910.133 and European Standard EN166.
- Other Protective Clothing/Equipment: Additional protective clothing or equipment is not normally required.
Safety precautions for Smooth-Sil 940: Safety datasheet
- Handling Precautions: Minimize breathing of vapors and avoid prolonged or repeated contact with skin. Wear proper protective equipment.
- Ventilation: Provide general or local exhaust ventilation systems
- Protective Clothing/Equipment: Wear chemically protective gloves. Wear protective eyeglasses per OSHA eye and face protection regulations
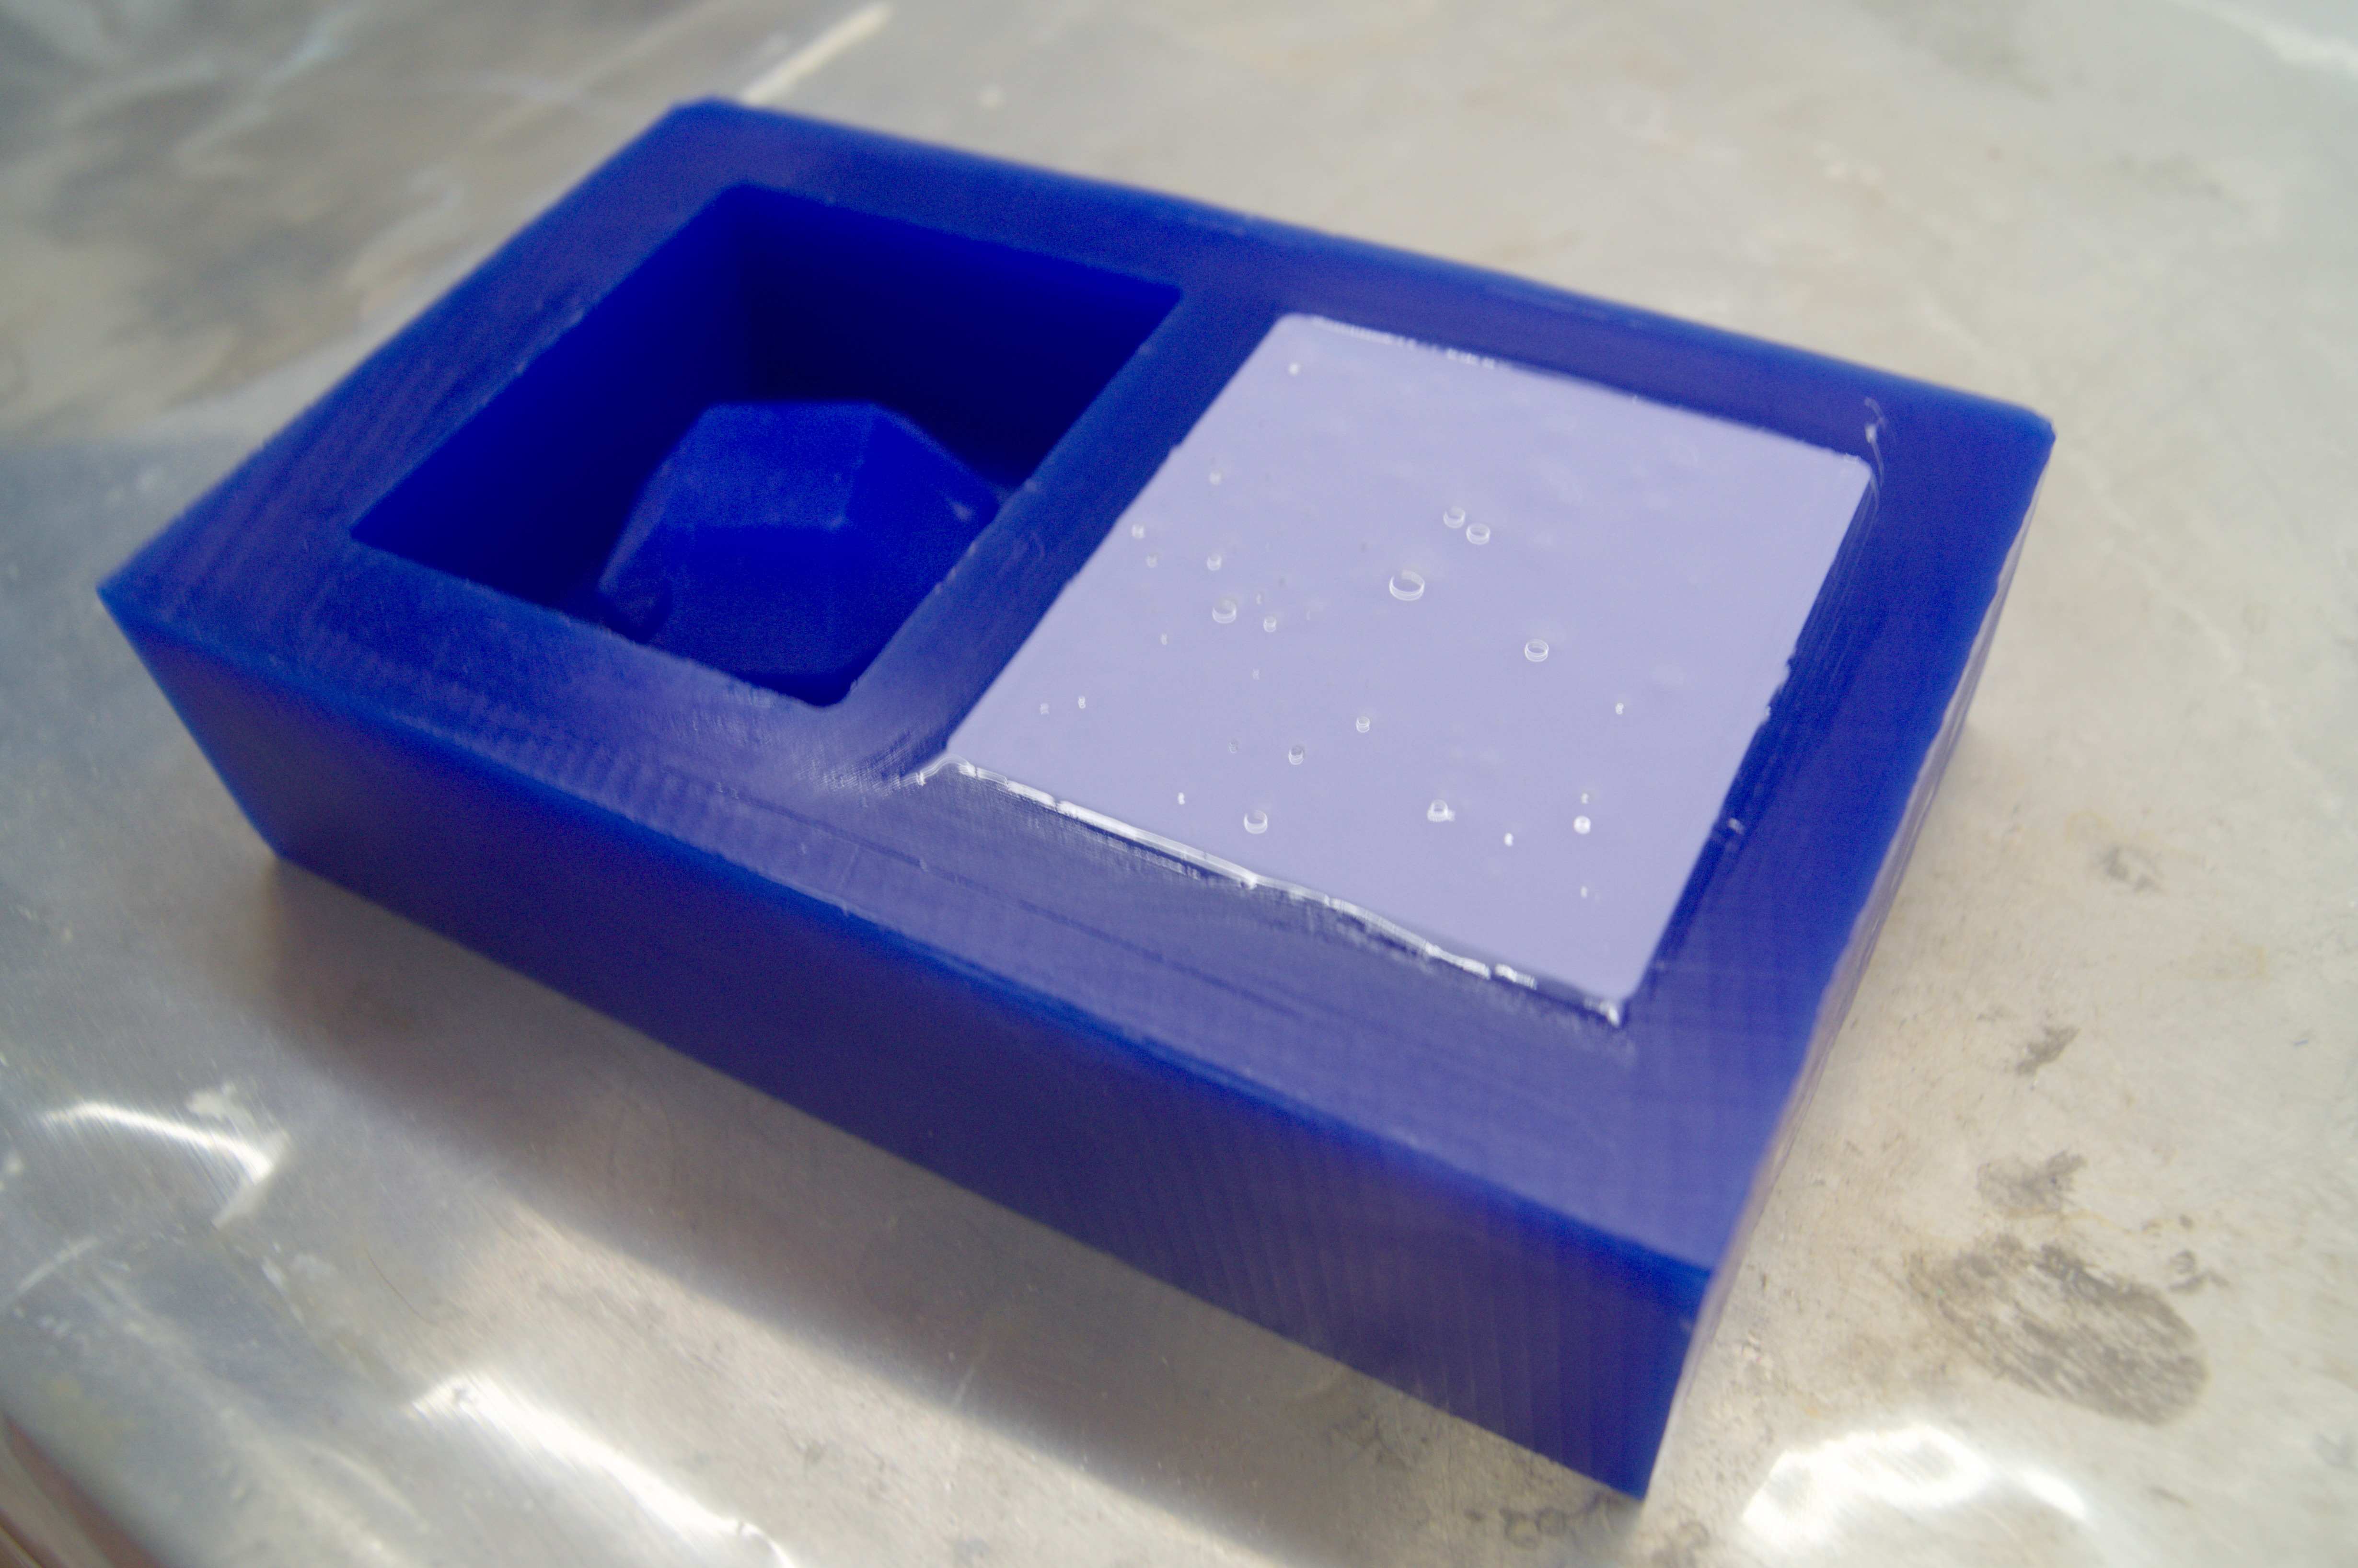
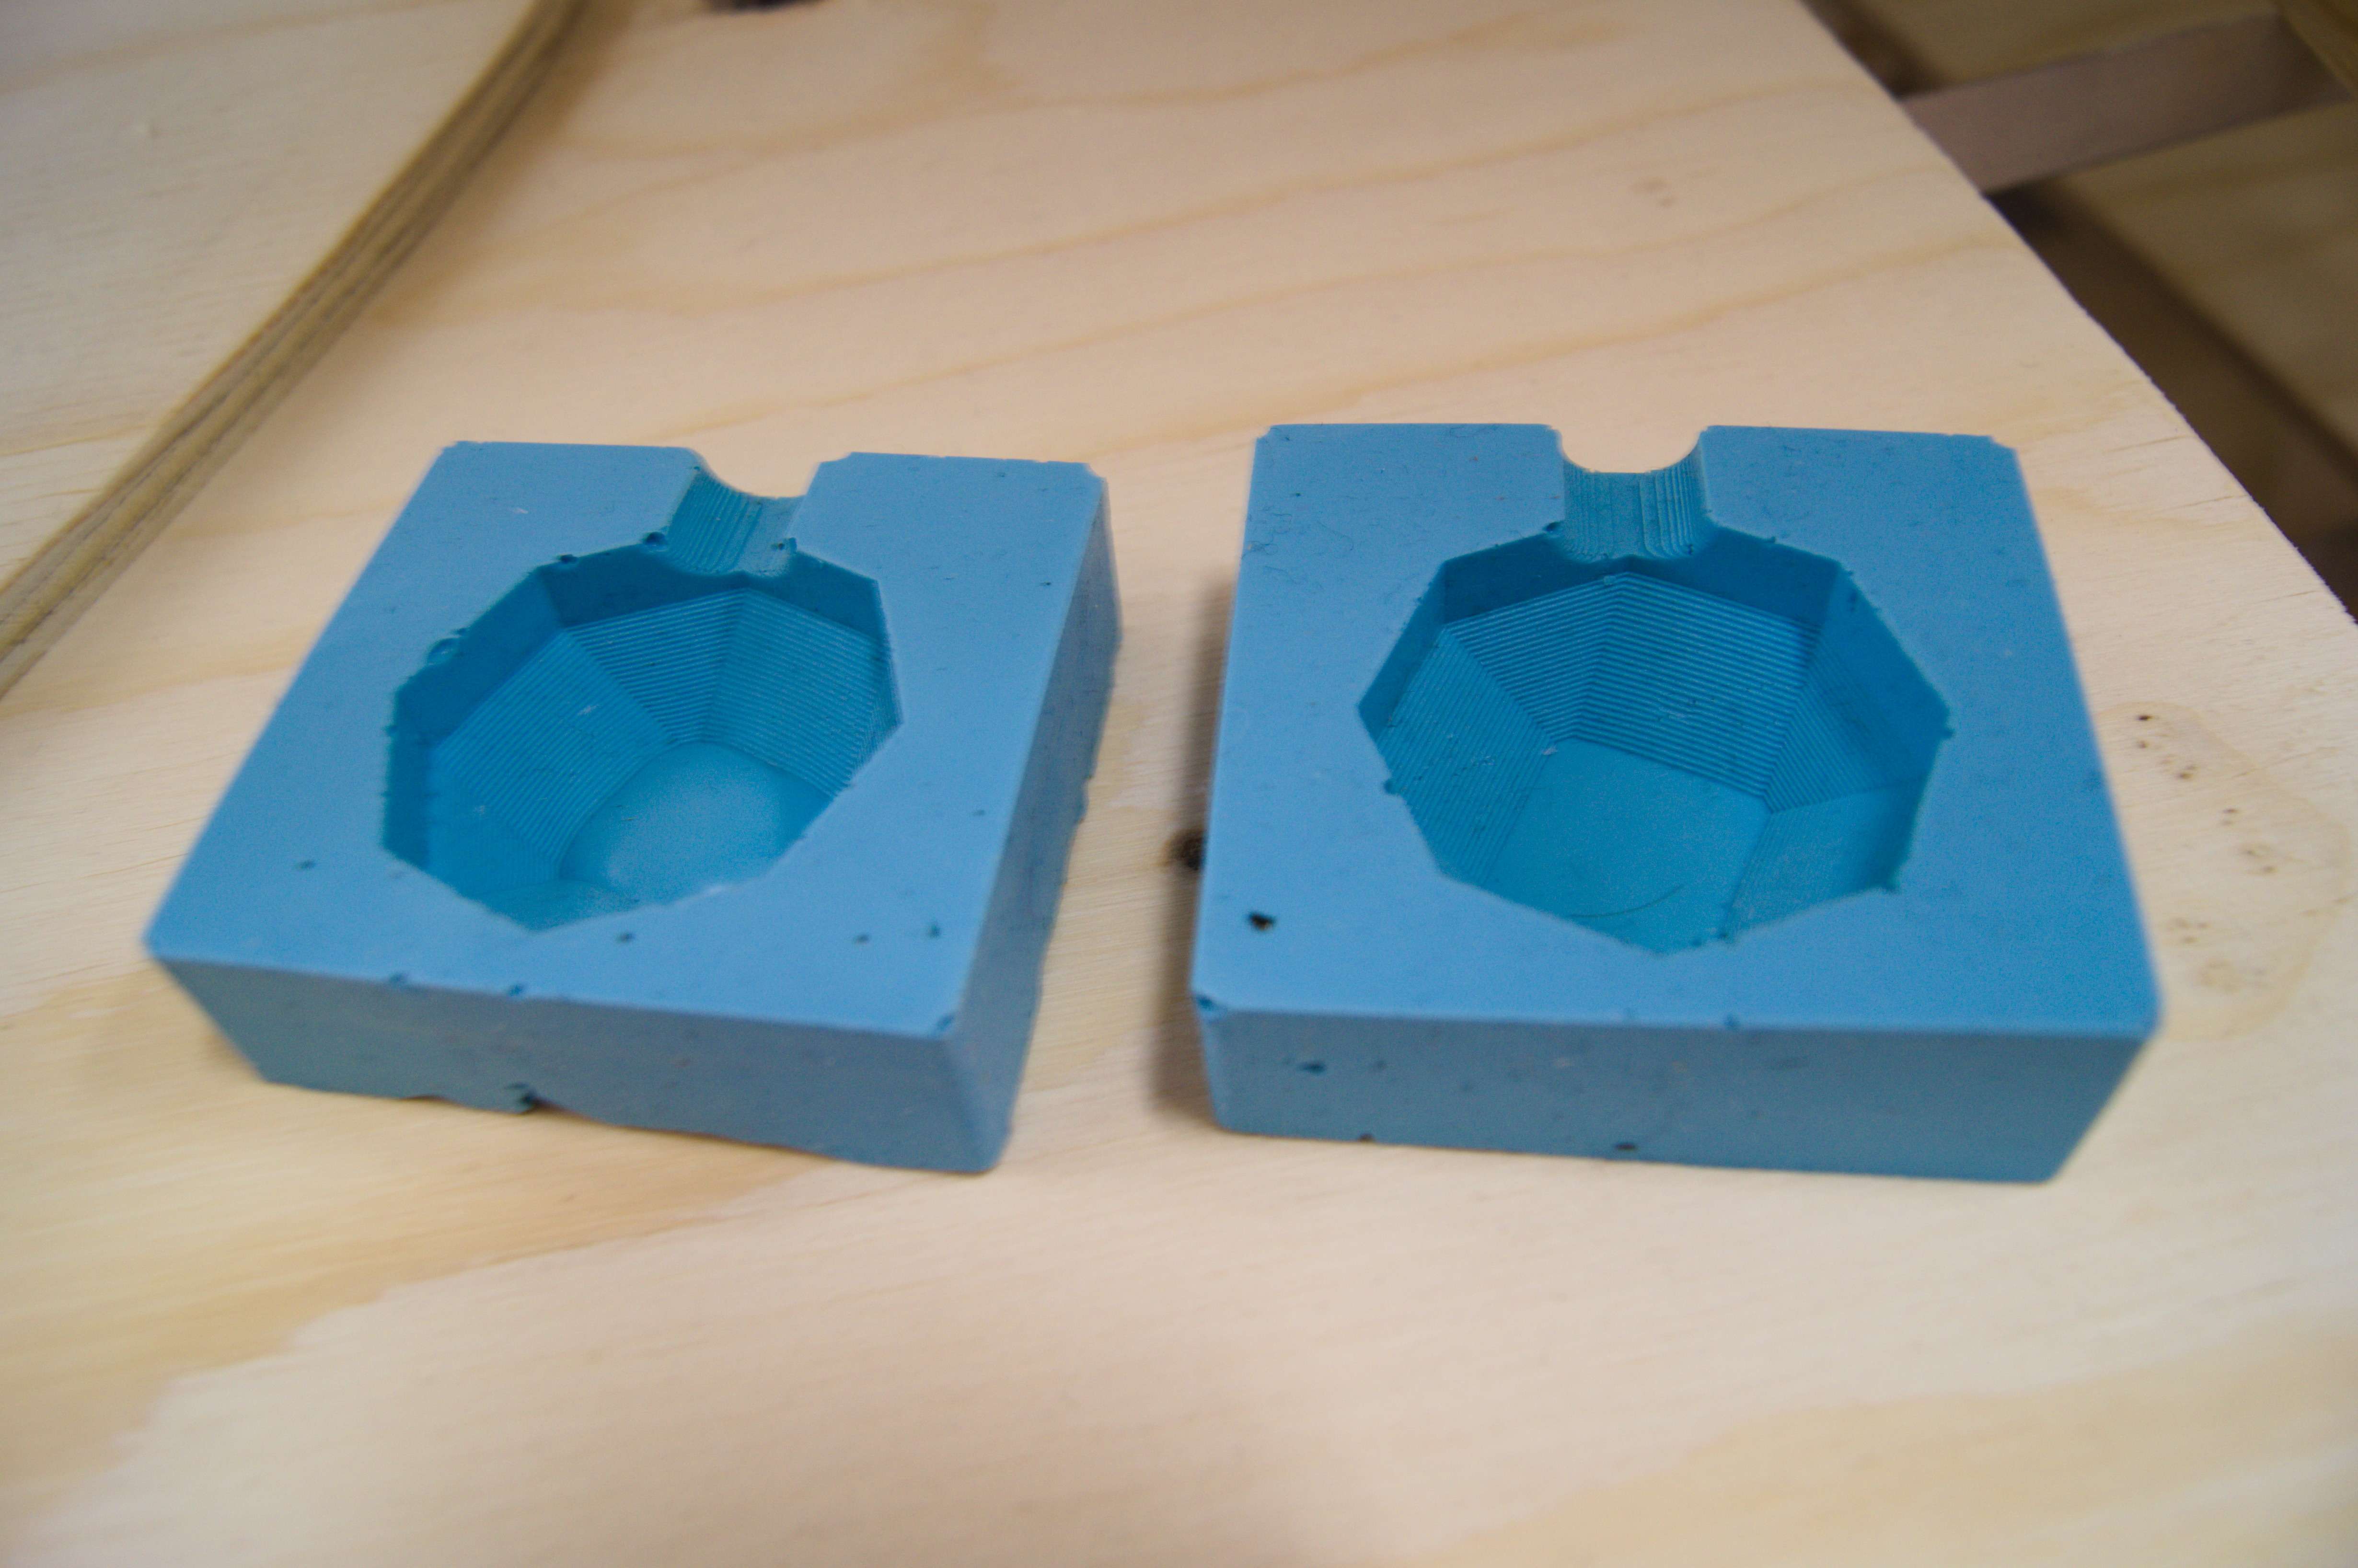
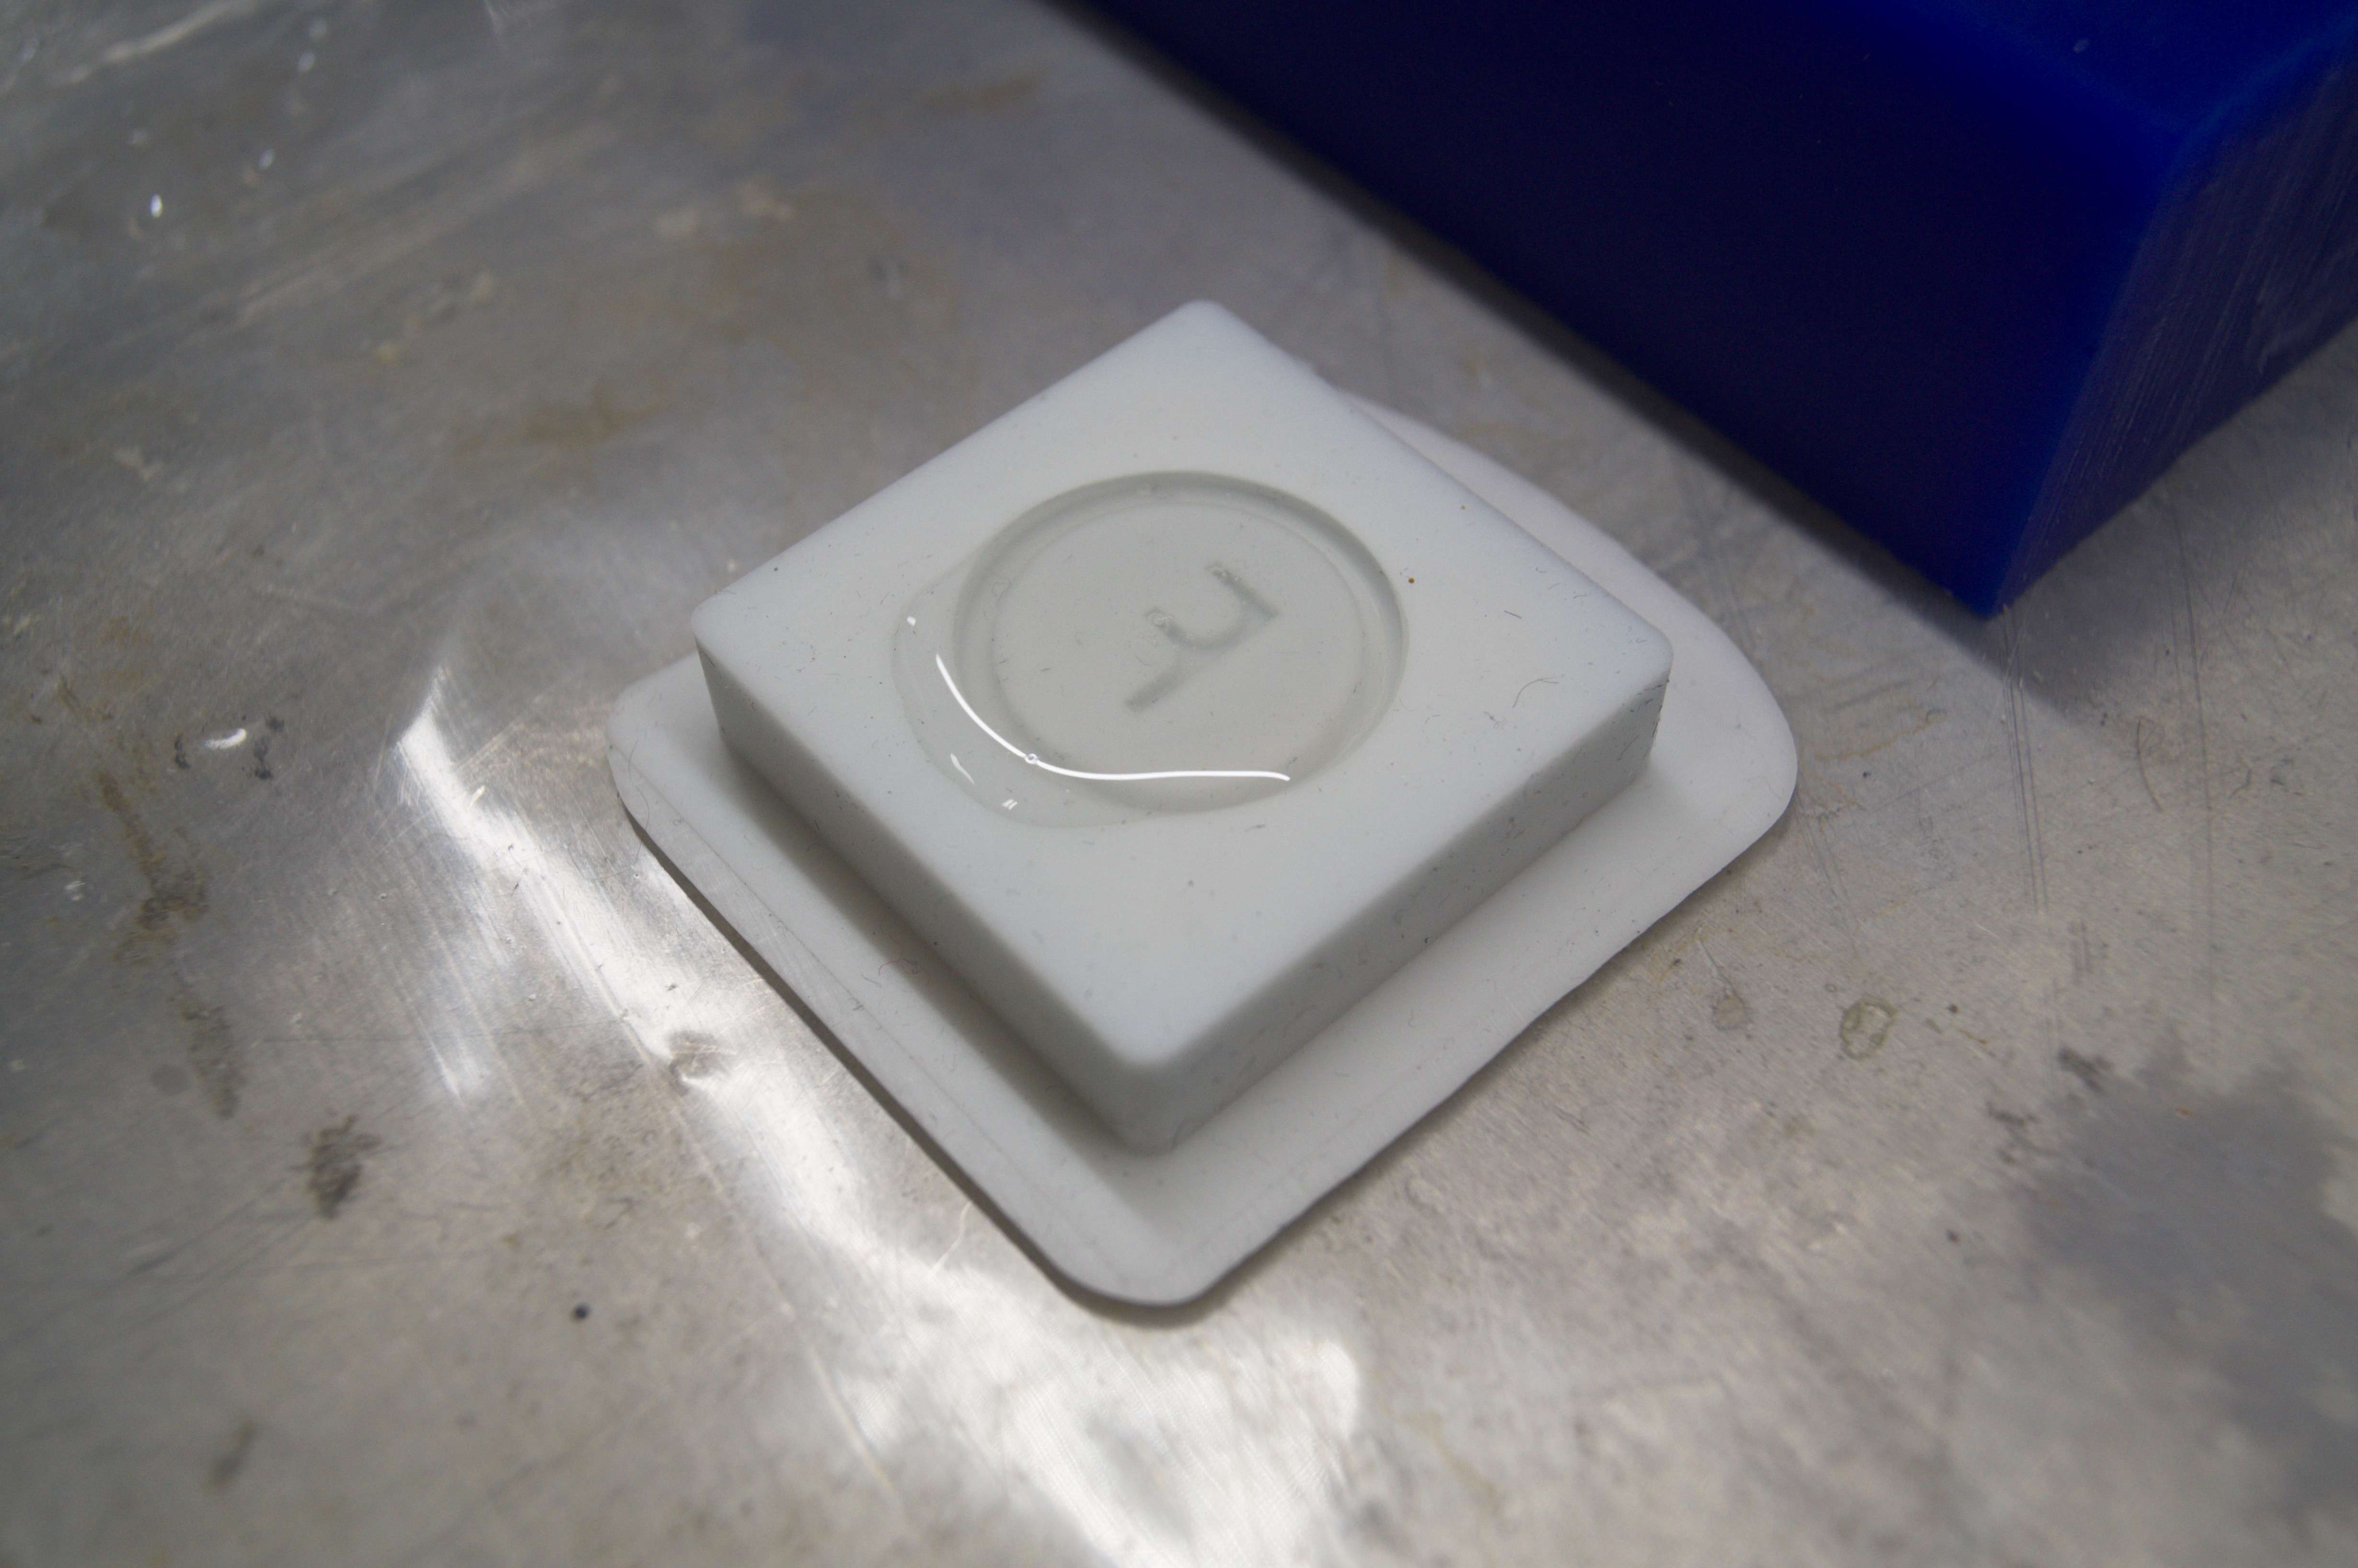
Two side mold 1: OOMOO 30
Sounds like name of some washing powder and here is a prove: CLICK. I will just quote producer, I think this serves as best description.
No Vacuuming (No Scale) - Easy To Use OOMOO 30 is an easy to use tin cure silicone rubber compound that features a convenient one-to-one by volume mix ratio (no scale necessary). It has low viscosity for easy mixing and pouring vacuum degassing is not necessary. This product cures at room temperature with negligible shrinkage. OOMOO 30 has a 30-minute pot life, with a six-hour cure time.
For The Novice Mold Maker - OOMOO silicones do not have great tear strength. They are good for making simple one- or two-piece block molds. If you require a high-tear strength silicone, Mold Max silicones are recommended.
OOMOO 30 is suitable for a variety of art-related and industrial applications including making one and two-piece block molds for sculpture and prototype reproduction, casting plaster, resins and wax. OOMOO silicones are also suitable for electrical potting and encapsulation applications.
The next images are just graphical description how to use OOMOO 30 to create molds. Let's start!
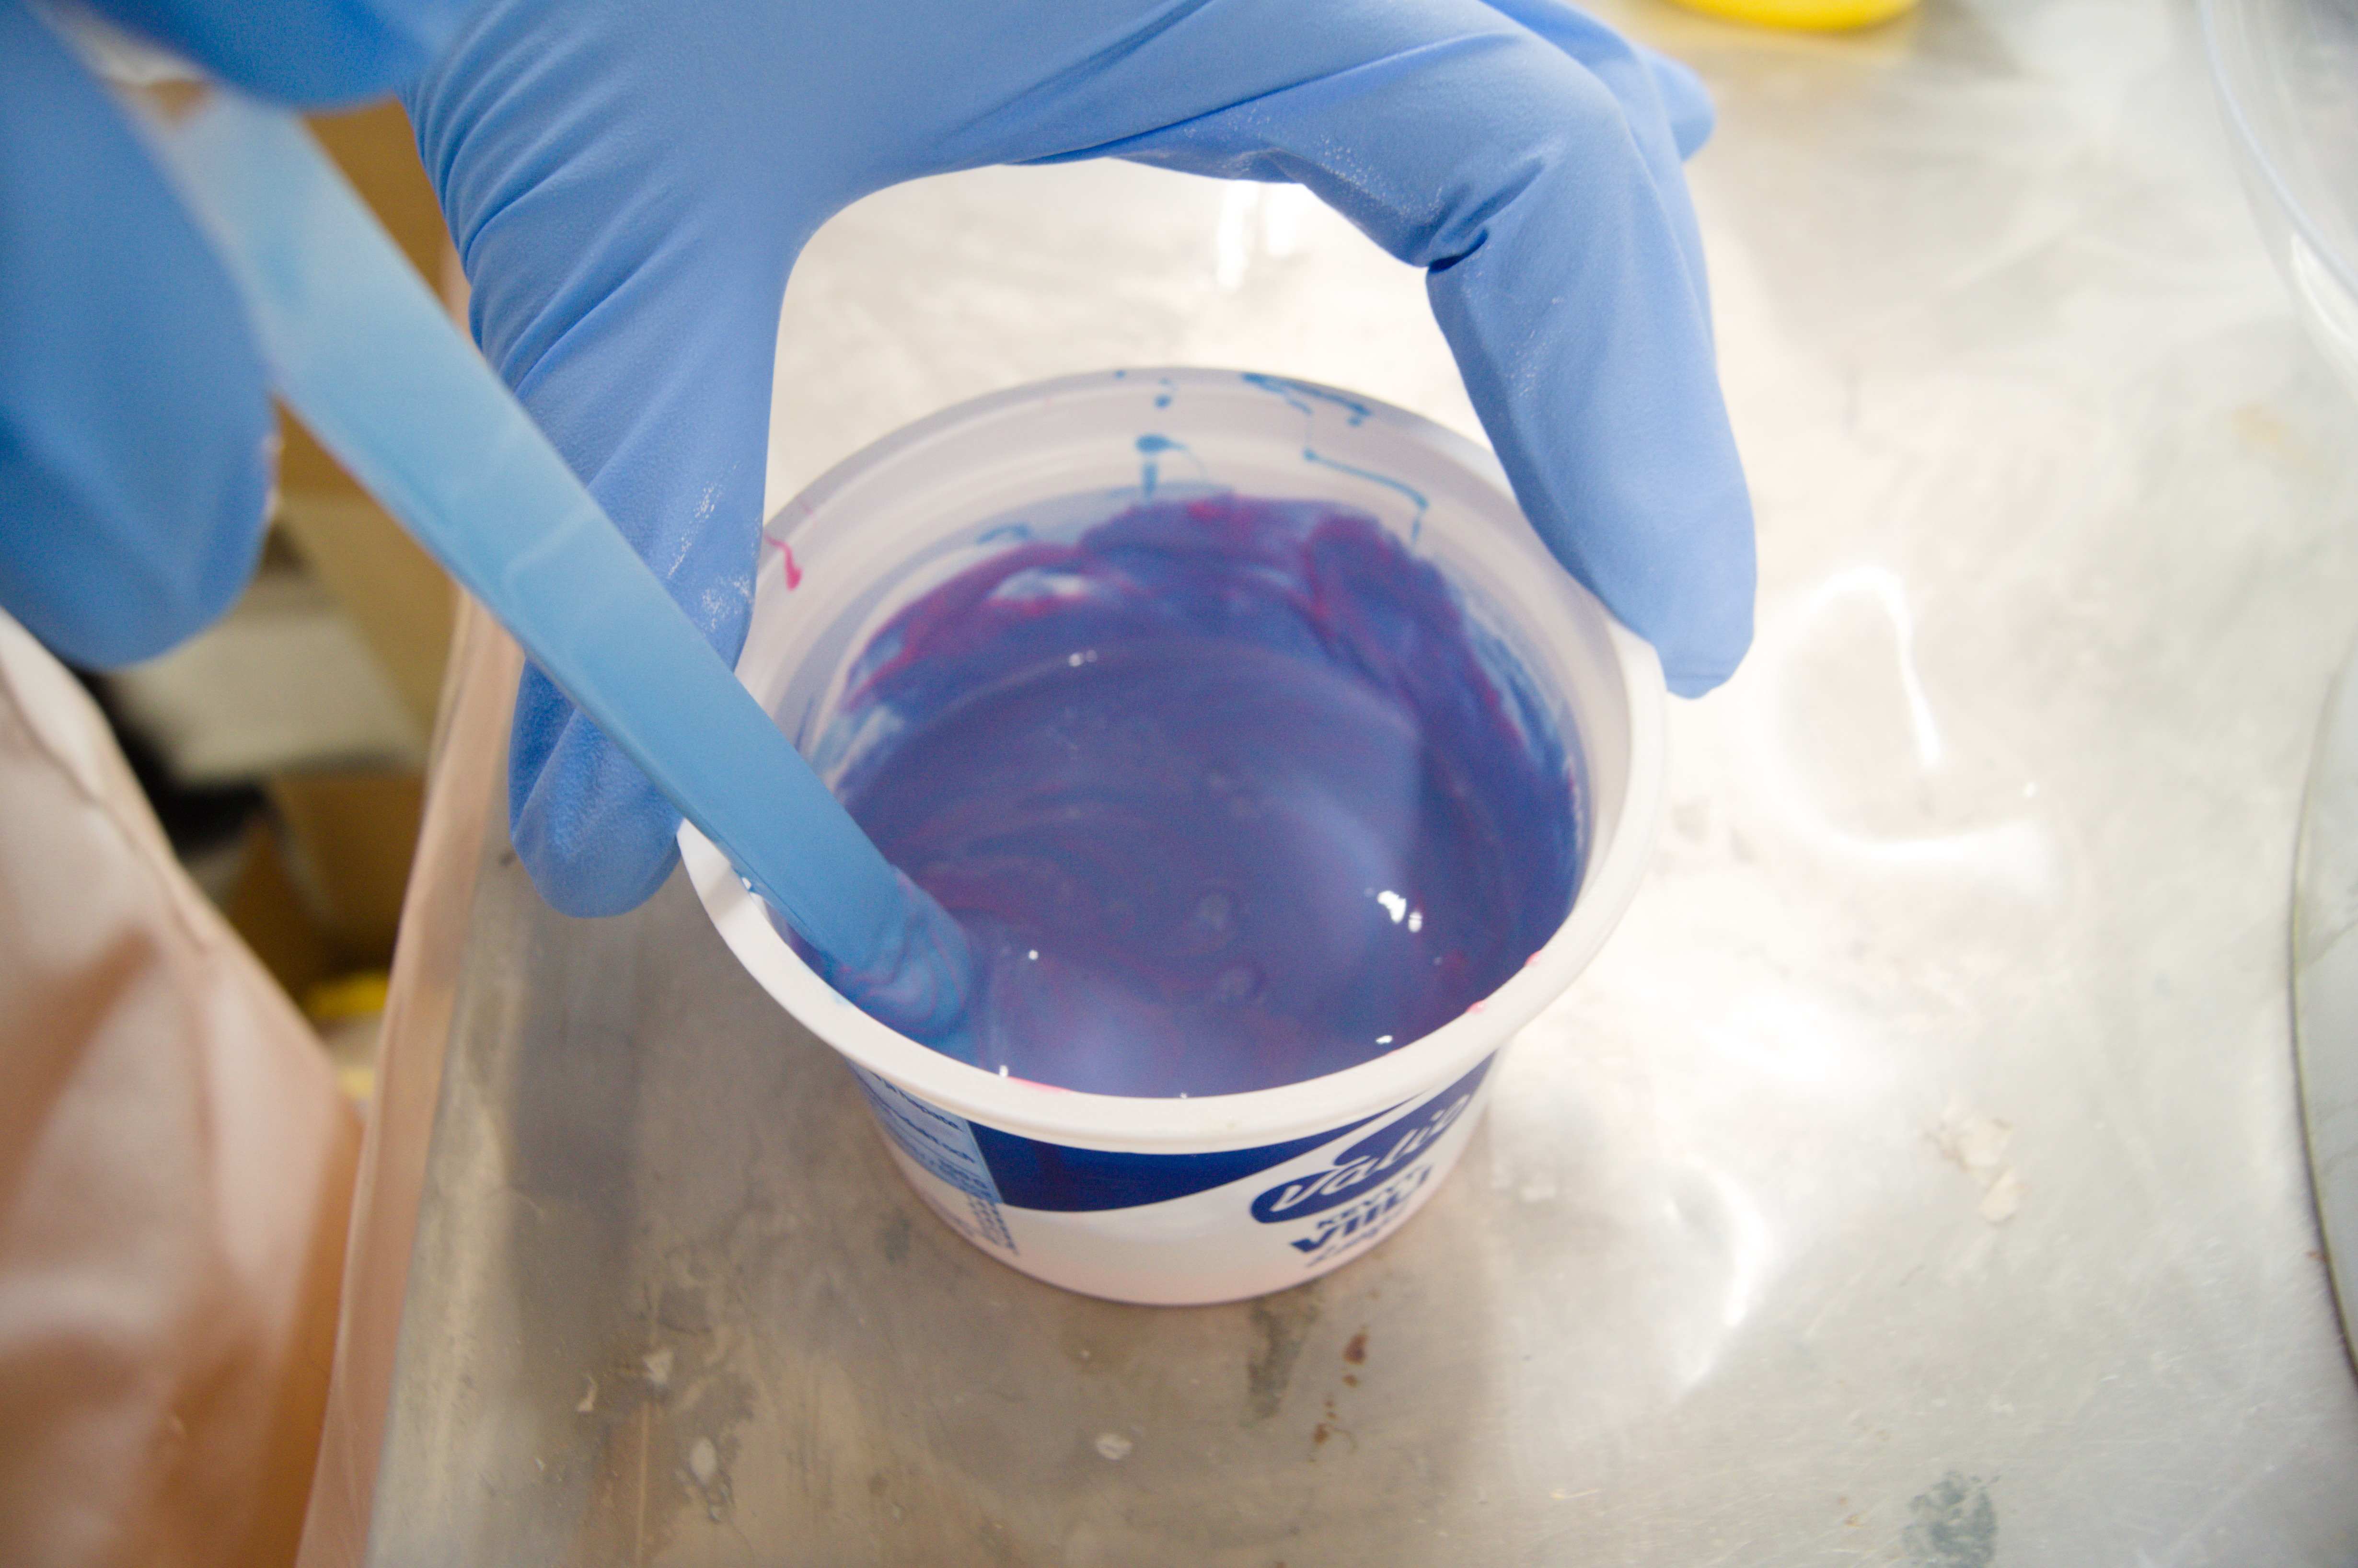
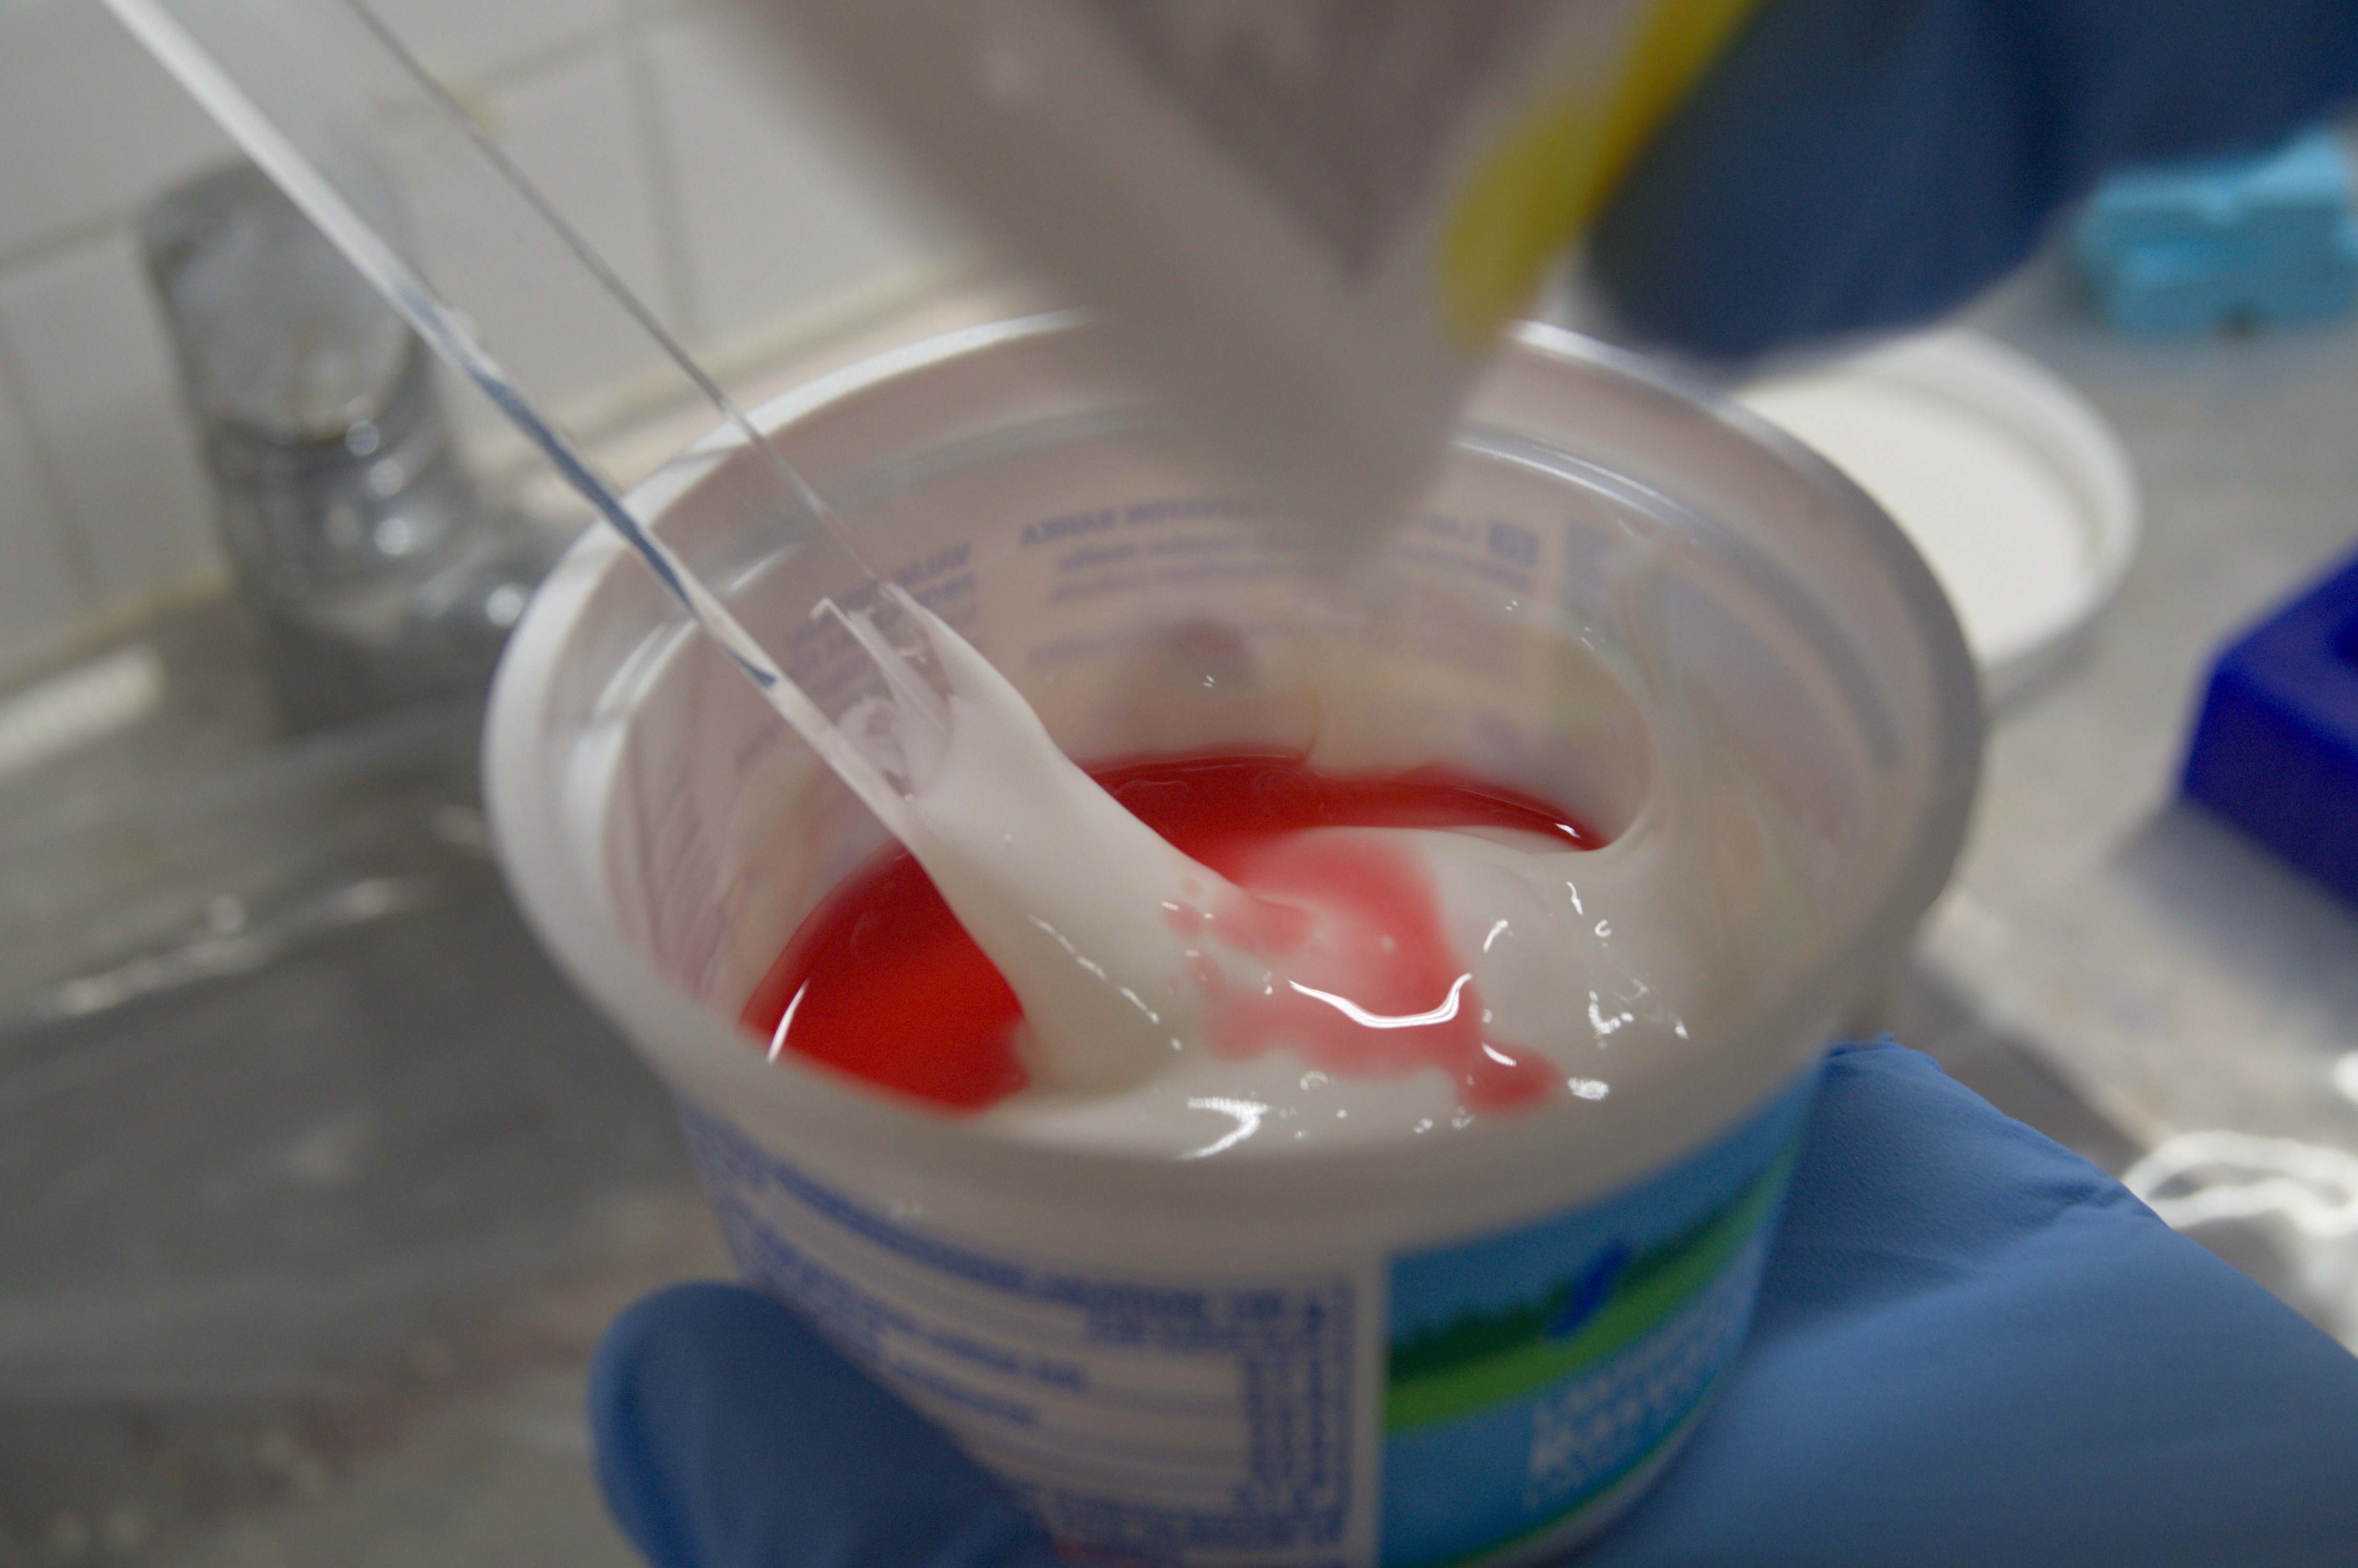
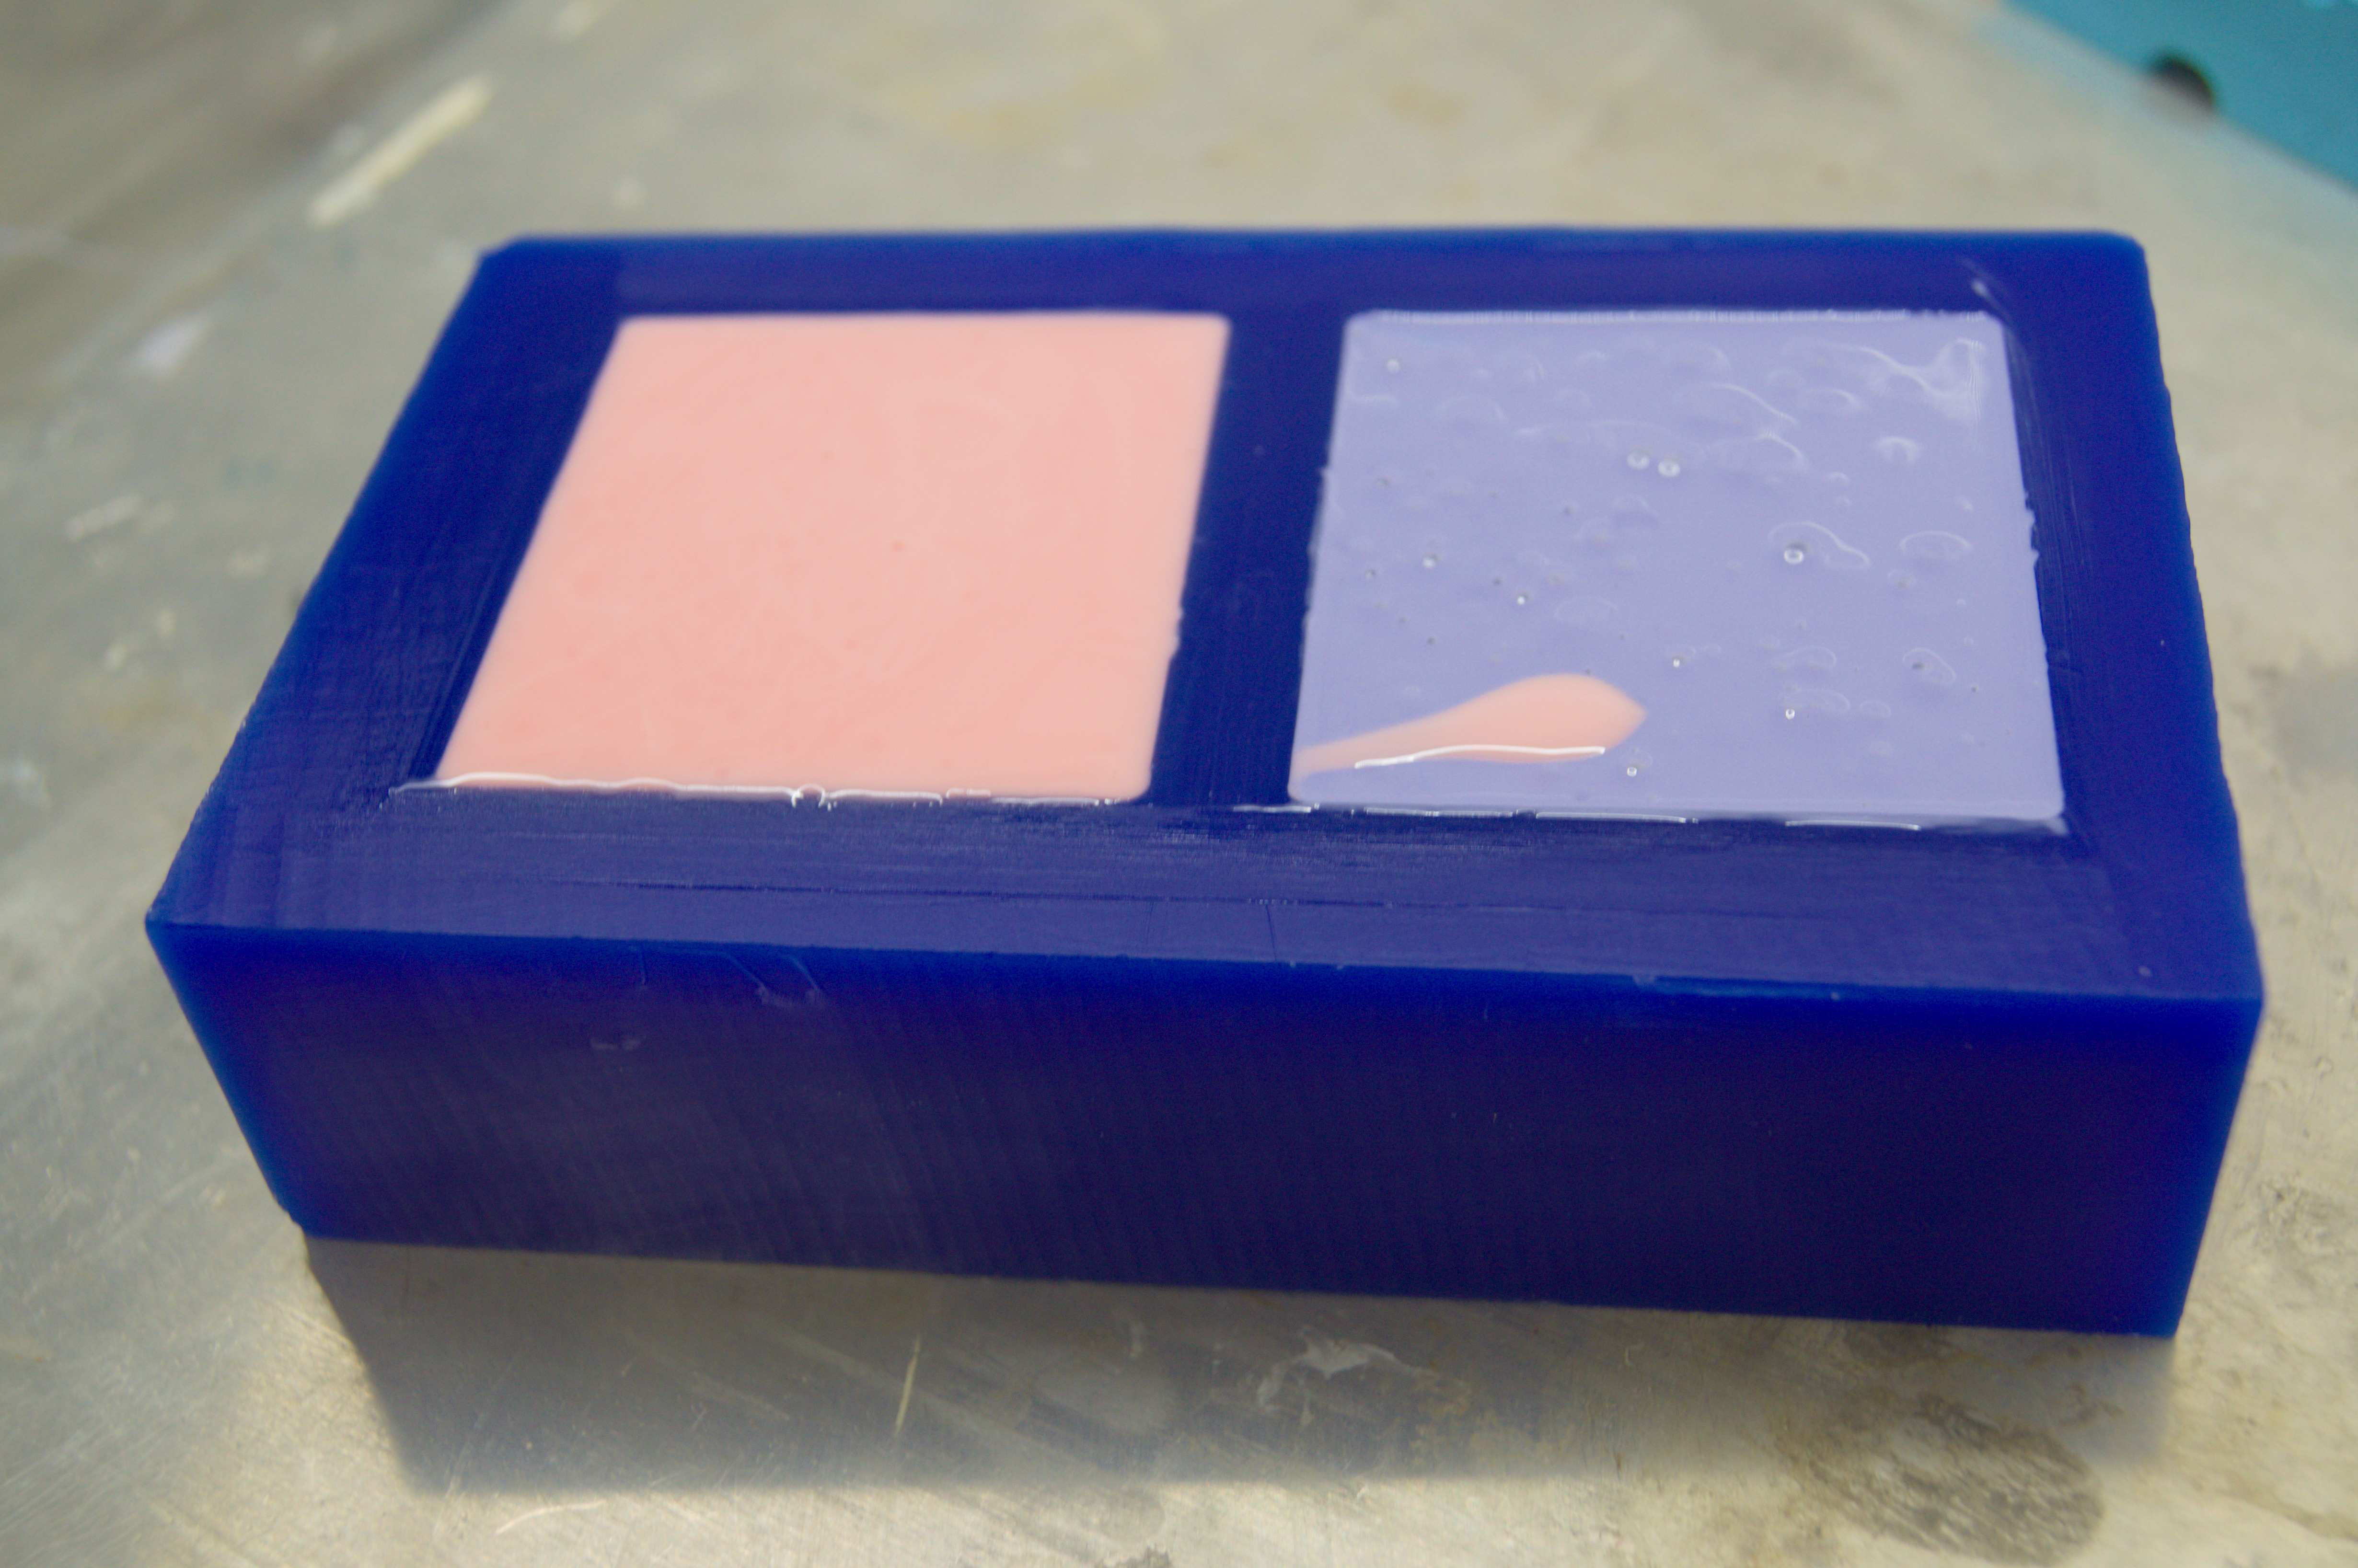
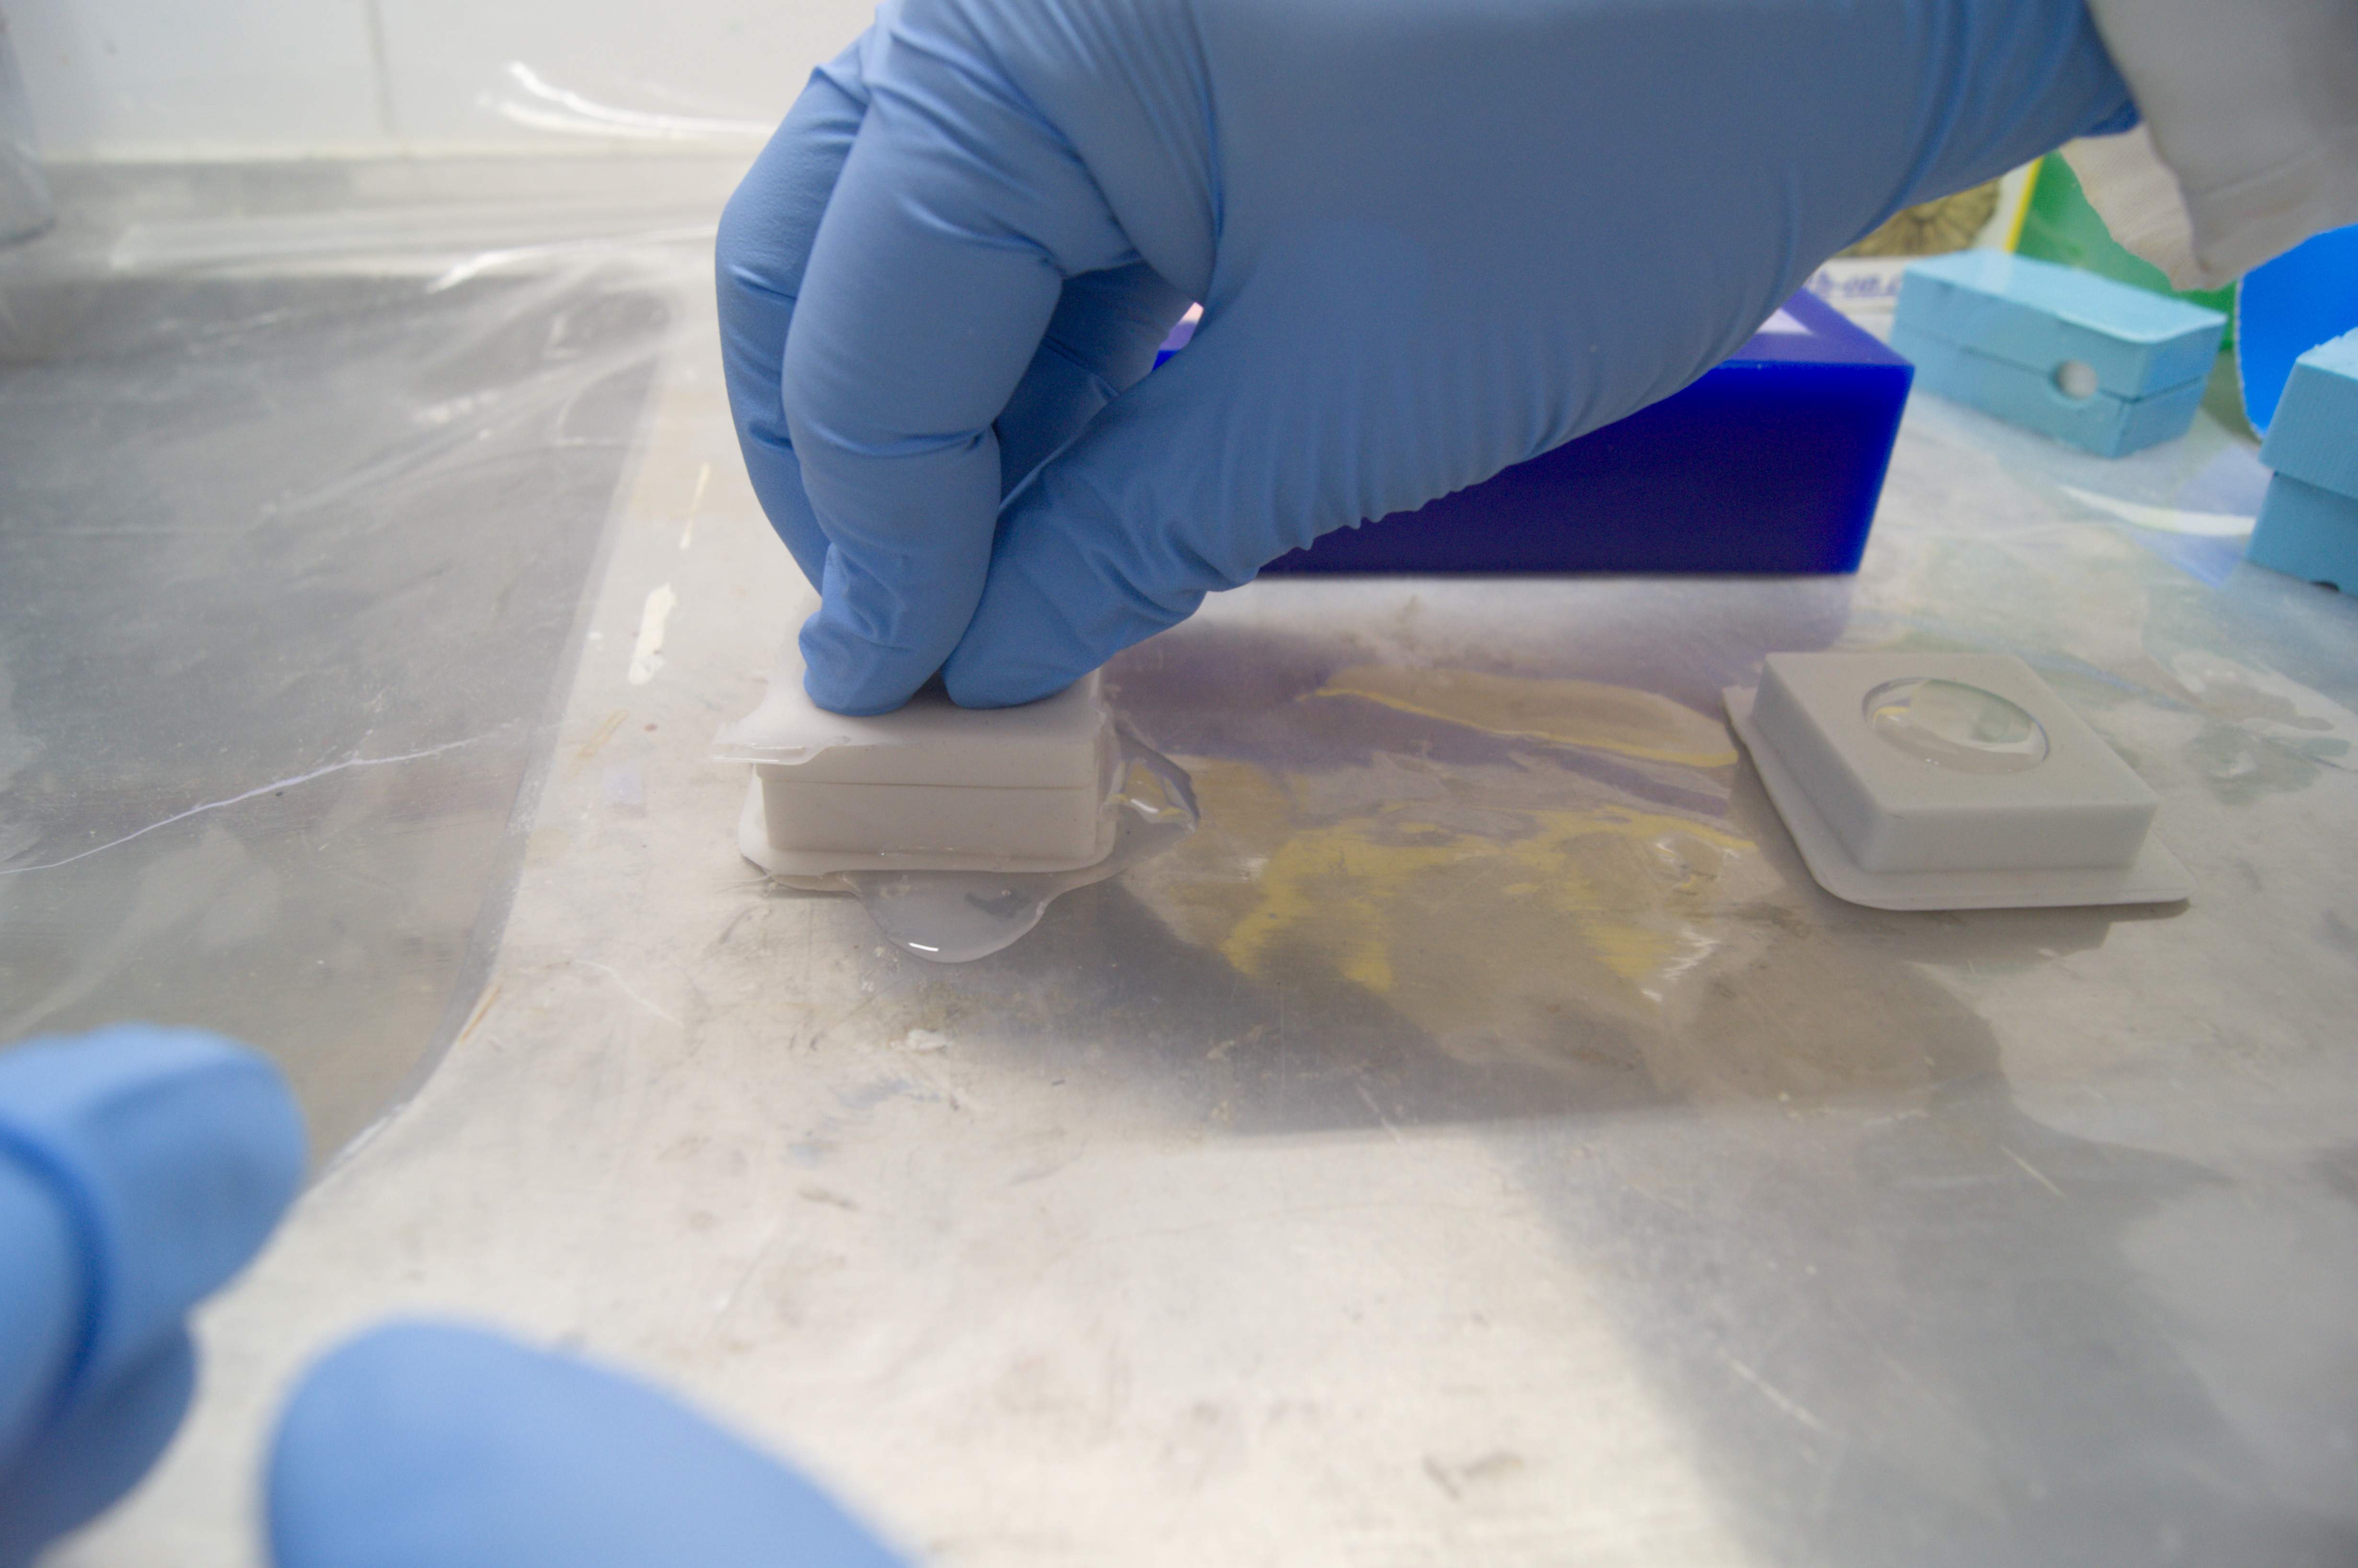
- There are two reagents used in the process. As soon as those are connected curing process will start. Nevertheless, it is good habit to stir them well before connecting. Part A is blue and Part B is pink. Those are quite dense and requires a bit of force during mixing. The ratio by weight was 100A:130B

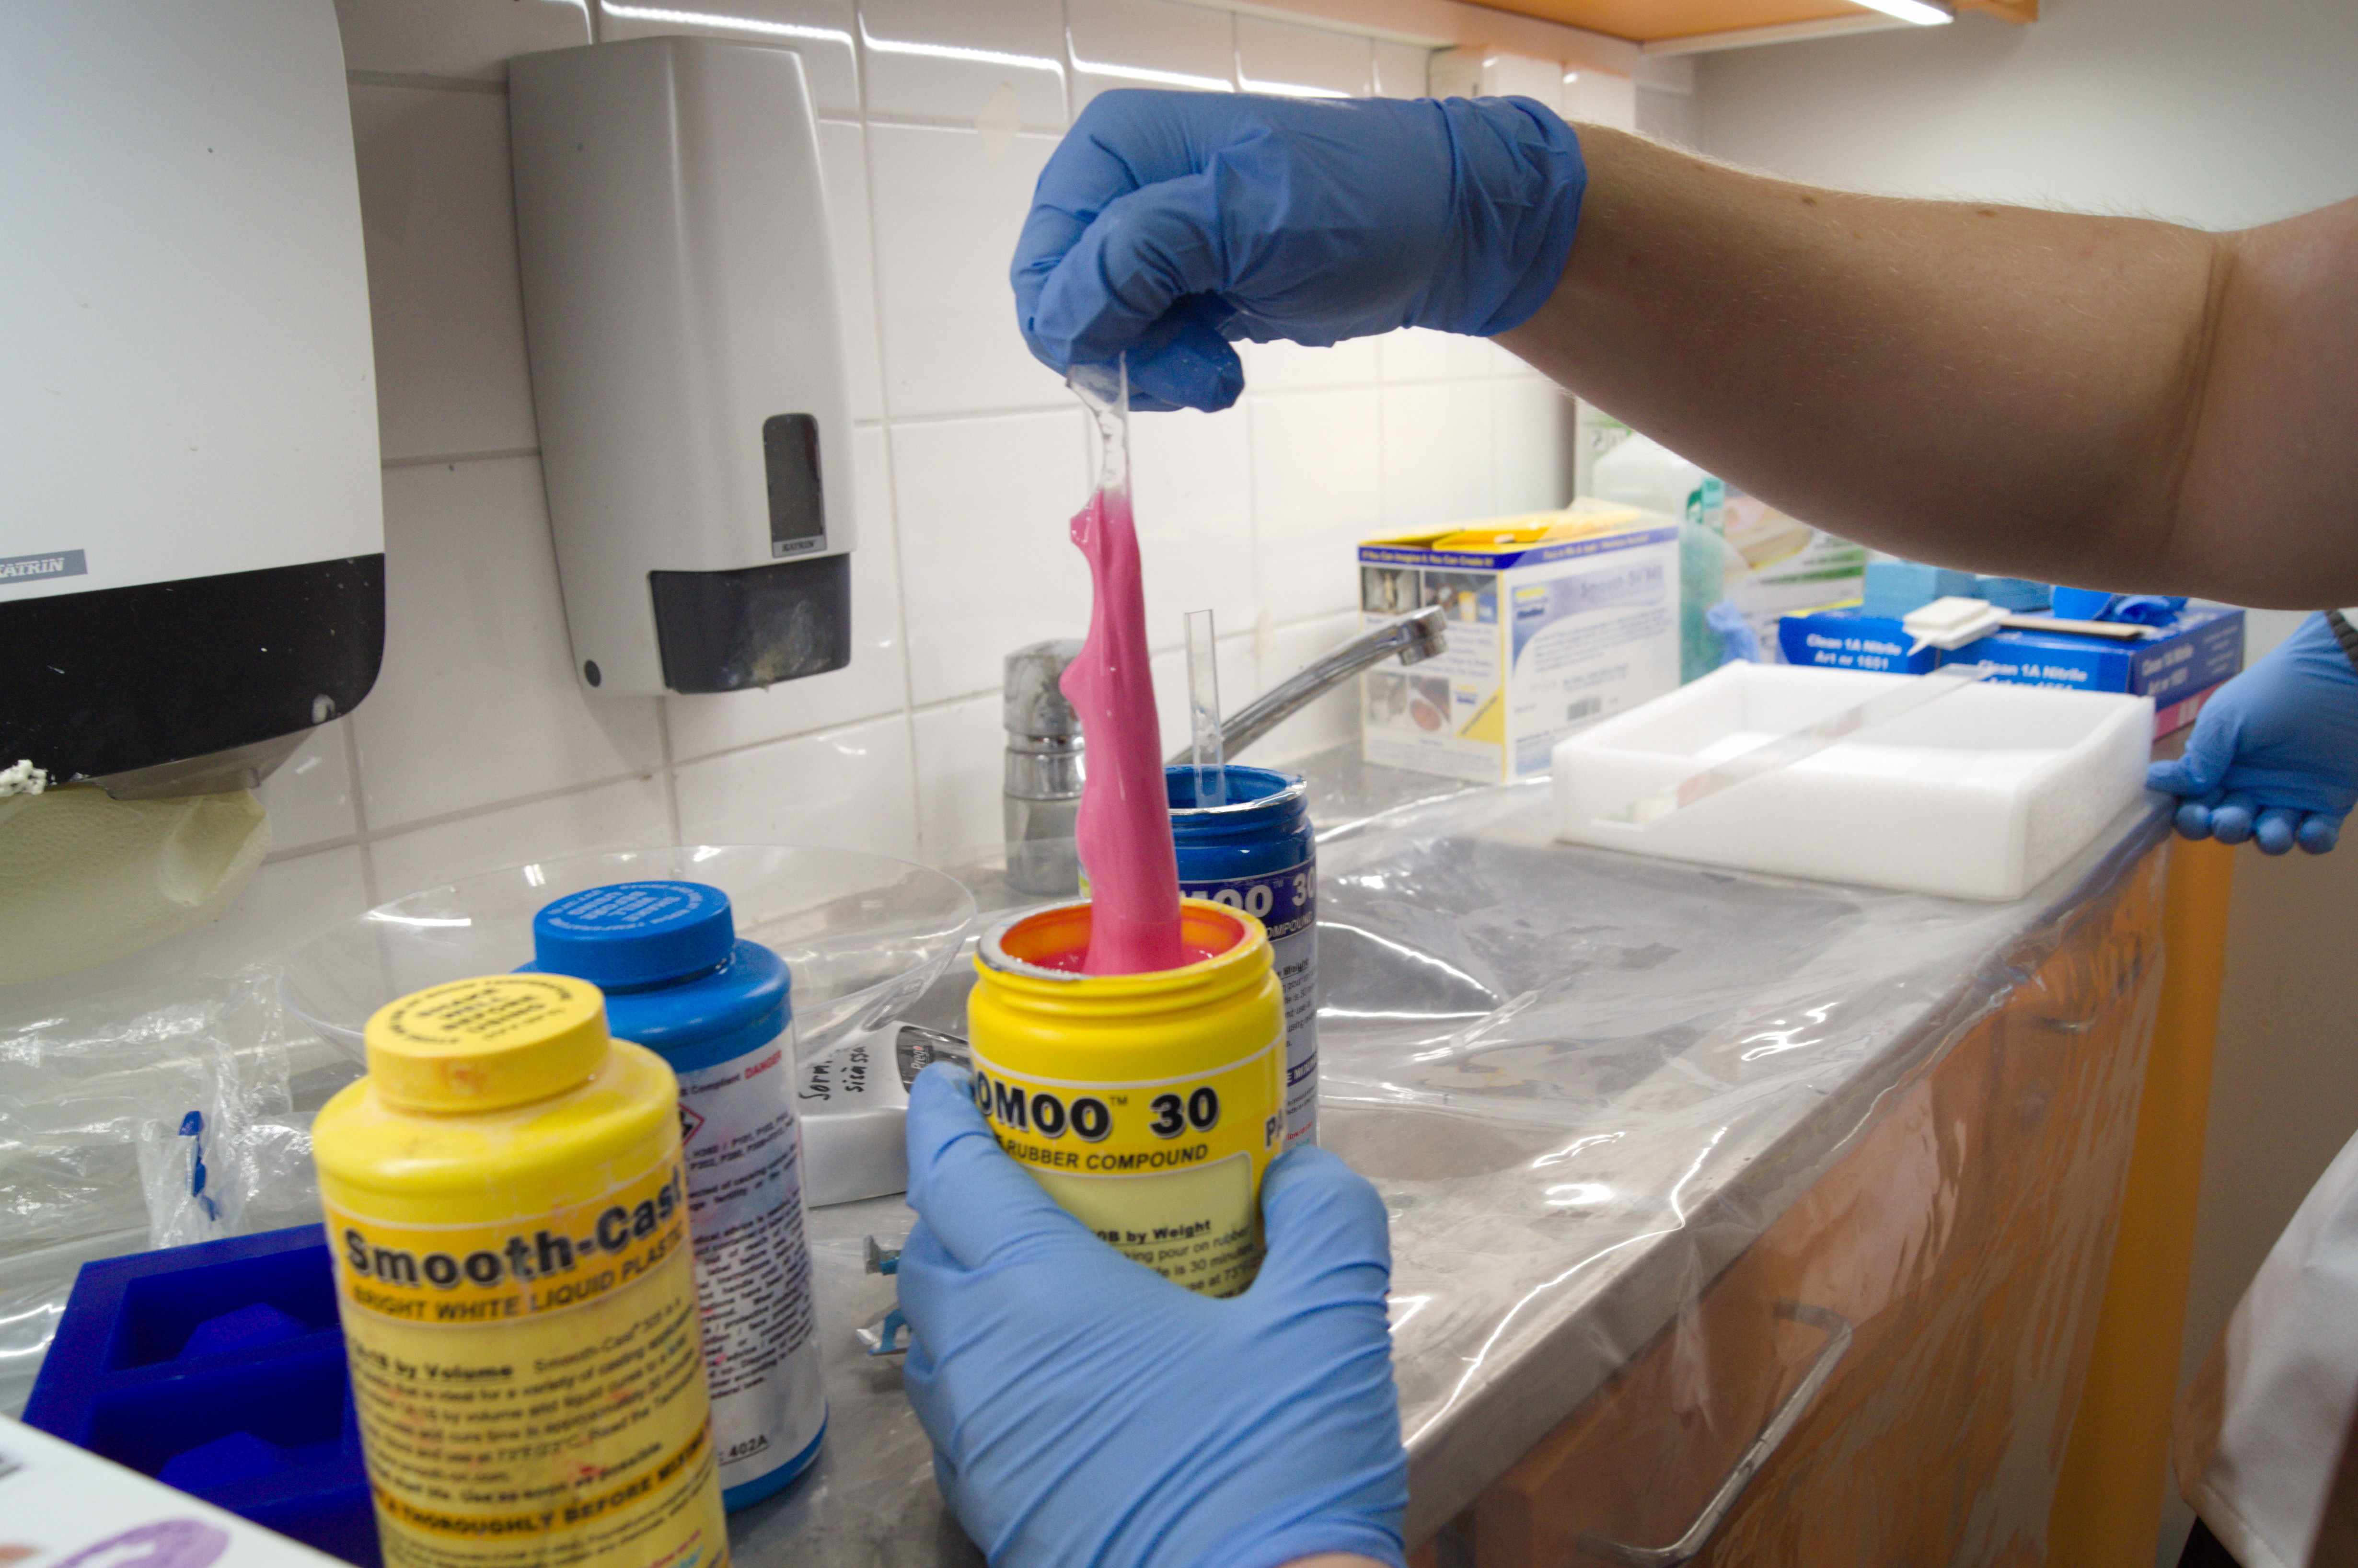
- It took us approximately five minutes to obtain single color without any traces of blue/pink. Yogurt (actually viili - a delicacy) cup was used as temporal container. It might be later reused.
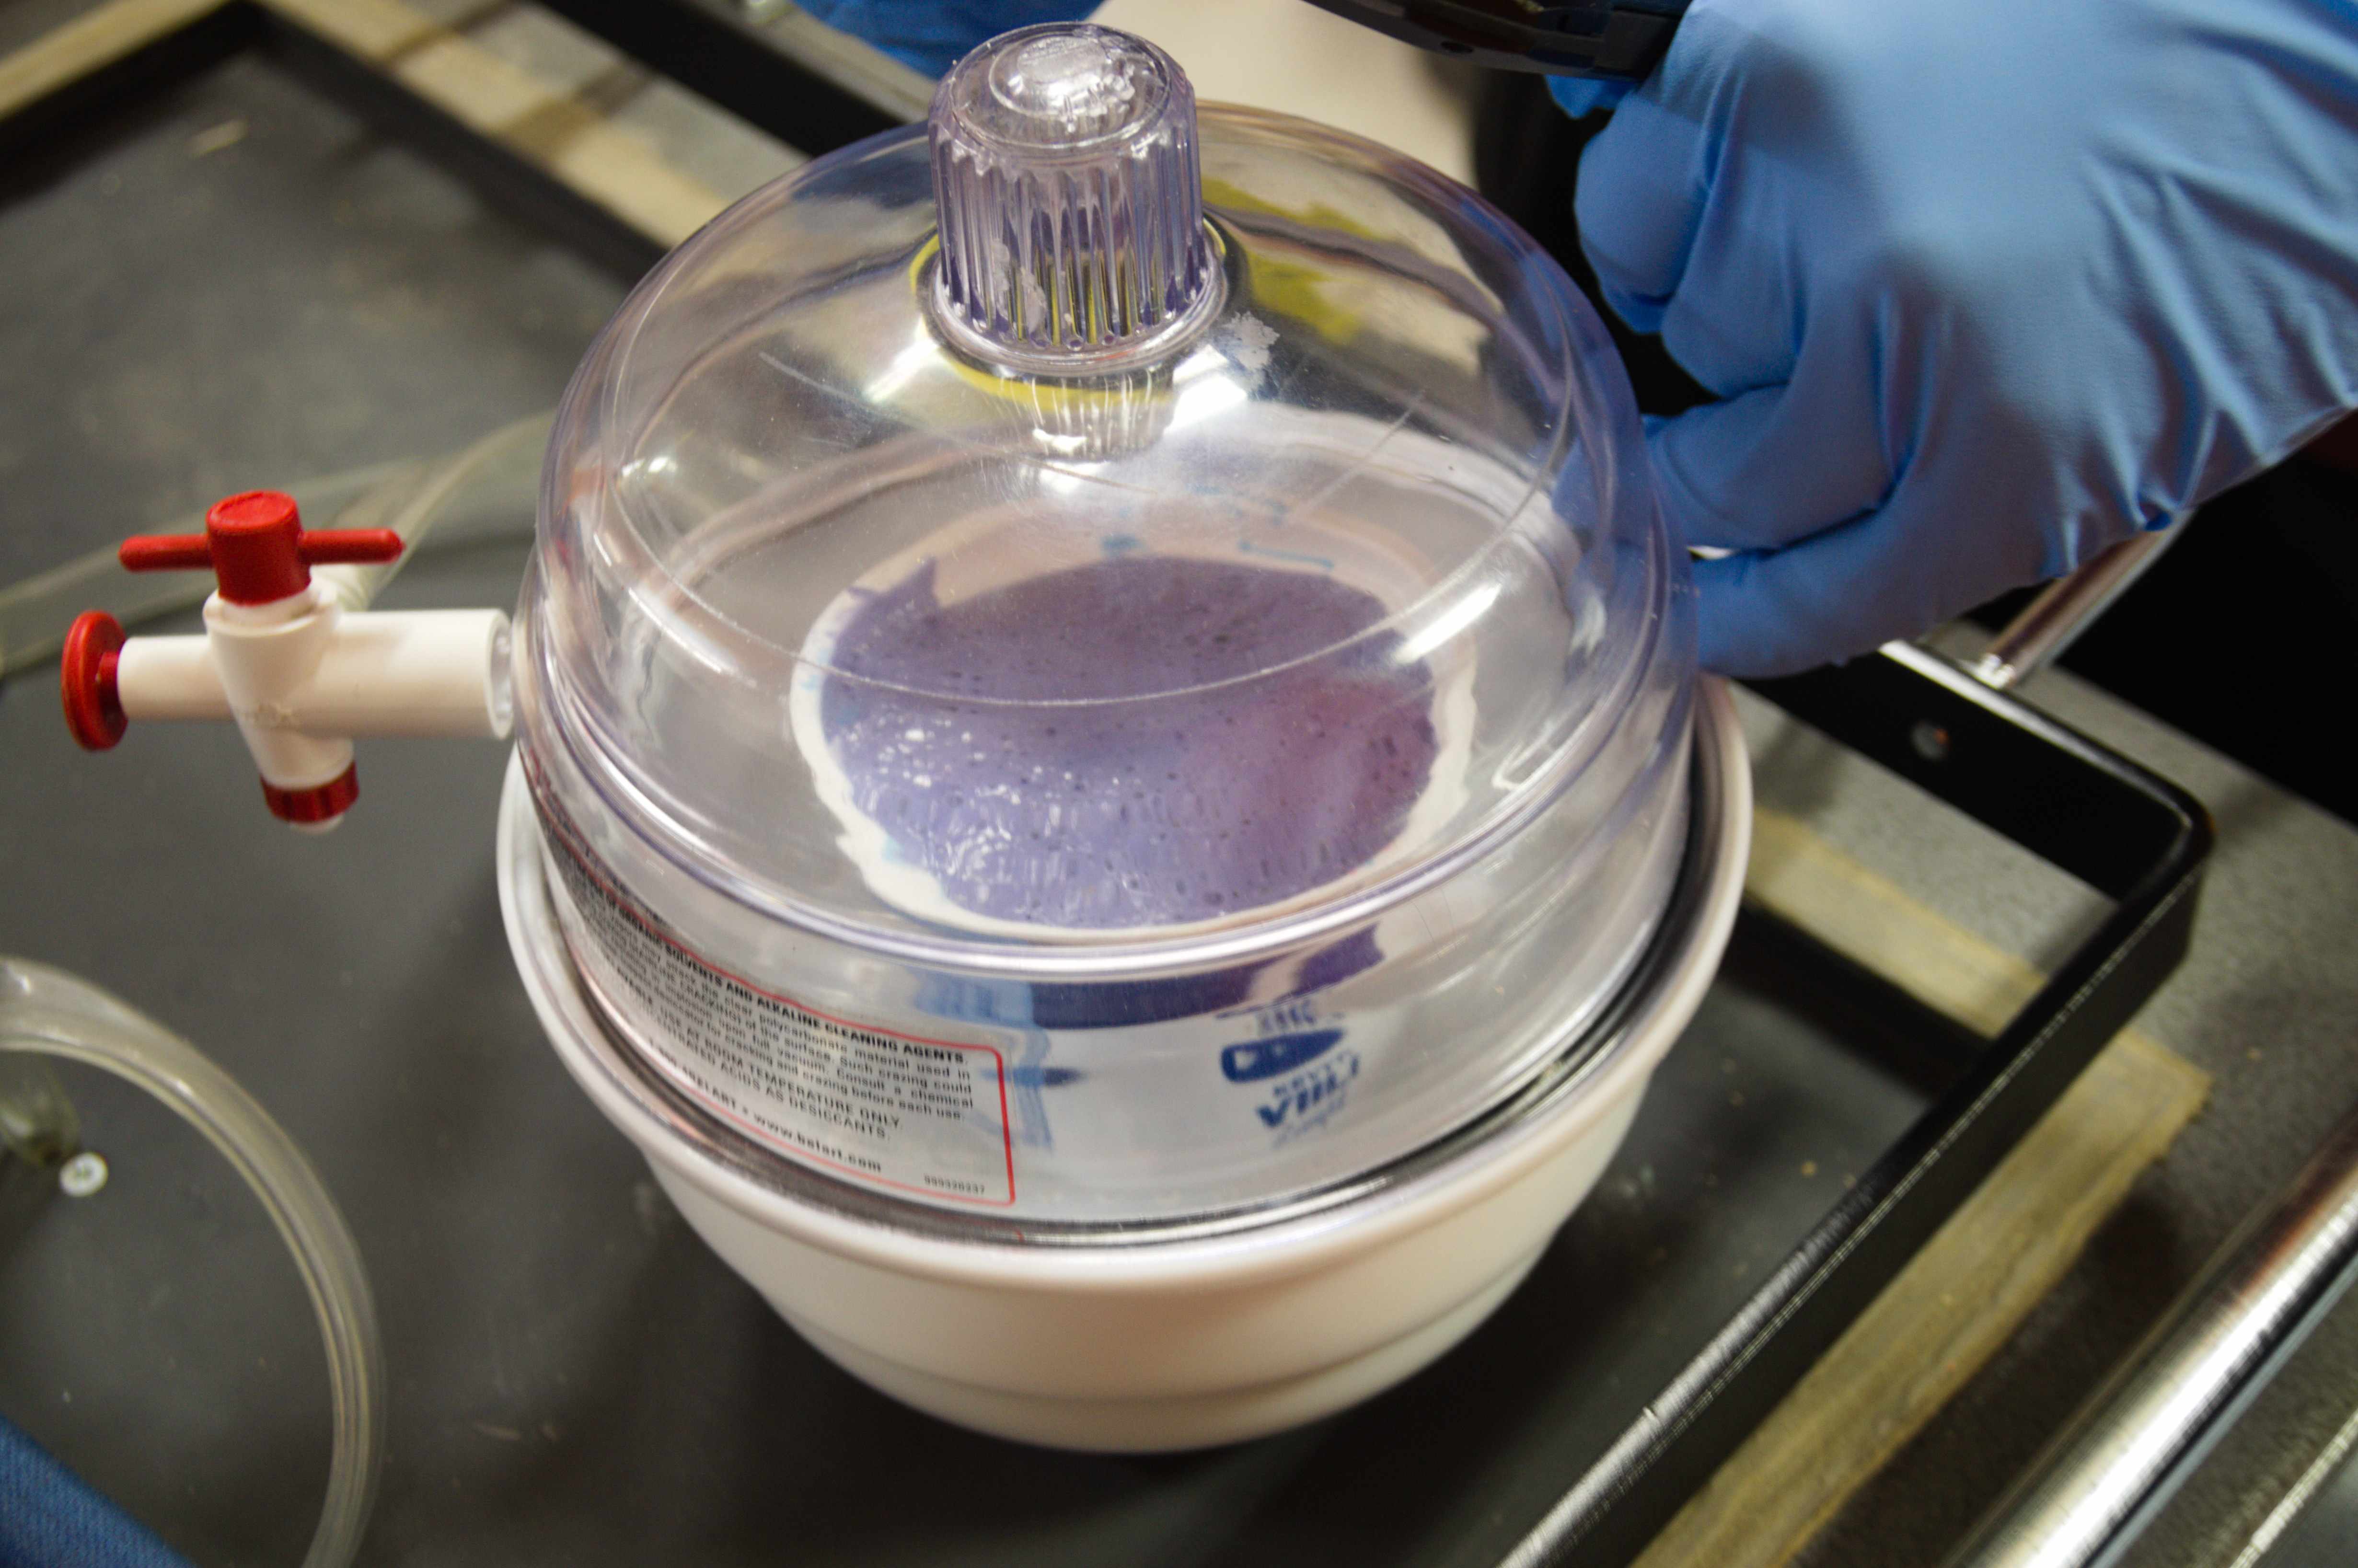
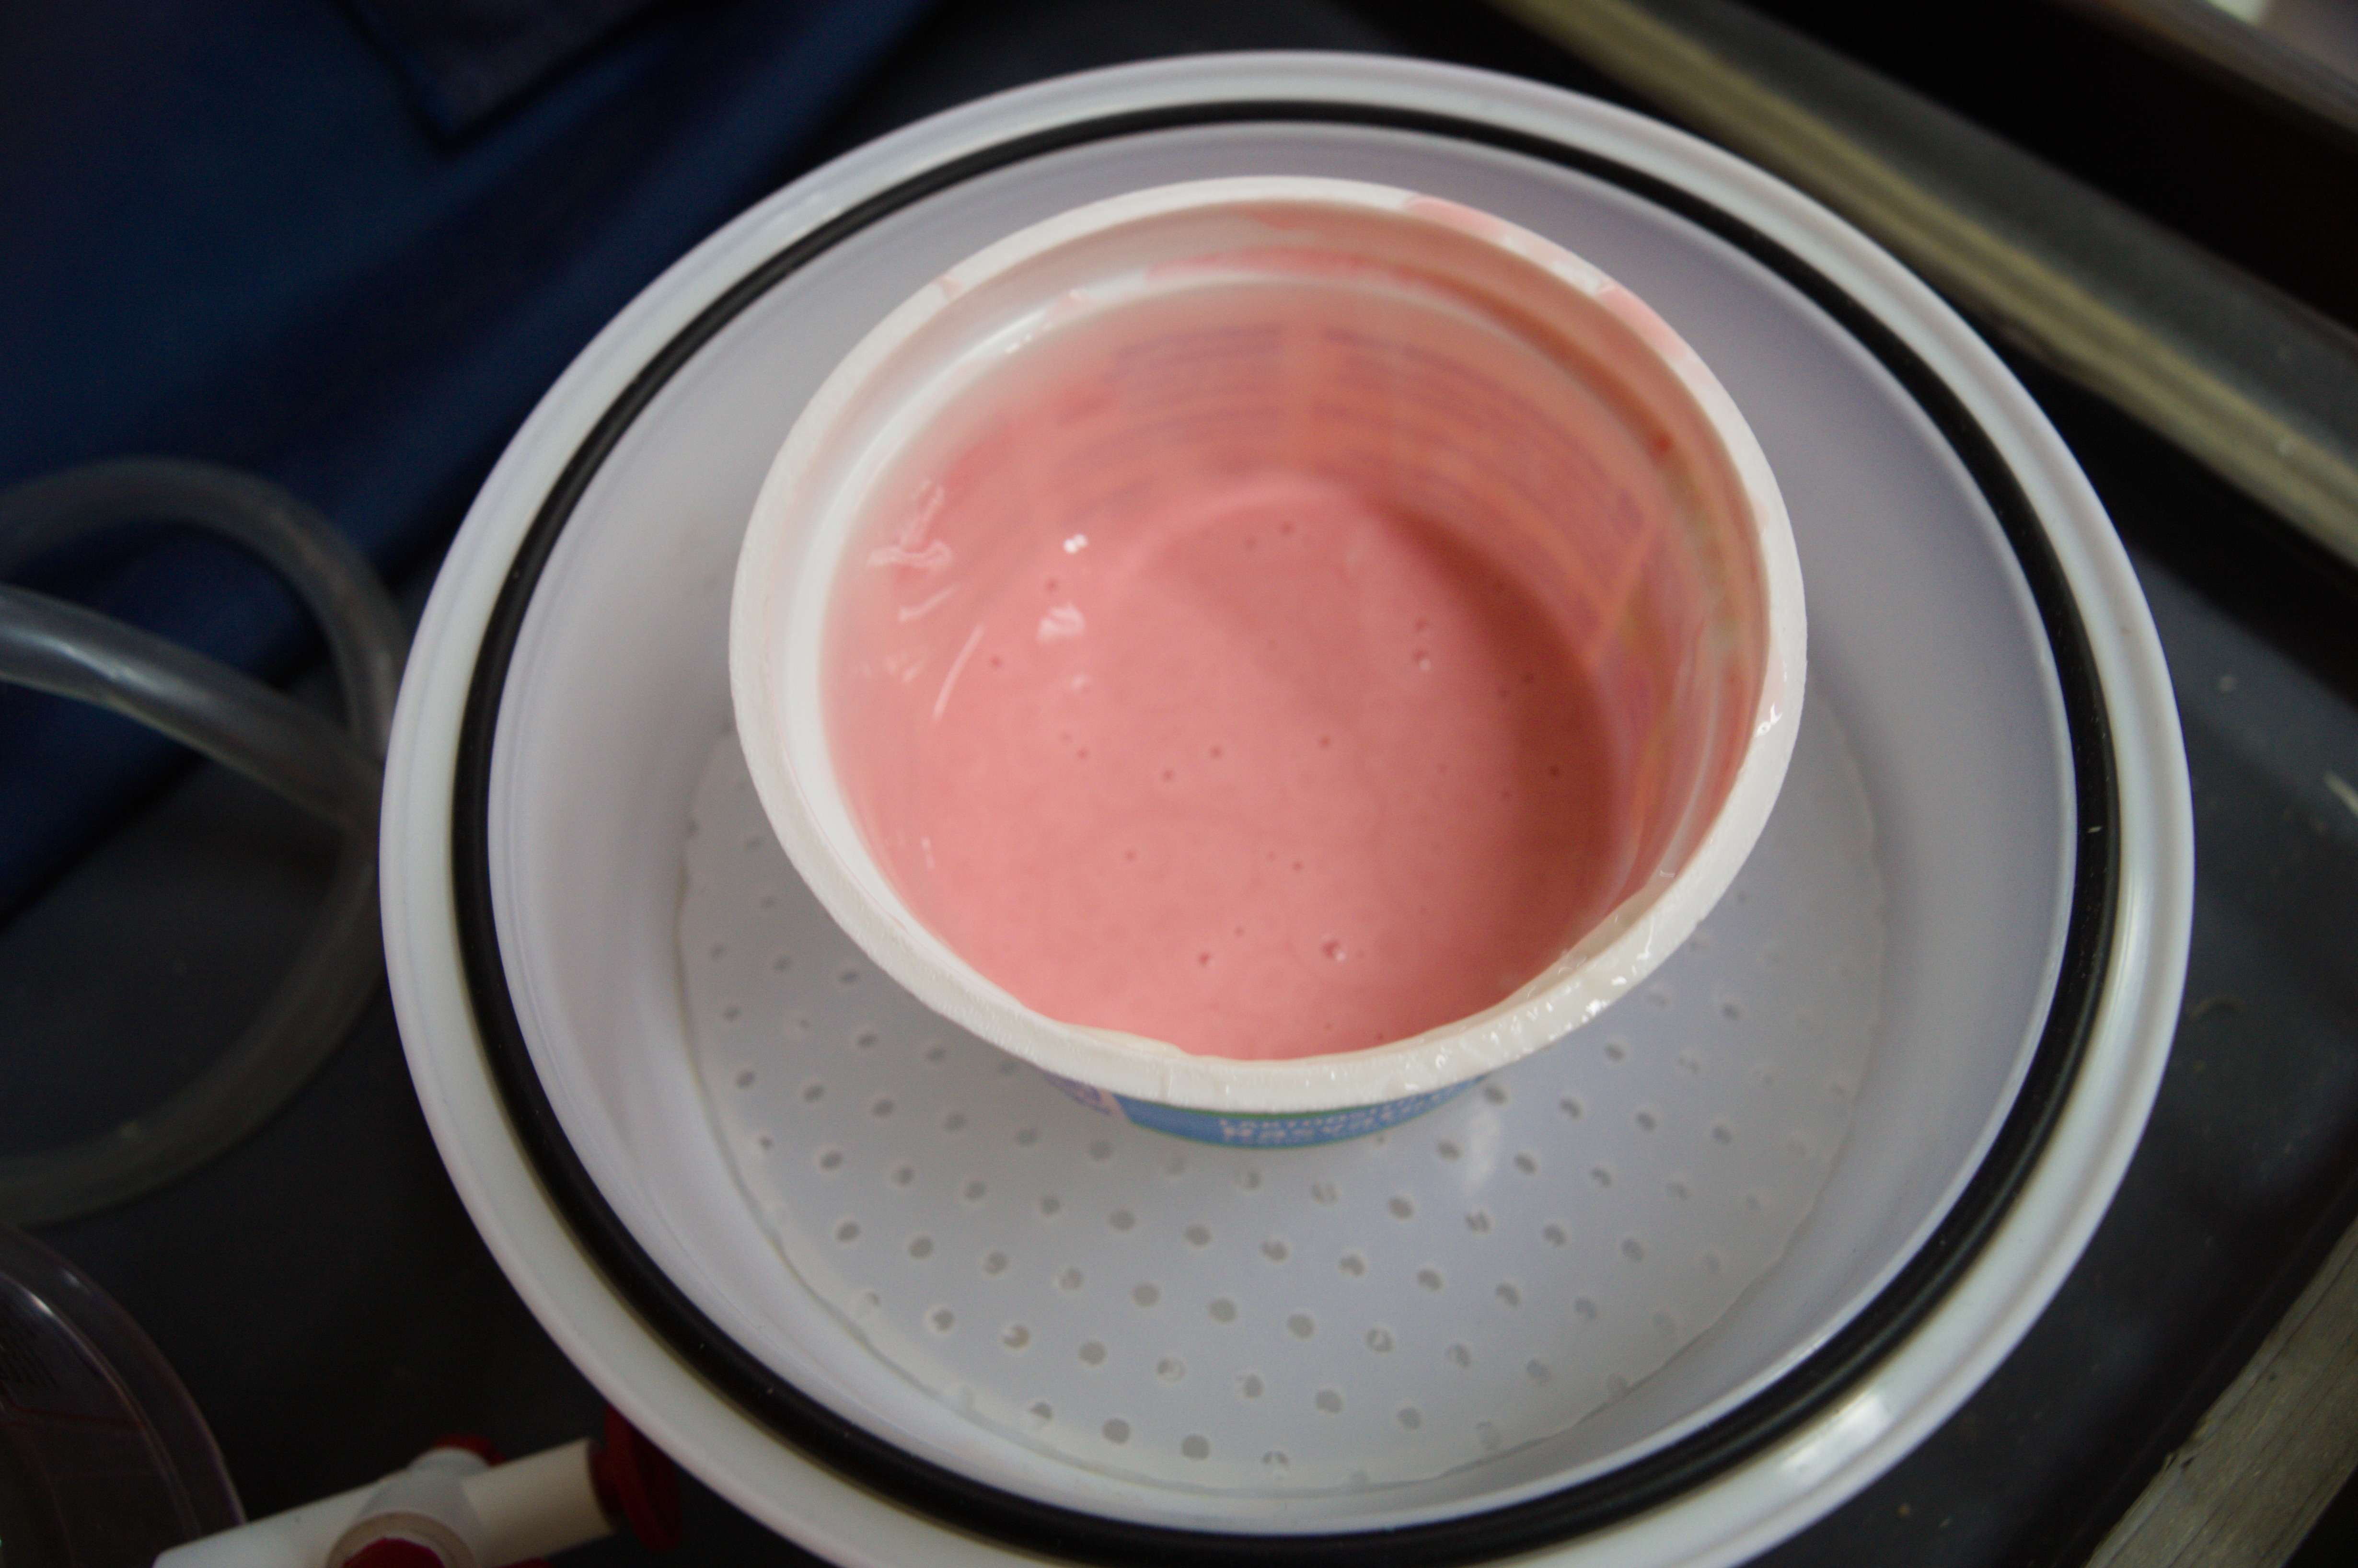
- It was said that OOMOO 30 doesn't need vacuuming as density is not very high. There is 4 researchers in this group, so we decided to remove bubbles anyway. Just because we can. It took another five minutes. We even recorded video. Fancy.
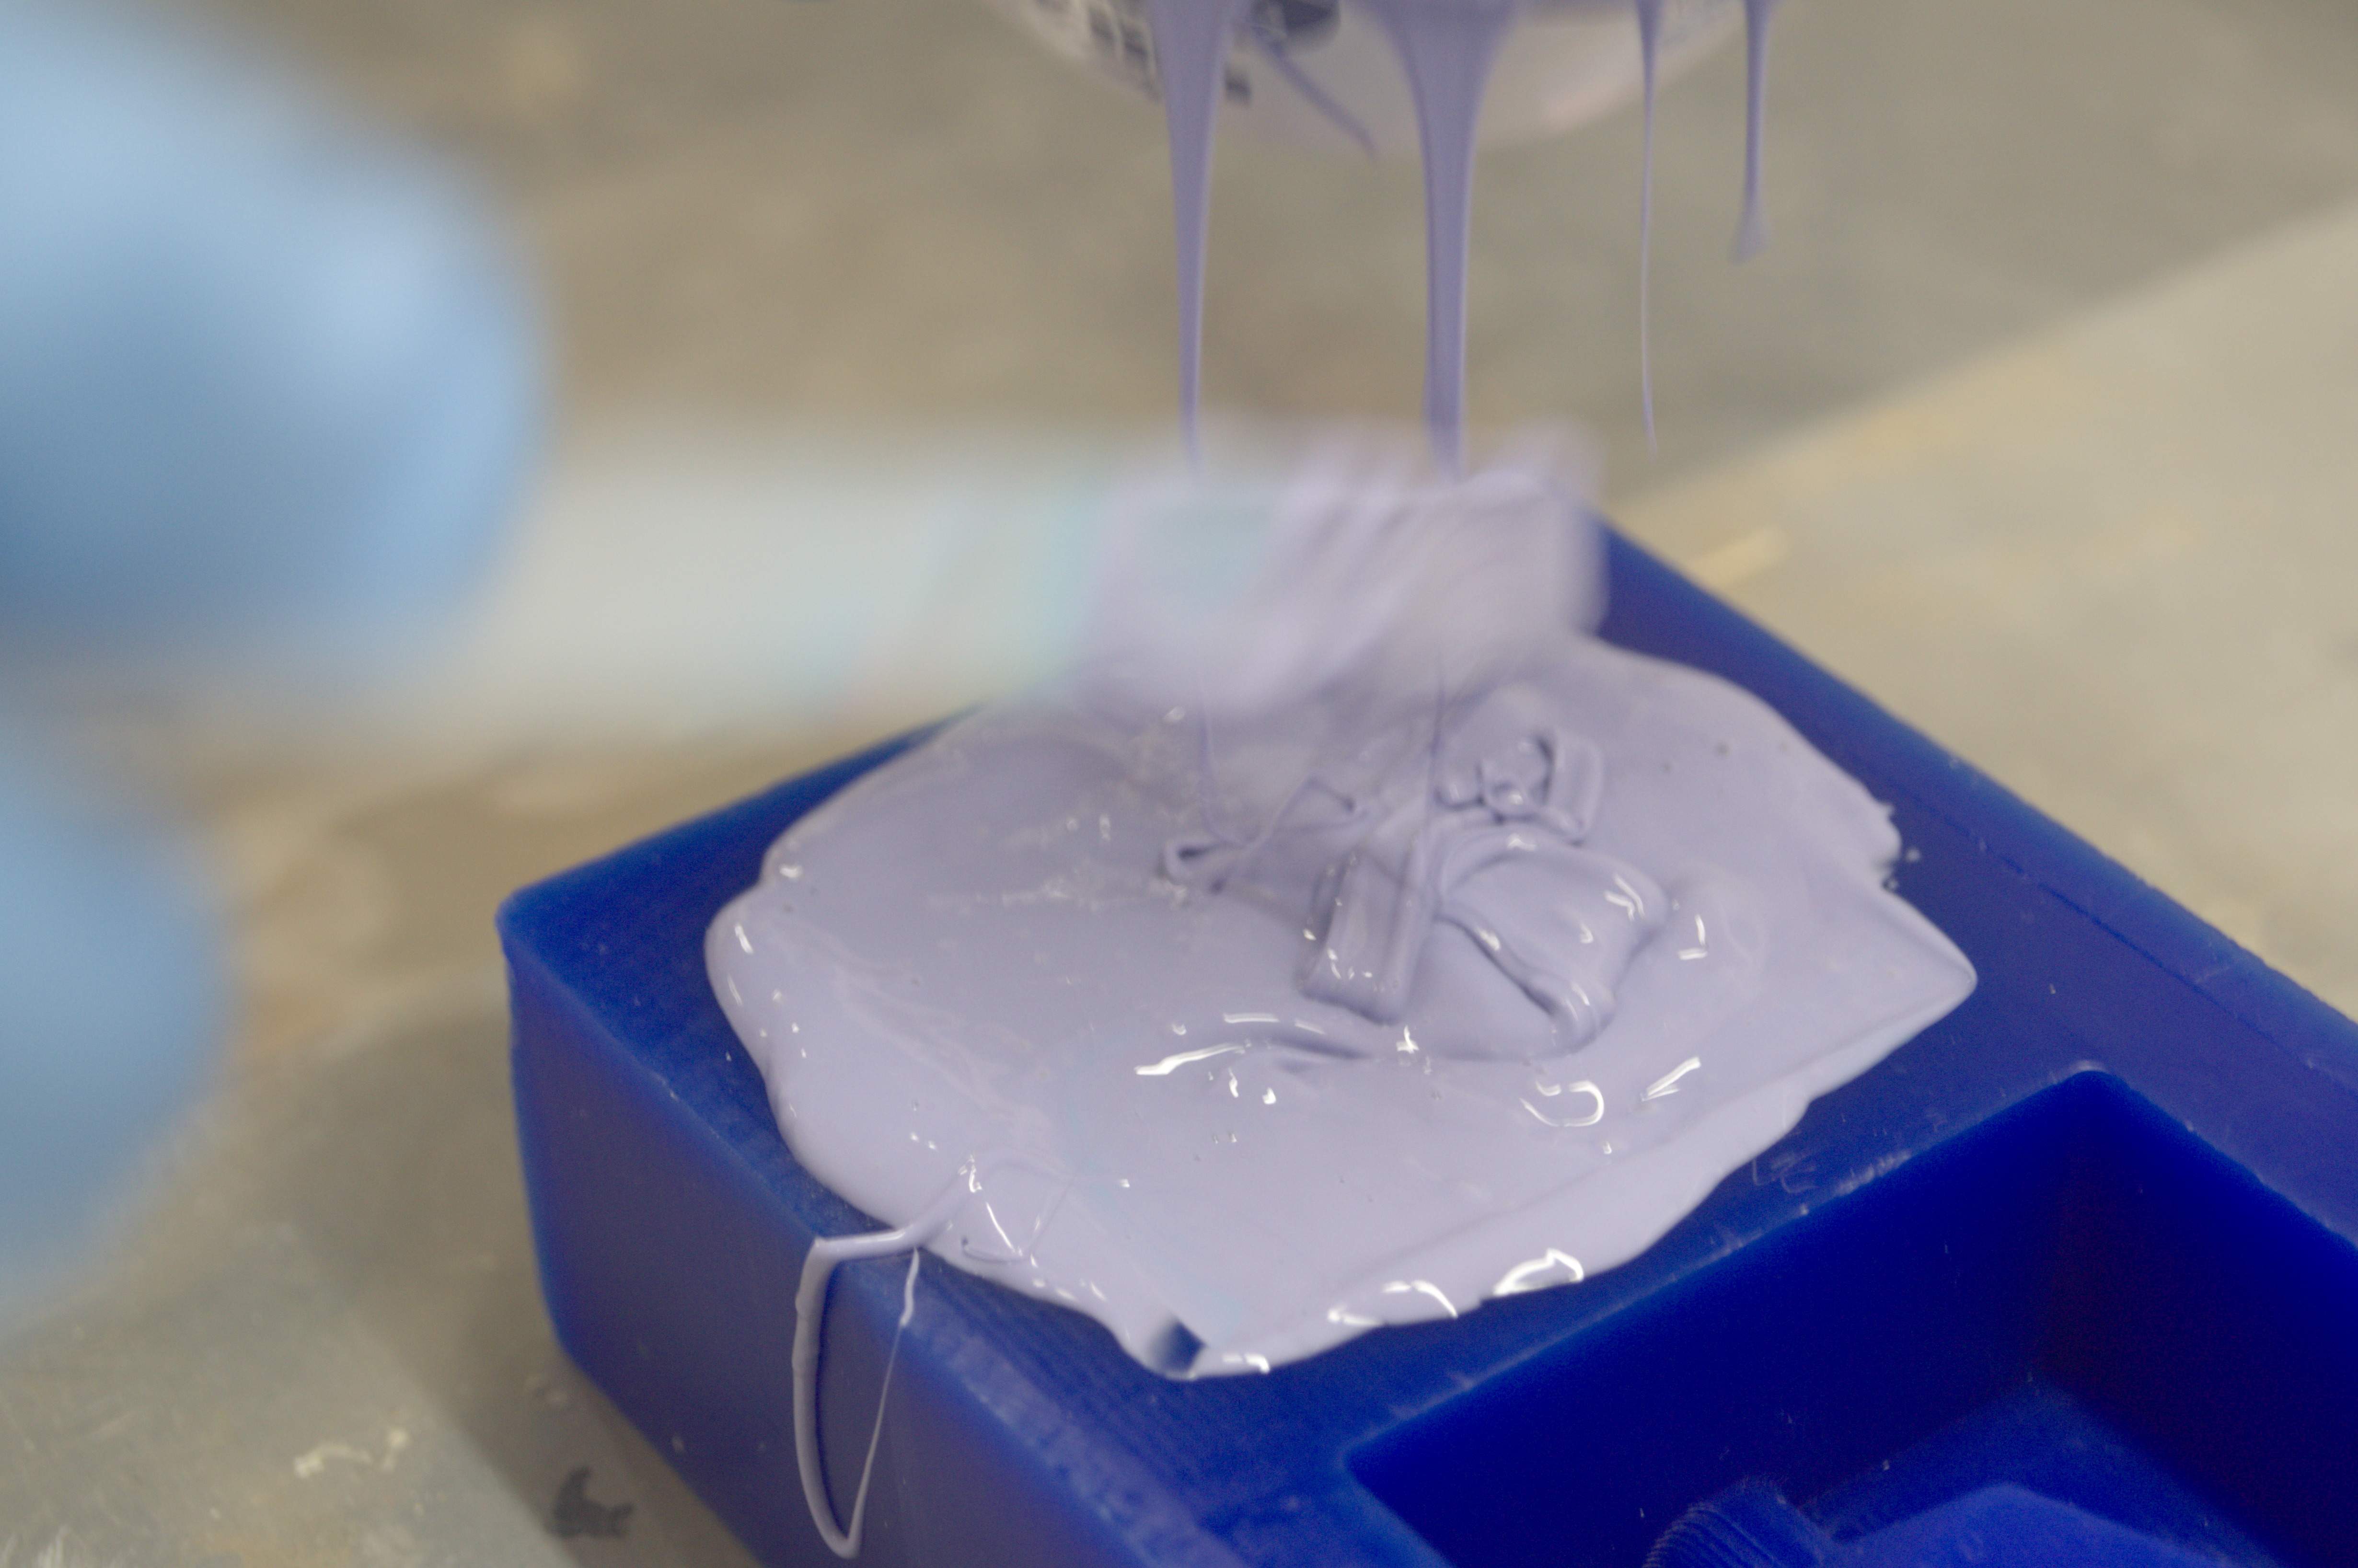
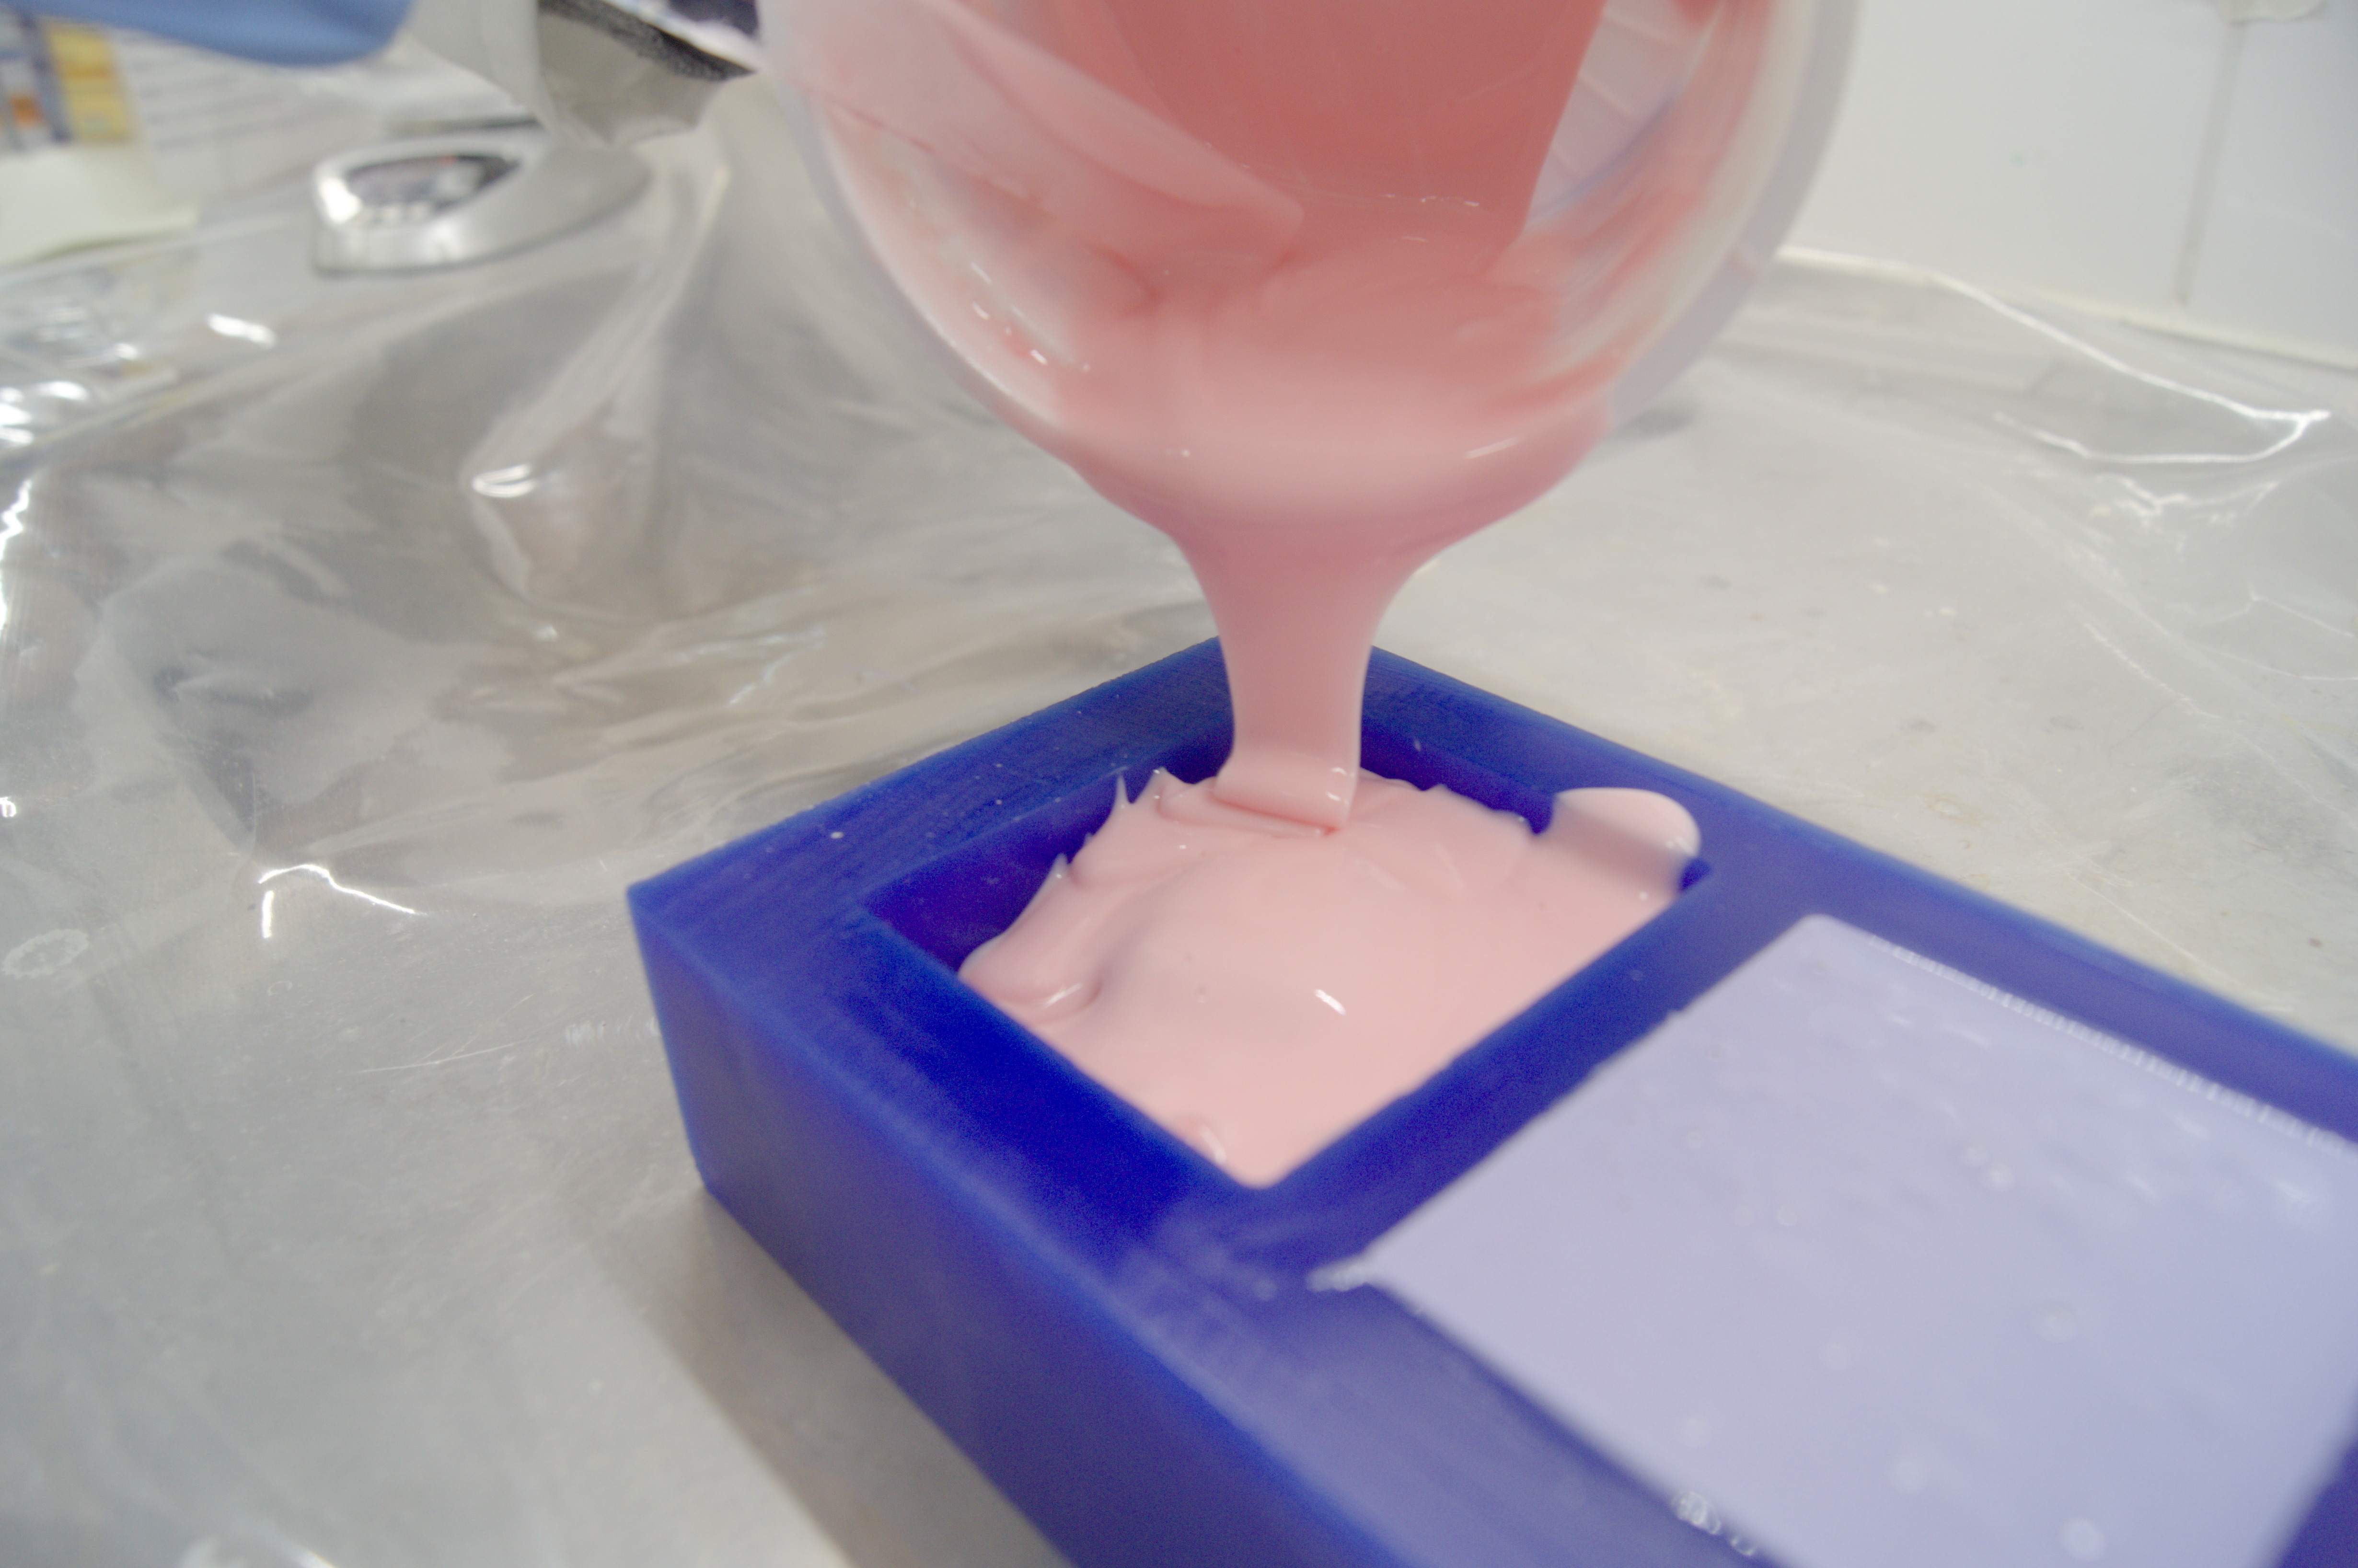
- Finally, we could pour the cake, I mean solution to the mold. The recipe 6 hours in room temperature, not sure about altitude.
- Okay or "Finnish - Oko", credentials to Gleb, who made it looking good.
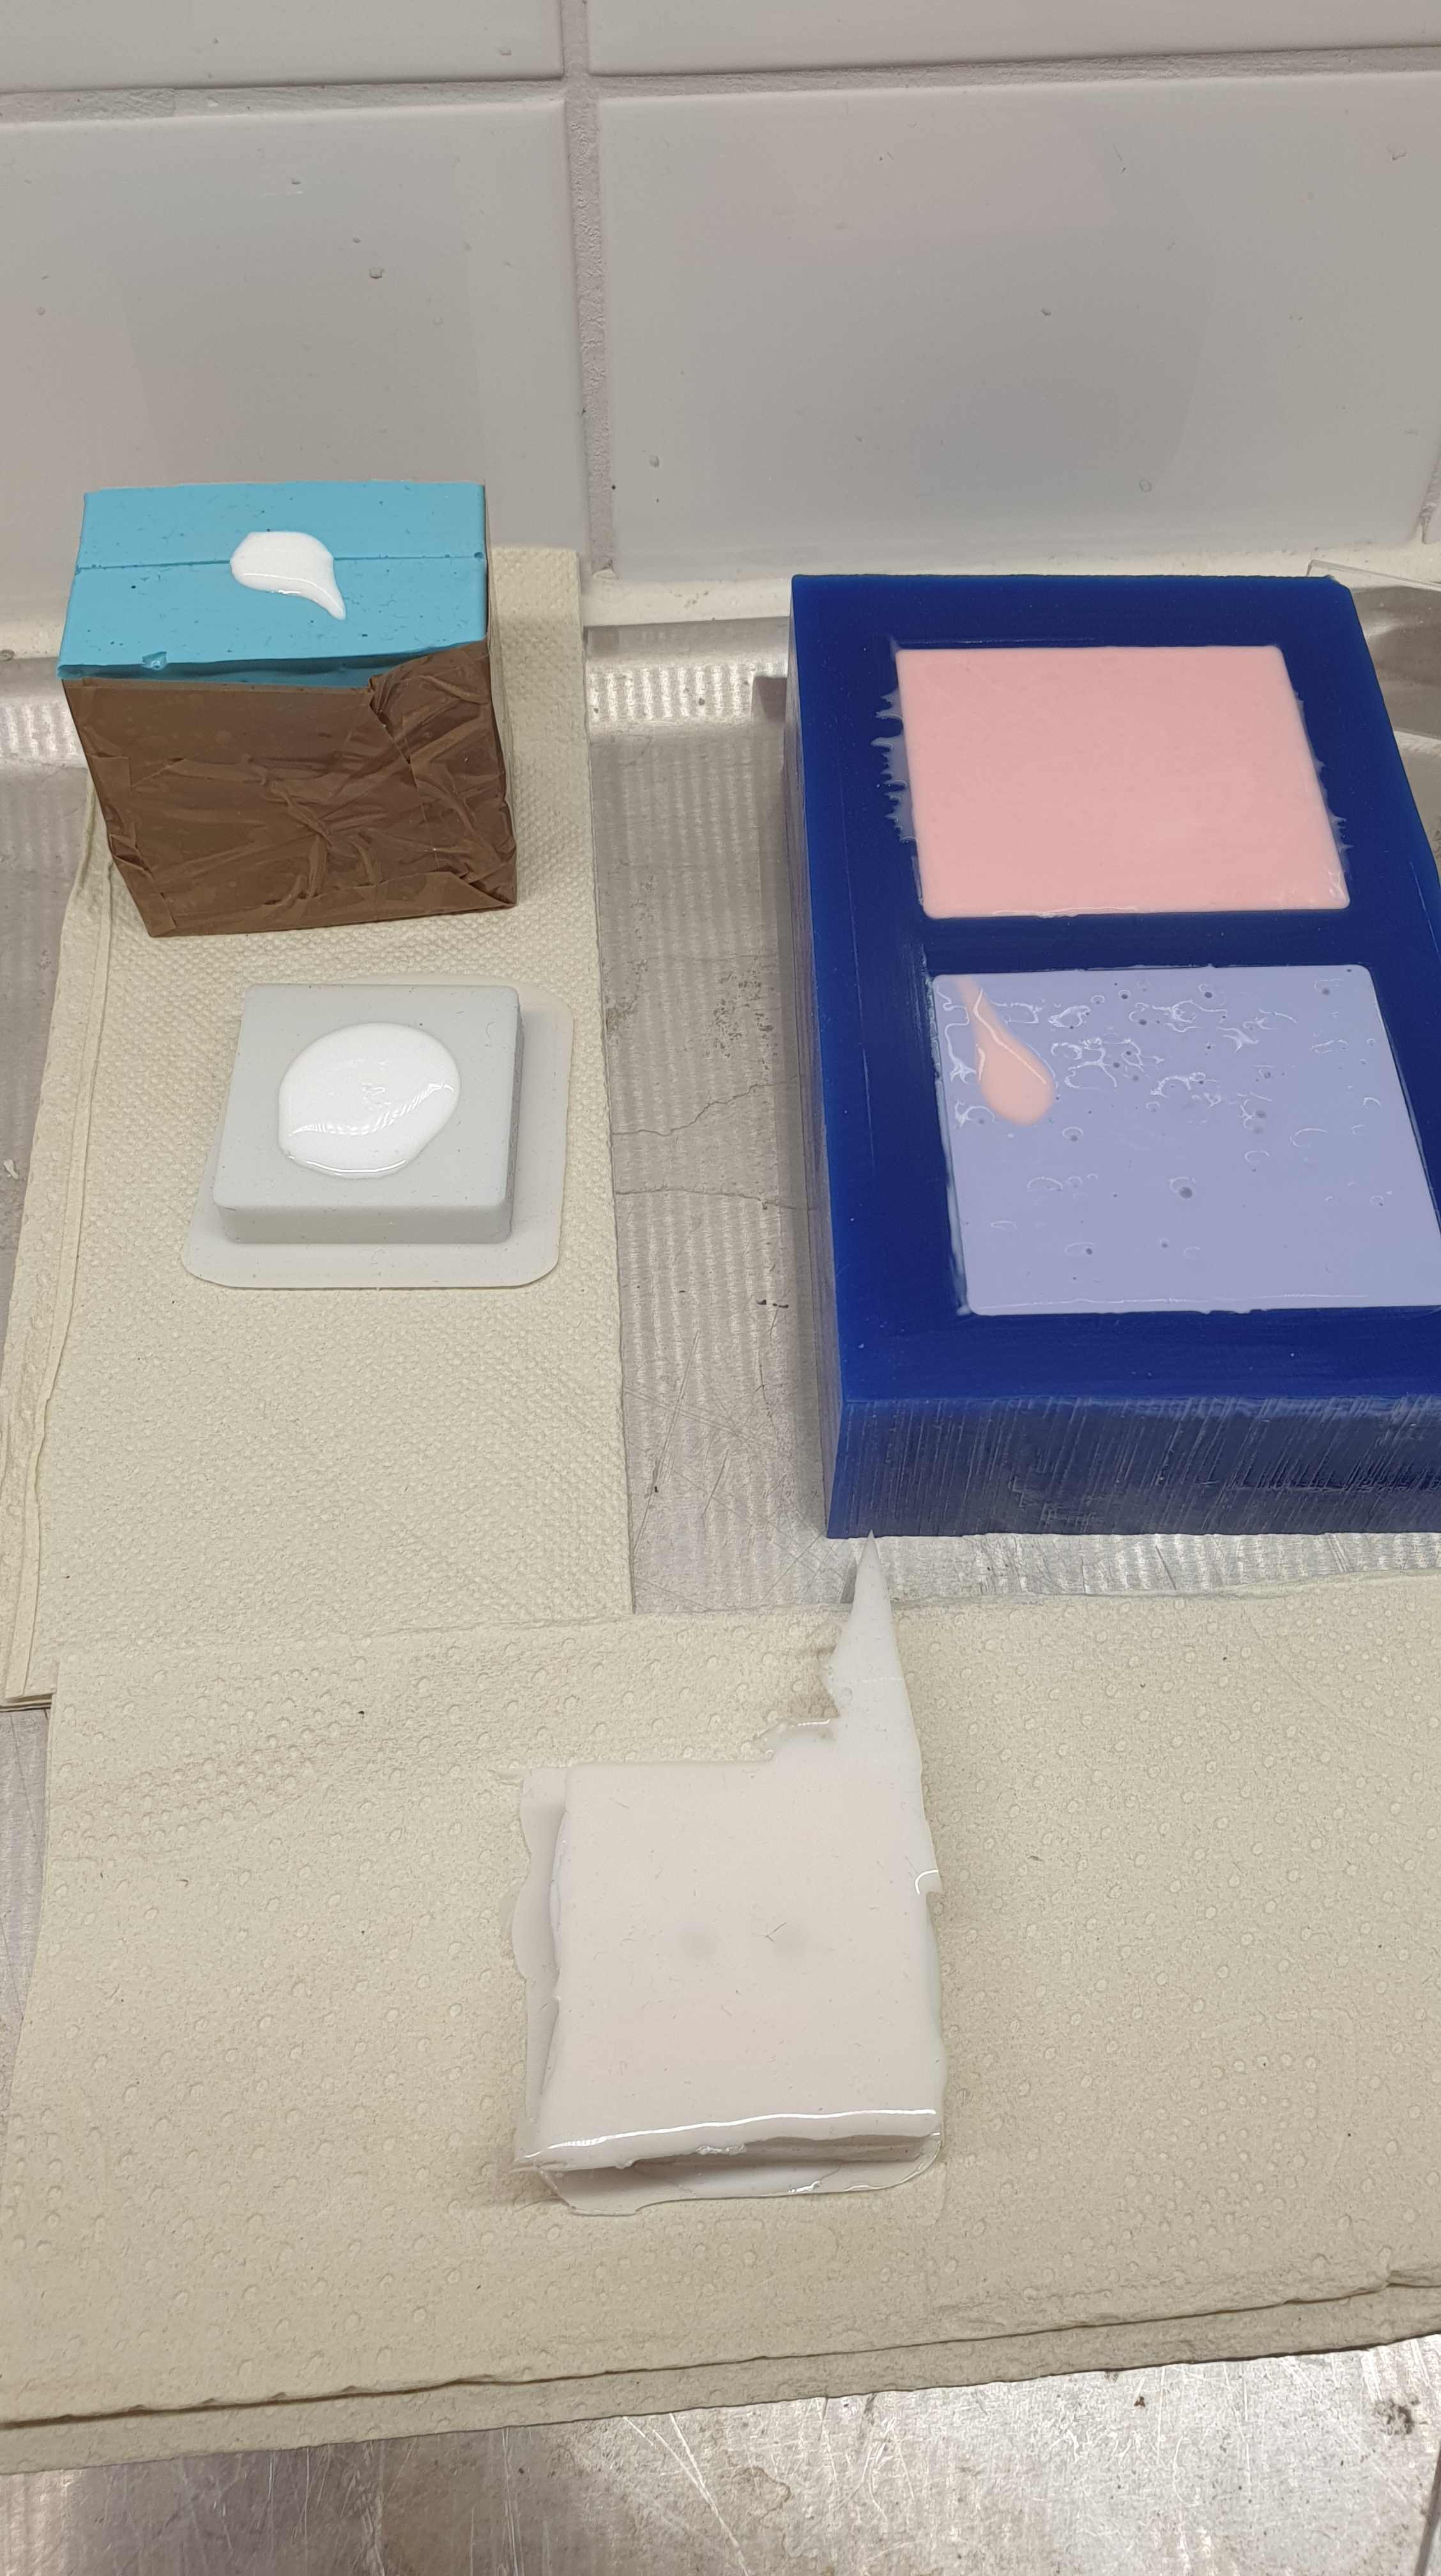
Two side mold 2: Smooth-Sil 940
Time for Smooth-Sil 940, which is food friendly after 24 hours of from pouring it to the mold. Once again I will quote the producer.
Smooth-On Smooth-Sil Platinum Silicones cure at room temperature with negligible shrinkage. With different hardnesses to choose from, Smooth-Sil products offer tremendous versatility and are suitable for making production molds of any configuration, large or small. These silicones exhibit good chemical, abrasion and heat resistance. Materials such as plasters, concrete, wax, low-melt metal alloys or resins (urethane, epoxy or polyester) can then be cast into these silicone rubbers without a release agent.
Smooth-Sil Platinum Silicones are used for rapid prototyping, wax casting (foundries and candle makers), architectural restoration and for casting concrete. Smooth-Sil 940 is suitable for food related applications.
Maybe the most interesting fact is that Smooth-Sil 940 may be used to cast metal alloys. Spoiler alert: I will use it in my individual work. Mixing ratio by weight for this substance is 100A:10B. Steps are totally the same.
 |
 |
 |
 |
Casting with polyurethane
Quick goggling on general polyurethane features gives this sentence: "Polyurethane casting can accurately match clients specification, no matter in color, texture and glossy finish, insert and over molding, or even optically clear".
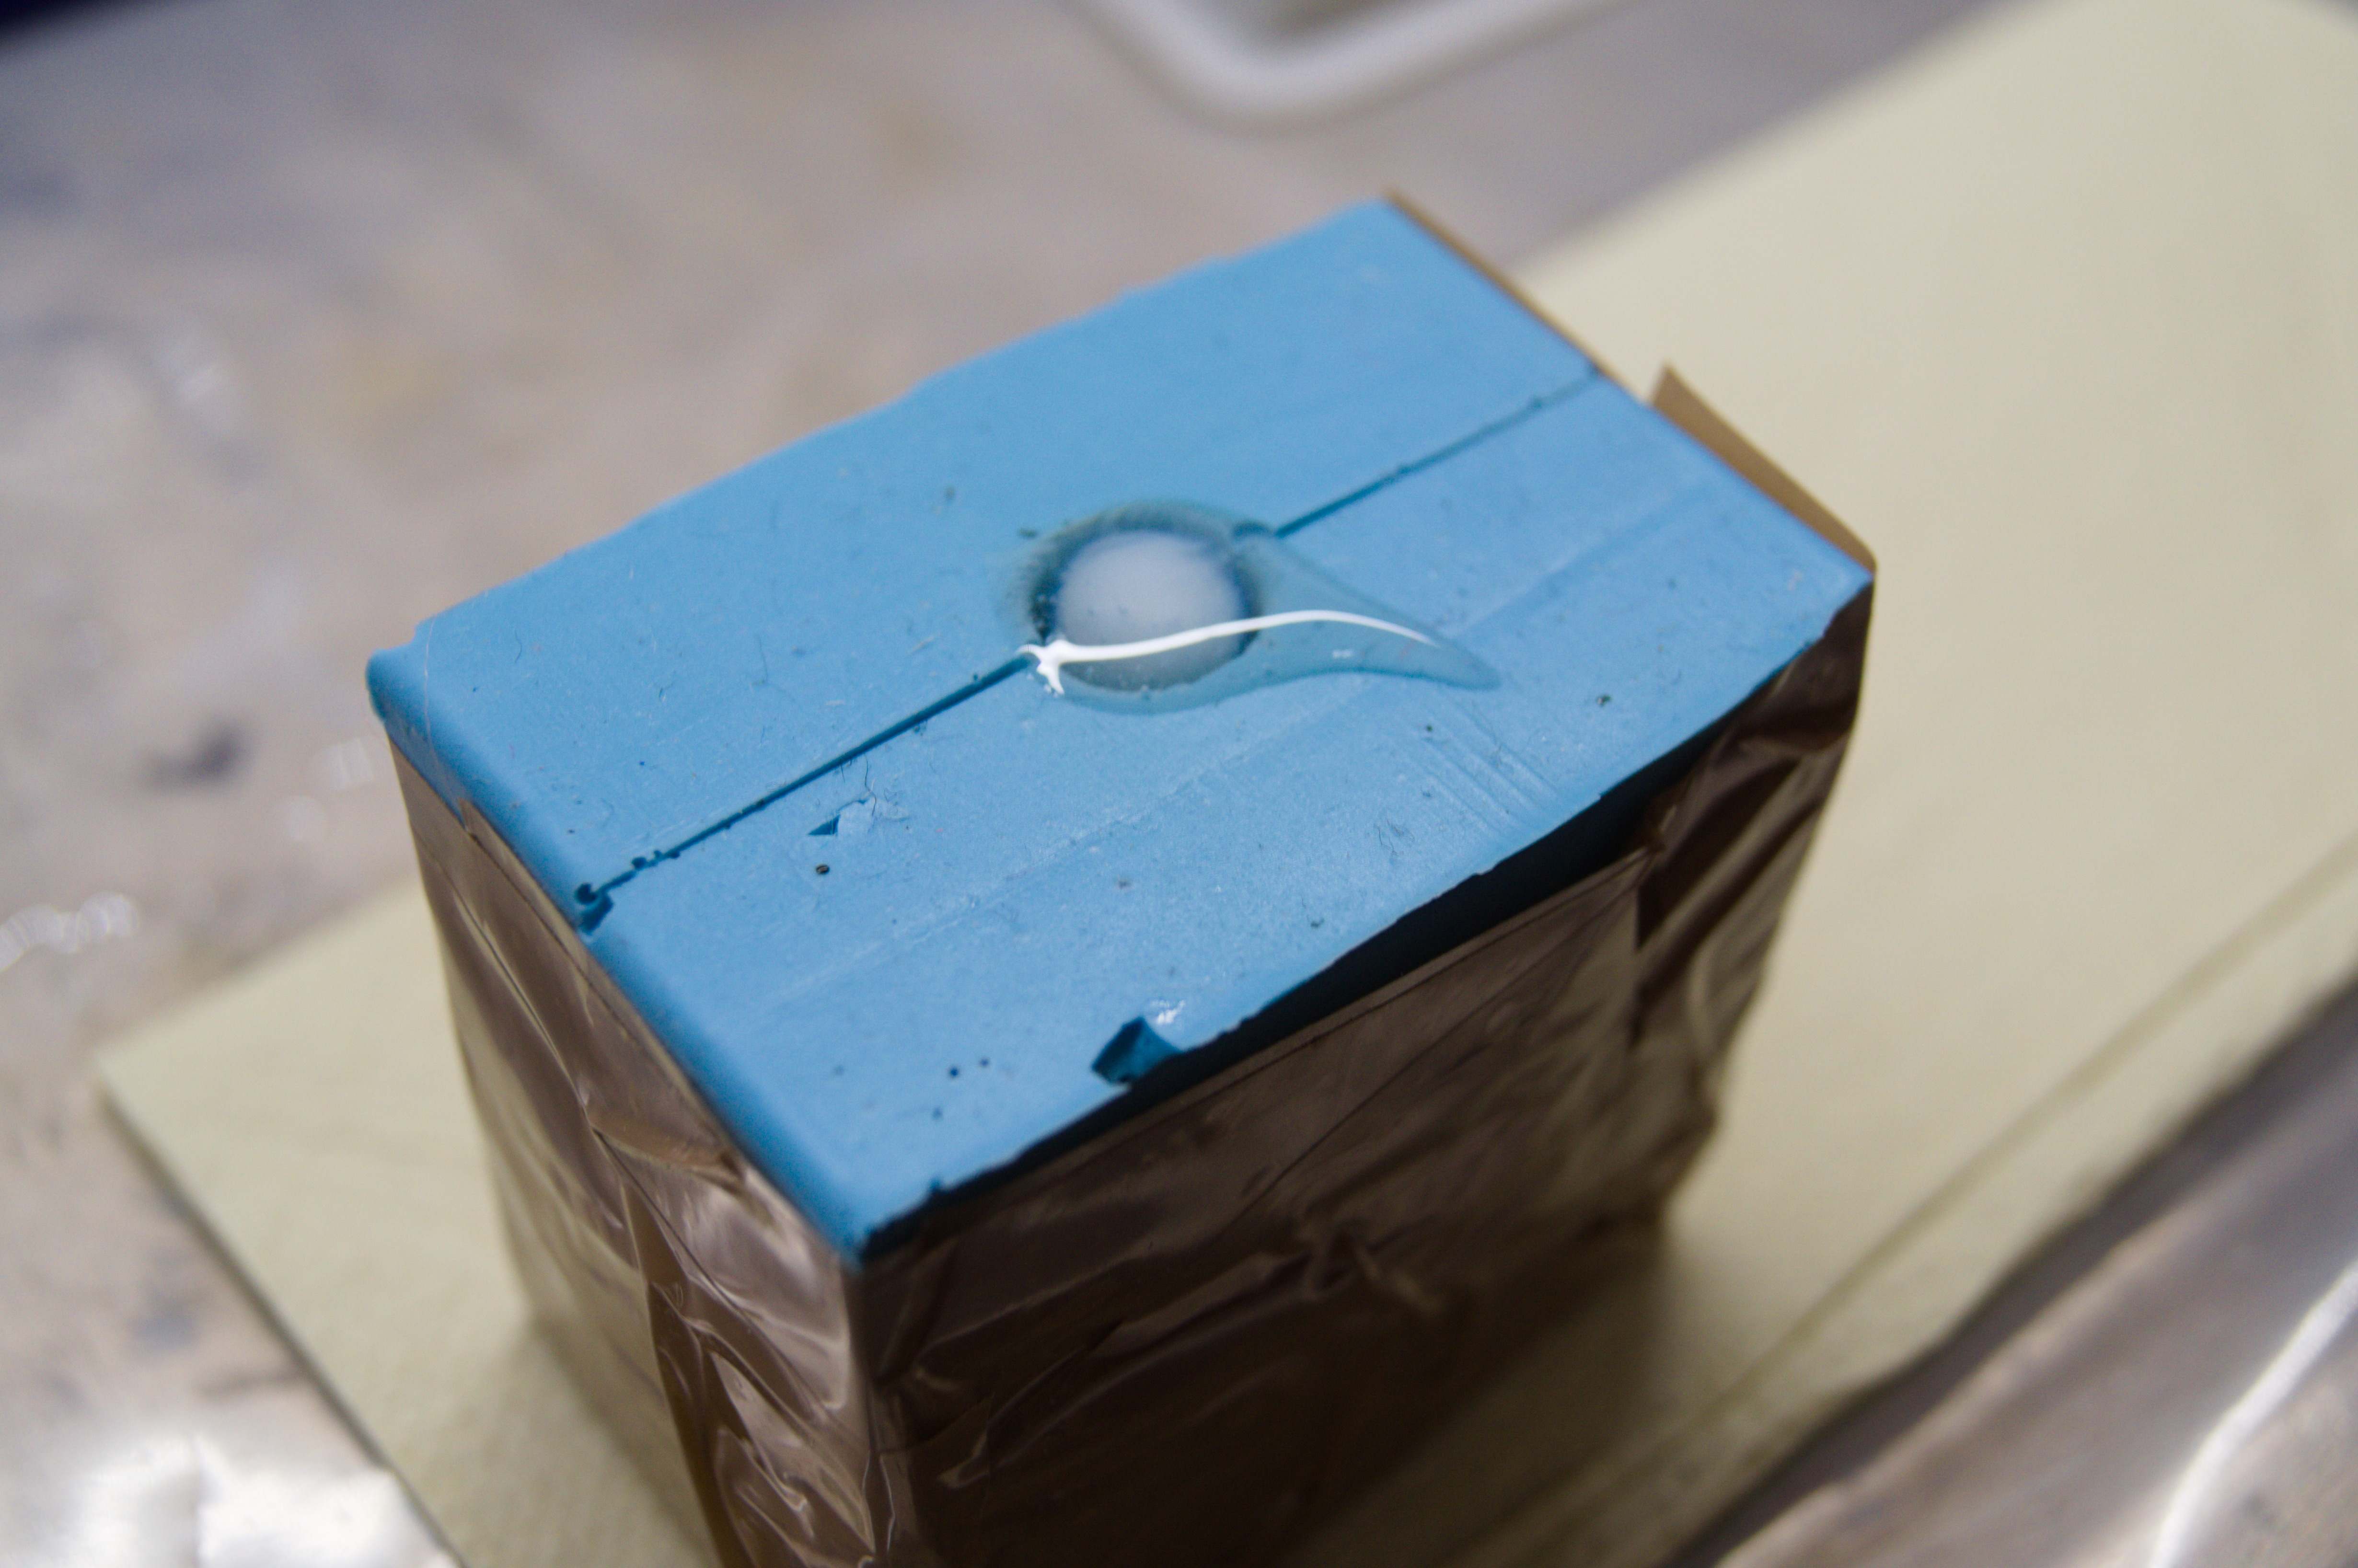
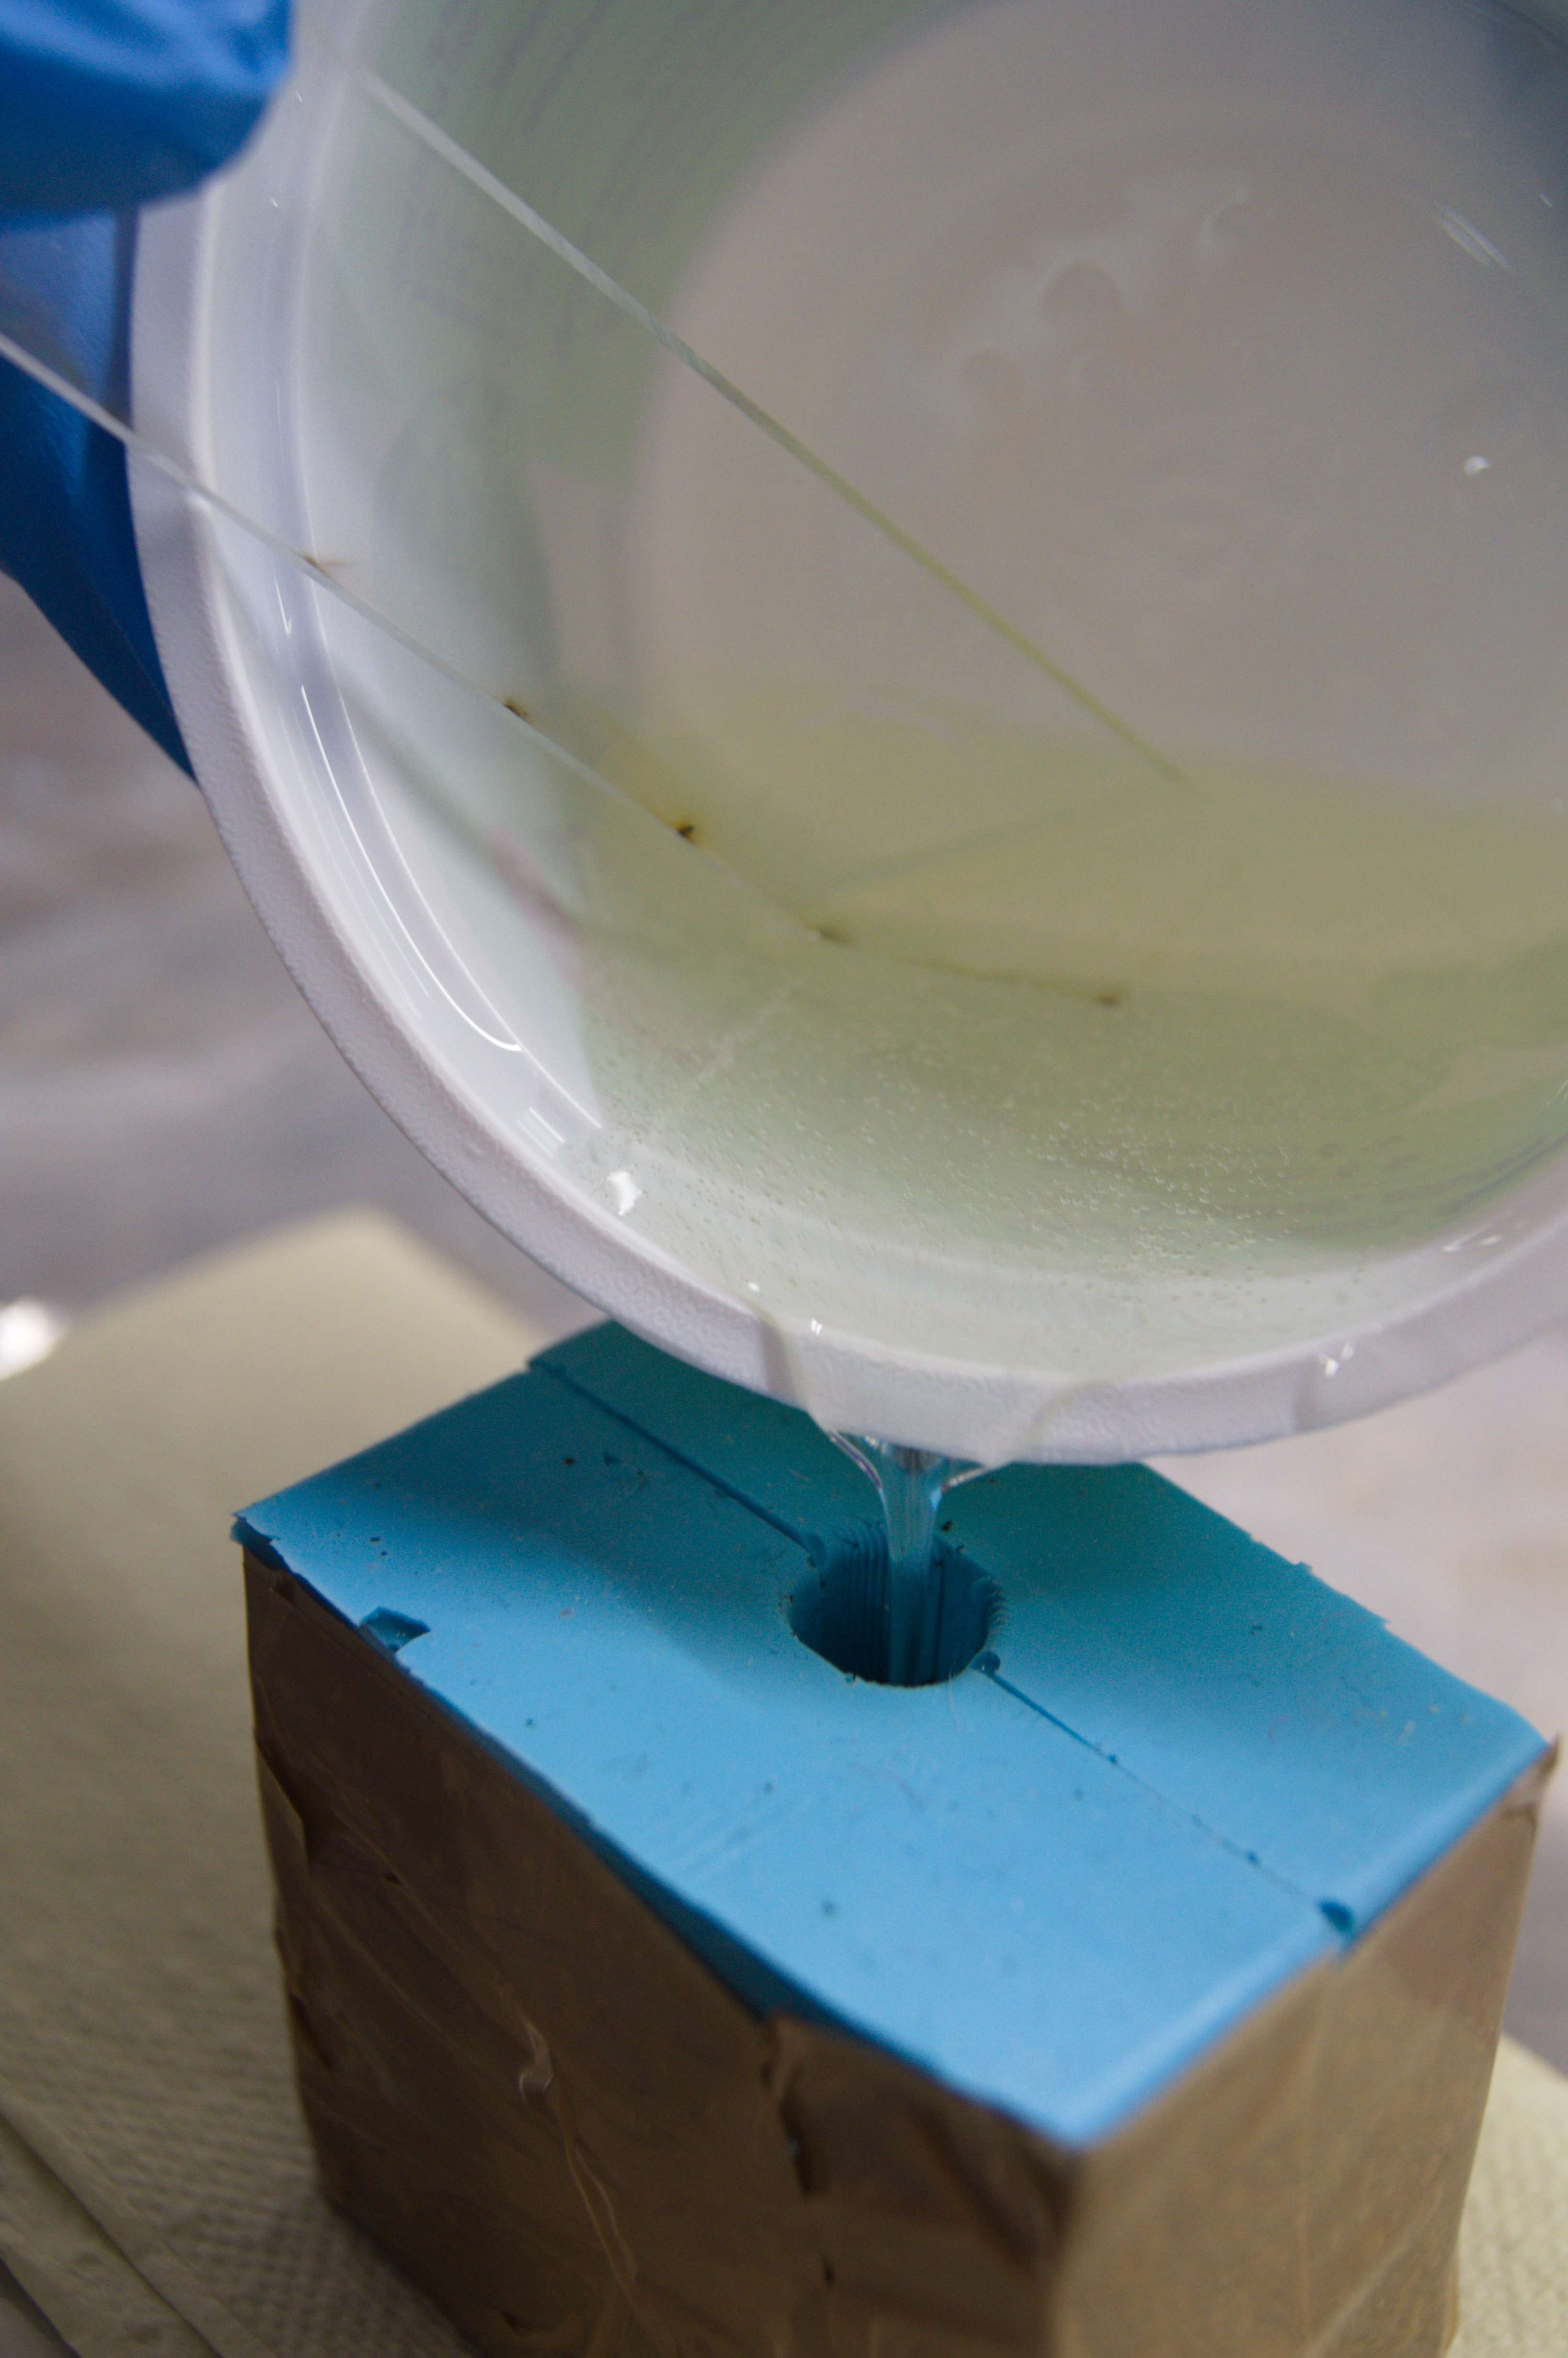
Preparation of the mixture (once again two reagents) is the same as in previous work with OOMOO and Smooth-Sil, including proper and honest mixing, vacuum treatment and pouring into mold. Let's start with two pieces mold:
|
|
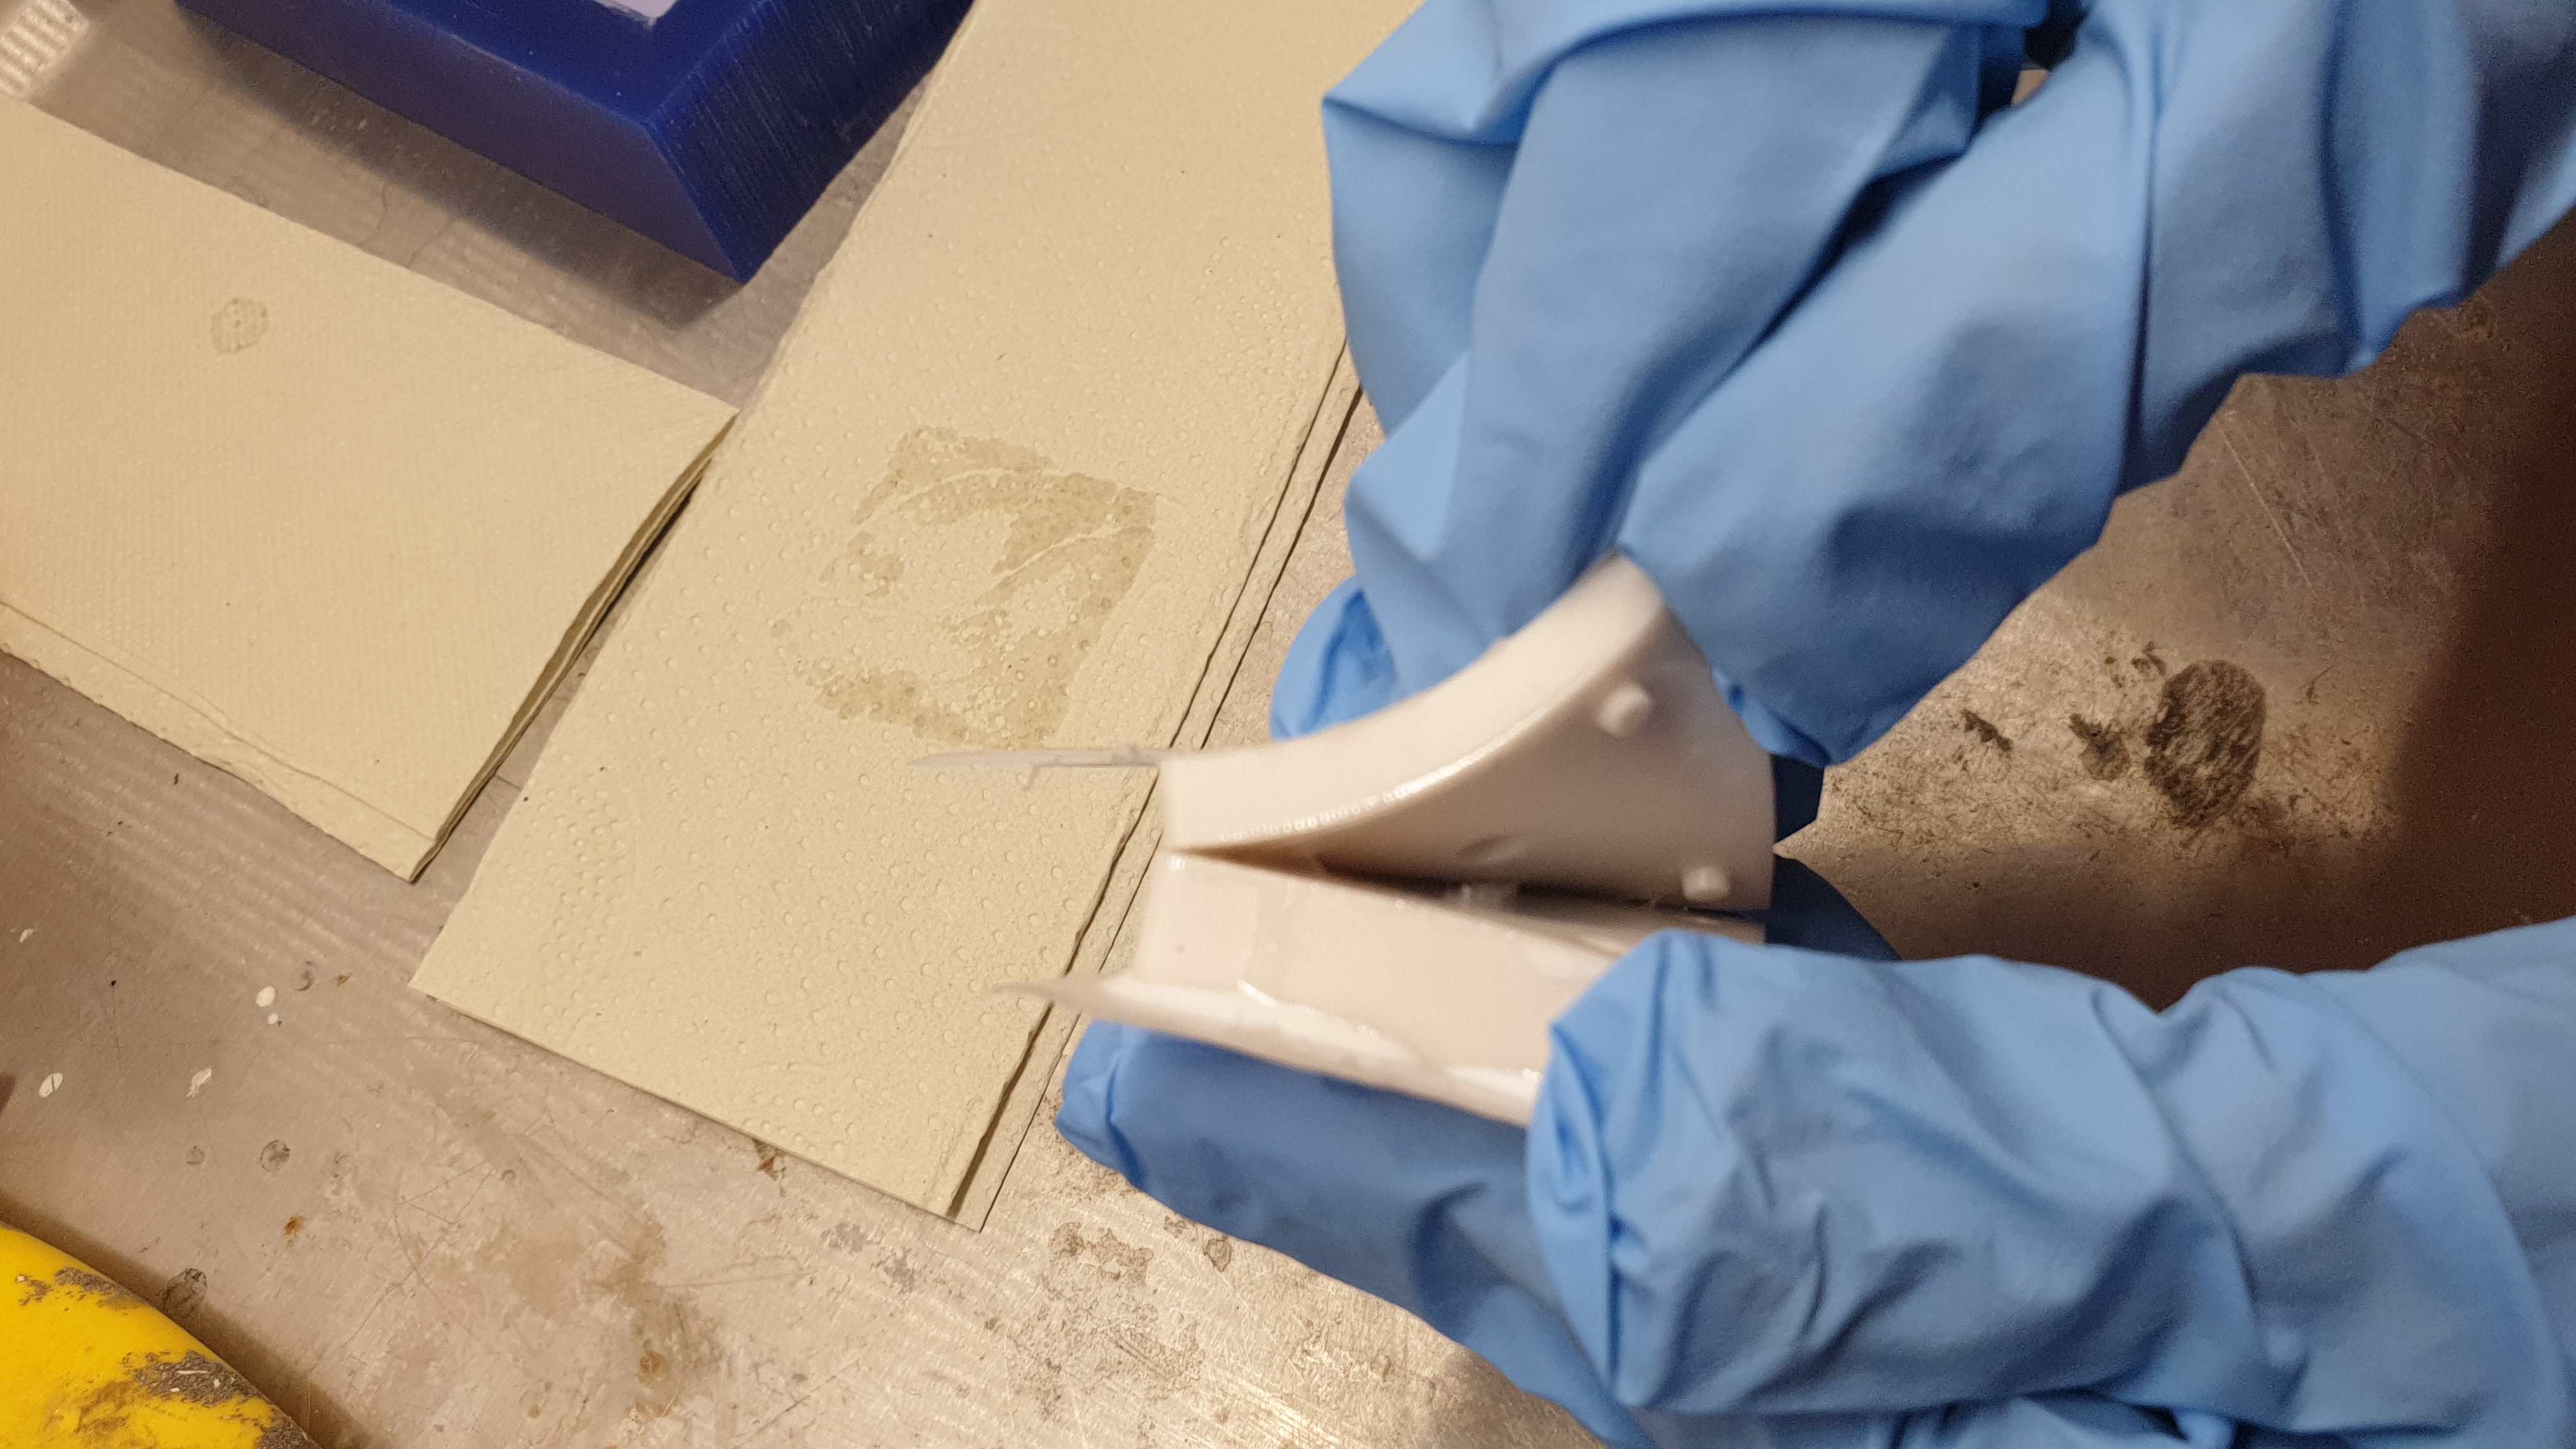
The next stop was casting the Fablab token. We decided that we will do it both with as single piece and two sided mold. As the mixture was already prepared it was just pouring it into molds.
 |
 |
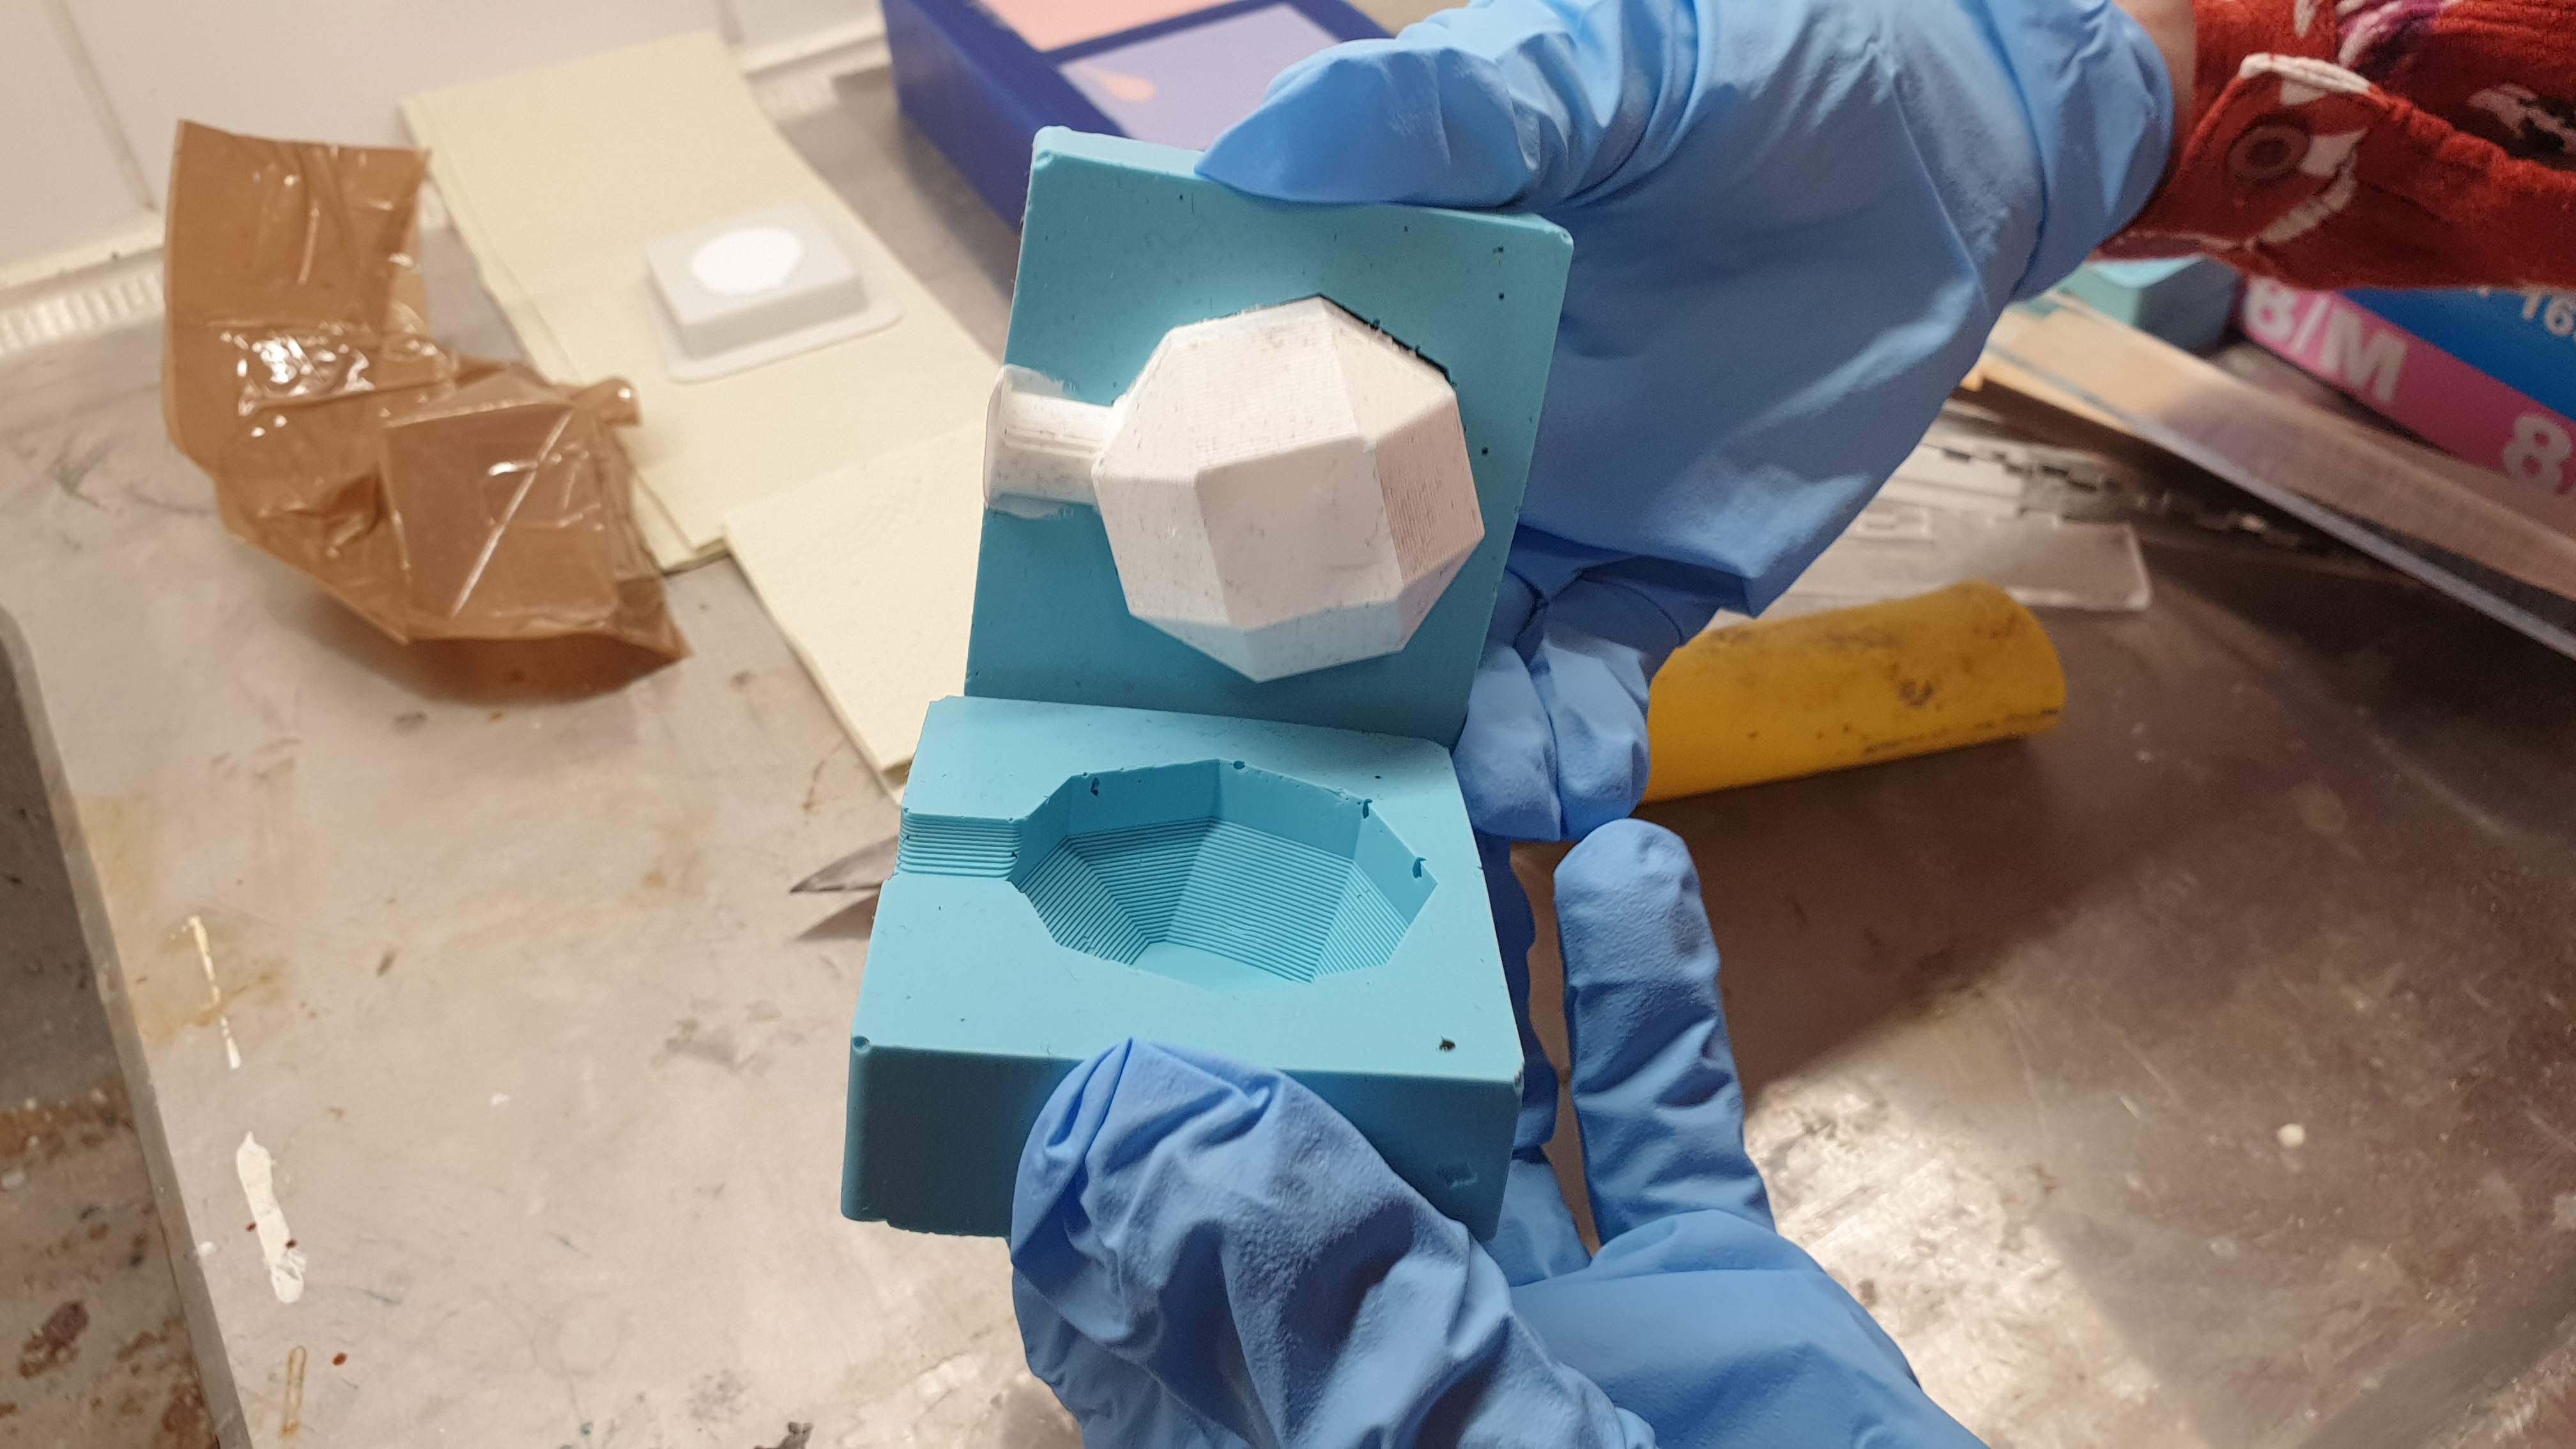
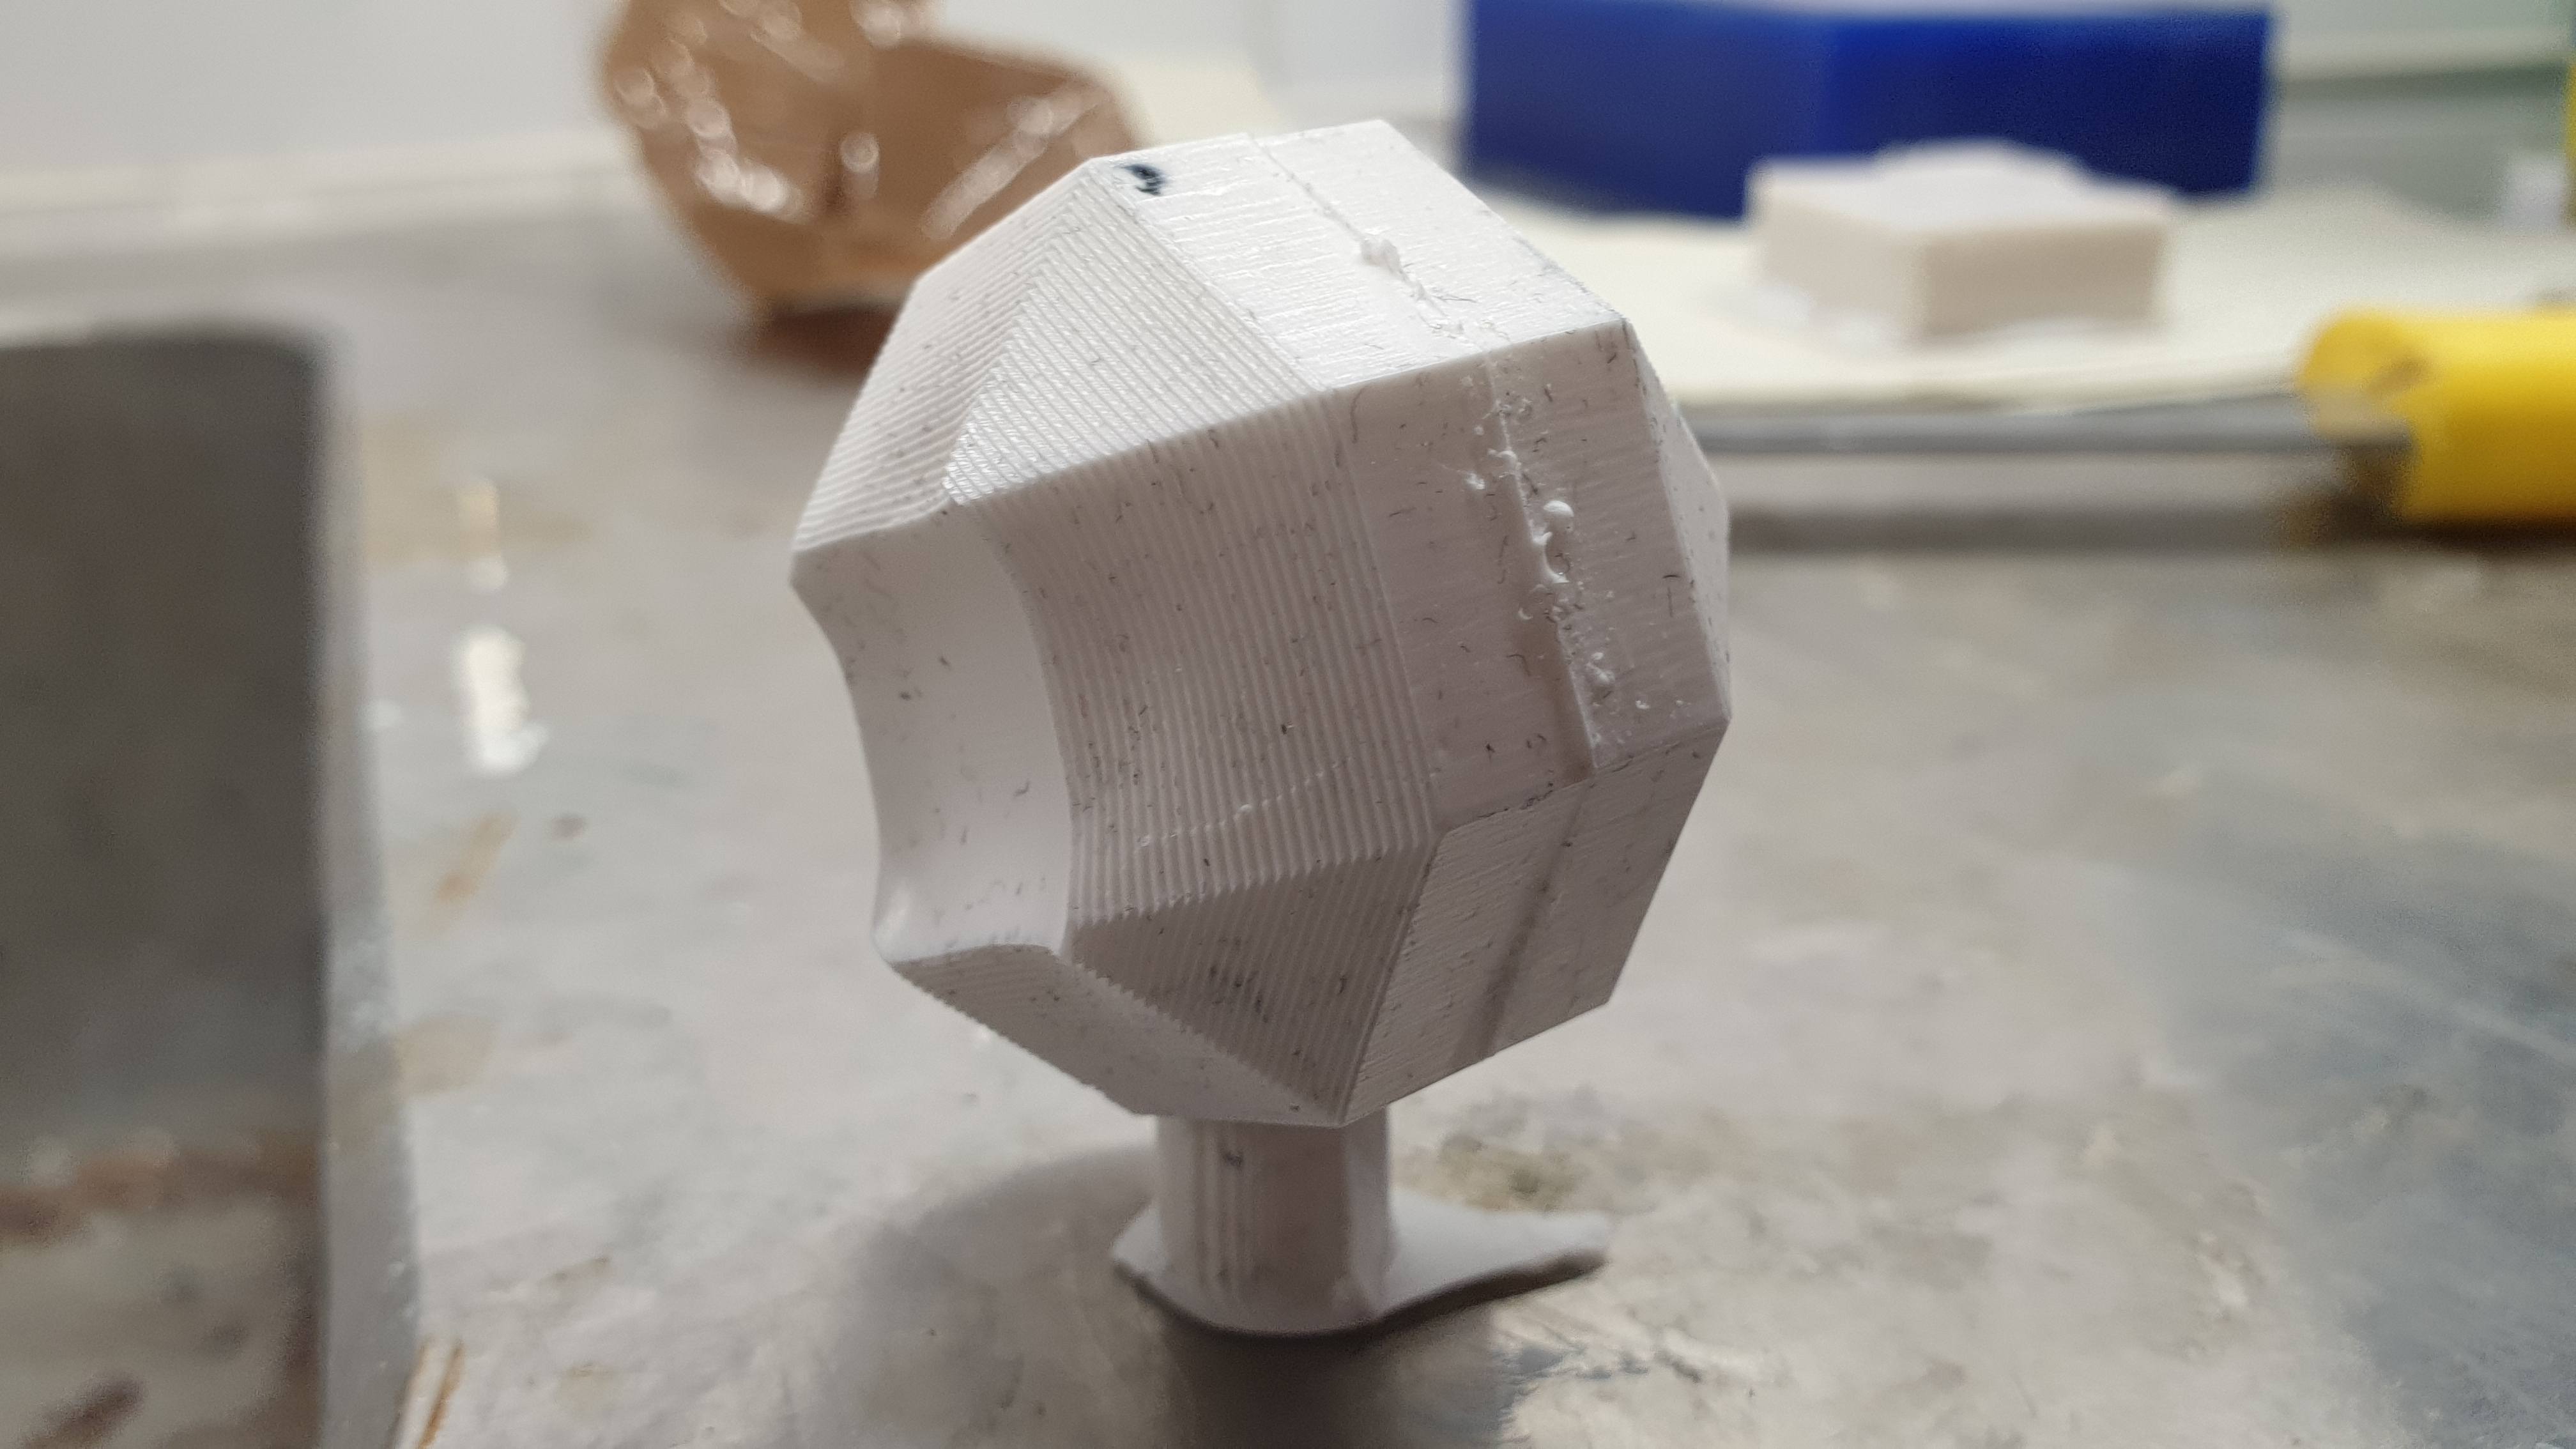
In the end of the day we achieved to get following things done: two sided negative mold and cast three objects such as two kinds of FabLab tokens and some ball-like object made with squares and triangles.
Great opening!
We could have opened everything couple hours after but we decided that next day is more suitable for us. Let's see the results.
 |
 |
 |
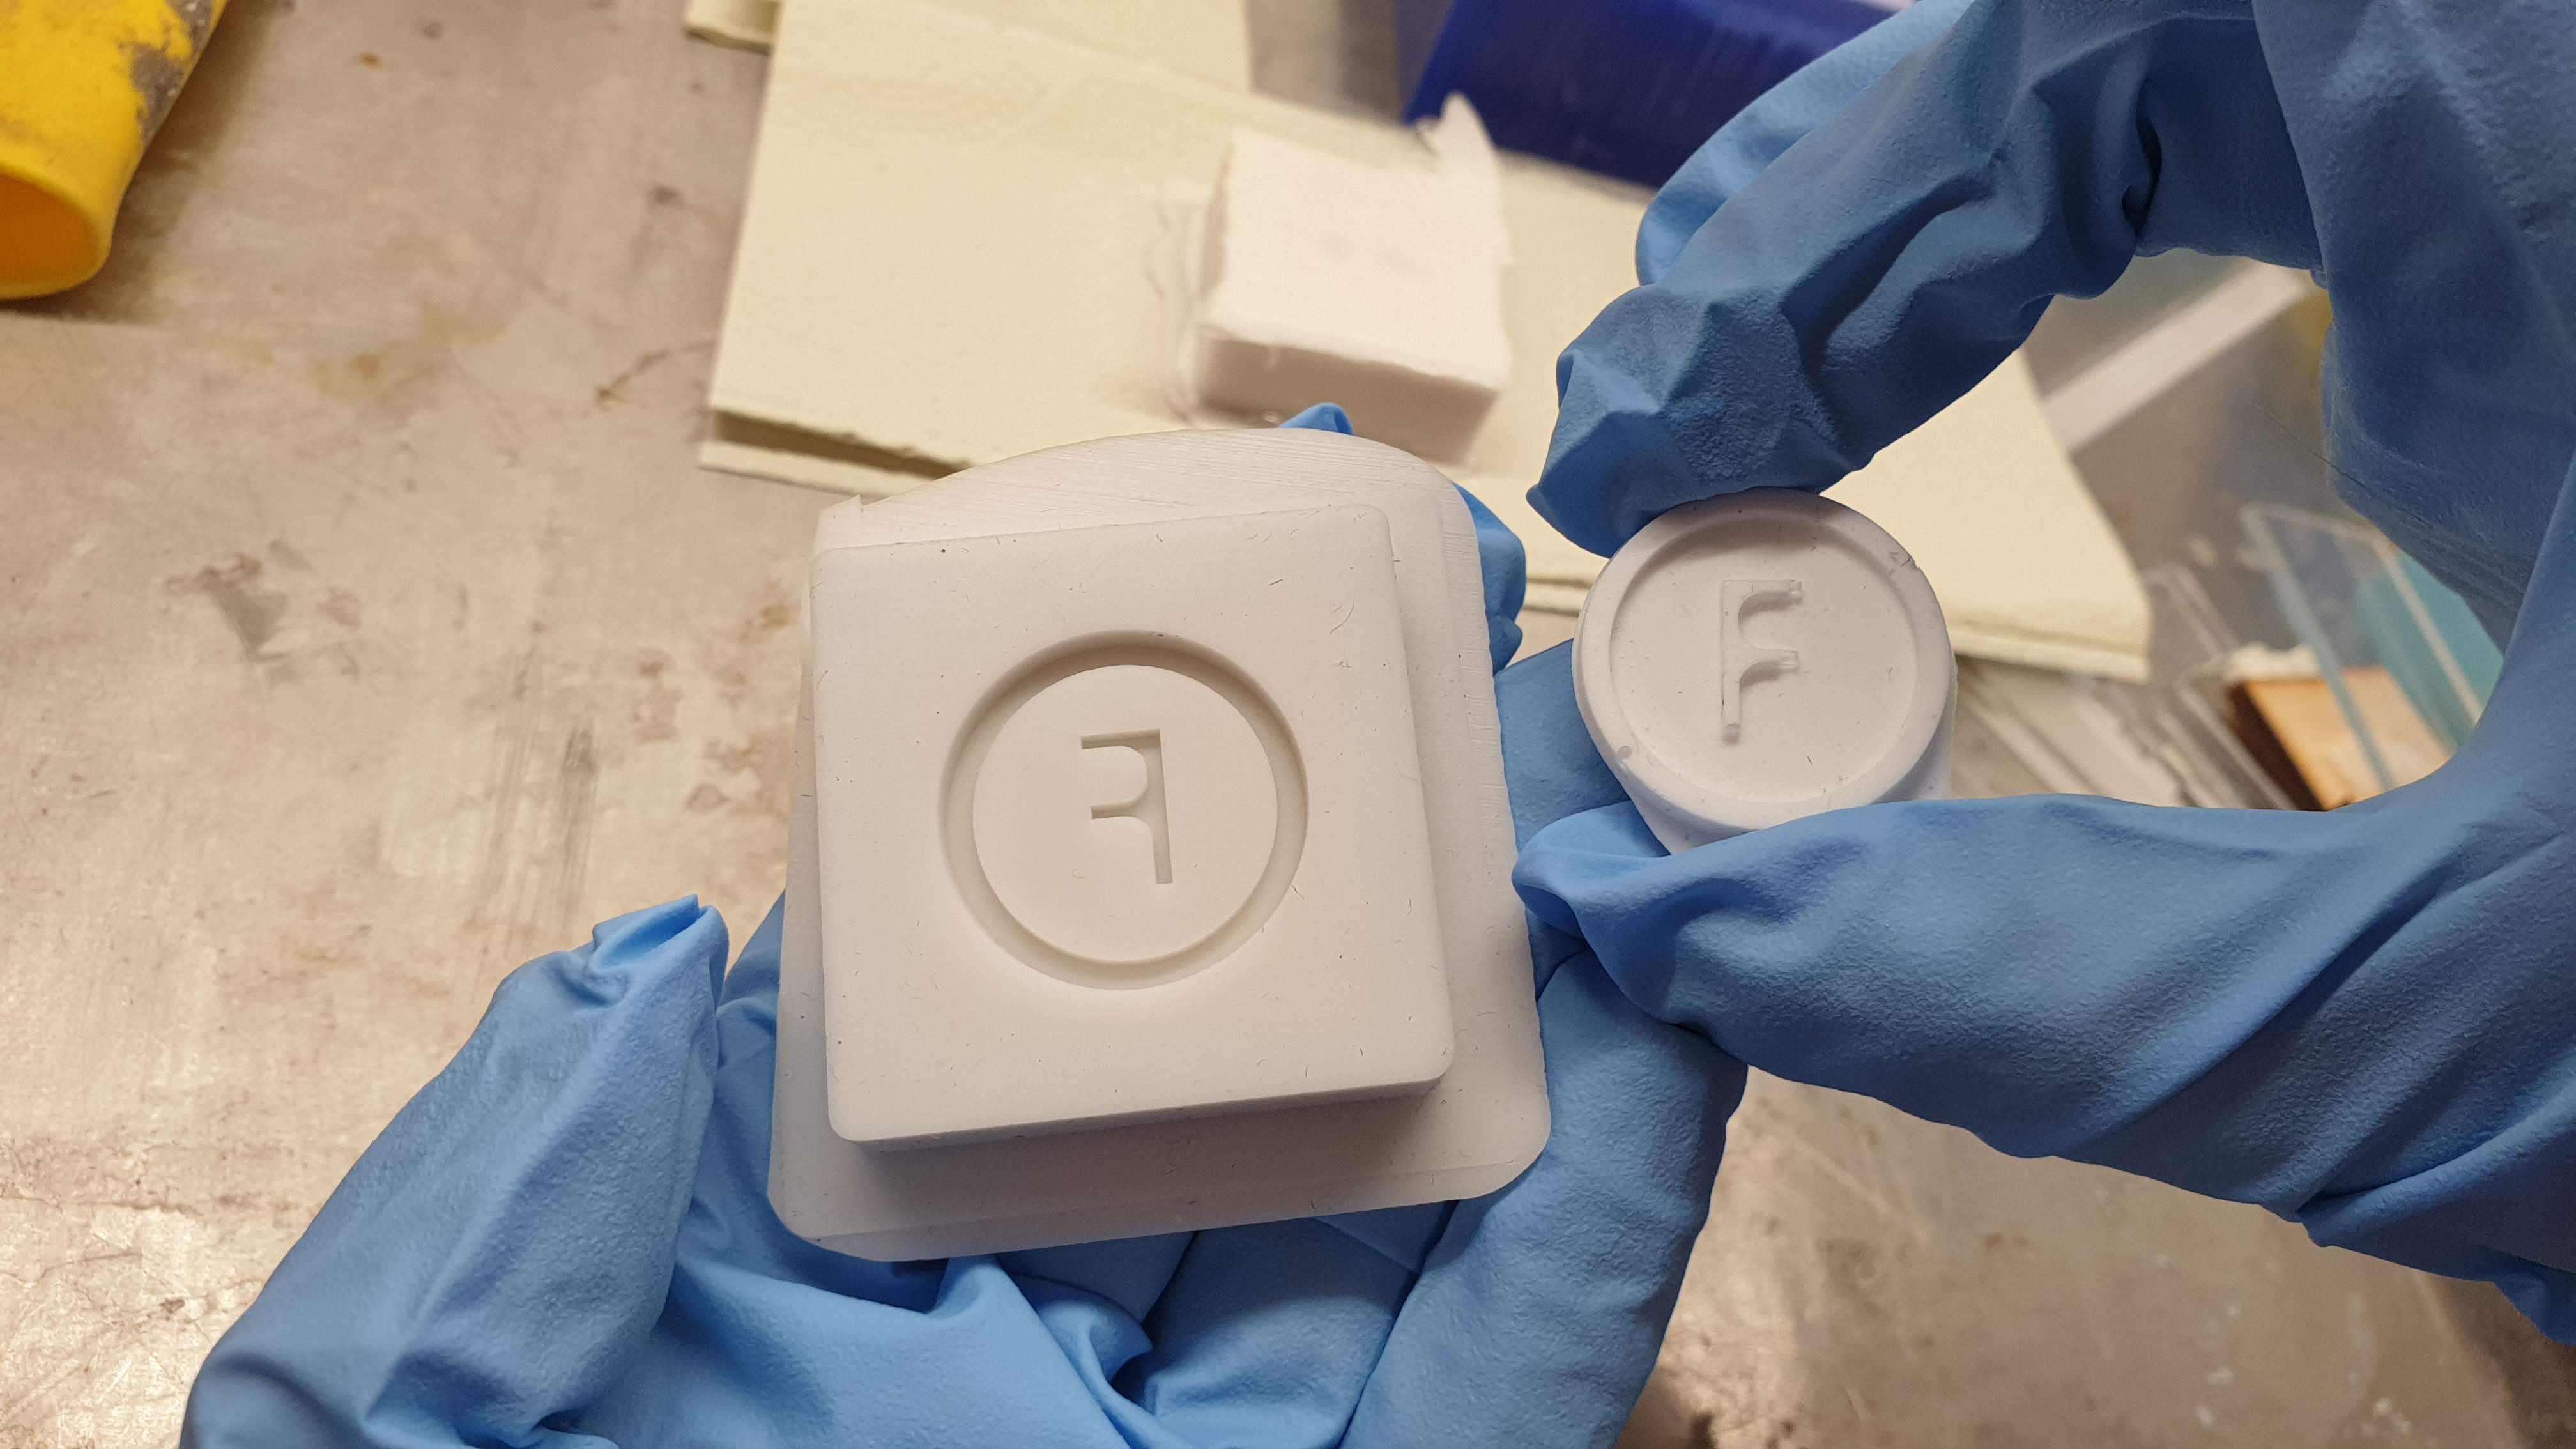 |
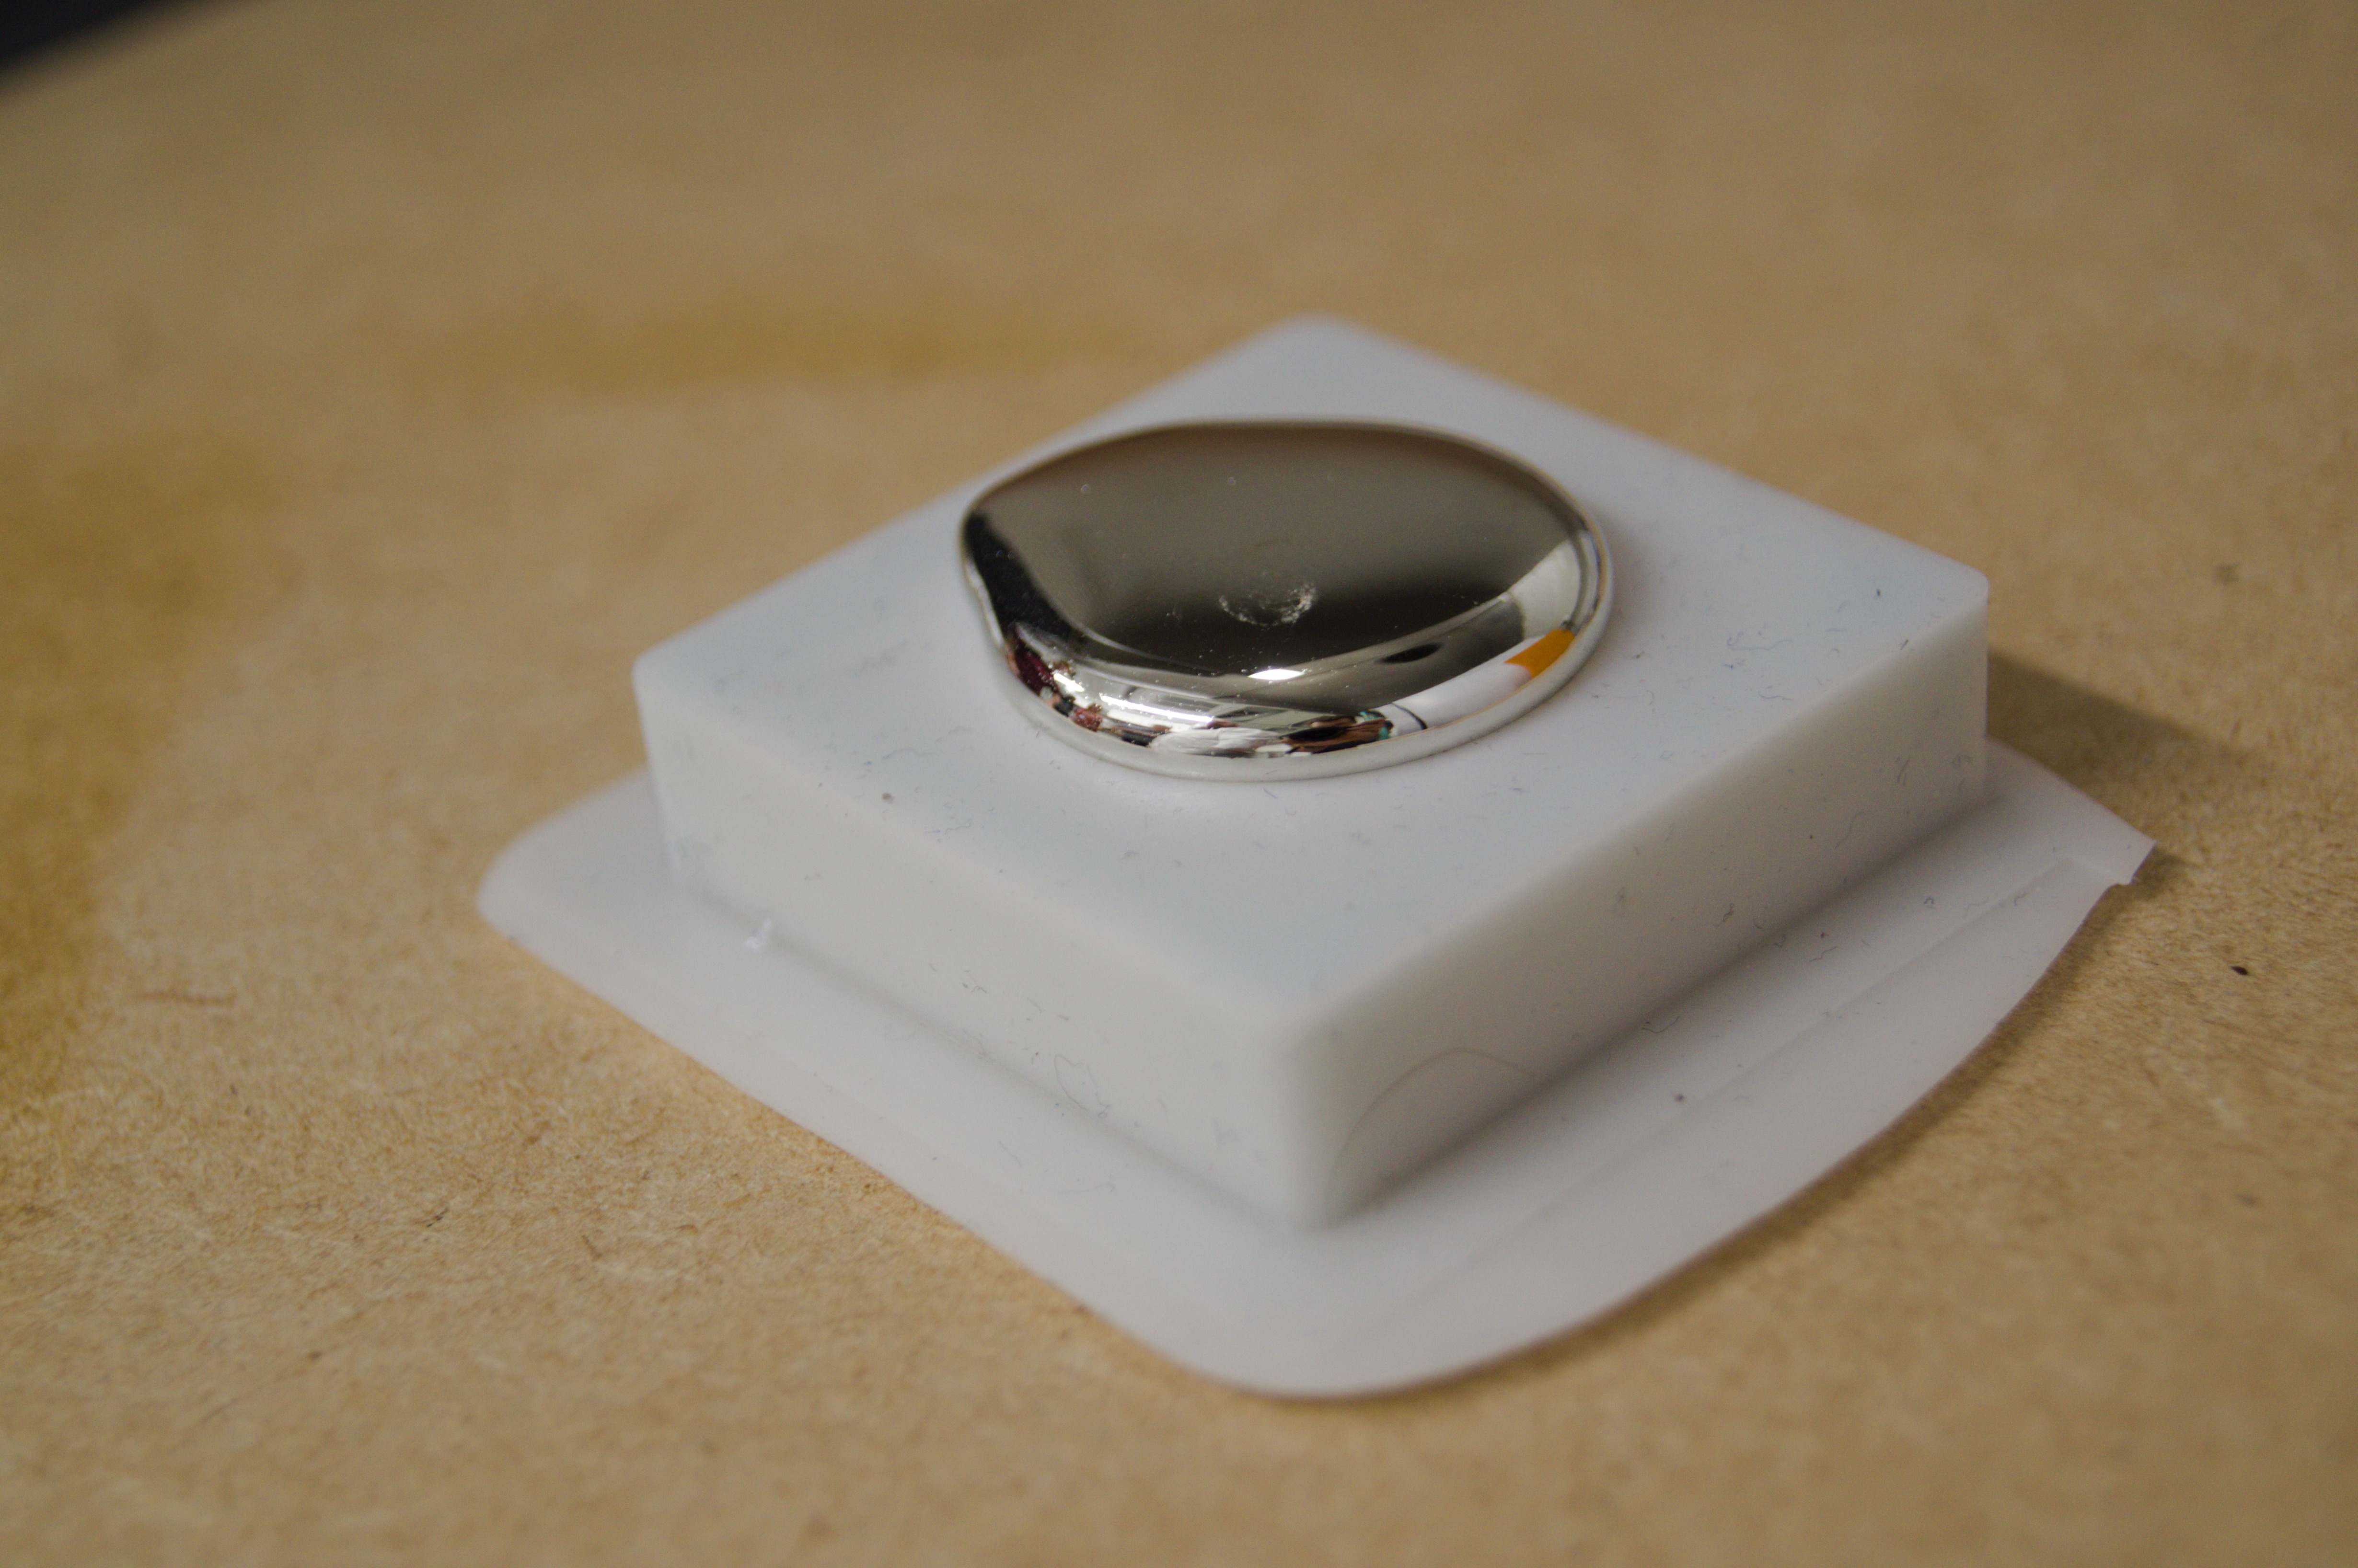
In case of our strange shaped ball, one of the walls was "sucked" to the inside. The reason of that fault is thick wall of the mold. During curing process mixture was pushed outside. Both tokens looked very good, well-shaped and stiff.
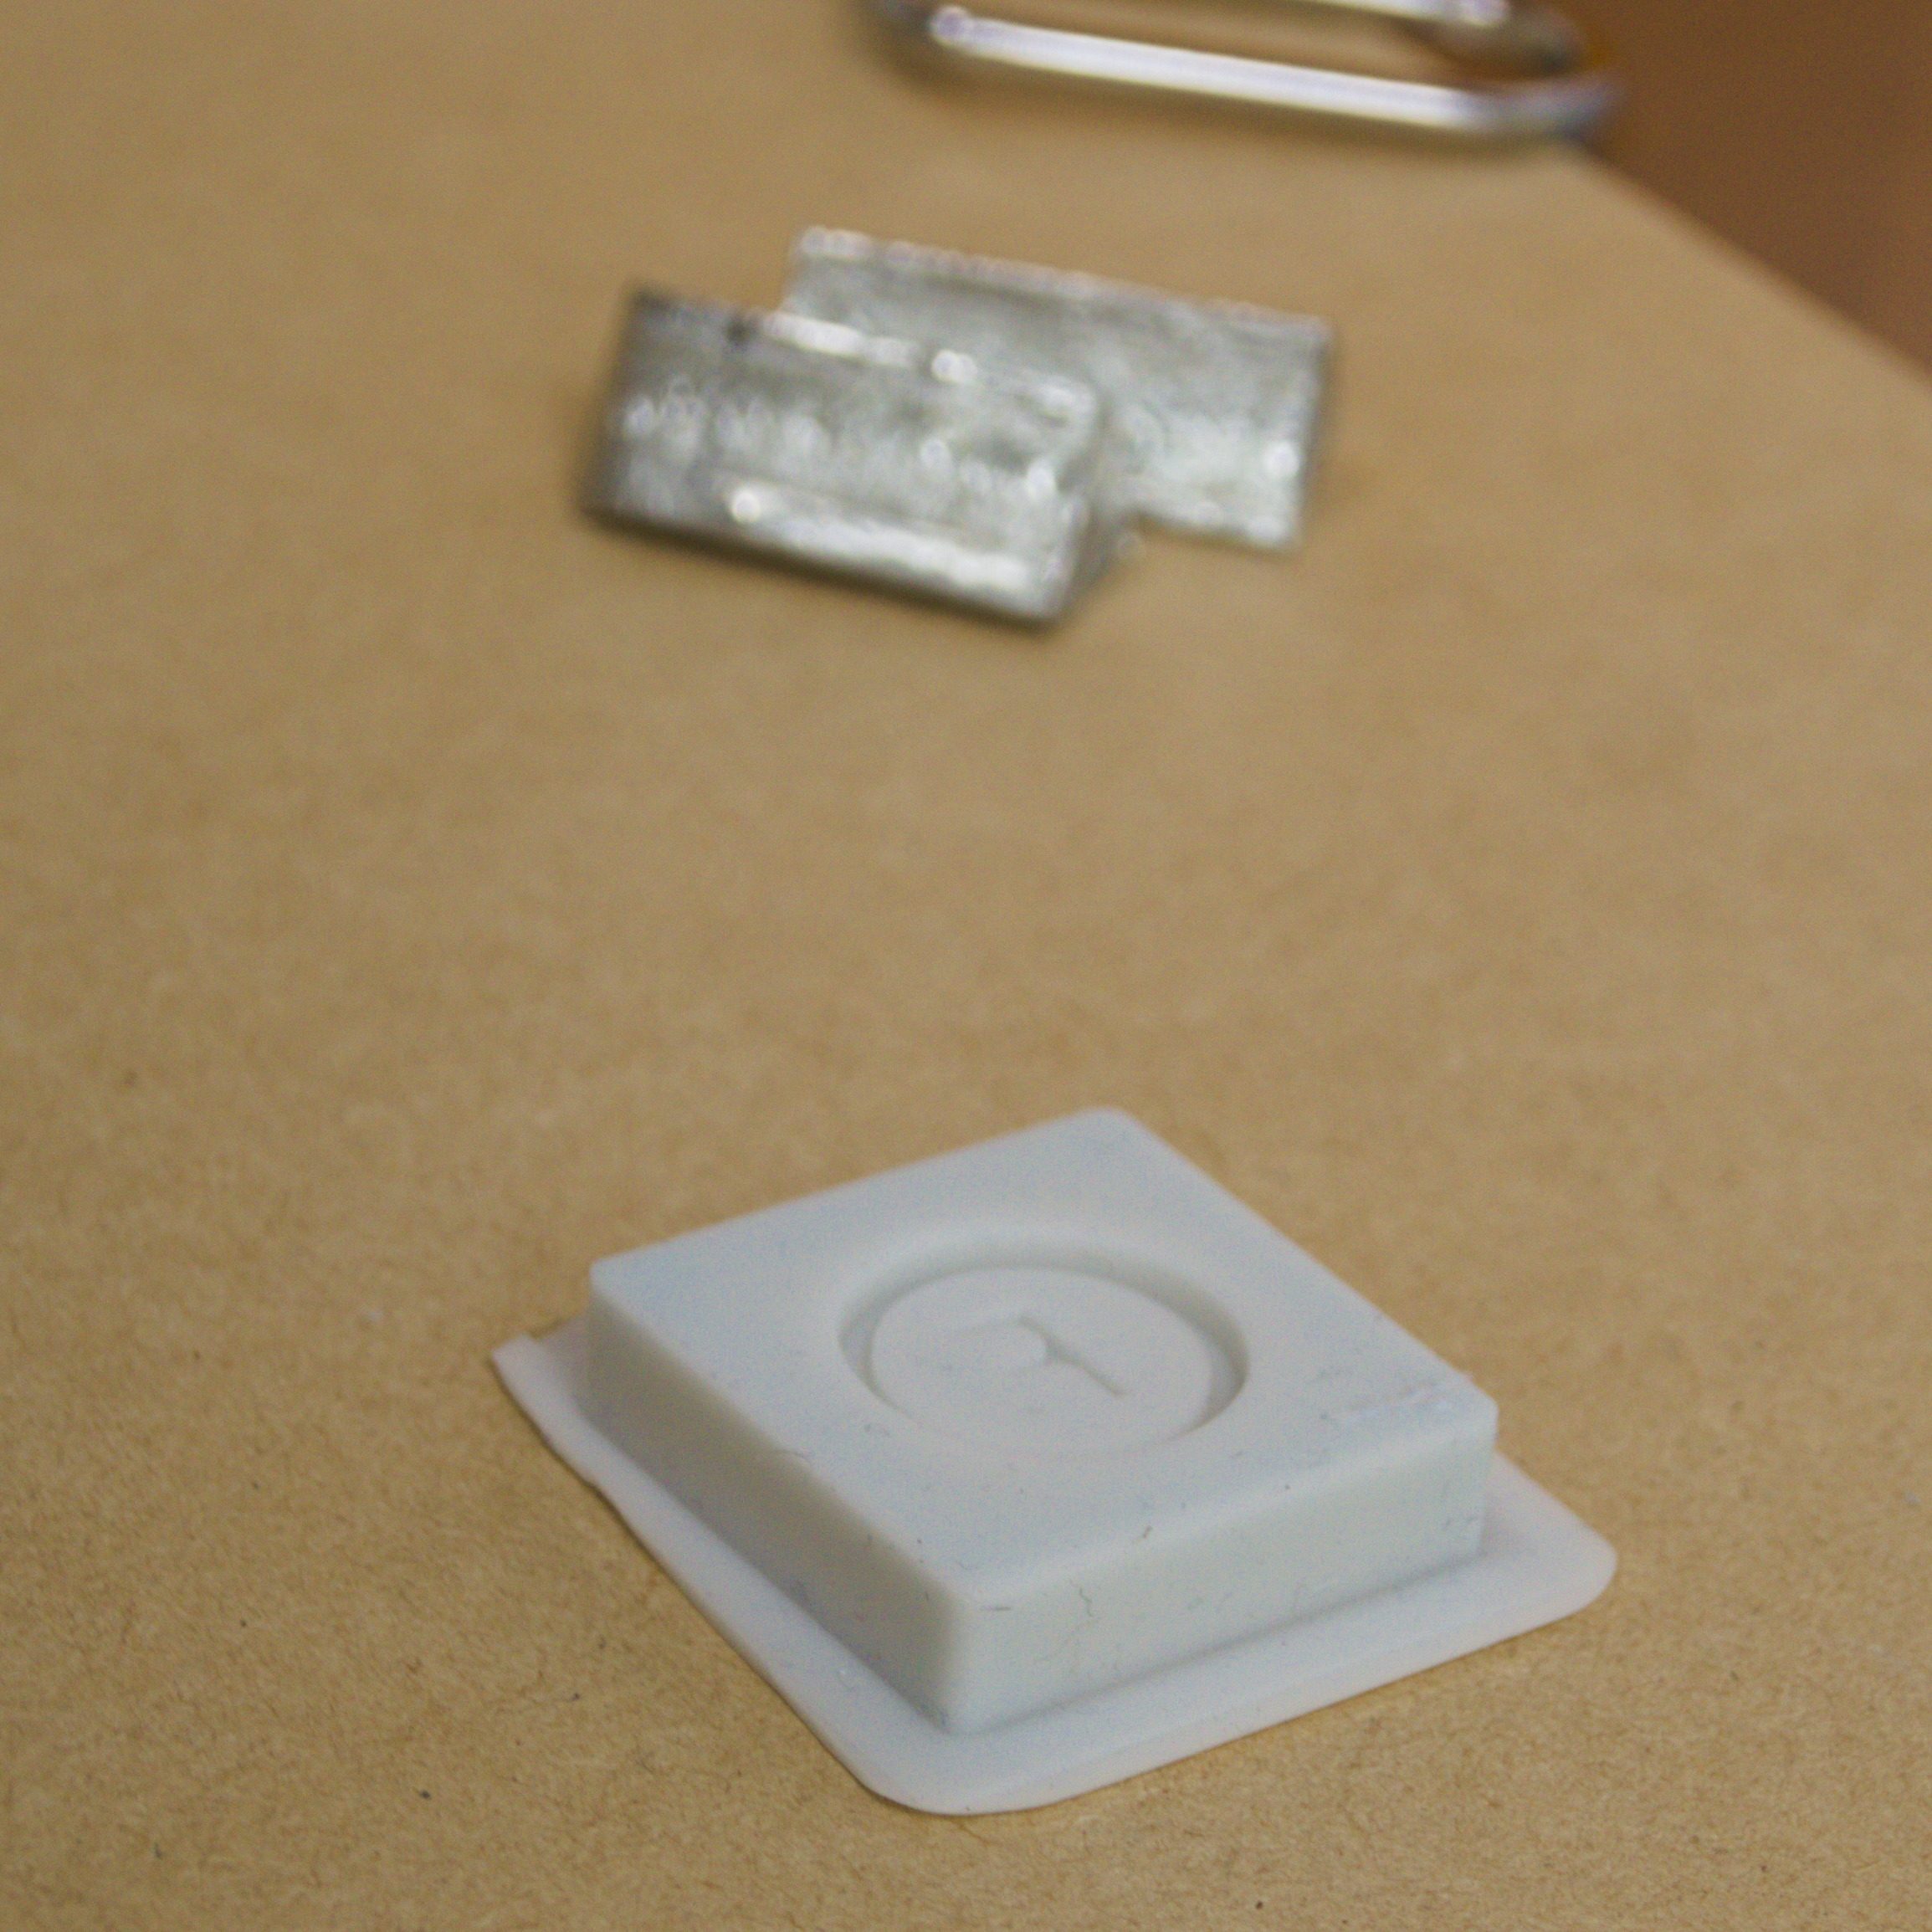
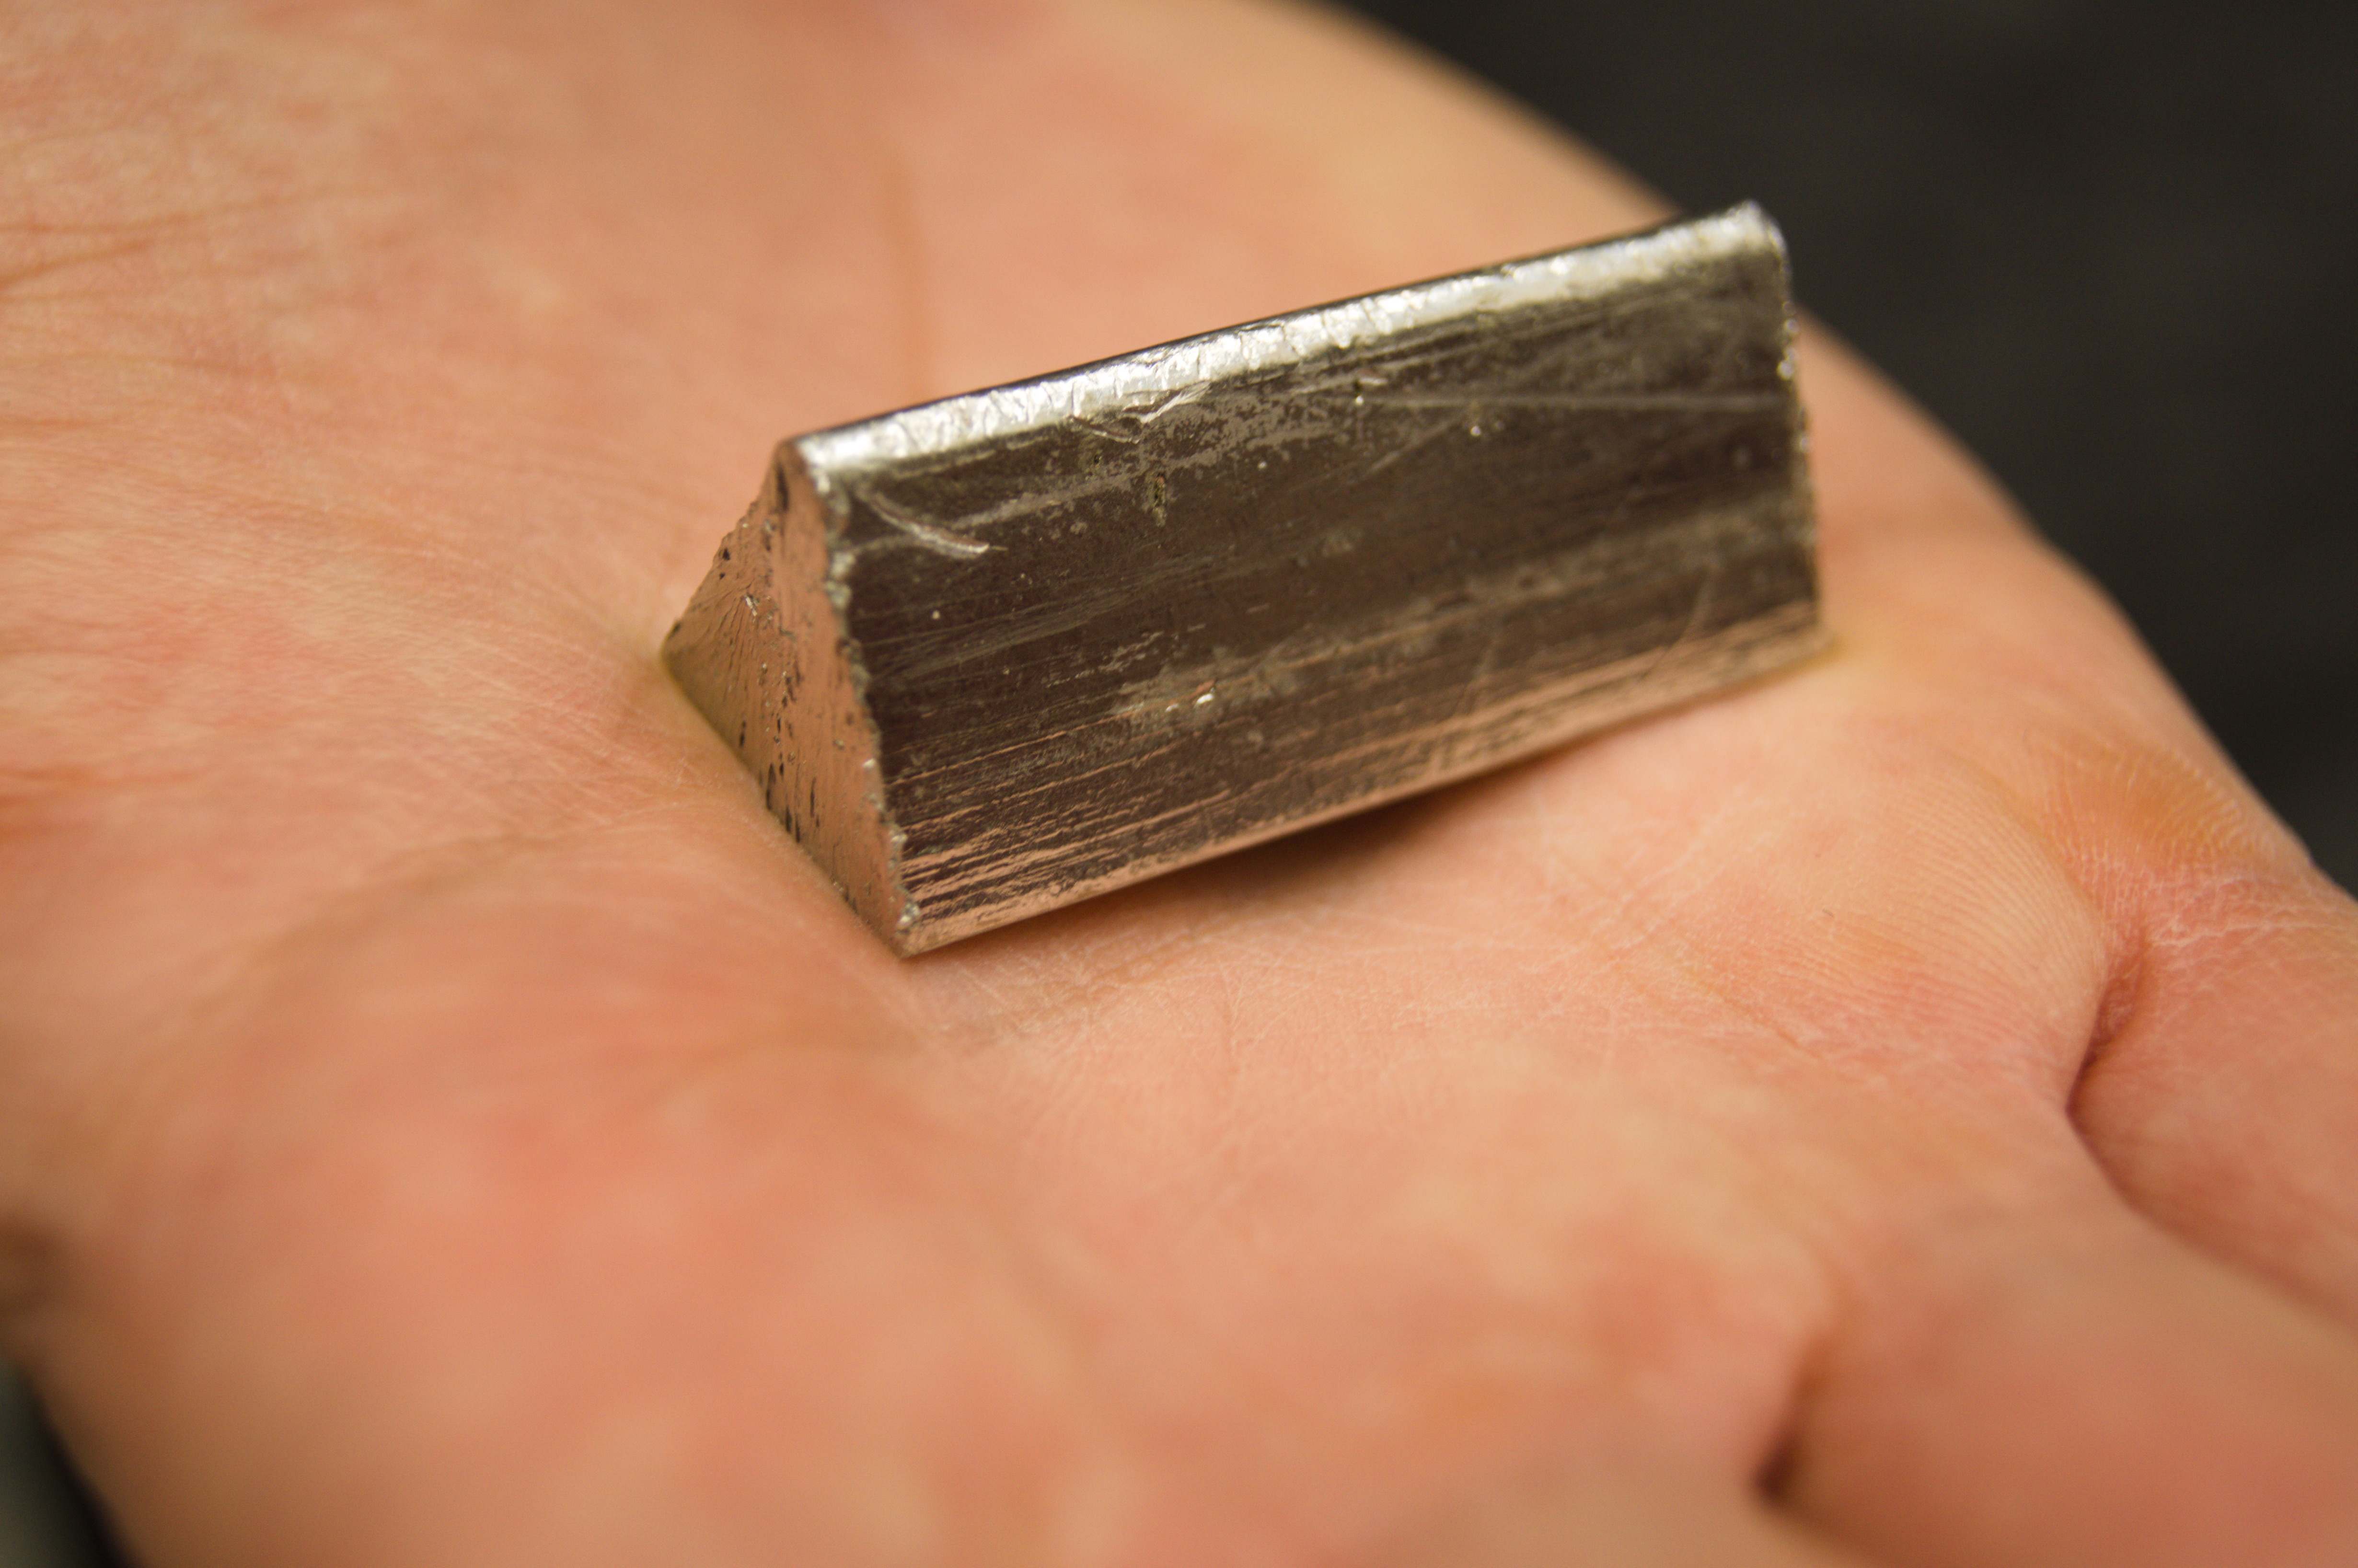
Metal!
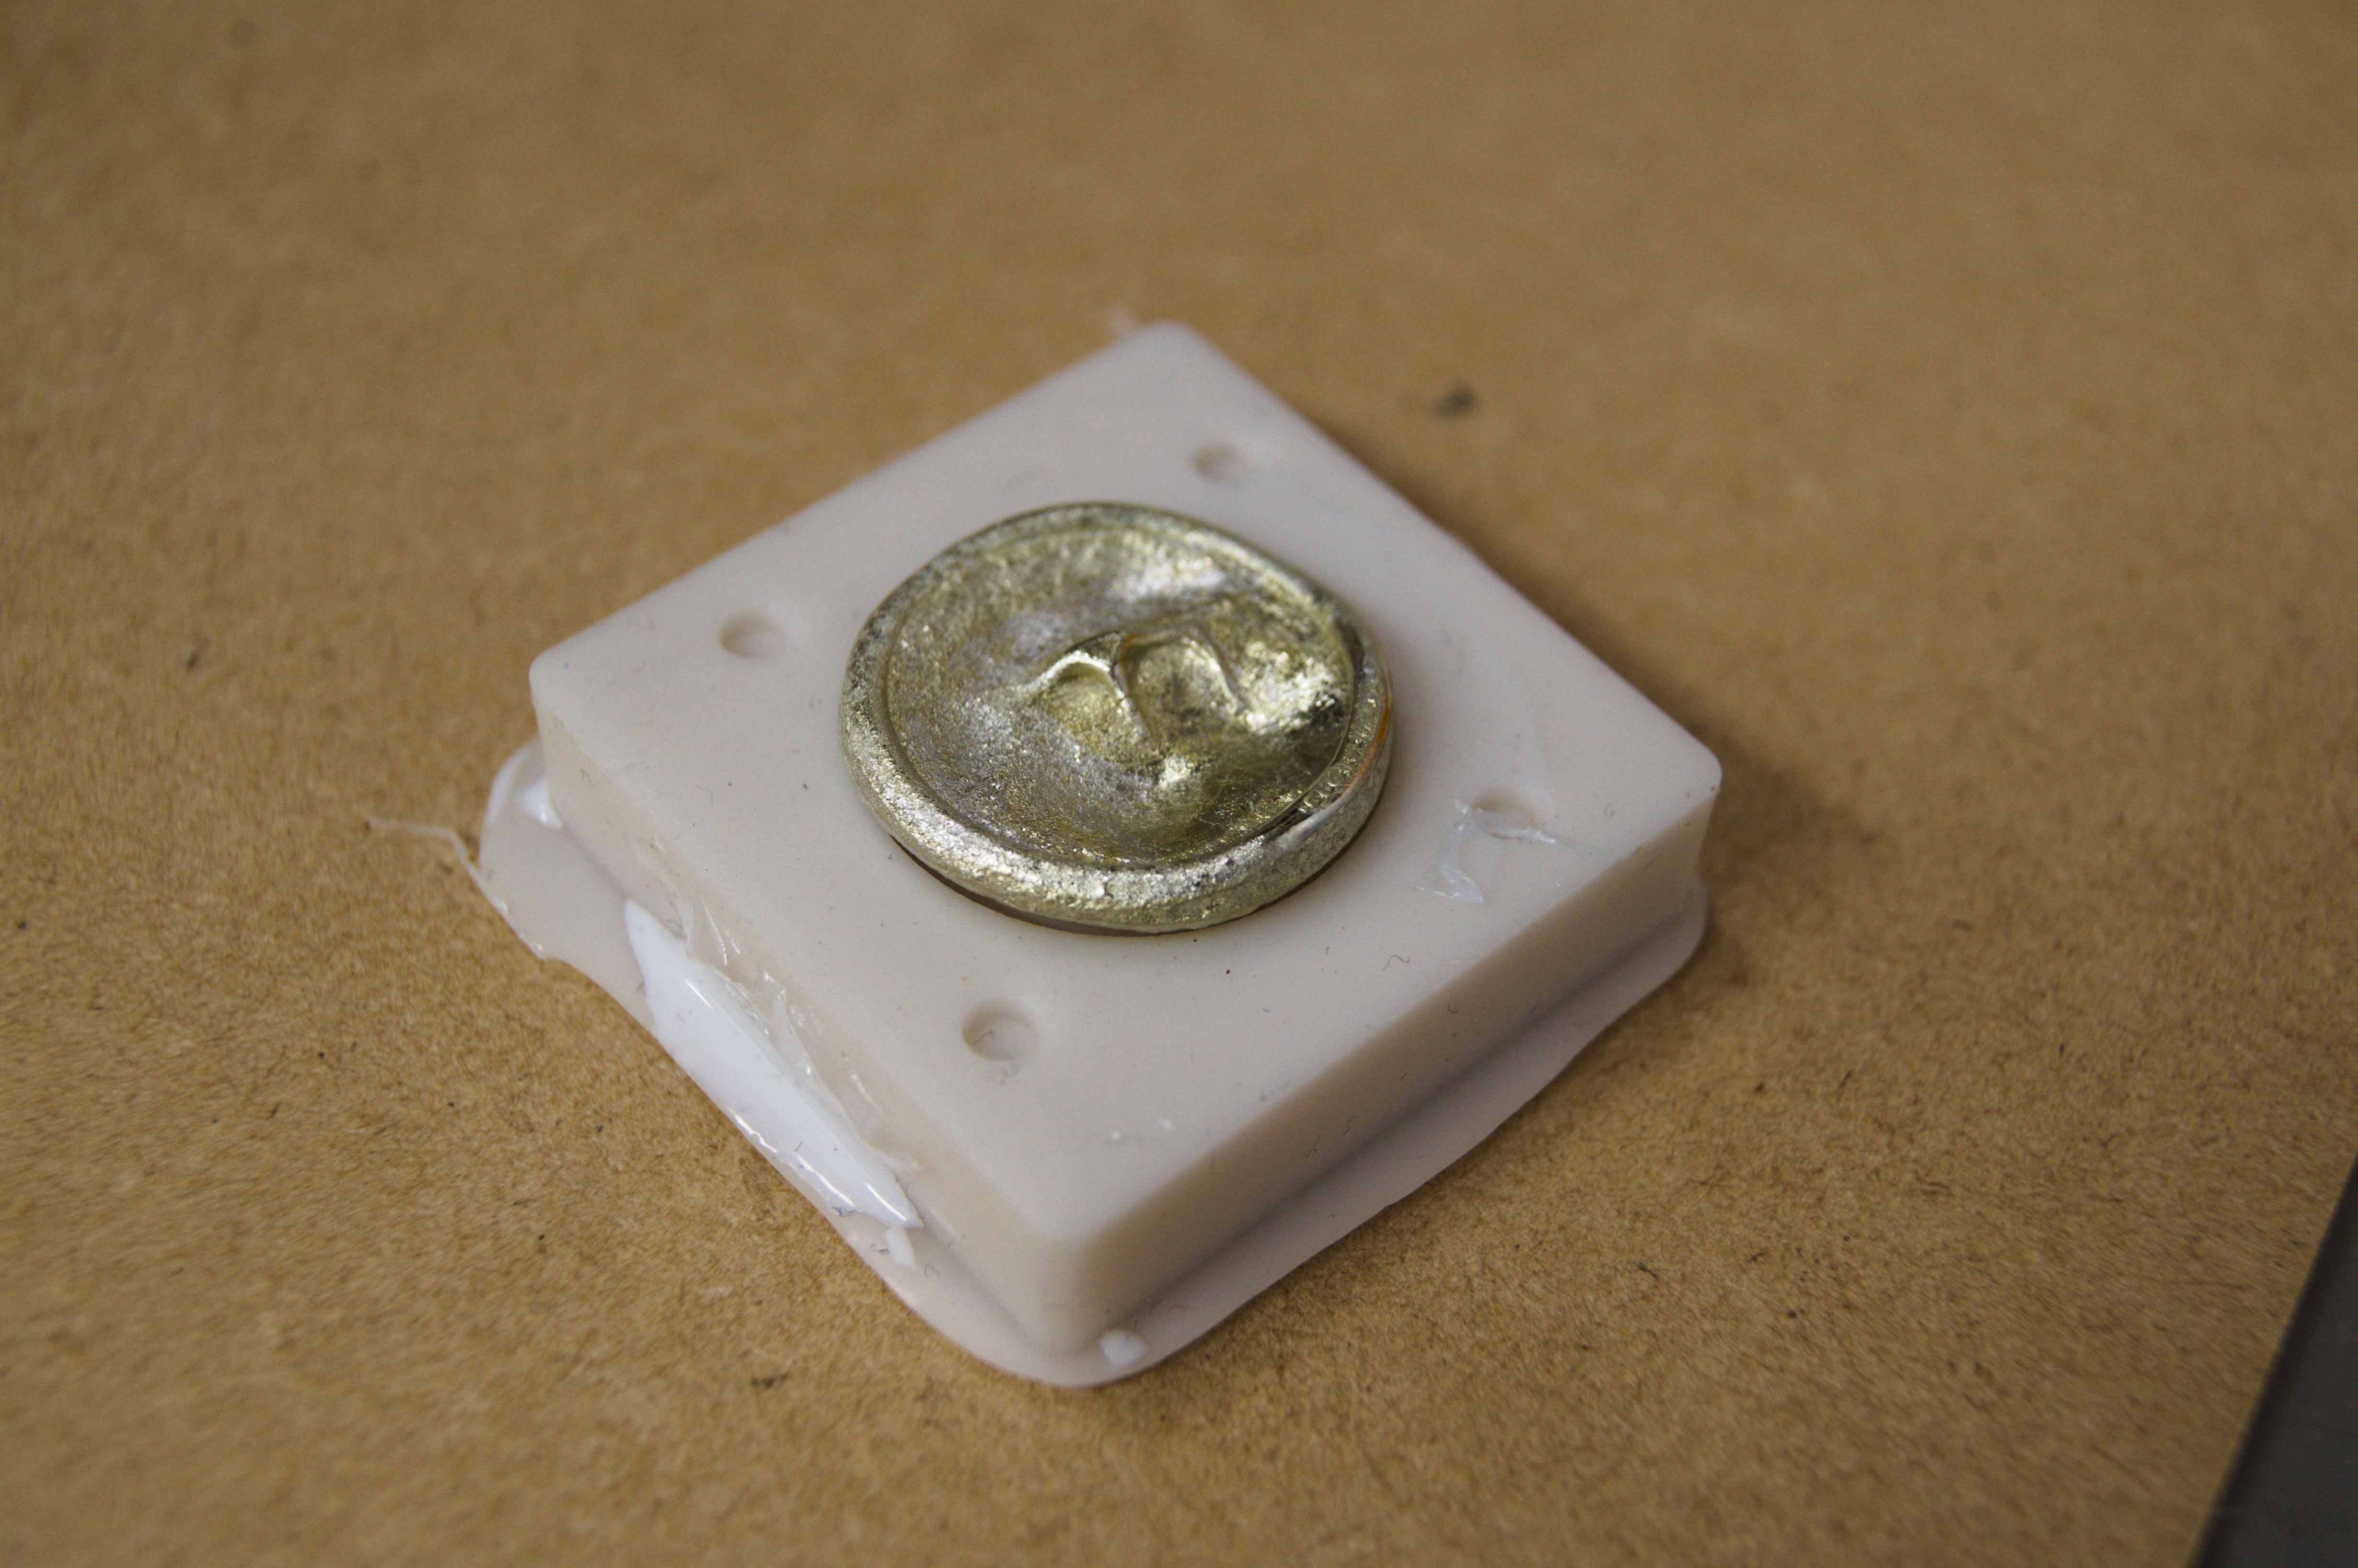
Probably it so called "Parrot mark on the forehead". Nevertheless, it was very interesting and because of this attempt I decided on my final project. We decided to cast some tin-antimony mixture, which melting point is 240 Celsius degrees. We could use Smooth-Sil 940 molds as this substance has melting point a bit above melting point of our alloy. We tried to make FabLab token once again.
This time there was no mixing. Just melting and pouring. Safety precautions: isolating gloves, eye protection, white robes, presence of adult.
|
|
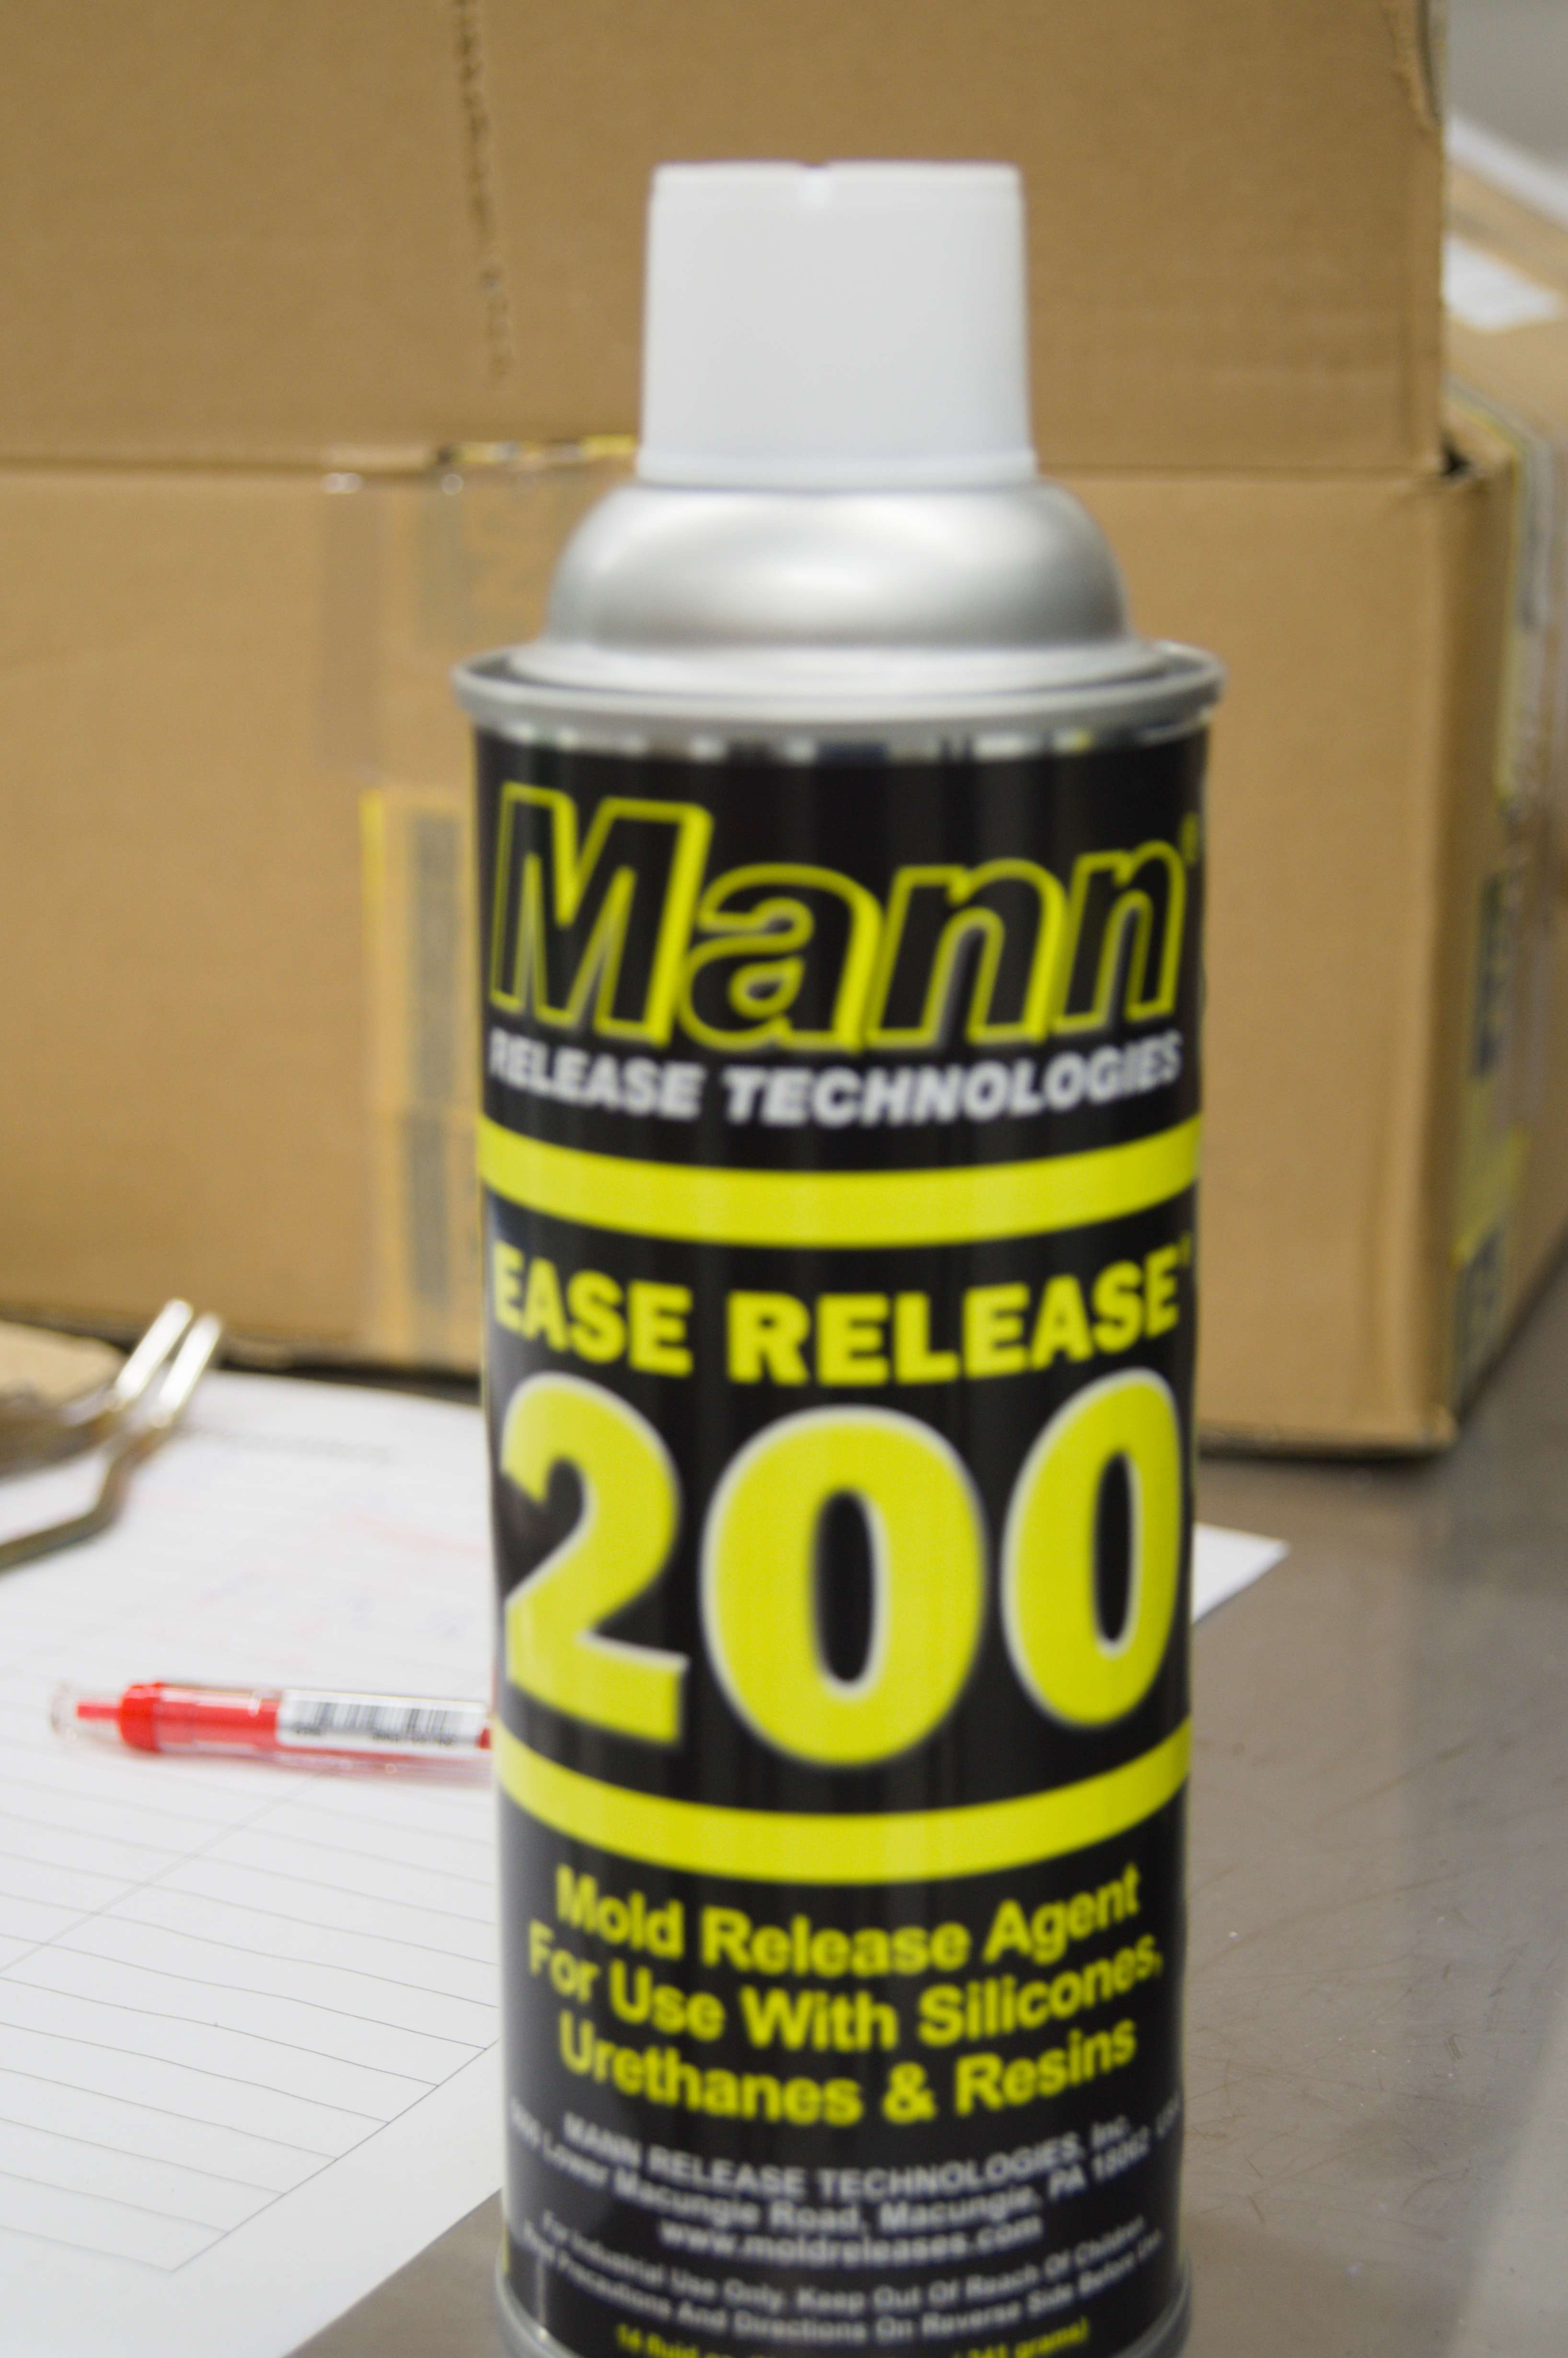
We were putting our trust in Mann 200, Mold release agent. Nevertheless, baby powder (talk) proven much better as the shape we achieved was rather poor.
 |
 |
Individual Assignment
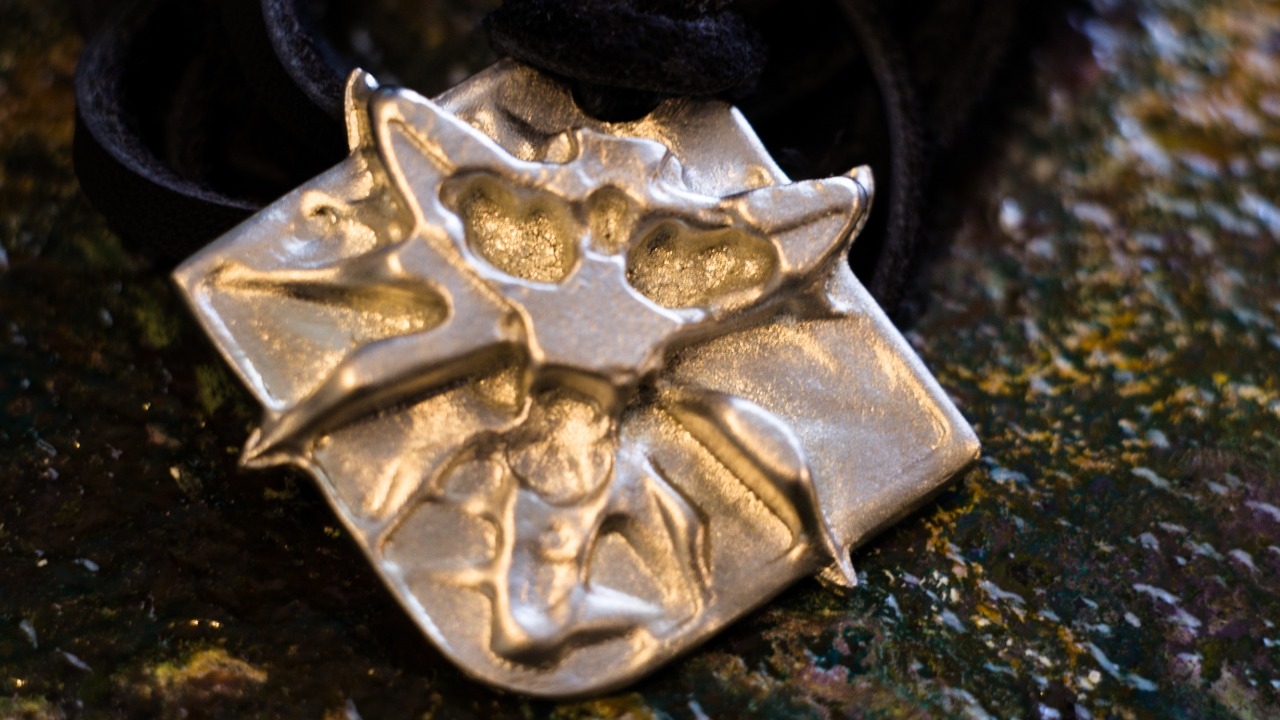
My goal was to cast Witcher medallion. Paying subscribers probably already noticed that I'm a fan of books and games.
I think it needs a bit of description. Once again I will quote, this time I will quote the books:
The witcher medallion is not only an insignia of our profession, it is also one of its tools. It has numerous useful capabilities that are accessible, of course, only to one who possesses the necessary knowledge and training. First of all, it reacts to the presence of sorcerous auras in the immediate surroundings, making us aware of nearby spell casting, active illusions, or magical creatures. It also warns the owner of sudden dangers, thus providing an additional moment to react. Keep in mind, though, that the medallion is not infallible. A very strong magical aura, such as those found in Places of Power or during the solstices, can provoke aberrant reactions. In large cities, where people widely use simple magical amulets or sorcerous alarm systems to protect their homes, coin, or ruttish wives, the medallion can also behave abnormally.
-Vesemir, The World of the Witcher
Designing
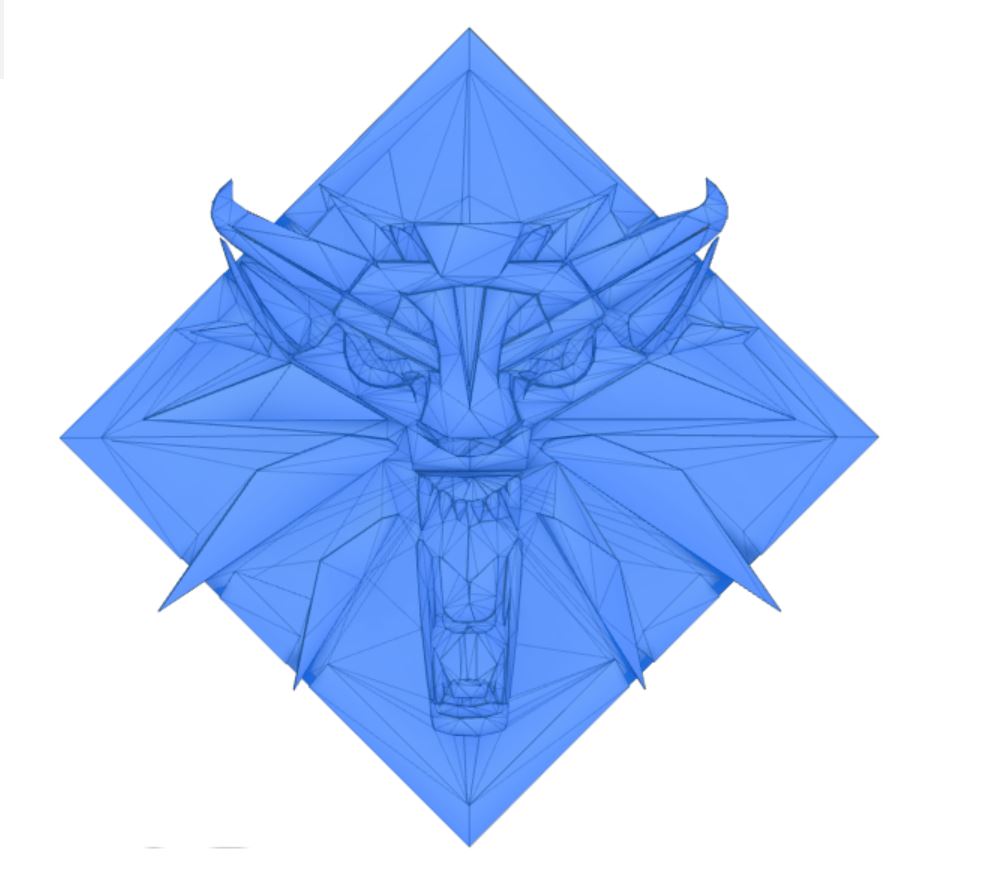
Once again Fusion 360 was the main tool during creating the mold. My designing skills were not enough design medalion thus I decided to use open source projects with free licensing. I simply used this web page. There are plenty of different designs. I chosen, one, which gives biggest chance for success by molding not 3D printing. I downloaded object as meshbody (of triangles).
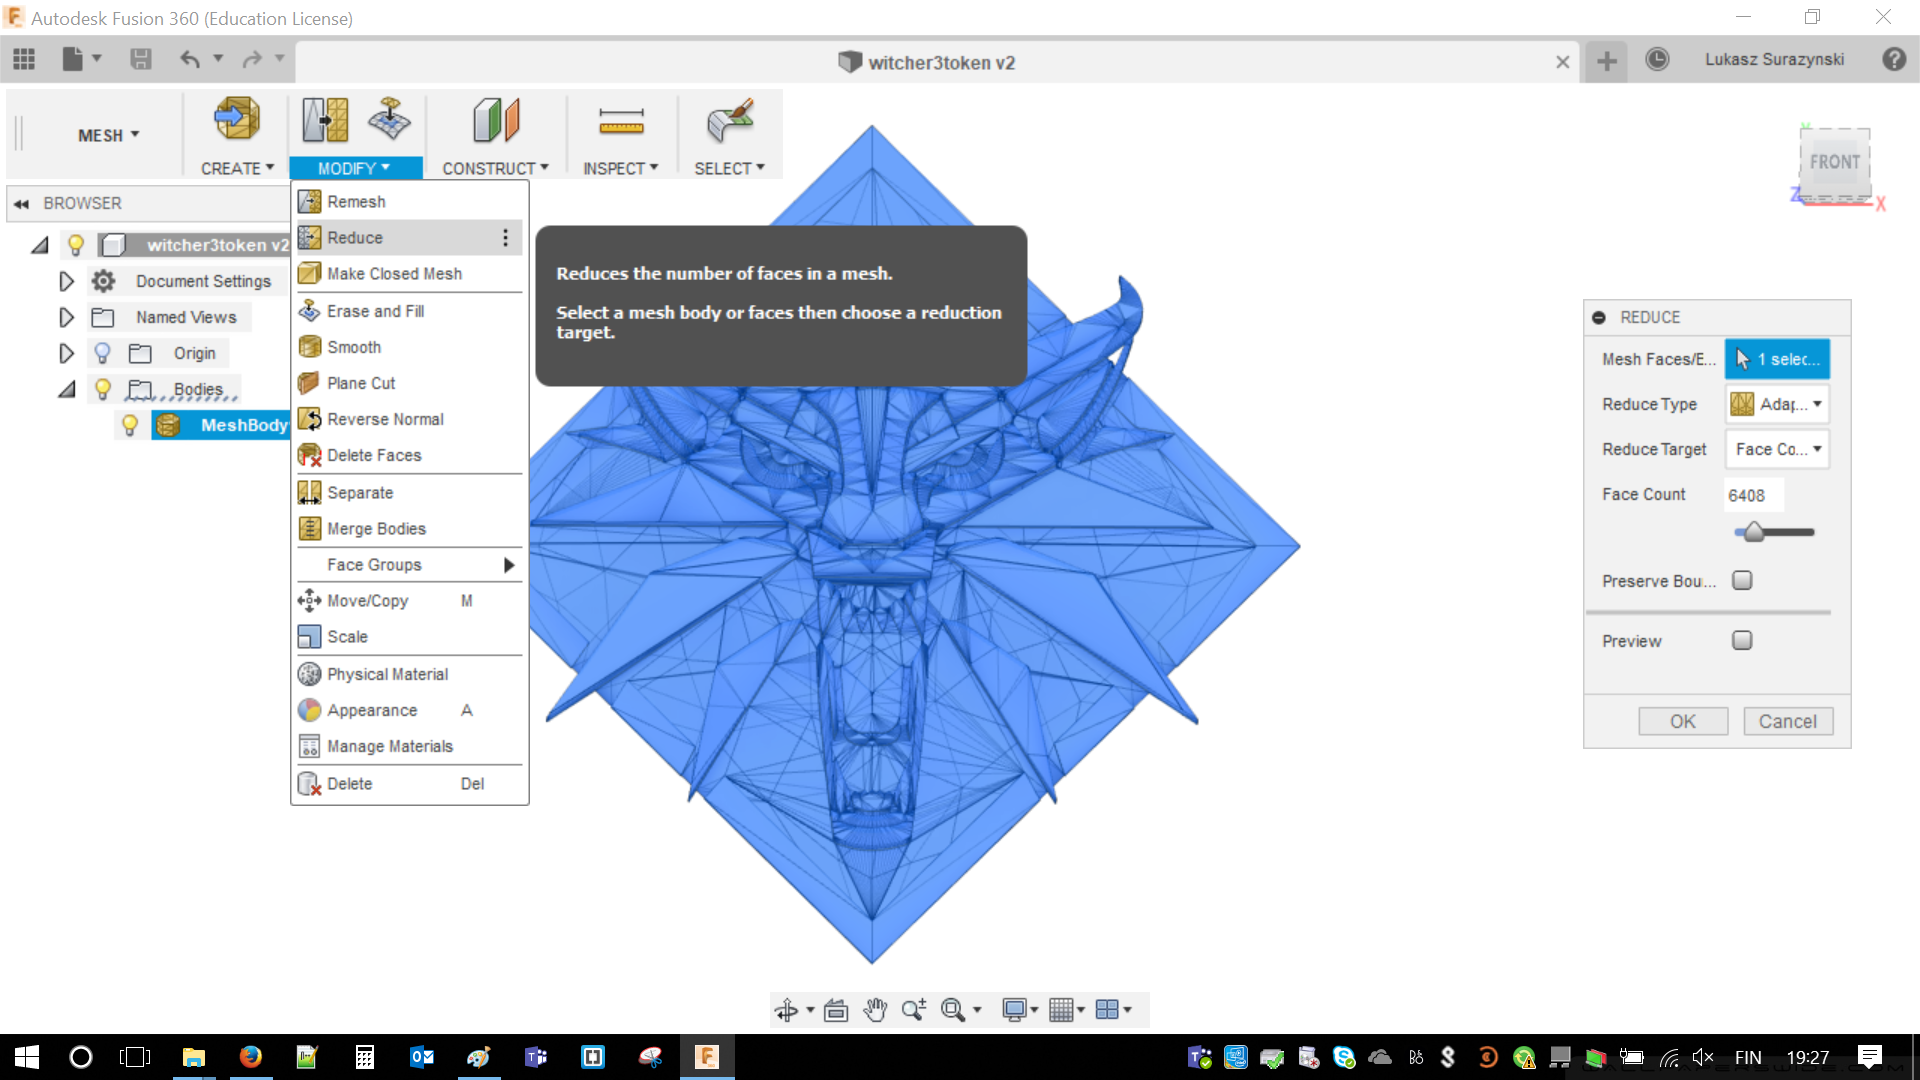
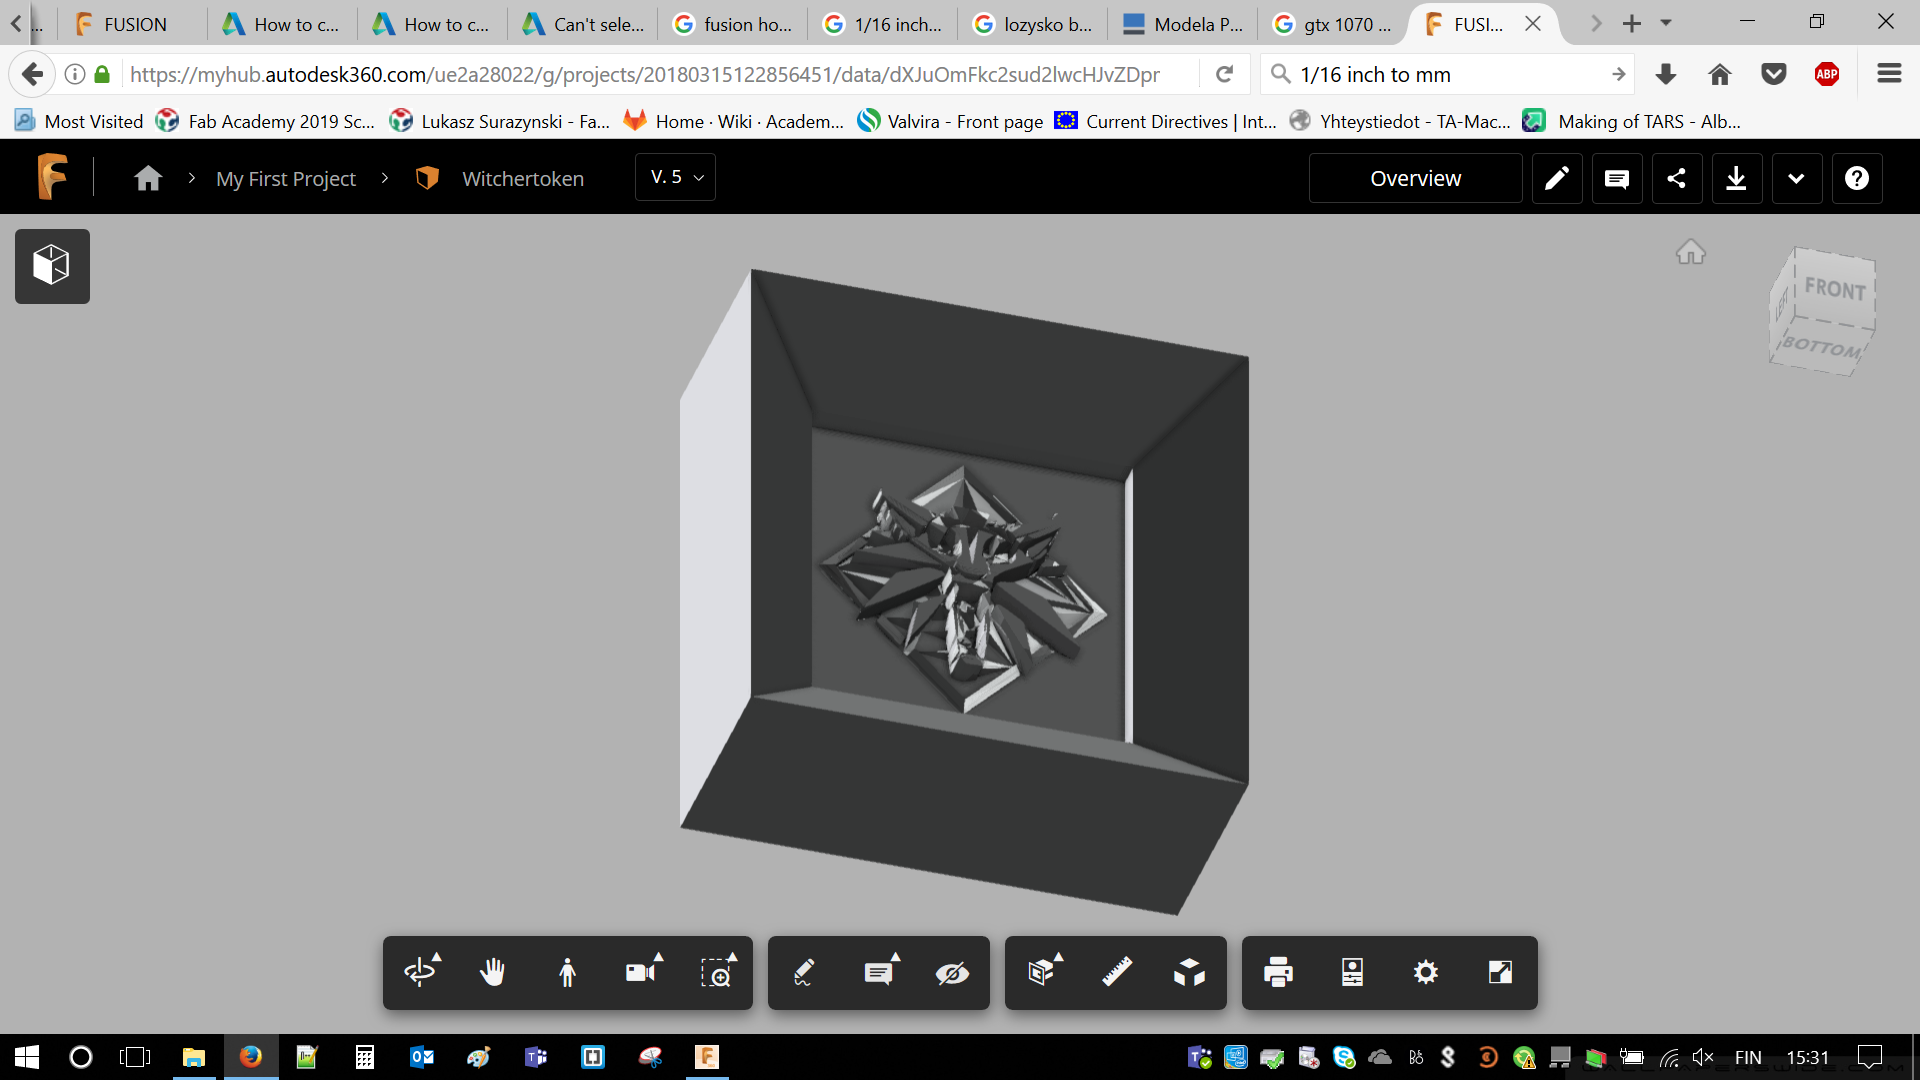
- This is how medallion looked in the beginning. I was amazed how well-designed it was. However, it was way too big (75 mm of diameter). In the meantime I reduced amount of triangles to 4000 using MODIFY/Reduce

It has to be rescaled. First of all MESH environment has to be chosen, as all the operations will be made on meshbody. Then I have chosen MODIFY/Scale in order to make it almost twice smaller.
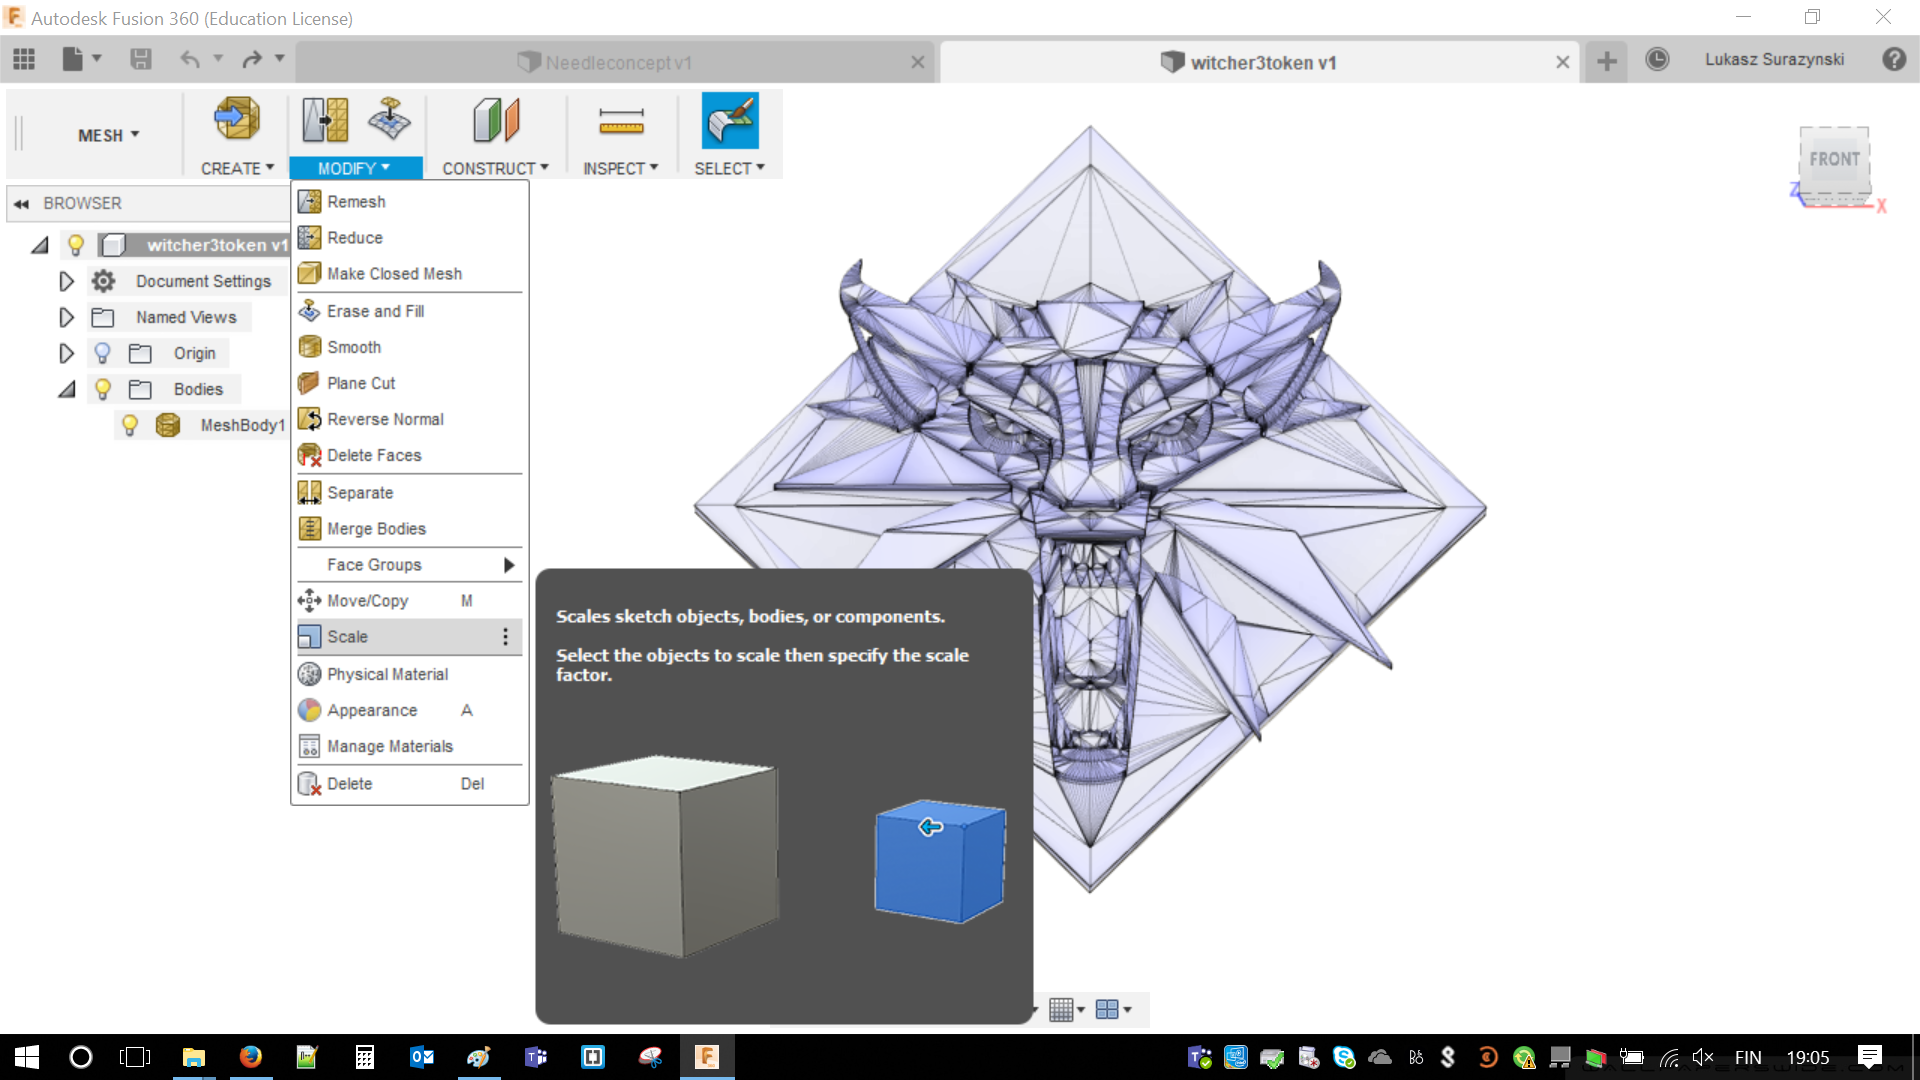
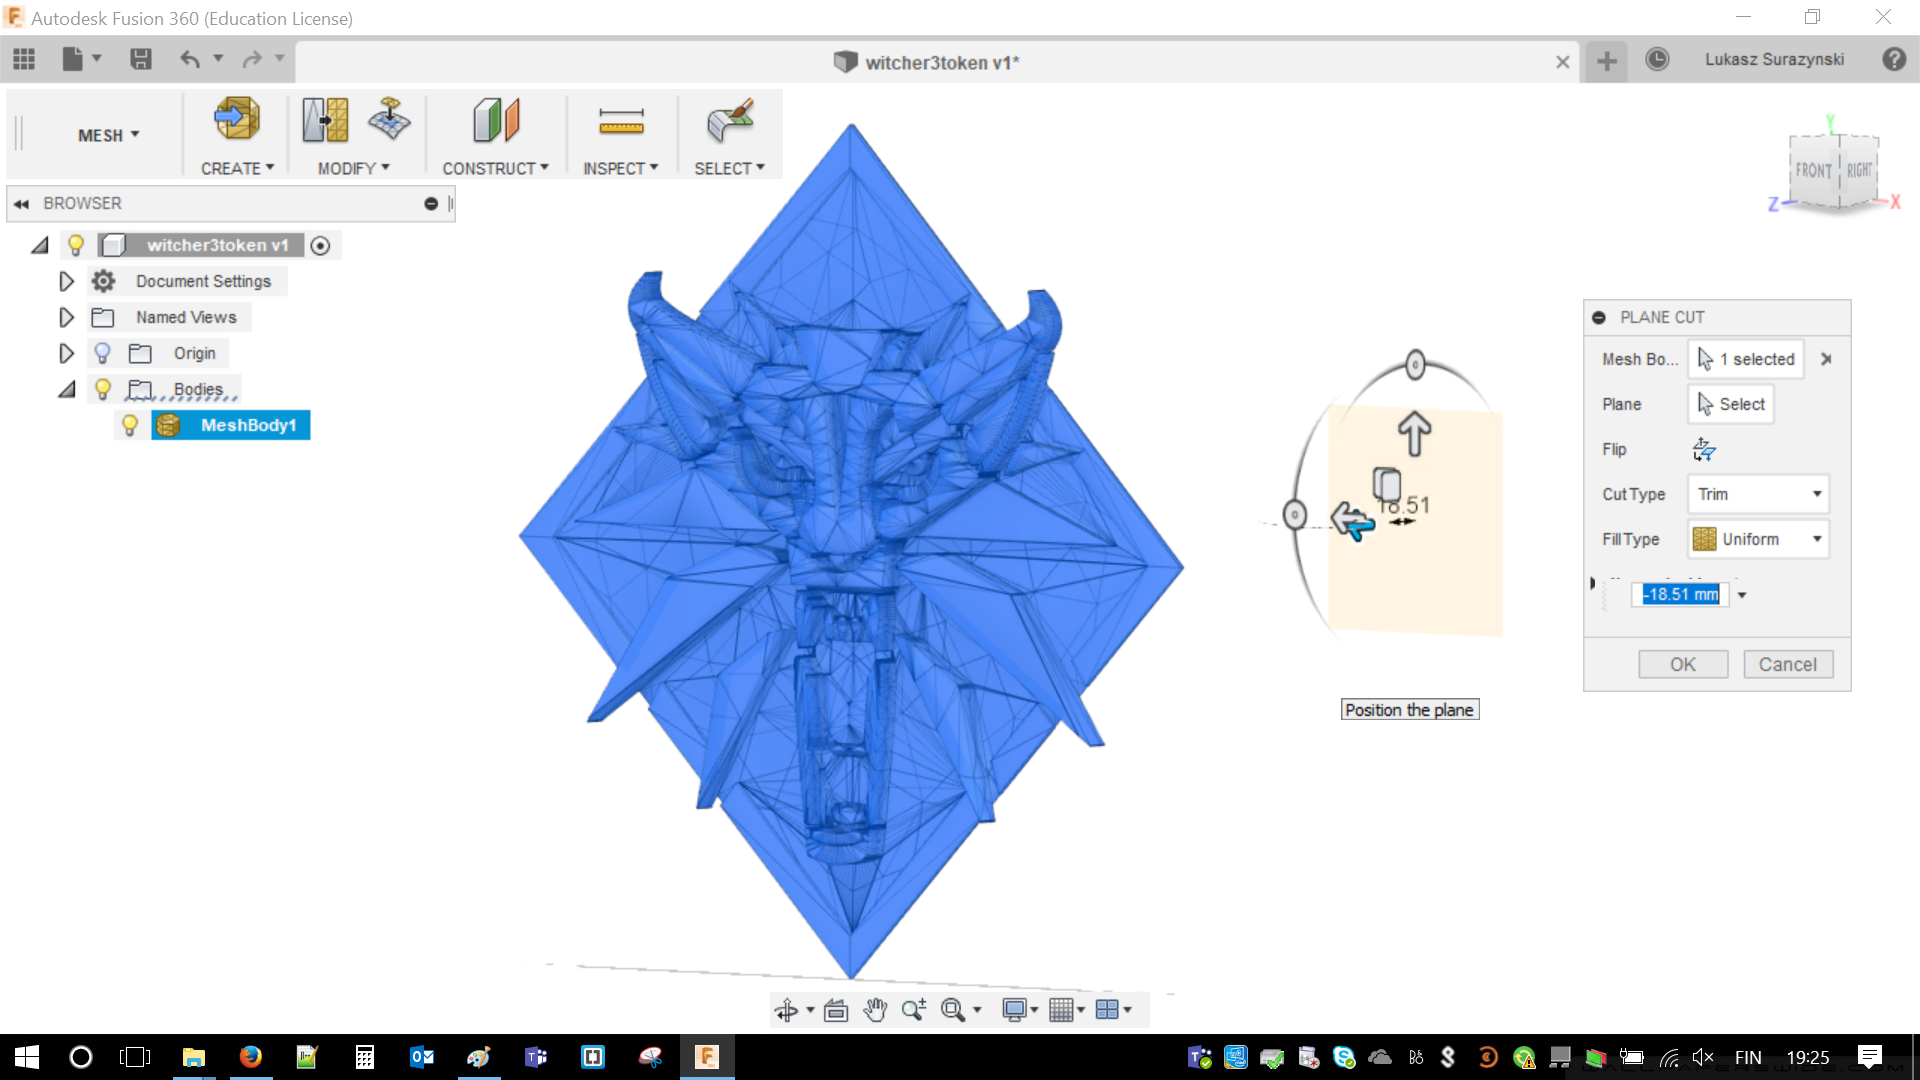
For a moment I had the idea to MODIFY/Plane cut in order to remove diamond-shape background but I decided not to. Still medallion was to thin. Once again MODIFY/Scale was used. I just pulled the medallion to make it about 5 mm thick.
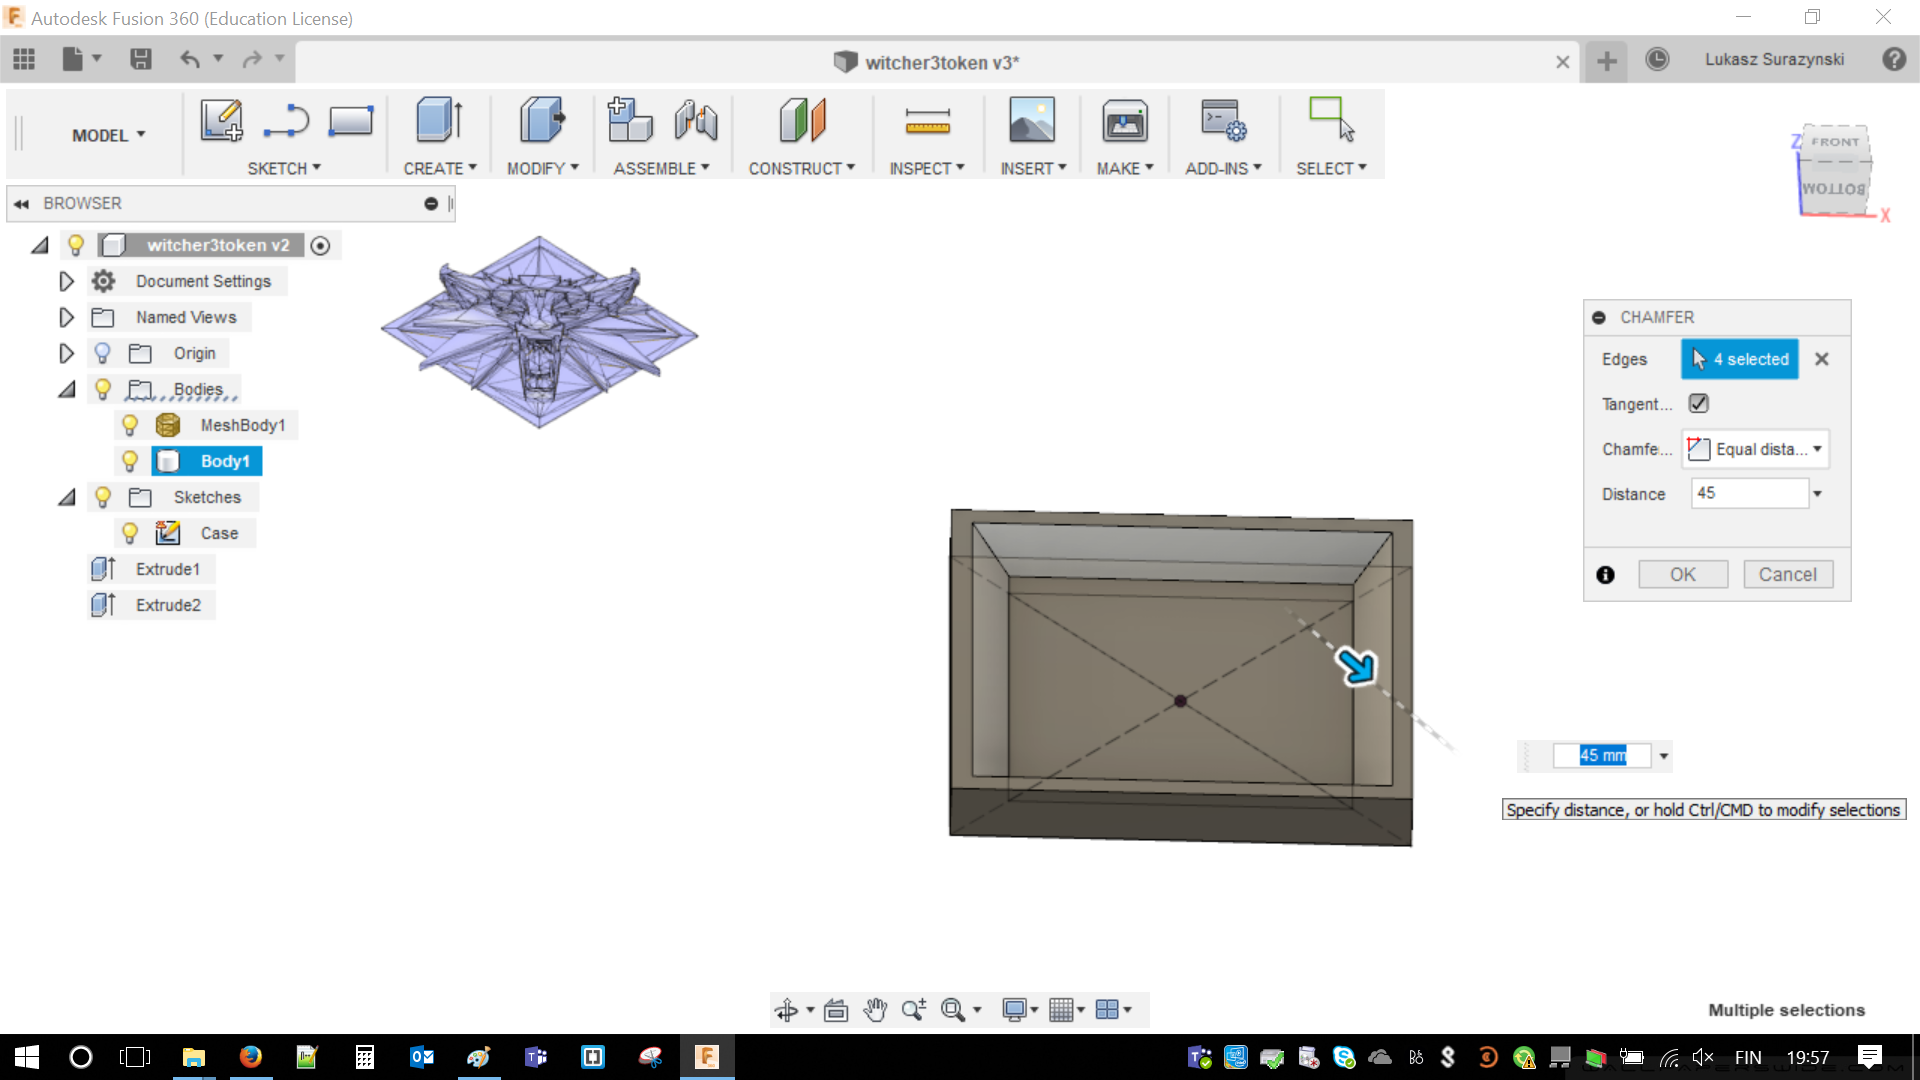
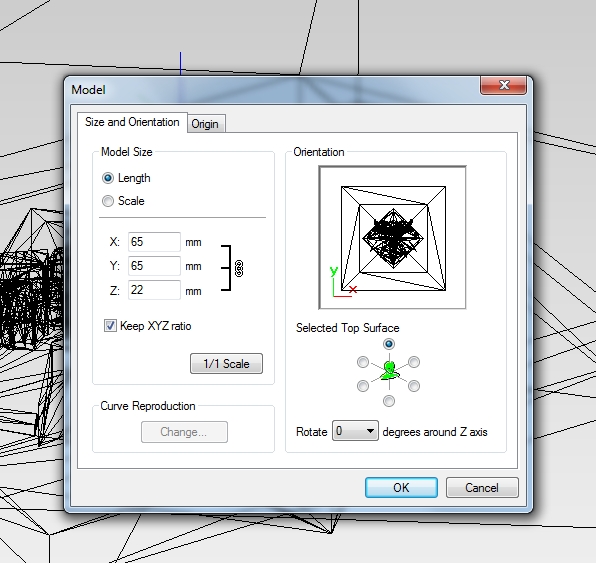
Everything went pretty easy and simple. I could design the box. I had to return to MANUFACTURE tab and using standard tools create cube. I carved it and create MODIFY/Chamfer in order to make it more accessible for the milling bit. At this point I didn't know, which size of milling bit I will use. Angle was quite acute.
It was time to place the medallion inside the wall with Move command or pressing (M) on the keyboard. I made it slightly overlapping inside so the ears of the wolf will touch the bottom. There are slopping walls included as this is one of the limitations of the drill. This way I ensured that milling bit won't broke and will reach every single millimeter and corner of my design. Then I exported file in STL format using File/View Details on Web. This method gives more freedom in which save the file.
Time to make hands dirty!
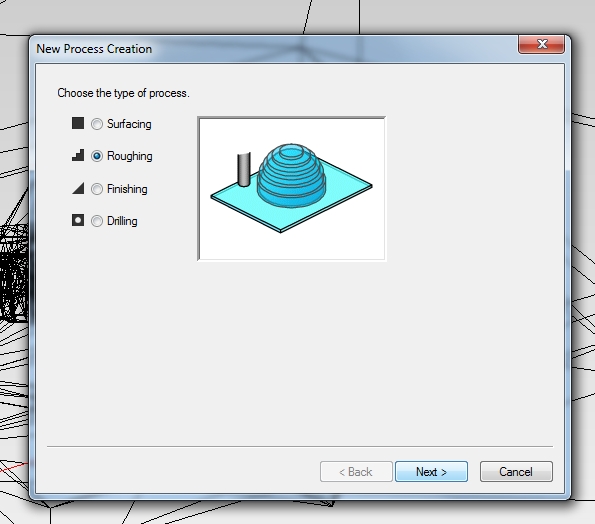
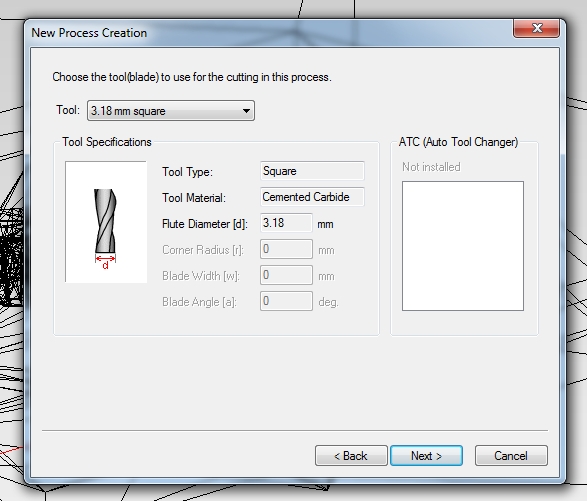
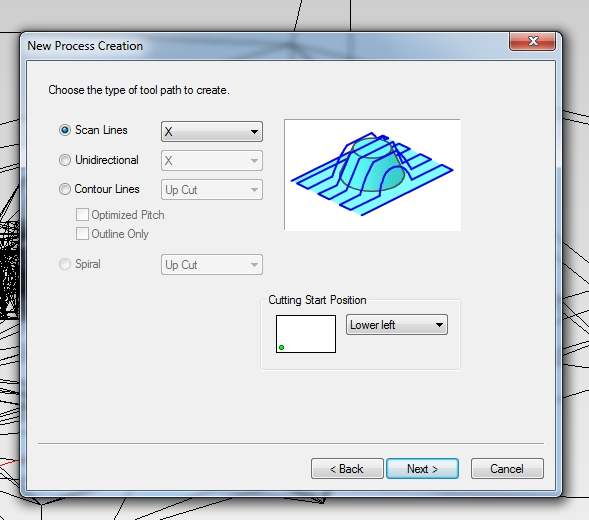
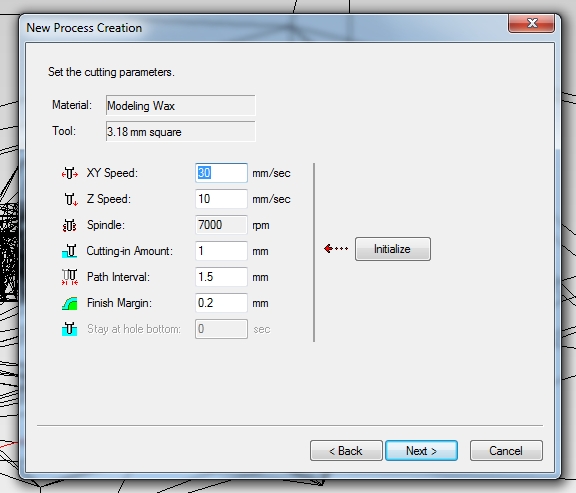
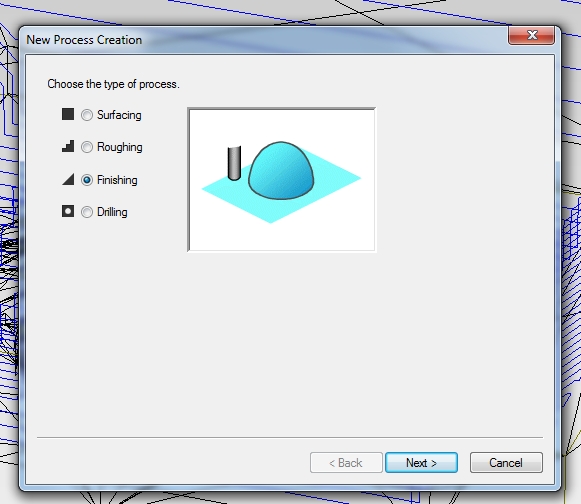
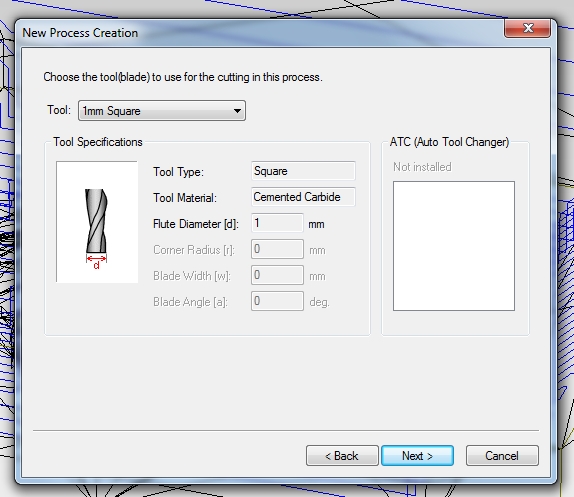
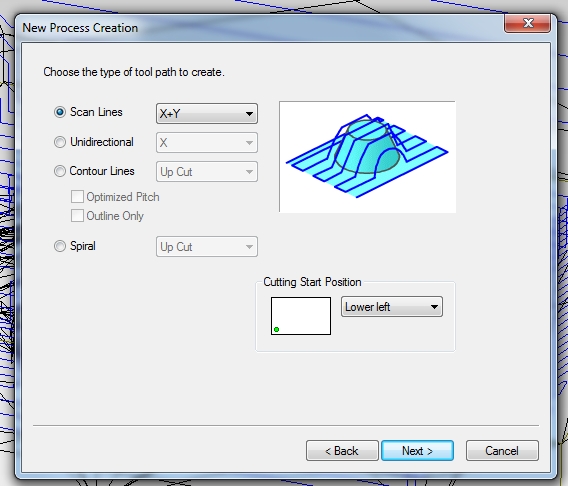
The software for milling is MODELA. This is Freeware environment. If everything will go right VPanel will be only used to move the head and change milling bit. MODELA will change STLs into format readable by SRM-20 milling machine. Process is very simple and there is a lot of OK buttons, has to be clicked but previously Modeling Wax has to be chosen in the options.
 |
 |
 |
 |
 |
 |
 |
 |
 |
 |
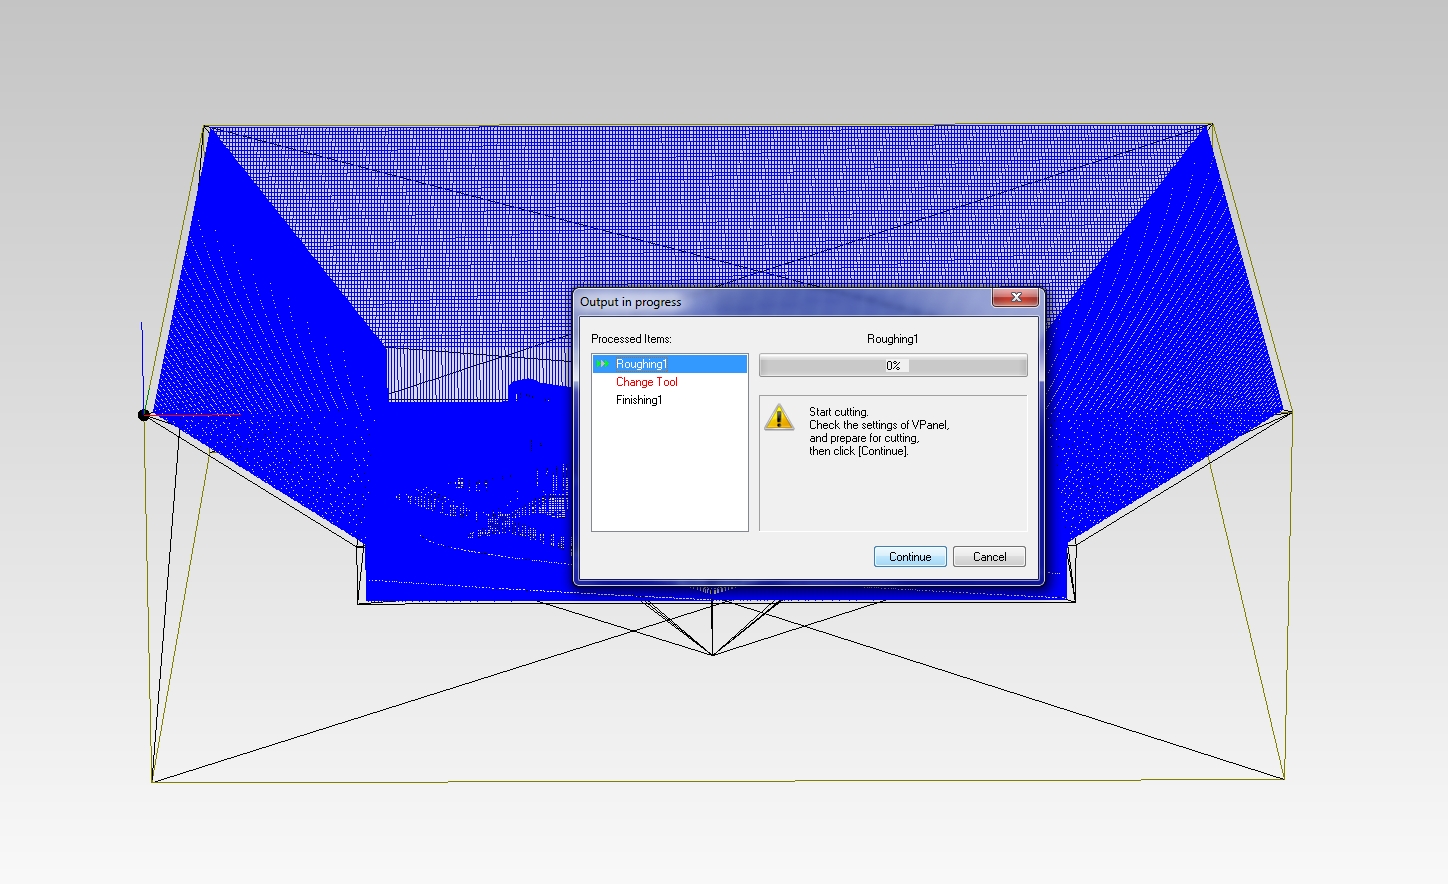
After going trough the process and confirming it, this window should be visible. It is describing all the programmed steps. It also inform about changing the milling bit (after successful roughing). Requires confirmation after performing the change.
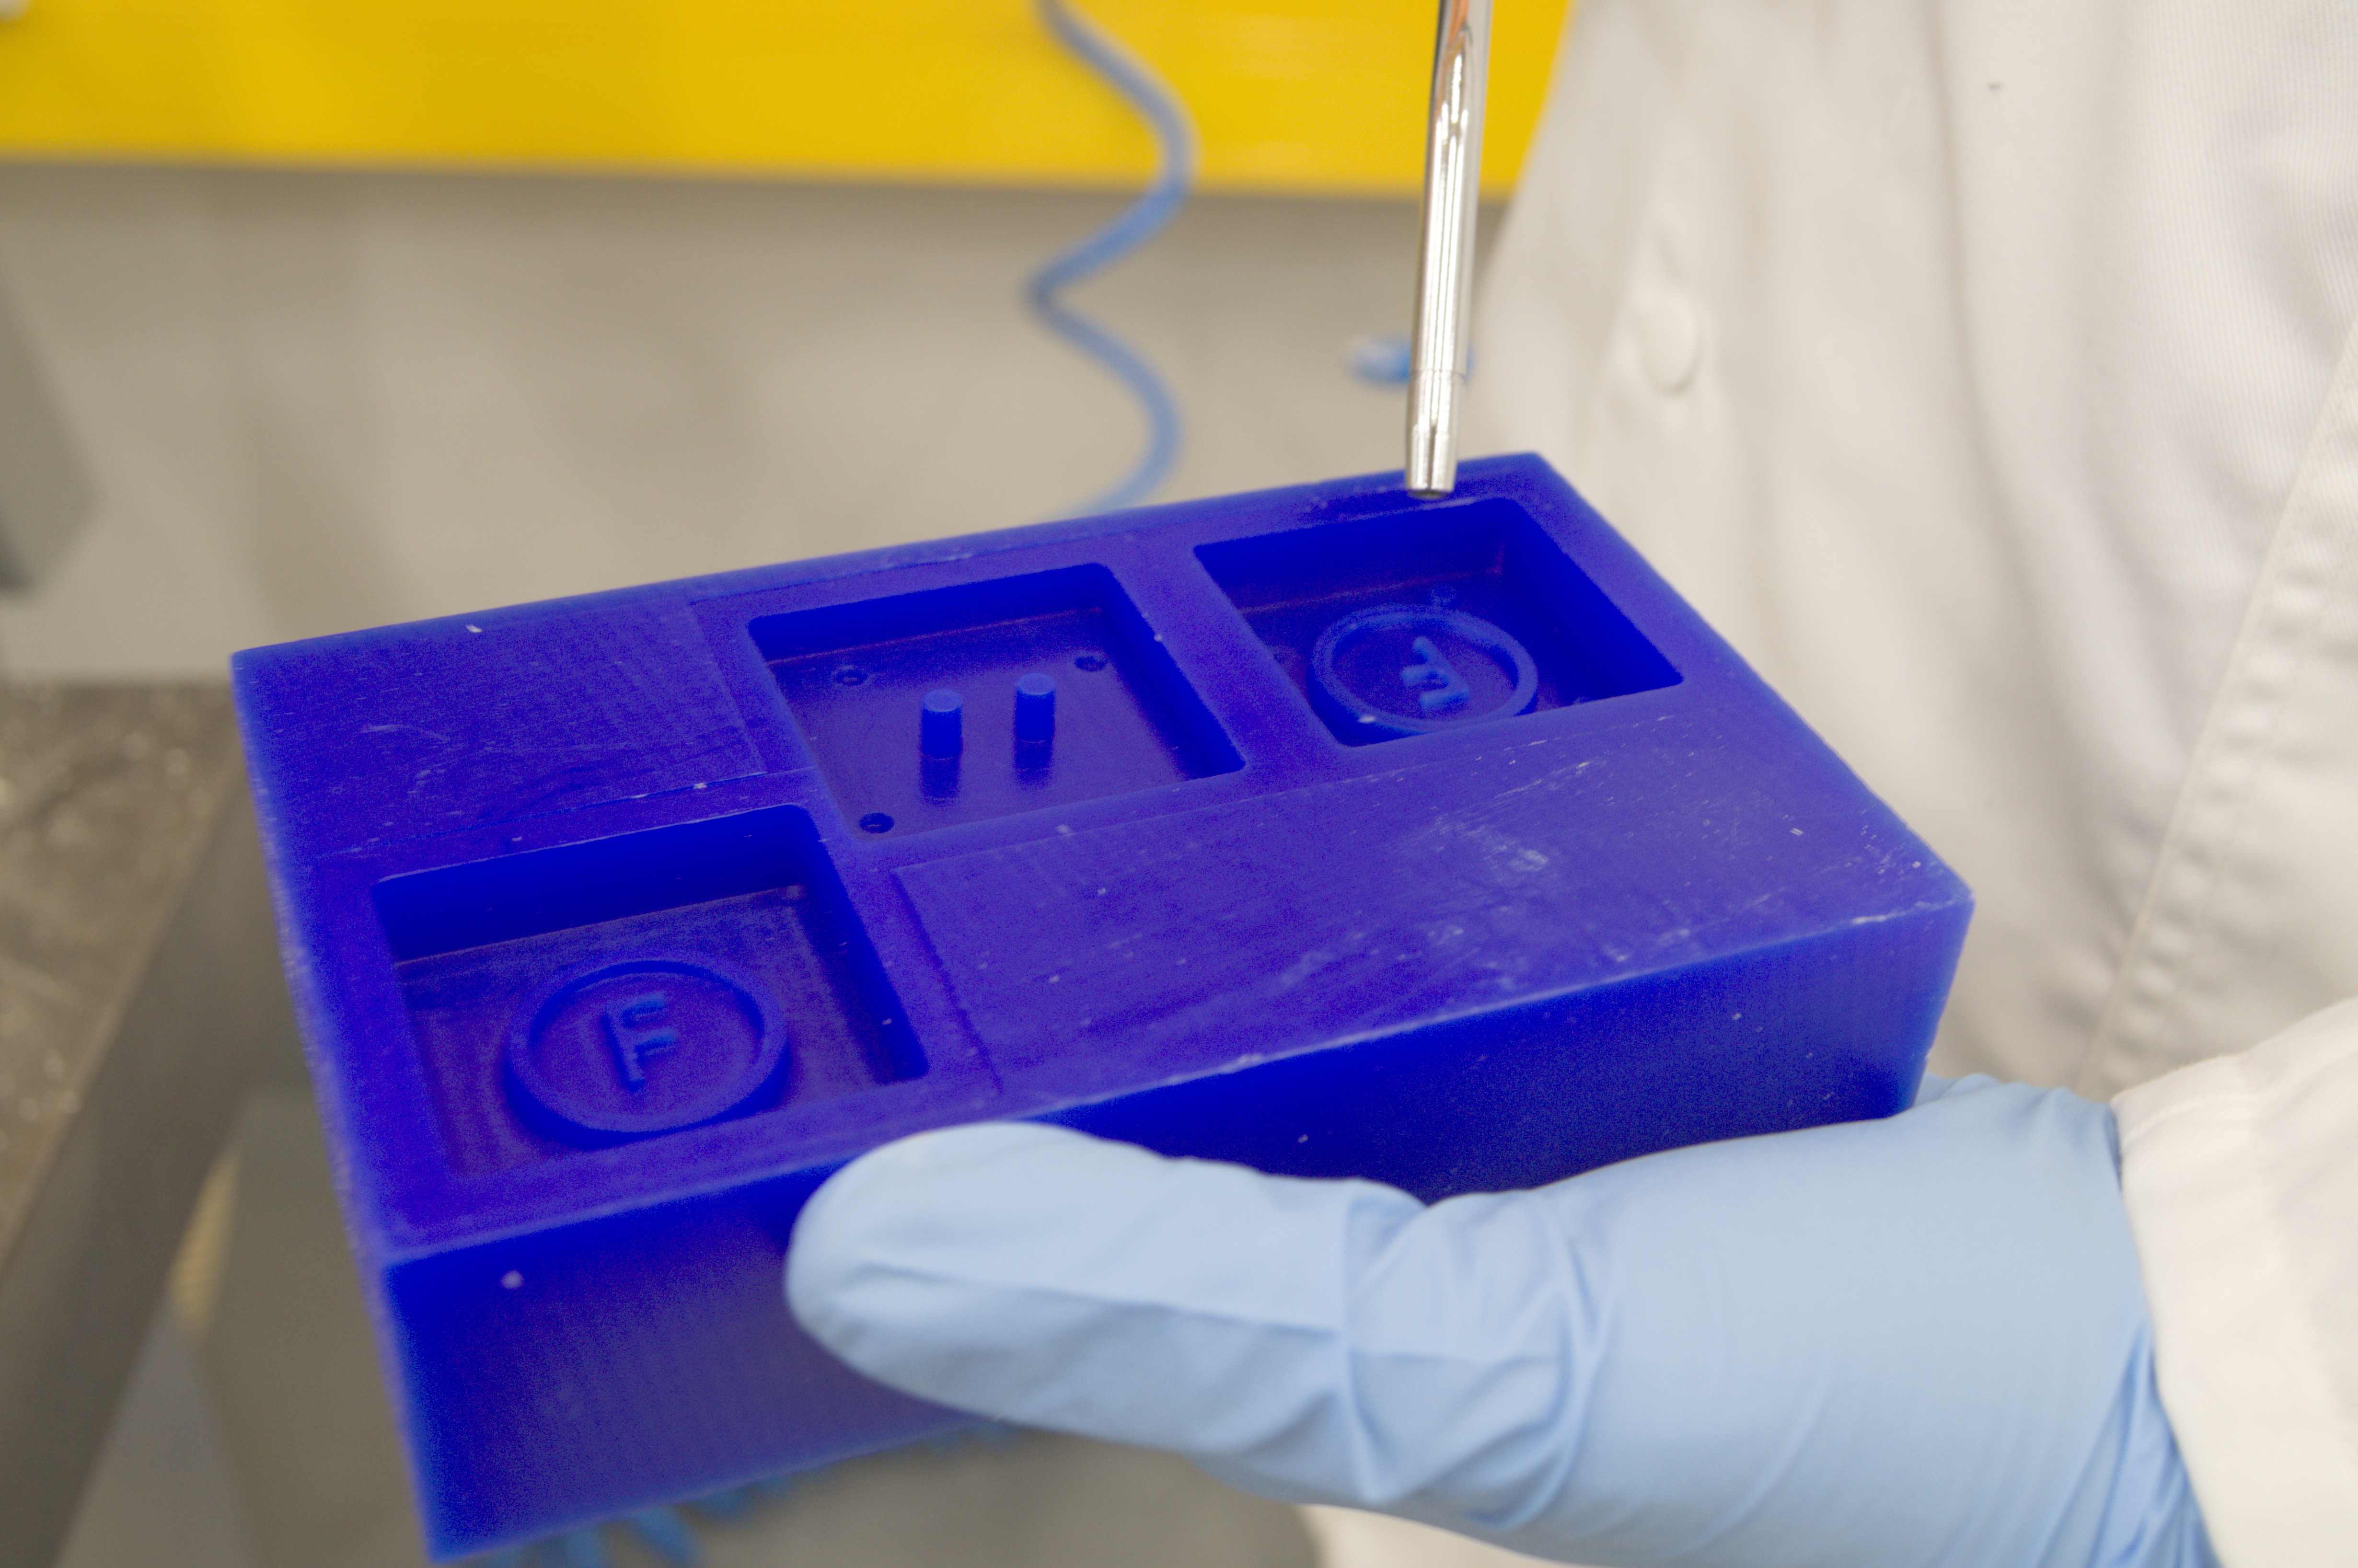
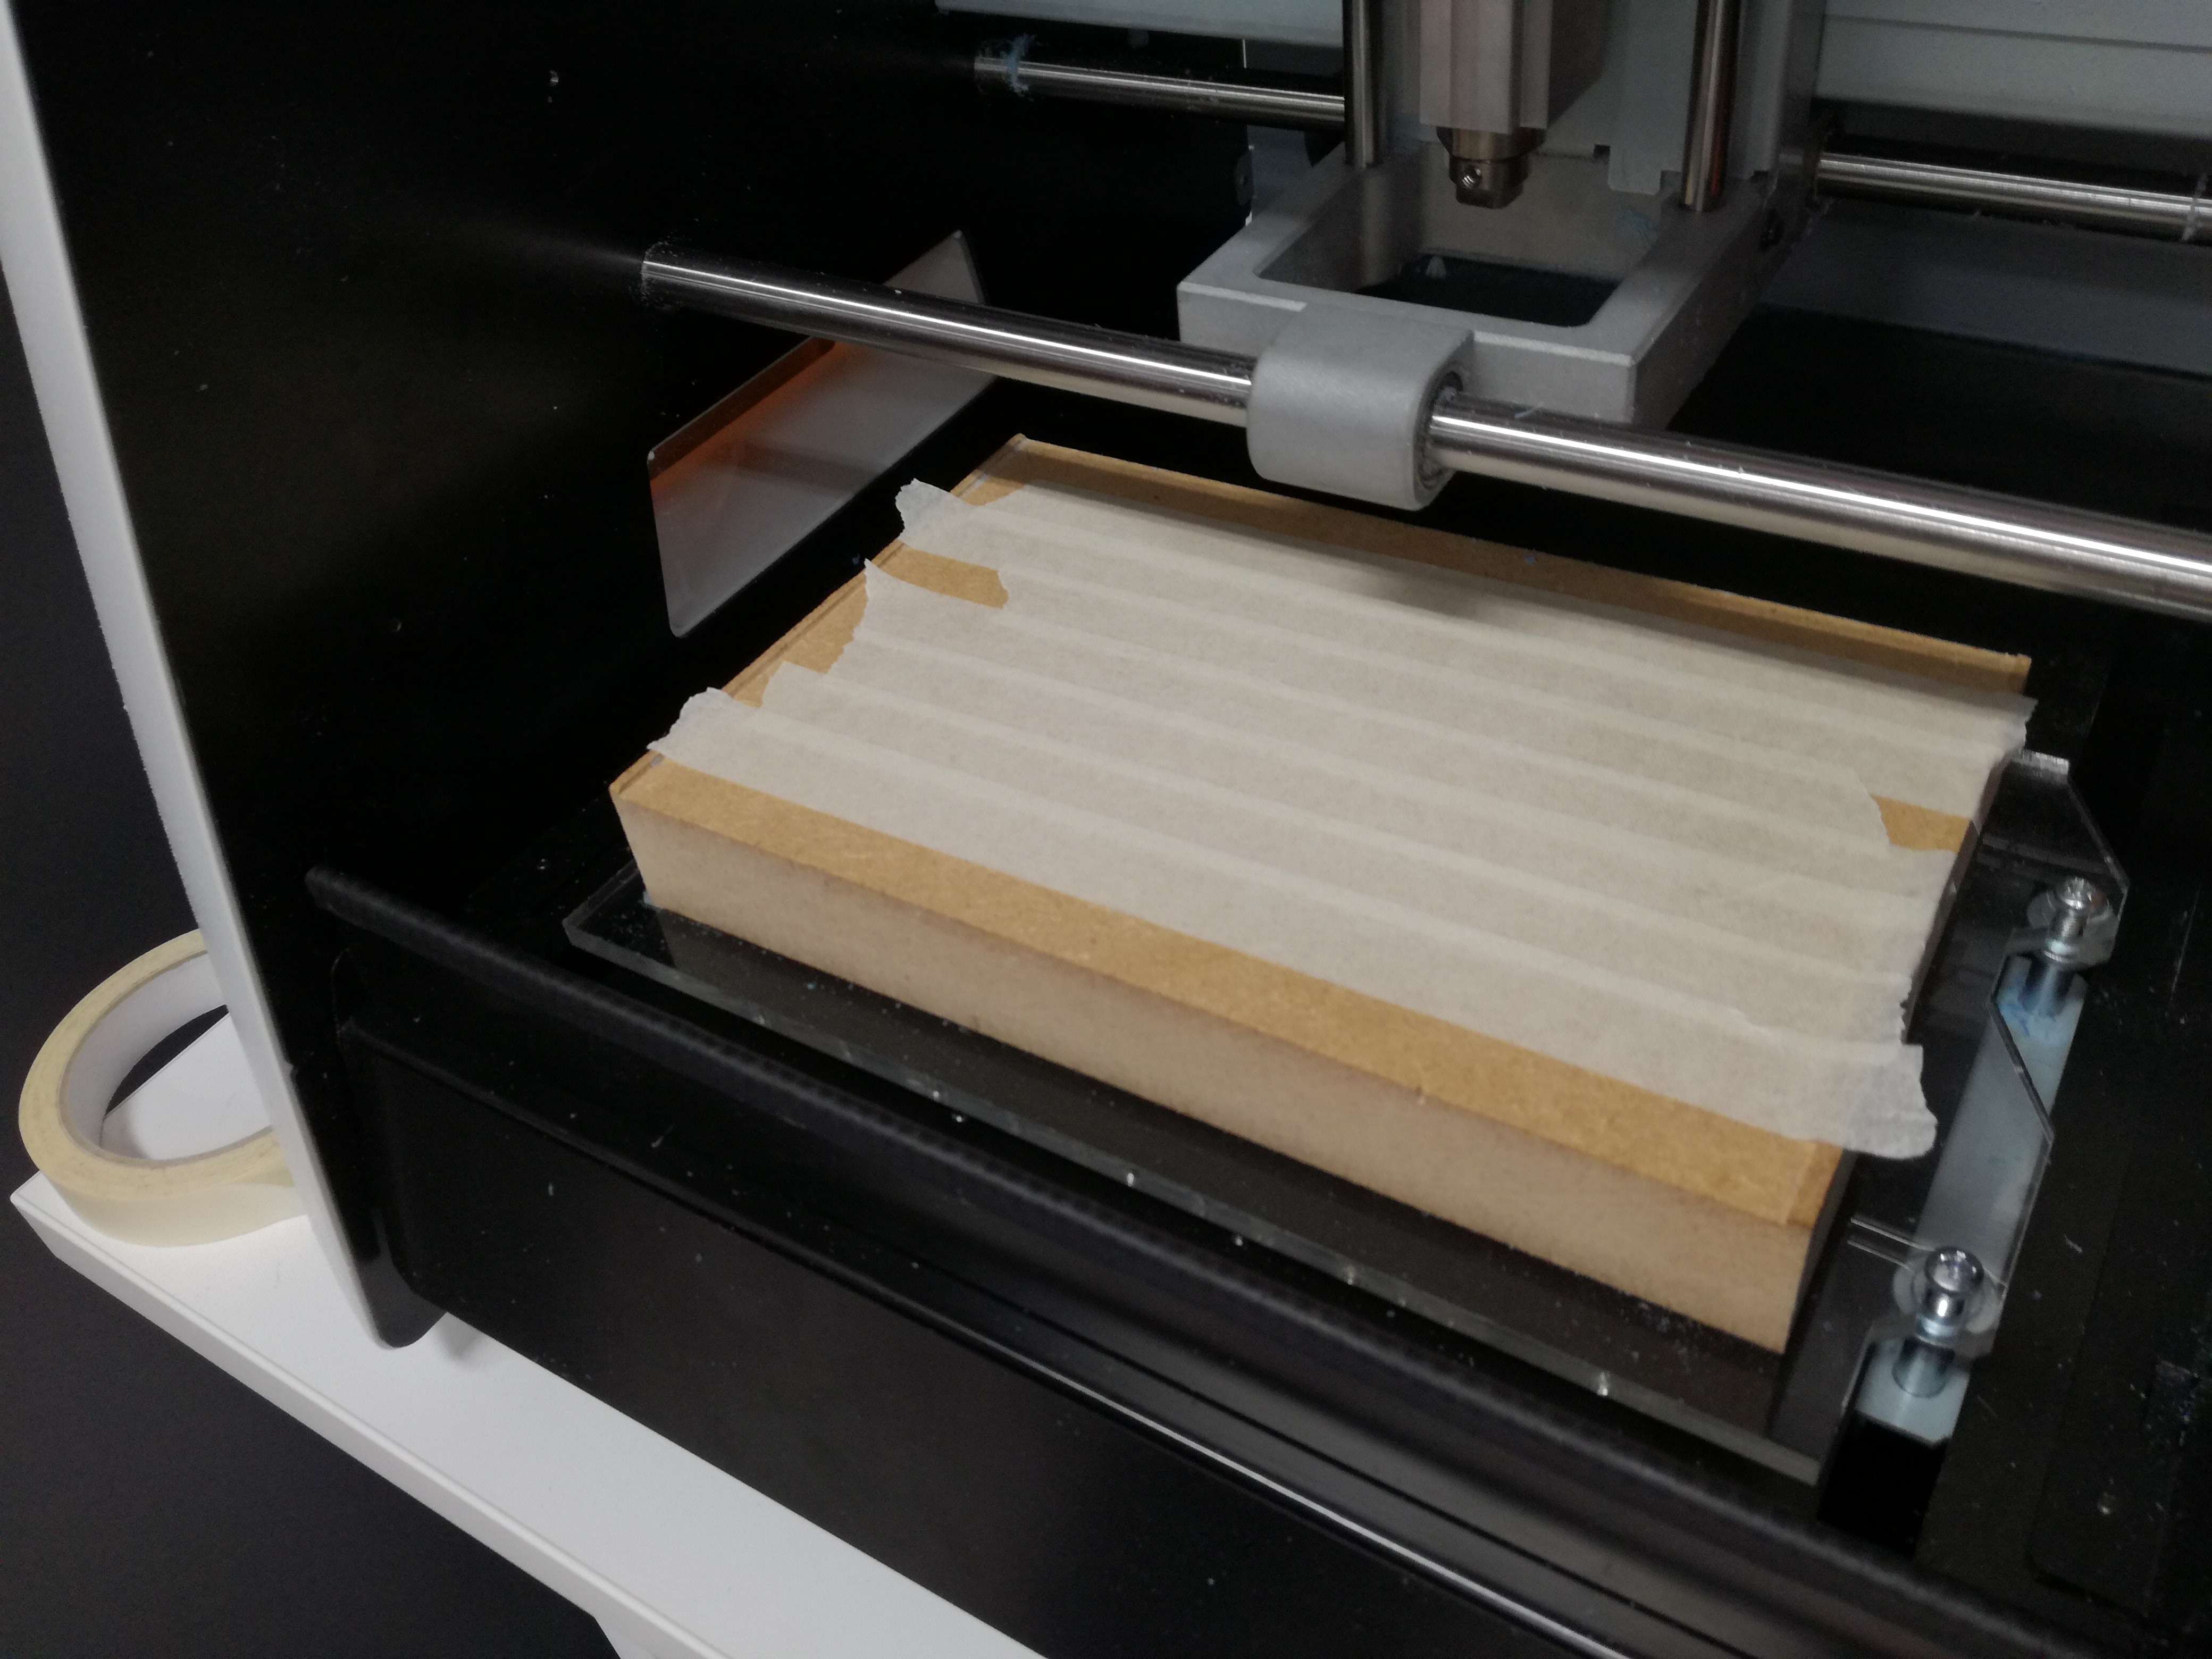
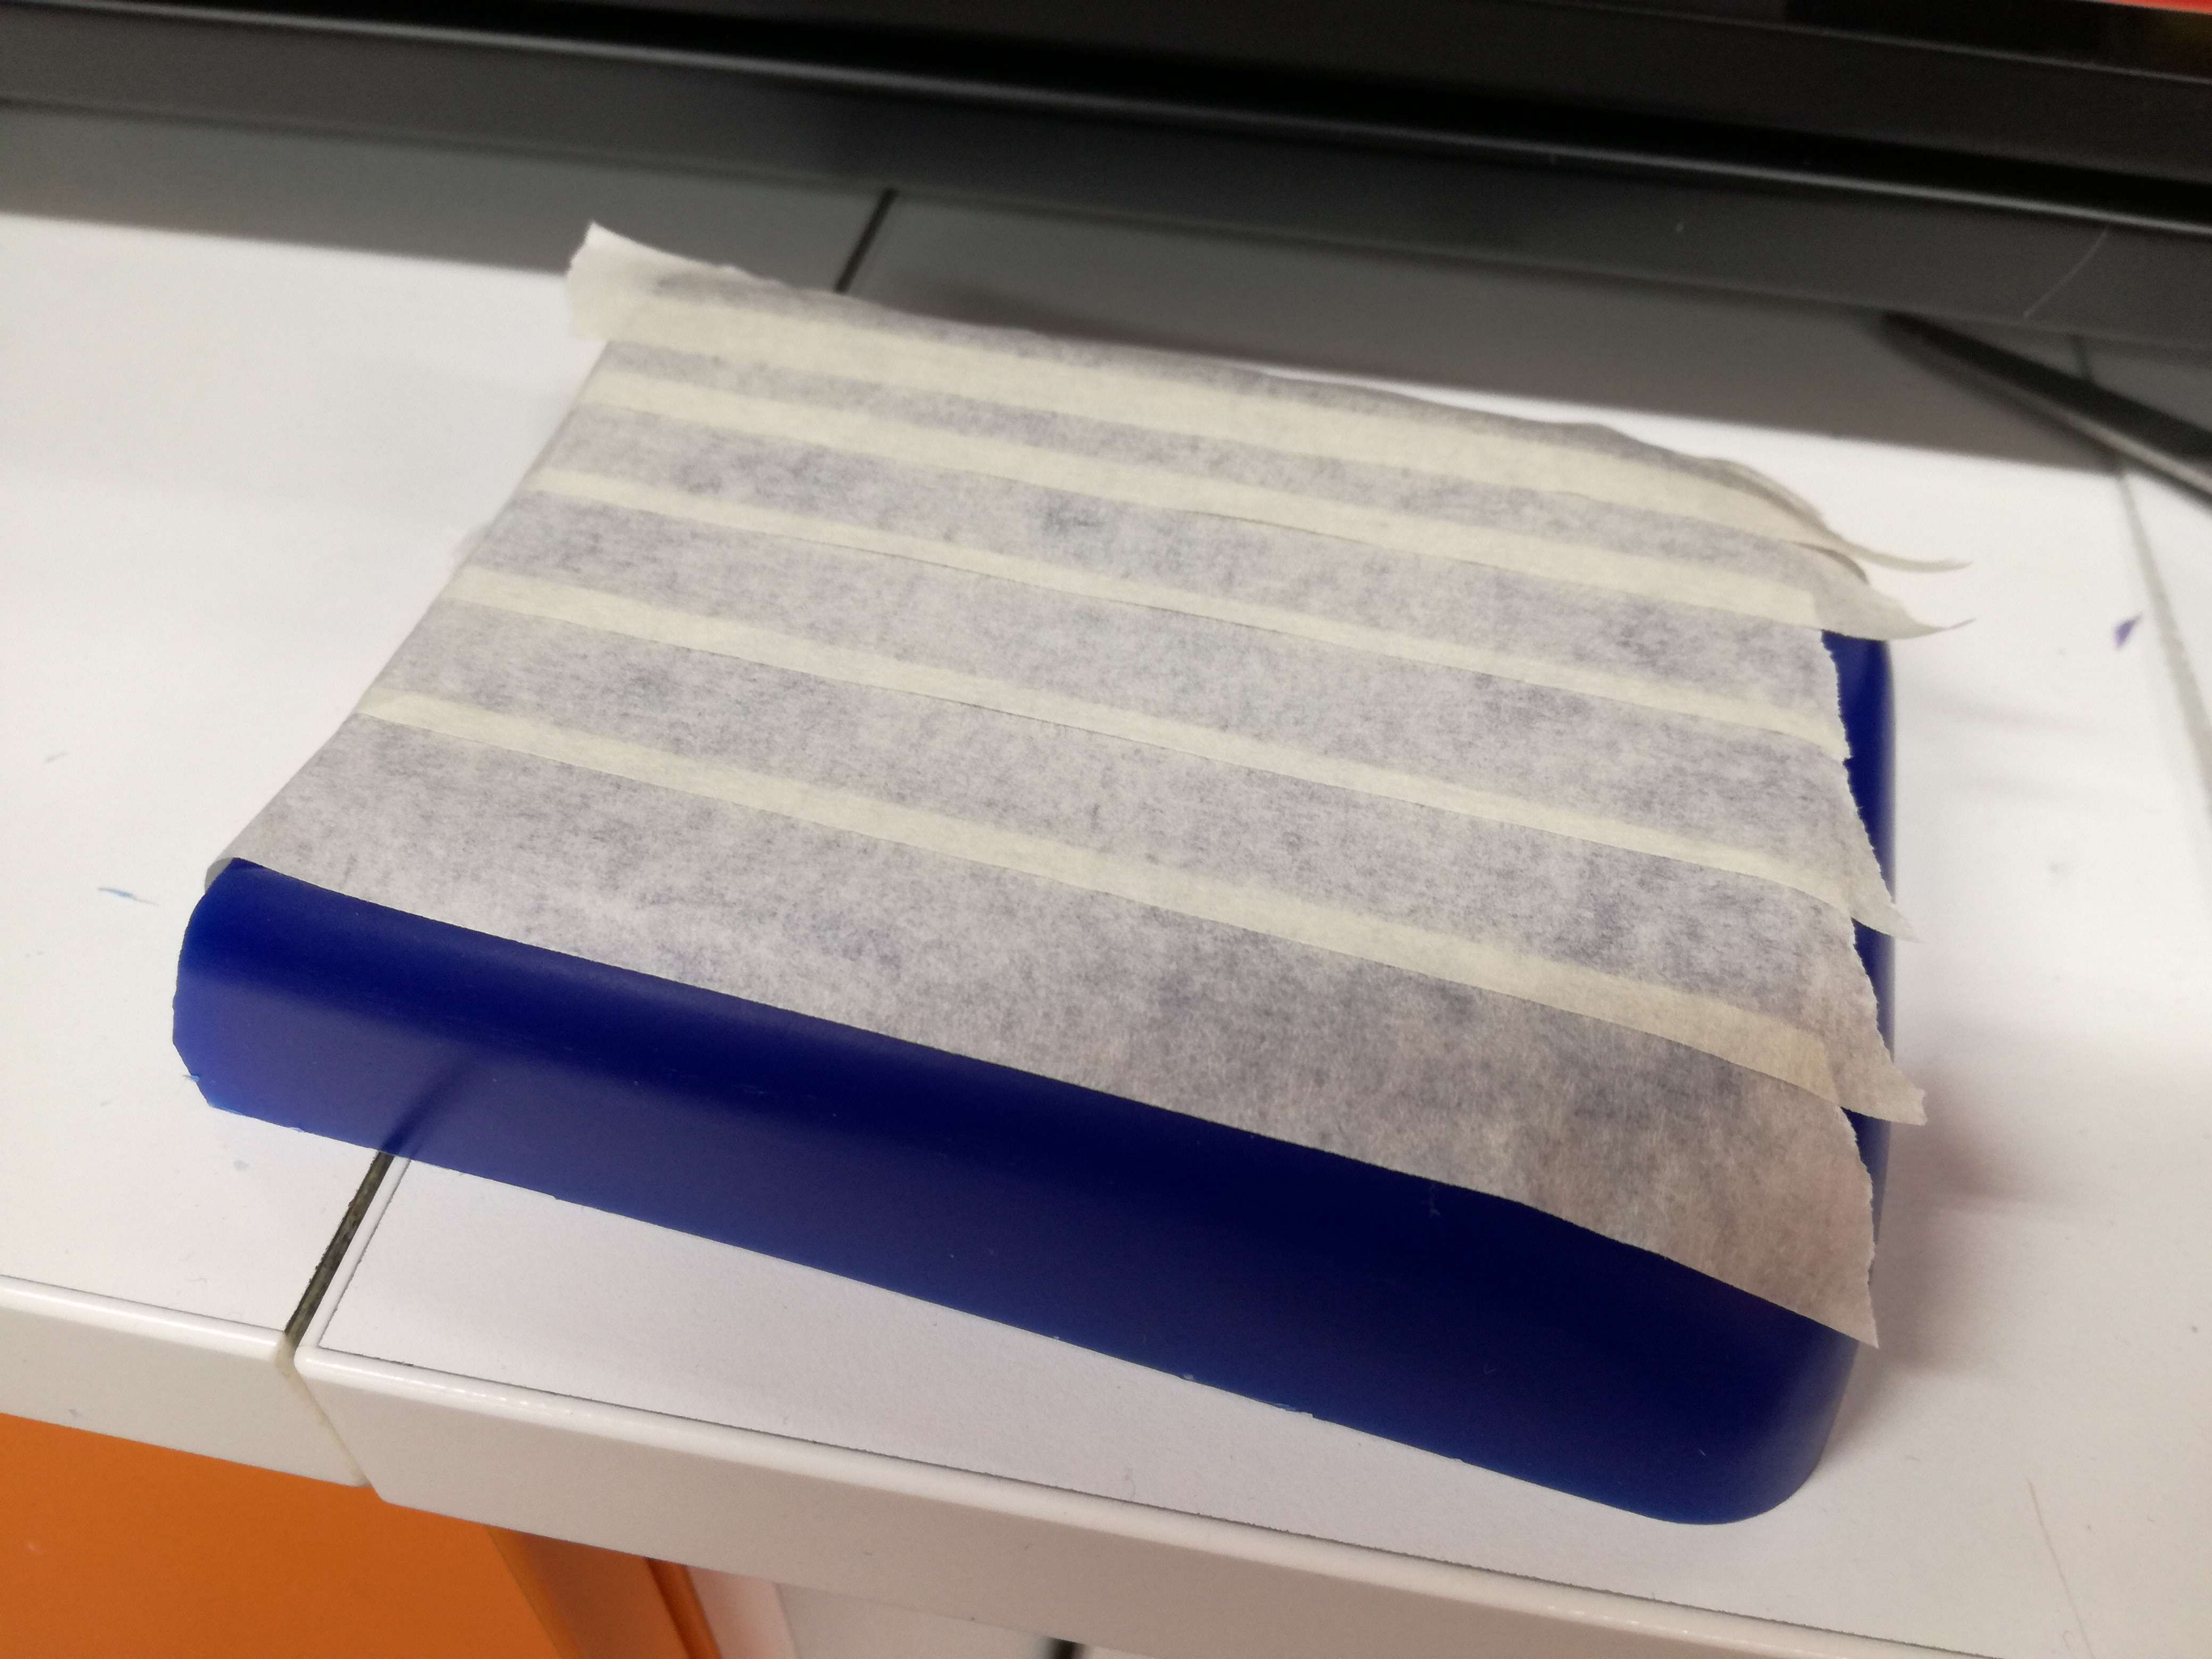
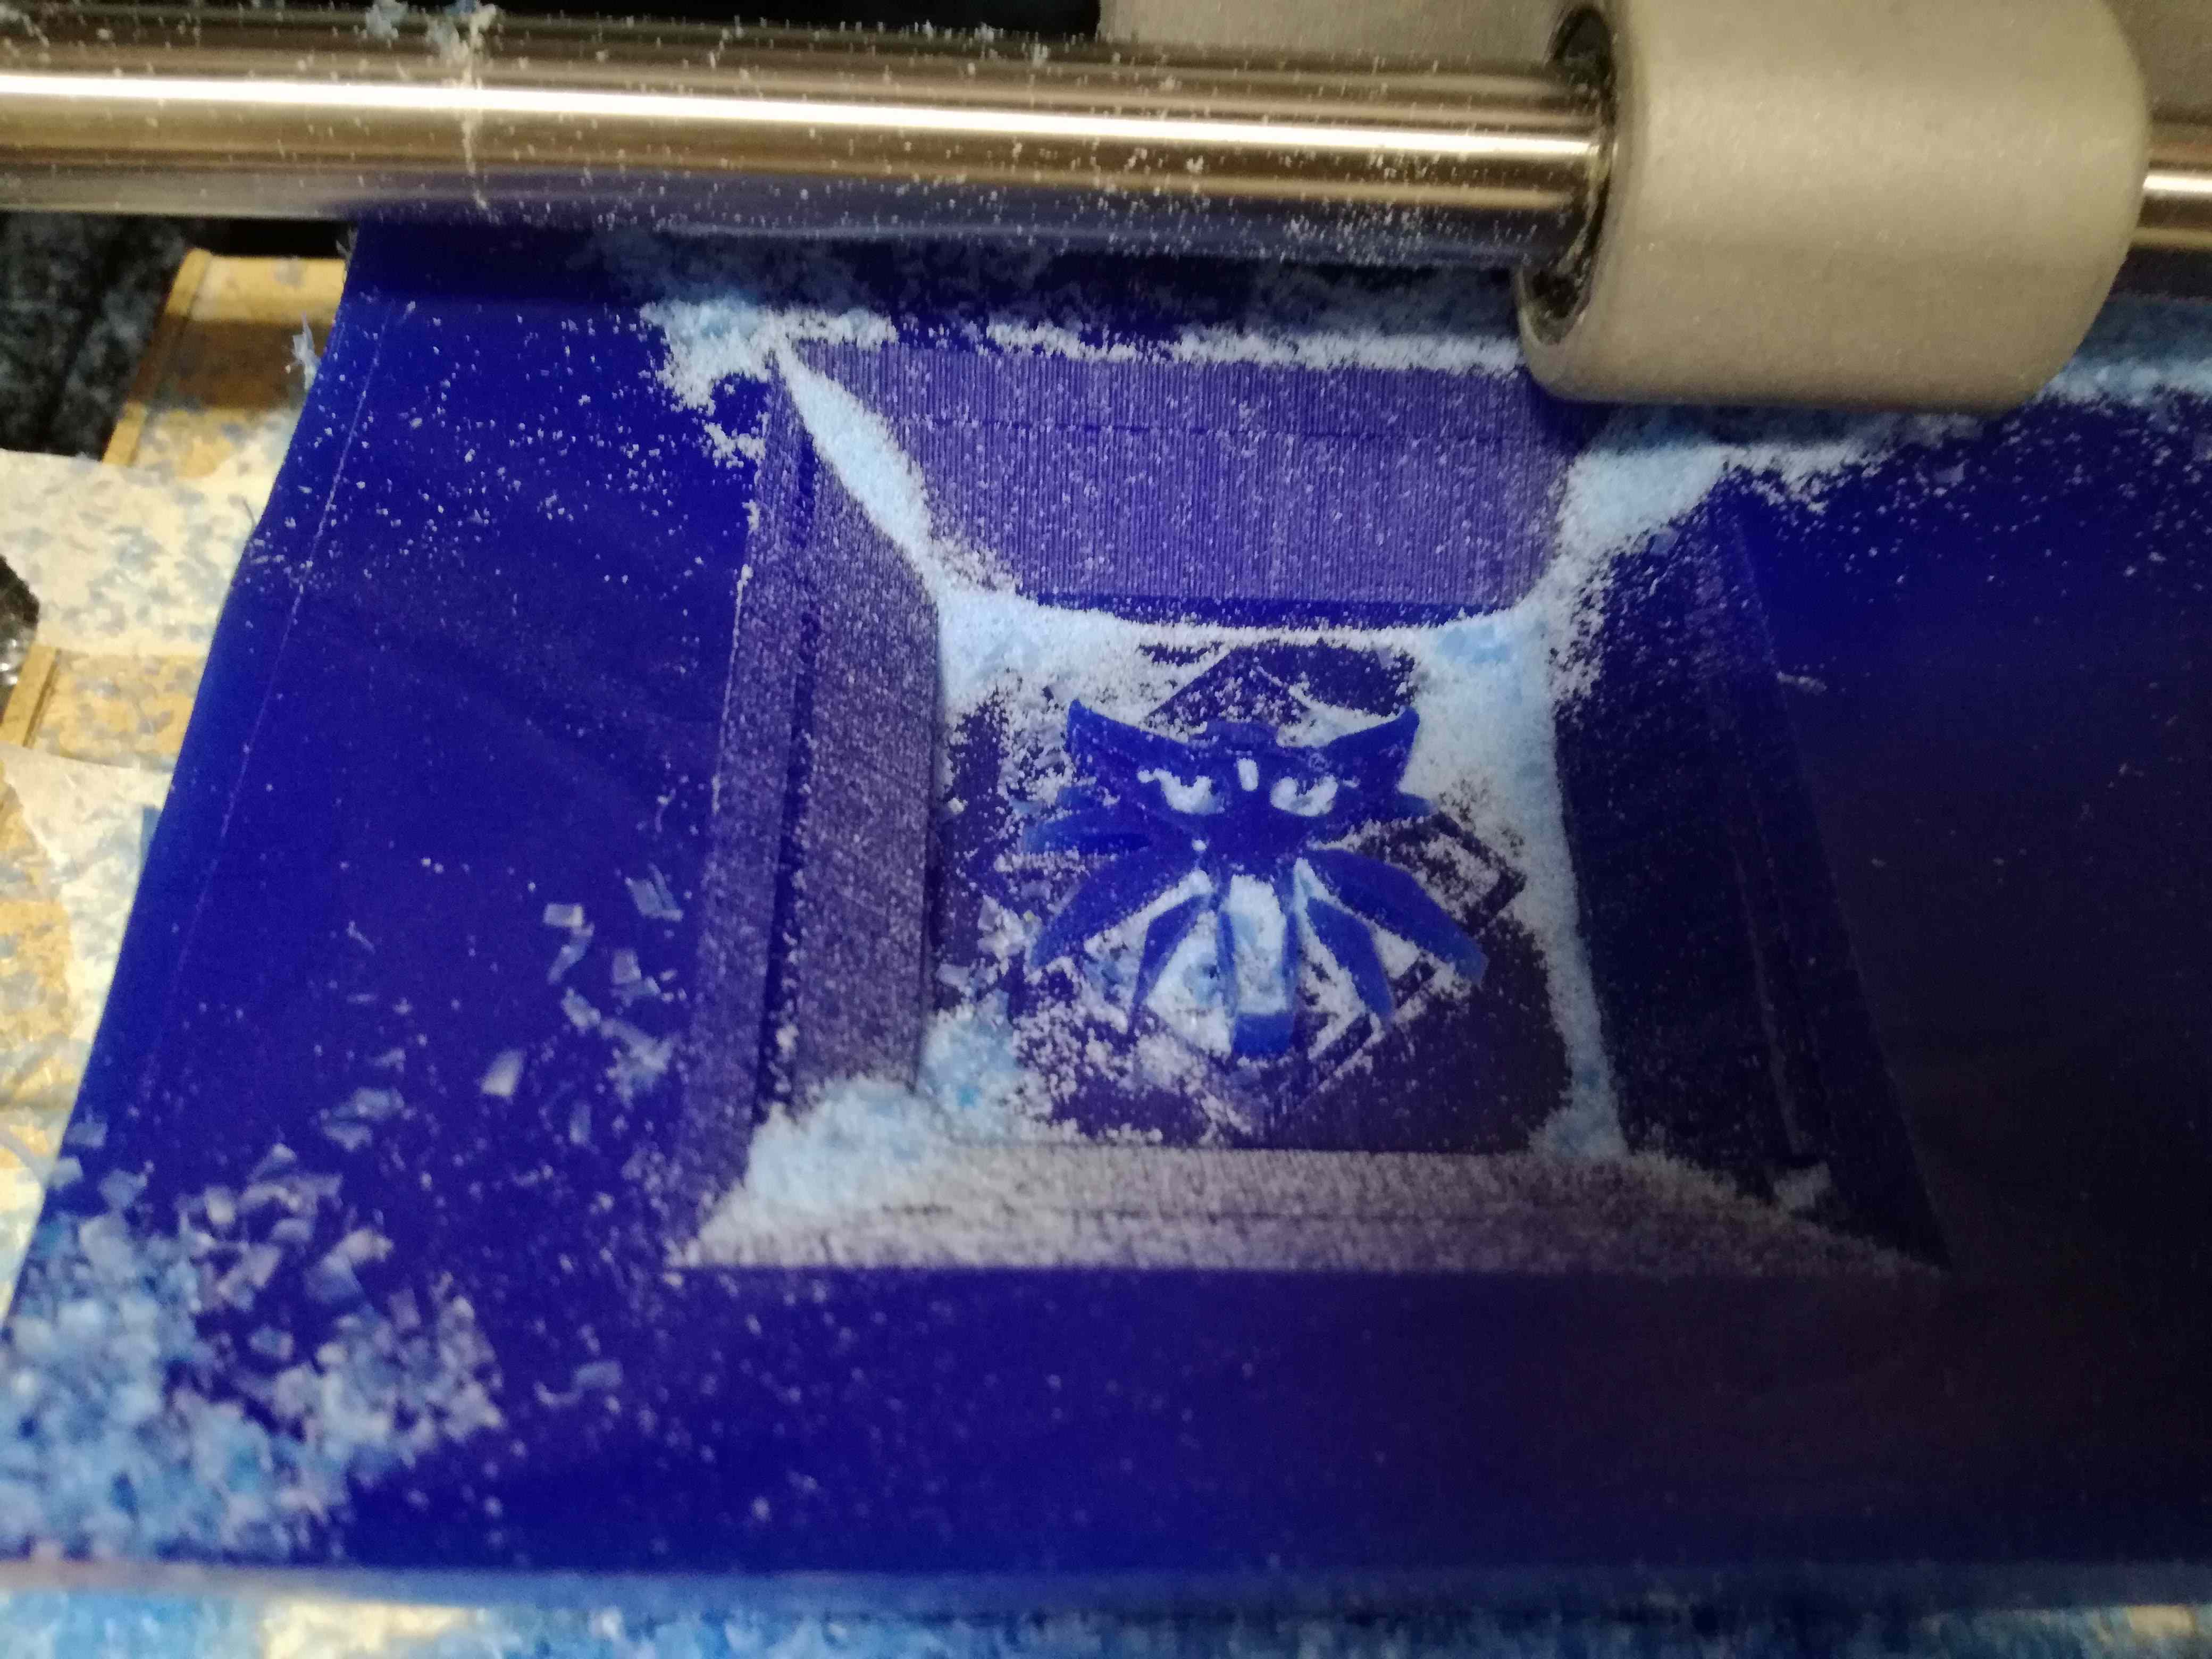
In order to attach wax cube hot glue was used. Two sided tape is not strong enough. Especially, I had some fine details. Yellow painting tape prevent making milling machine dirty. Rocket science.
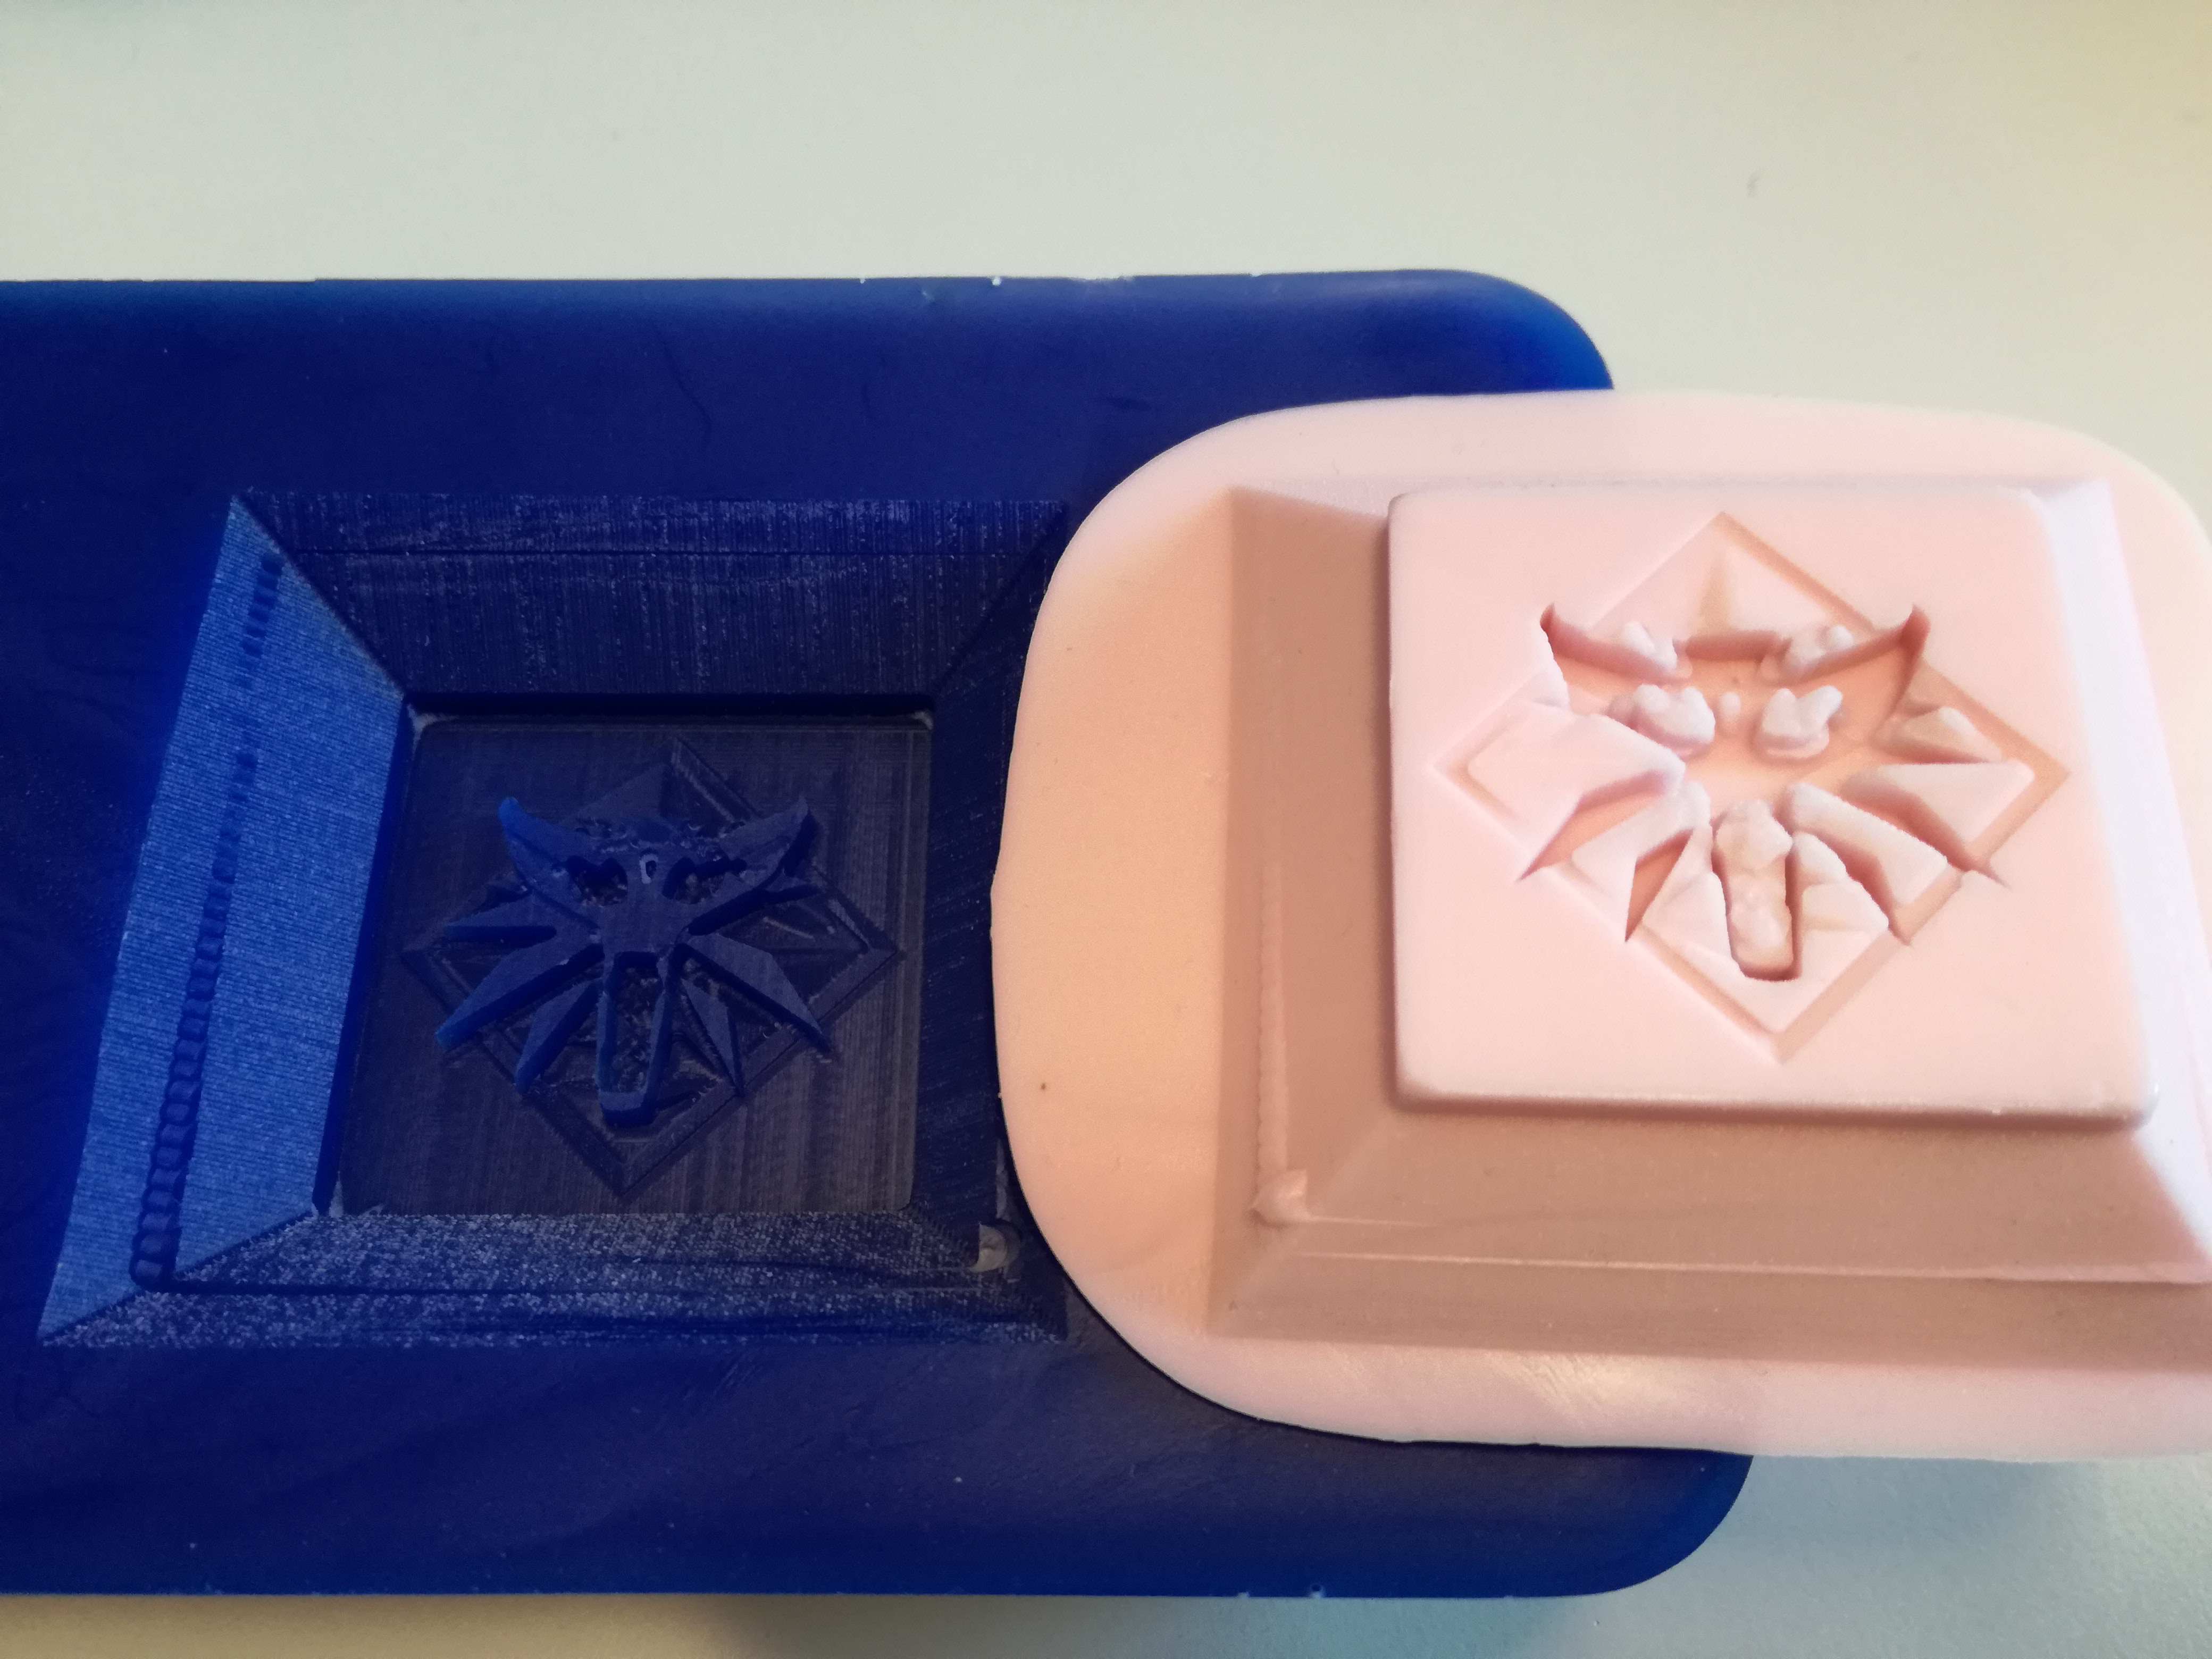
Right after finishing milling everything was dirty but I managed to wipe the leftovers over the mold. The result was decent. I wasn't expecing every detail will be visible as I used 1 mm milling bit. It was some kind of compromise between time and details. I was happy with the result.
At this point I removed all of the dust using air under pressure. I gently washed it with water, blow air once again and left to dry. Afterwards, I repeated the procedure done during group work with Smooth-sil. Cast was extremely nice and detailed. I was really pleased. I started to believe that metal casting might be successful. Below wax and silicone molds.
The day has come. Unfortunately I did not manage to make any photos during the process. Well, limited amounts of hands. There were two attempts. Ari and Gleb were helping me. We heated metal to 250 Celsius degrees, and preheated silicone mold to 100 Celsius. Then I poured molten metal to the cast. Surprisingly there were really nice details and medallion was nicely shaped.
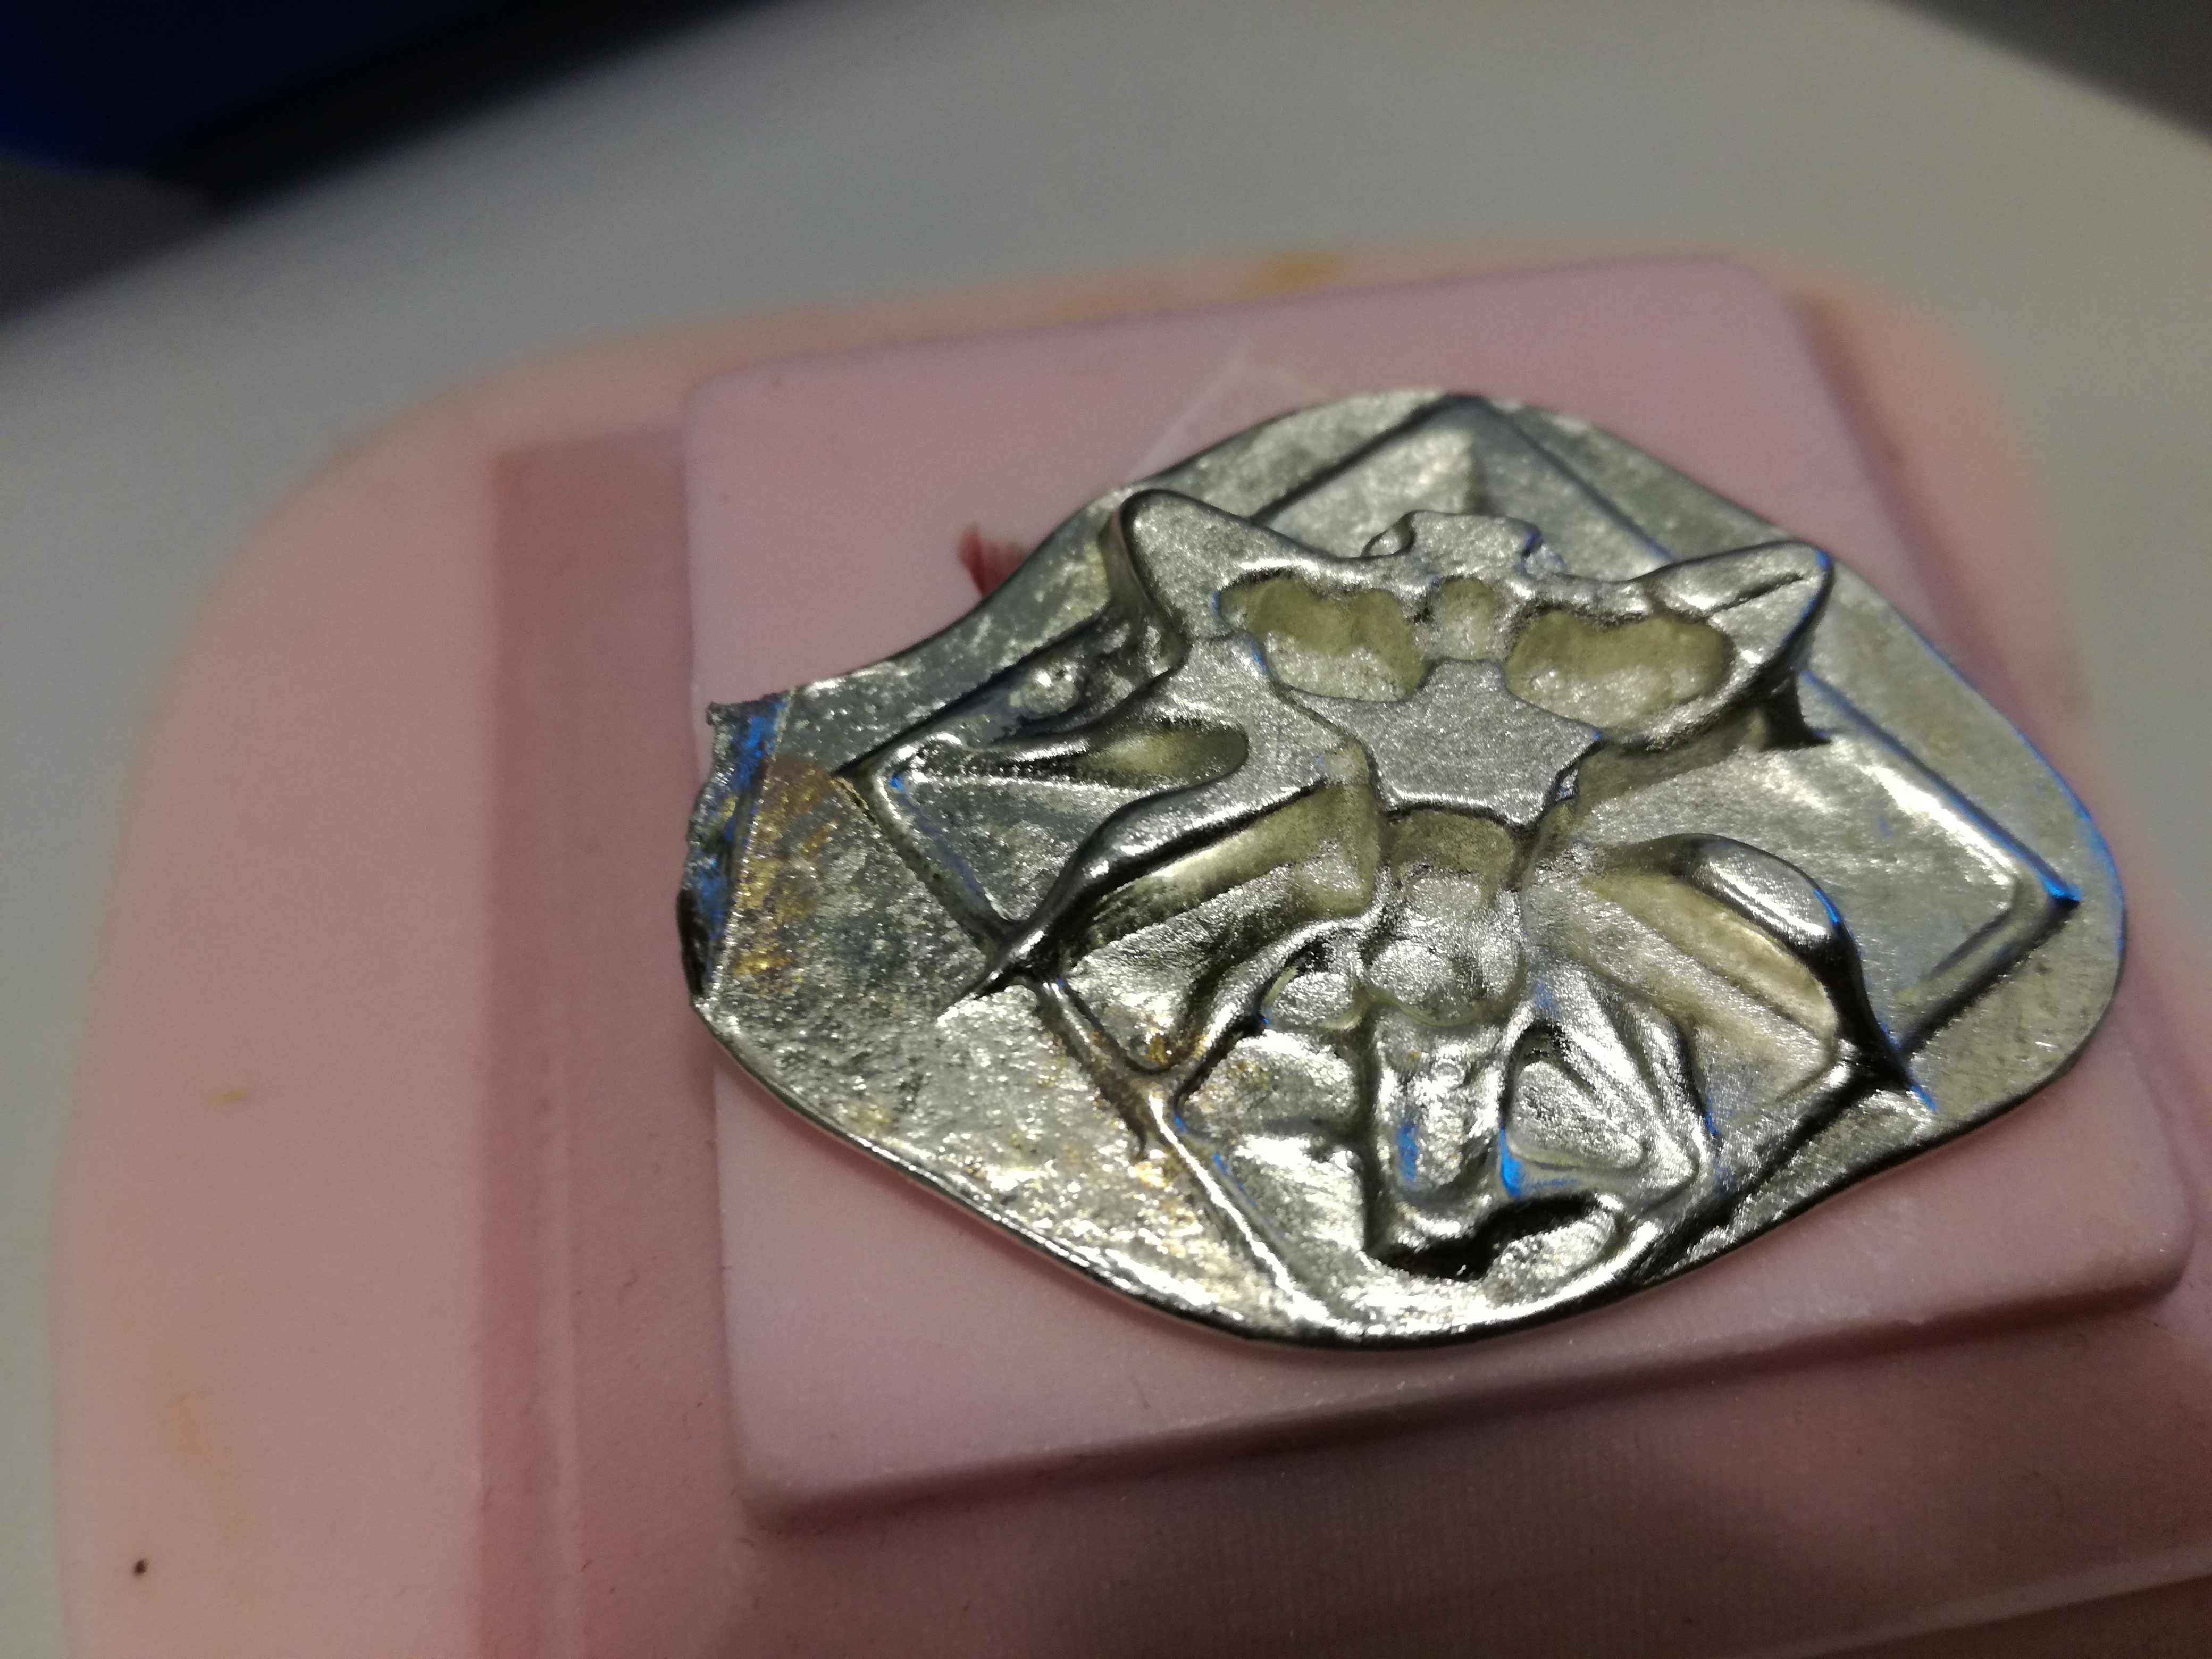
Gleb is really skilled craftsman. He insisted that we cannot leave medallion this way. Using his own tools, he was able to change it into piece of art. Cutting, filing, polishing. He even cut stripe of leather to carry it on the neck. Medallion became whole.