Week 17: Machine Design
Second week of our struggle, which actually was not a struggle at all. After having the idea how to proceed with our machine, there were no big issues. I would like to acknowledge Marjo for her outstanding work on Vitafab logo!
Group Assignment
Members: Arash, Gleb, Marjo, Perttu and me
Once again our group work may be find on external website. Here is the link: CLICK ON ME!
Individual Assignment
During this week I was responsible for the code, every single line was written by me. Fortunately, I had whole group helping me with connections, zeroing position of cup holder during tests and troubleshooting. This way was very efficient and I enjoyed our group work very much. Especially, when we were reaching our milestones. Step by step we made our servo motor working, then cup moving left to right and in the end self homing procedure.
As basic description of the code may be found in our group work, I will focus on some details during code development and issues I was facing. It makes more sense, especially after familiarizing with previously mentioned group work.
My contribution
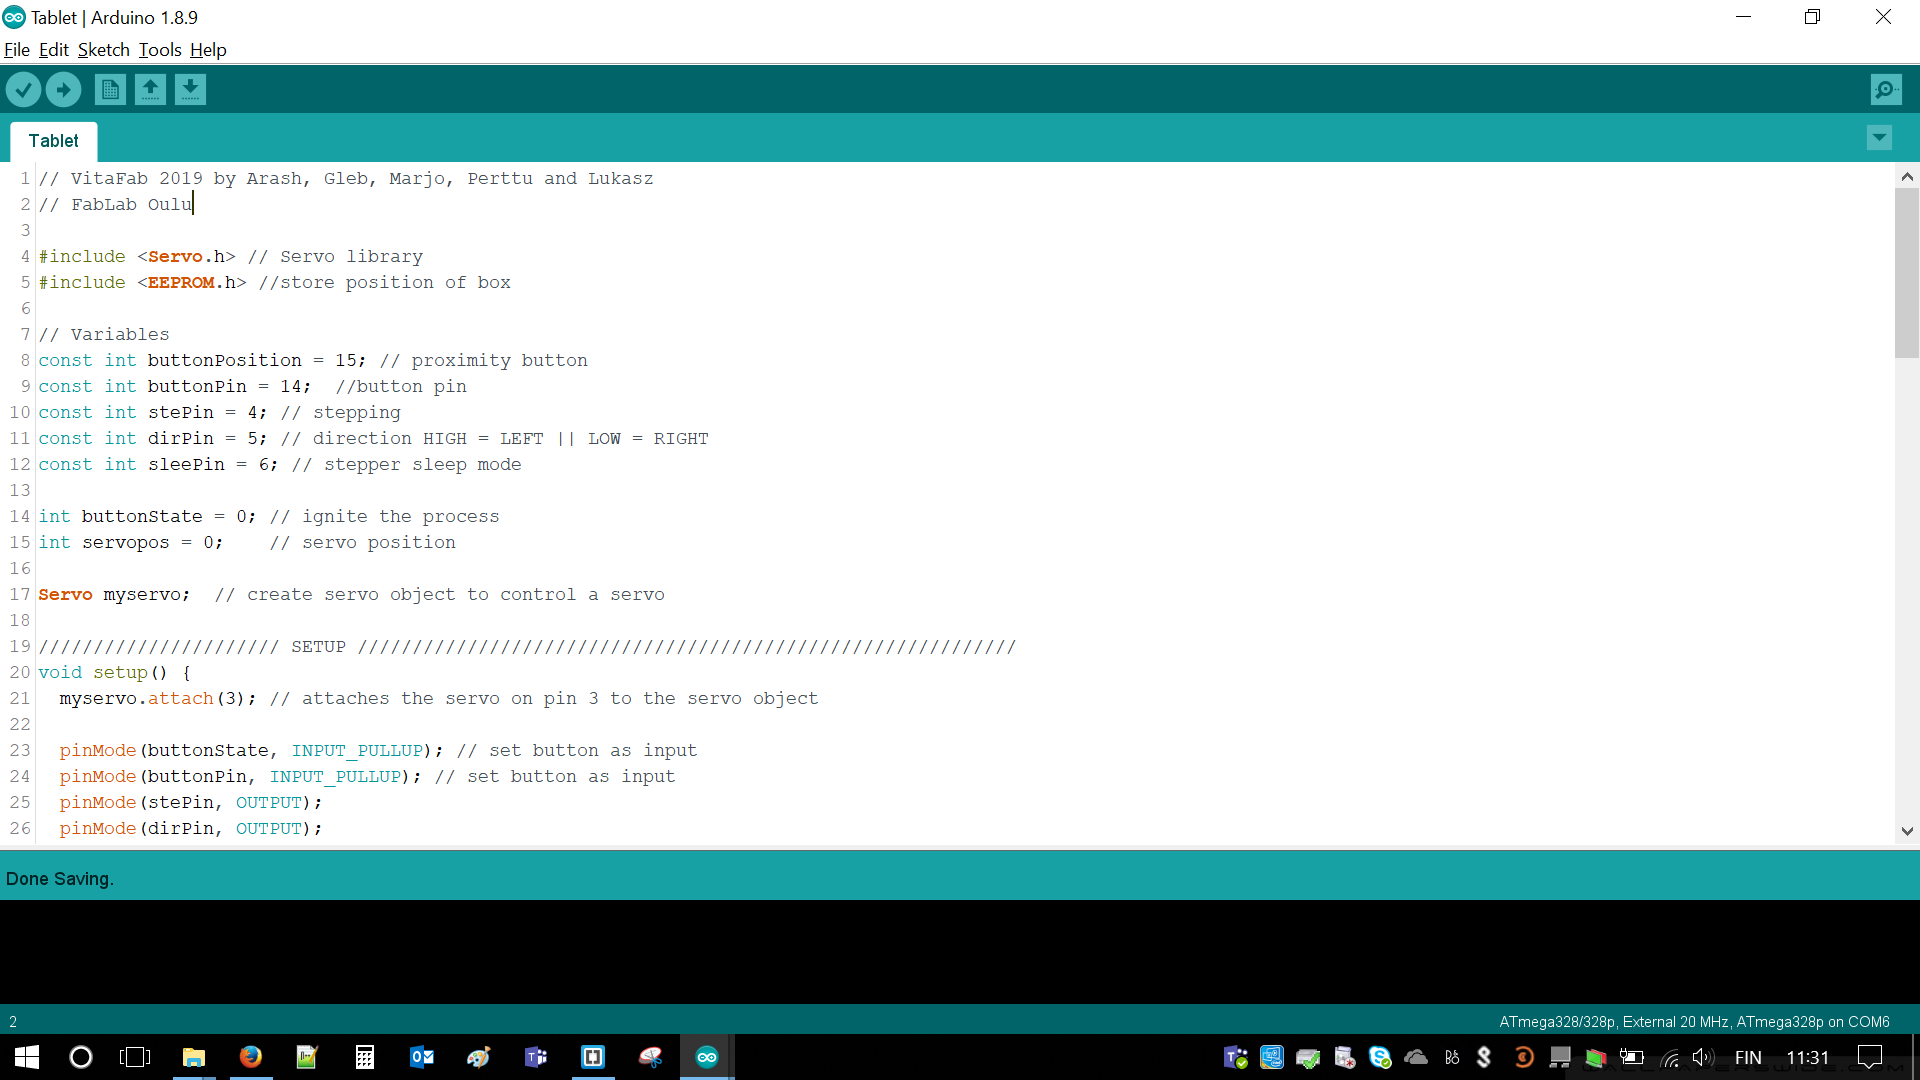
As it was stated before programming environment was Arduino IDE as our microcontroller board is Arduino UNO. It had two big advantages, libraries for both servo and stepper motor. Among variables there were two buttons used, one to start making a drink and other one as a sensor. I will describe second one a bit later. Our stepper motor driver required at least two pins: stePin in order to start movement and dirPin, which was responsible for direction of movement (clockwise or counter-clockwise). In our case it controlled movement of the cup (left/right). During testing with laboratory power supply I observed that when idle stepper motor draws quite a bit current. I decided we will also use sleep function, requiring additional pin (sleePin)
Two remaining variables are start button beginning state and servo beginning position.
In general there are two libraries Servo.h and EEPROM.h. Nevertheless, only one is required. I had idea to use EEPROM memory in order to store position of the cup holder. We really did not want to break the walls, especially, if someone will turn off the device in middle of operation. EEPROM requires relative long time to access the data but biggest issues were with limited re-writes. I believe cell No 1 on this Arduino Uno is already unwritable.
In void setup() we are defining inputs and outputs. Inputs are our two buttons and outputs are used in order to control stepper motor driver. No black magic in here.
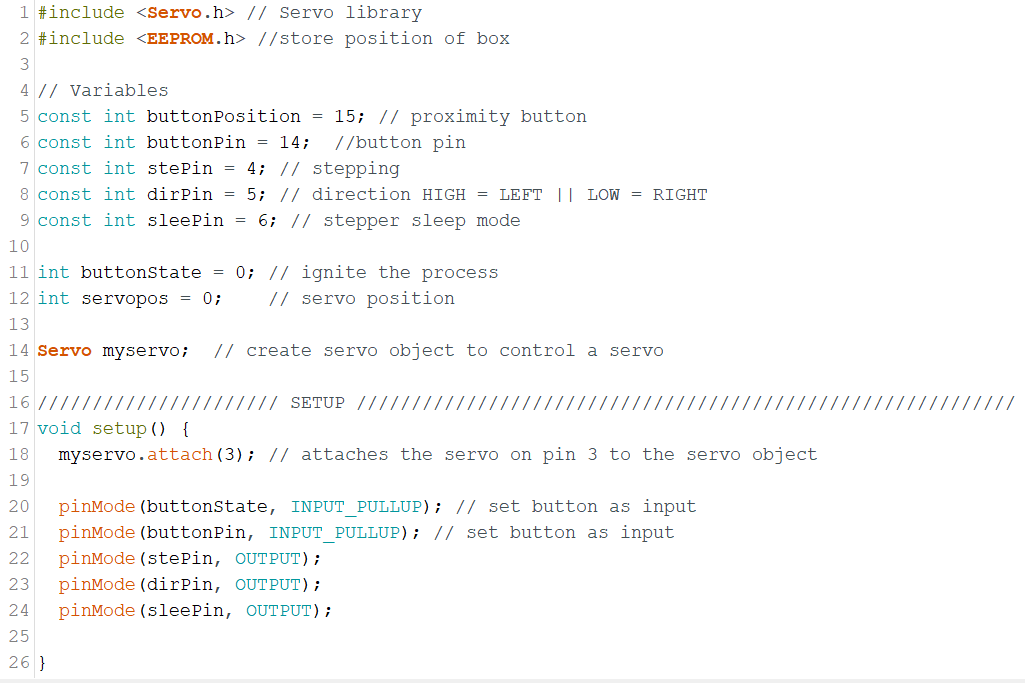
There is not much to say about Main loop. It first executes function checkSteps(), which check position of cup holder and return it begin position. Then it awaits for signal (button) to start making the drink.
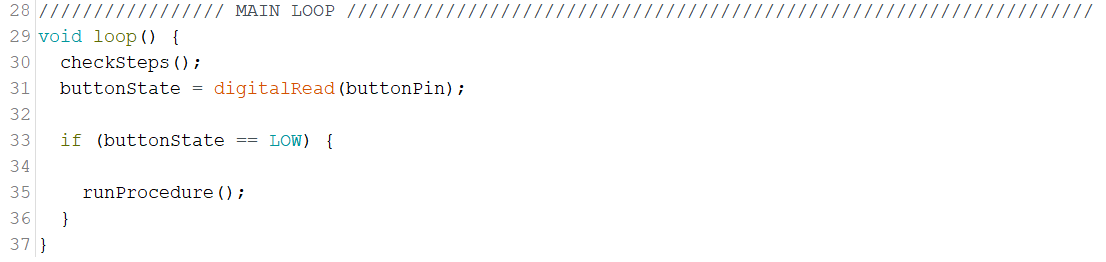
Ha! Now the magic starts! checkSteps() is very important function for whole operation. It assumes that user is an idiot. It is some kind of sanity check. We are not storing information about the position of the cup. Stepper motor could easily destroy the walls using cup if unguided. There is fixed amount of steps that it needs to make. First idea with EEPROM was not successful. Then we added a button on the wall. If it is not pressed this function assumes that cup is somewhere in the middle. Then it movies cup to the very left position until button will be pressed. Voila! Simple, easy and efficient
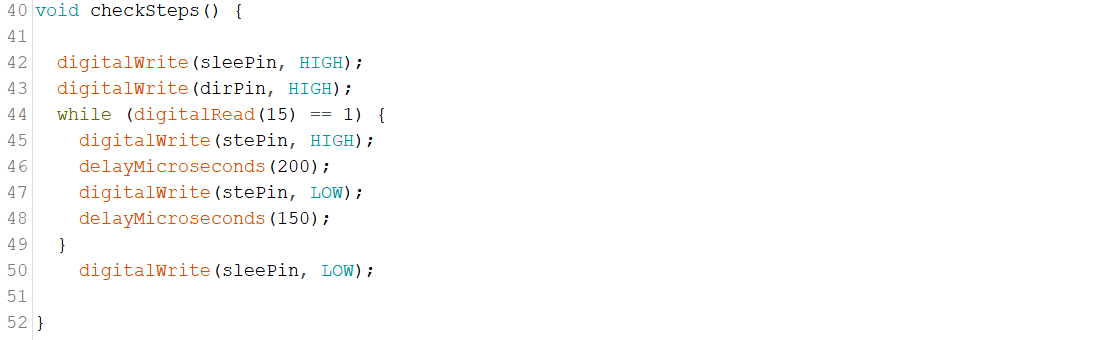
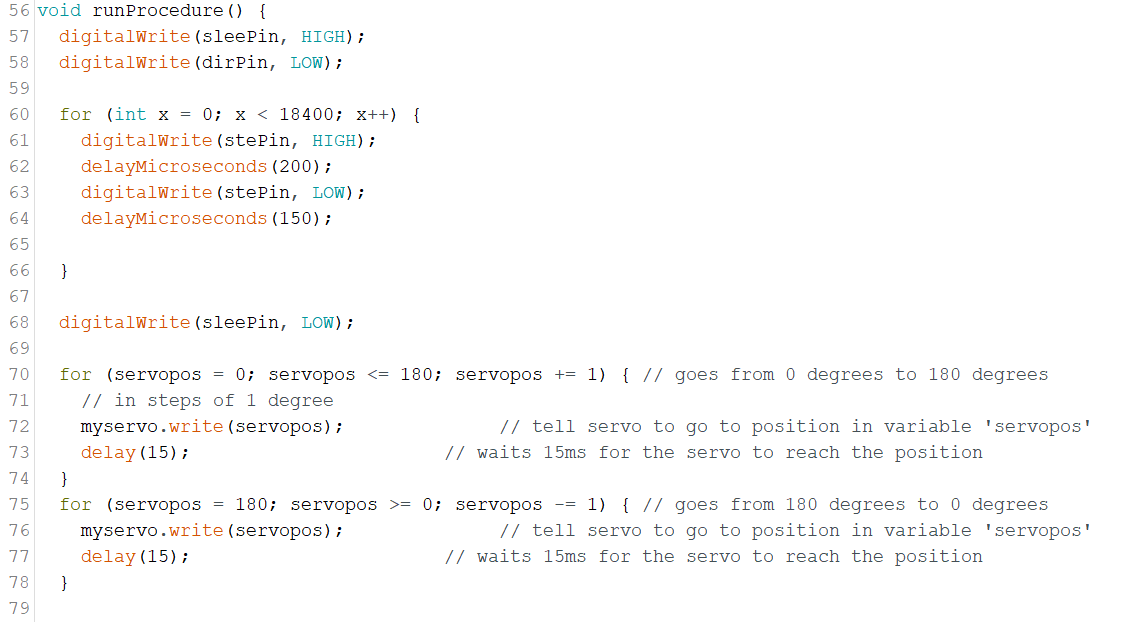
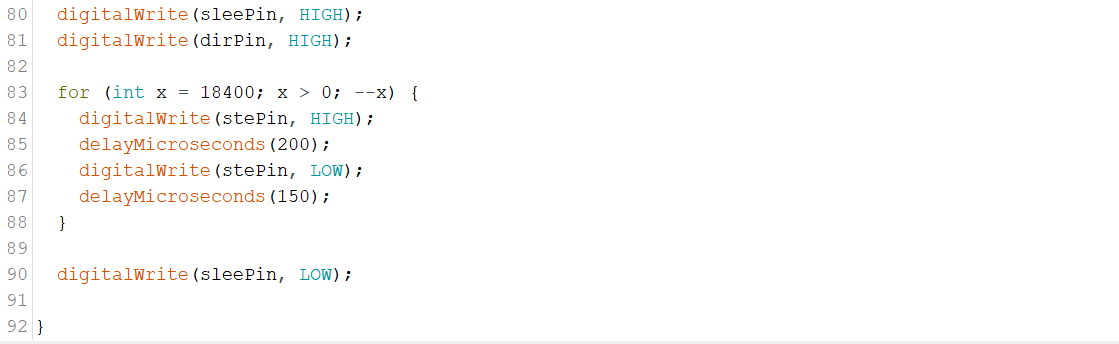
runProcedure() is main part of the code. It is first waking up the stepper motor and setting direction. Then it rotates motor for fixed amount of revolutions, in our case i = 18400. Speed is controllable using delays. If delays are too short, motor won't spin as coils require time to execute! In the end stepper motor is put to sleep again, to reduce current and don't heat it.
Servo motor is then shinning. It makes full spin. First loading the tablet and then dropping it by moving the tablet to opposite direction. Operation will repeat with next pushing button
Afterwards stepper motor is moved to opposite direction by playing with state of dirPin.
Complementary info
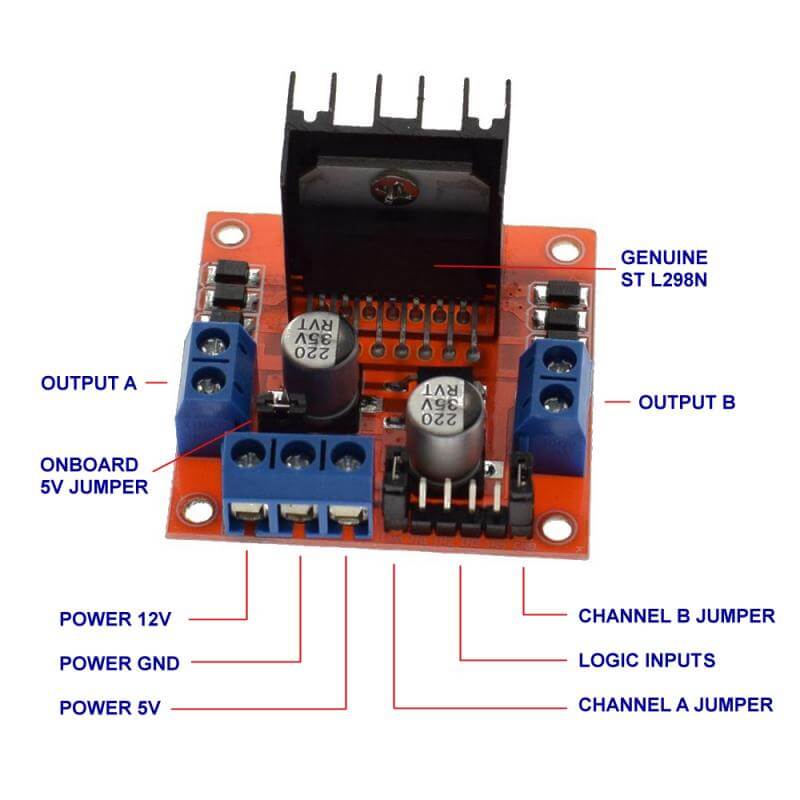
We also tried to use H-bridge in order to make our stepper motor spinning. However, we did not manage to succeed. We bought this part especially for the project. The problem was in such driver construction. There suppose to be two smaller motors connected rather than 4-phase one, which we had. Fortunately, we managed with different driver.