Week 16: Interface and application programming

Group Assignment
Members: Whole Oulu group
This week we did the group work together with whole Oulu group. Several of us used Processing, also Python, Blynk and PyQt5 were used. Here is some comparison of the used programs.
Processing
Processing is a flexible software sketchbook and a language for learning how to code within the context of the visual arts. Since 2001, Processing has promoted software literacy within the visual arts and visual literacy within technology. There are tens of thousands of students, artists, designers, researchers, and hobbyists who use Processing for learning and prototyping. Download website: is under this link.
- Free to download and open source
- Interactive programs with 2D, 3D, PDF, or SVG output
- OpenGL integration for accelerated 2D and 3D
- For GNU/Linux, Mac OS X, Windows, Android, and ARM
- Over 100 libraries extend the core software
- Well documented, with many books available
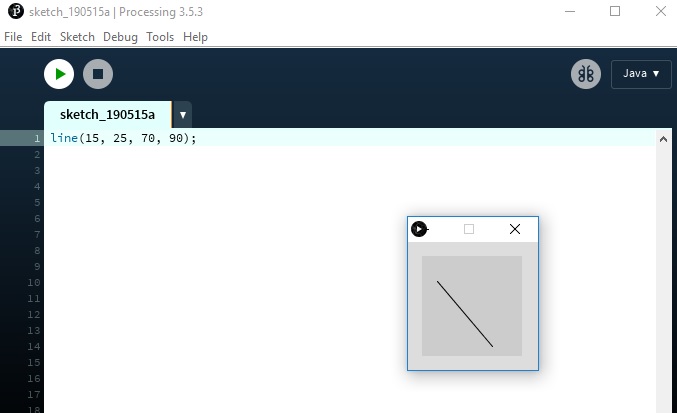
The Processing equivalent of a "Hello World" program is simply to draw a line:
line(15, 25, 70, 90);
Blynk
Blynk supports hardware platforms such as Arduino, Raspberry Pi, and similar microcontroller boards to build hardware for your projects. Download website: is under this link.
Blynk supports the following connection types to connect your microcontroller board (hardware) with the Blynk Cloud and Blynk's personal server:
- Ethernet
- Wi-fi
- Bluetooth
- Cellular
- Serial
The Blynk platform includes the following components:
- Blynk app builder: Allows to you build applications for your projects using various widgets. It is available for Android and iOS platforms.
- Blynk server: Responsible for all the communications between your mobile device that's running the Blynk app and the hardware. You can use the Blynk Cloud or run your private Blynk server locally. It's open source, could easily handle thousands of devices, and can even be launched on a Raspberry Pi.
- Blynk libraries: Enables communication with the server and processes all the incoming and outcoming commands from your Blynk app and the hardware. They are available for all the popular hardware platforms.
Hello world with Blynk looks like this:
BLYNK_LOG1("Hello World"); // Print a string
PyQt5
Qt is set of cross-platform C++ libraries that implement high-level APIs for accessing many aspects of modern desktop and mobile systems. These include location and positioning services, multimedia, NFC and Bluetooth connectivity, a Chromium based web browser, as well as traditional UI development. Download website: is under this link.
PyQt5 is a comprehensive set of Python bindings for Qt v5. It is implemented as more than 35 extension modules and enables Python to be used as an alternative application development language to C++ on all supported platforms including iOS and Android.
PyQt5 may also be embedded in C++ based applications to allow users of those applications to configure or enhance the functionality of those applications.
Hello world in a window with PyQt5:
 import sys

                    from PyQt5.QtWidgets import QApplication, QWidget

                    if __name__ == '__main__':

                    app = QApplication(sys.argv)

                    w = QWidget()

                    w.resize(250, 150) w.move(300, 300)

                    w.setWindowTitle('Hello World')

                    w.show()

                    sys.exit(app.exec_())
Python
Python is an interpreted, high-level, general-purpose programming language used for developing both desktop and web applications. Python is also used for developing complex scientific and numeric applications and its design philosophy emphasizes code readability with its notable use of significant whitespace.
A simple program for addition and calculating savings in Python is presented below :
 # Create a variable savings

                    savings = 100


                    # Create a variable factor

                    factor = 1.10


                    # Calculate result after 7 years

                    result = savings * (factor ** 7)


                    # Print out result

                    print (result)
Hello world is simply or you can save it in a variable as above and print it:
print("Hello, World!")?
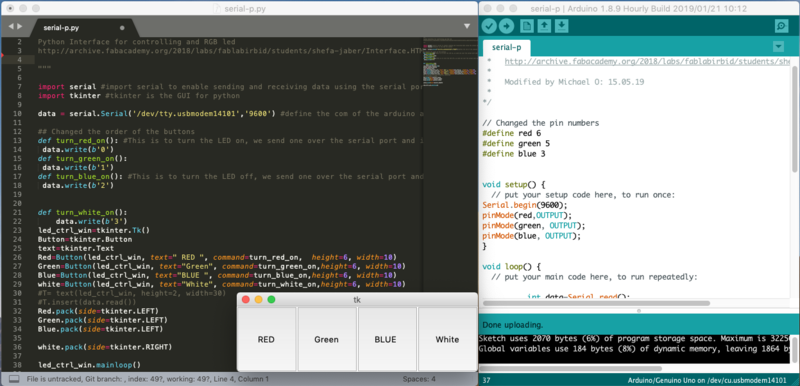
For the assignment, we followed this example for controlling an RGB LED with Python and Arduino.
Individual Assignment
It is time to write an application that interfaces an user with an input and/or output device that I made. As I haven't find anyone in our group, who tried to do it in Matlab and I'm working daily with Matlab I decided to use this particular environment. For interface purposes I used two already fabricated boards: ATTiny "Hello world" and Photo transistor from Input Devices Week.
First board will be used as Serial Interface (bridge between computer and sensor board) and second board is just detector. ATTiny44 will be enable serial communication, as this was microcontroller, which I had on the "Hello world" board. I was forced to use two different boards as there were no real detector (and I really wanted to detect something using Matlab) on ATTiny44 board. Those will be connected with temporary soldered wires.
I started investigating the case and I found This website. There are really nice description and basic know-how. It turned out there are two ways to create/design interface in Matlab. First and most obvious one is command line and second one is Graphical User Interface (GUI). Command line requires mostly coding but GUI is much more interesting. All the files are attached in the end.
Matlab to ATTiny44 Interface - Arduino IDE
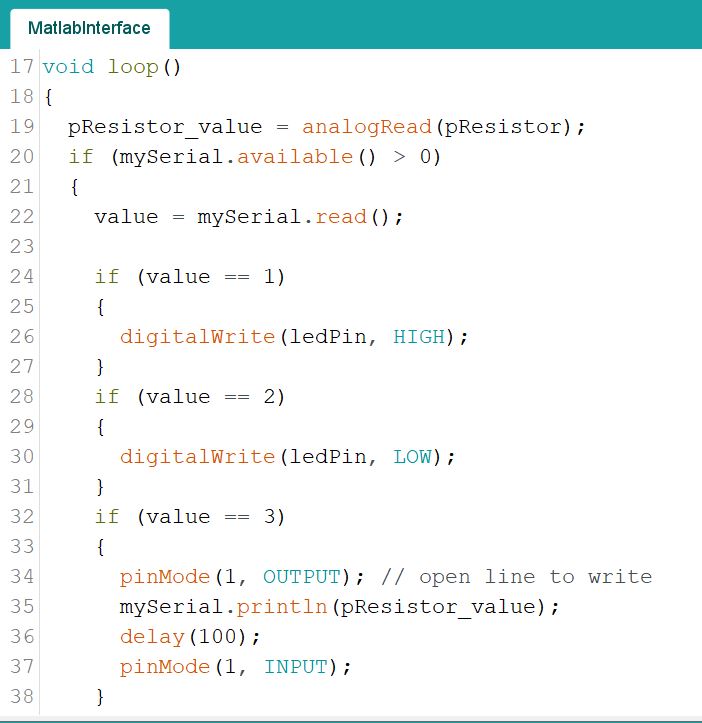
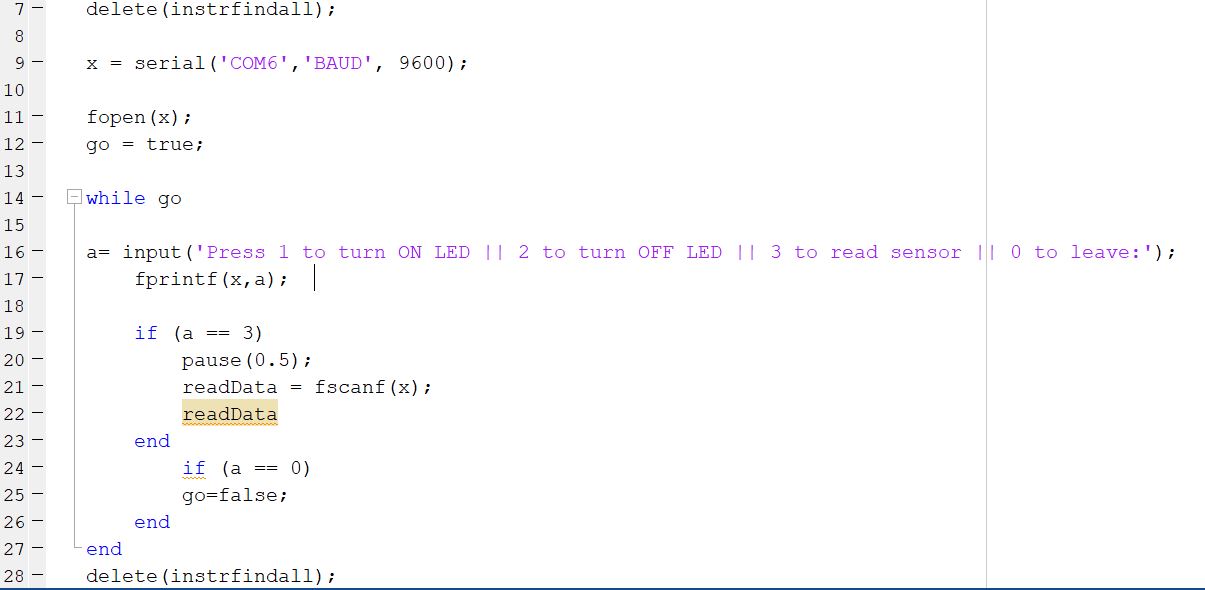
In order to have some kind of interface in the beginning microcontroller code has to be fixed. My choice was Arduino IDE as I'm pretty familiar with it. Using previously obtained knowledge in Networking and communications week I developed below code. It is once again reading values over serial port. There are three cases, first two are in charge of turning on/off LED and third one is sending value of photoresistor over serial port. Baud rate that I used was equal to 9600.
Idea is to send single bytes with value "1", "2" or "3" from the computer to ATTiny, which is in constant reading mode. ATTiny after reading a byte, will execute particular functionality. Turning LED on/off or reading value of ADC (photoresistor) and sending a string back to computer, which will be in reading mode for a while. Frame ends with "/n".
Matlab to ATTiny44 Interface - Command Line
Time to start working with Matlab. There are also libraries used to work with serial interface. Such simple project as mine requires around 30 lines. Used port and Baud rate has to be defined.
As with microcontrollers, I created here an infinite loop. There are couple functions, which might be handy
   fopen() - opening serial port

                    fprintf() - sending a value over serial port

                    pause() - work same as delay() function in C/Arduino IDE

                    fscanf() - reading value over serial port

                    delete(instrfindall) - very handy function, ensures that ports were closed or reseted if needed
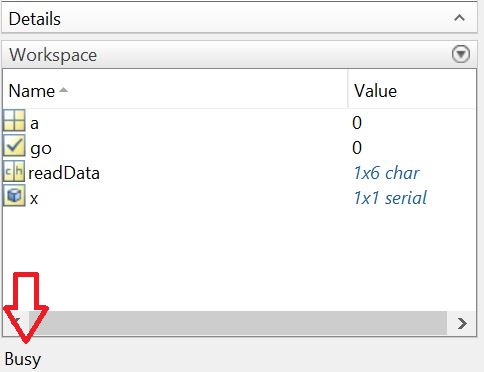
Side note: It is important to wait a bit after creating connection using Serial port. In the bottom Matlab informs about its status. It is required to wait until BUSY indicator will disappear.
After compiling such code, so-called "Command Window" will be used as Interface. Below example is was already my testing. There were three options featured already in Arduino IDE but I also added a way to disconnect and stop communication by pressing "0".

If image is worth 1 000 words then movie is worth much more. Below there is movie, how the Interface works and how to operate it. I don't feel that any user would need a description how to use it.
Video featuring results
Matlab to ATTiny44 Interface - GUI
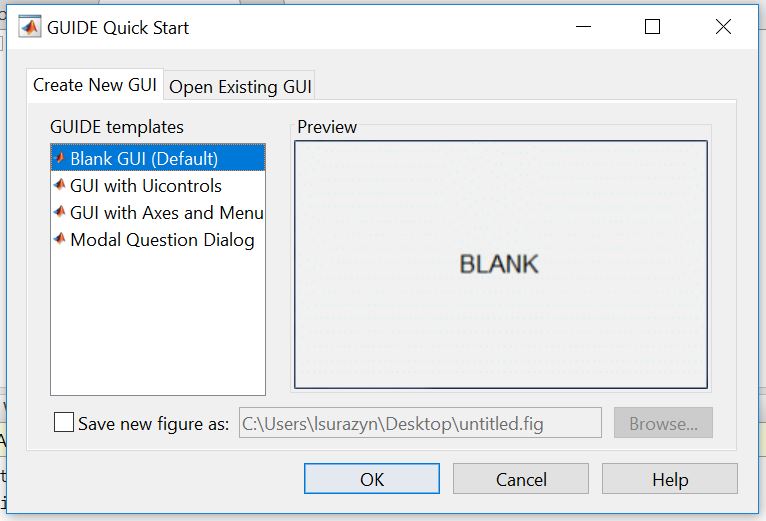
This is the part, where all fun starts. The best way to start is typing guide in the command line. This will open below window. In Create New GUI obvious choice ice Blank GUI (Default). In order to re-open previously designed GUIs, second tab Open Existing GUI has to be selected.
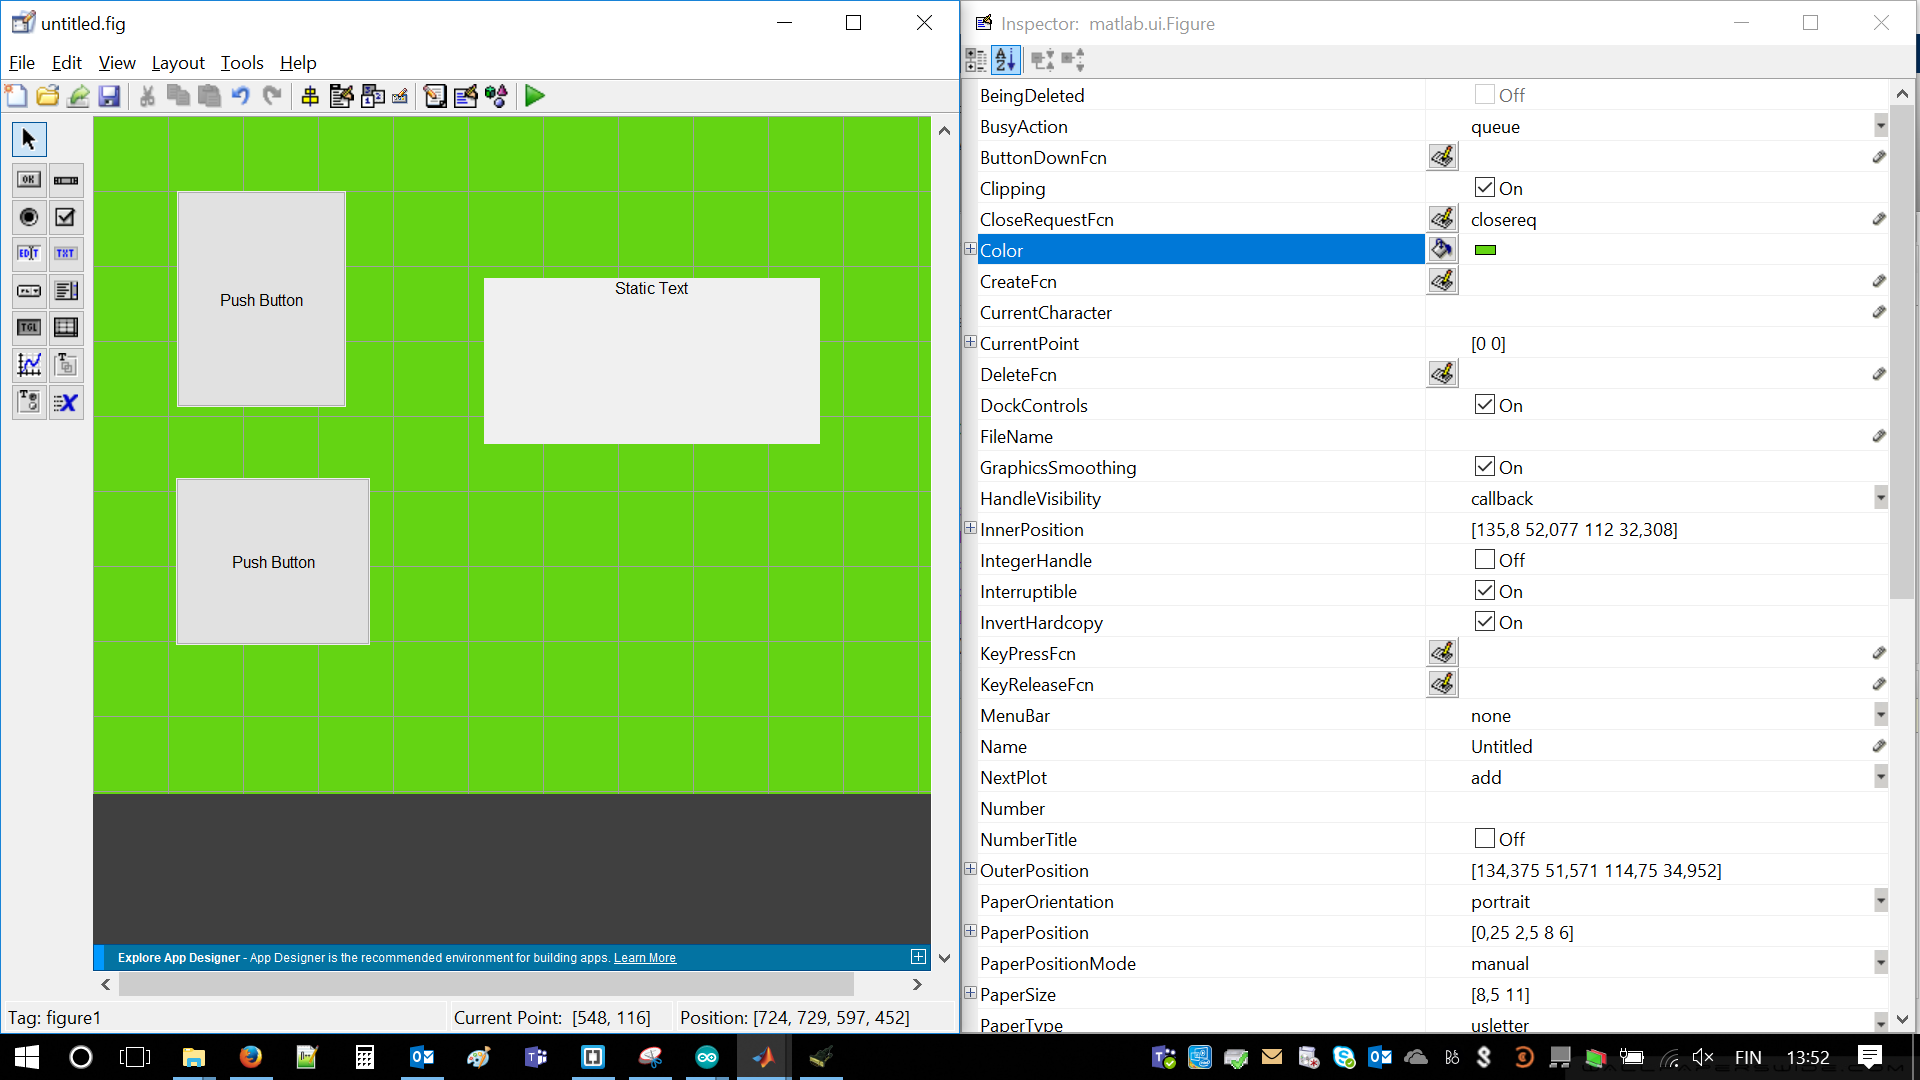
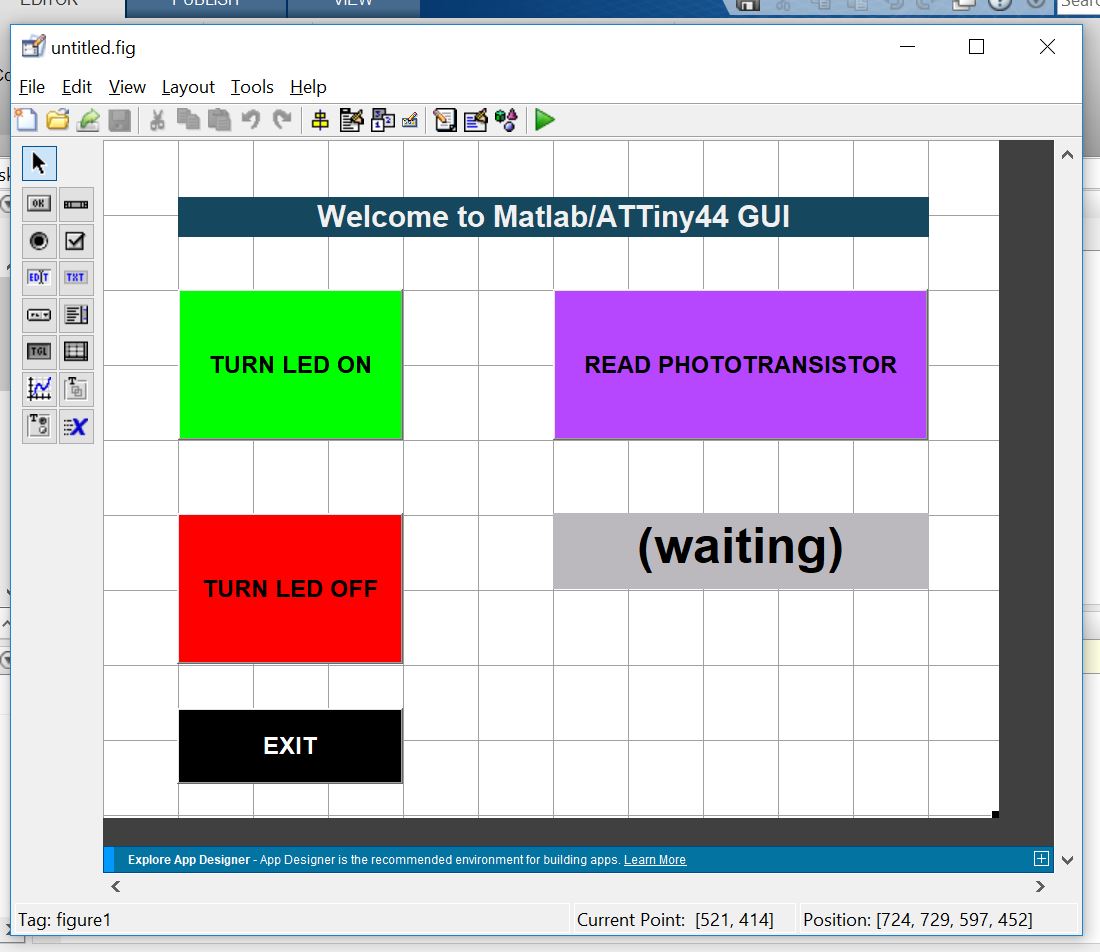
After that a little window will pop-up. It is possible to add different kind of boxes. The most important boxes for me were Push button and Static Text box. First is used to allow user to turn LED ON/OFF and read data from phototransistor. Second type of boxes is used just to visualize things, e.g. variables or text. Very handy if you are expecting some interactions.
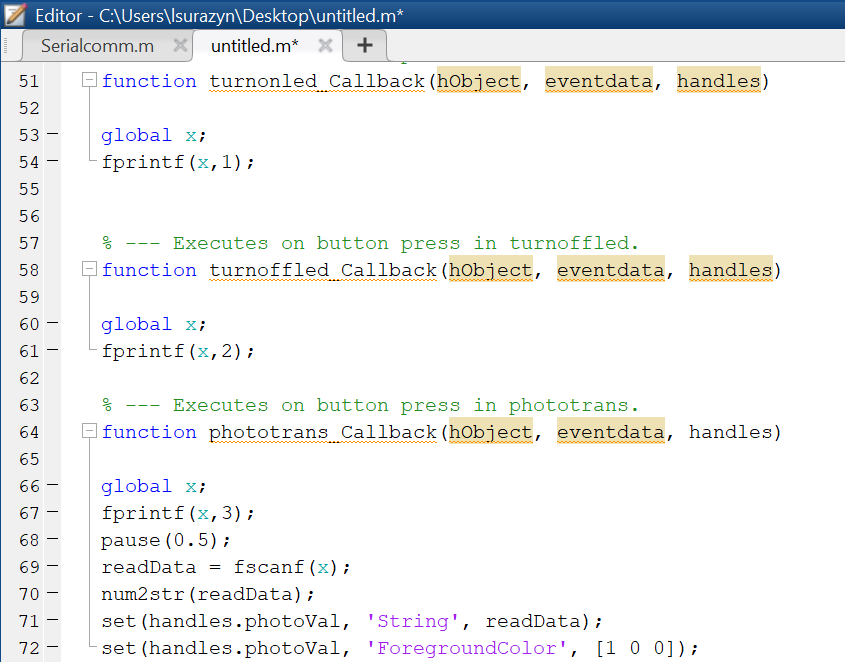
There are plenty of options opening, when double clicked on background or boxes. There are fonts, colors, sizes, alignments, names, visibilities accessible. Just after saving by Save button, which may be find in Menu tab or combination of CTRL+S Matlab code is generated. Every button is separate function.
There are not much differences in code between Command Line and GUI. Placement of the code is different (callback functions) and buttons need to work with handlers. It is just another way to address variables/functions. Each functionality has to be inserted in corresponding callback function. Believe me or not but that is the whole trick!
This is how my GUI draft look like. I played a bit with colors, text sizes and localization of the buttons. Those might be changed by clicking on each button and choosing color in the window list. The story is that you are first reading value of phototransistor and judging it you may decide what to do with LED.
Principle of operation is fairly easy. Side note: once again it is required to wait until BUSY indicator will go off. It means serial transmission was created successfully.
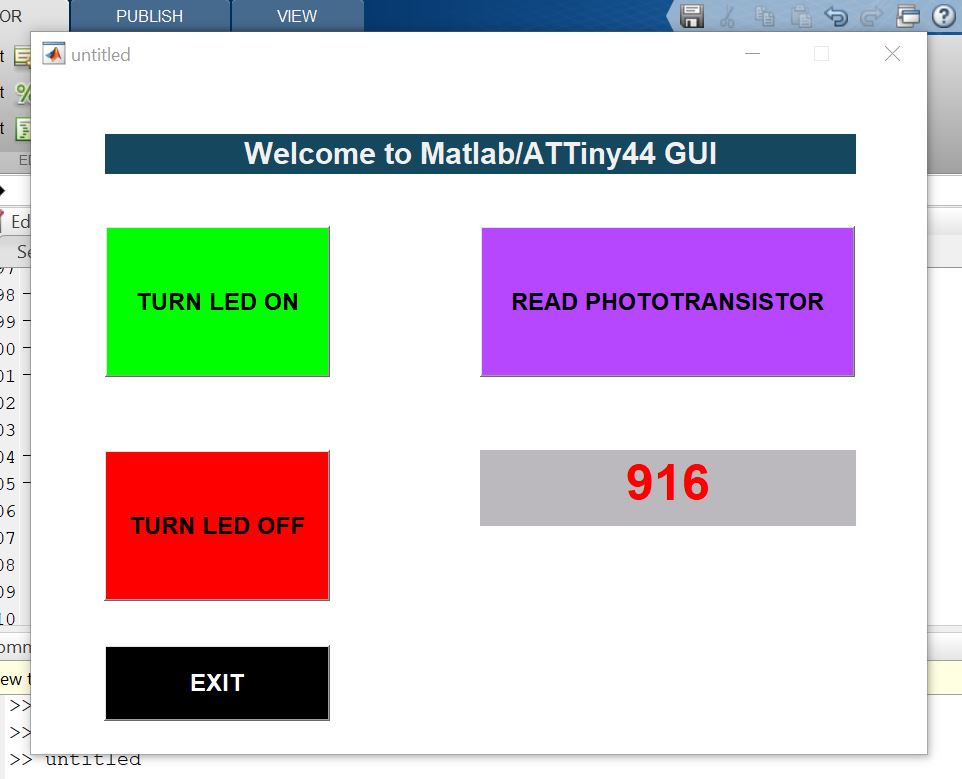
In the end, once again video, which is worth n-words. Both reading and sending data via serial communication was done. I never tried it before in Matlab. I was happy after I discovered it is possible and fairly easy/simple. There are plenty of materials on Internet. If you seek you will find it.
Video featuring results
Troubleshooting
Difficulties in this assignment are mostly connected with programming language. I didn't have any issues by using command line (as I'm using it daily) but challenging part was GUI. It is very important to insert code inside callback functions. Each created button has its own place in a code. It was very easy during testing to start typing in wrong place and ruin everything. Fortunately, CTRL Z is working nicely in MatLab.
Files:
Download: Arduino codeDownload: Matlab Command Line Interface
Download: Matlab GUI Figure
Download: Matlab GUI Code