Final Project
Hello lamp
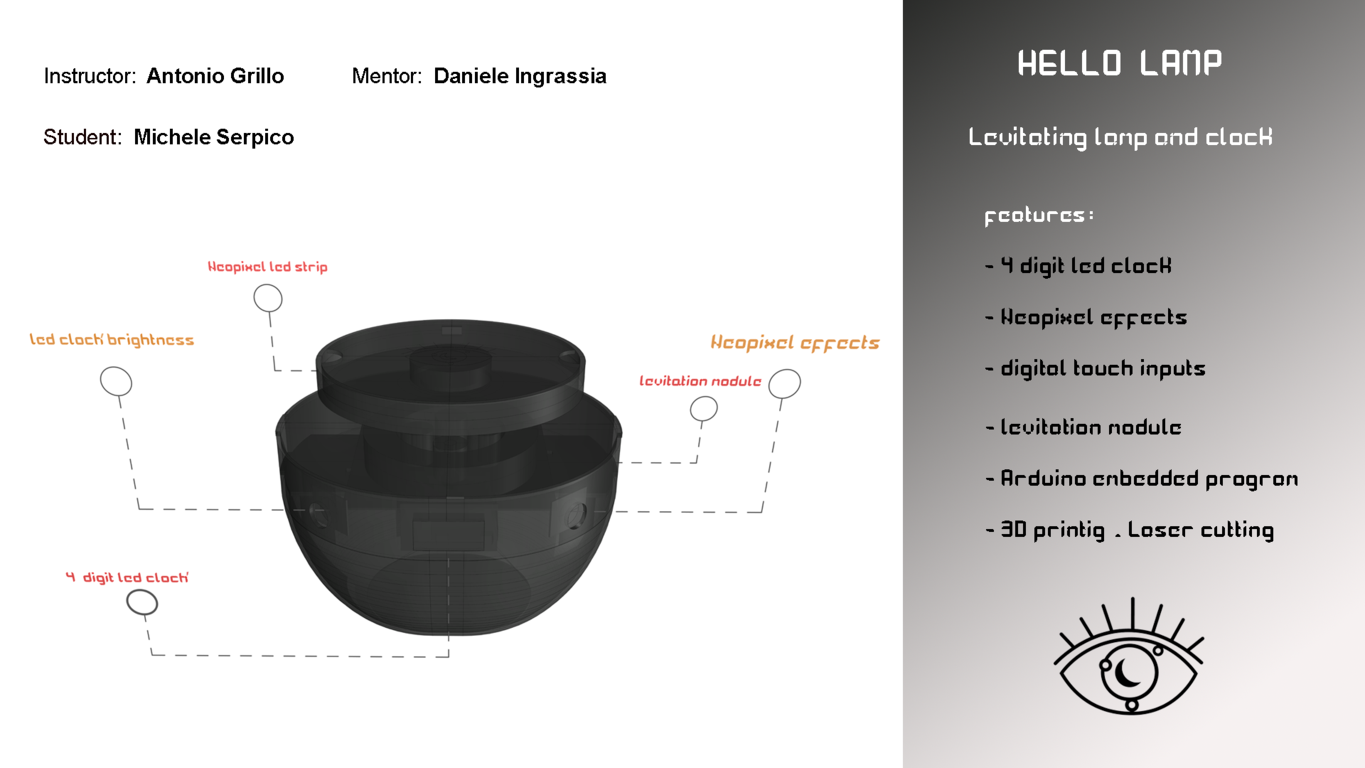
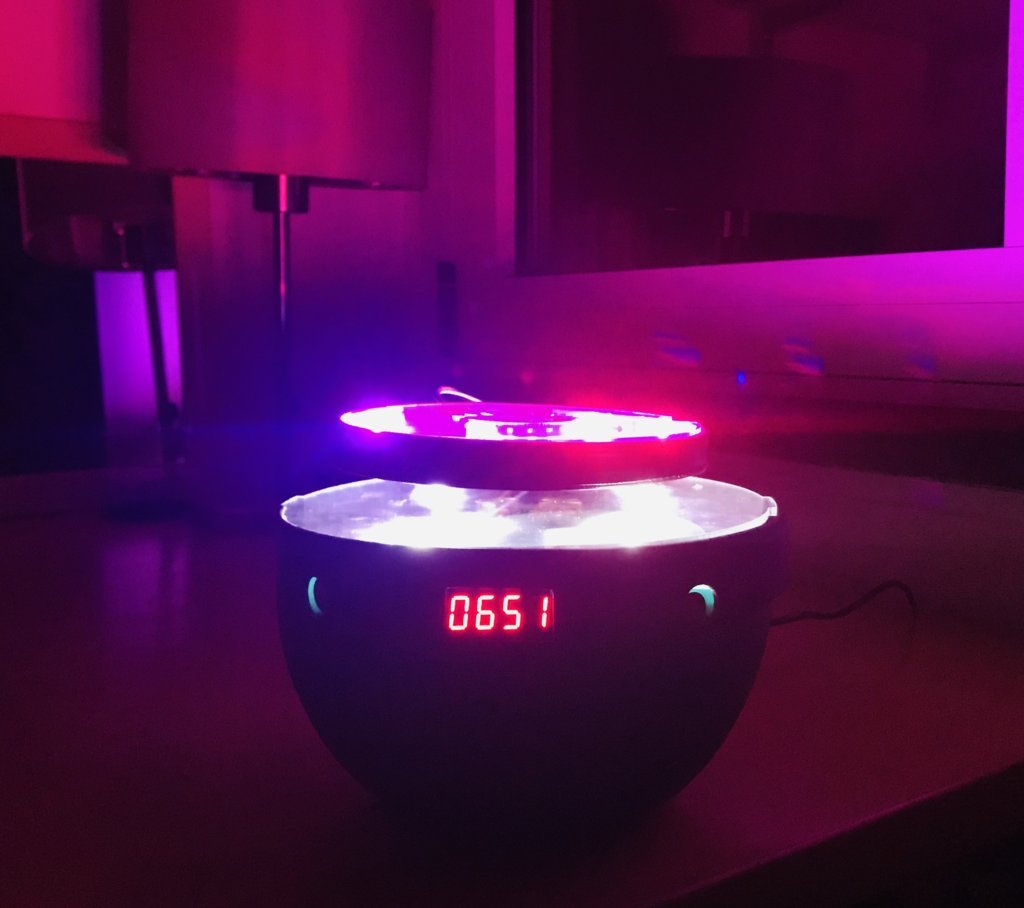
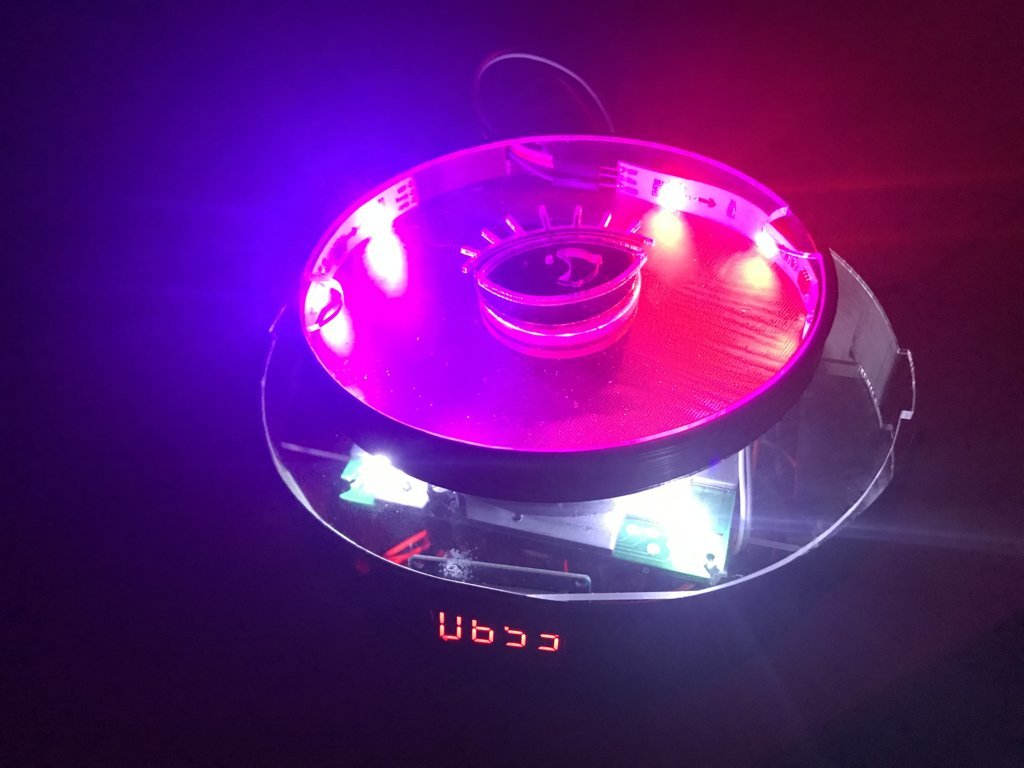
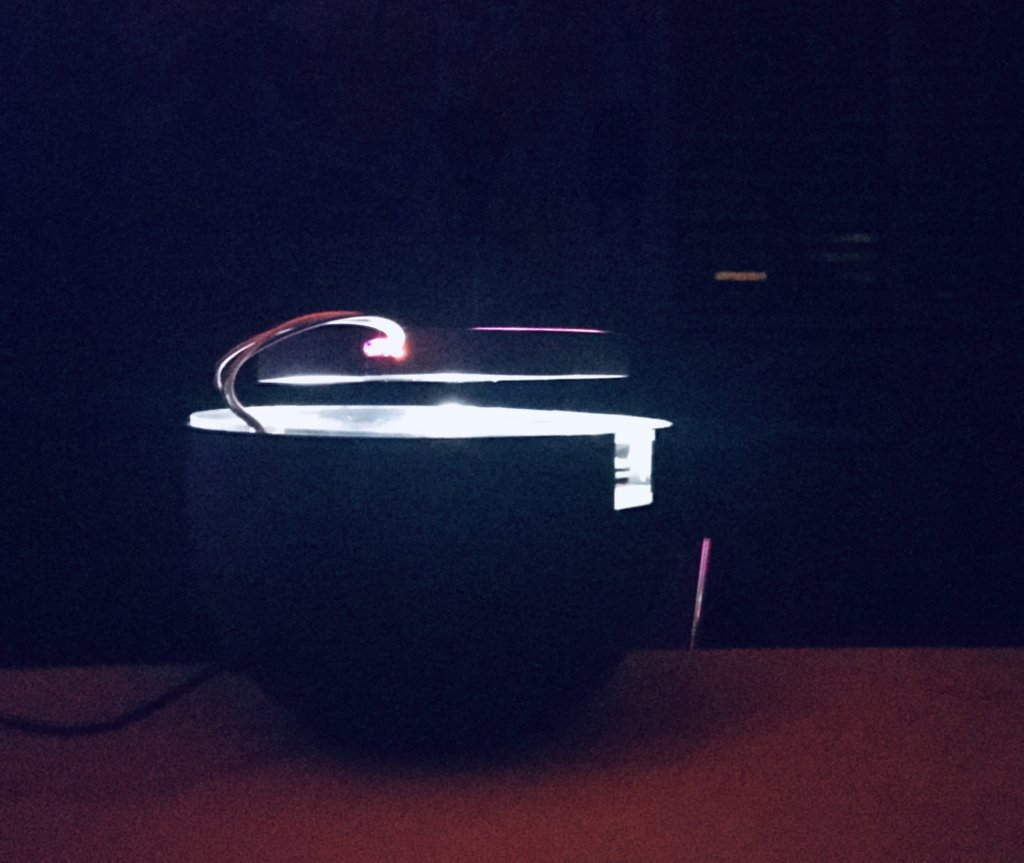
For my final project I made a levitating RGB lamp and clock Including a whole digital fabrication process, through electronics production, computer numerical control and embedded programming process.
I was looking for something new with fascionating design. I shared my final project documentation on my repository. All the documentation is licensed with the Attribution-ShareAlike 4.0 International (CC BY-SA 4.0) License
This video miss of TM1637 decimal dots but the .ino code at the foot of the page is complete.
See here the Hello Lamp’s BOM
Electronics design & production
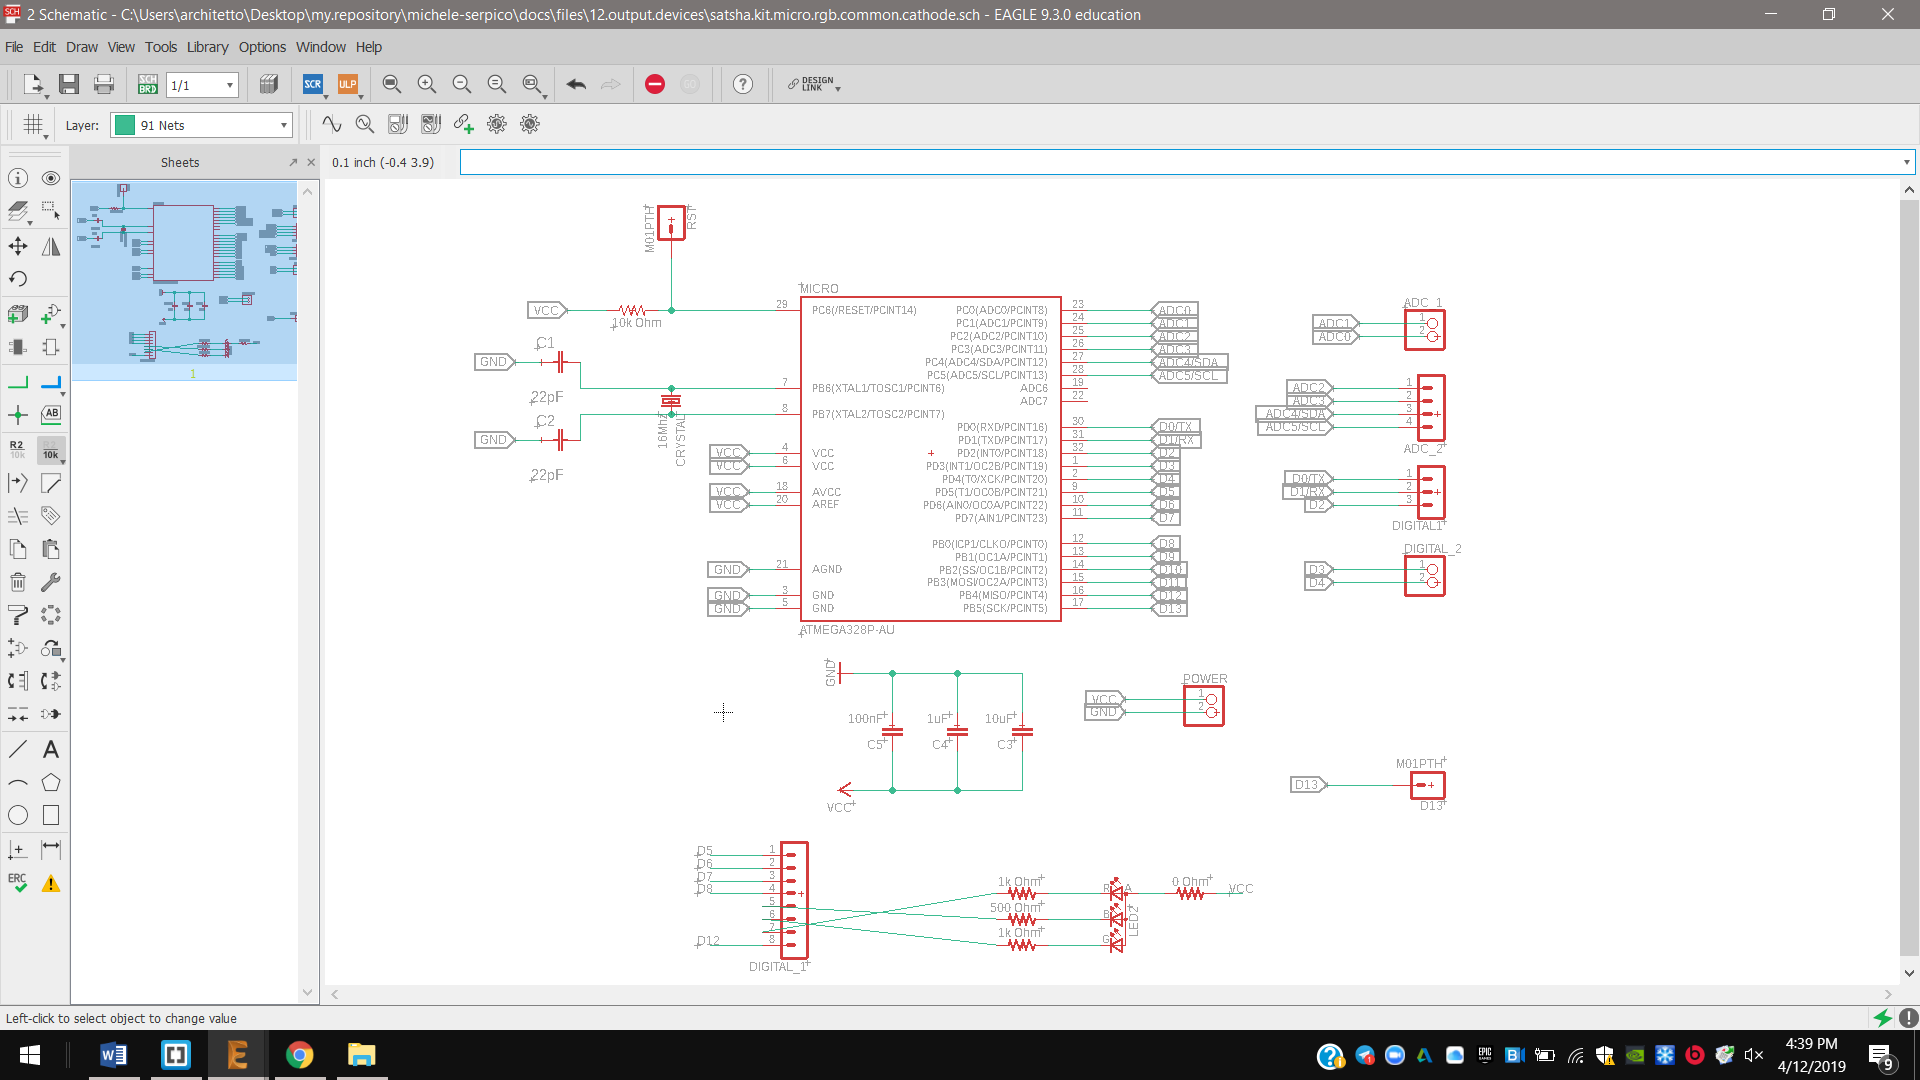
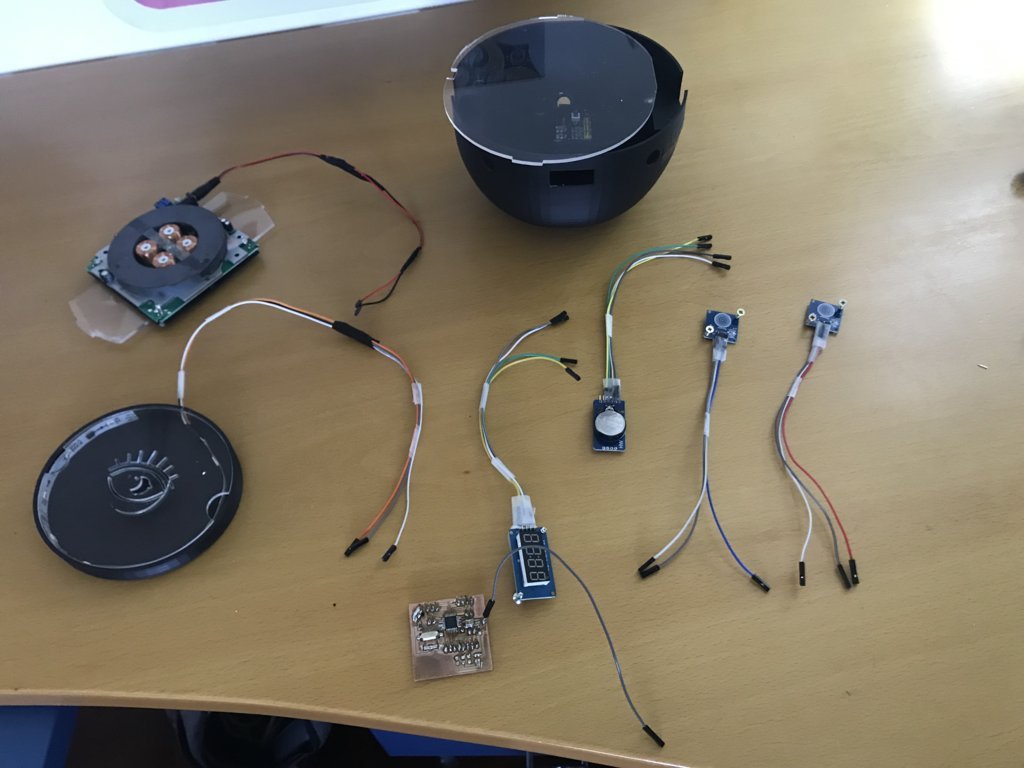
The generic Arduino board to program the Hello Lamp has to have free SDA and SCL pins (RTC DS3231), x3 digital pins(x2 TTP223 signal pin, TM1637 DIO pin) and x2 PWM pins (TM1637 CLK, Neopixel Din);
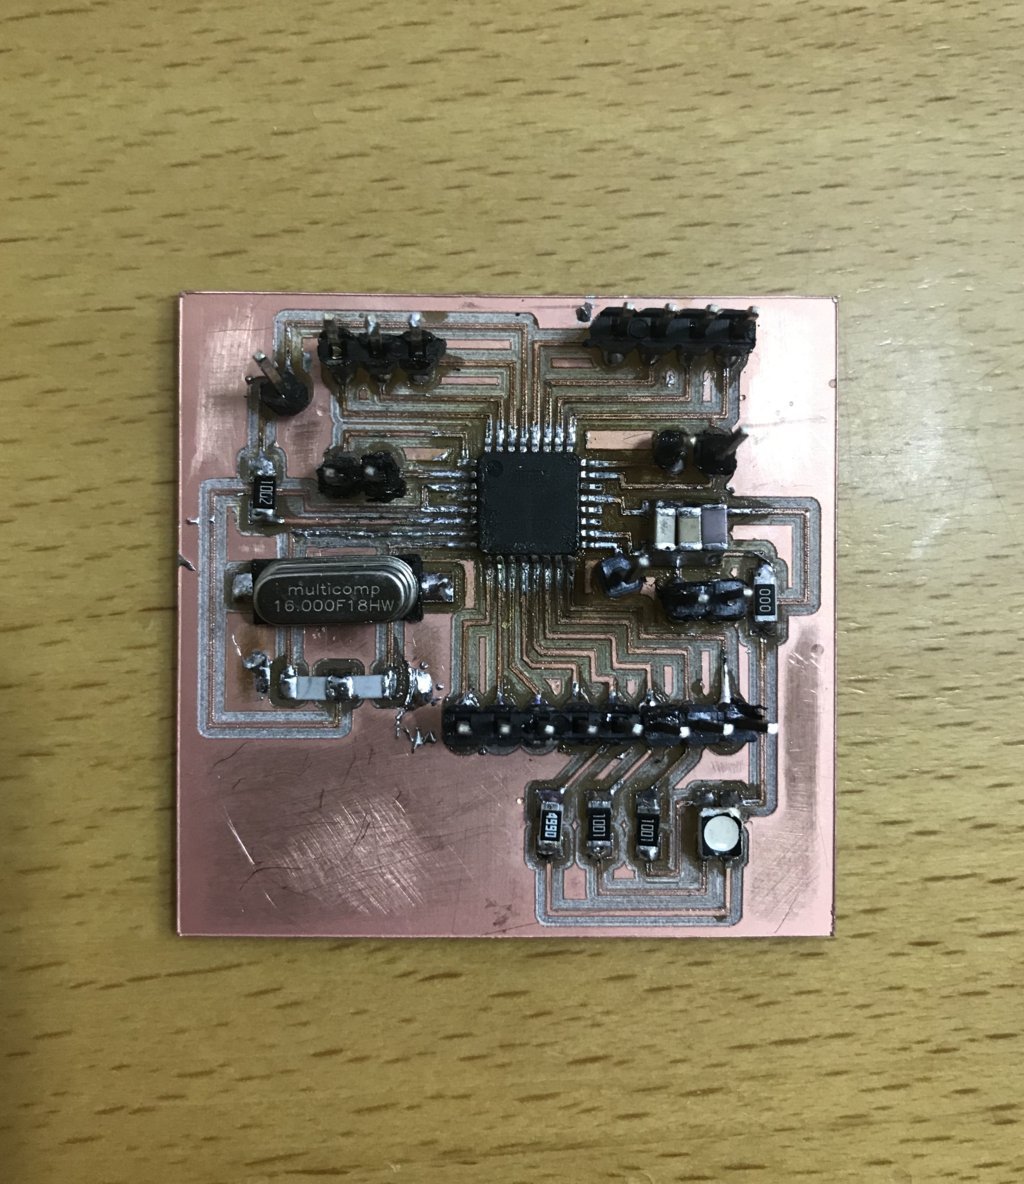
The board I made for my final project is a Satsha Kit Micro, through electronics design and electronics production.
I designed and made it during the output devices week, adding a 4plcc RGB common anode LED.
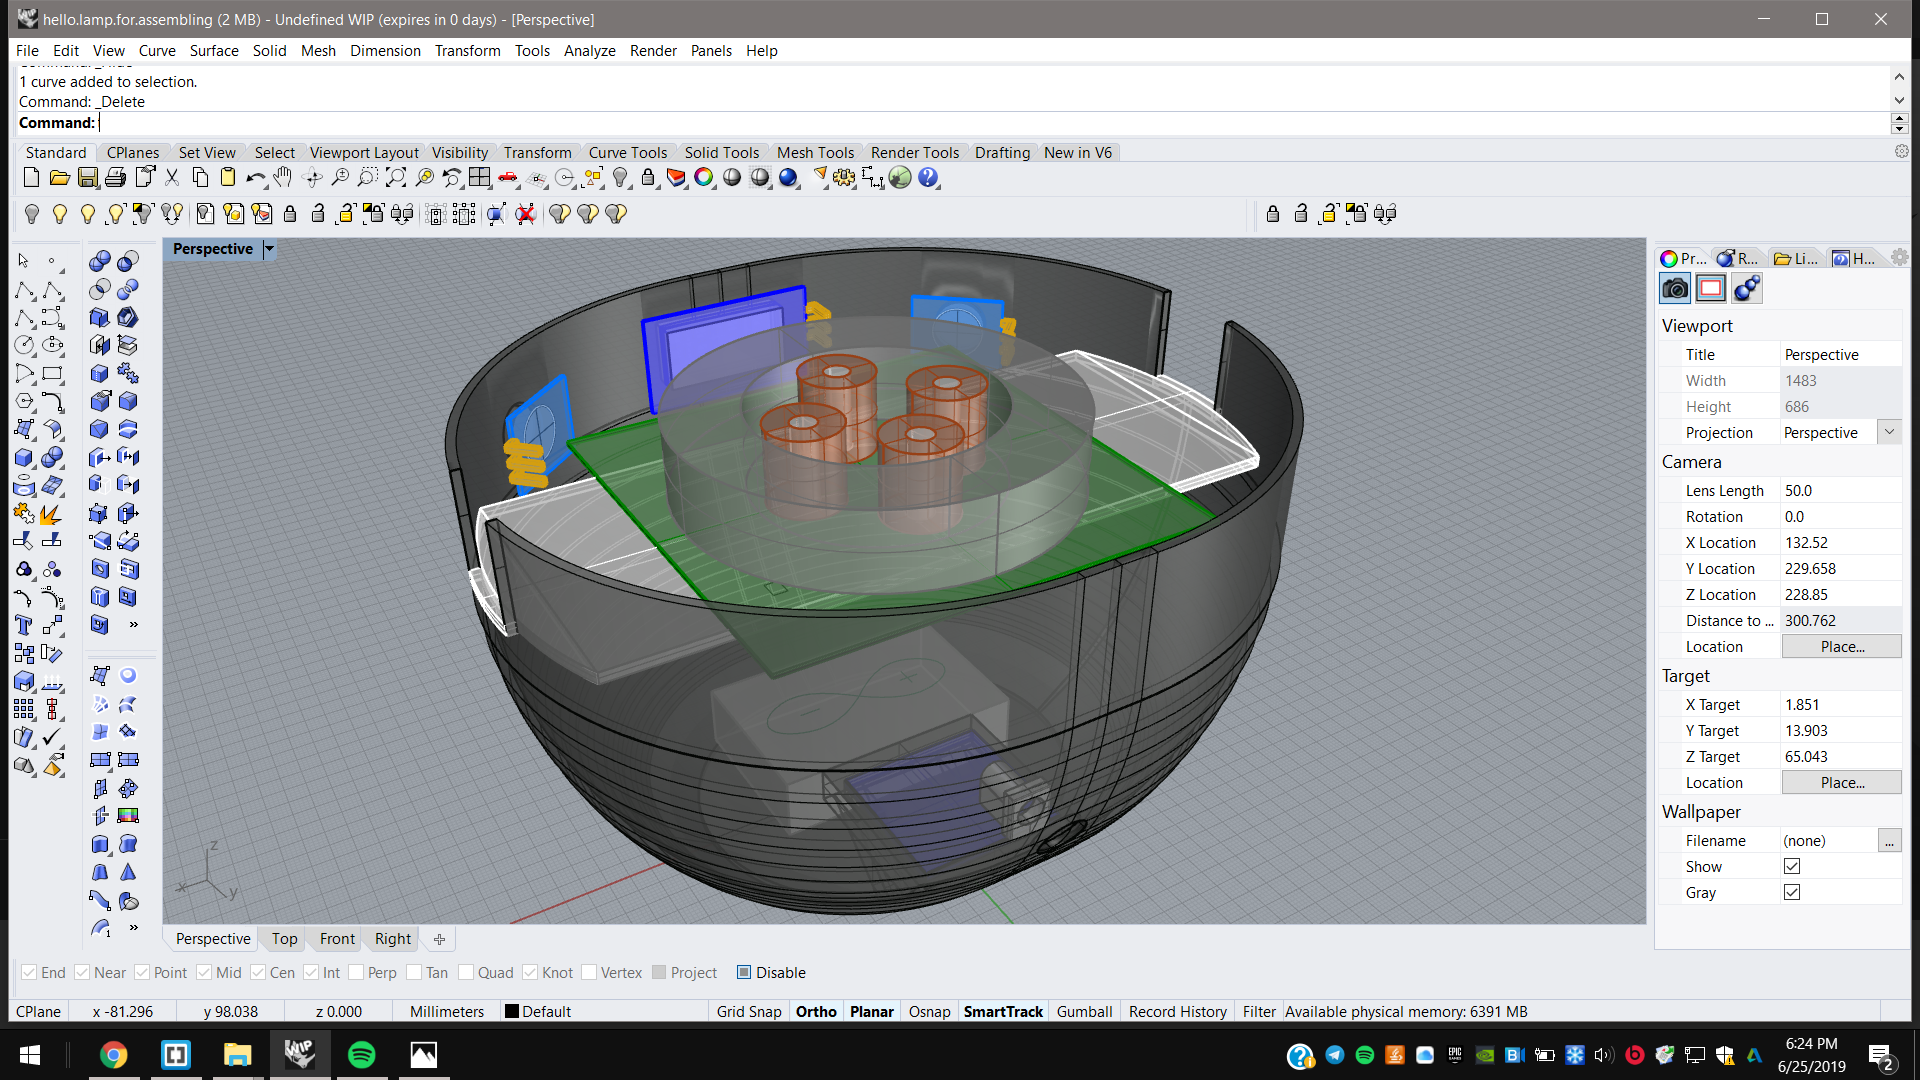
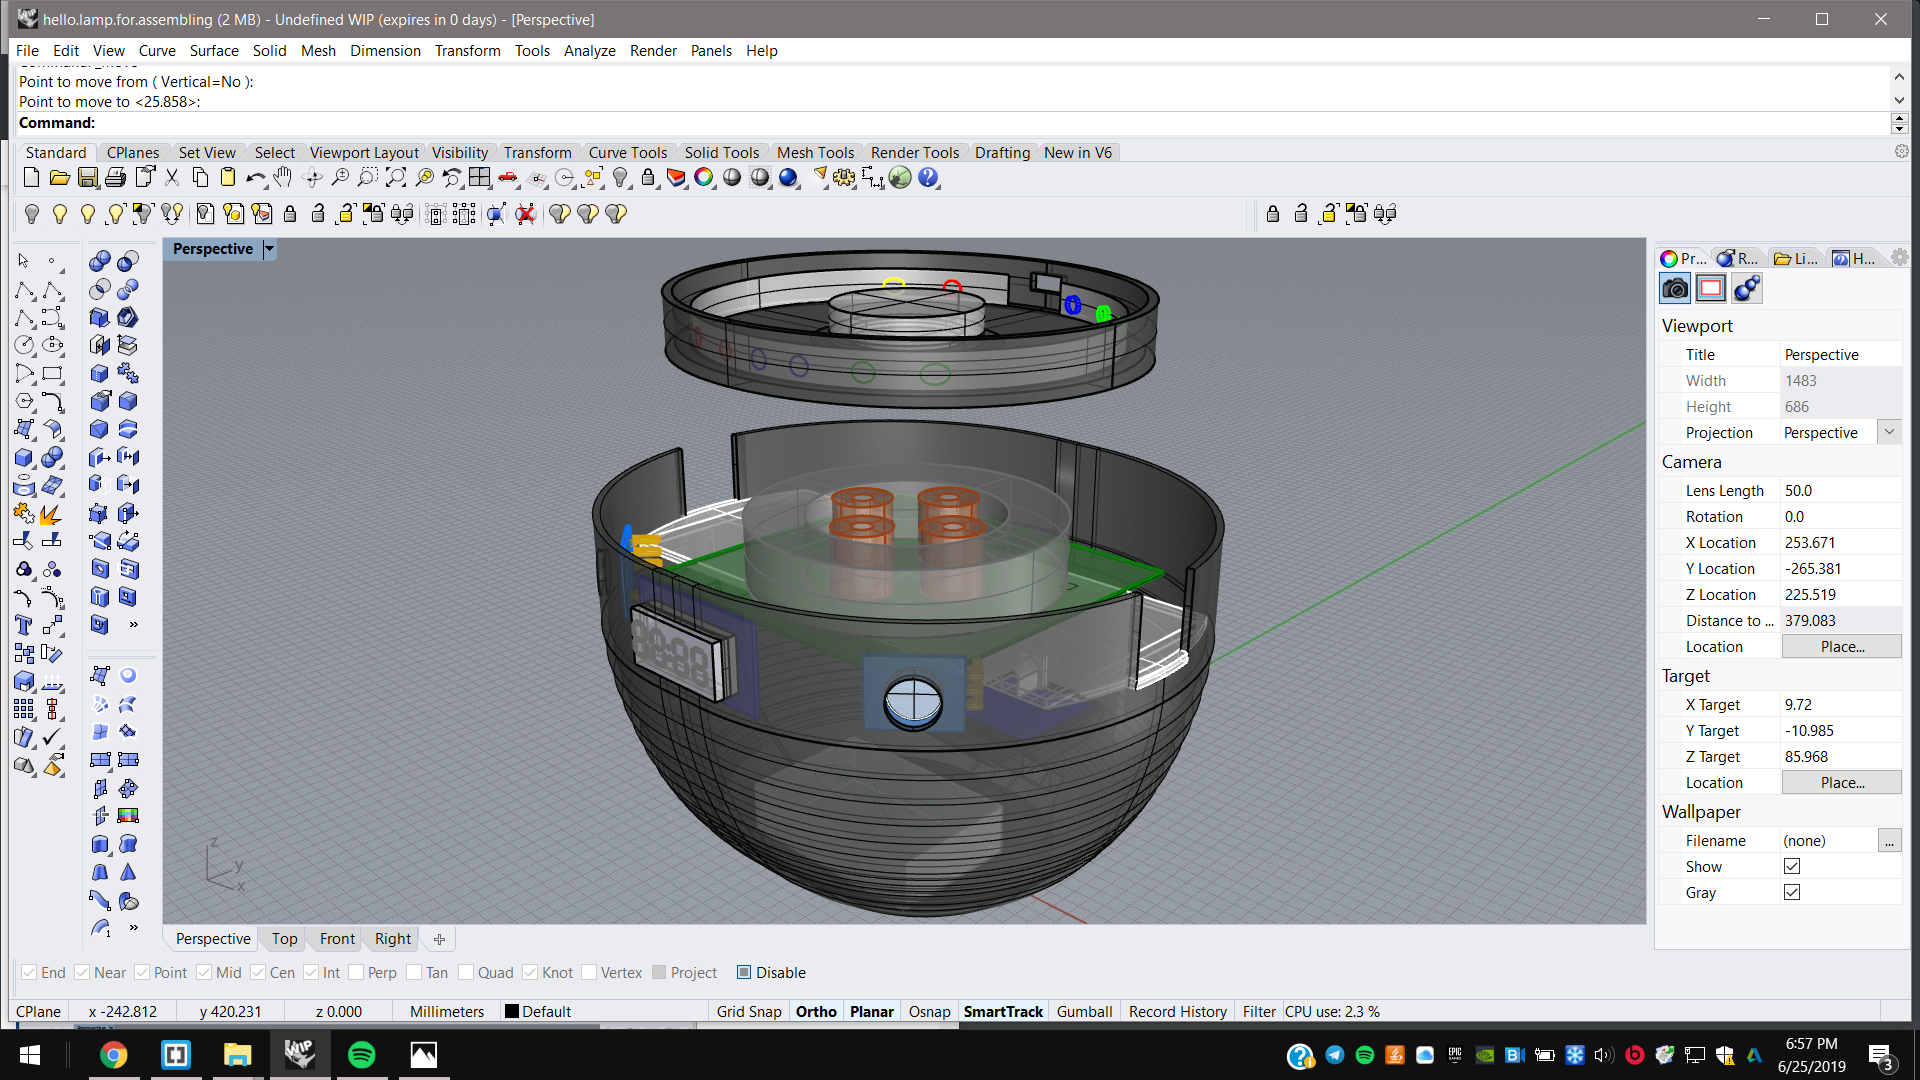
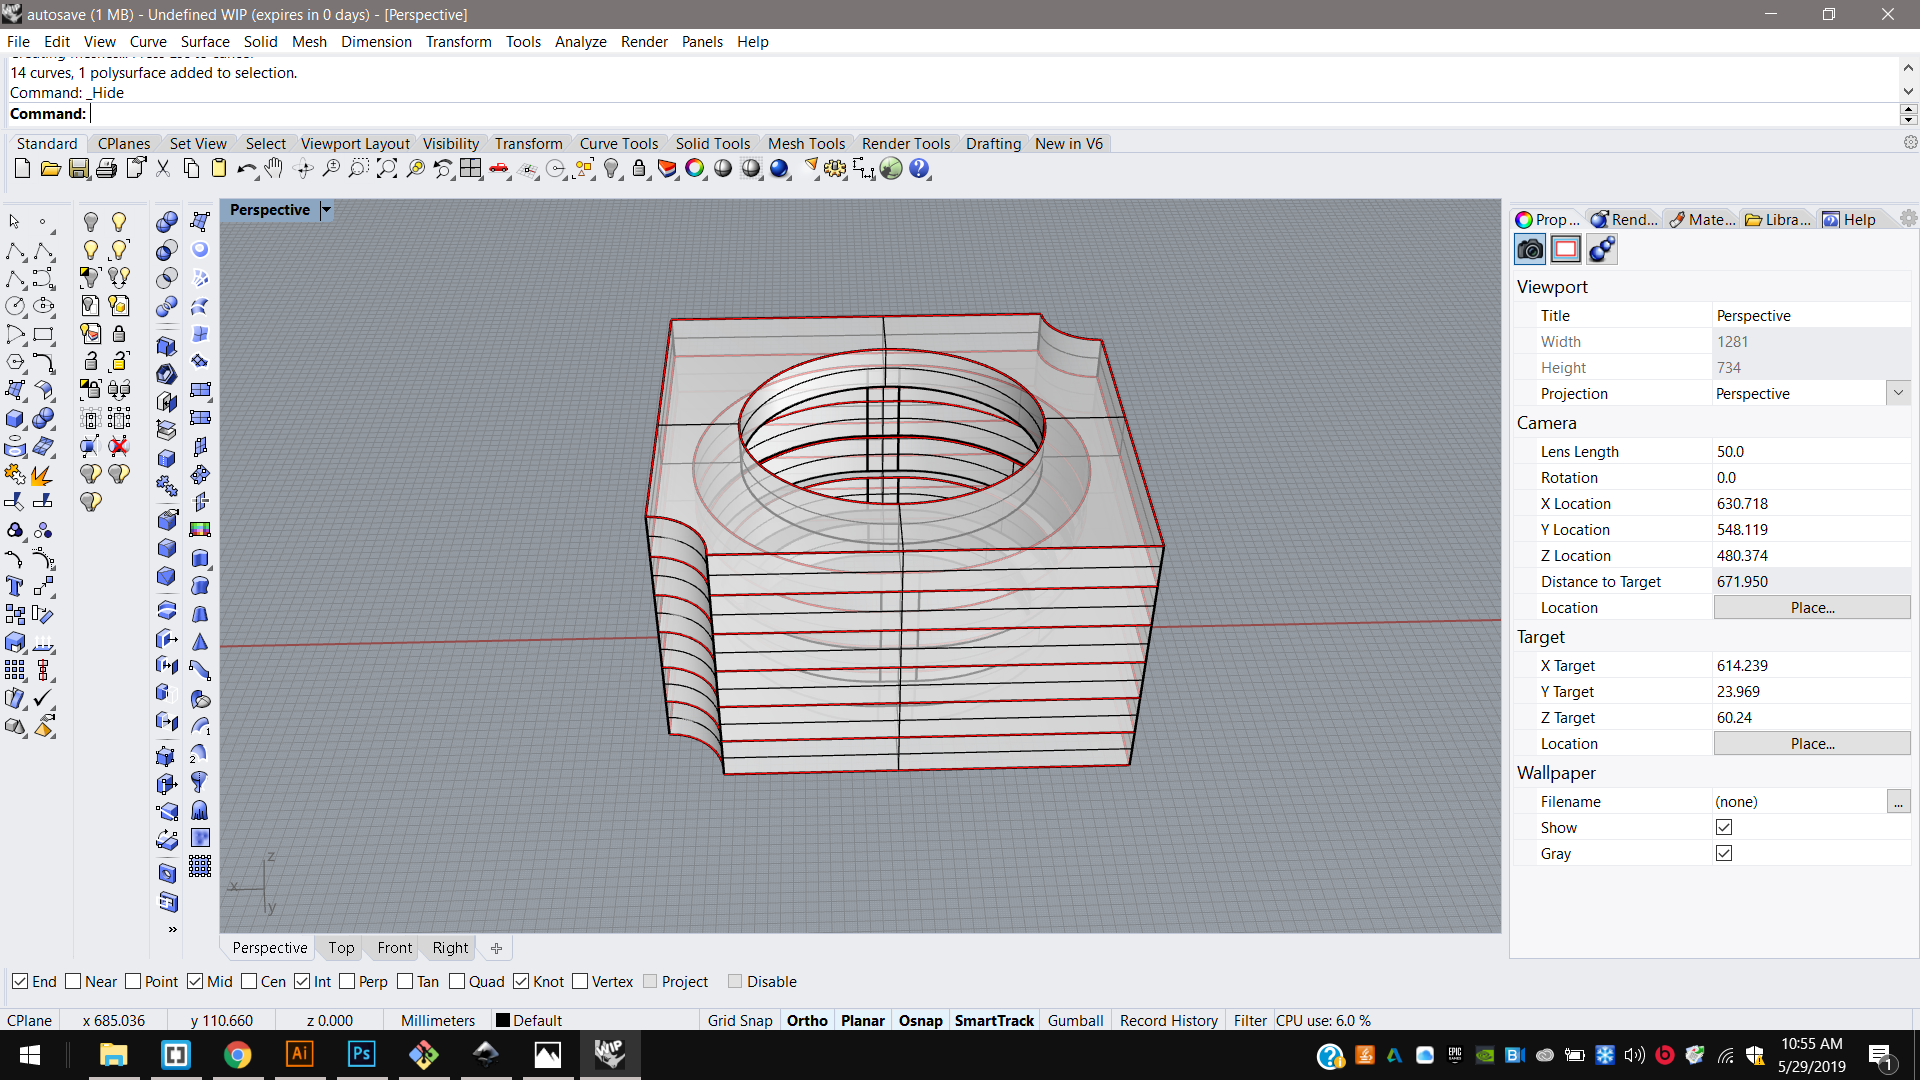
Computer aided design
Through computer aided design I designed joined parts.
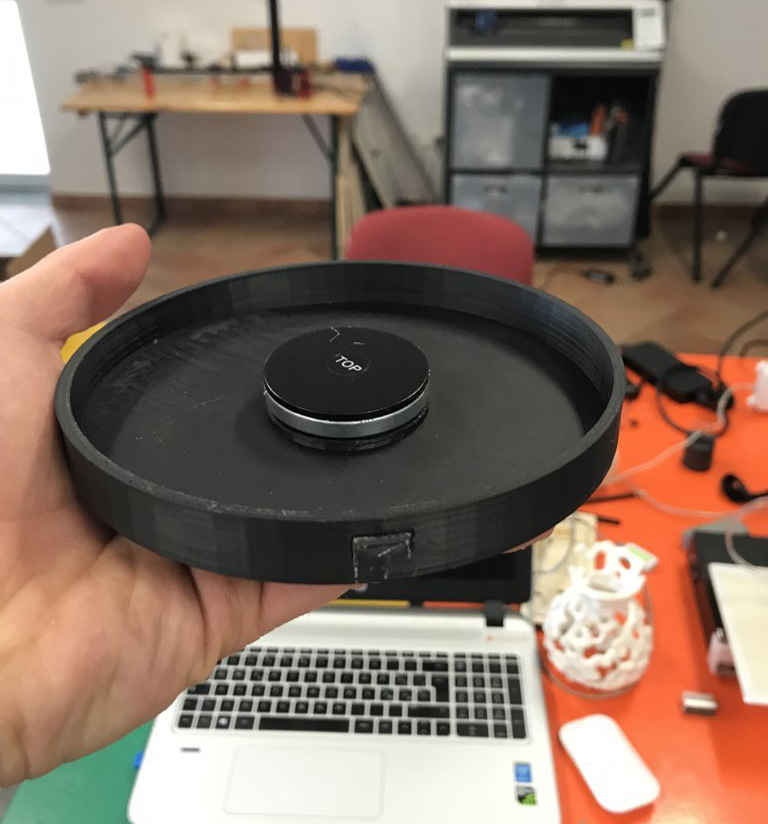
The lower case is designed to hold:
-
the Arduino board
-
a voltage divider (3.3V, 5V and 12V)
-
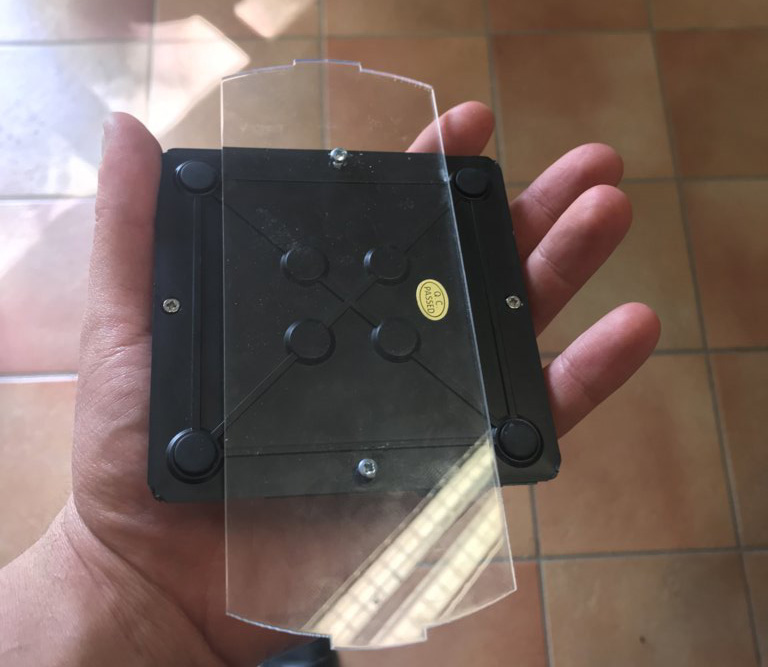
a levitation module joined to a plexyglass support
-
touch input devices and a led-clock output device.
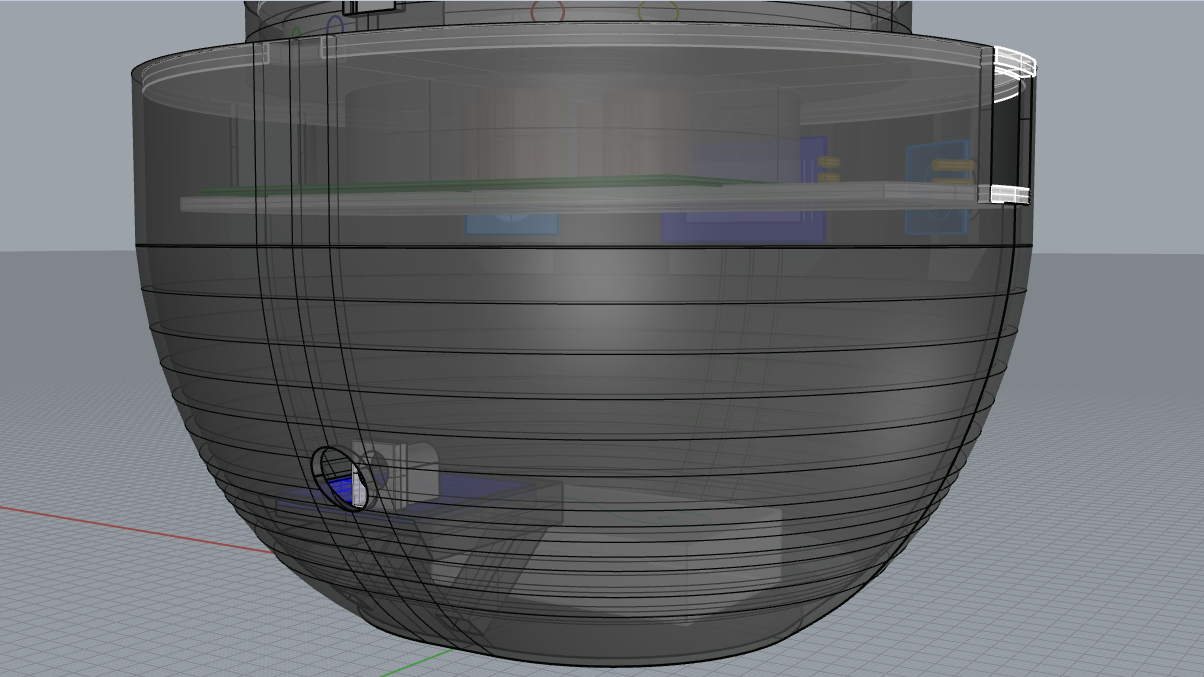
Instead, the upper levitating case is designed to hold a magnet and a led strip.
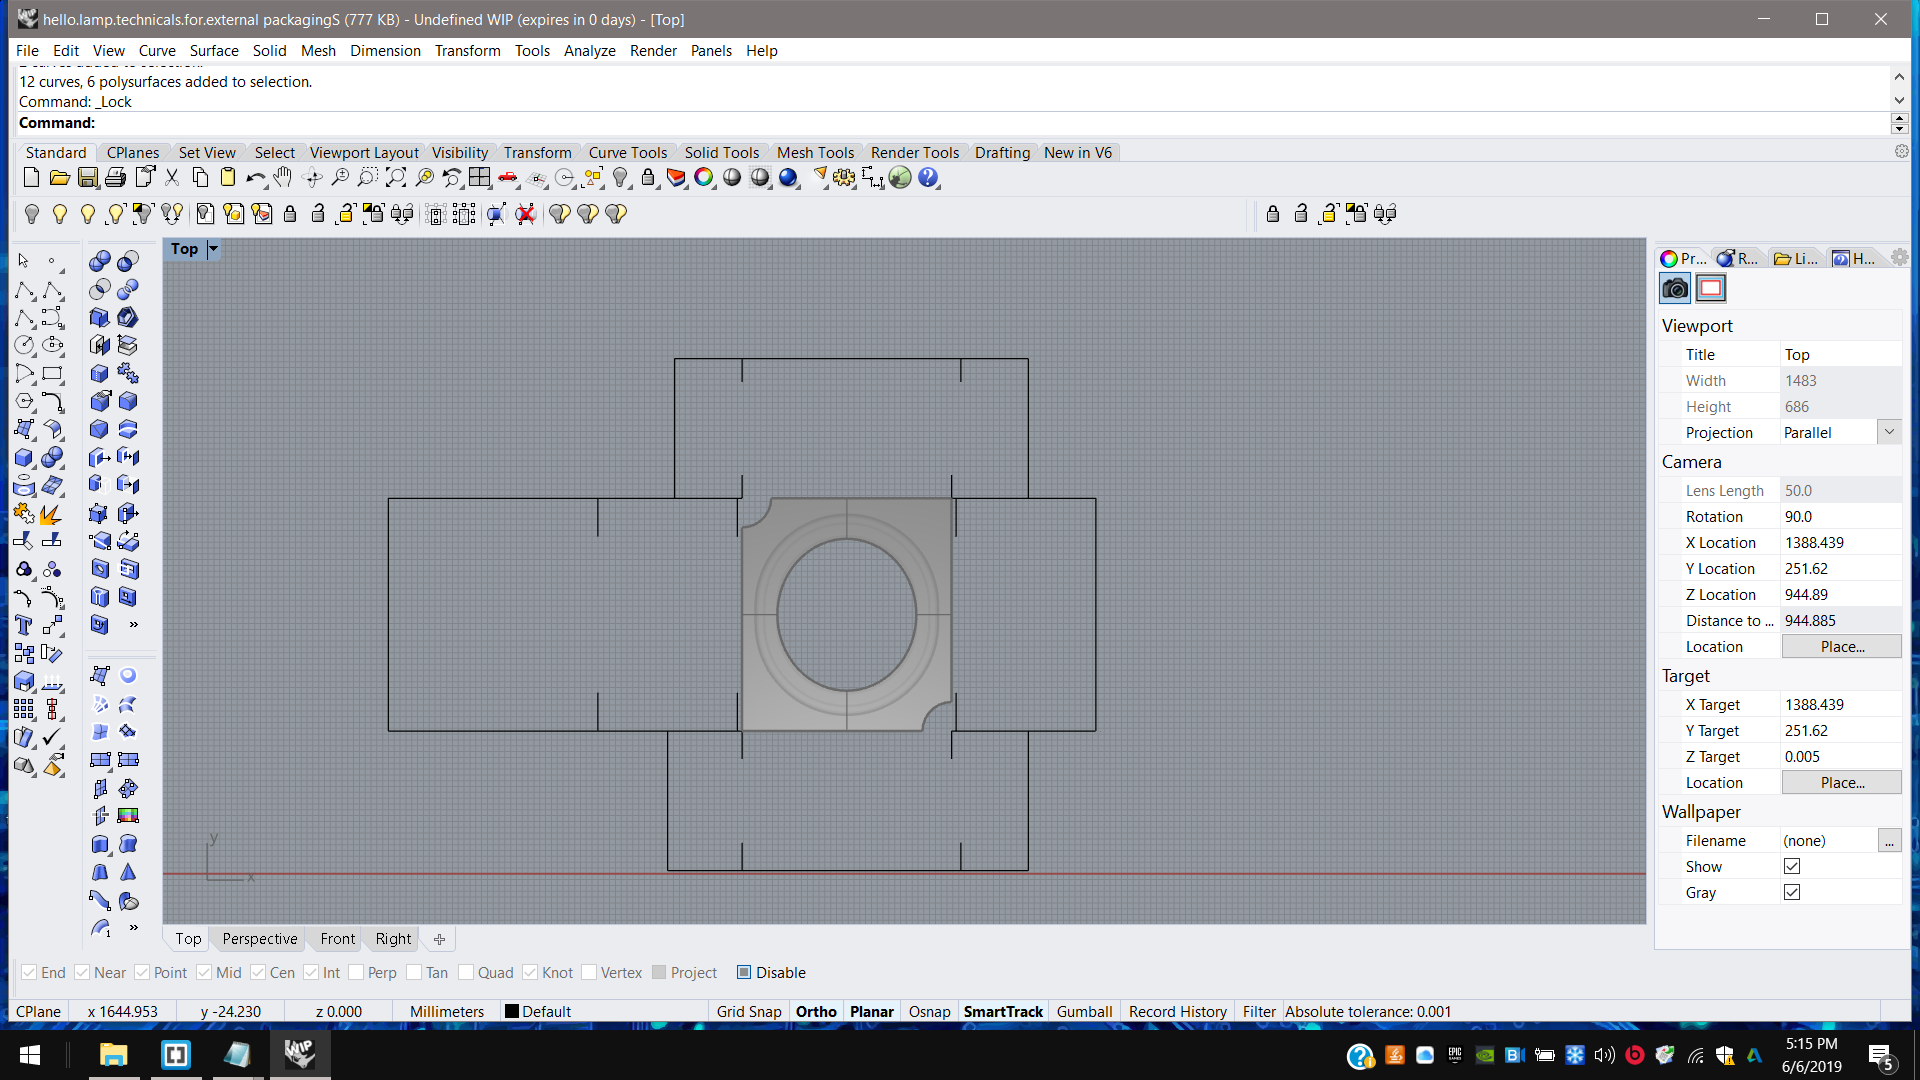
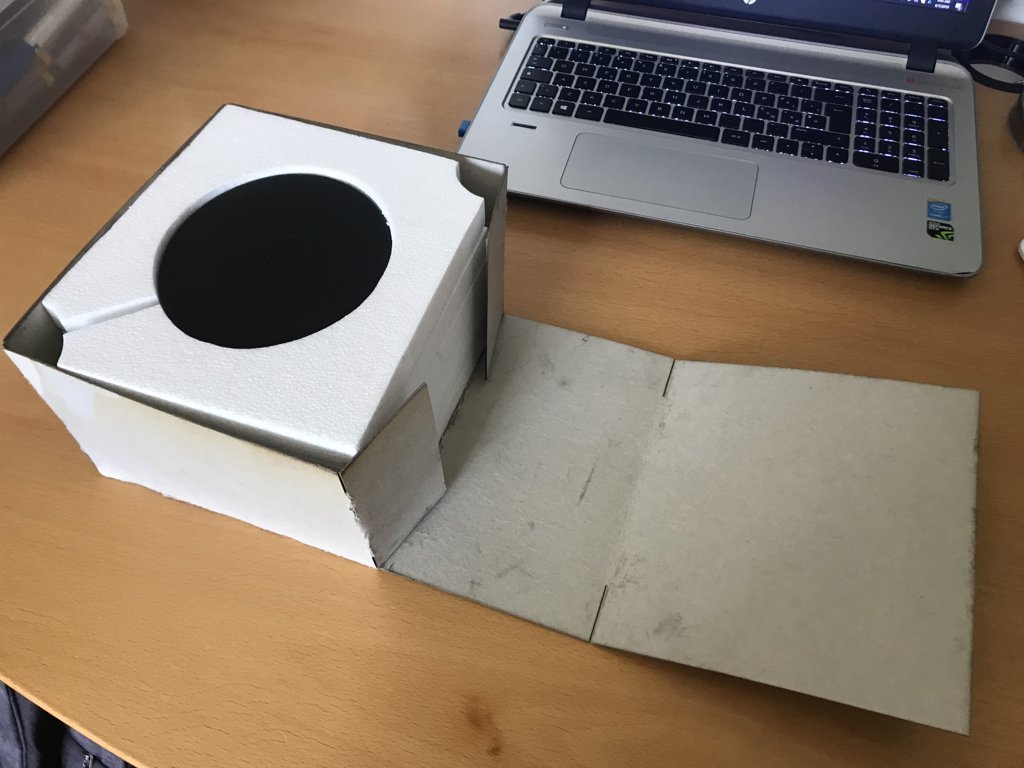
Then I also designed an internal and external packaging system;
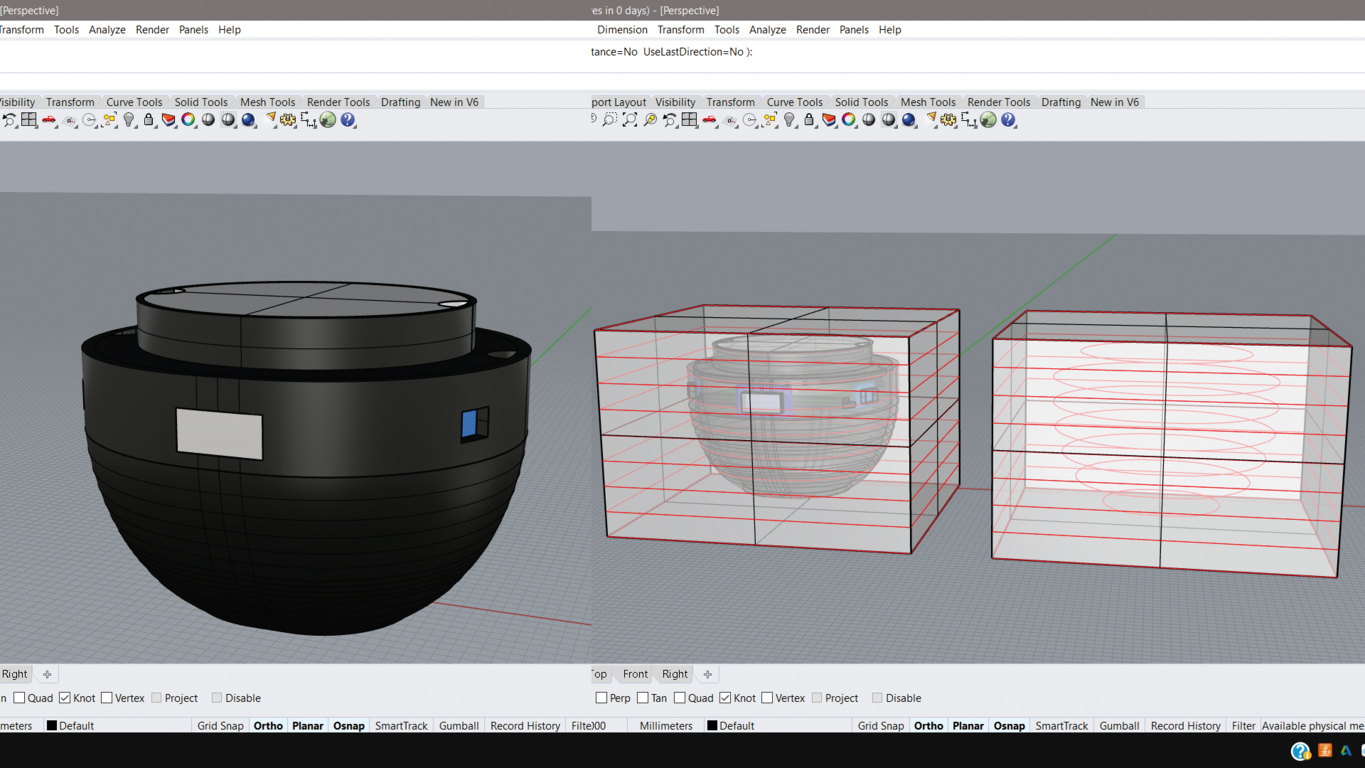
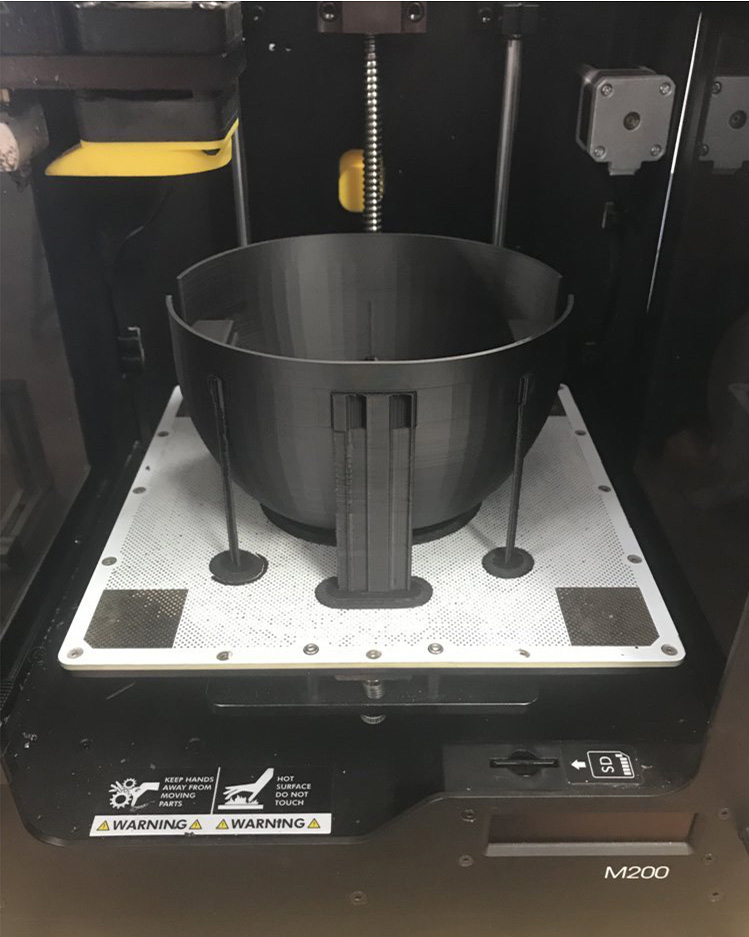
3d printing
I made the two case through 3d printing additive fabrication process with a Zortrax M200, importing .3dm models and setting parameters on Z-Suite;
Lower case:
Application version: 2.8.0.0
Estimated print time: 18h 22m
Material usage: 60.15m (143g)
Printer: Zortrax M200
Profile: Last settings
Support type: Automatic
Support: 20°
Material: Z-ABS
Nozzle diameter: 0.4 mm
Layer: 0.19 mm
Quality: High
Infill: 30%
Levitating upper case:
Application version: 2.8.0.0
Estimated print time: 4h 27m
Material usage: 20.02m (48g)
Printer: Zortrax M200
Profile: Last settings
Support type: Automatic
Support: 20°
Material: Z-ABS
Nozzle diameter: 0.4 mm
Layer: 0.19 mm
Quality: High
Infill: 30%
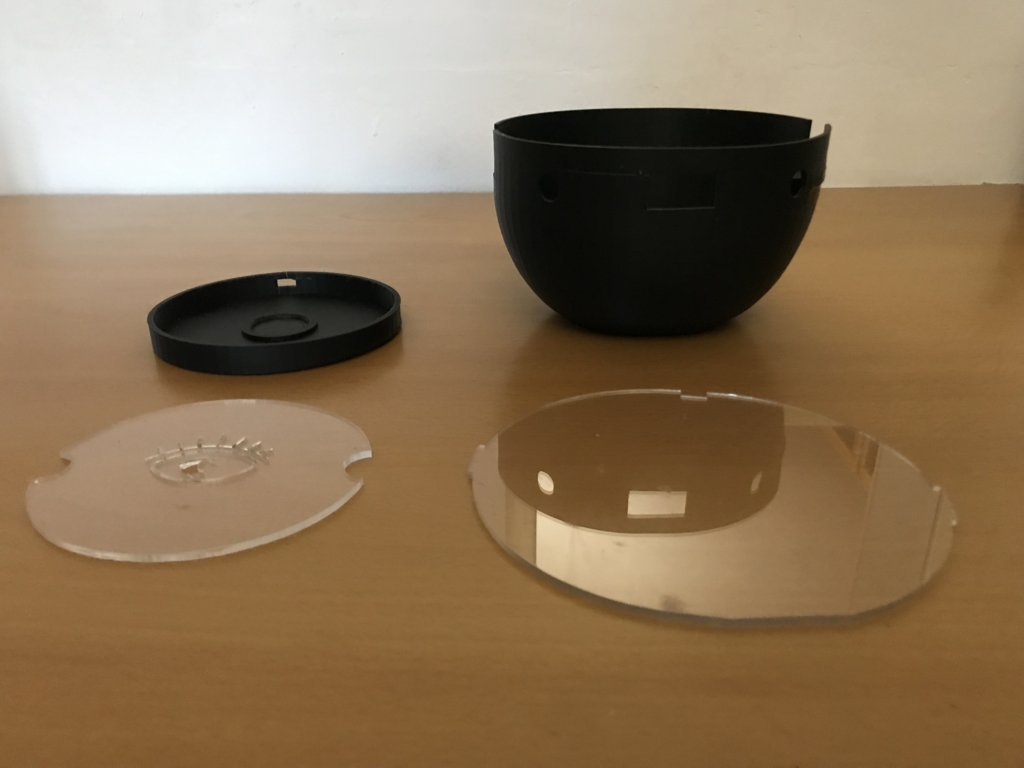
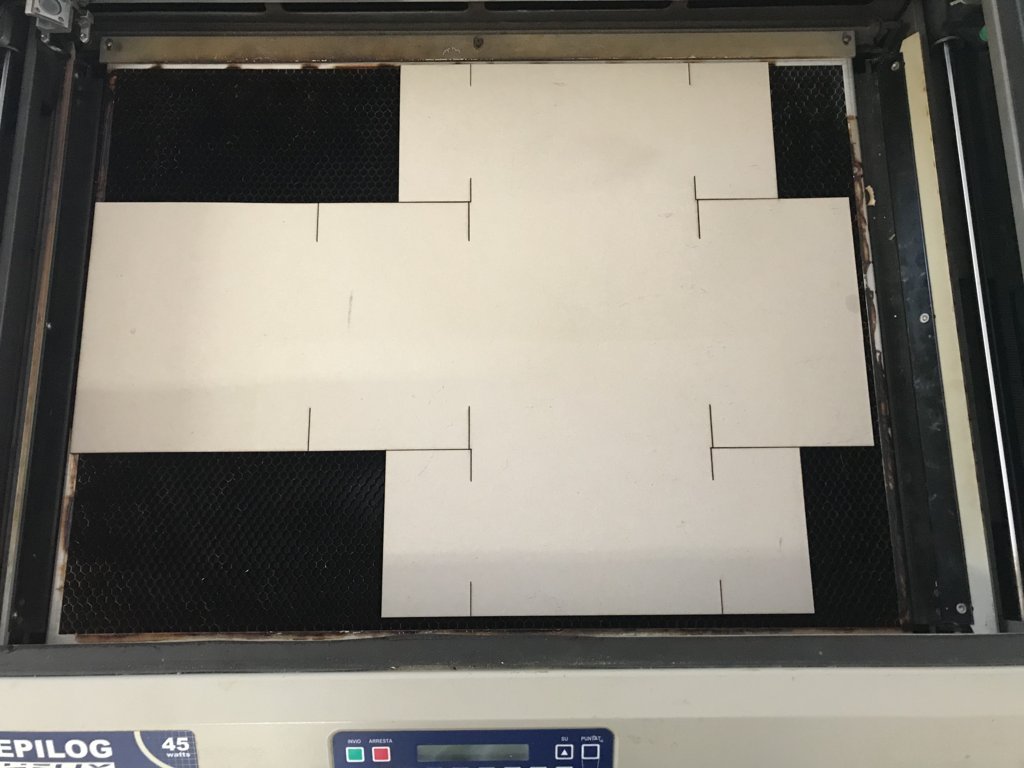
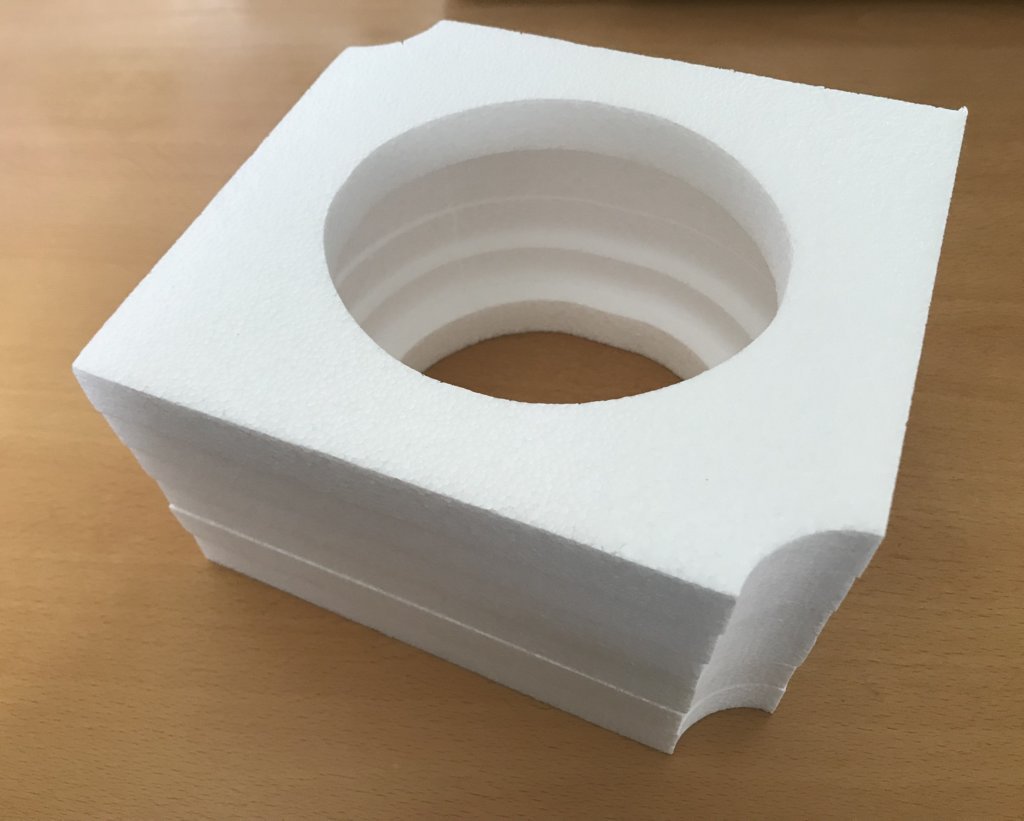
Laser cutting & polystyrene cutting
Then I first made plexyglass cases’ covers and levitation module support through laser cutting, and then I made the internal and external packaging system with carboard and also through polystyrene cutting.

Embedded programming
And finally I automated and actuated the Hello Lamp through embedded programming.
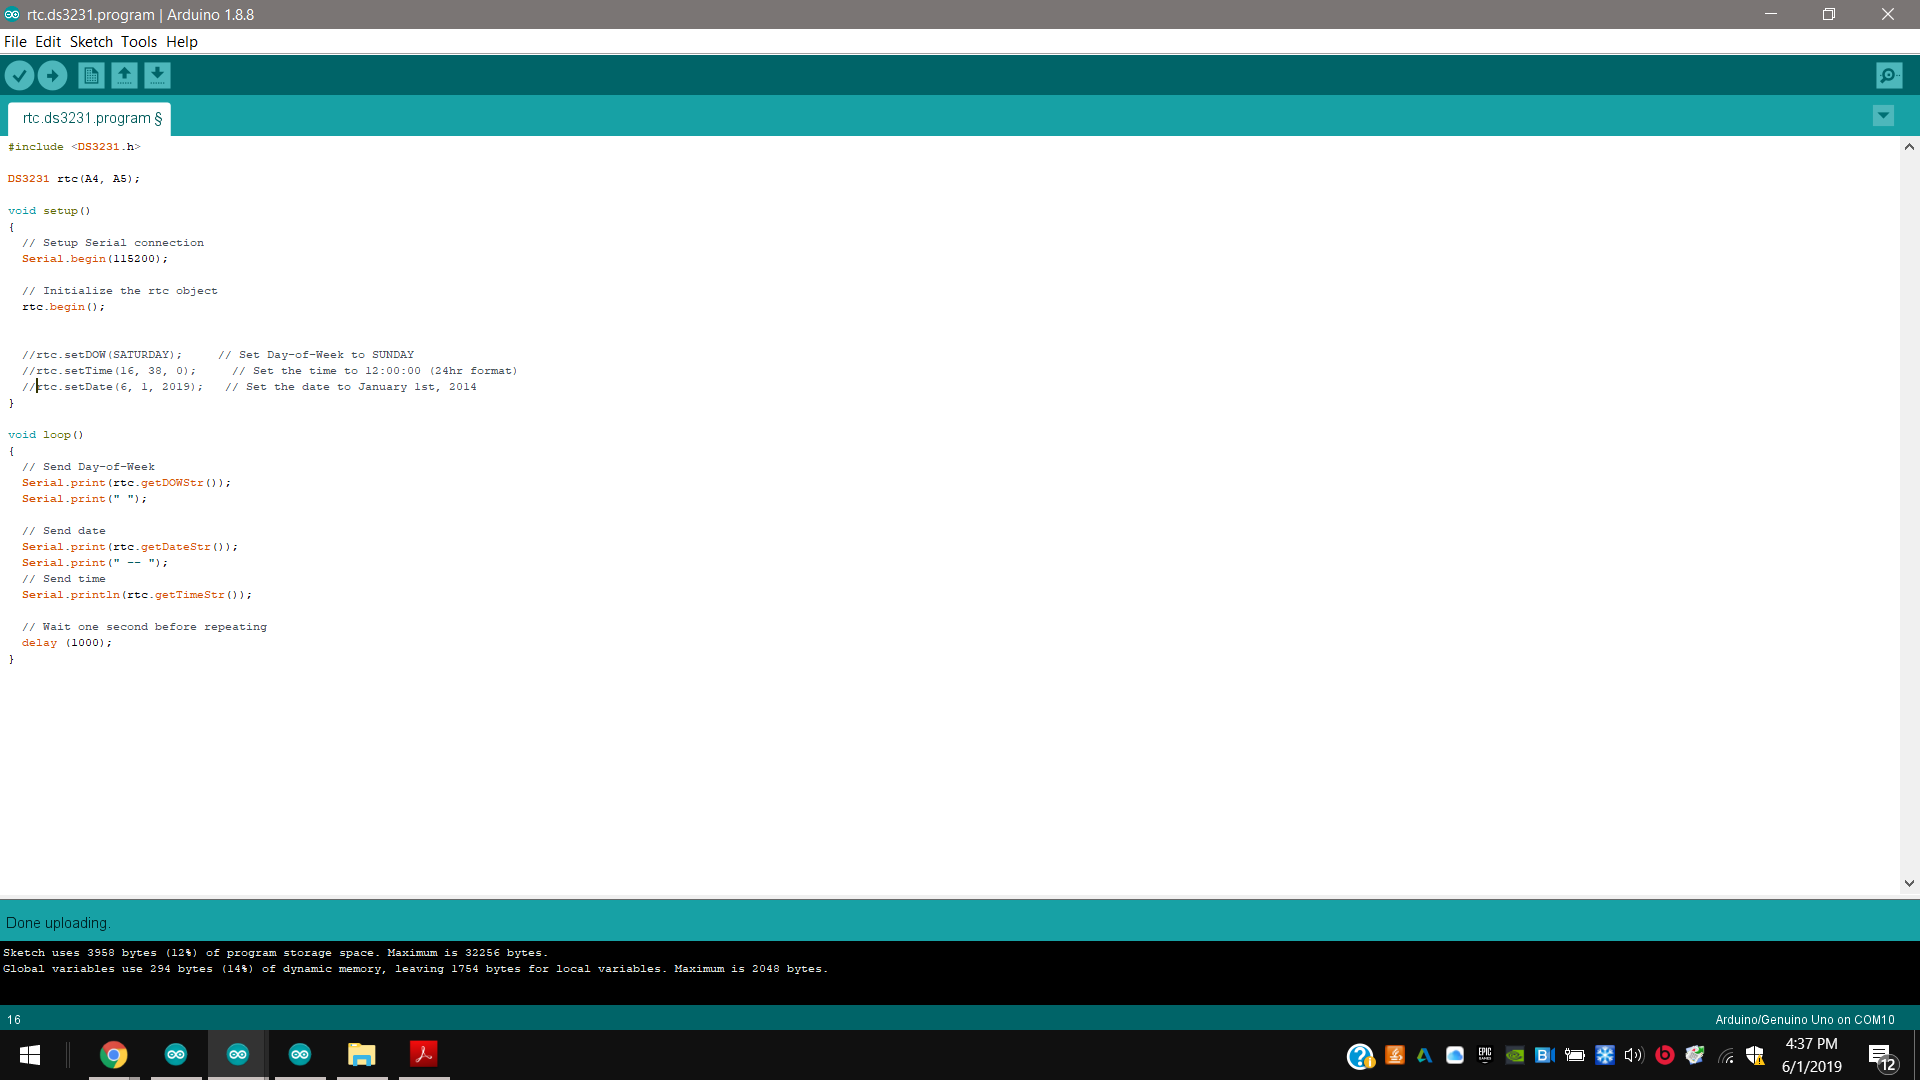
I started programming a RTC DS3231 to set constantly the real time;
I defined libraries and SDA, SCL pins (see Networking and communication) and I uncommented lines to set the current time and date, cheking it by serial. So I programmed it a first time;

And again, uncommenting those lines, I uploaded the program and the DS3231 keep real time constantly, even if not charged;
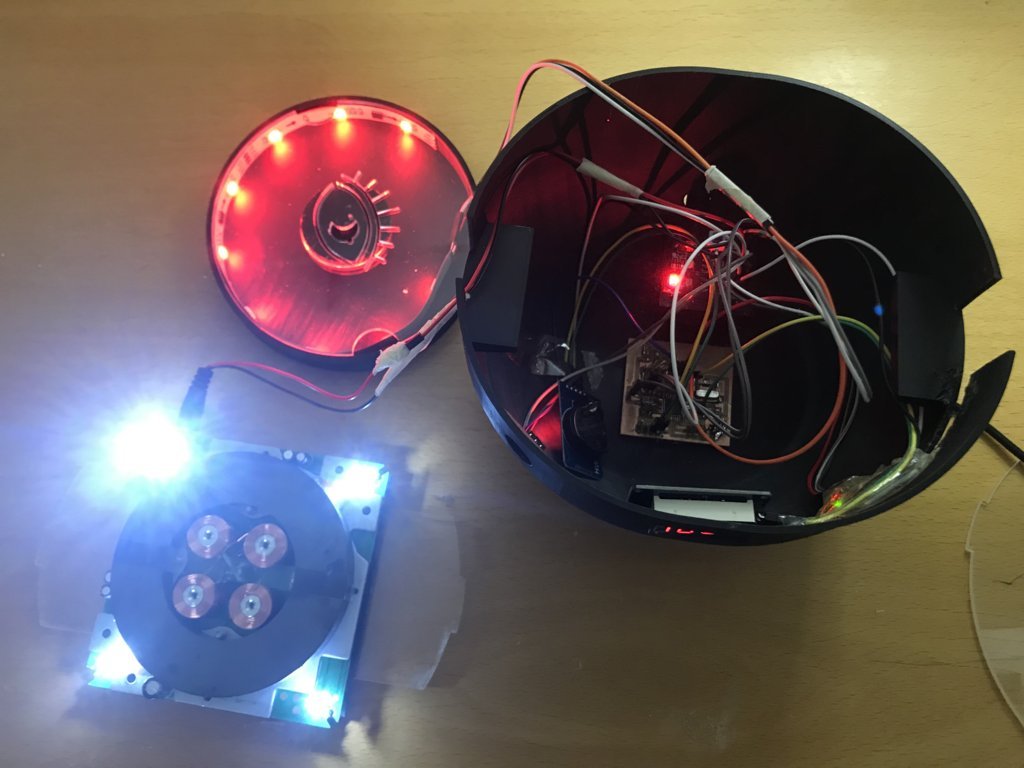
Then I downloaded the Adafruit Neopixel library on the Arduino lybrary manager, I compiled and uploaded the whole code in the satsha kit micro, to display the rtc through the TM1637 as output, in addition to min. e max. brightness touch input, as well as for the Neopixel LED strip to light on many RGB effects.
From the voltage divider I charged the lavitation module and the LED strip with 12V, the two capacitive touch input devices with 3.3V, and the satsha kit micro, the led-clock output device and the RTC with 5V.

#include <TM1637Display.h>    //including libraries
#include "RTClib.h"
#include <Wire.h>

#include <Adafruit_NeoPixel.h>
#ifdef __AVR__
 #include <avr/power.h> // Required for 16 MHz Adafruit Trinket
#endif

RTC_DS3231 rtc;                  // defining RTC I2C communication
#define CLK 5                    // defining TM1637 diplay DIO output and CLK pins
#define DIO 4
int touchClock = 7;              // defining touch variables for the clock
int touchClockVal = 0;
TM1637Display display(CLK, DIO);   // initializing TM1637 clock
int a, t;

#define BUTTON_PIN   8                 // defining Neopixel touch cycler pin
#define PIXEL_PIN    6                 // defining  Neopixel Din pin
#define PIXEL_COUNT 13
Adafruit_NeoPixel strip(PIXEL_COUNT, PIXEL_PIN, NEO_GRB + NEO_KHZ800);
boolean oldState = HIGH;
int     mode     = 0;    // Currently-active animation mode, 0-9


void setup () {
  Wire.begin();                     // Initializing I2c communication between Arduino Satsha and rtc through SDA and SCL
  display.setBrightness(0);         // initializing clock brightness function

  pinMode(BUTTON_PIN, INPUT);       // declaring Neopixel touch input cycler
  strip.begin();                    // initializing Neopixel
  strip.show();
}


void loop (){
      uint8_t segto;                                    // how to light on TM1637 decimal dots
      int value = 1244;
      segto = 0x80|display.encodeDigit((value/100)%10);
      display.setSegments(&segto,1,1);
    DateTime now = rtc.now();
    a=now.second()%2;
    t = (now.hour()* 100 )+ now.minute();
    display.showNumberDec(t, true);


  if (digitalRead (7) == 1){
    touchClockVal++;
    if (touchClockVal>=3) {
      touchClockVal=1;
       }
      delay (500);
  }

  if (touchClockVal==1) {
  display.setBrightness(7);
  }
    if (touchClockVal==2) {
        display.setBrightness(0);
    }


    boolean newState = digitalRead(BUTTON_PIN);
  if((newState == LOW) && (oldState == HIGH)) {    // checking if state changed from high to low (button press).

    delay(20);

    newState = digitalRead(BUTTON_PIN);          // checking if button is still low after debounce.
    if(newState == LOW) {
      if(++mode > 8) mode = 0;                   // .. advancing to next mode, wrap around after #8
      switch(mode) {                              // Start the new animation...
        case 0:
          colorWipe(strip.Color(  0,   0,   0), 50);    // respectively, blinking fast ..
          break;
        case 1:
          colorWipe(strip.Color(255,   0,   0), 50);    // Red
          break;
        case 2:
          colorWipe(strip.Color(  0, 255,   0), 50);    // Green
          break;
        case 3:
          colorWipe(strip.Color(  0,   0, 255), 50);    // Blue
          break;
        case 4:
          theaterChase(strip.Color(127, 127, 127), 50);   // White
          break;
        case 5:
          theaterChase(strip.Color(127,   0,   0), 50);   // Red
          break;
        case 6:
          theaterChase(strip.Color(  0,   0, 127), 50);   // Blue
          break;
        case 7:
          rainbow(10);      // Initializing "rainbow" effects ..
          break;
        case 8:
          theaterChaseRainbow(50);
          break;
      }
    }
  }


  oldState = newState;          // Setting the last-read button state to the old state.
}


// Fill strip pixels one after another with a color. Strip is NOT cleared
// first; anything there will be covered pixel by pixel. Pass in color
// (as a single 'packed' 32-bit value, which you can get by calling
// strip.Color(red, green, blue) as shown in the loop() function above),
// and a delay time (in milliseconds) between pixels.

void colorWipe(uint32_t color, int wait) {
  for(int i=0; i<strip.numPixels(); i++) {   // For each pixel in strip...
    strip.setPixelColor(i, color);       //  Set pixel's color (in RAM)
    strip.show();             //  Update strip to match
    delay(wait);              //  Pause for a moment
  }
}


// Theater-marquee-style chasing lights. Pass in a color (32-bit value,
// a la strip.Color(r,g,b) as mentioned above), and a delay time (in ms)
// between frames.

void theaterChase(uint32_t color, int wait) {
  for(int a=0; a<10; a++) {
    for(int b=0; b<3; b++) {
      strip.clear();

      for(int c=b; c<strip.numPixels(); c += 3) {
        strip.setPixelColor(c, color);
      }
      strip.show();
      delay(wait);
    }
  }
}

void rainbow(int wait) {     // Rainbow cycle along whole strip. Pass delay time (in ms) between frames.


  // Hue of first pixel runs 3 complete loops through the color wheel.
  // Color wheel has a range of 65536 but it's OK if we roll over, so
  // just count from 0 to 3*65536. Adding 256 to firstPixelHue each time
  // means we'll make 3*65536/256 = 768 passes through this outer loop:

  for(long firstPixelHue = 0; firstPixelHue < 3*65536; firstPixelHue += 256) {
    for(int i=0; i<strip.numPixels(); i++) {
      // For each pixel in strip...
      // Offset pixel hue by an amount to make one full revolution of the
      // color wheel (range of 65536) along the length of the strip
      // (strip.numPixels() steps):

      int pixelHue = firstPixelHue + (i * 65536L / strip.numPixels());
          // strip.ColorHSV() can take 1 or 3 arguments: a hue (0 to 65535) or
      // optionally add saturation and value (brightness) (each 0 to 255).
      // Here we're using just the single-argument hue variant. The result
      // is passed through strip.gamma32() to provide 'truer' colors
      // before assigning to each pixel:

      strip.setPixelColor(i, strip.gamma32(strip.ColorHSV(pixelHue)));
    }
    strip.show();   // Update strip with new contents
    delay(wait);    // Pause for a moment
  }
}

void theaterChaseRainbow(int wait) {  // Rainbow-enhanced theater marquee. Pass delay time (in ms) between frames.

  int firstPixelHue = 0;    // First pixel starts at red (hue 0)
  for(int a=0; a<30; a++) {   // Repeat 30 times...
    for(int b=0; b<3; b++) { //  'b' counts from 0 to 2...
      strip.clear();    //   Set all pixels in RAM to 0 (off)
      // 'c' counts up from 'b' to end of strip in increments of 3...
      for(int c=b; c<strip.numPixels(); c += 3) {
       // hue of pixel 'c' is offset by an amount to make one full
        // revolution of the color wheel (range 65536) along the length
        // of the strip (strip.numPixels() steps):
        int      hue   = firstPixelHue + c * 65536L / strip.numPixels();
        uint32_t color = strip.gamma32(strip.ColorHSV(hue));  // hue -> RGB
        strip.setPixelColor(c, color);  // Set pixel 'c' to value 'color'
      }
      strip.show();
      delay(wait);
      firstPixelHue += 65536 / 90;
    }
  }
}
Downloads
BOM
.xlsx
Satsha Kit Micro
.sch
hello.board.plus.button.led.sch
.brd
hello.board.plus.button.led.brd