18. Wildcard week
Week 18: The final stretch approaches. Getting pretty nervous about completing my final project in time for graduation…I feel rather behind in terms of progress. Wildcard week feels like a distraction…as it doesn’t seem to have clear application to my final project…but it also seems like a whole lot of fun.
The Group Assignment page is here.
The Assignment
“Design and produce something with a digital fabrication process (incorporating computer-aided design and manufacturing) not covered in another assignment, documenting the requirements that your assignment meets, and including everything necessary to reproduce it. Possibilities include (but are not limited to) composites, textiles, biotechnology, robotics, folding, and cooking.“
- Demonstrate workflows used in the chosen process
- Select and apply suitable materials and processes to create your project
- Show how you made your project
- Described problems and how you fixed them
- Included your design files and ‘hero shot’ photos of the project
The Plan - Composite
For wildcard week, I have decided to work with composites. After much deliberation, I decided to make a small scale, environmental-friendly surfboard model…utilizing techniques pioneered by Mike Sheldrake and commercialized by Westkunstsurf. Mike Sheldrake’s surfboard is unique for its use of environmentally friendly cardboard core structure…rather than the more commonplace (not so earth friendly) styrofoam. I intend to ‘skin’ the board with a natural fiber fabric.
The Project - Scale Model Surfboard
With Neil’s “Supply-Side Time Management” mantra in my head, I decided to control the scope of this week’s project. With only a couple of days to work on this composite project (and growing anxiety about returning to work on my final project), and the limited size cardboard that can be cut with the lab’s laser cutter (max 600mm x 300mm sheets)…I decided not to build a full-sized surfboard. My Wildcard Week project will be a scale model surfboard used to learn…
- How to design and fabricate a cardboard grid structure
- How to apply a natural fabric and resin ‘skin’ to the grid structure
…the techniques learned in the scale model would eventually be used to make a larger board (after finishing my final project, when I have more time).
The overall dimensions of the board I will make is…700mm L x 300mm W x 200mm H
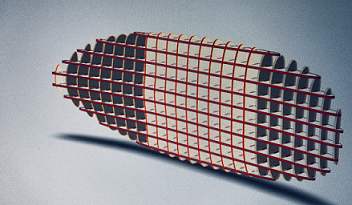
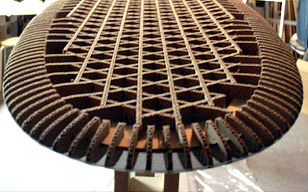
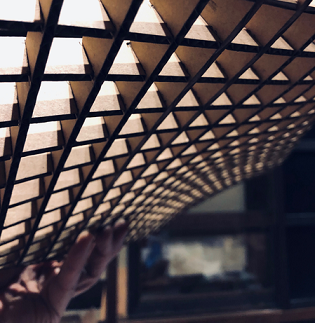
My composite project will rely heavily on surfboard designs of Mike Sheldrake and Westkunstsurf. A surfboard with an environment friendly cardboard, not foam, core. An ‘Isogrid’ lattice of cardboard strips creates a compression resistant structure.
Day 1
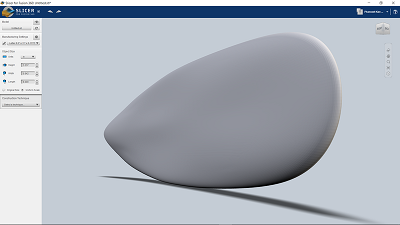
Surfboard Modeling - Fusion 360
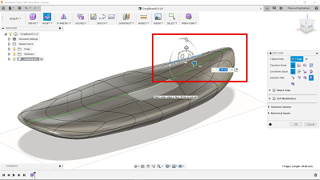
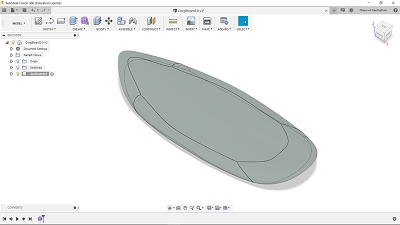
I modeled my surfboard using Fusion 360’s ‘Sculpt’ function…accessed via the pink grid box icon in the top tool bar.
- Starting with a sculpted ‘Box’…and used the ‘Symmetry’ function (selecting two panels on either side of the symmetry line) to allow changes on one side of the board to be automatically reflected on the other side.

- I pushed and pulled vertices and edges (using the ‘Modify’ function) until (1.5hrs later) I had a shape that resembles a surfboard.
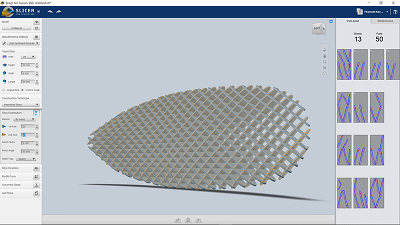
Surfboard Grid Structure - Slicer for Fusion 360
I was advised by instructors to use ‘Slicer for Fusion 360’ to turn the Fusion 360 model of the surfboard into a press-fit grid structure.
- I downloaded and installed Slicer for Fusion 360 (‘Slicer’) from here.
- I exported my F360 surfboard model into Slicer…from the ‘Make’ menu I selected ‘Slicer for Fusion 360’, selected my surfboard object and selecting ‘High’ resolution.
After the surfboard loads in Slicer…
I adjusted Slicer settings…
- In ‘Manufacturing Settings,’ I created a custom size to represent the cardboard sheets (600mm x 300mm) the Slicer generated parts will be cut from.
- I defined the units as ‘mm’.
- In ‘Object Size’ and with the ‘Uniform Scale’ radio button selected…I set the desired length of my surfboard as ‘700mm’ (Height and Width dimensions adjusts automatically).
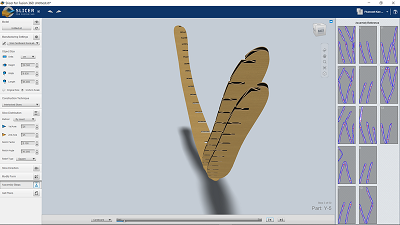
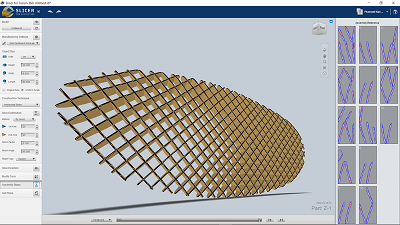
- In ‘Construction Technique’…I chose ‘Interlocking Slices,’ ‘By Count’…and inputting 25 for both ‘1st Axis’ and ‘2nd Axis’ directions
- In ‘Slice Direction’…I rotated the slices to occur at a 45deg angle
- …these settings resulted in xx parts to be printed on 12 cardboard sheets.
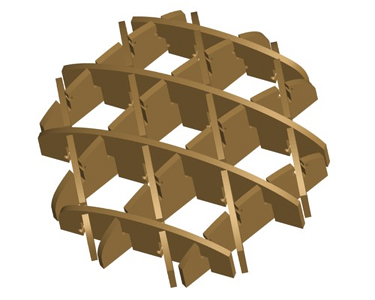
- Looking at the Slicer model, it became clear to me that the Mike Sheldrake design is better than what Slicer produced The Sheldrake design stronger because in addition to diagonally intersecting splines, a set of lengthwise running splines completes the ‘Quarter Isogrid’ structure. (on another website, Rhino and Grasshopper were used to create Quarter Isogrid slices of a 3D model…I want to figure out how to do this when I have time).The Sheldrake design also includes a horizontal edge piece to which vertical rounded edge pieces are attached…to aid in forming a nice round edge.
I am going to have a hard time with a nice round edge when skinning tomorrow…unless I can approximate the Sheldrake somehow.
- Slicer automatically generates printed sheets with the assembly splines spaced on them. While a great feature overall, I feel that Slicer wastes a lot of cardboard…by not maximizing the number of pieces on a board. I wonder if there is a way I can specify how many pieces can be crammed onto each cut path file? I dug through all the menus and settings and could not find a way to more efficiently distribute cut parts on cardboard sheets…
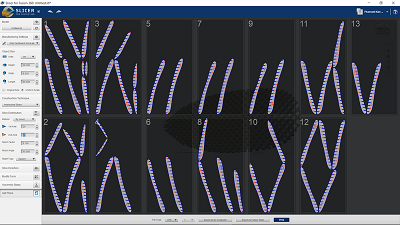
- Slicer can generate cut path files in EPS, DXF or PDF format. I went with DXF to be used with the Laser Cutter.
Laser Cutting
All the software for the Laser Cutter worklow in the Kamakura lab is in Japanese, a challenge for me as I can’t really read Japanese. I will document the process here in detail for my own future reference…
Corel Draw - Preparing DXF Drawings for Laser Cutting
- Opened DXF files in Corel Draw to prepare it for generation of a format that can be understood by the laser cutter Job Control program.
- Check that the page size matches the cardboard sheet sized…rotate the drawings to match the orientation of the page if necessary (Ctrl-A to select all…then a rotation option will appear in the top toolbar)
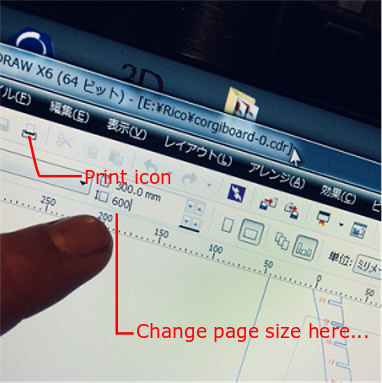
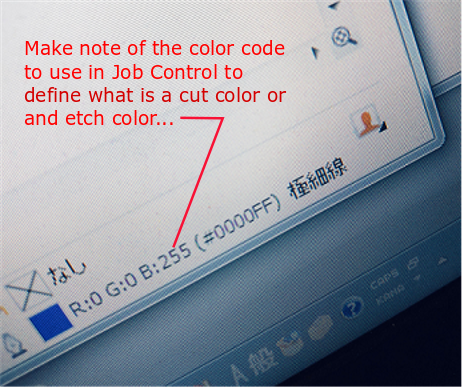
…also make note of the color codes for the colors used in the drawing (bottom right of screen). Ensure that the line color for lines to be cut through are consistent…blue in my case. Text meant to be etched or lightly cut onto the cardboard surface…in red color.
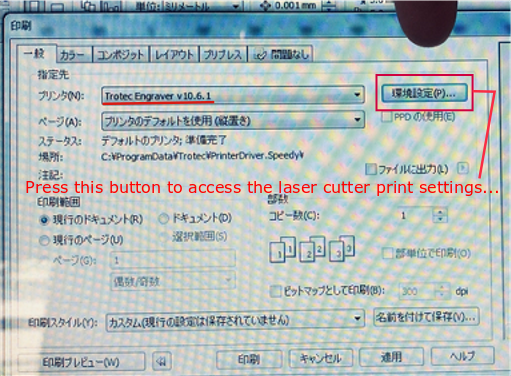
- Select the ‘Print’ icon to go to the print dialogue box.
- In the print dialogue box, make sure that ‘Trotec Engraver’ is selected then click the ‘Printer Settings’ button
- Making sure that the sheet size is correct and the 2nd selection box is checked…click the ‘JC’ button at the Bottom
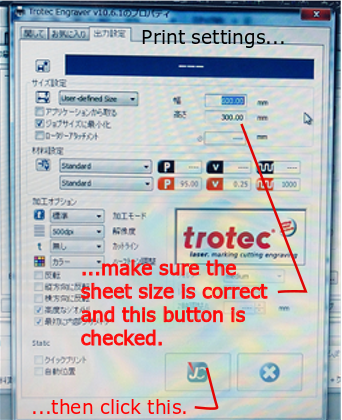
- Back at the print dialogue box…select ‘Accept’ (second from right at bottom) then ‘Send’ (4th from the right at Bottom)

…20-30secs later it appears in the Job Control software’s list of files (right side of screen)
Laser Cutter Operations
Make sure the Laser Cutter glass cover door is in the closed (down) position, turn ON the Laser Cutter with the switch in the upper left-back corner. The Laser Cutter’s print bed will drop to the bottom to calibrate.
This is the Trotec Laser Cutter’s control panel…
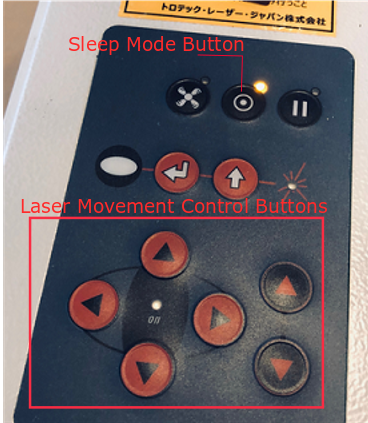
Calibrate the Laser Cutter Focus Height
- Position the laser over the material to be cut
- Hang the metal calibration dongle to the right of the Laser Cutter head
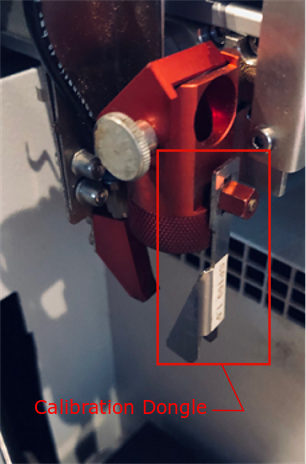
- Raise the print bed of the Laser cutter slowly until the dongle drops off…
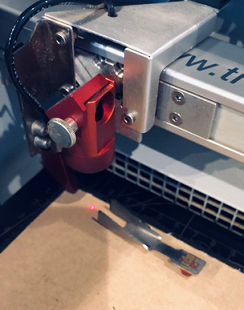
- …this is the correct height of the Laser Cutter head above the material to be cut.
Preparing to Cut
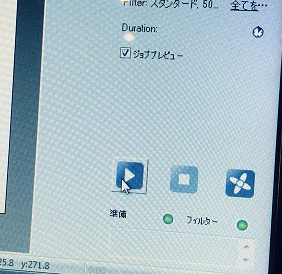
In the Job Control dialogue box…
- Push ‘USB Cable’ icon button to connect Job Control to the Lasercutter…the fan will spin up and make noise
- Double click the file name from the upper right to be cut…drag the rectangular outline of image file’s left upper corner to the location of the Laser’s crosshairs
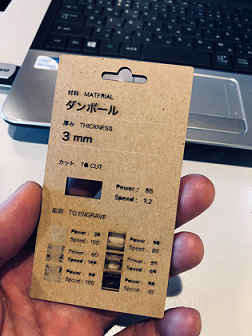
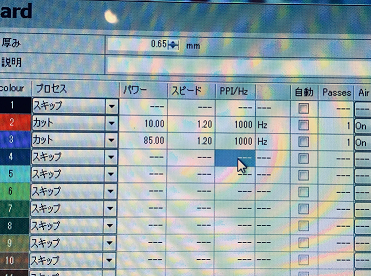
- Click in the white space outside the image rectangle to bring up the line color dialogue box…set ‘Power’ and ‘Speed’ figures for the corresponding cut (85 and 1.2) and etch (10 and 1.2) line colors in the drawing…referring to the guide card for the material you are cutting (3mm Cardboard, in this case)
- Click print ‘Play’ icon to start cut job

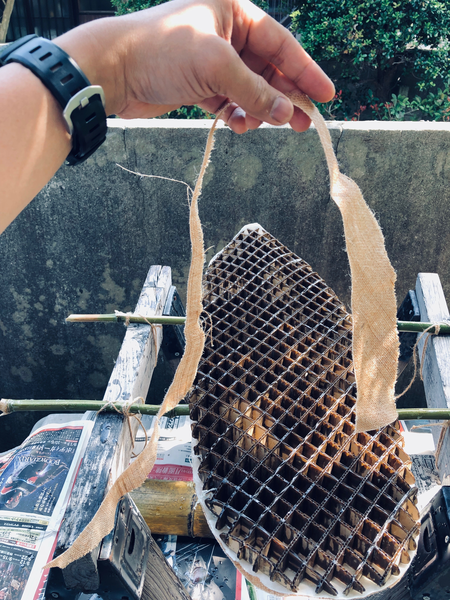
Assembly
Parts cut, time to assemble!
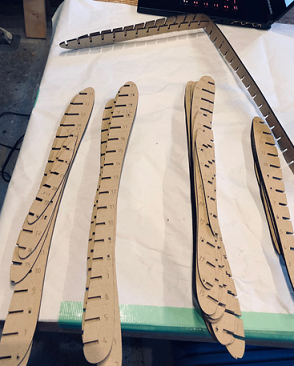
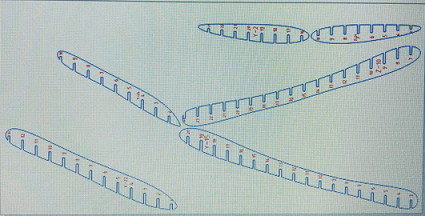
- While time consuming, this part went rather well… made easy by the assembly instruction slide show on Slicer
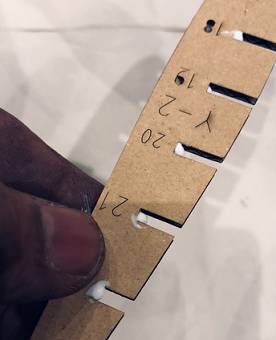
and the clear numbering system generated by the software on each individually cut spline pieces
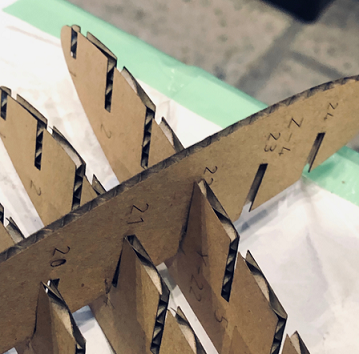
- the 3mm cardboard is a bit delicate and I took care not to damage it or bend it…making connection between pieces harder and distorting the final shape
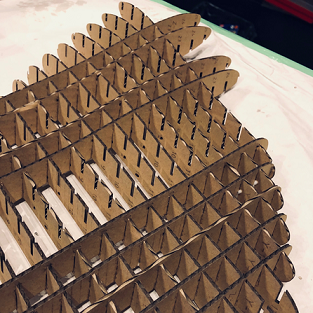
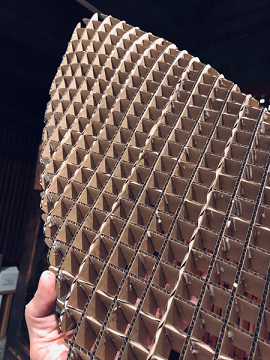
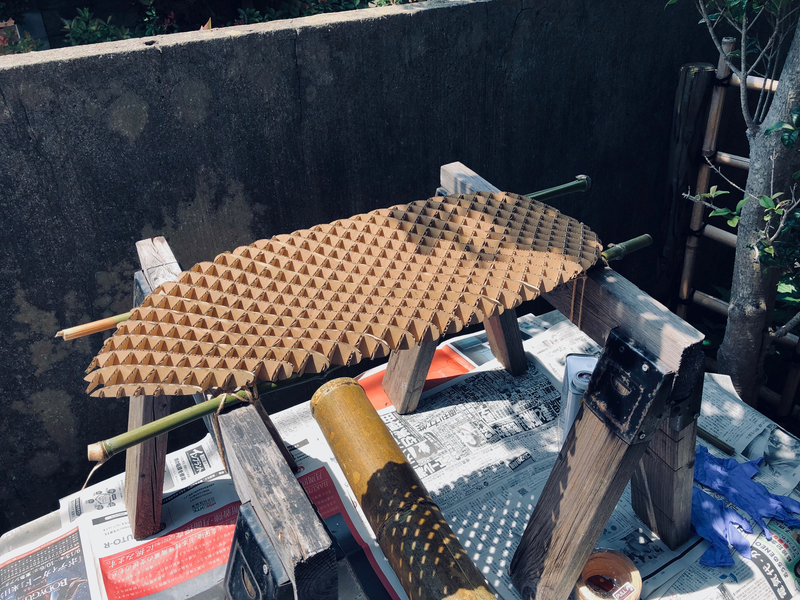
- 1.0hr later, the surfboard’s cardboard structure core is assembled
- I added white glue at edge joints and other joints where multi-directional curves occur
…to help fix the shape in prep for skinning tomorrow
Day 2
Skinning & Resin Coating
Preparing the board for skinning
Safety and Technical Datasheets for the Polyester Resin was only available in Japanese. Grateful to Caterpillar Sensei for translating the key points for me…
- Use in well-ventilated area (wear a filtering mask too?)…the fumes are a health hazzard. If feeling dizzy…get fresh air.
- Will irritate skin…wear protective clothing to avoid topical contact. Wash with soap and water if contact occurs.
- Will irritate eyes…wear protective glasses. Wash with running water if it gets into the eyes.
- (presumably…it would be bad if ingested…?)
- The Poleyester resin will melt certain types of plastics (which specifically?)
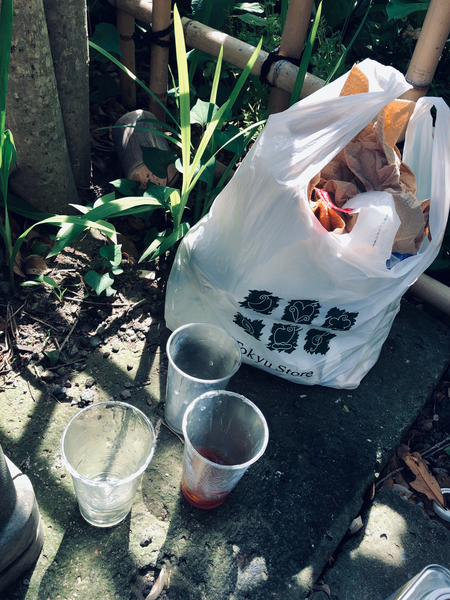
I set up a work station outside to do the skinning. Experimental work to create coupons using the Polyester Resin revealed that the resin smells really bad and left me with a very bad headache when I worked with it indoors, even will all the windows open and fan running. I made sure to lay down several layers of newspaper to absorb resin that is sure to drip and splash as I apply it to the board.
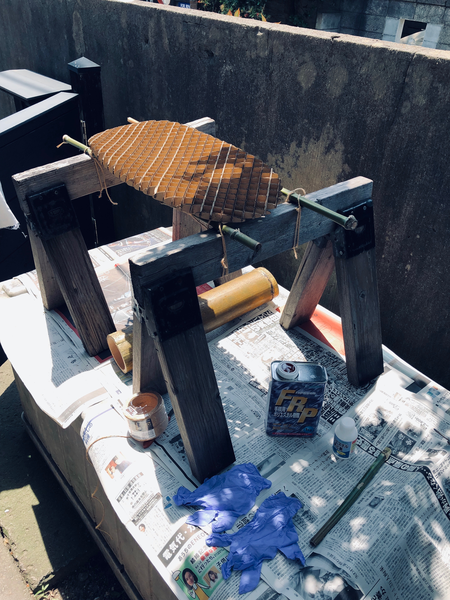
For safety, I used rubber gloves and eye protection…and was glad I did. Later as I was skinning, a bit of the resin splashed on my face and it stung! Some soap and water was the solution to the painful skin irritation…clearly the Polyester Resin is neither good to breathe or have come in contact with the skin.
I REALLY don’t like this stuff (Polyester Resin)…and hope to never use it again. Regardless of how fast drying or cheap it is. It’s toxicity…and also reputed incompatibility with some types of plastics…makes it not worth it in my mind.
I measured resin in plastic cup using a weight scale…1ml = 1mg. As it was hot and the resin would dry very fast (this again from the coupon work I did yesterday)…I mixed up about 200ml at a time with a ratio of 1:100 for Hardener & Resin. Mixing too much would mean the resin will harden in the cup before it can be applied to the surface. 200ml was able to cover most of my little surfboard surface…but I mixed up another 200ml to follow up with a second coat and get resin evenly applied everywhere.
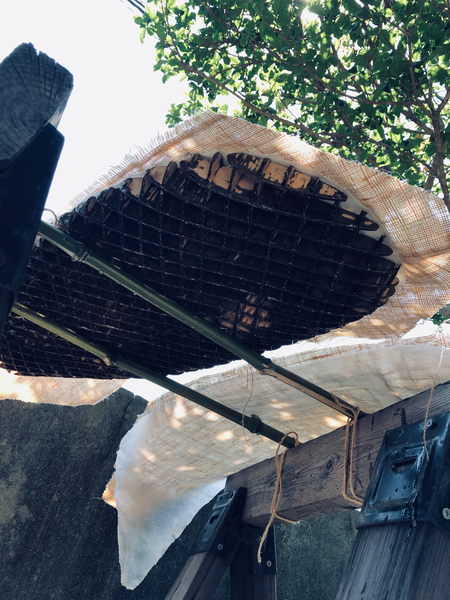
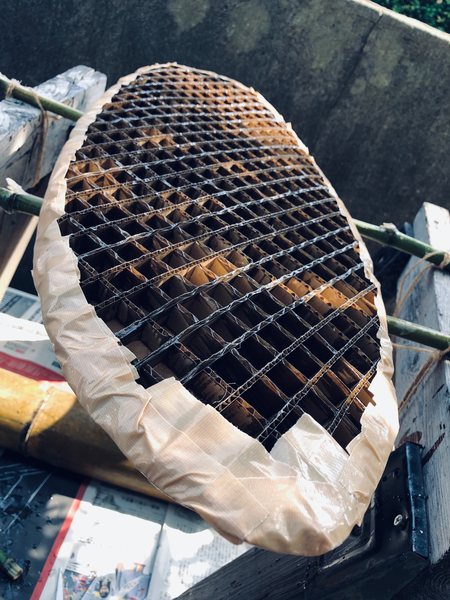
Skinning the Bottom of the Board
I chose to start with the bottom because I thought skin material would sit easier on the concave curve surface of my board.
- Linen was trimmed to the approximate shape of the board…leaving about 1 inch to overhang the sides. The linen was then laid on top of the concave curved bottom surface of the surfboard lattice structure.
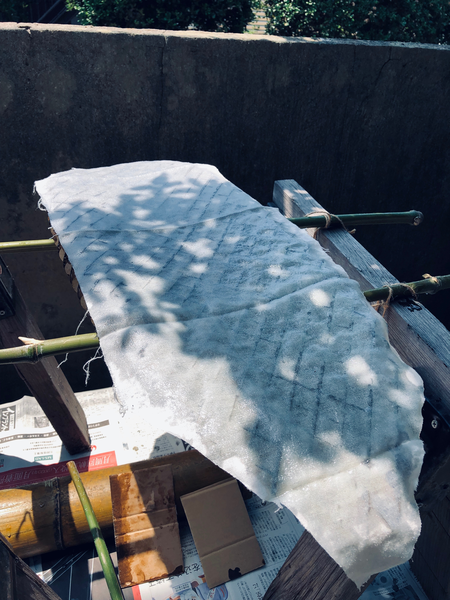
- Approximately 400ml of Polyester resin was eventually applied to fully coat the surface…the linen absorbs it nicely and doesn’t allow too much ‘flow through’ (the resin doesn’t flow through the linen and drip down through the cardboard structure).
- I left it to gravity to make the linen skin form to the shape of the board…but in retrospect…I should have put it into a vacuum bag and used compression to help form the shape better. Note for next time.
- When hardened, I noticed that the linen did not sit perfectly on top of the structure…there were lots of places where the material bubbled up from the structure below.
- After the linen was dry and hardened, a second layer of jute was also laid and resin coated on top. This to stiffen the board further (2 layers stiffer than one…base on coupon experiments here)
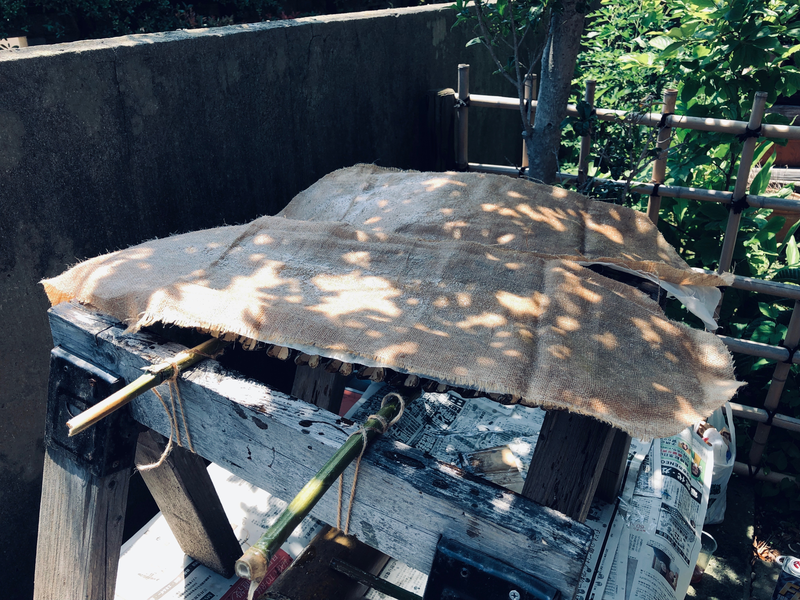
My morning efforts to skin my surfboard was a not so successful…and the fumes have left me with a bad headache. Some observations…
- Jute seems to need a ton of resin to become saturated and usable. I was mixing up 200mm of resin coat every time and put on 3 coats…it didn’t seem to be enough. I am thinking that with Jute material…a better way may be to soak the cut sheet in a bucket to soak up the resin…and the soaking jute fabric then laid on the form (…like Paper Mache method).
- A single layer of Linen absorbs quickly but bubbles up in places…the resin applied was too thin to weigh it down? Not sure if this is characteristic to the material or I did something wrong.
- Was recommended by instructor to make a multi-layered skin construction. Working with what I have…I tried to mix Jute with Linen. Not sure the combination works so well…
- Better check the ratio of resin and hardener too…I was told 1% so mixing in 1ml for 100ml of resin…doesn’t seem to want to harden as quickly as it did yesterday
Rather than continue with a bad technique, I took a break and did some research (probably should have done this first).
Watched this video here and here…@ Mike Sheldrake’s site to get some help.
From Mike’s video…
- 2 layers of fiberglass skin (bottom 6oz, top 4oz) draped over board and pulled as tight as possible…doing 2 layers at once minimizes ‘drip through’
- Hot weather will mean faster hardening of resin mix…cannot mix as much up at a time…it will harden befoe it is all used.
- Mike didn’t use any sort of vacuum bag technique to get his skin to form perfectly with the sub-structure.
- I noticed he applied in sections…maybe he waited until parts of the skin got tacked down (hardened enough) and worked slowly with smaller batches of resin mix to slowly adhere the skin to the structure.
Video Observations…
- It is clear that using a material that will drape better over complex curves is important to successful skinning. Jute is probably not the answer, because it is a stiff material…is there a way to ‘soften’ up Jute to make it drape more naturally over complex curves?
- Each side of the surfboard is skinned one at a time…rather than both at the same time (I tried to skin both sides and shove everything into a vacuum bag in my morning session…which just resulted in a failed mess)
- No vacuum bag used…resin impregnated skin was just allowed to dry on top of the cardboard Core
Skinning the Top of the Board
Armed with more technical information and less dizzy from the fumes after a bit of a break…I moved on to skinning the top surface…deciding to be more methodical and rush less.
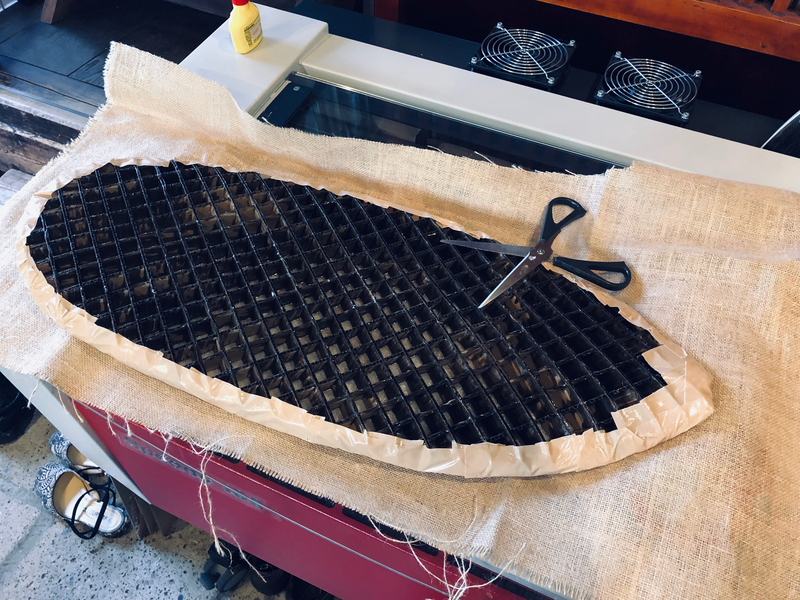
Excess, hardened skin material trimmed away from the bottom skin
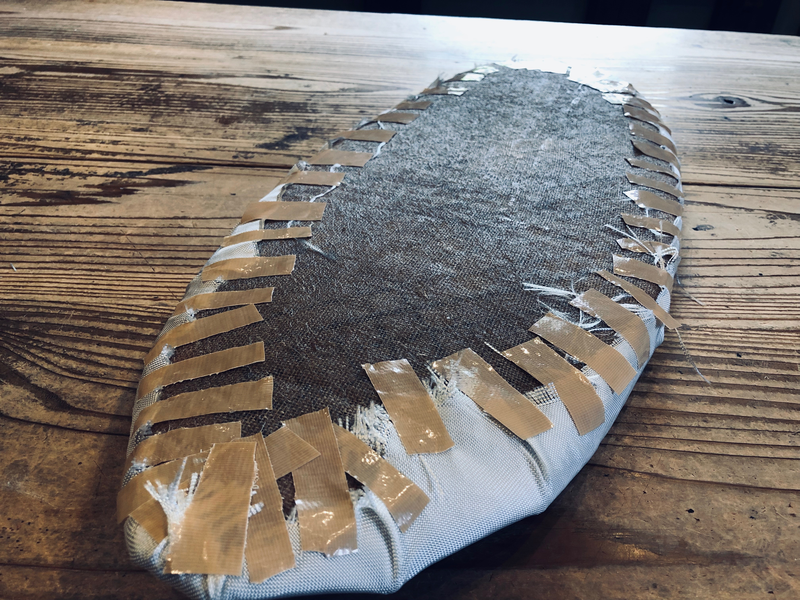
Next I taped around the edge of the board…to bring the bottom surface edges flush with the surface of the board structure and also form a more continuously curved side of the board than the sub-structure cardboard provides.
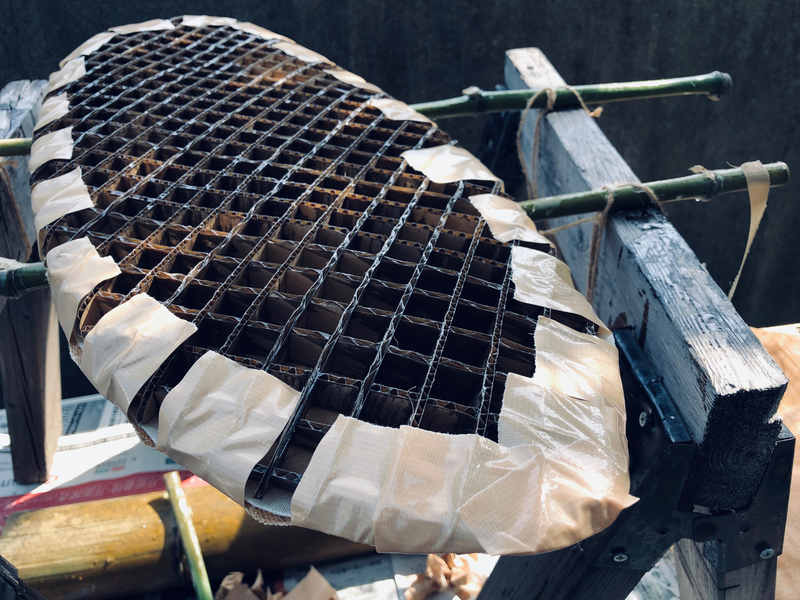
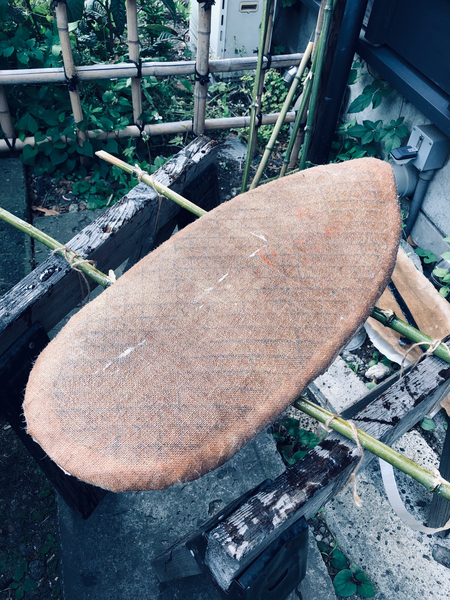
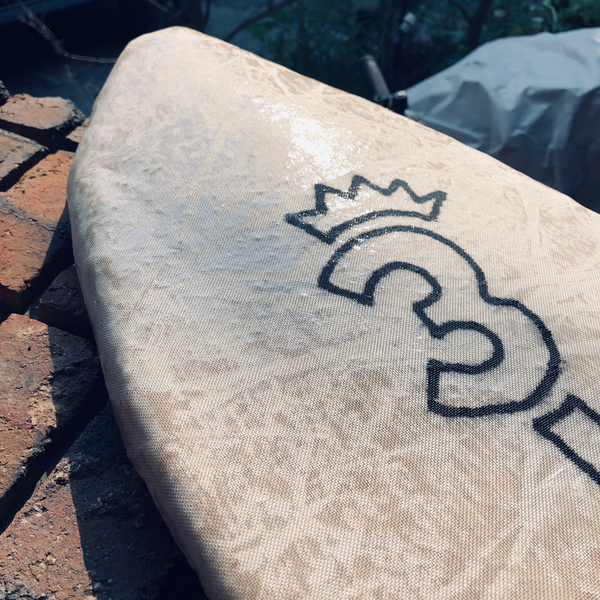
With time running out on the day, I decided to finish the top of the board with a single layer of Jute. Stretching the jute to conform with the shape of the board and taping excess material edge to the hardened bottom surface of the board.
Resin coat applied…
A total of 500ml was needed to properly coat the top jute surface. I discovered that it was not a problem of jute being non-absorbent…but that jute allows resin to flow through.
…To properly finish the board
- Several more resin coats will need to be applied…the lower layers progressively acting like a barrier to resist flow through
- Regional instructors also recommended to apply another layer of material to the top…and employ some sort of compression technique…to fulfill the assignment objectives.
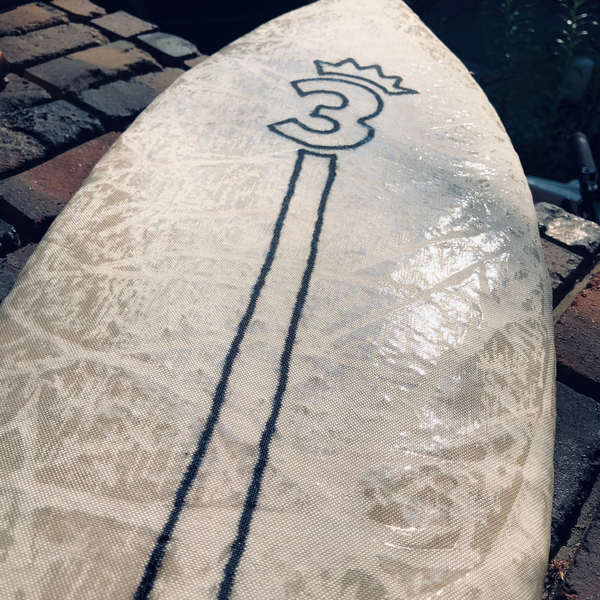
- I would also eventually like to add some colorful design element on top of the board.
Day 3 - Additional Layers and compaction
Following the advice of the regional instructors (and Neil’s from the class), I resolved to try to achieve the definition of ‘composite’…by adding additional layers and use ‘Compaction’ techniques.
Departed from my goal of using natural materials only (Jute and linen so far)…I decided to use some of the Ballistic Nylon (BN) fabric I had been saving for making a kayak as the additional layer material.
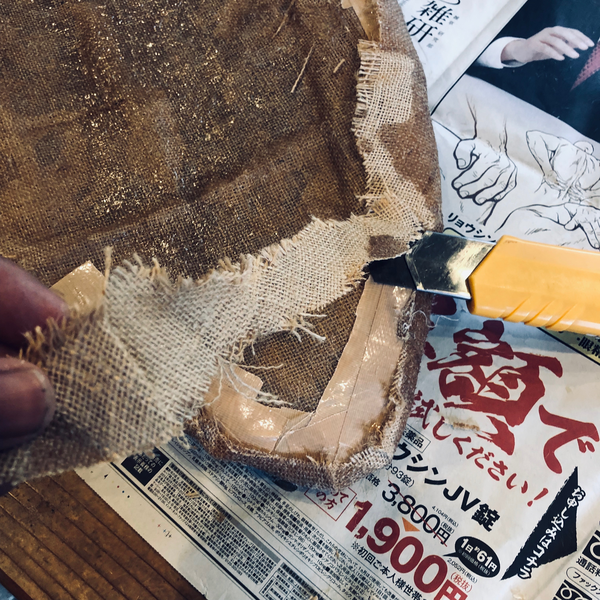


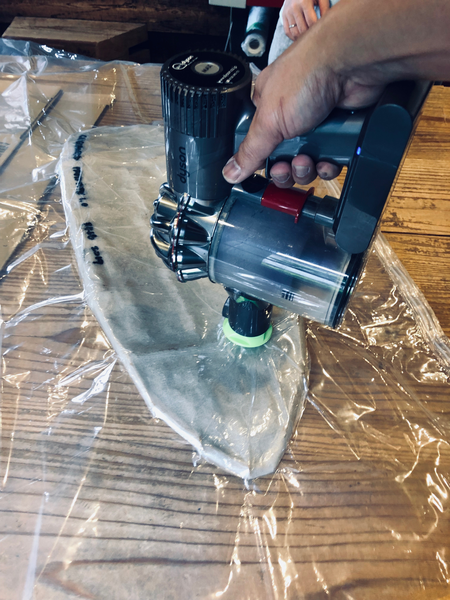
Working with the bottom of the mini-surfboard first, I cut and taped down the BN fabric…applied resin on top as I did the week before (Note: resin application went much much more smoothly on the BN fabric!!!). After about 80ml of the resin was applied and evenly spread over the surface, I put the board into a plastic bag non-reactive with the resin…which was then placed into a ‘Suction Vacuum’ bag used normally to store clothing and bedding…sucking the air out of the bag to create the compaction force.
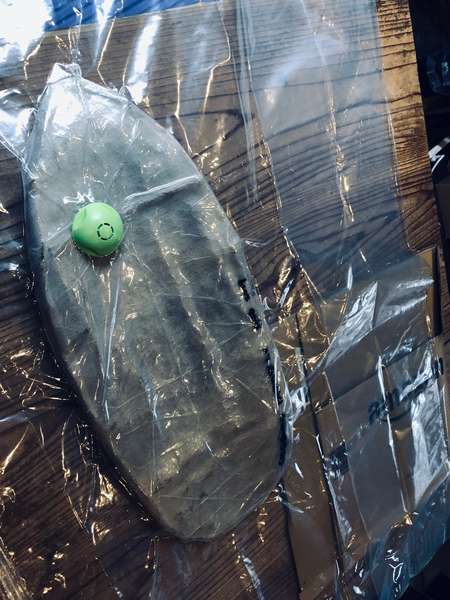
The compaction generated was…disappointing. This ‘Suction Vacuum’ bag was never intended to create a stable and strong compression force (…or maybe I did something wrong? Didn’t close the valve completely? Didn’t seal the zip lock on the bag properly? Didn’t suction the air out long enough?). While the bag got suctioned tight to the surfboard initially…within a few minutes…the compression force weakened (did air leak out?).
Anyway, I let the bottom layer dry…then repeated the process for the top layer (noticed that the bottom layer…after 4hrs on a reasonably warm day…was still slightly wet and tacky)…sliding back into the bag, this time for a few days…for the board to cure.
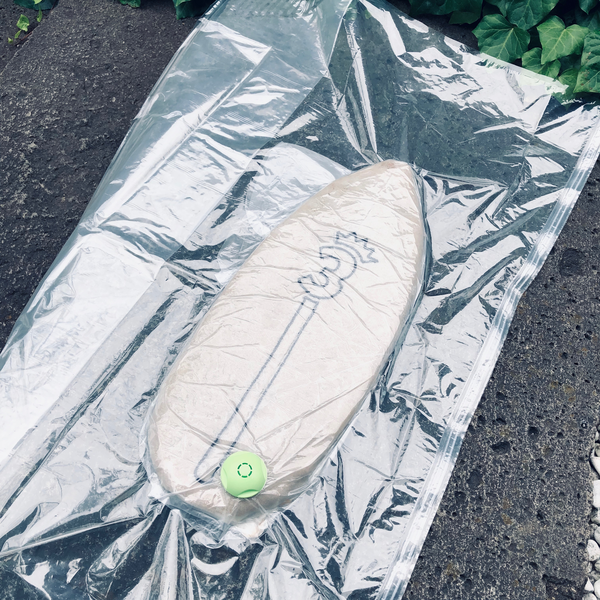
When I finally pulled the board out of the bag…I was pretty disappointed. One, the BN fabric did not adhere to the hardened jute layer below well. Two, the resin was STILL not completely dry…despite high temperatures a few of the curing days. Three, the plastic back that the board was wrapped in left marks on the board’s surface.
Oh well…no more Supply Management time to spend on this Composite project. Lessons learned…and time to move on.
Observations:
- I didn’t quite get the nice results I hoped for…most of the reasons for the failure was my own sloppy process. I should have studied the process more carefully and been more rigorous with my fabrication procedure…but I was suffering some serious panic attacks about the final project…and rushed through the composite project.
- Should have planned from the beginning to resin and cure the bottom surface…before doing the top surface and other final refinement work (edge resin and cure for surfboards?)
- Should not resin and cure one layer at a time…should work with 2 layers minimum…and definitely use some sort of ‘compaction’ technique to ensure that the layers fuse into a single composite layer.
- Less than perfect results aside…I came away from the week (and a half) with some good learning…both what to do and what not to do.
- Still hate Polyester Resin…will only work with Epoxy from now on
- The Isogrid structure is VERY cool and has great potential in other projects
Other Observations… - Jute is not an easy material to resin coat…resin appears to flow through it. And because the core of my surfboard is not solid, the flowed through resin does not end up as a thin film under the resin…but probably just drips through the holes in the lattice structure. - Ballistic Nylon is a great material to work with…deals with resin application well and would result in a great surface on future projects…if I am less sloppy with my methods. - Drying is meaningfully slower one day versus the next…not certain if it was the resin mixture ratios (I tried to keep it at 1:100 as per the instructions) or the differences in ambient temperatures - The fabrication process generates alot of waste…much of it is plastic…not good for the environment if the board is OK but the waste need to make it not. Need to rethink the process to generate less waste. Can resin be mixed in something that is biodegradable or reusable?
Files
The Fusion360 file is here
The 13 slicer DXF files of the cardboard structure assembly components can be found… here here here here here here here here here here here here here