3. Computer Aided design
Week 3: Mind blown from Niel’s last lecture. 2D and 3D CAD software has come a very long way from my prehistoric Autocad and 3D studio days. So many different approaches to 3D modelling now. Very impressed that powerful, open source 2D and 3D CAD software is available for free online. CAD week, here we go…
Assignment Requirement
-
Model (raster, vector, 2D, 3D, render, animate, simulate, …) a possible final project, and post it on your class page. Show how you did it with words/images/screenshots - Included your original design files
-
Evaluate and select 2D and 3D software - Demonstrate and describe processes used in modelling with 2D and 3D software
My CAD Background
I have some familiarity with CAD platforms, having studied and worked in the Architecture field previously. Used Silicon Graphics (forgot the software name), Autocad, 3D Studio, Form Z, Sketchup most extensively…for architectural working drawings and 3D mock up of projects. For 2D, I had some experience with Illustrator, Inscape, Gimp, Lightroom, Photoshop, etc.
Mostly I drew on paper. I never found an effective workflow or need to link work from 2D apps to 3D apps. I have been using Autodesk SketchBook on my Surface Pro 3 tablet extensively to conceptualize and document design digitally…in an attempt to move away from easily perishable paper drawings.
Aside: I woke up the day after the lecture with a vague idea/question of how 3D modeling might be use to represent investment data. Asked myself if Excel is still the best analytical tool for the work and why financial market information is still mostly represented in 2D charts…not 3D or 4D images
3D
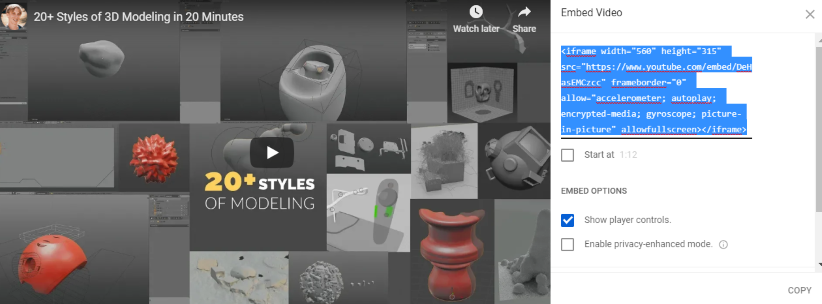
Wanting to know more about different methods of 3D modeling, and to help me decide which software to commit to, I turned to YouTube to do some research. I found this excellent video by Gleb Alexandrov that outlines over 20 approaches to 3D modeling here.
Note: learned how to embed a YouTube link onto webpage so that a preview image also appears. Selecting “share” the “embed”…copy the HTML code that gets generated (upper right) and past it into the markdown document.
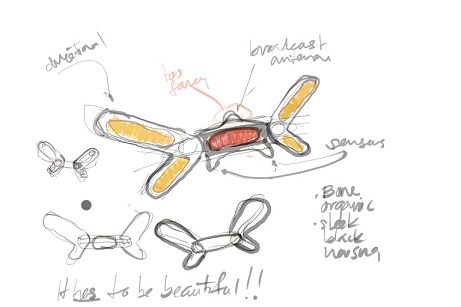
After watching the video, I have decided to have a deeper look at Freecad, Blender, and Fusion 360. For my project, in addition to modeling the form of my GY-RO9 Wings device, I would like to be able to test the model in an Aerodynamic Simulator to see how it would respond to wind.
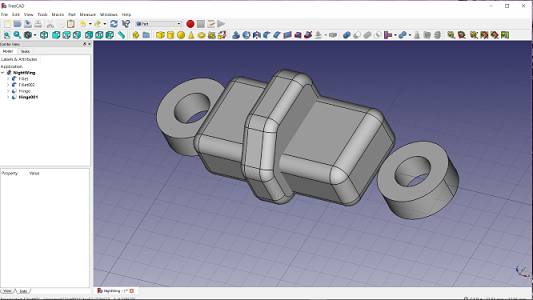
1. FreeCAD
- The Program has a nice start screen to initiate new users
-
Could get started with a new model quickly using a ‘parts workbench’. Went to YouTube immediately for a tutorial to get my ‘test drive’ done efficiently, this one was good…
-
Building a 3D form using primitives is easy to understand…like the fact that object dimensions can be entered in table
- Don’t like that to orbit the model had to do an awkward combo of middle mouse button and a left mouse click. Wonder if this can be changed to just holding down the middle mouse button? OK…shift + Rt Mouse Btn works better to orbit the model.
- Can I do real-time transformations of an existing object that has had a boolean operation performed on it? I want to make my cylinders shorter…both the master and the dependent copy (can’t figure it out)
- Filet, tranform, chamfer, boolean subtraction transformations…tried in the software
Takeaway:
- A steep learning curve for this software I think. Maybe a minimum few hours of tutorials would allow for some comfort
- An hour worth of trying to create and manipulate 3D shapes was a bit frustrating…not a super intuitive interface. Moreover, each work bench has different functions and allows for different of transformations. Reasonable familiarity with each of the many many workbenches would be needed to understand how to model smoothly on this software
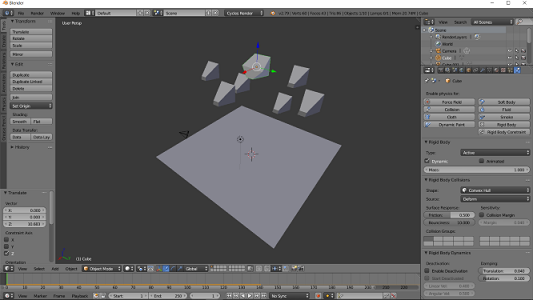
2. Blender
From the video earlier, it appears that Blender offers A LOT of different modeling options. I the short time spent on the software, before Fab Academy, I came away with the impression that the software is not so intuitive for beginners…it has a very steep learning curve.
I think I will invest time to try to gain some expertise in this software, as I already started to use it in conjunction with my 3D printer. My project will also likely involve hard surface modeling of curved surfaces…so Blender may be the ticket.
- An intimidating opening screen…lots and lots of buttons and menus…yikes!!!

YouTube tutorial time…I found this one good for getting to know the interface.
- I like the mouse functions…but switched left and right mouse button functions to something I am more used to (left to select, not right)
- Shift+S to return cursor to origin…good to know
- X to delete objects
- Shift+A to add objects
- Tab to go from ‘object’ mode to ‘edit’ mode
- …keyboard shortcuts seems critical to efficient use of Blender
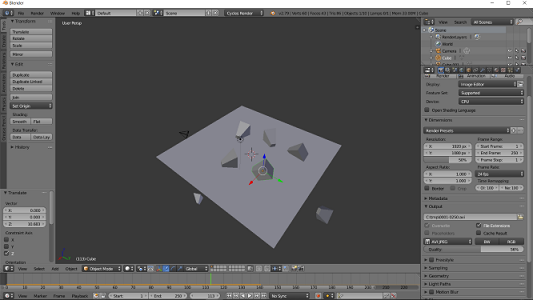
- I love how easily it is to add new working windows…to run a different process…i.e. rendering vs modeling (would be best to have a very large screen to work on though, maybe NASA size…)
- ‘Cycles Render’ supposedly more realistic and better than ‘Blender Render’ (render mode change at top center of screen)
- Right side of screen tools…mostly for rendering
- G + X, Y, or Z…constrains translation movements to specific axis…useful!
- Physics Engine so easy to use! Active vs Passive objects, bounciness…played with with great results
Note: gotta figure out how to take and add a short video from Blender or Windows
- …don’t know what I will use this for in my project, but good to move around the interface a little and know the Physics Engine is not so intimidating
- Time to model…
- Hmmm…looks like Blender may not be so ideal for Parametric Modeling
- Through lots of online research, it seems what I am looking for is “Parametric Modeling” that Blender is not really designed for…
” Blender is not a CAD software. It is very weak NURBS/Parametric surface modeler. In Blender you would be making everything from polygons. (Blender does not offer procedural workflow). Blender is a 3D software with most of its actions being destructive. Blender can be used for engineering, but it’s not designed for it…engineering workflow with Blender is slow and full of workarounds.” This from a Stackexhange discussion on the question “Is Blender actually useable for engineering?”
- I am determined to learn this software eventually though…but now I have to focus on CAD and CAM functionality so…
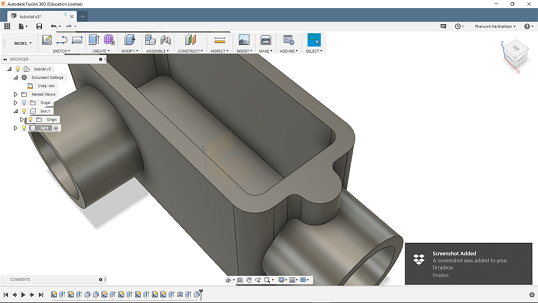
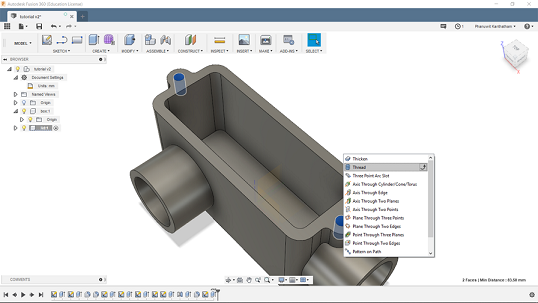
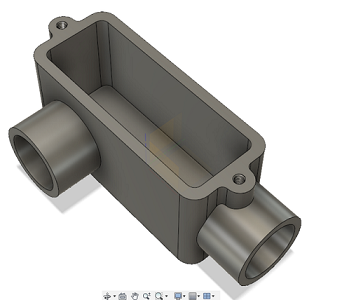
3. Fusion 360
Next YouTube tutorial…Fusion 360. Part 1 and Part 2 videos by Lars Christiansen.
Note: I am finding this procedure of using a YouTube tutorial to “test drive” software is really effective. A time limited, results generating procedure to get an effective hands-on experience…rather than just blindly trying out difficult software like CAD.”
- 1st Impression: deceptively simple initial interface…not cluttered and intimidating
- Definitely seems geared towards “parametric modeling” with “Procedural Tree” function
- This type of modeling captures action ‘history’ that can be later modified (and rearranged)
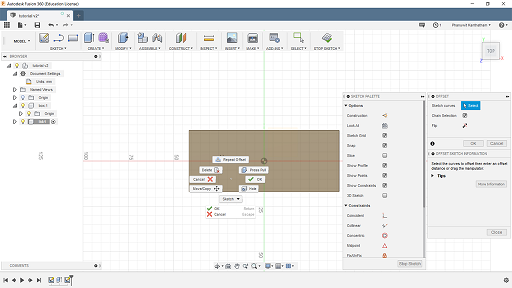
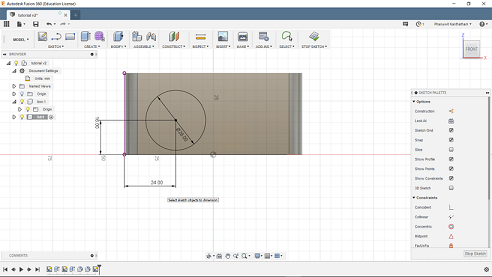
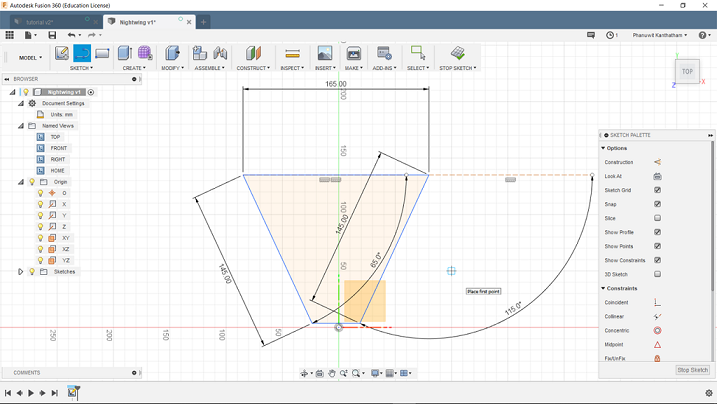
- S = Sketch
- Very useful that instead of having to look thru menus or tool bars for commands…sketch commands can be searched for after clicking “S”
- Enter dimensions for blue text…hit Tab to go enter the next dimensions
- Each shape has “Relationship” markers all around the side…rules, constaints for the shape
Workflow Notes: block out the component first, before “sketching”
Workflow Notes: select surface or edge to be modified, select modification operation
Workflow Notes: apply relationships first before entering dimensions
Workflow Notes: take time to fully define sketches…as best practice”
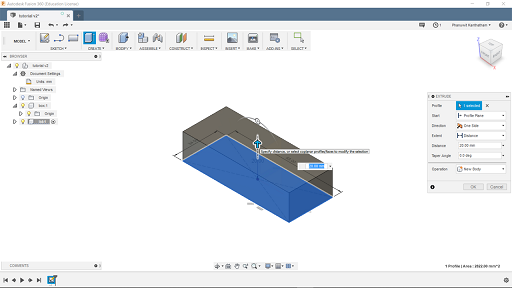
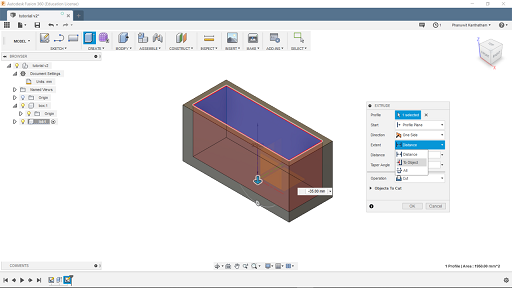
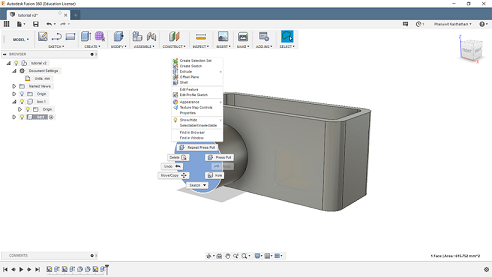
- Q = Extrude
- Right Click on a surface or line…to bring up modeling menu
- Offset…can be relative to an object (like from a bottom face of a box), this now defined parametric relationship will be maintained even if some other dimension of the object is modified…great!!!
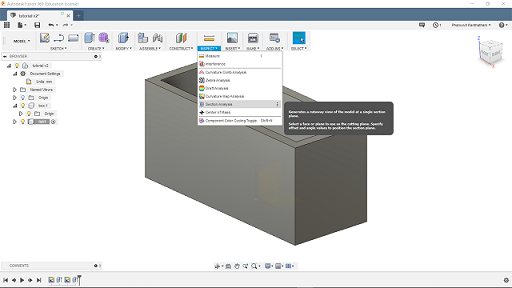
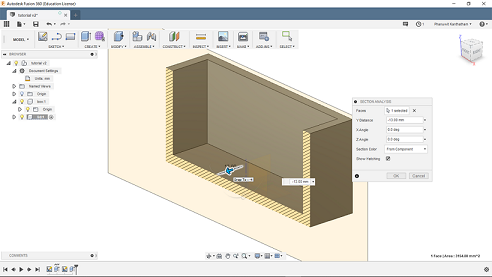
- Inspect…can be used to create a section view of the object, to see the inside of the object…super useful!!!
- F…filet
- C = Circle
- When “sketching” no need to be accurate initially (as to location)
- D = dimension…an incredibly useful tool to precisely locate a sketched shape relative to edges of a reference object…by specifying exact distances from those edges
- “To Object”…is a best practice way to be sure Offsets and Extrusions are precise and creates a clean parametric model that will not be problematic later if modified in some way
- L + X = Construction Lines…invisible reference guide lines for Modeling
- When a shape is BLUE…it is NOT fully defined yet, needs additional dimensions to fully define it
- Actions on the history timeline can be right clicked on…to make modifications (ex: Edit Feature)…great!!
- Two-direction extrusions!!!…useful to make sure curved intersections of objects are correct

- Objects can be selected from the Action Tree at the bottom
- Wow!!! Just learned that actions in the Action Tree can be rearranged…so an action that occurred previously can be moved to occur AFTER the most recent action…very powerful!
- Hold down ‘CTRL’ to multi-select Objects
Tutorial model done. Among the 3 3D modeling software tested so far…Fusion 360 the clear winner for Parametric modeling because of its VERY intelligent and relatively intuitive interface. This is the software to use to create a CAM usable model quickly.
2D
1. Inkscape
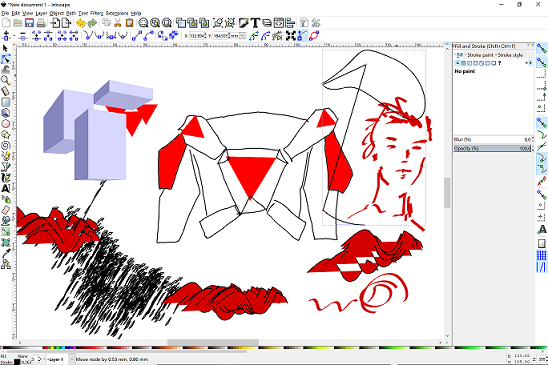
- Feels a bit like an aged vector drawing program…
- Drawing tools and interface doesn’t feel particularly intuitive…not the pen on paper feel I get from SketchBook that I used to conceptualize in my workflow (more later…)
- Spray paint tool was a surprise. I had a selection box around a shape I had drawn and the sprayed image was the shape…not just a color that I was expecting
the strength of Inkscape is probably the “Bezier Curve” tool that generates lines with modification nodes that allow for later adjustment of the curve to fine tune the desired shape. Probably useful for creating complex 2D shapes that can be the basis of 3D extrusions…
- I can’t see the value of this software in my workflow right now…
2. Gimp
Reviewed the ‘How to Use Gimp’ video here
- Layer based photo editor…very similar to Photoshop…a reasonable alternative as it has tons of great functions for photo manipulation
Some other useful tutorials on GIMP, showing some powerful, useful functions…here and here.
…and a very cool smoke effect technique video here!!
3. Autodesk Sketchbook
I use this software in conjuction with my Surface Pro 3 tablet with a pen sensitive screen (wacom digitizer?). I am able to make drawings in this software as I would with a pen on paper. It works very smoothly with my old school workflow…
The interface is simple and intuitive…nothing to distract from just putting pen to screen. It has layers to make the drawings more functional. Don’t know about export capabilities yet…
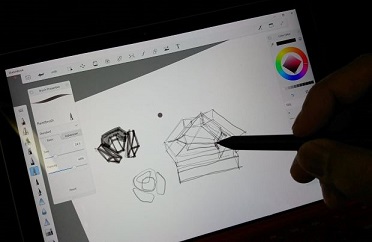

- I use this software extensively to conceptualize my projects
- Feels like pen on paper and I can quickly draw up ideas that occur to me (using my Surface 3 Pro tablet and pressure sensitive pen).
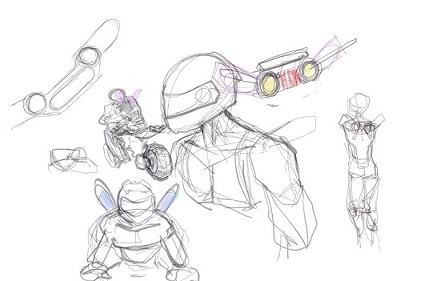
- Good for creating Reference Images for modeling…invaluable to my workflow as it feel incredibly intuitive and comfortable to me
- …great for recording too, as I don’t lose images as I tend to do with drawings on random scrap paper
Note: uploaded XnConvert to batch process images for addition to my webpages.
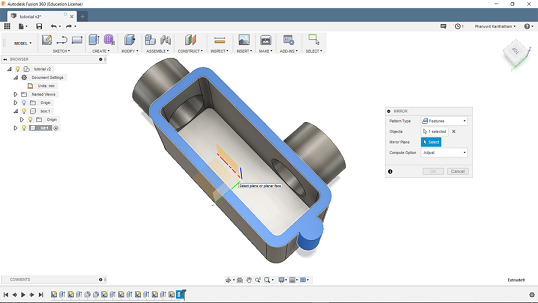
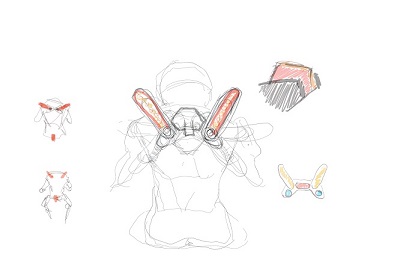
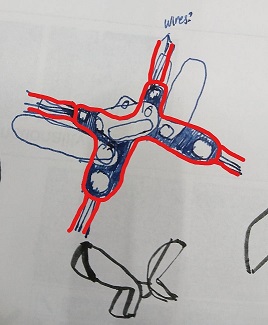
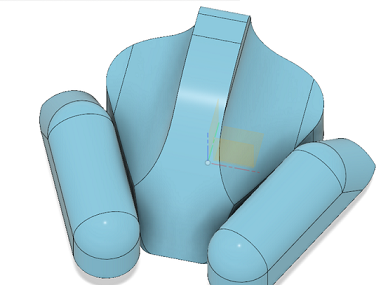
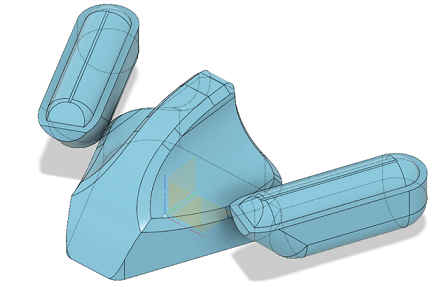
Modeling the “GY-RO9 Wings” Project
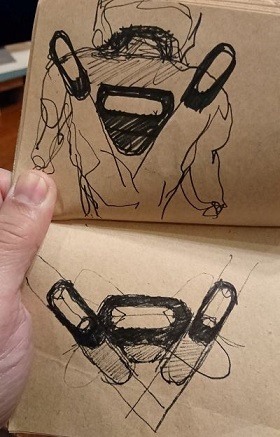
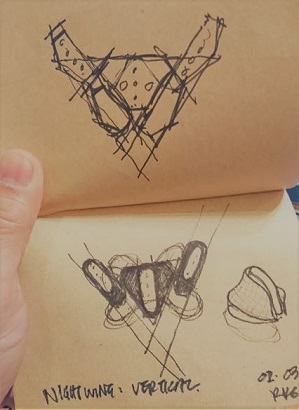
After much thinking and sketching, I have come up with a concept form for the GY-RO9 Wings device that I am happy with…good general when in operation but also allows to ‘fold’ to a more compact form when not in use for easier storage.
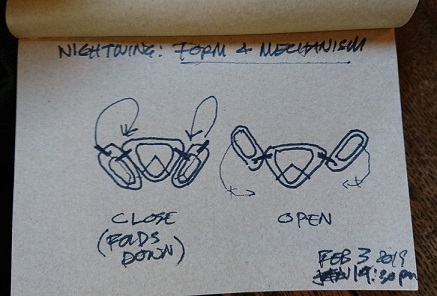
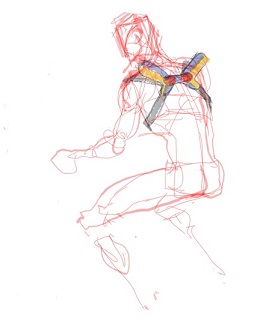
I also have a general idea of a harness shape and system that will attach to the NightWing device and allow it to be worn over a motorcycle jacket.
Before making a digital model of the device, I decided to mock up a real scale templette of the device on a real motorcycle jacket. Old school paper cutouts…until i got to a basic shape and size that works for me.

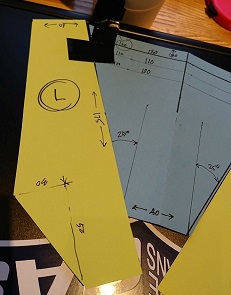
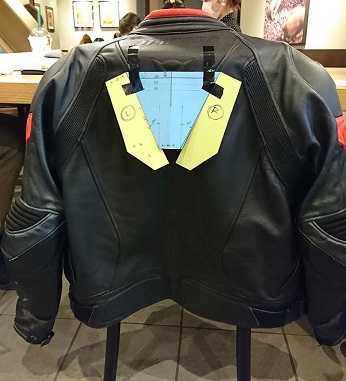
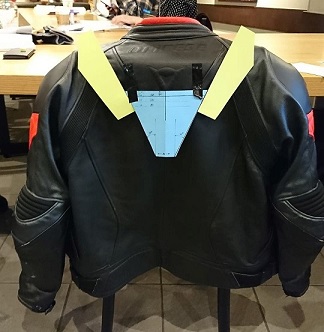
Feels a little bit big, but now I have a concrete starting point. OK!!! Time to get back to Fusion360 and model this thing!
- Sketching the 2D outline shape of the “Control Housing” part is easy enough as is the initial Z-extrusion, but…
- …struggling to model the complicated, triangulated upper portion of the housing.
- “Fillet” function makes reasonable curved surfaces…the majority of the model is generated with this function
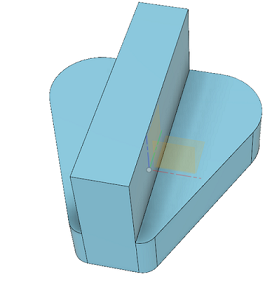
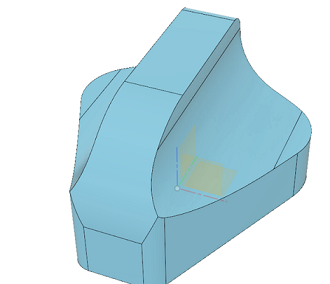
- “Chamfer” used to shape the back end of the wing

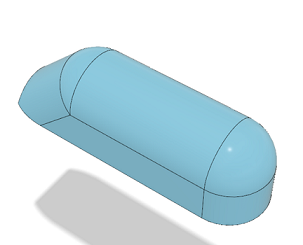
- “Free Move”, “Move Copy”,”Rotate Move”…used to create a second wing and rotate them to show “Open” and “Clossed” positions of wings
Managed to figure out how to do a simple material assignment and render as well…yippee!
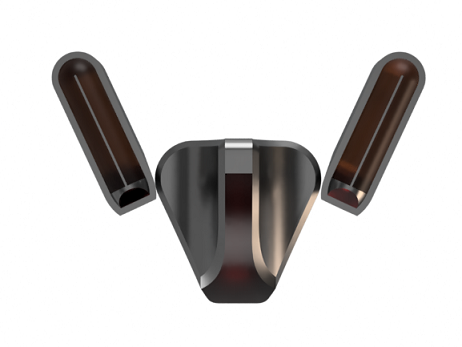
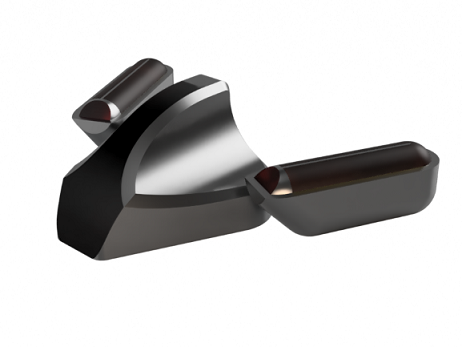


I got some familiarity with Fusion360 doing this first iteration of the GY-RO9 Wings 3D model…and I see the logic and power of the software. The form of GY-RO9 Wings> is not what I was hoping for yet…will need to dig into Fusion360 more to see how to make curved surfaces of a complex form. Will probably have to sketch out a better reference image to help guide the 3D model.
Note: Found this video describing a script to automatically connect line ends (but not join them into a single continuous line)…very useful
Files
Fusion 360 File here