Assignment 13_interface and application programming
01 write an application that interfaces with an input &/or output device that you made
ARDUINO COMPILER CODE
For this assignment, I use the same input than Input Week, so I use the same Arduino code of the Ultrasonic Sensor. For the interface I decide to use Processing to visualize the information then the sensor gets.
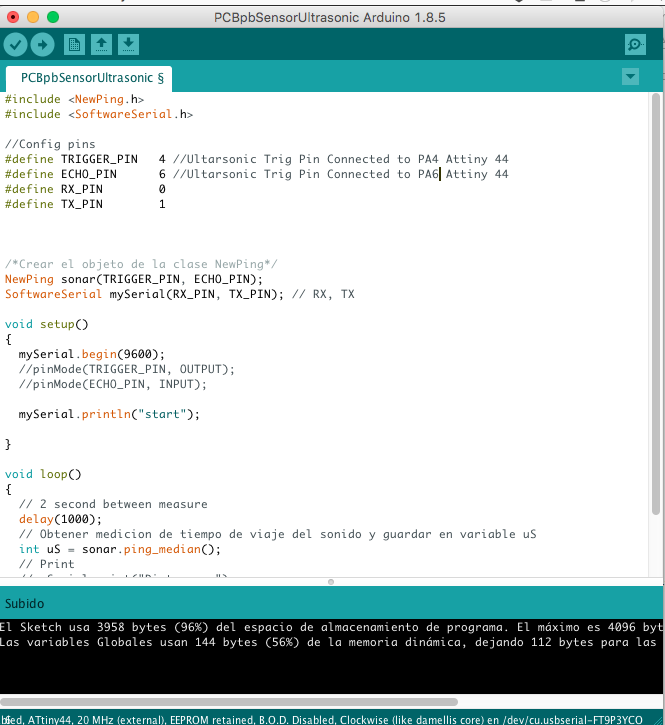
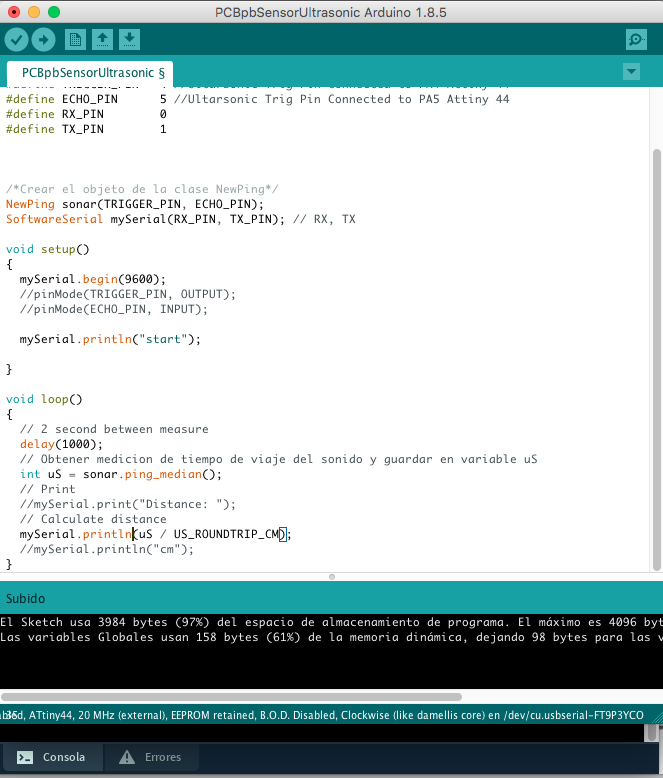
First, I realize I have an error in the code I didn't correct in the documentation of the Input week. I realize I have the ECHO PIN in the pin 5 when was the 6. I spend half an hour trying to correct the code, and then I get this little mistake.
I change the code to comment on Serialprintln "Distance: " and "cm", so the data of the sensor will not be badly interpreted. I also add "ln" to the print of the sensor value, for Processing to convert it to a graphic.
I use this code of processing that I found on ITP Physical Computing's web, and change some details of the code to better visualization of the information.
First, I'm going to add the explanations I found on the web written by Tom Igoe in the section "Read the Data in Processing", that will help to understand the code:
READ THE DATA IN PROCESSING
The serial monitor in Arduino and CoolTerm aren’t the only programs on your computer that can read data in from the microcontroller. Any program that can access the computer’s serial ports can do it. Processing is an excellent tool for reading serial data because you can program it to interpret the data any way you want. Write a program to take in serial bytes and graph them.
The first thing you need to do is to import the Processing Serial Library. This is a code library that adds functionality to Processing so it can read from and write to the computer’s serial ports. You can do this by choosing the Sketch menu, then Import Library...-->serial, or you can type:
Processing code:
import processing.serial.*;
To use the serial library, create an instance of the library in a global variable as shown below:
Processing code:
Serial myPort;
In the setup() method, set the window size, and use the serial library to get a list of the serial ports:
Processing code:
void setup () {
size(800, 600);        // window size

// List all the available serial ports
println(Serial.list());
}
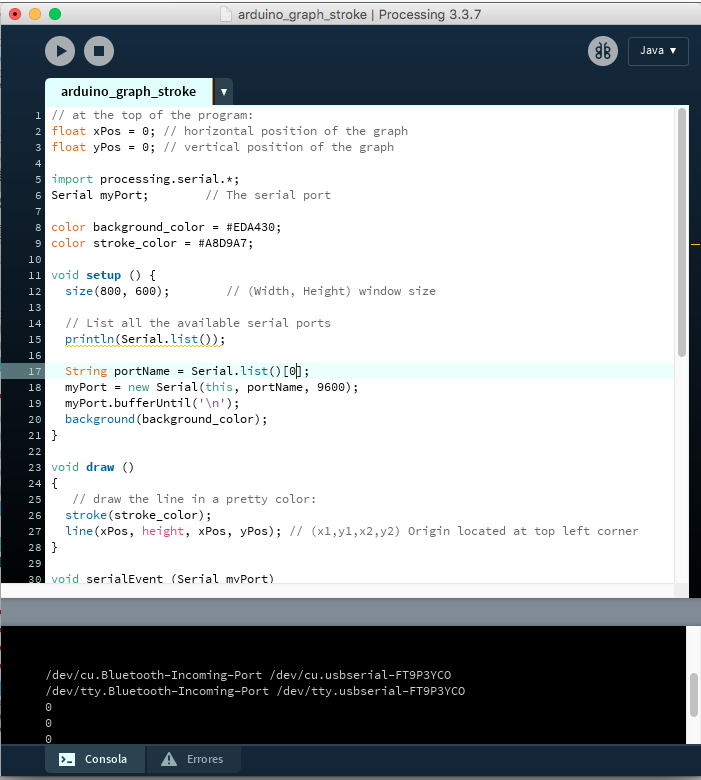
If you run what you’ve typed so far, you should get a list of the serial ports in the monitor pane that looks a bit like this on a mac. On a Windows machine, the port list will have names like COM3, COM4, COM5, and so forth:
/dev/cu.Bluetooth-Incoming-Port /dev/cu.Bluetooth-Modem /dev/cu.usbmodem13 /dev/cu.usbmodem15 /dev/cu.usbmodem17 /dev/cu.usbmodem1421 /dev/cu.usbmodem14221 /dev/tty.Bluetooth-Incoming-Port /dev/tty.Bluetooth-Modem /dev/tty.usbmodem13 /dev/tty.usbmodem15 /dev/tty.usbmodem17 /dev/tty.usbmodem1421 /dev/tty.usbmodem14221
One of these ports is the same as the serial port name you use in the Arduino programming environment. That’s the one you want. So to open that port, add the following lines at the end of the setup:
Processing code:
// change the number below to match your port:
String portName = Serial.list()[12];
myPort = new Serial(this, portName, 9600);
Finally, set the background color. Pick a nice color:
Processing code:
background(#081640);
The serial library has a special method called serialEvent(). Every time a new byte arrives in the serial port, serialEvent() is called. So you can use it to read bytes coming in the serial port from the microcontroller. Write a serialEvent method that reads the incoming byte and prints it out:
Processing code:
void serialEvent (Serial myPort) {
  // get the byte:
  int inByte = myPort.read();
  // print it:
  println(inByte);
}
myPort.read() tells the program to read a byte from the serial port myPort.Bytes are read like peas coming out of a peashooter. Every time you read a byte, it’s removed from the serial buffer. So it’s good practice to read the byte into a variable as shown above, then never read again until you want another byte. If you want to do something with the byte you read (like graphing it), use the variable in which you saved the incoming byte.
GRAPH THE SENSOR VALUE
Now it’s time to draw a graph with the bytes you read. To do this, you’ll pick a point whose distance from the bottom of the window corresponds to the byte’s value. In other words, the vertical position (call it yPos) equals the height minus the byte’s value (yPos = height - inByte). Add global variables called xPos and yPos and set them to 0. Then in the draw(), set the stroke color to a nice color, and draw a line at xPos, from the bottom of the screen to the vertical position you just calculated.
Add this at the top of the program:
Processing code:
// at the top of the program:
float xPos = 0; // horizontal position of the graph
float yPos = 0; // vertical position of the graph
Finally you need to increment the horizontal position after you draw the line, so that the next byte’s line is further along on the graph. If you reach the edge of the screen, set the horizontal position back to 0. Do this at the end of the draw():
Processing code:
// at the edge of the screen, go back to the beginning:
  if (xPos >= width) {
    xPos = 0;
    // clear the screen by resetting the background:
    background(#081640);
  } else {
    // increment the horizontal position for the next reading:
    xPos++;
  }
CHANGES I MAKE
First, I determine my serial port:
Then, I change the weight of the line, and how was evolving.
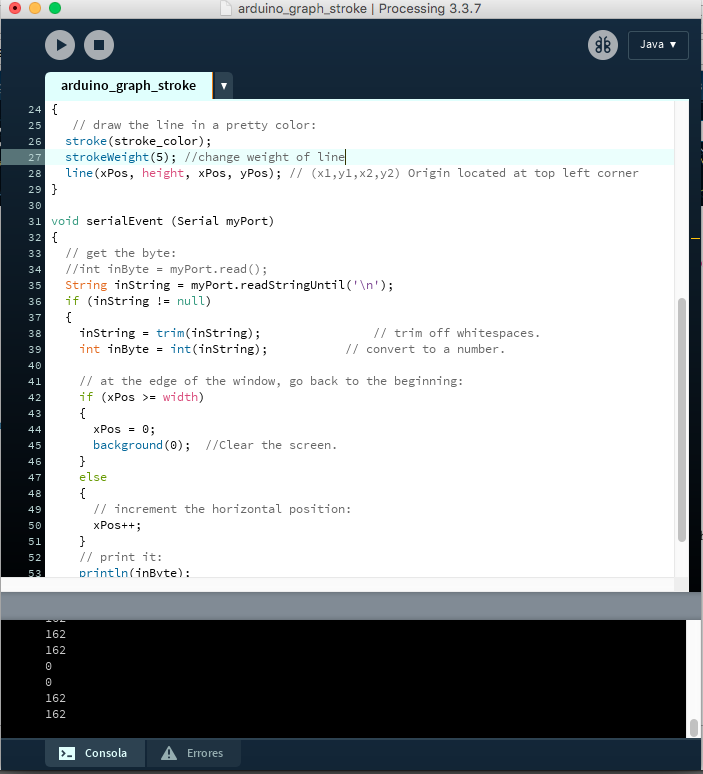
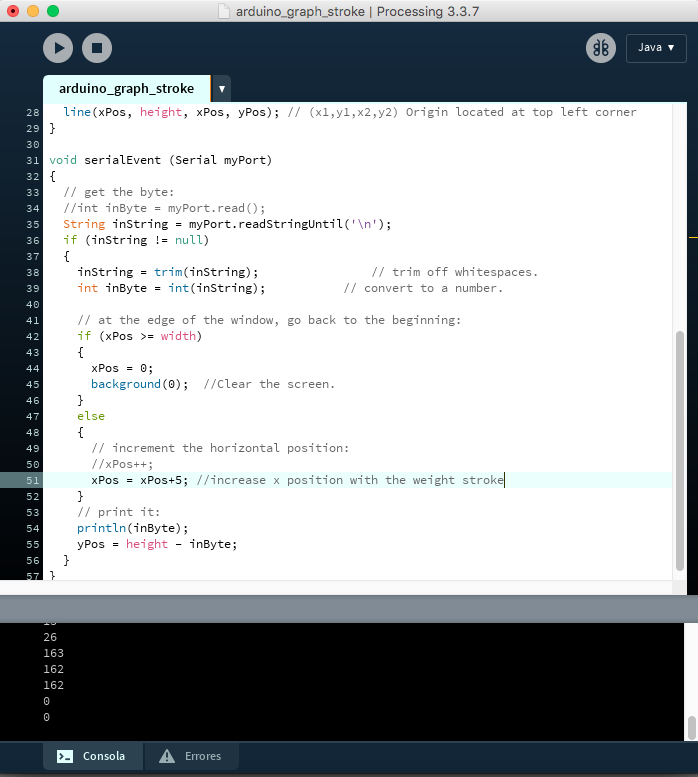
Then, for automatize more the code I introduce a char variable named weight, so If I wanted to change it, I don´t have to go through all the code.
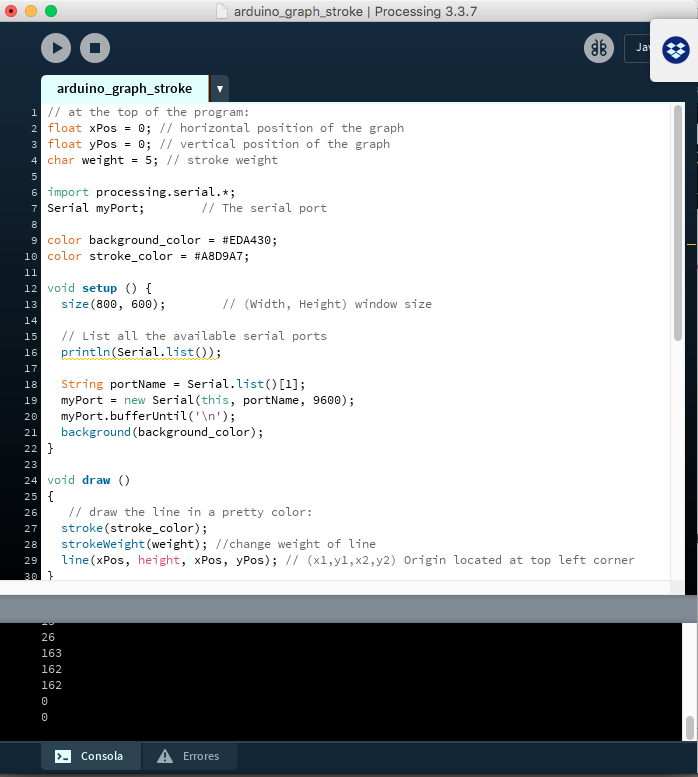
Final Code
// at the top of the program:
float xPos = 0; // horizontal position of the graph
float yPos = 0; // vertical position of the graph
char weight = 10; // stroke weight

import processing.serial.*;
Serial myPort;        // The serial port

color background_color = #EDA430;
color stroke_color = #A8D9A7;

void setup ()
{
  size(800, 600);        // (Width, Height) window size

  // List all the available serial ports
  println(Serial.list());

  String portName = Serial.list()[1];
  myPort = new Serial(this, portName, 9600);
  myPort.bufferUntil('\n');
  background(background_color);
}

//the loop of arduino
void draw ()
{
   // draw the line in a pretty color:
  stroke(stroke_color);
  strokeWeight(weight); //change weight of line
  line(xPos, height, xPos, yPos); // (x1,y1,x2,y2) Origin located at top left corner
}

void serialEvent (Serial myPort)
{
  // get the byte:
  //int inByte = myPort.read();
  String inString = myPort.readStringUntil('\n');
  if (inString != null)
  {
    inString = trim(inString);                // trim off whitespaces.
    int inByte = int(inString);           // convert to a number.

    // at the edge of the window, go back to the beginning:
    if (xPos >= width)
    {
      xPos = 0;
      background(0);  //Clear the screen.
    }
    else
    {
      // increment the horizontal position:
      //xPos++;
      xPos = xPos+weight; //increase x position with the weight stroke
    }
    // print it:
    println(inByte);
    yPos = height - inByte;
  }
}
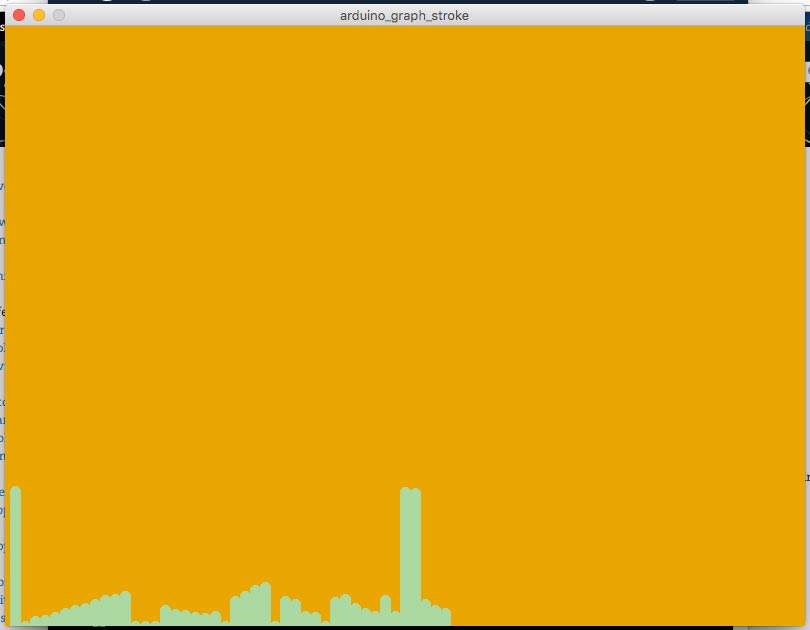
The code of processing get the information of the Ultrasonic sensor from my PCB and then visualize it to a graphic.
Processing of Ultrasonic Sensor from Pilar Bolumburu on Vimeo.

Este obra está bajo una licencia de Creative Commons Reconocimiento-NoComercial-CompartirIgual 4.0 Internacional.