Embedded programming
In this week task is to learn Microcontrollers through datasheets, embedded programming languages and make something with Hello world board in as many as different languages. its a continuation of last assignment consisiting programming and opearation of Hello world board.
To do this prepared following things.
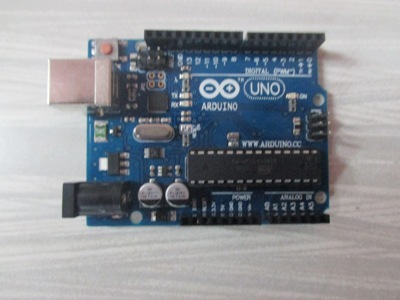
Arduino UNO board: My fabisp is not functionalso I'm using arduino as a programmer.
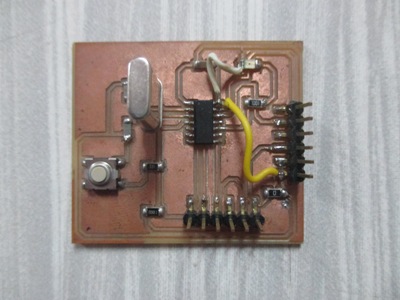
Hello world printed board : Designed and fabricated in last assignment.
 |
 |
Softwares and drivers :
Software: Arduino IDE 1.6.3
Drivers:Attiny drivers for Arduino
Arduino never works directly with Attiny ;forthis we have to download drivers.After downloading go inside documents -->Arduino -->Make new folder HARDWARE--> Put downloaded Attiny folder inside.
Learning through datasheet:
To write a programm for any microcontroller its must to read datasheet first and then write as per. Datasheet helps to understand process and working of that controller . Here I used Attiny 44 microcontroller of AVR family.
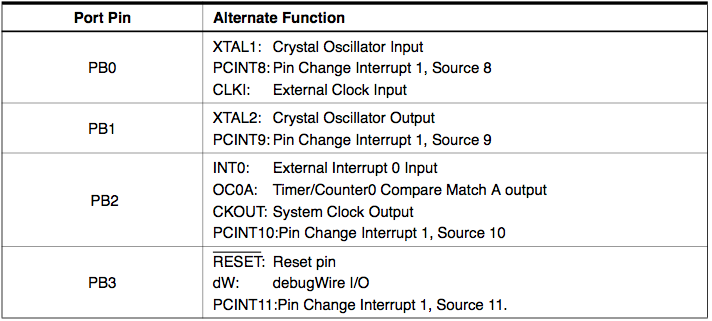
PIN Description:
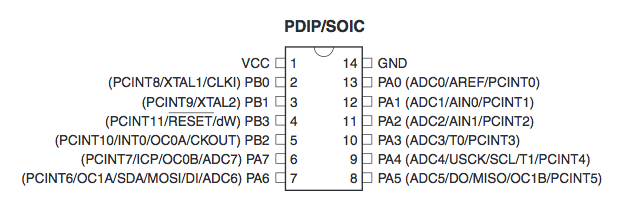
VCC : Supply Voltage.
GND : Ground.
Port B (PB3:PB0) 4-bit bi-directional I/O port with internal pull-up resistors.
RESET (PB3 when RSTDISBL fuse = 1) low level (with longer > minimun pulse length) will generate Reset.
Port A (PA7:PA0) 8-bit bi-directional I/O port with internal pull-up resistors.
Most port pins have alternate functions in addition to being general digital I/Os
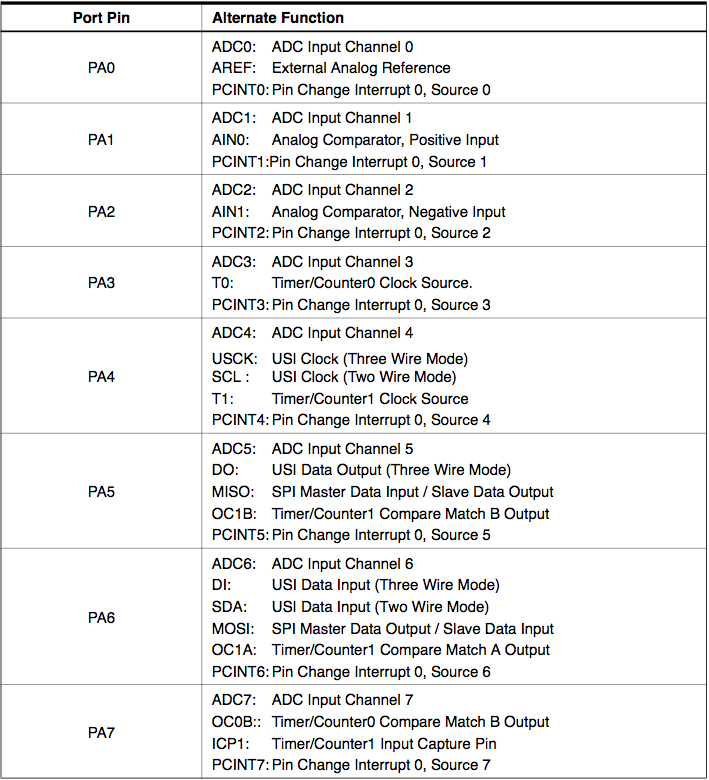
Alternate Functions of Port A:
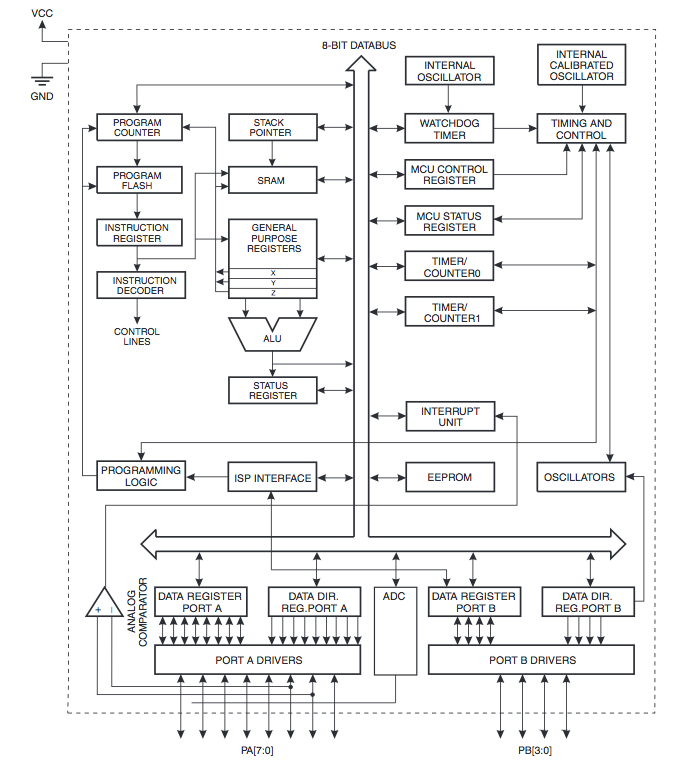
Block Diagram:
General purpose I/O resistor :
The ATtiny24A/44A/84A contains three General Purpose I/O Registers. These registers can be used for storing any information, and they are particularly useful for storing global variables andstatus flags. General Purpose I/O Registers within the address range 0x00 - 0x1F are directly bit-accessible using the SBI, CBI, SBIS, and SBIC instructions.


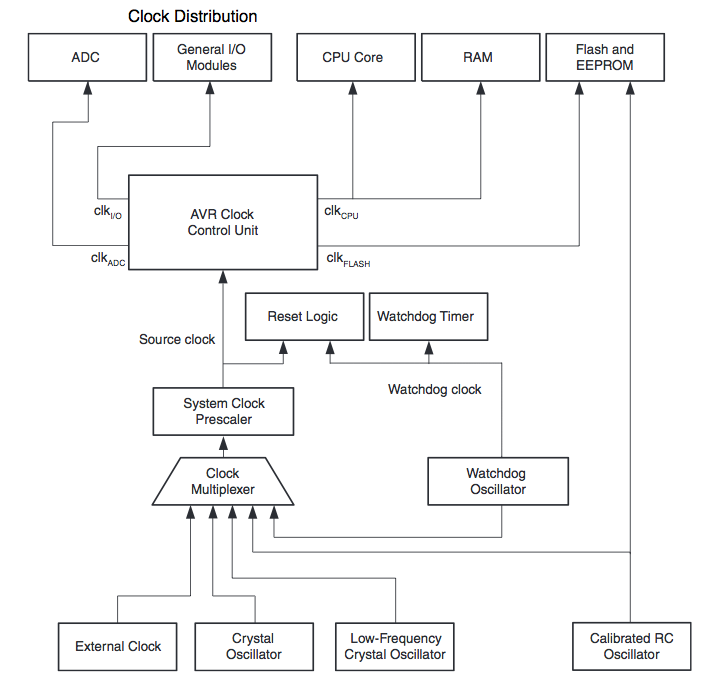
Clock system:
Here inside hello world board pin 4 (reset)connected with button and set as logically high.Port A-pin 3 is used as output and LED is connected to this with 1K resistor.Given supply to attiny44 as per datasheet.
Programming and process:
Source code :avrLED.c
Header file :avrLED.h
Defined pins inside header file. Inside source code --
const int numDelys_ms = 500; defined delay of 500ms.
LED has been connected over Port A, Pin 3 (PA3). Set this pin to be Output pin.
PORT_DIR_LED = 1 [left shift] PIN_LED;
//Pull Down all the pins of PORTA.
PORT_LED = 0;
Called while loop with exucating again and again while (1)
{
//Change the state of PA3 to opposite of previous state (toggle).
PORT_LED ^= 1[left shift]PIN_LED;
// add delay to take this toggled state ahead for a while.
_delay_ms (numDelys_ms);
}
return 0;
}
To upload this programm on hello world board I used Arduino as a programmer.
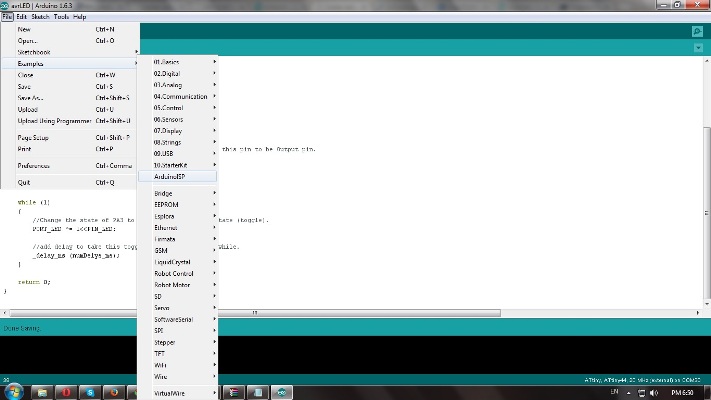
For this open Arduino IDE -->connect arduinoUno board--> Go inside file -->Examples-->Arduino as ISP. Load this programm on board to make arduino as a programmer.
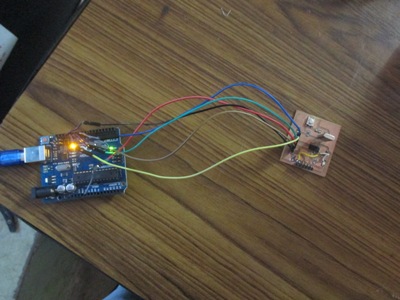
Now connect following pins between hello board and arduino.
Attiny 44--Arduino UNO
VCC-- 5V
GND--GND
MISO--Pin12
MOSI--Pin11
SCK--Pin13
RST--Pin10
Now copy header file inside Arduino home folder and source inside Arduino IDE.Go inside tools select port first for arduino UNO board. After this inside tools select board--> Attiny44;clock20MHZ. Under tools go inside programmer-->select arduino as a ISP. Compile and burn a code.
Remove all other pins exluding VCC and GND. Led starts blinking afetr with 500ms delay.
Here is video link.