Final Project Development
Week 3: Computer-controlled cutting
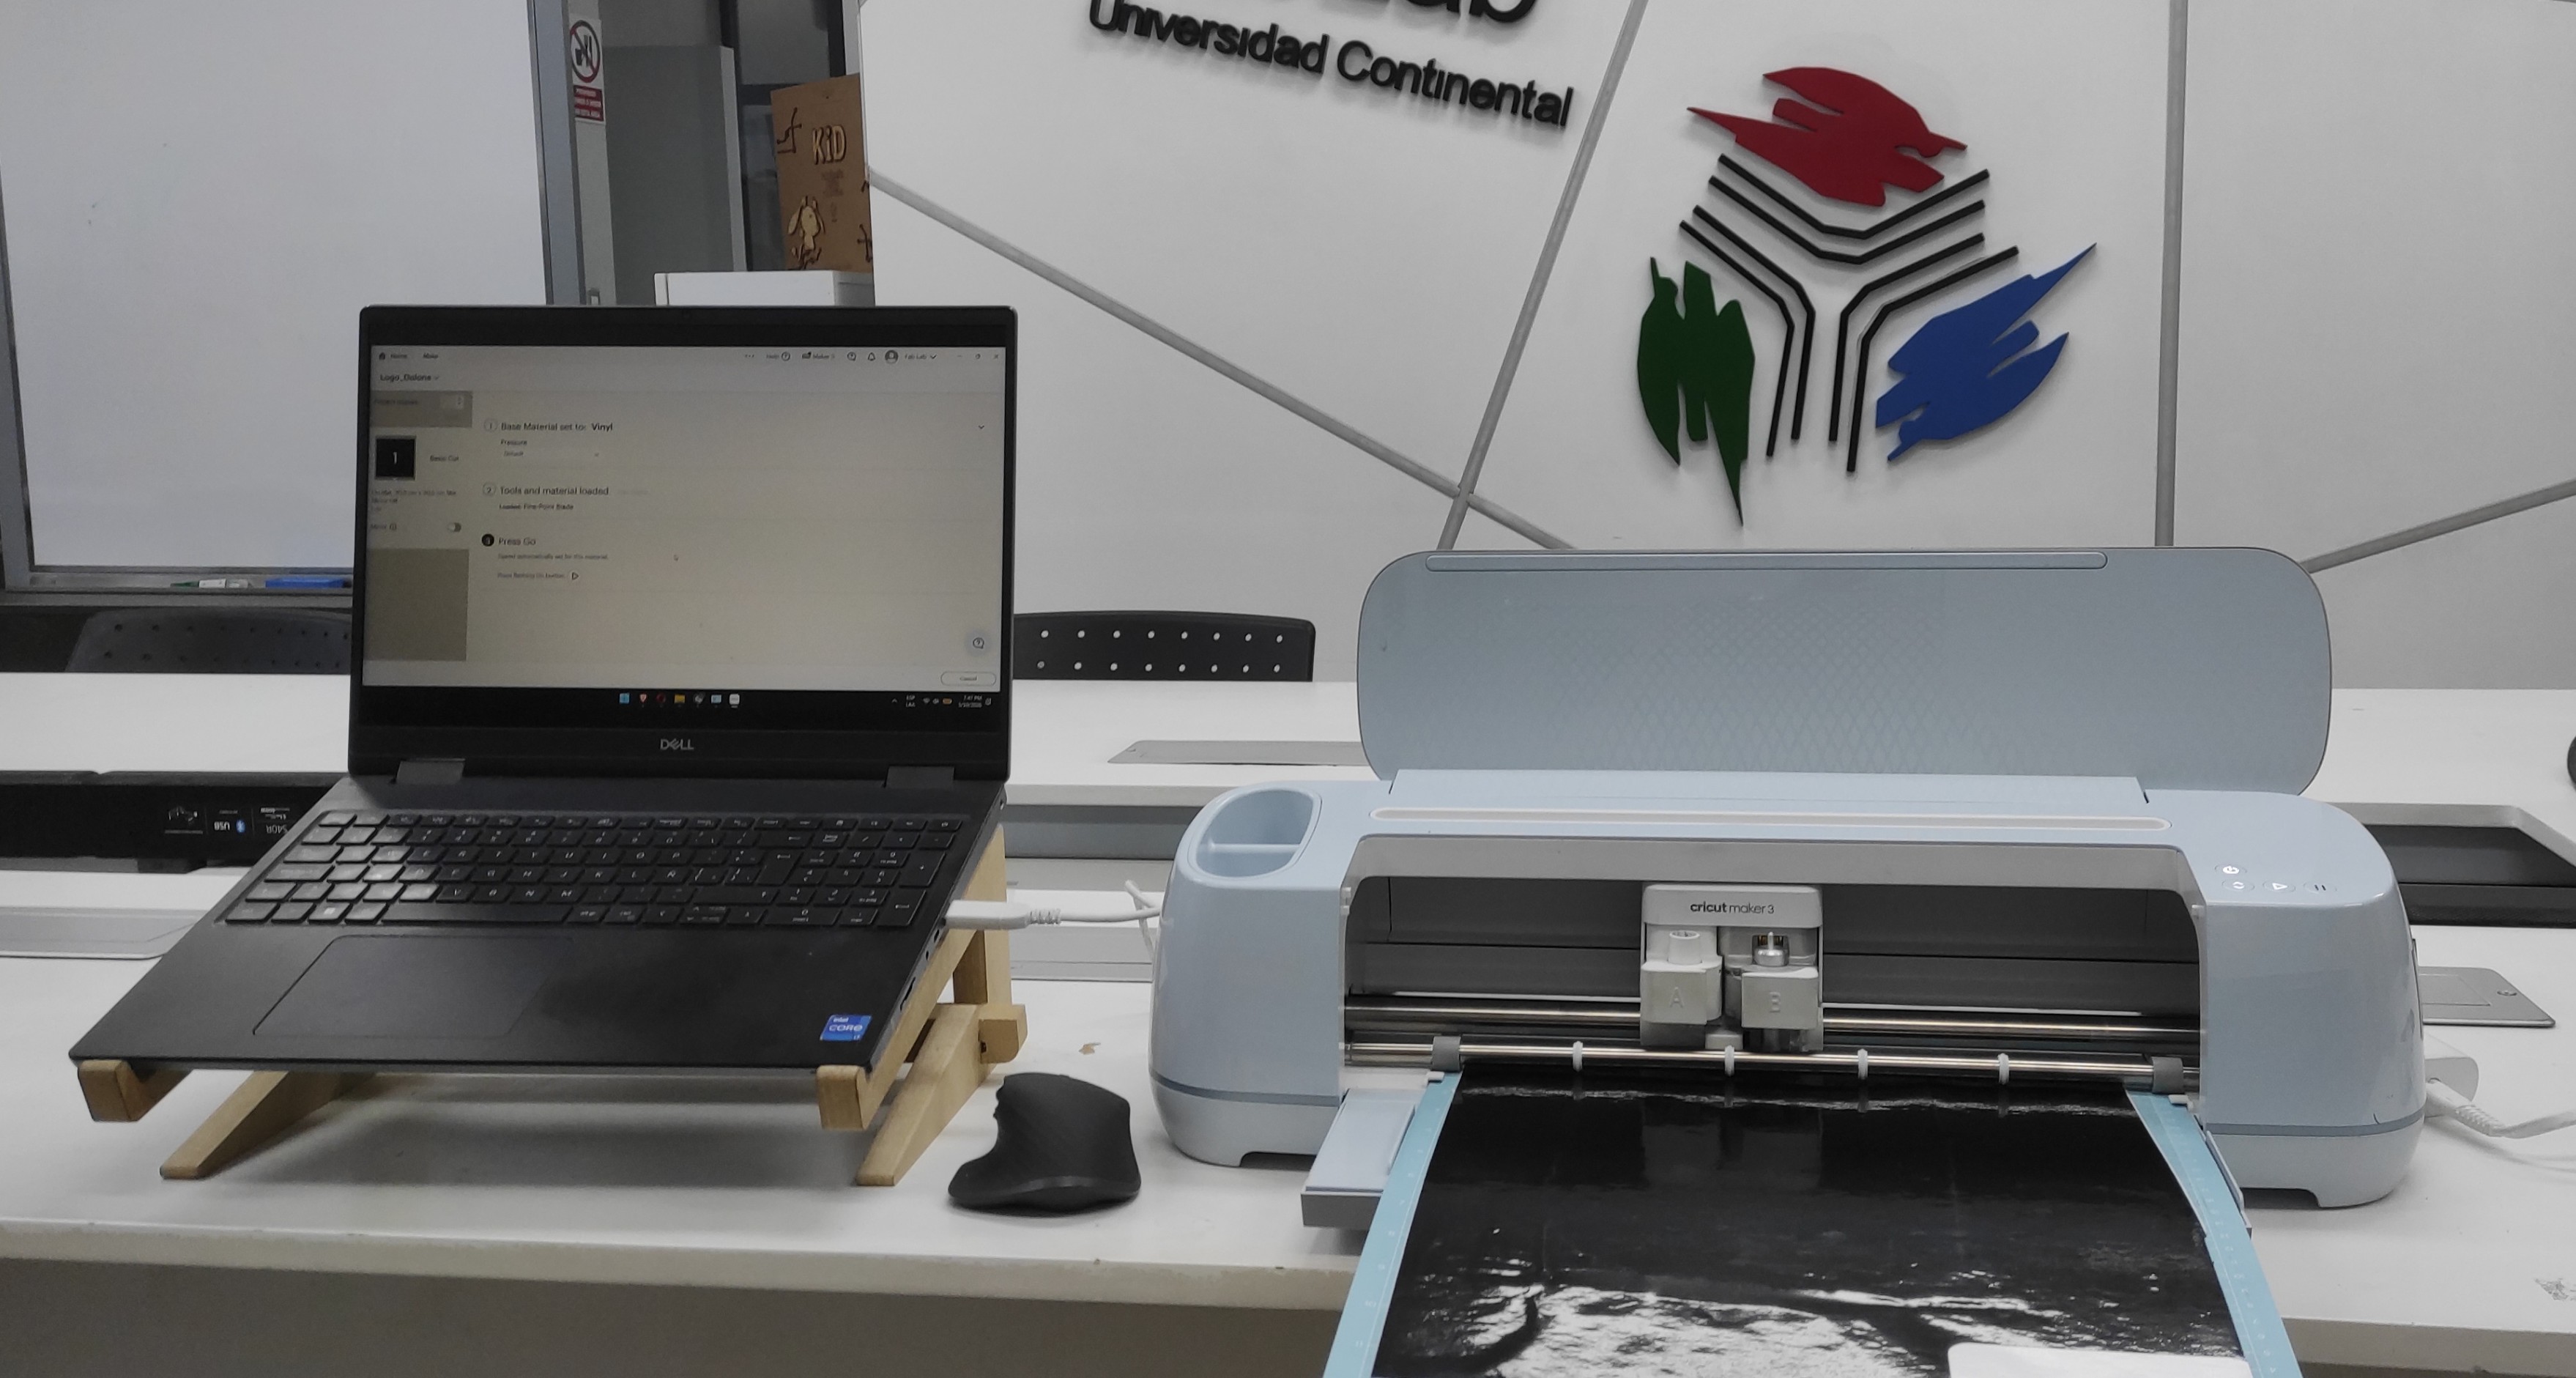
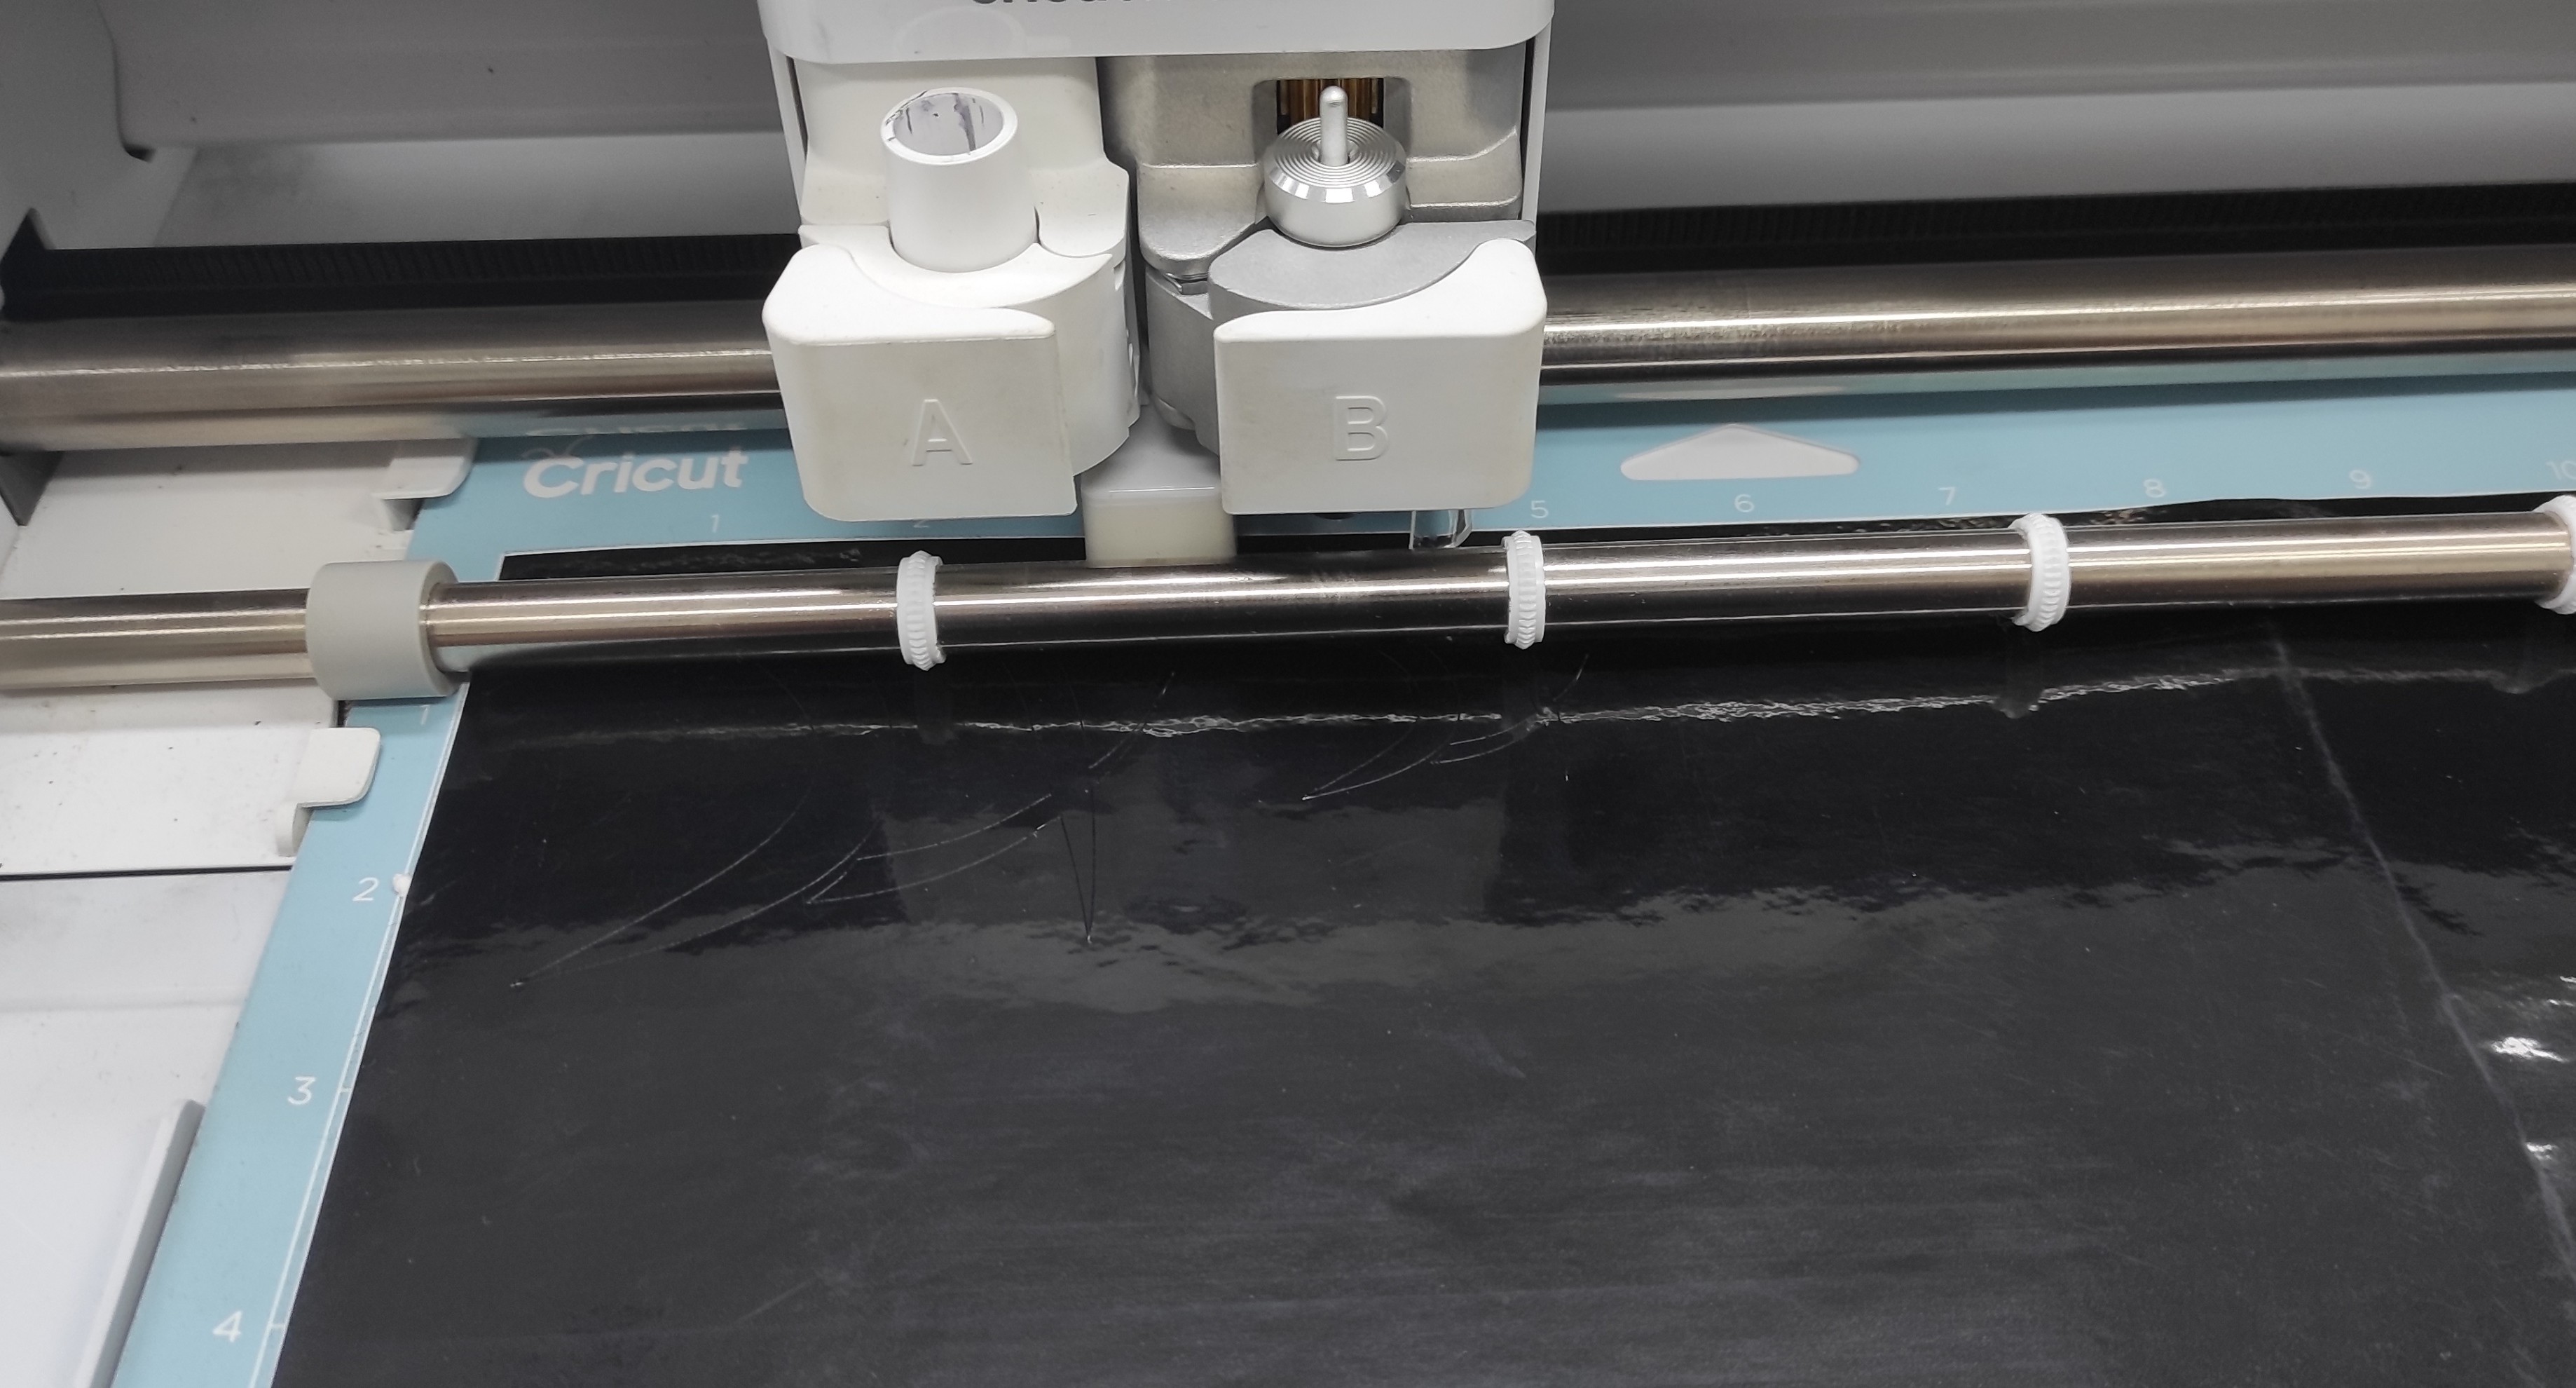
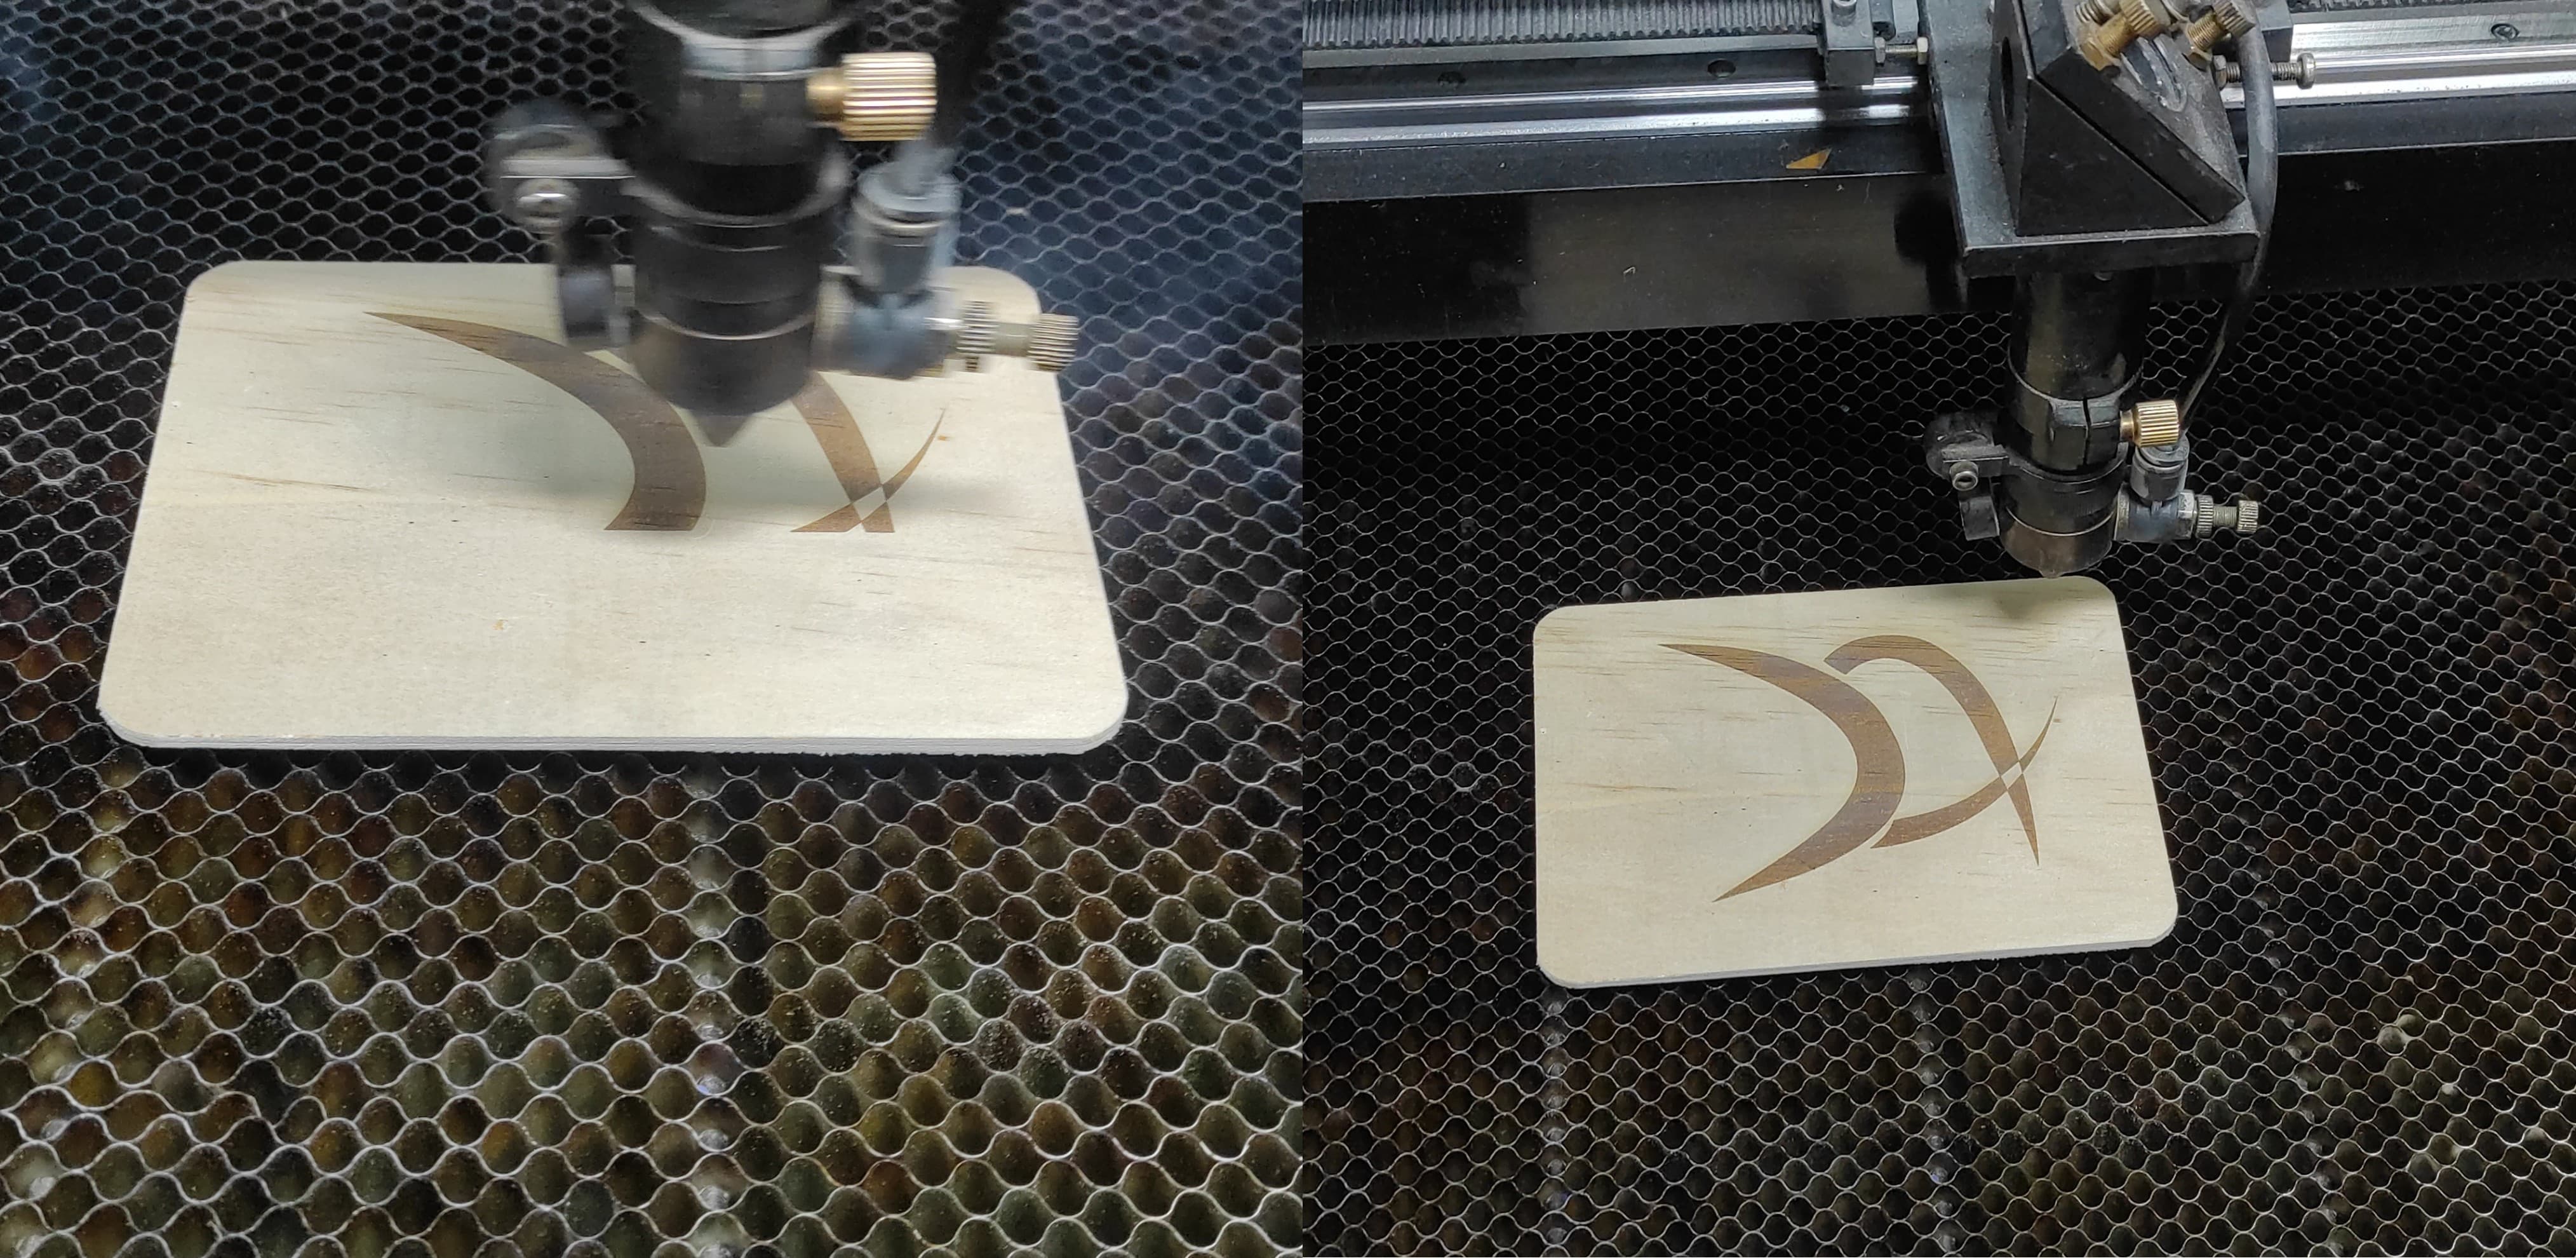
3.1 Vinil Cutter - Logo for my project
For my final project, I decided to create and cut a personal logo that will represent my project and future products. This logo will serve as the visual identity of my brand and help make my work recognizable and unique.

3.2. Files
Here are the files available for download.
Logo Design: Logo_dxf.rar
Week 4: Embedded Programming
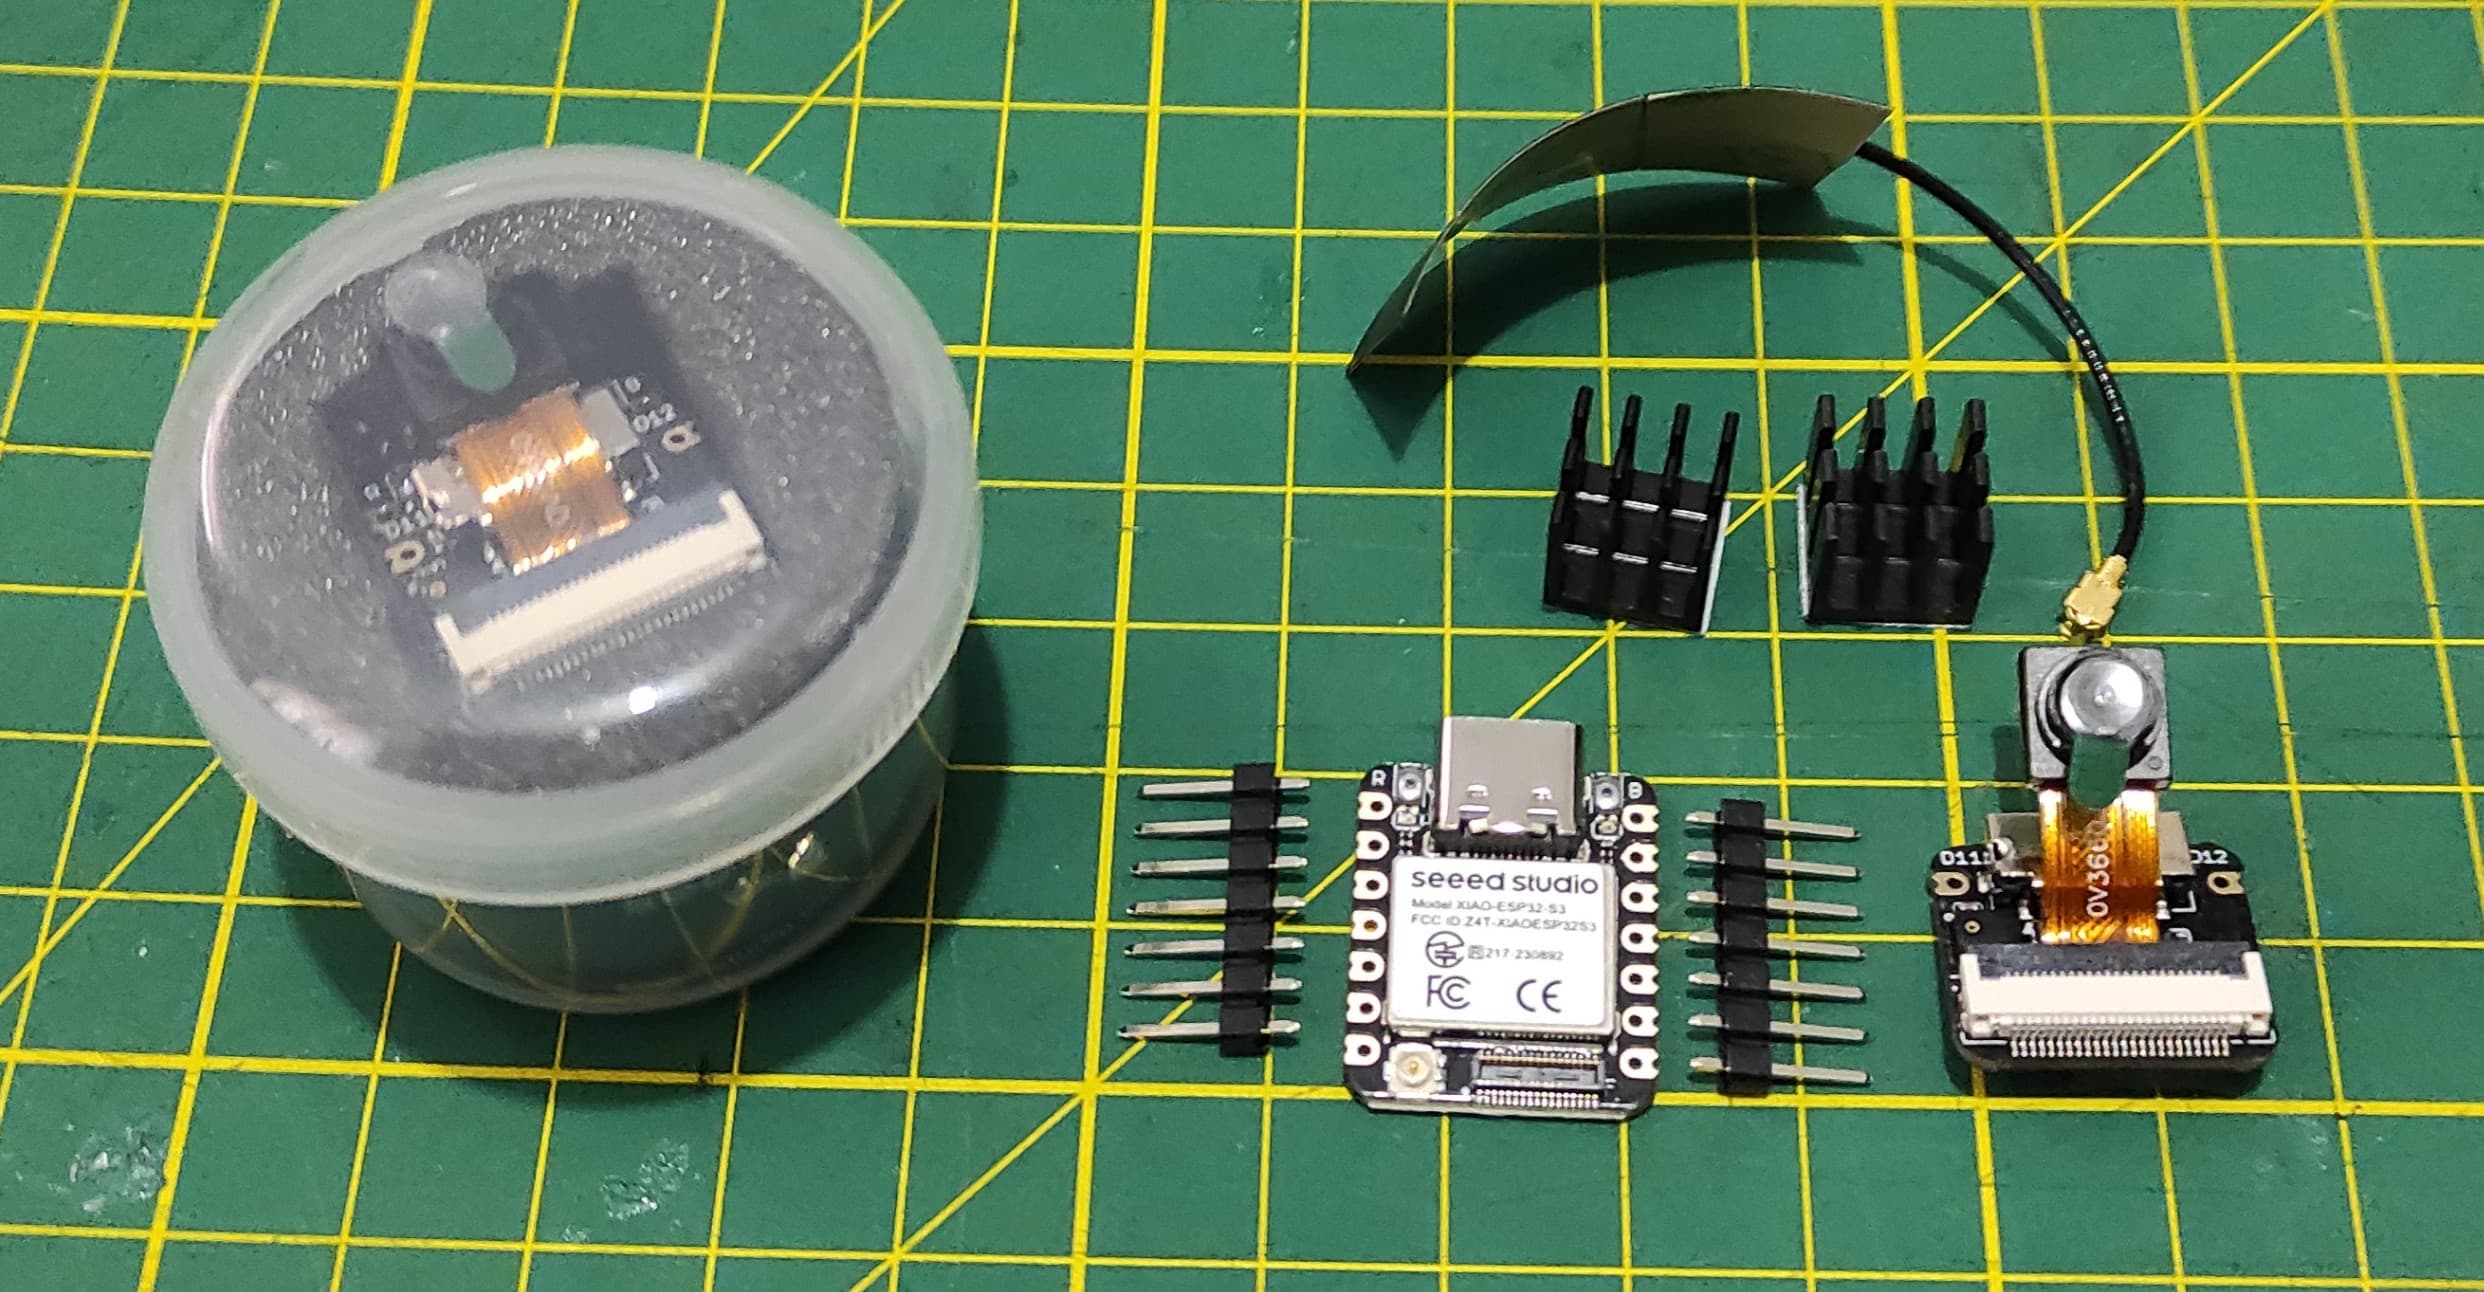
4.1 Exploring the XIAO ESP32S3 Sense:
Seeed Studio XIAO ESP32S3 Sense integrates camera sensor, digital microphone and SD card supporting. Combining embedded ML computing power and photography capability, this development board can be your great tool to get started with intelligent voice and vision AI.
Product Link: Seeed Studio XIAO ESP32S3 Series
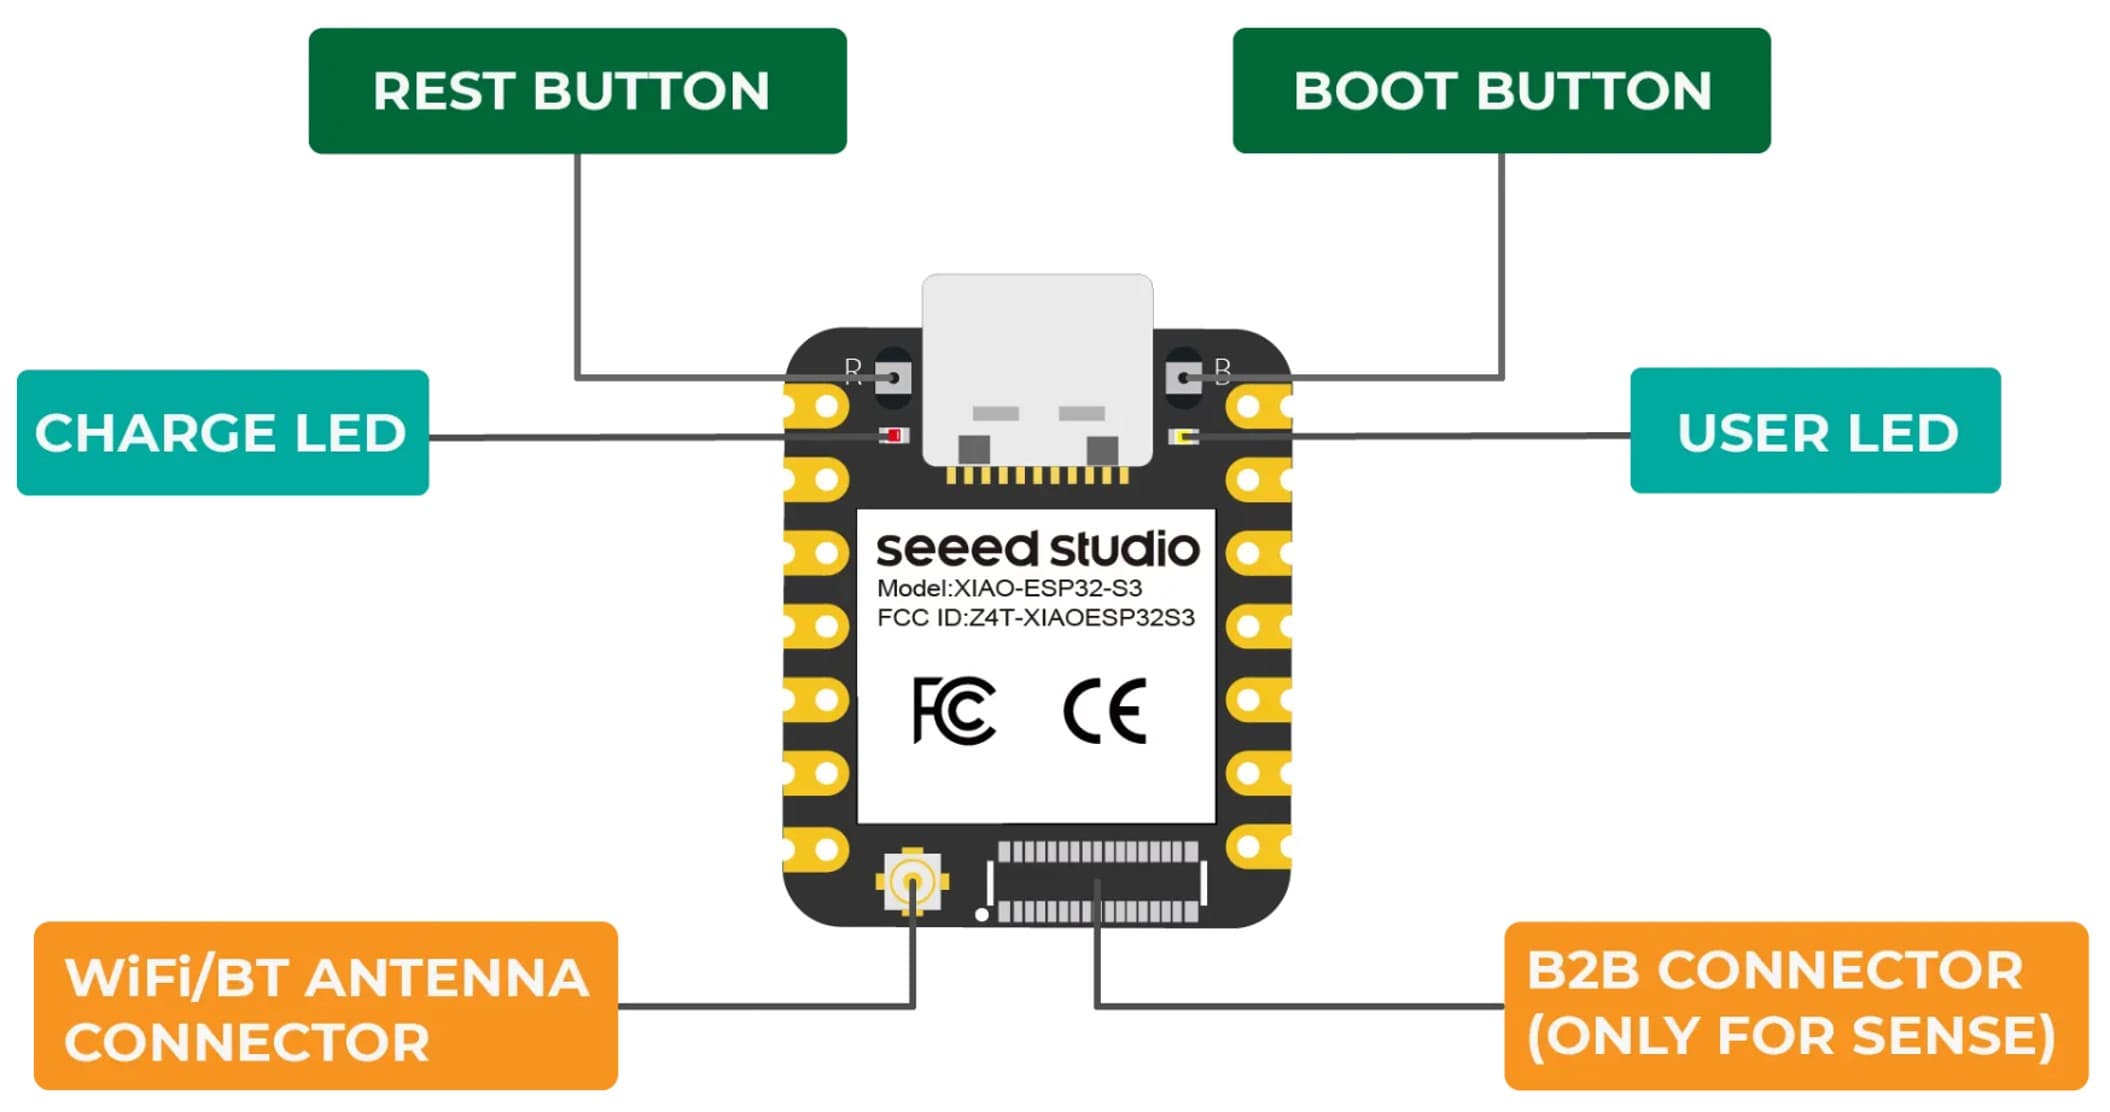
4.2 Pinout XIAO ESP32S3 Sense
The XIAO ESP32S3 Sense packs impressive I/O capabilities into its tiny 21 x 17.5mm form factor. Several pins serve dual purposes.
Seeed Studio XIAO ESP32S3 Sense integrates camera sensor, digital microphone and SD card supporting. Combining embedded ML computing power and photography capability, this development board can be your great tool to get started with intelligent voice and vision AI.
Week 5: 3D Scanning and Printing
5.1 Making the Case for Project:
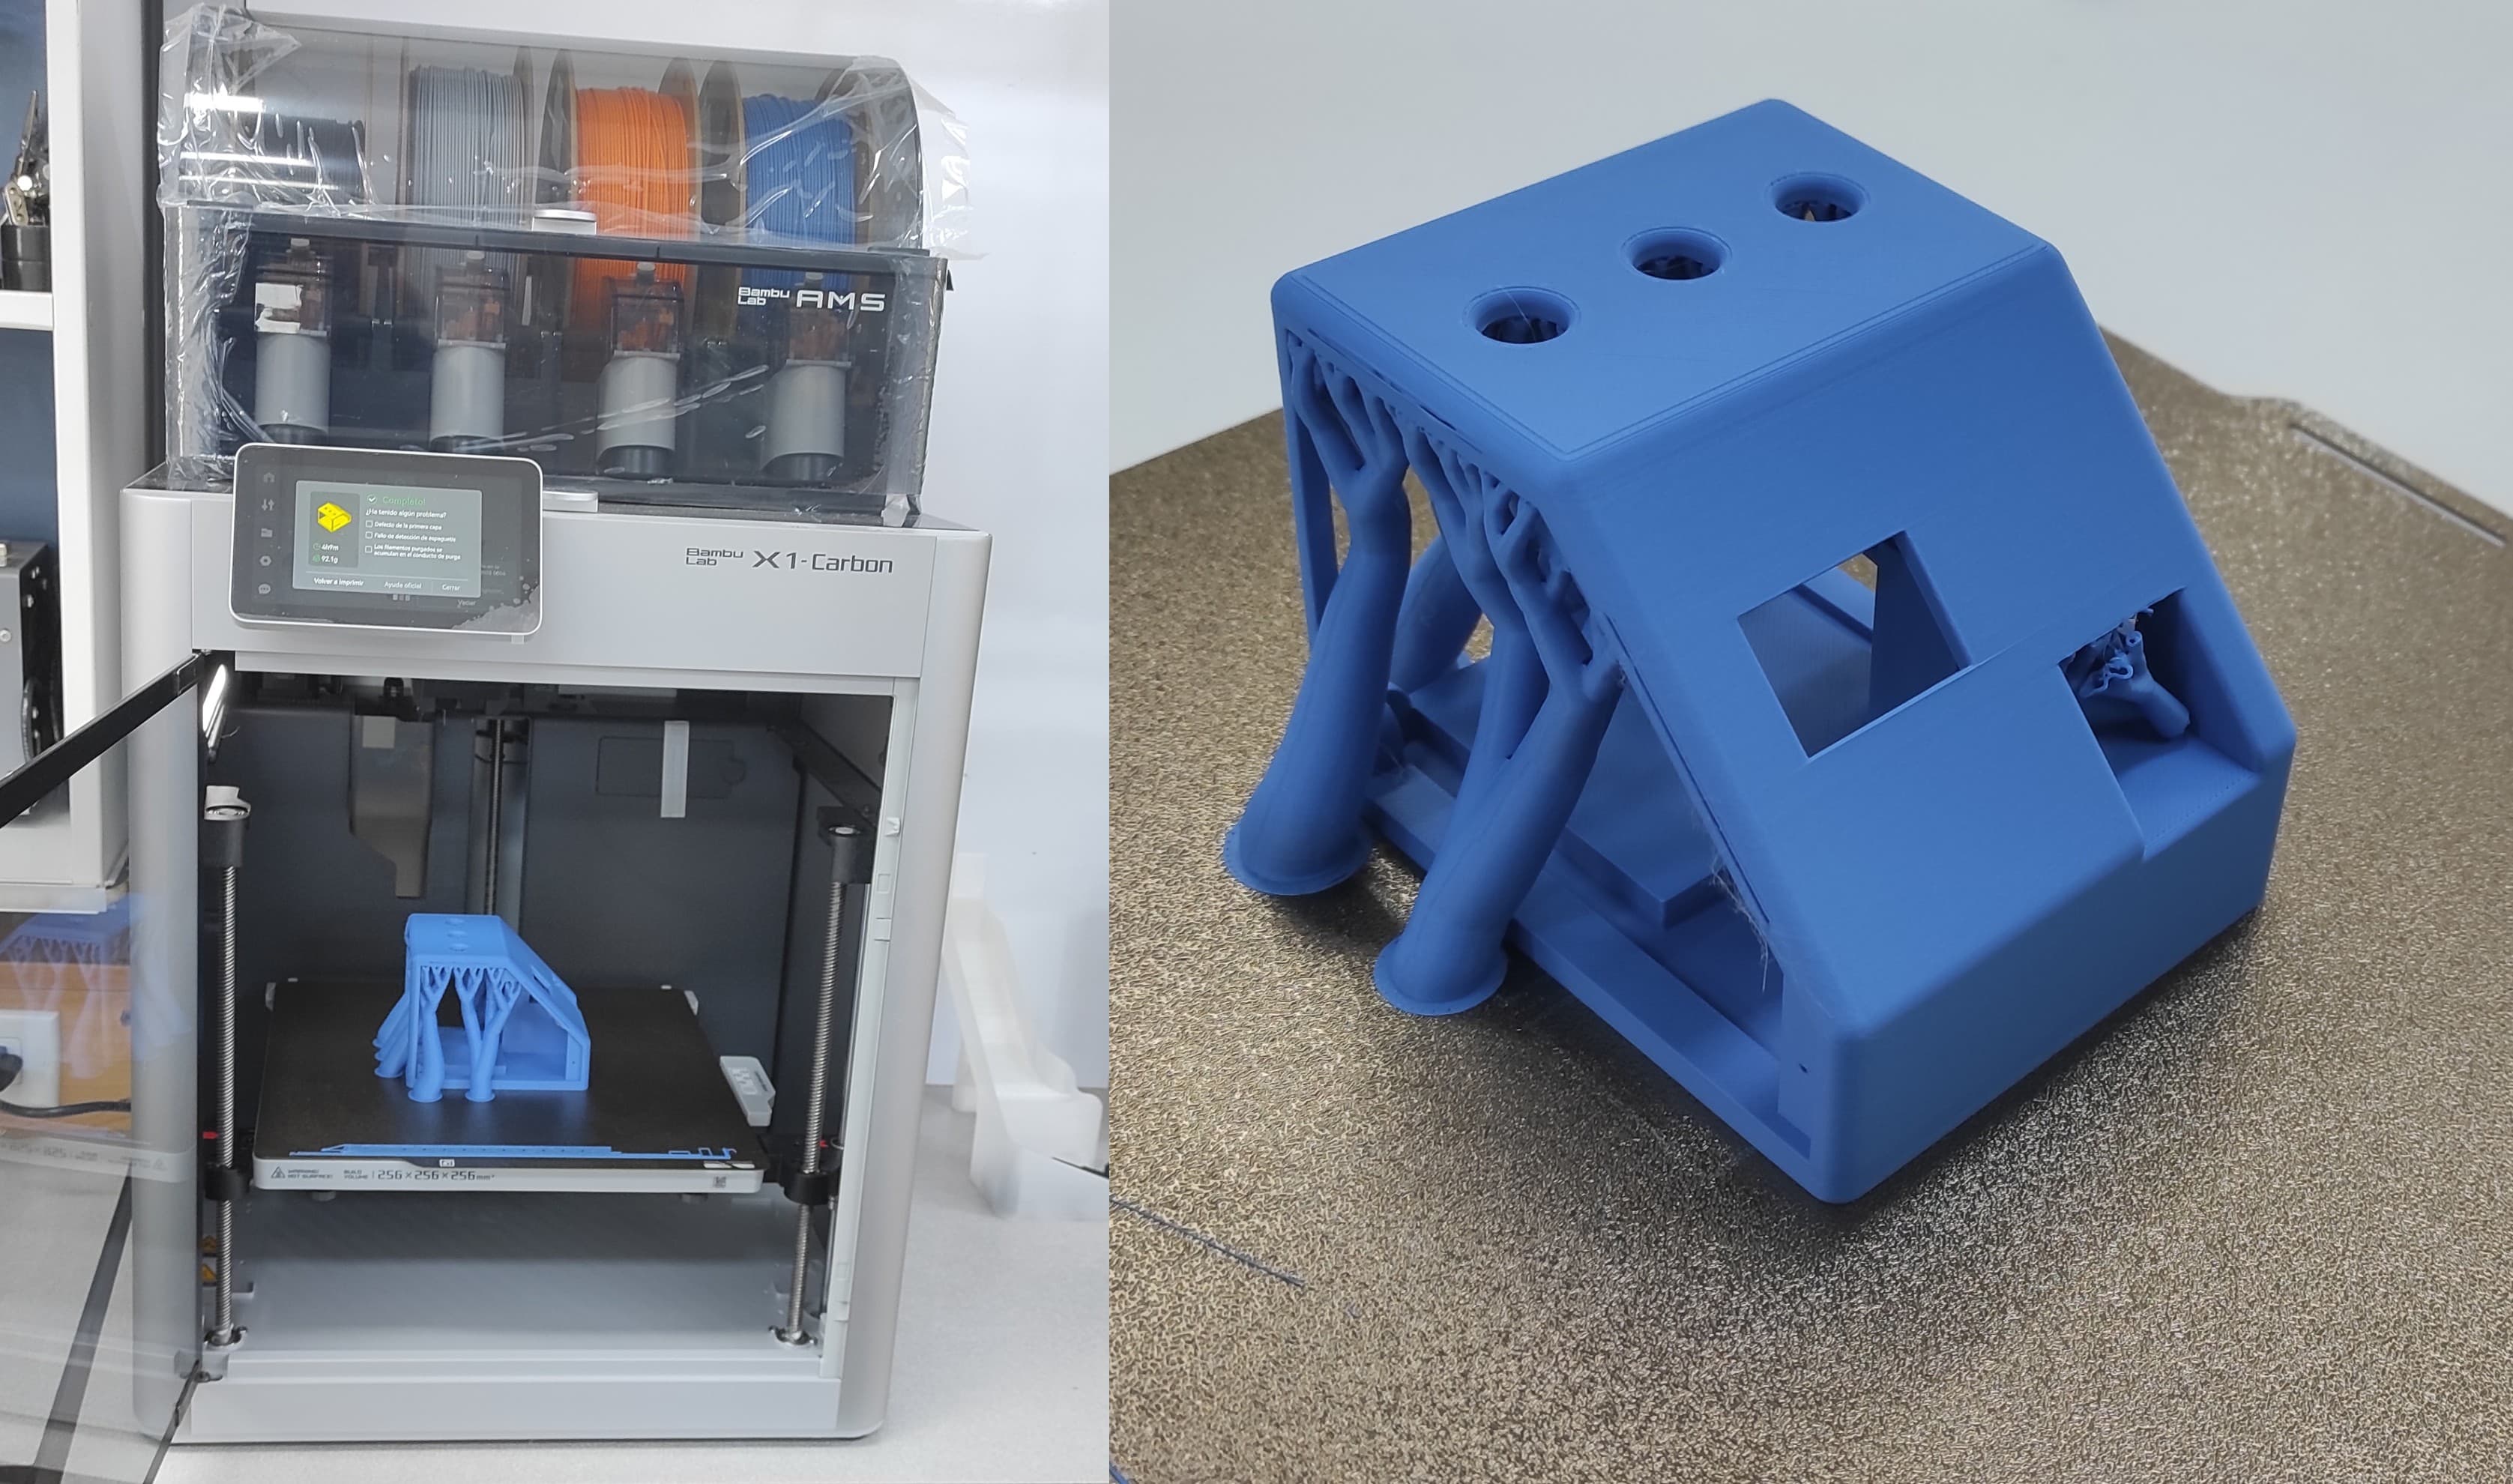
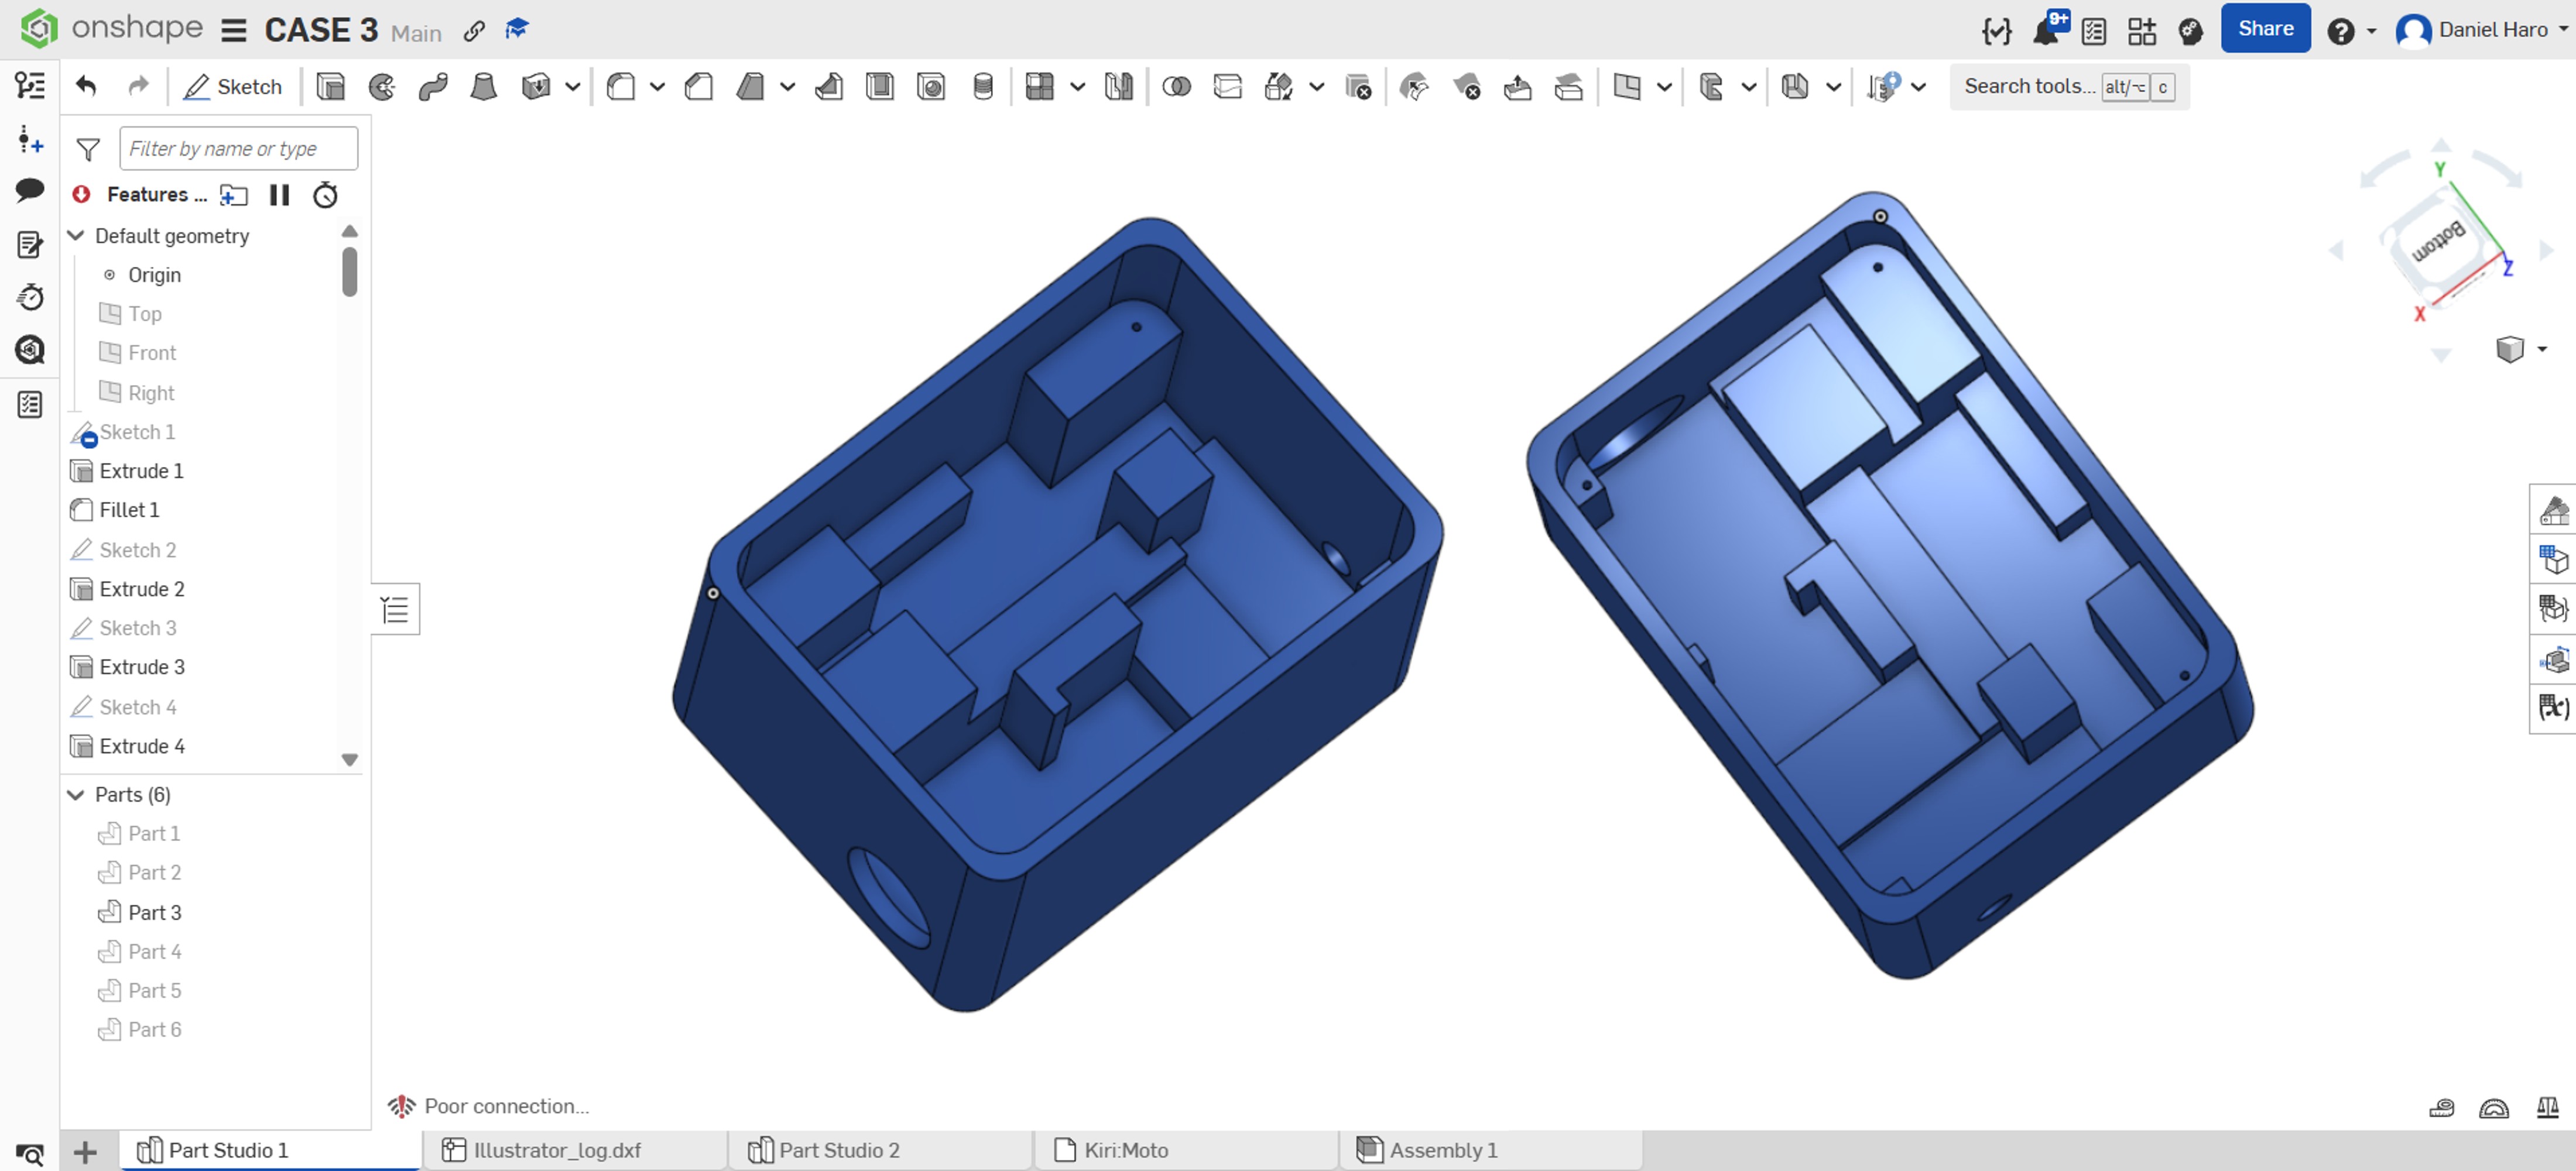
For holding the different sensors of my final project, I designed an initial enclosure in Onshape.
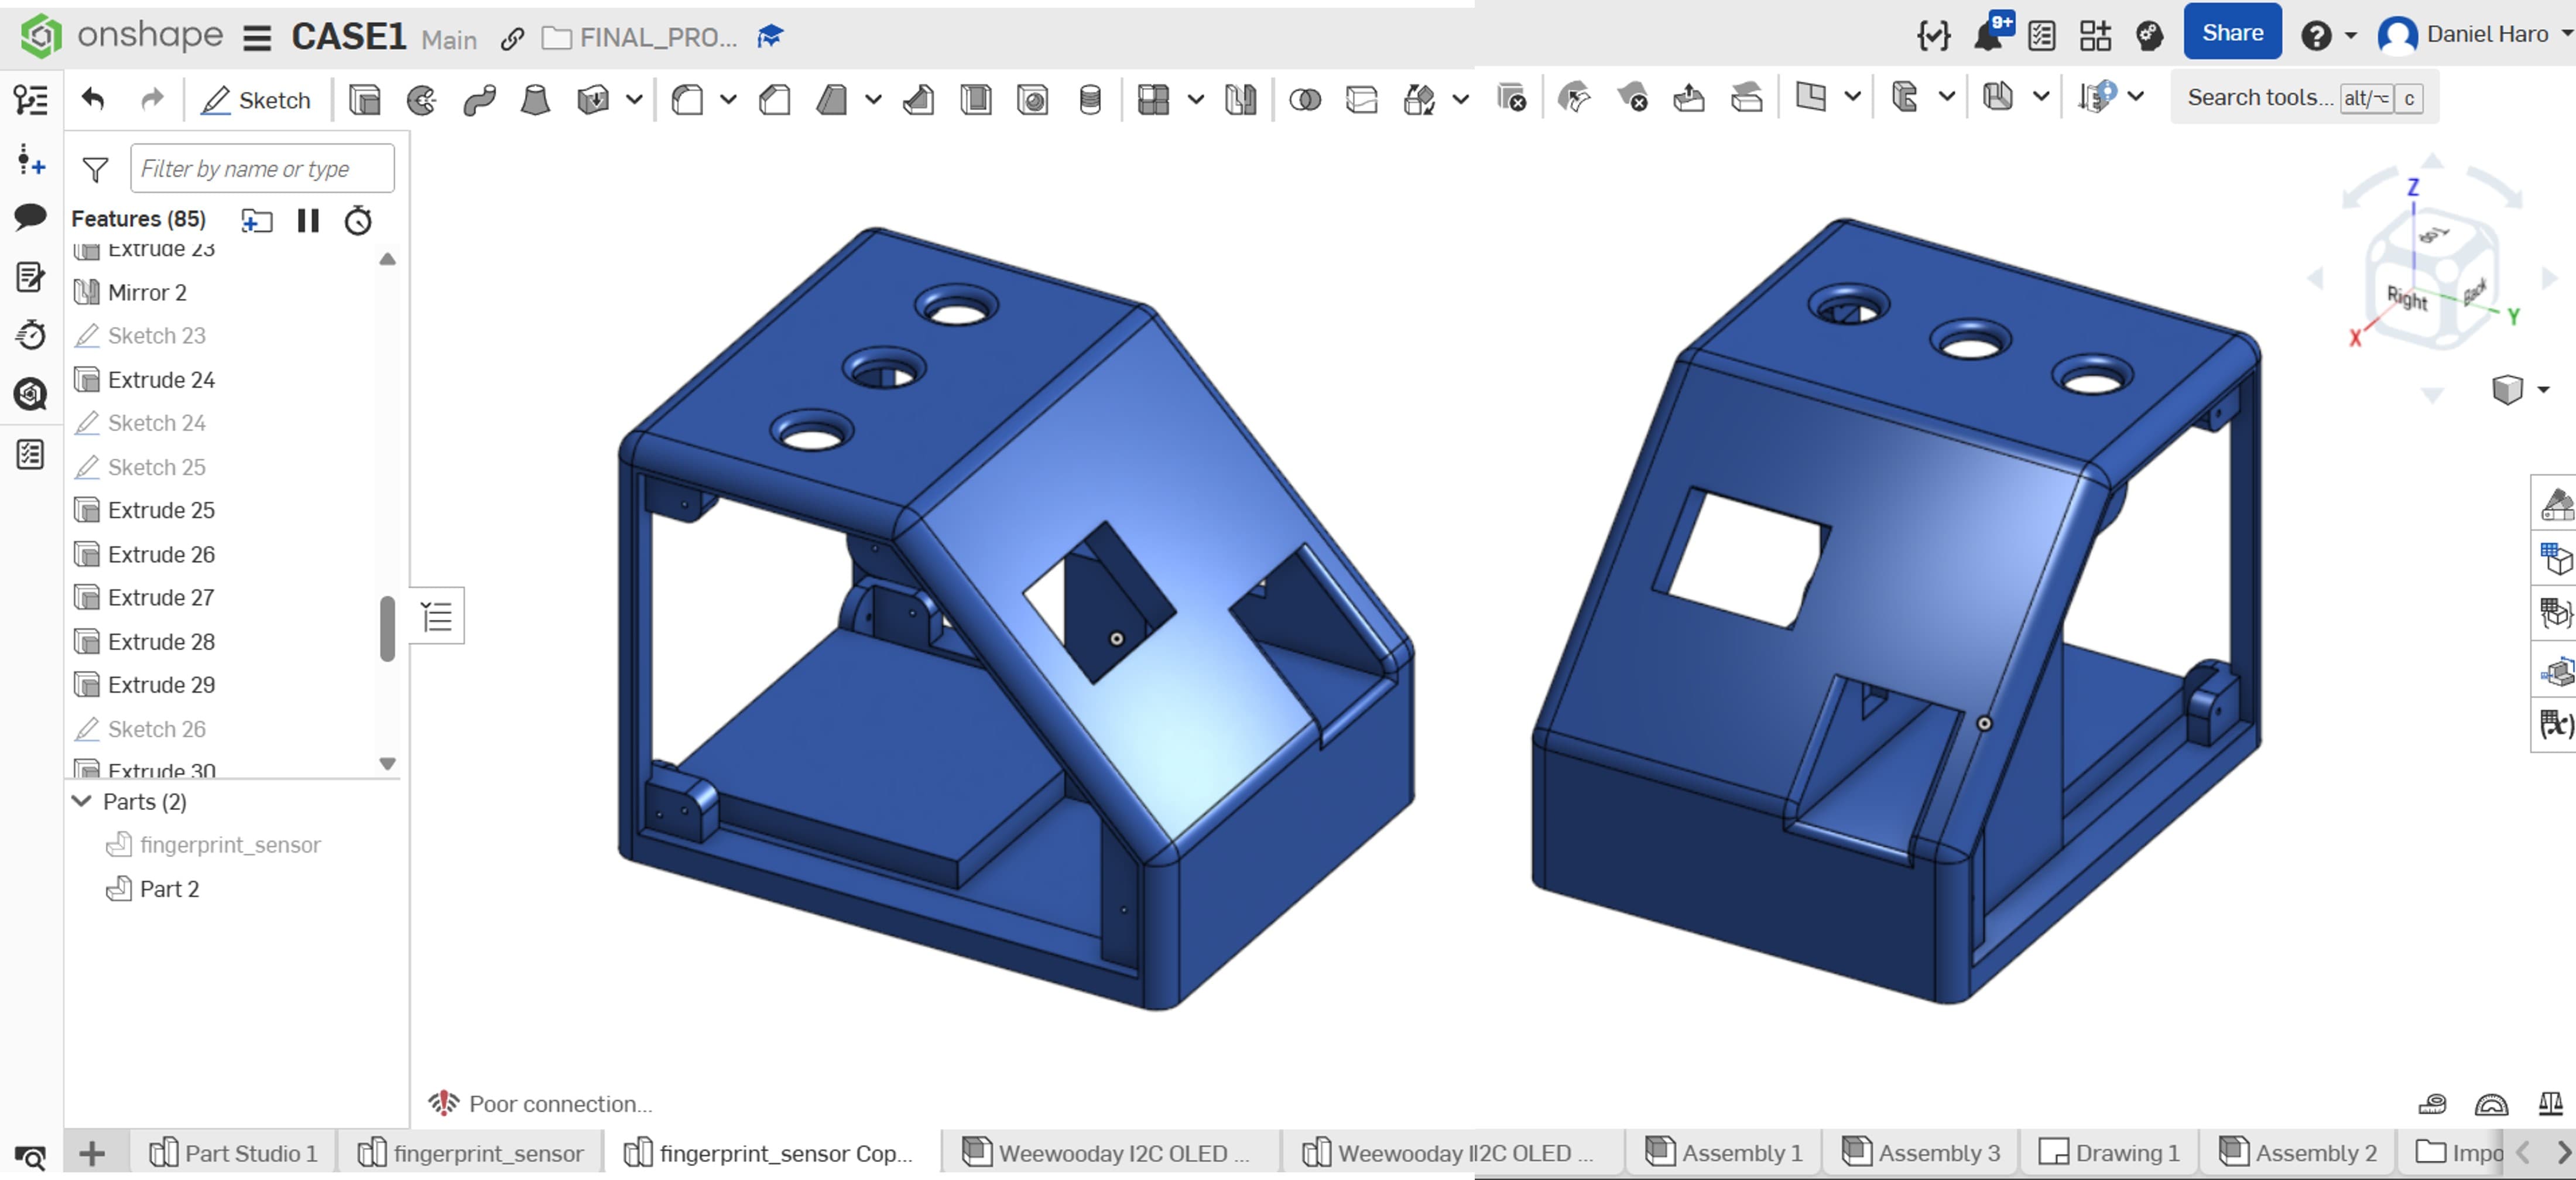
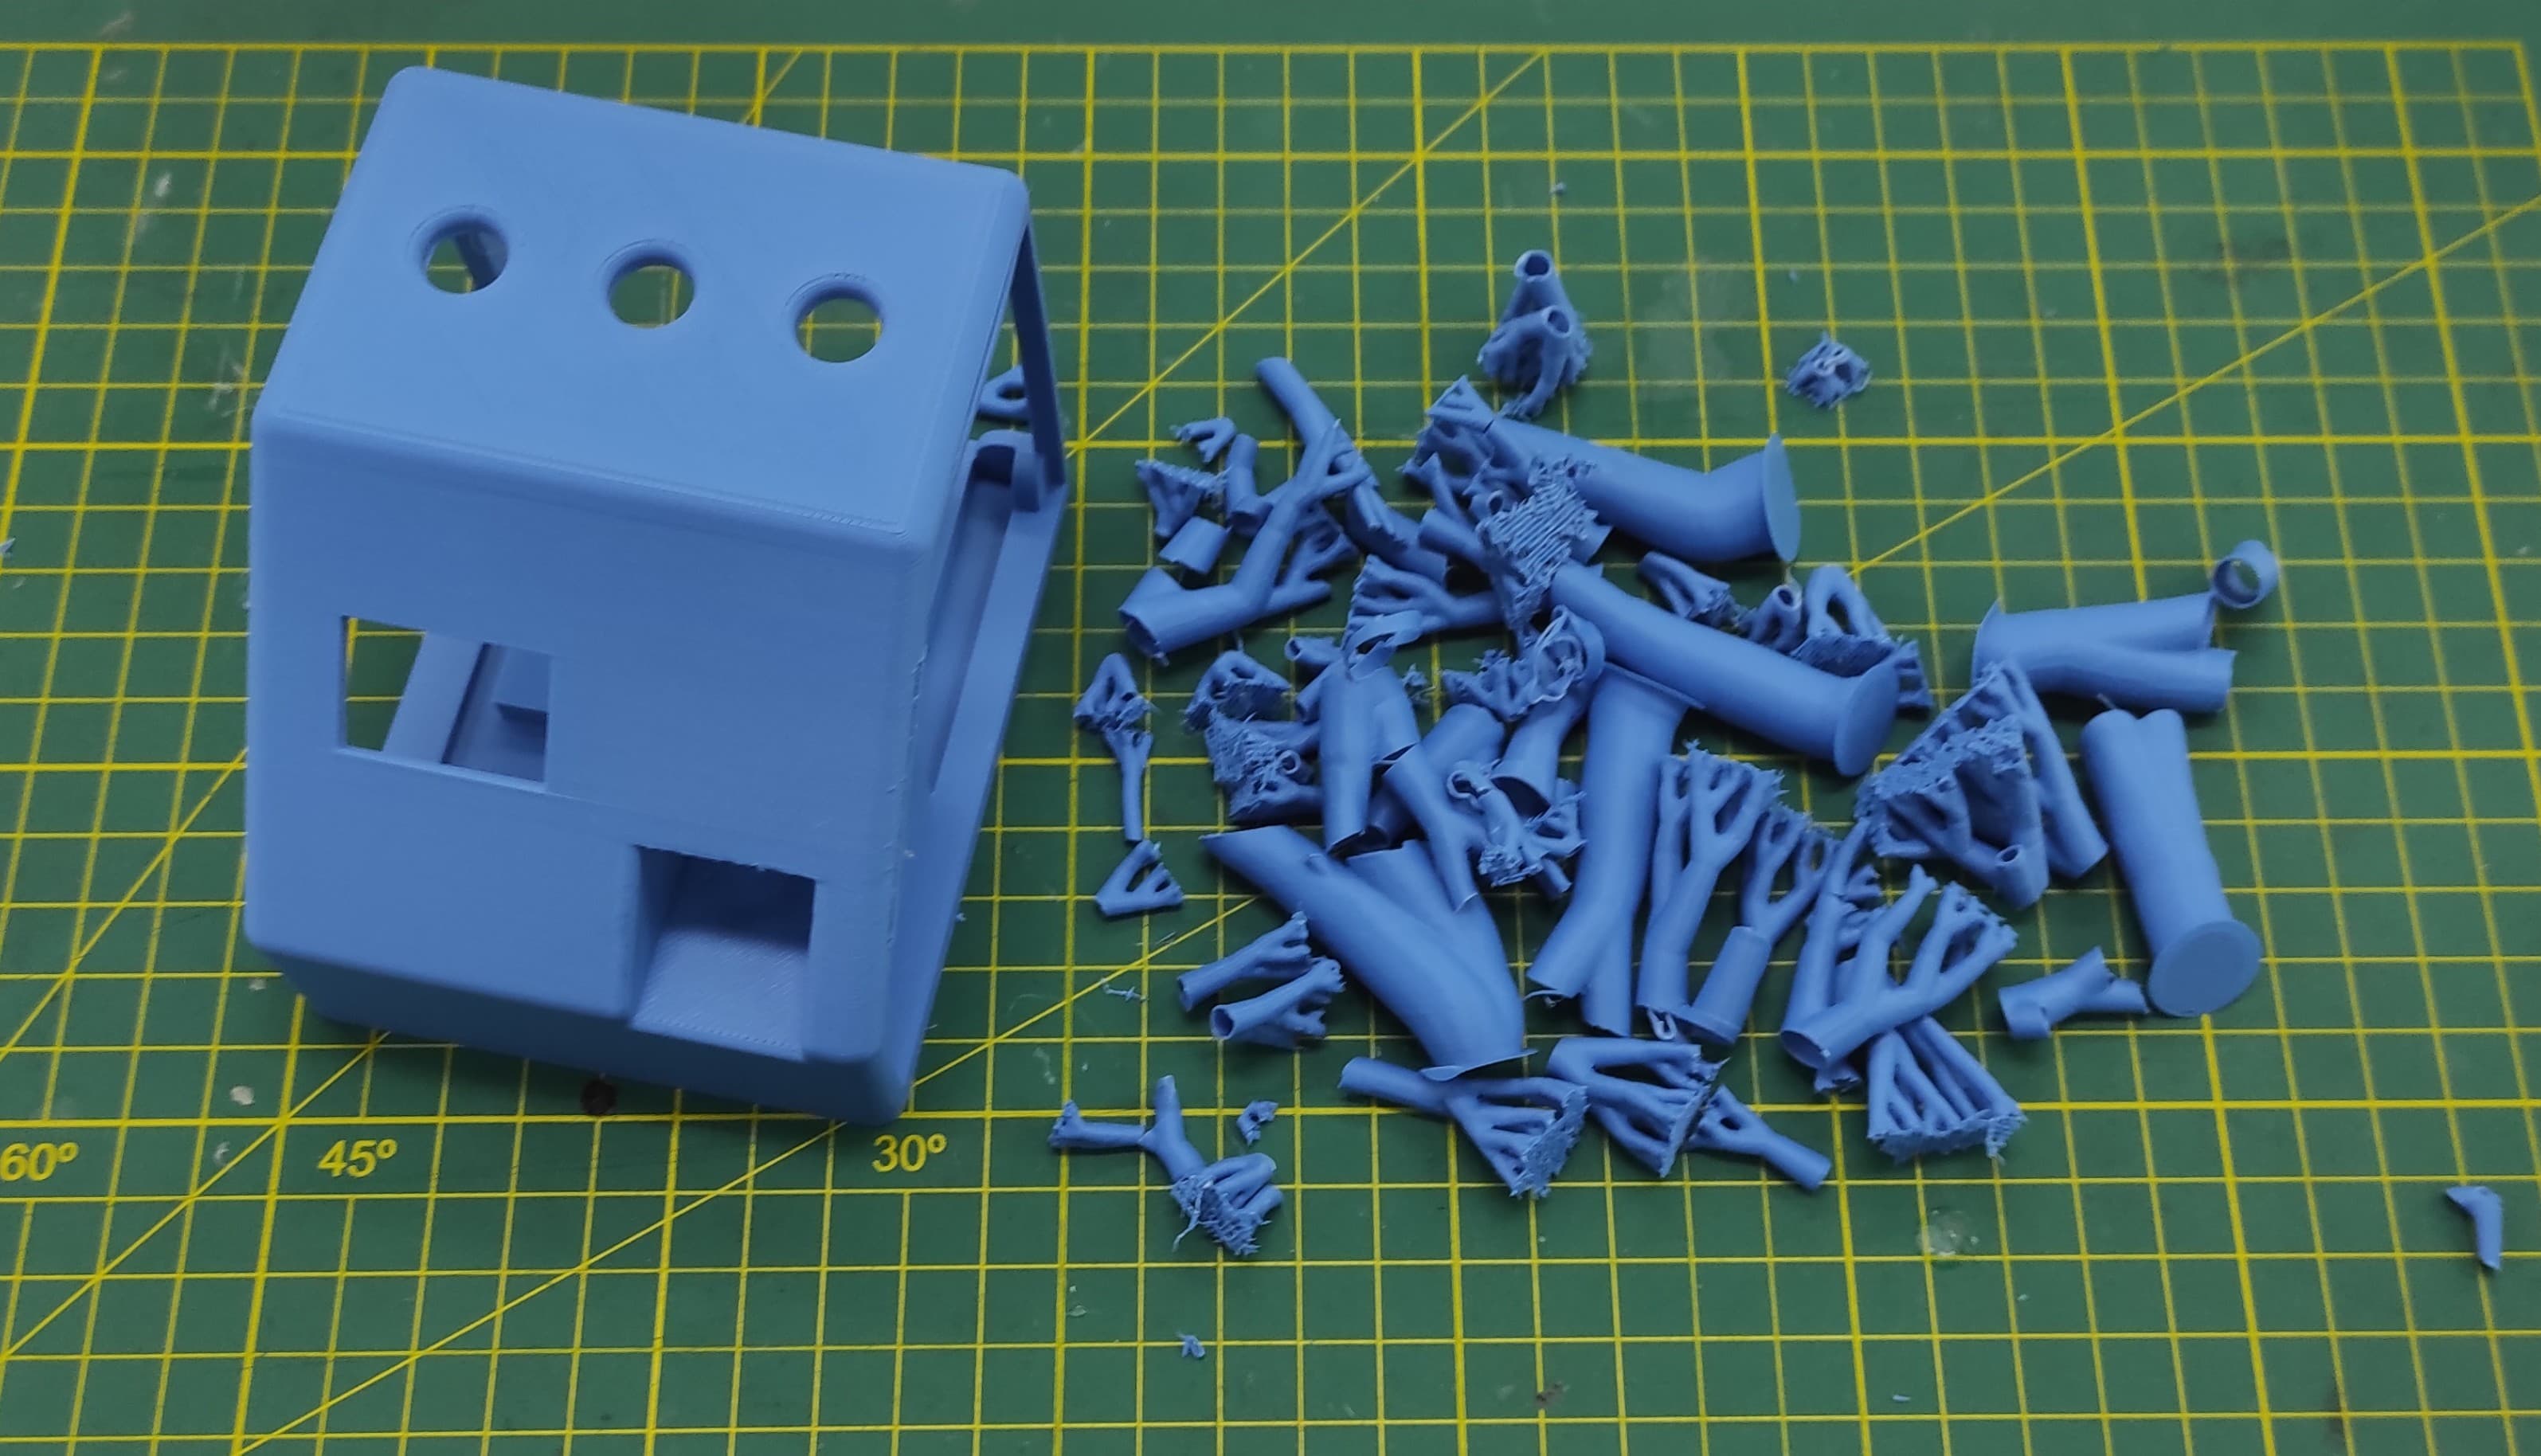
After the design was completed, I printed the case using a 3D printer (Bambulab X1C).
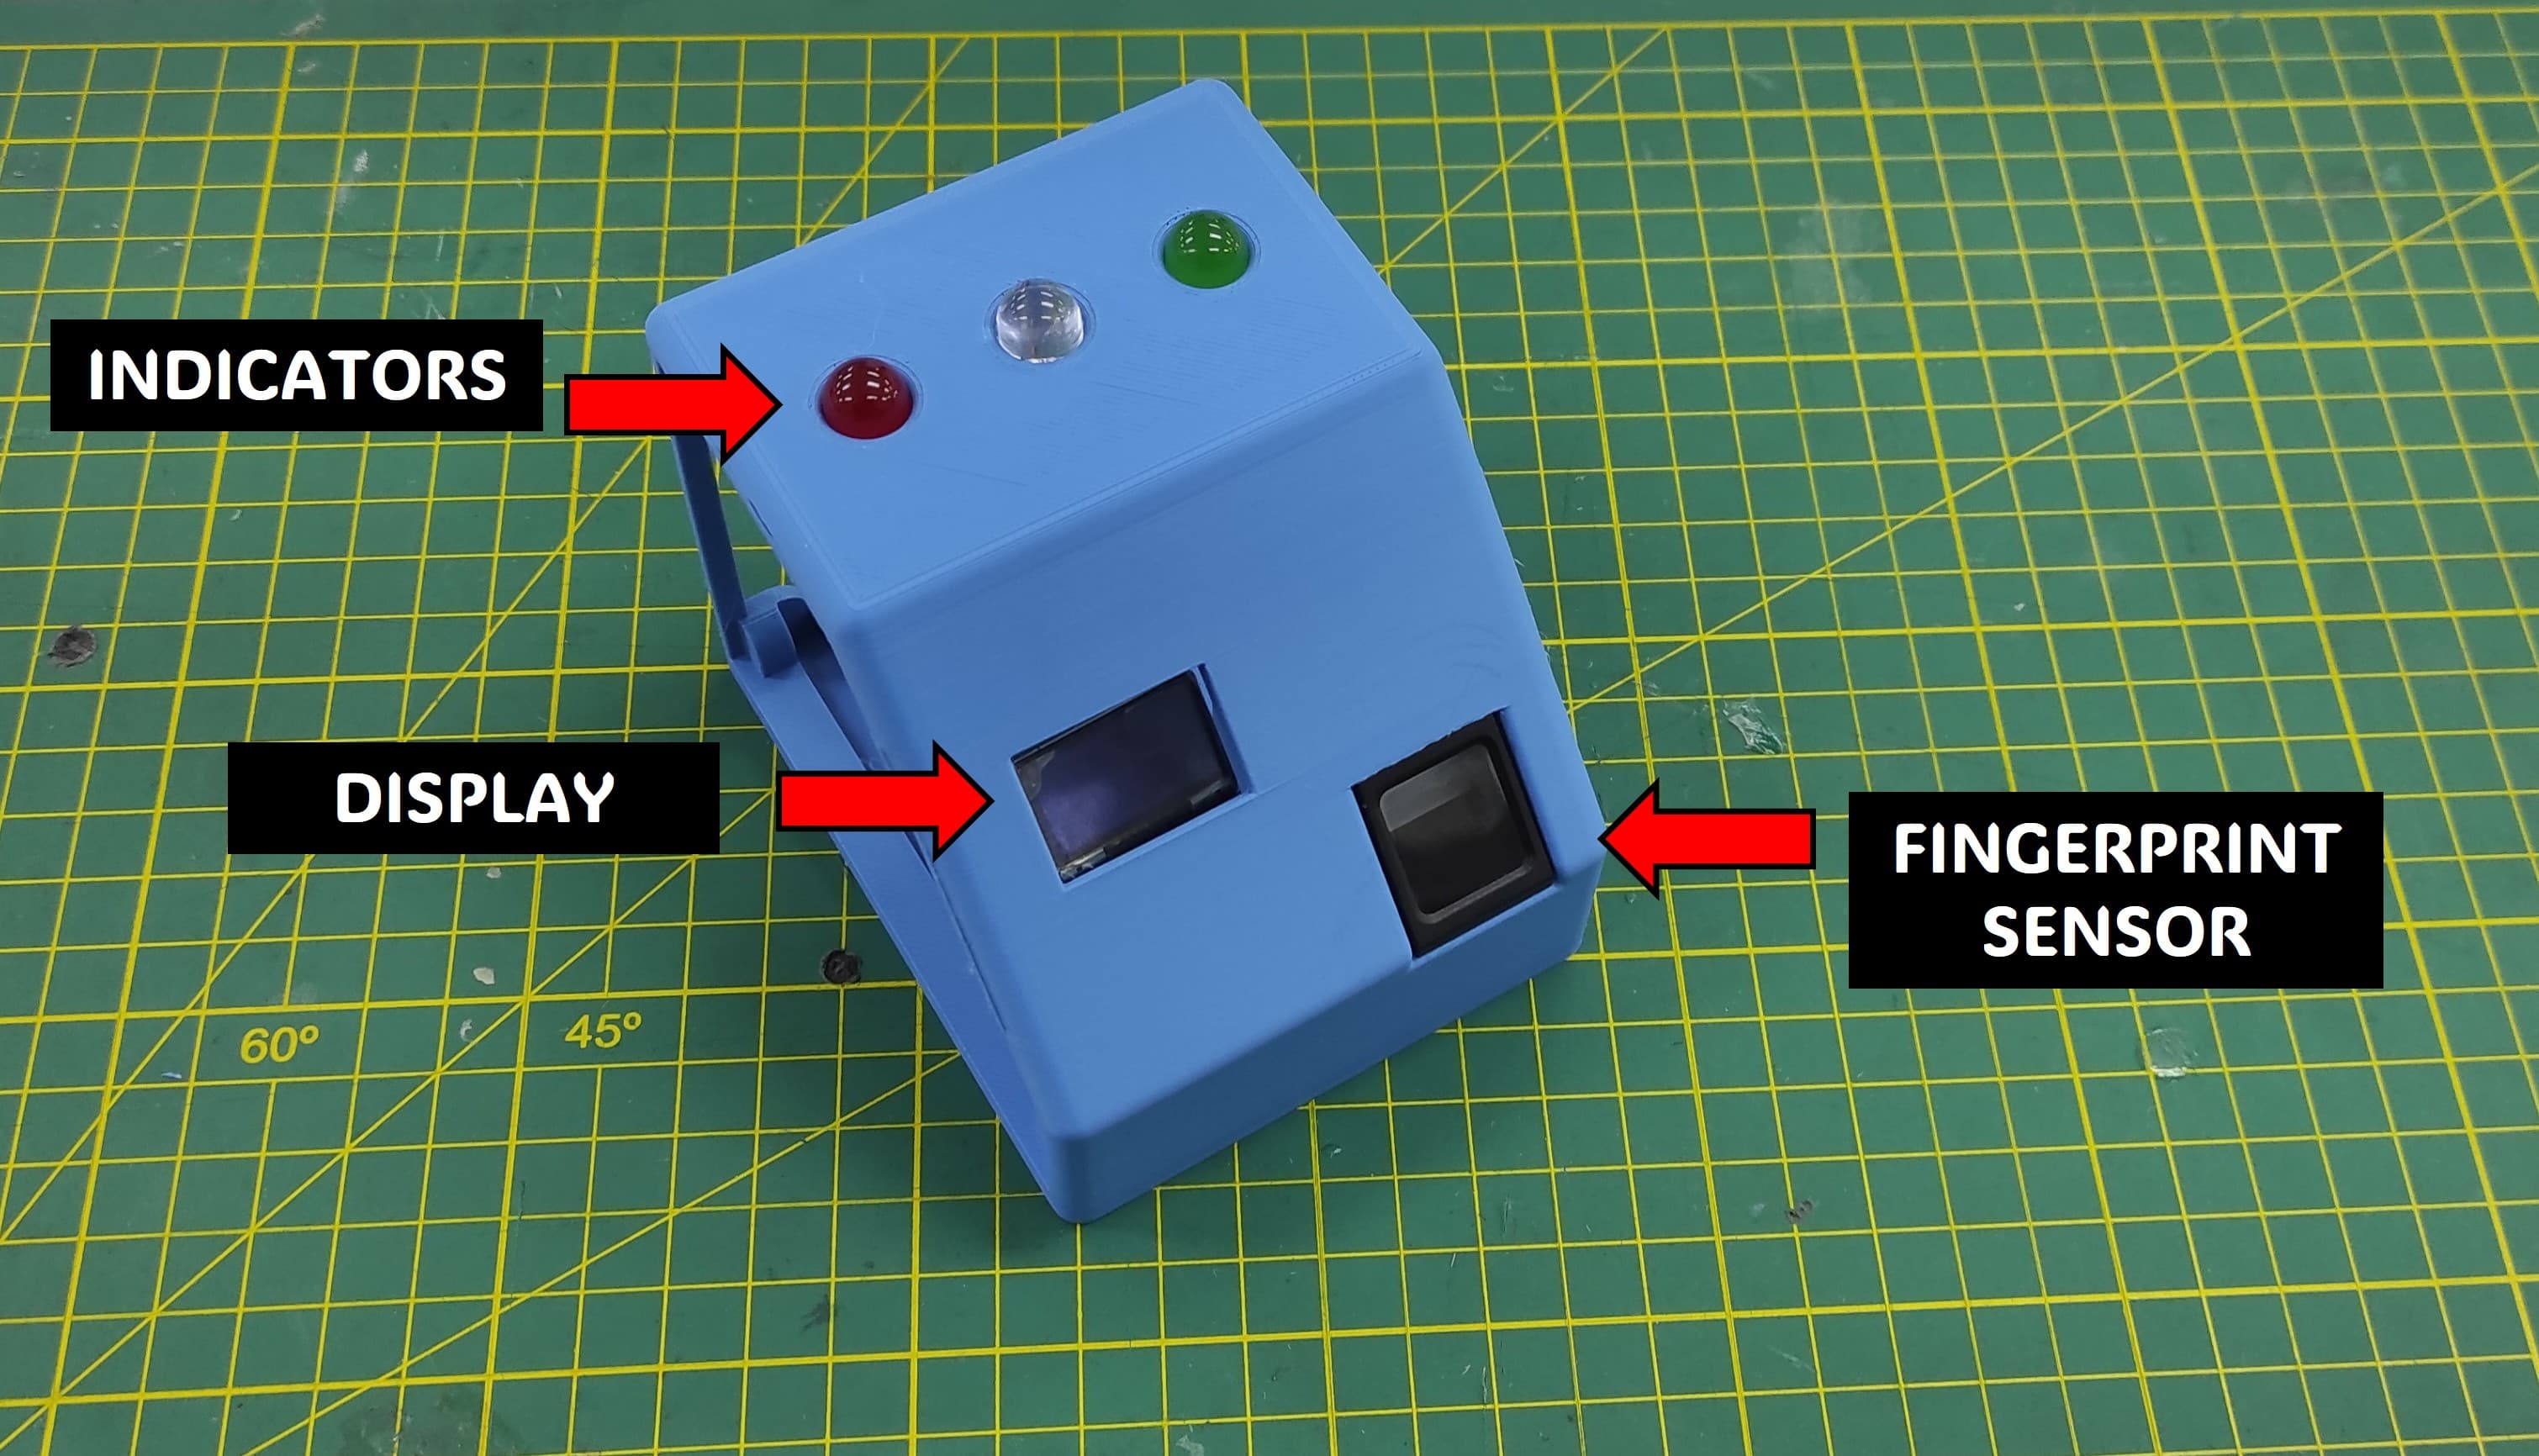
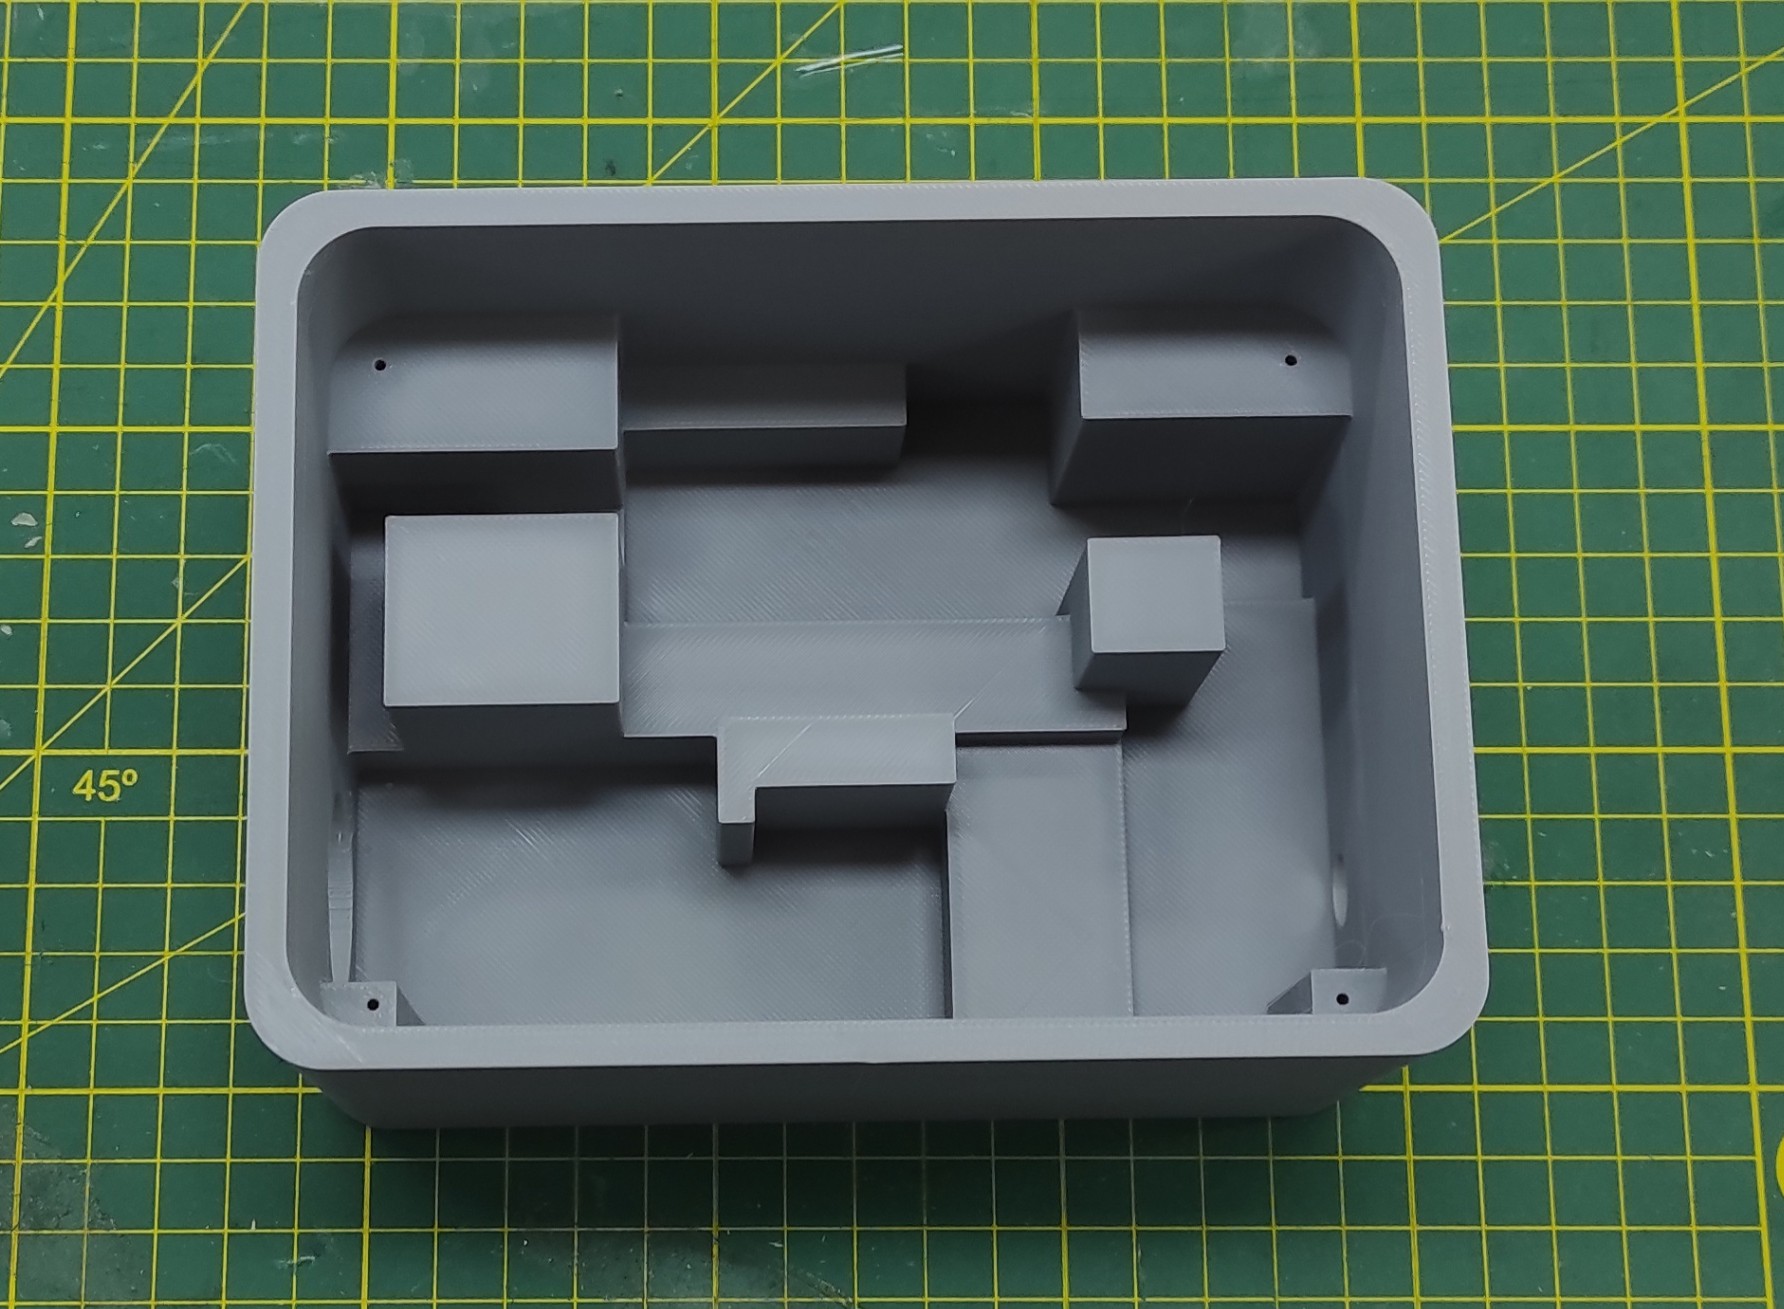
Here is the layout and positioning of the components within the enclosure:
5.2 Designing and Fabricating the Case for the Power Devices
To hold the different connectors and the solid-state relay for my final project, I designed a custom enclosure in Onshape.
I printed the enclosure using the Bambu Lab X1 Carbon
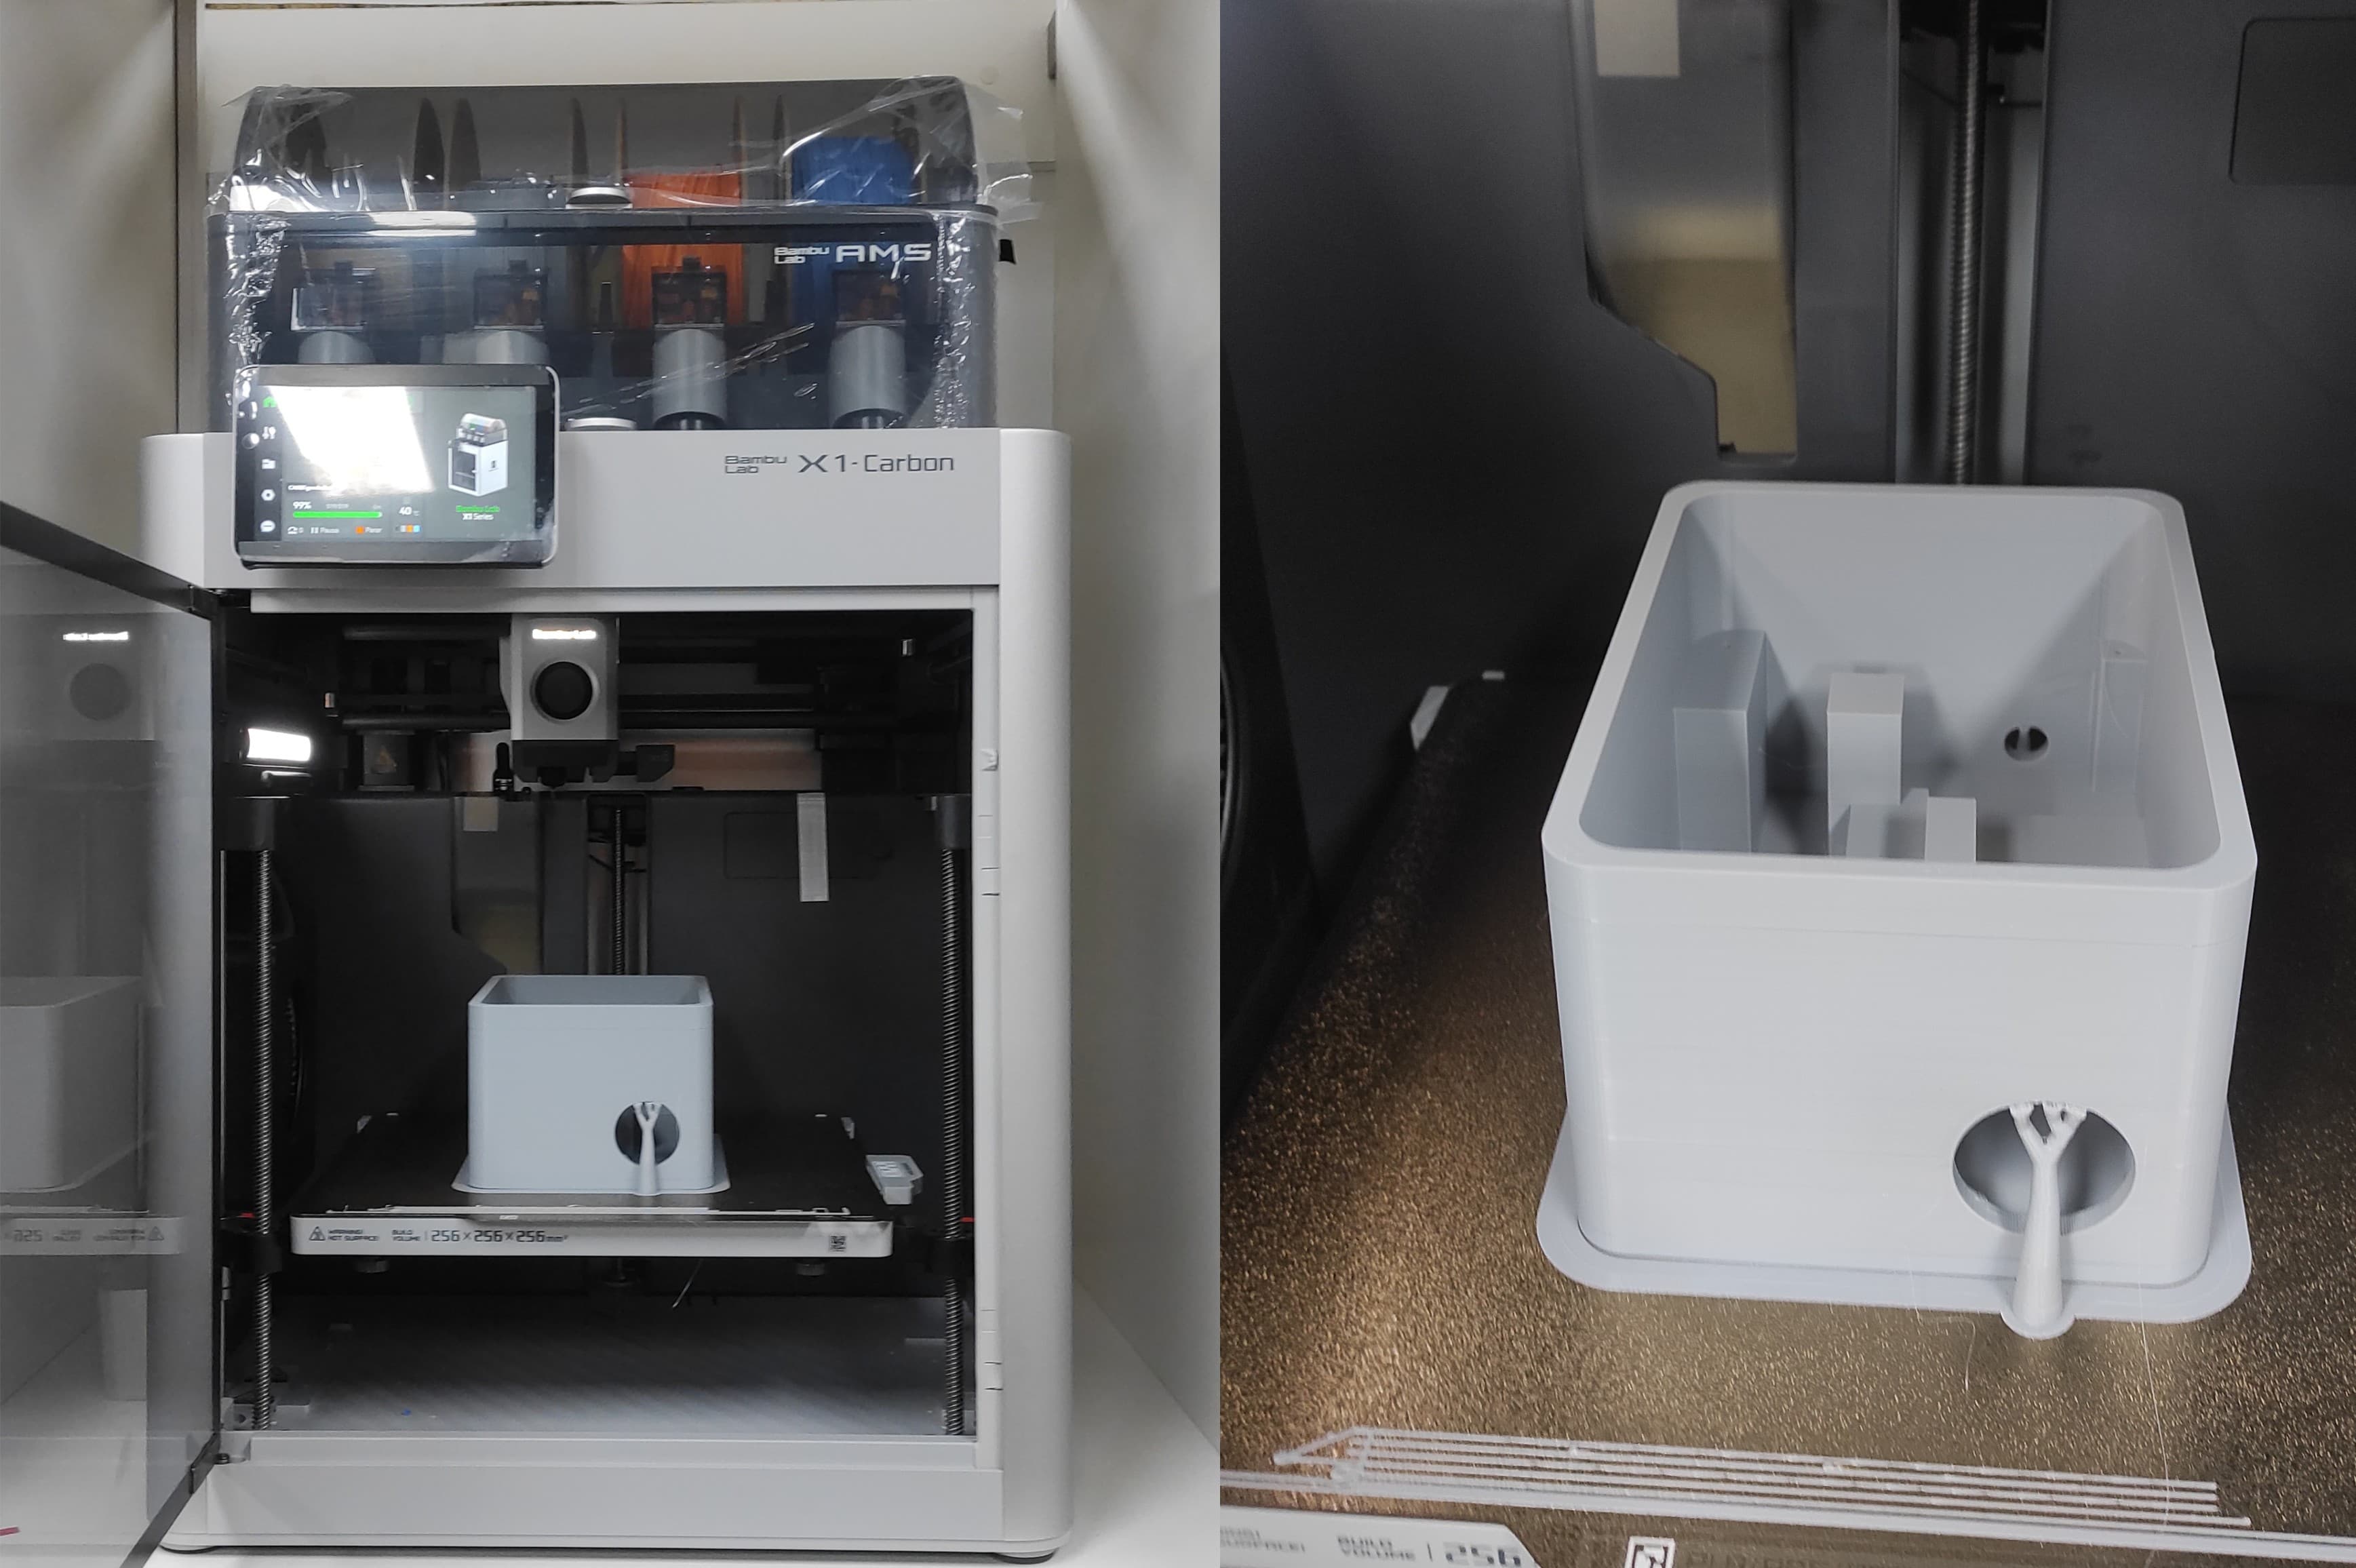
After printing, I inspected the fit to ensure all components aligned and assembled correctly.
5.3 Files:
Here are the files available for download.
1. 3d Model Case Control: STL_3d_model_control.rar
2. 3d Model Case Power: STL_3d_model_power.rar
Week 6: Electronics Design
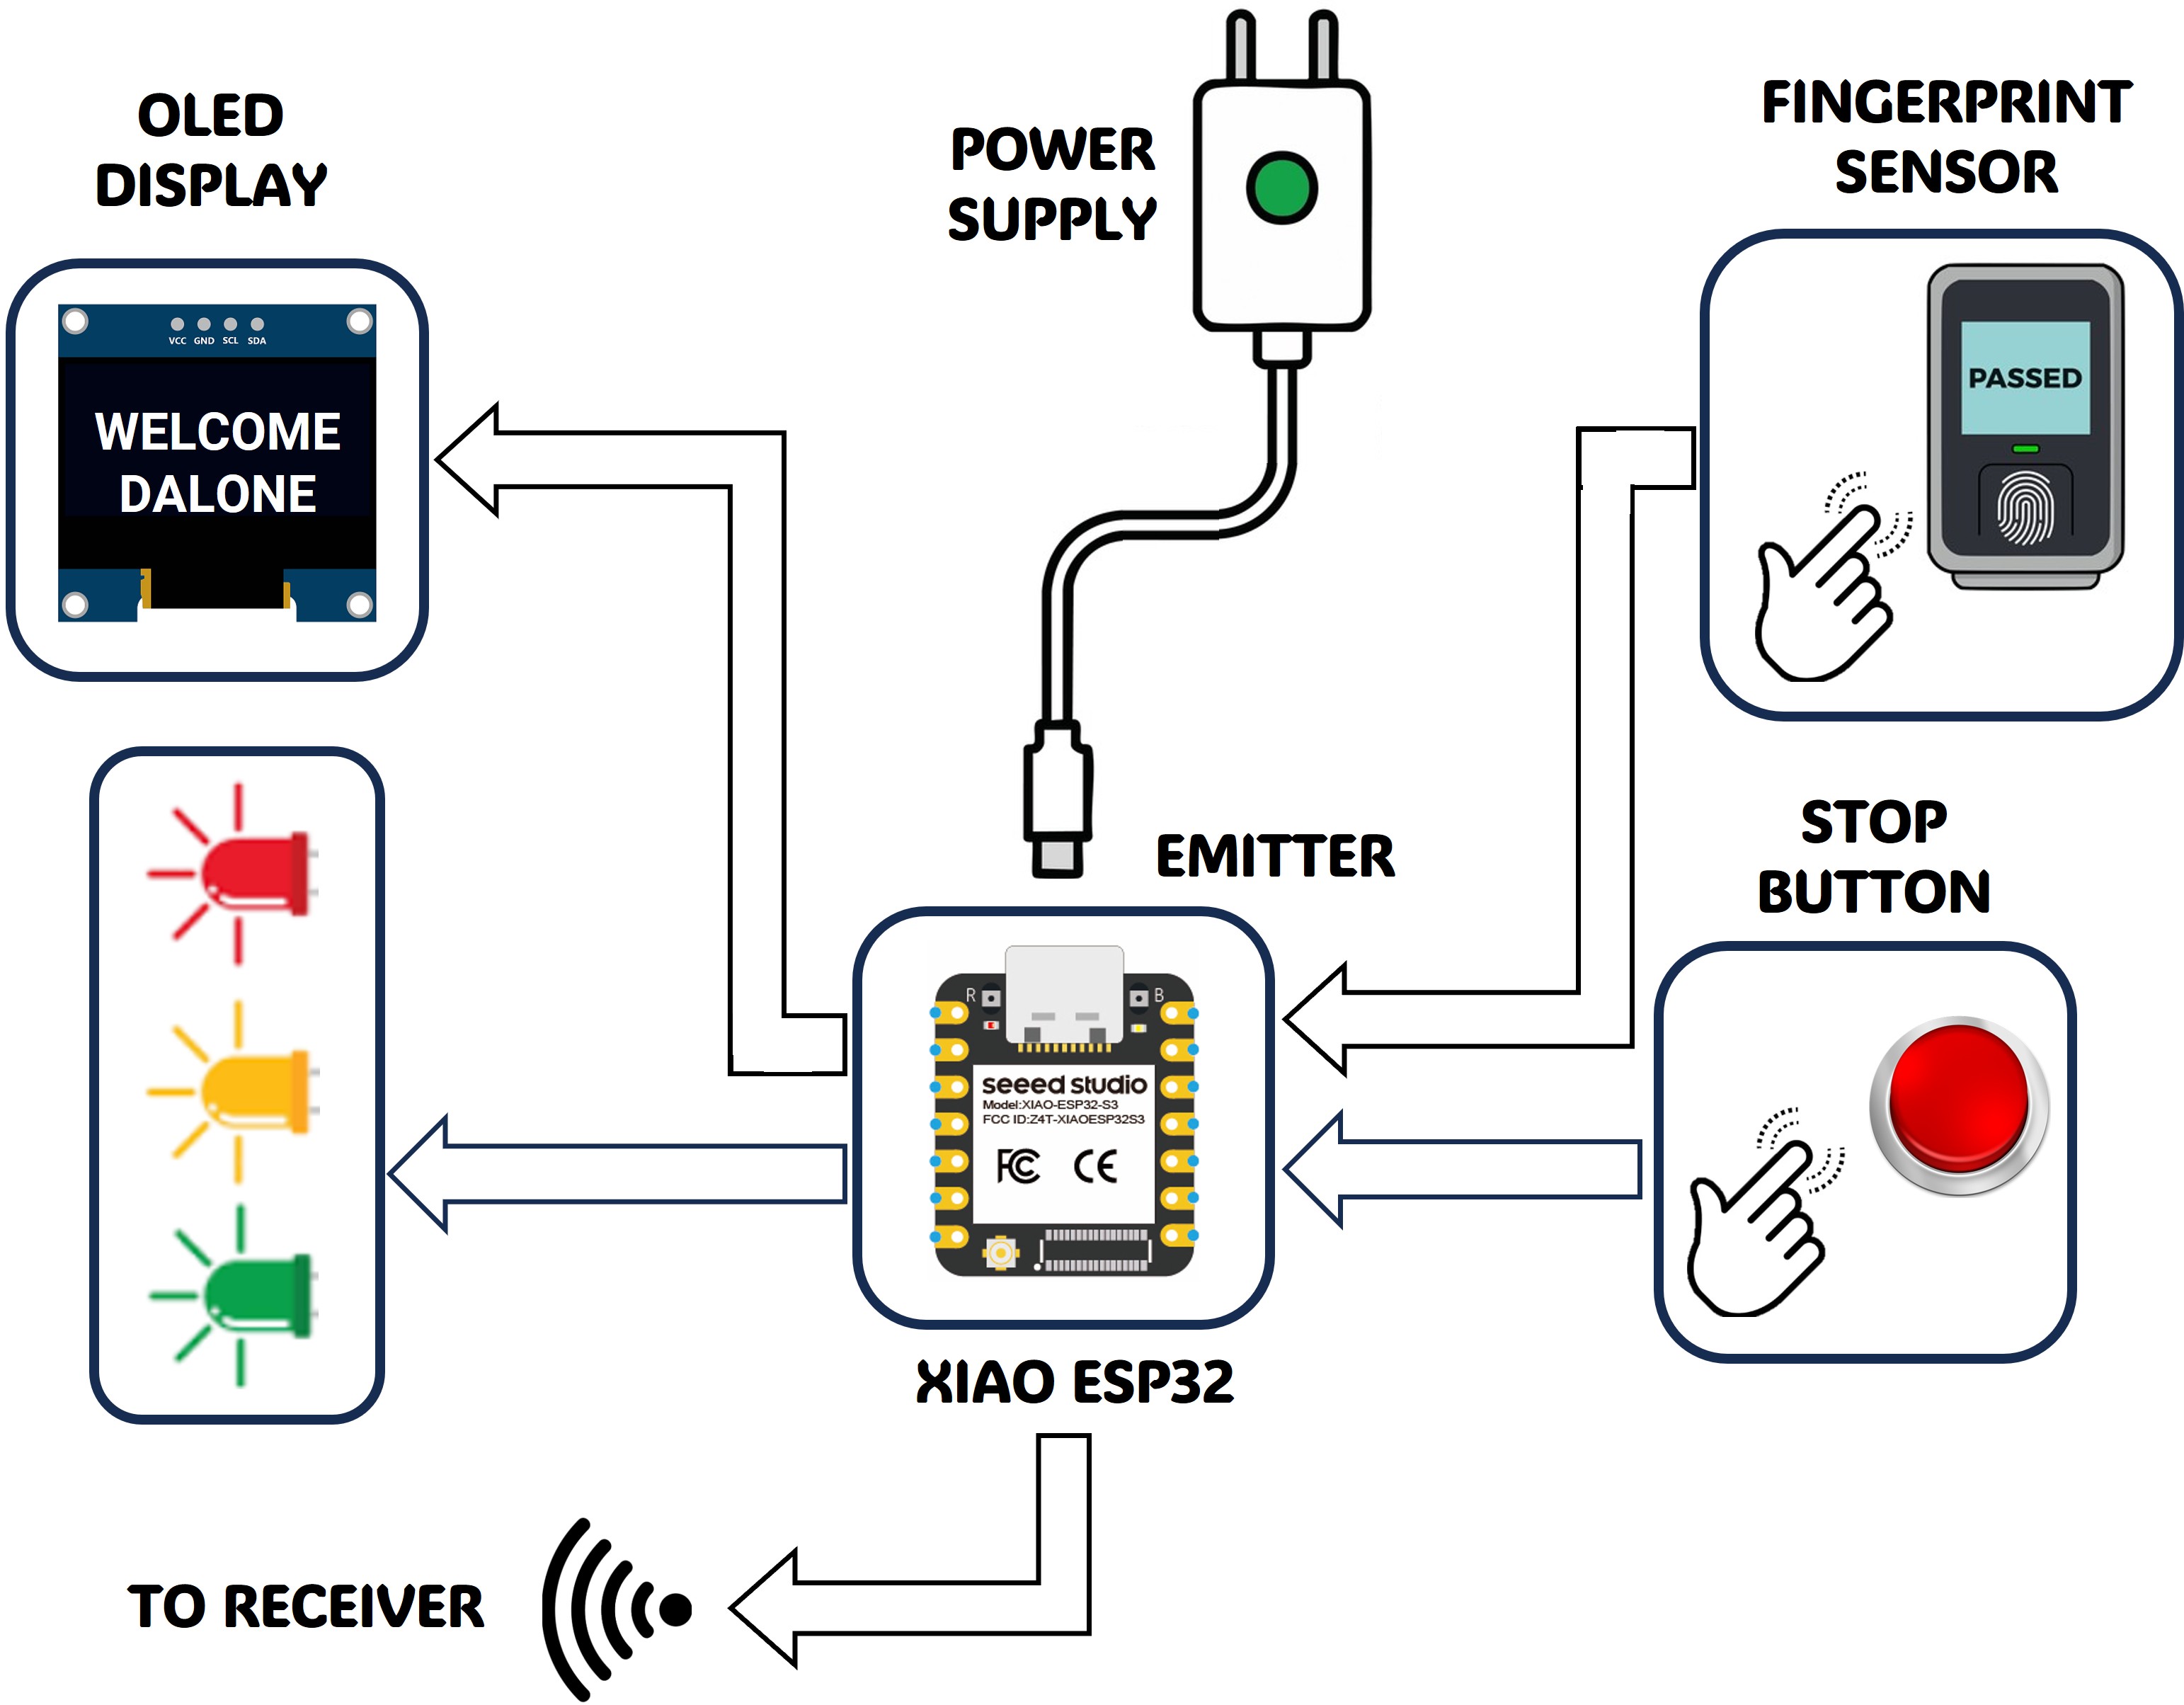
6.1 PCB Design - Block Diagram
Before designing the PCB, I began by creating a block diagram to define the main components and illustrate how they are interconnected.
6.2 PCB Design - Altium Designer
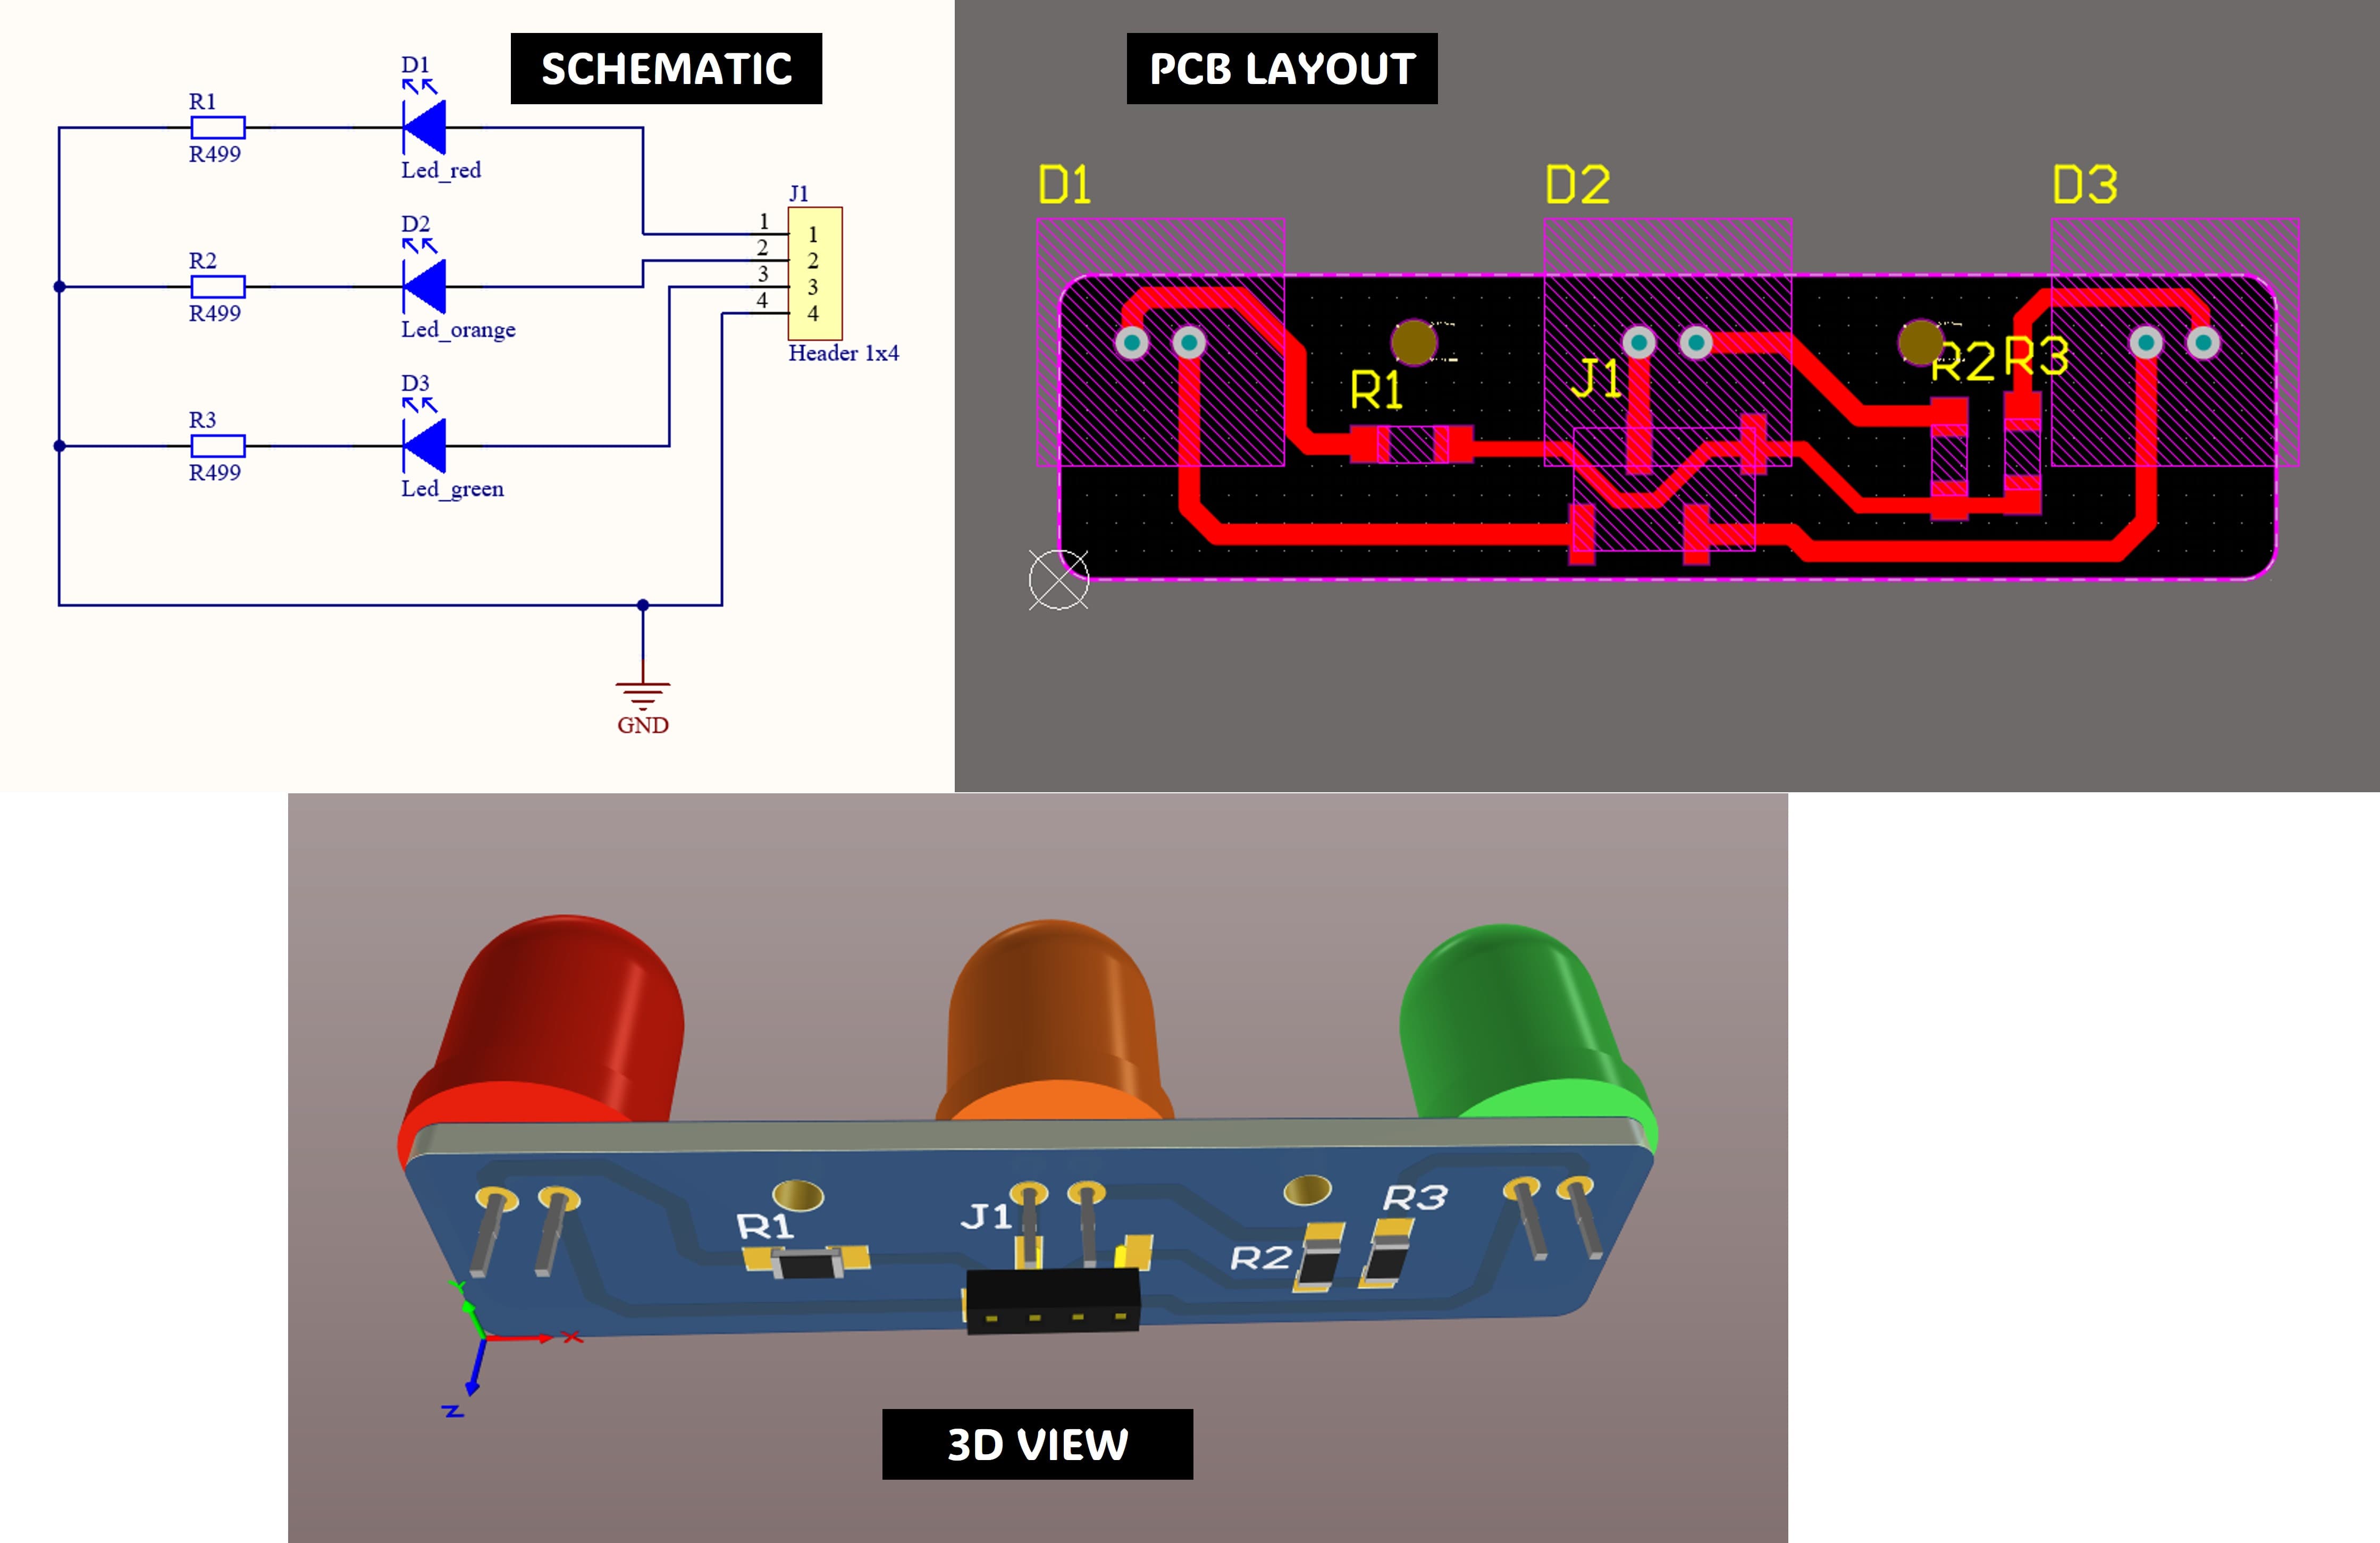
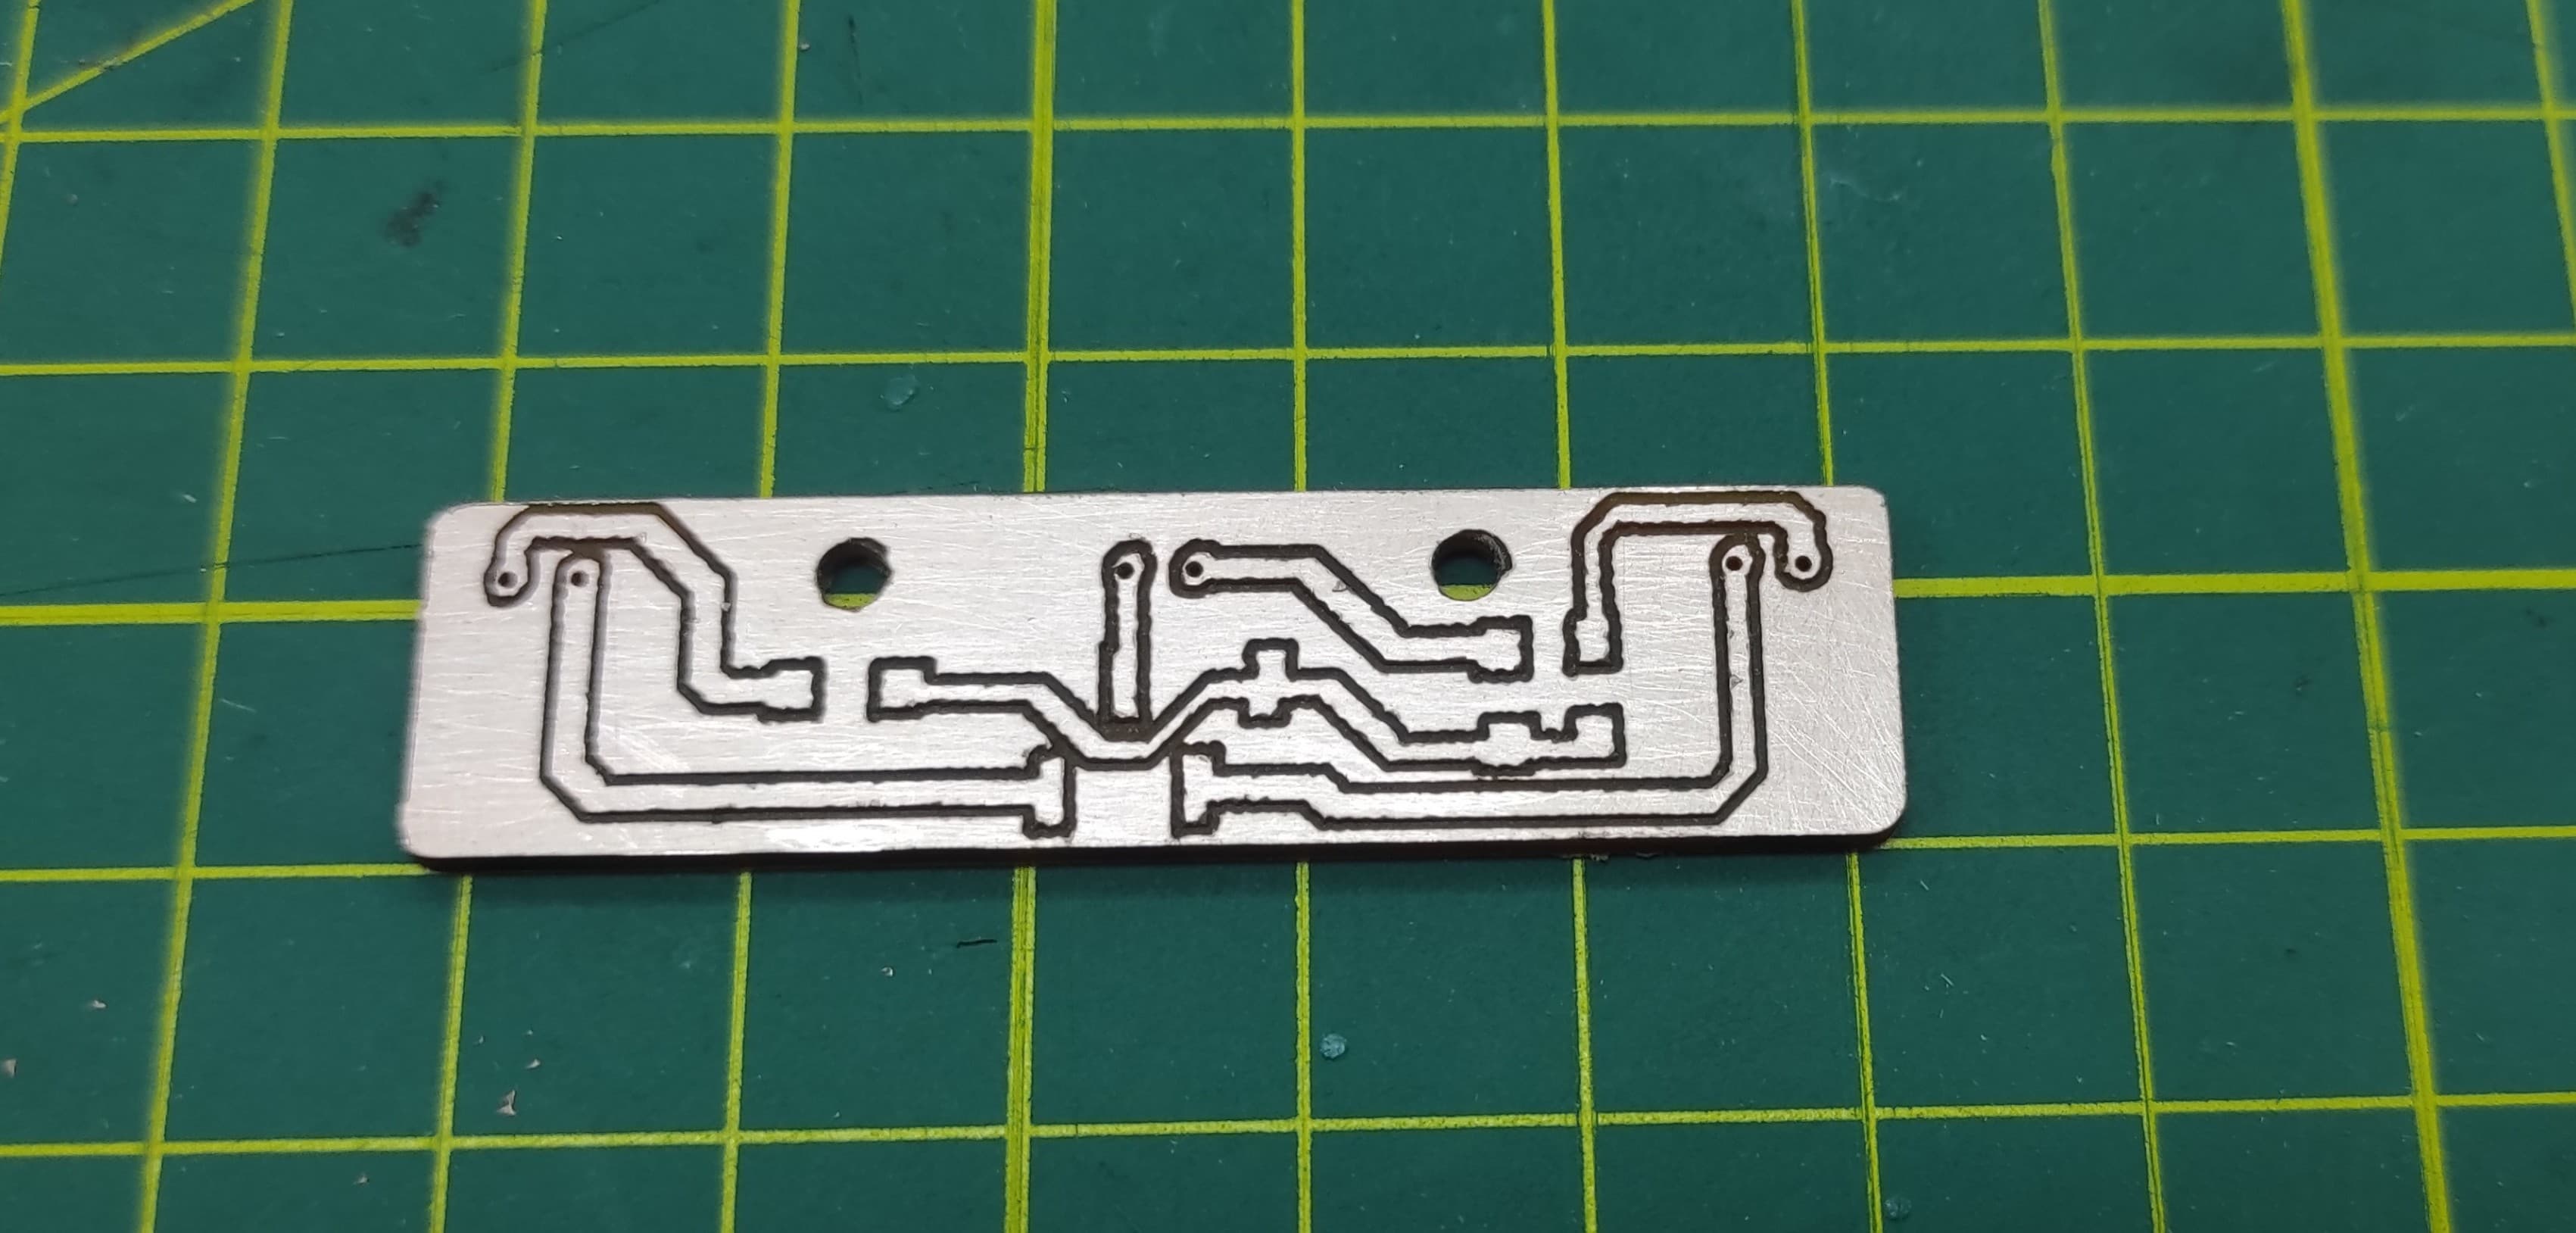
After completing the block diagram, I moved on to designing the PCB in Altium Designer, beginning with the board that integrates the LED indicators.
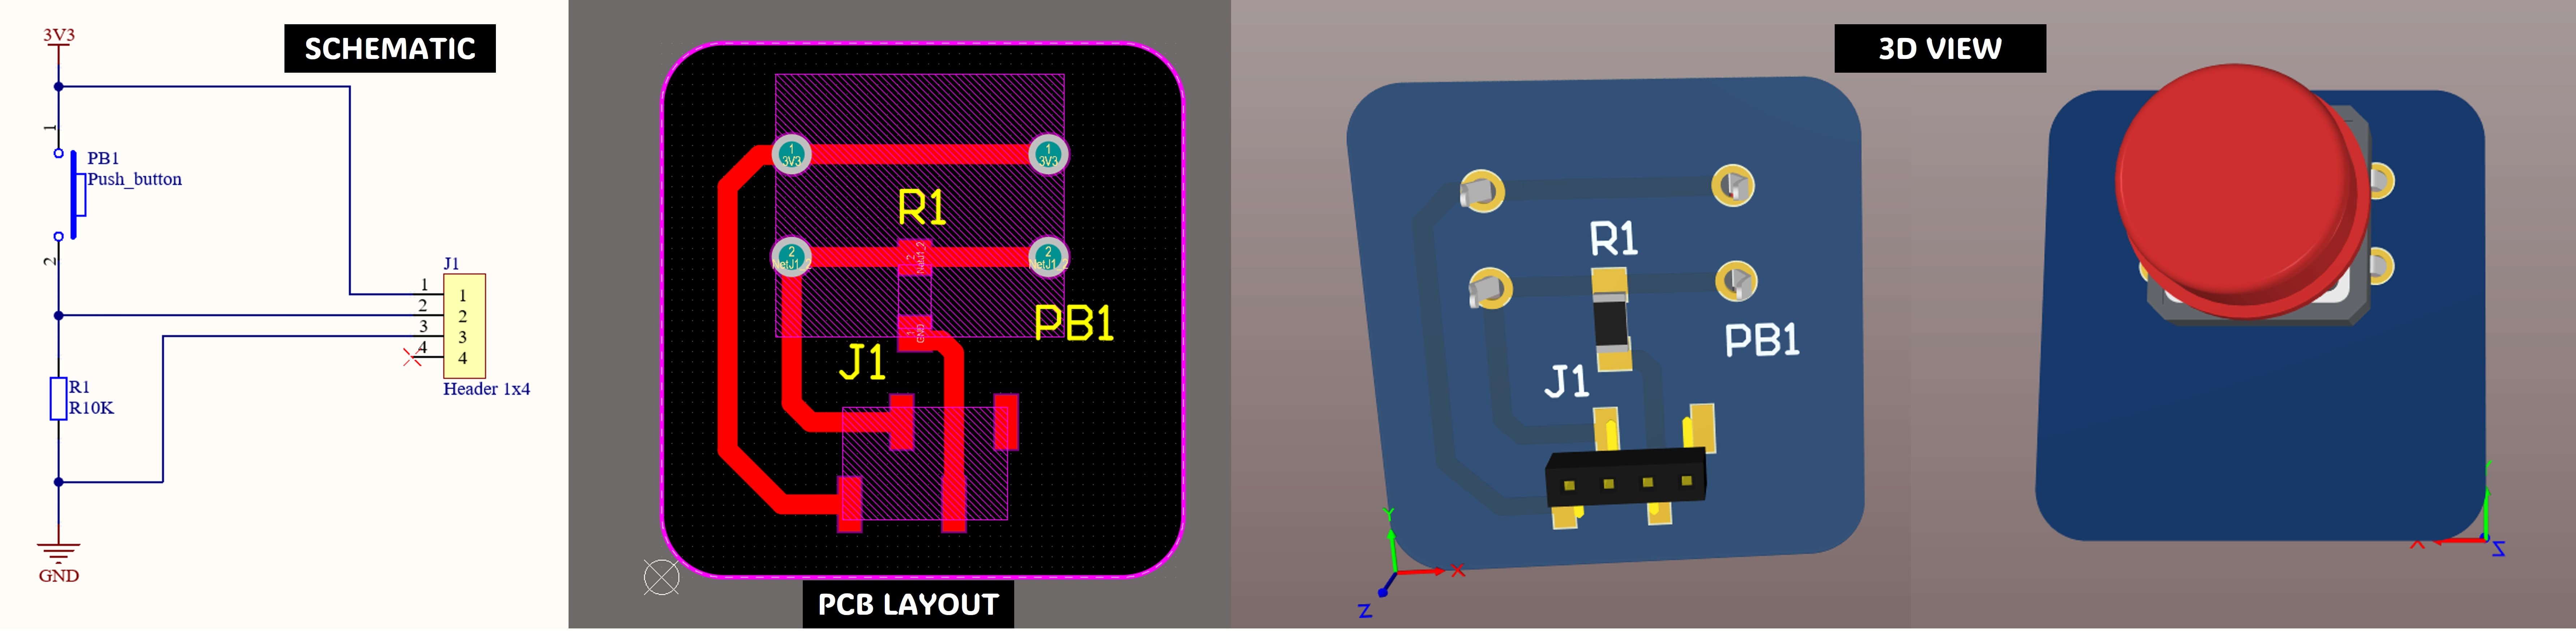
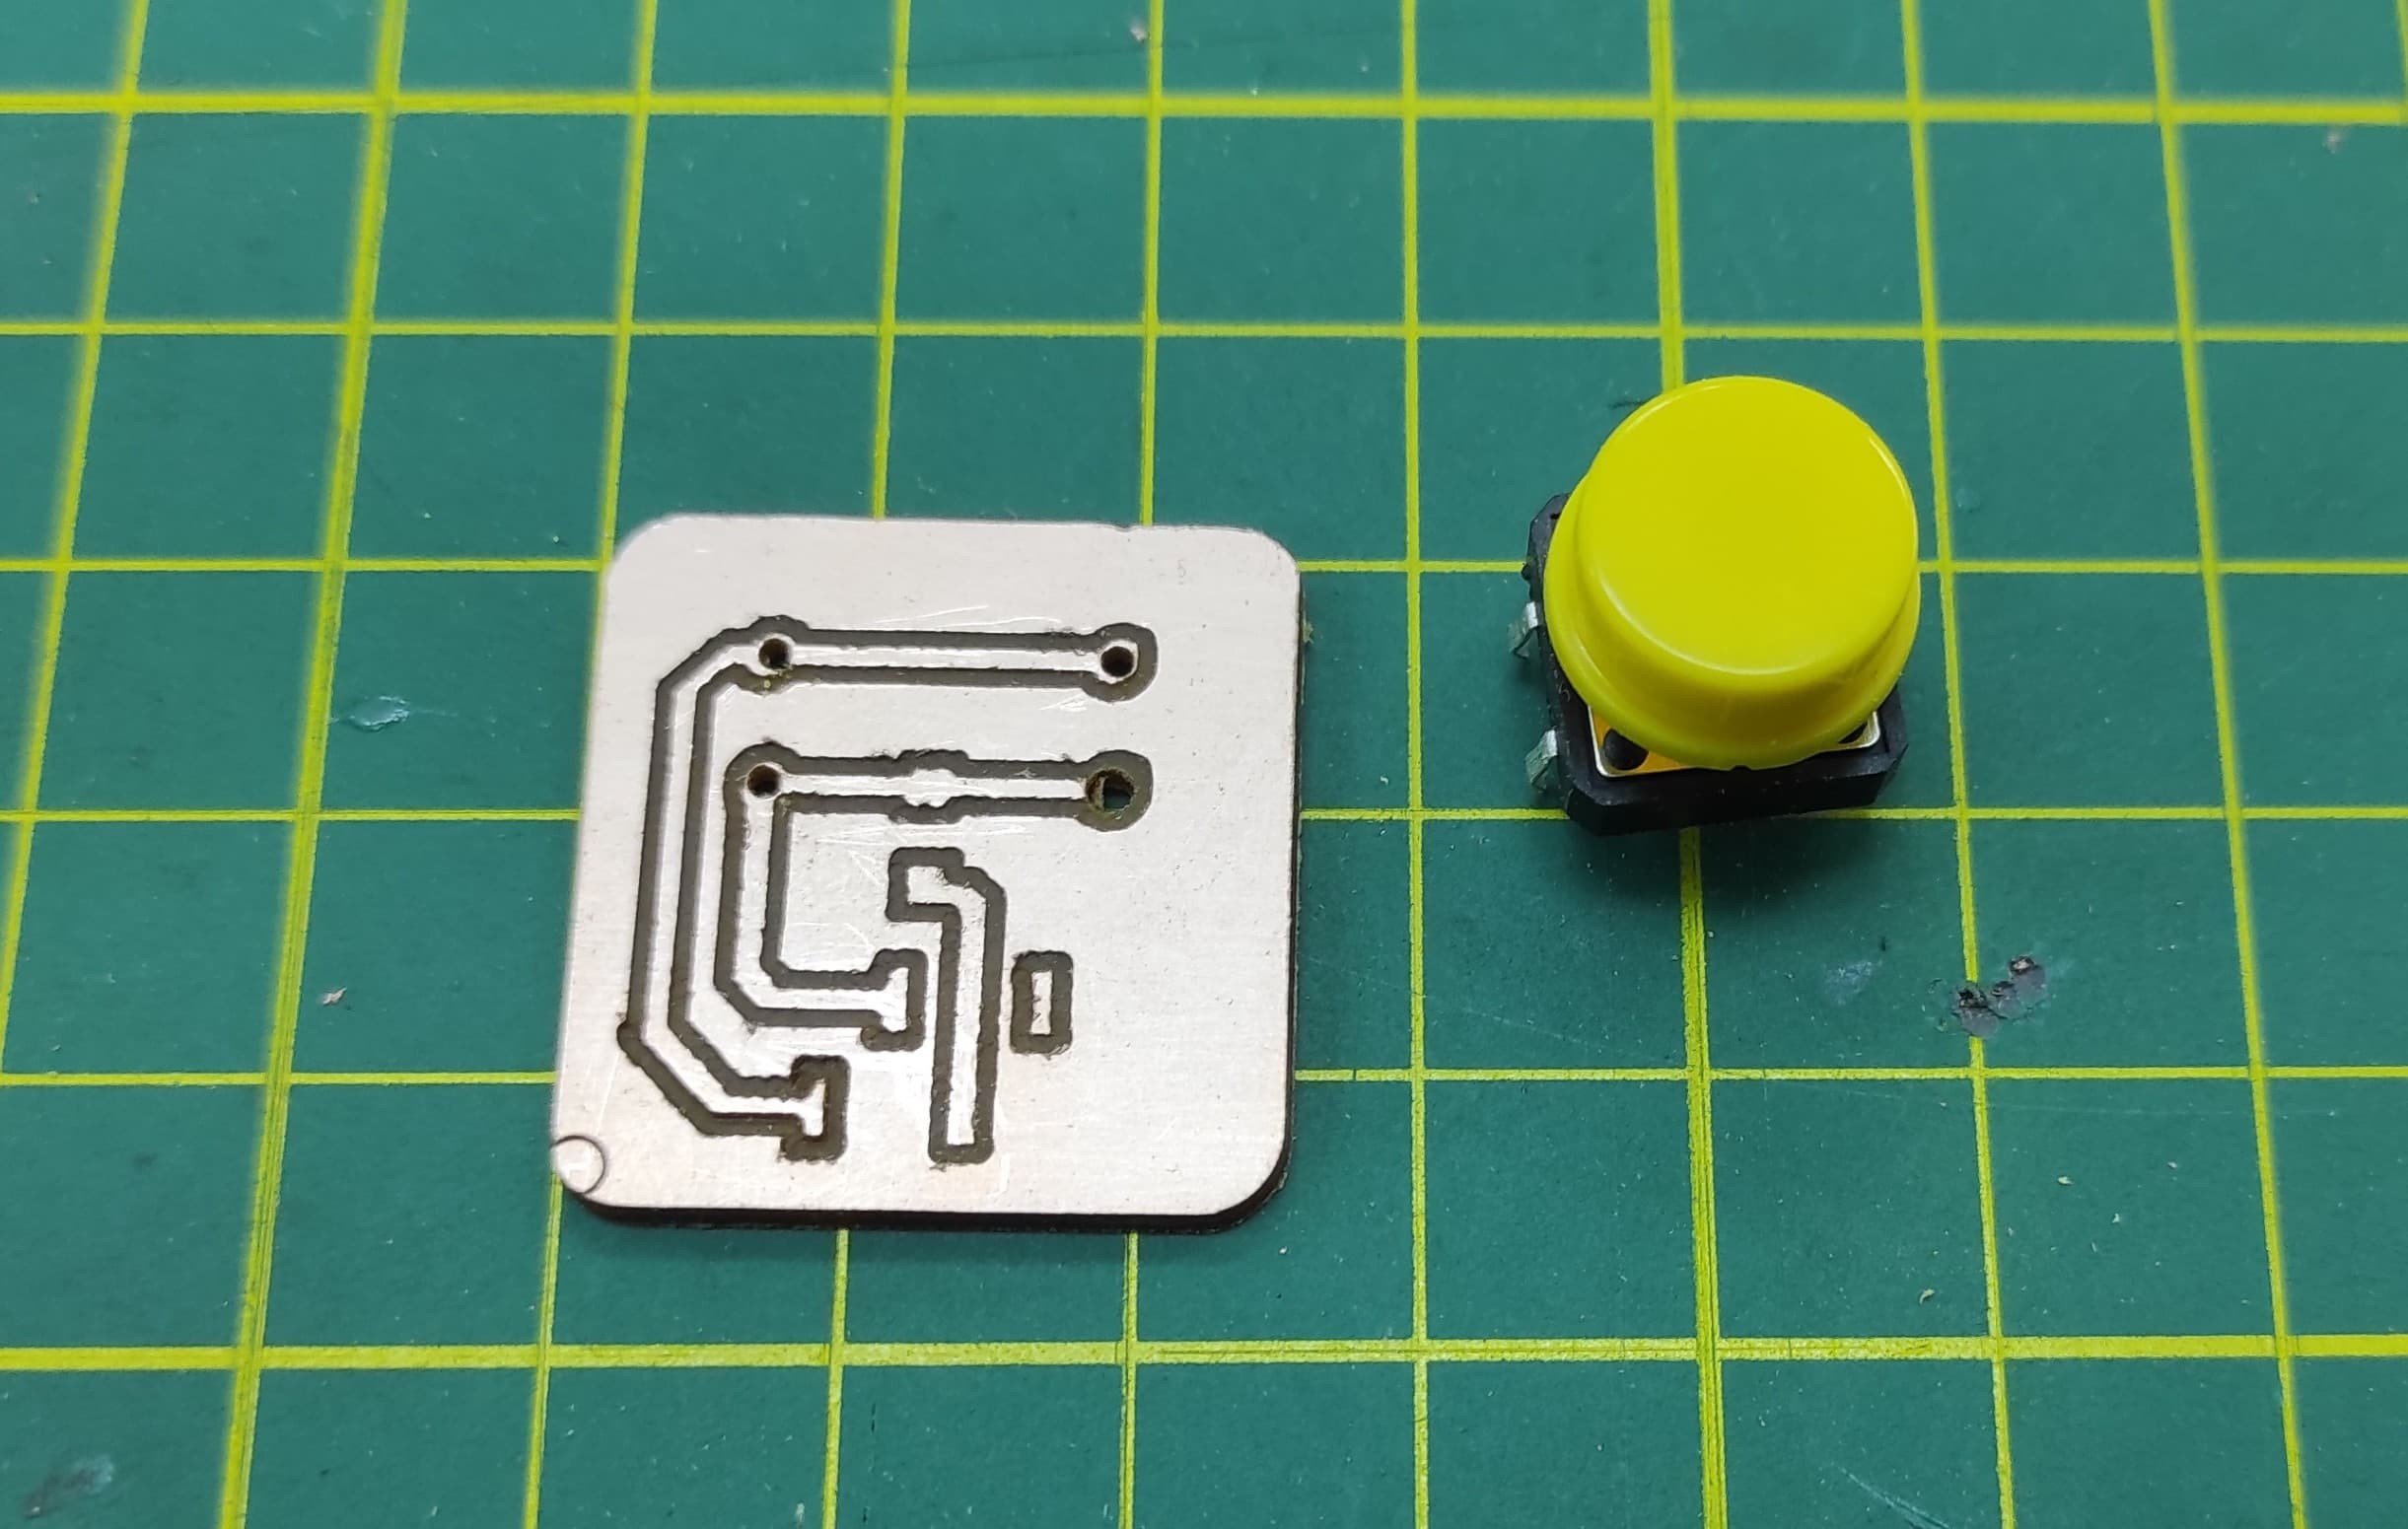
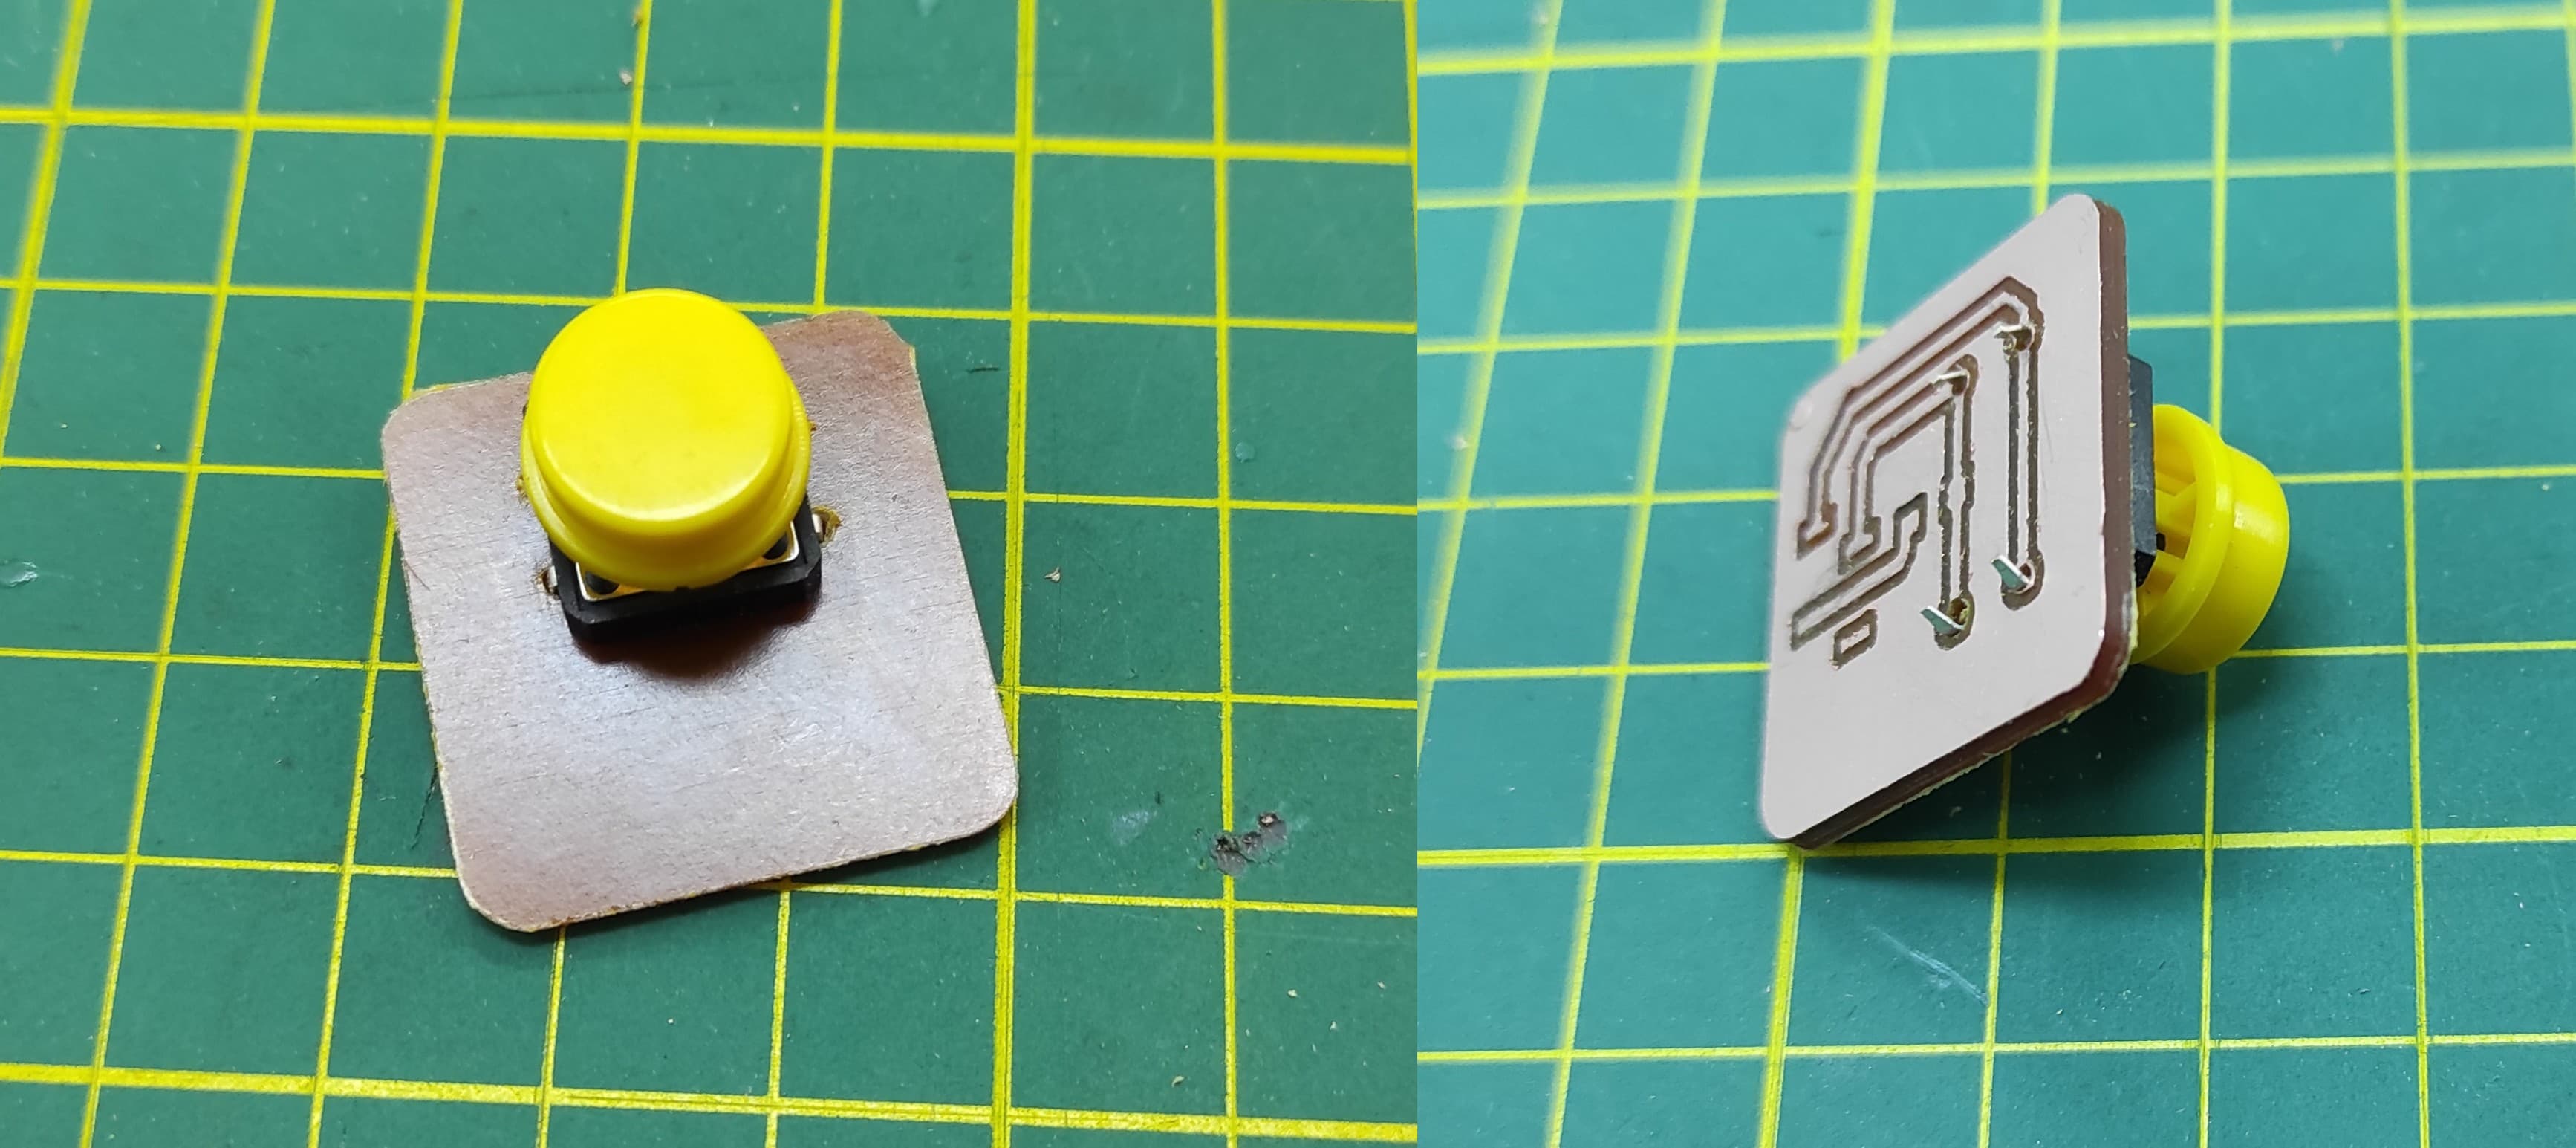
I then continued the PCB design by developing the board that includes the stop button, allowing the user to safely stop the machine after finishing its operation by simply pressing the button.
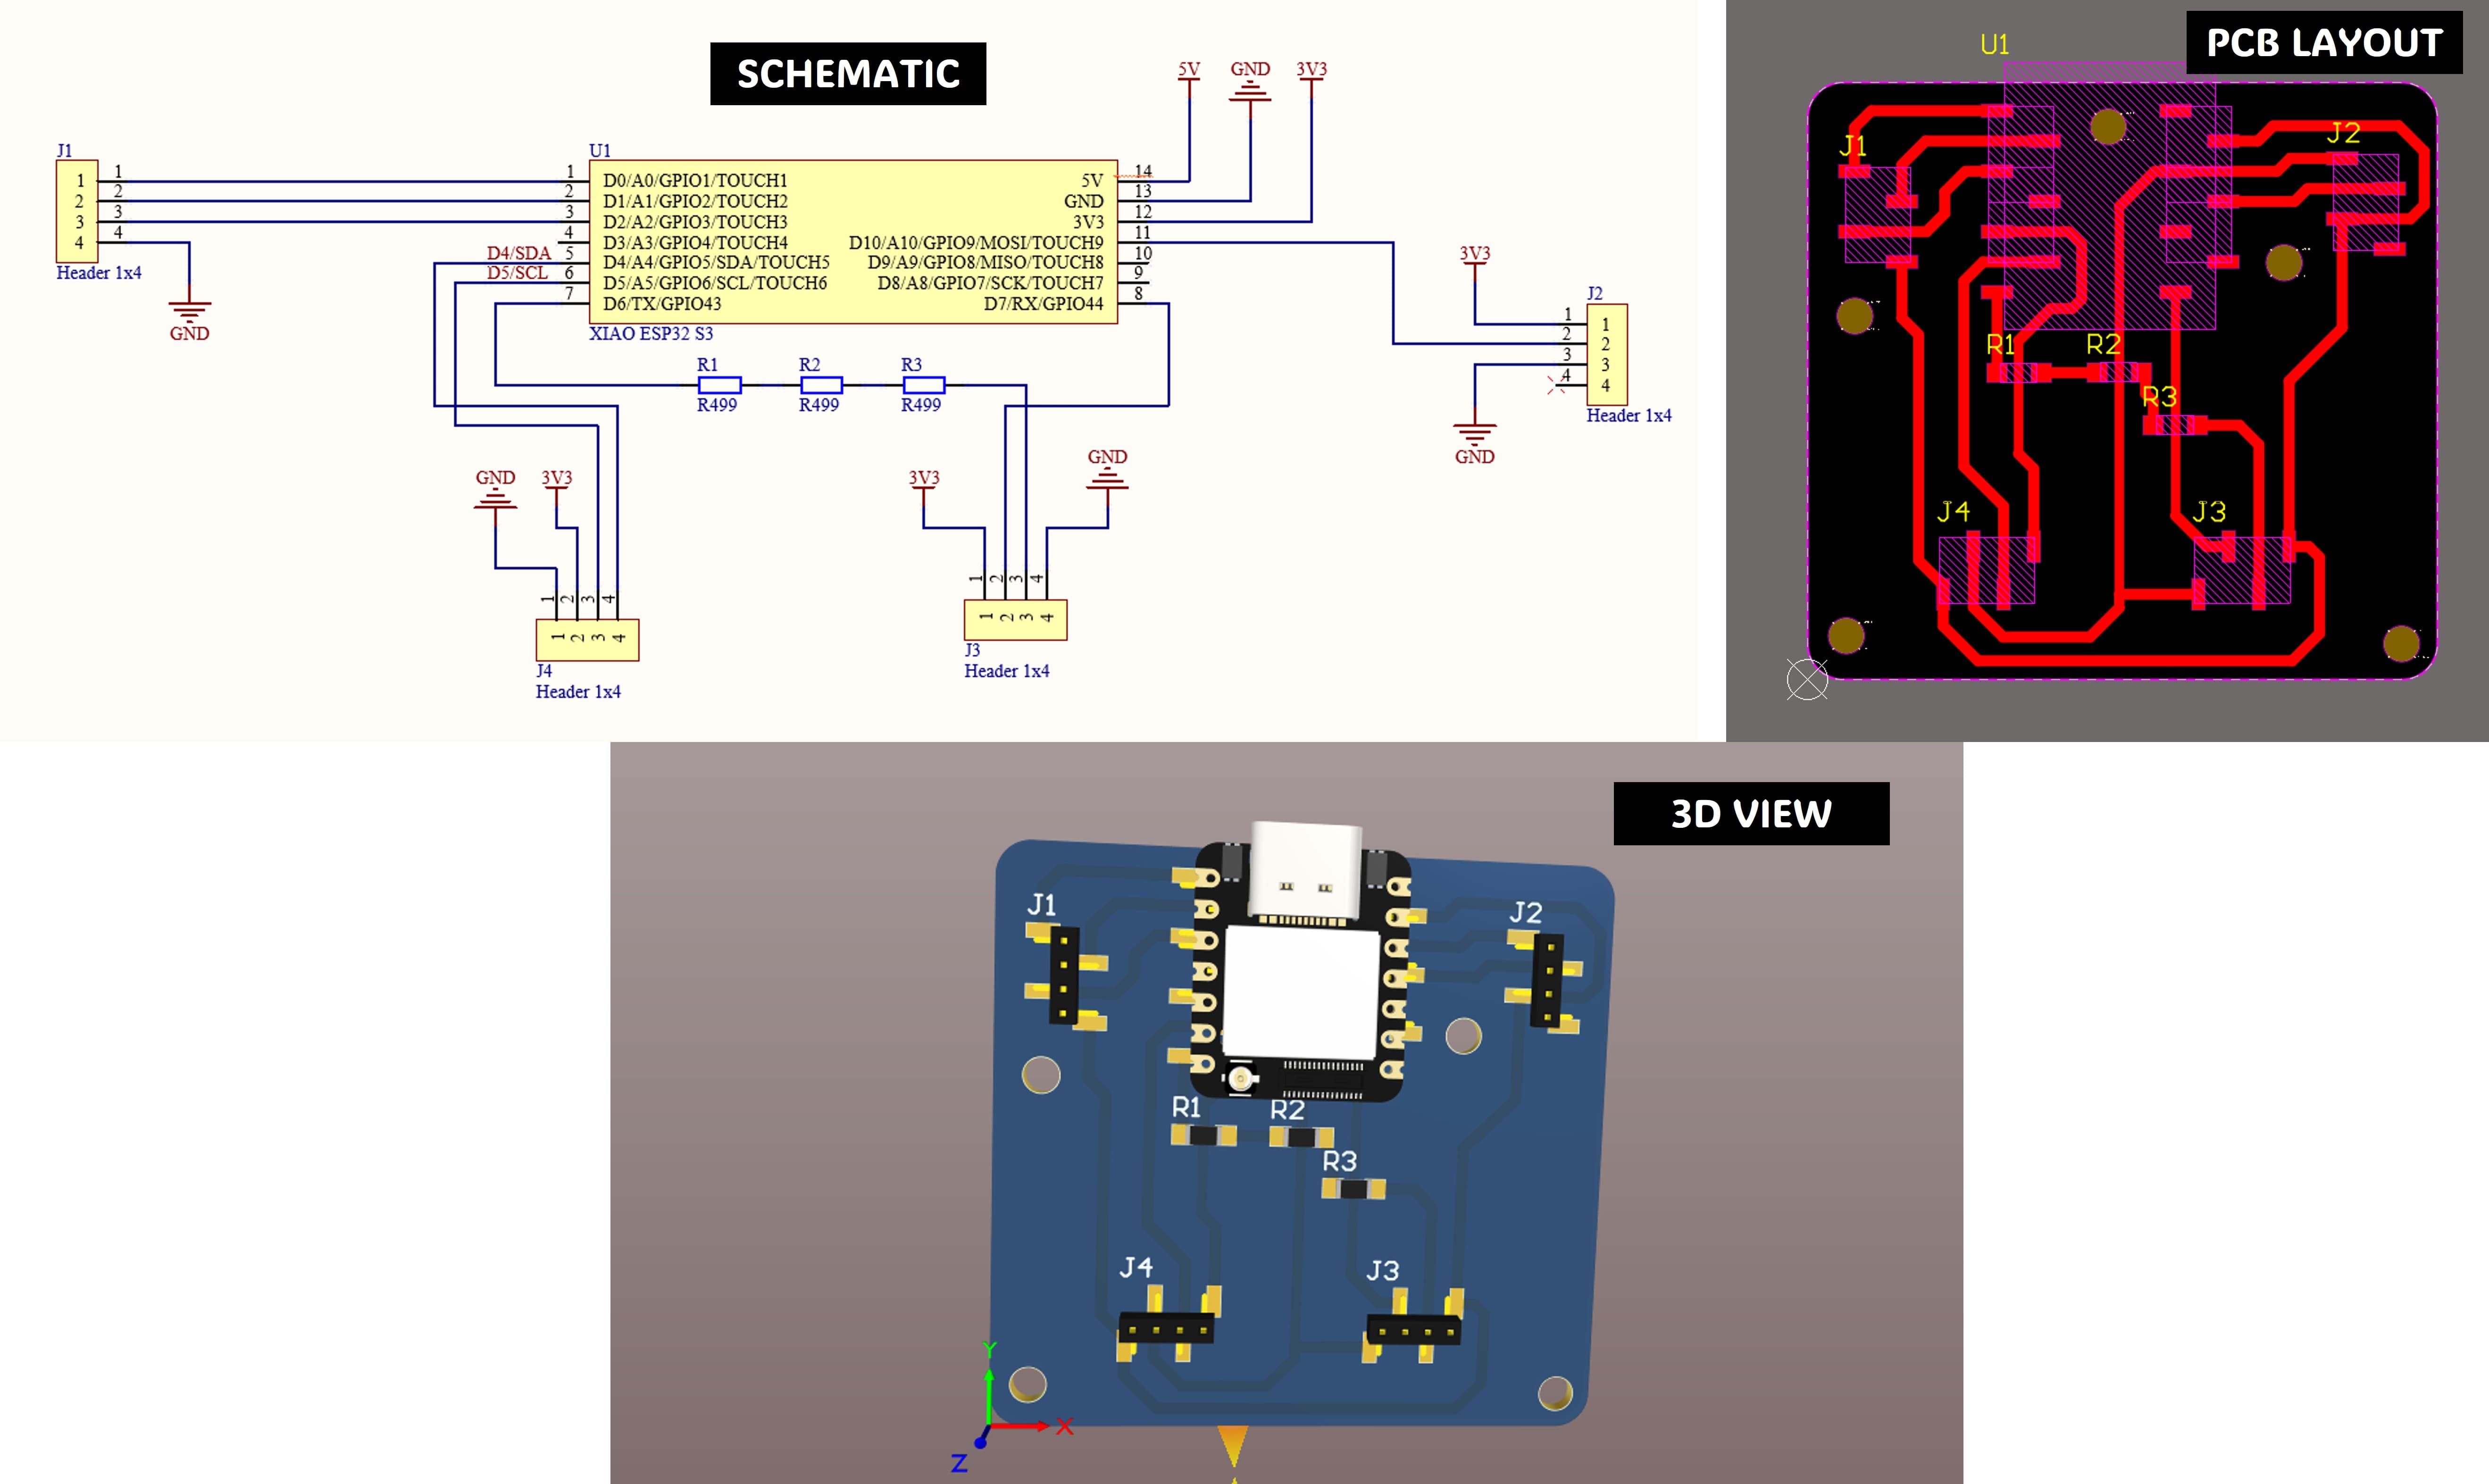
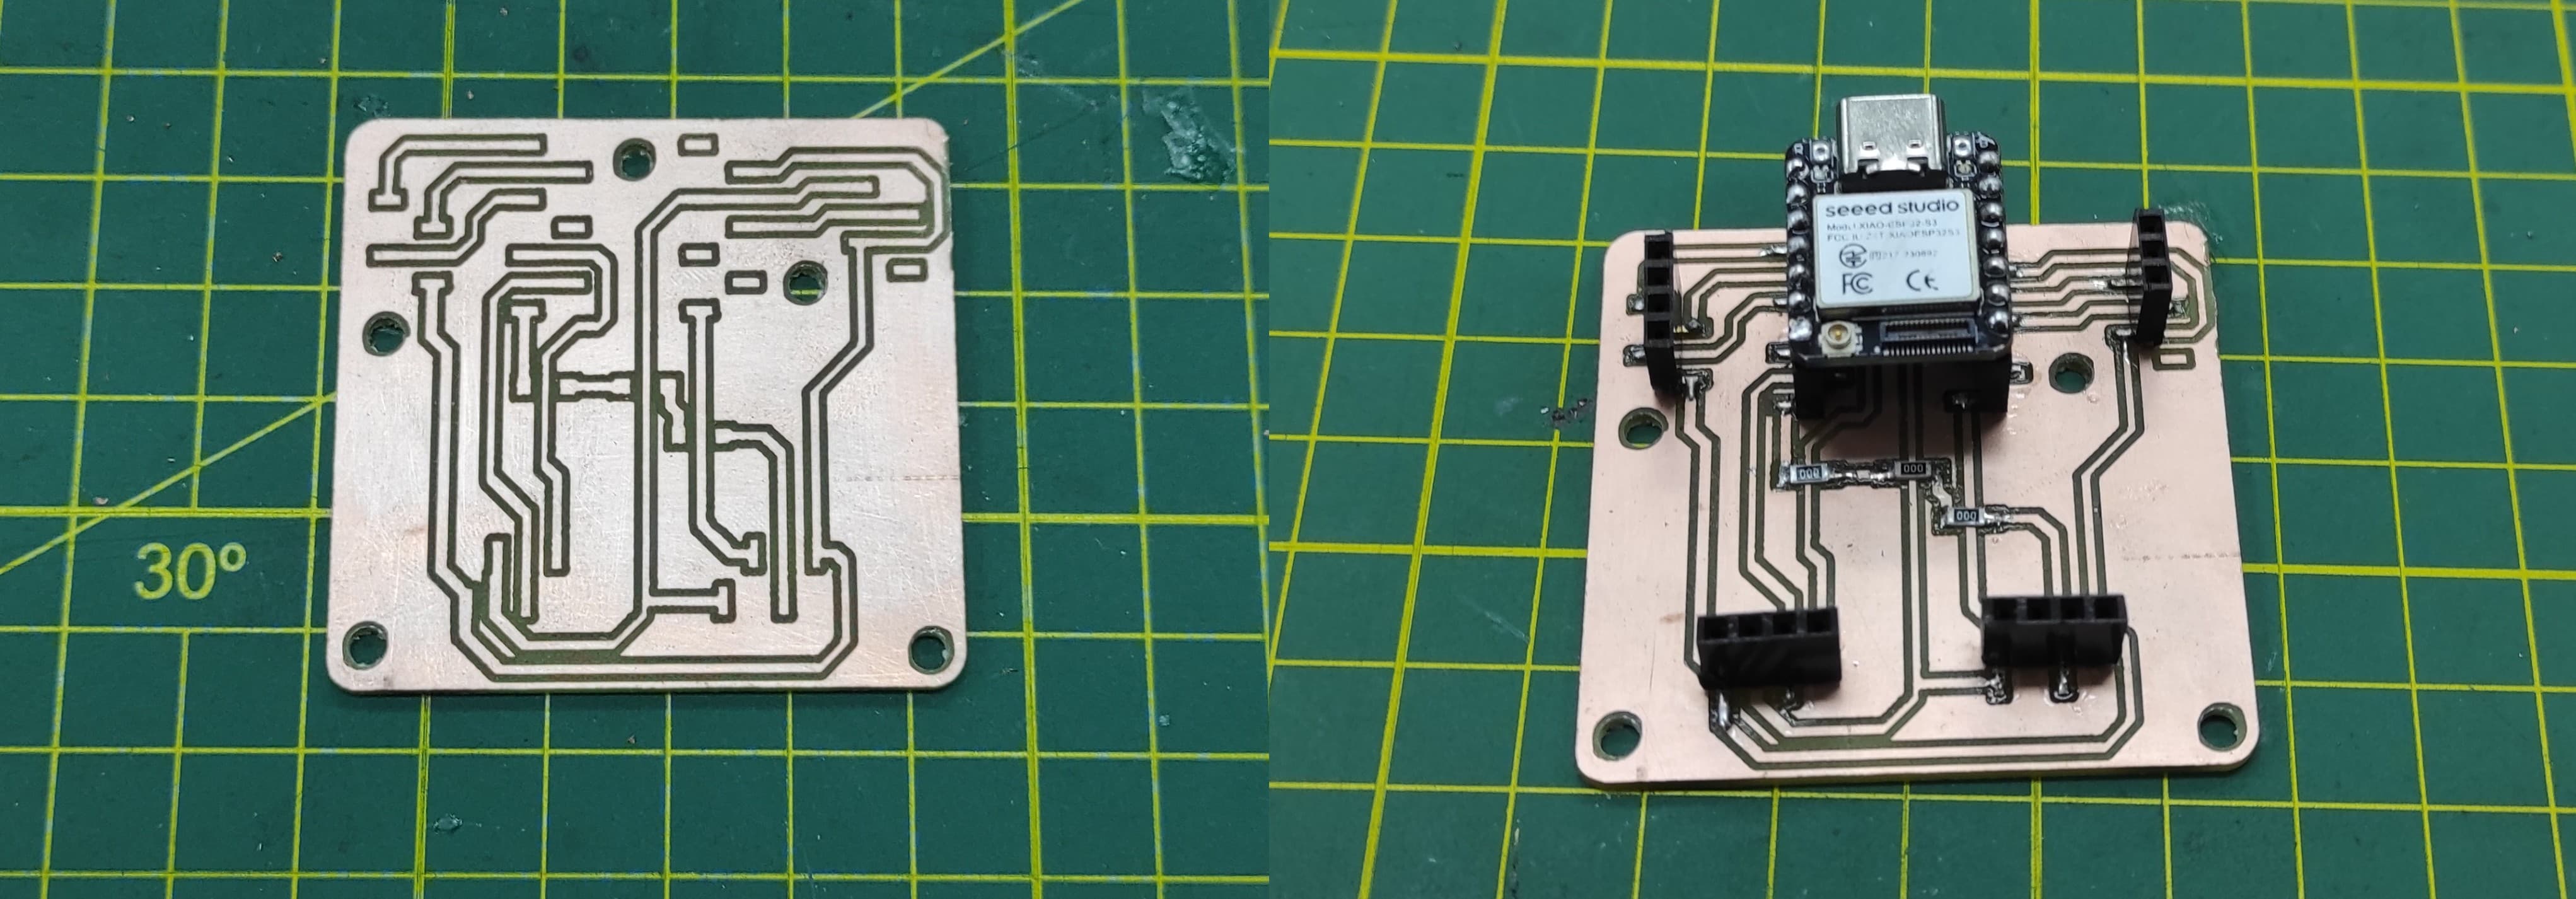
Finally, I designed the main PCB that integrates the microcontroller and all the sensors, ensuring that all components are properly connected and organized.
6.2 Files:
Here are the files available for download.
1. Files PCB Leds Original Files : PCB_Leds.rar
2. Files PCB Leds PDF : PCB_Leds_PDF.rar
3. Files PCB Leds PNG : PCB_Leds_PNG.rar
4. Files PCB Button Original Files : PCB_Button.rar
5. Files PCB button PDF : PCB_button_pdf.rar
6. Files PCB Button PNG : PCB_button_png.rar
7. Files PCB Central Original Files : PCB_Central.rar
8. Files PCB Central PDF: PCB_Central_pdf.rar
9. Files PCB Central PNG : PCB_Central_png.rar
Week 7: Computer-Controlled Machining
7.1 CNC Pocketing and Outline Machining Jobs
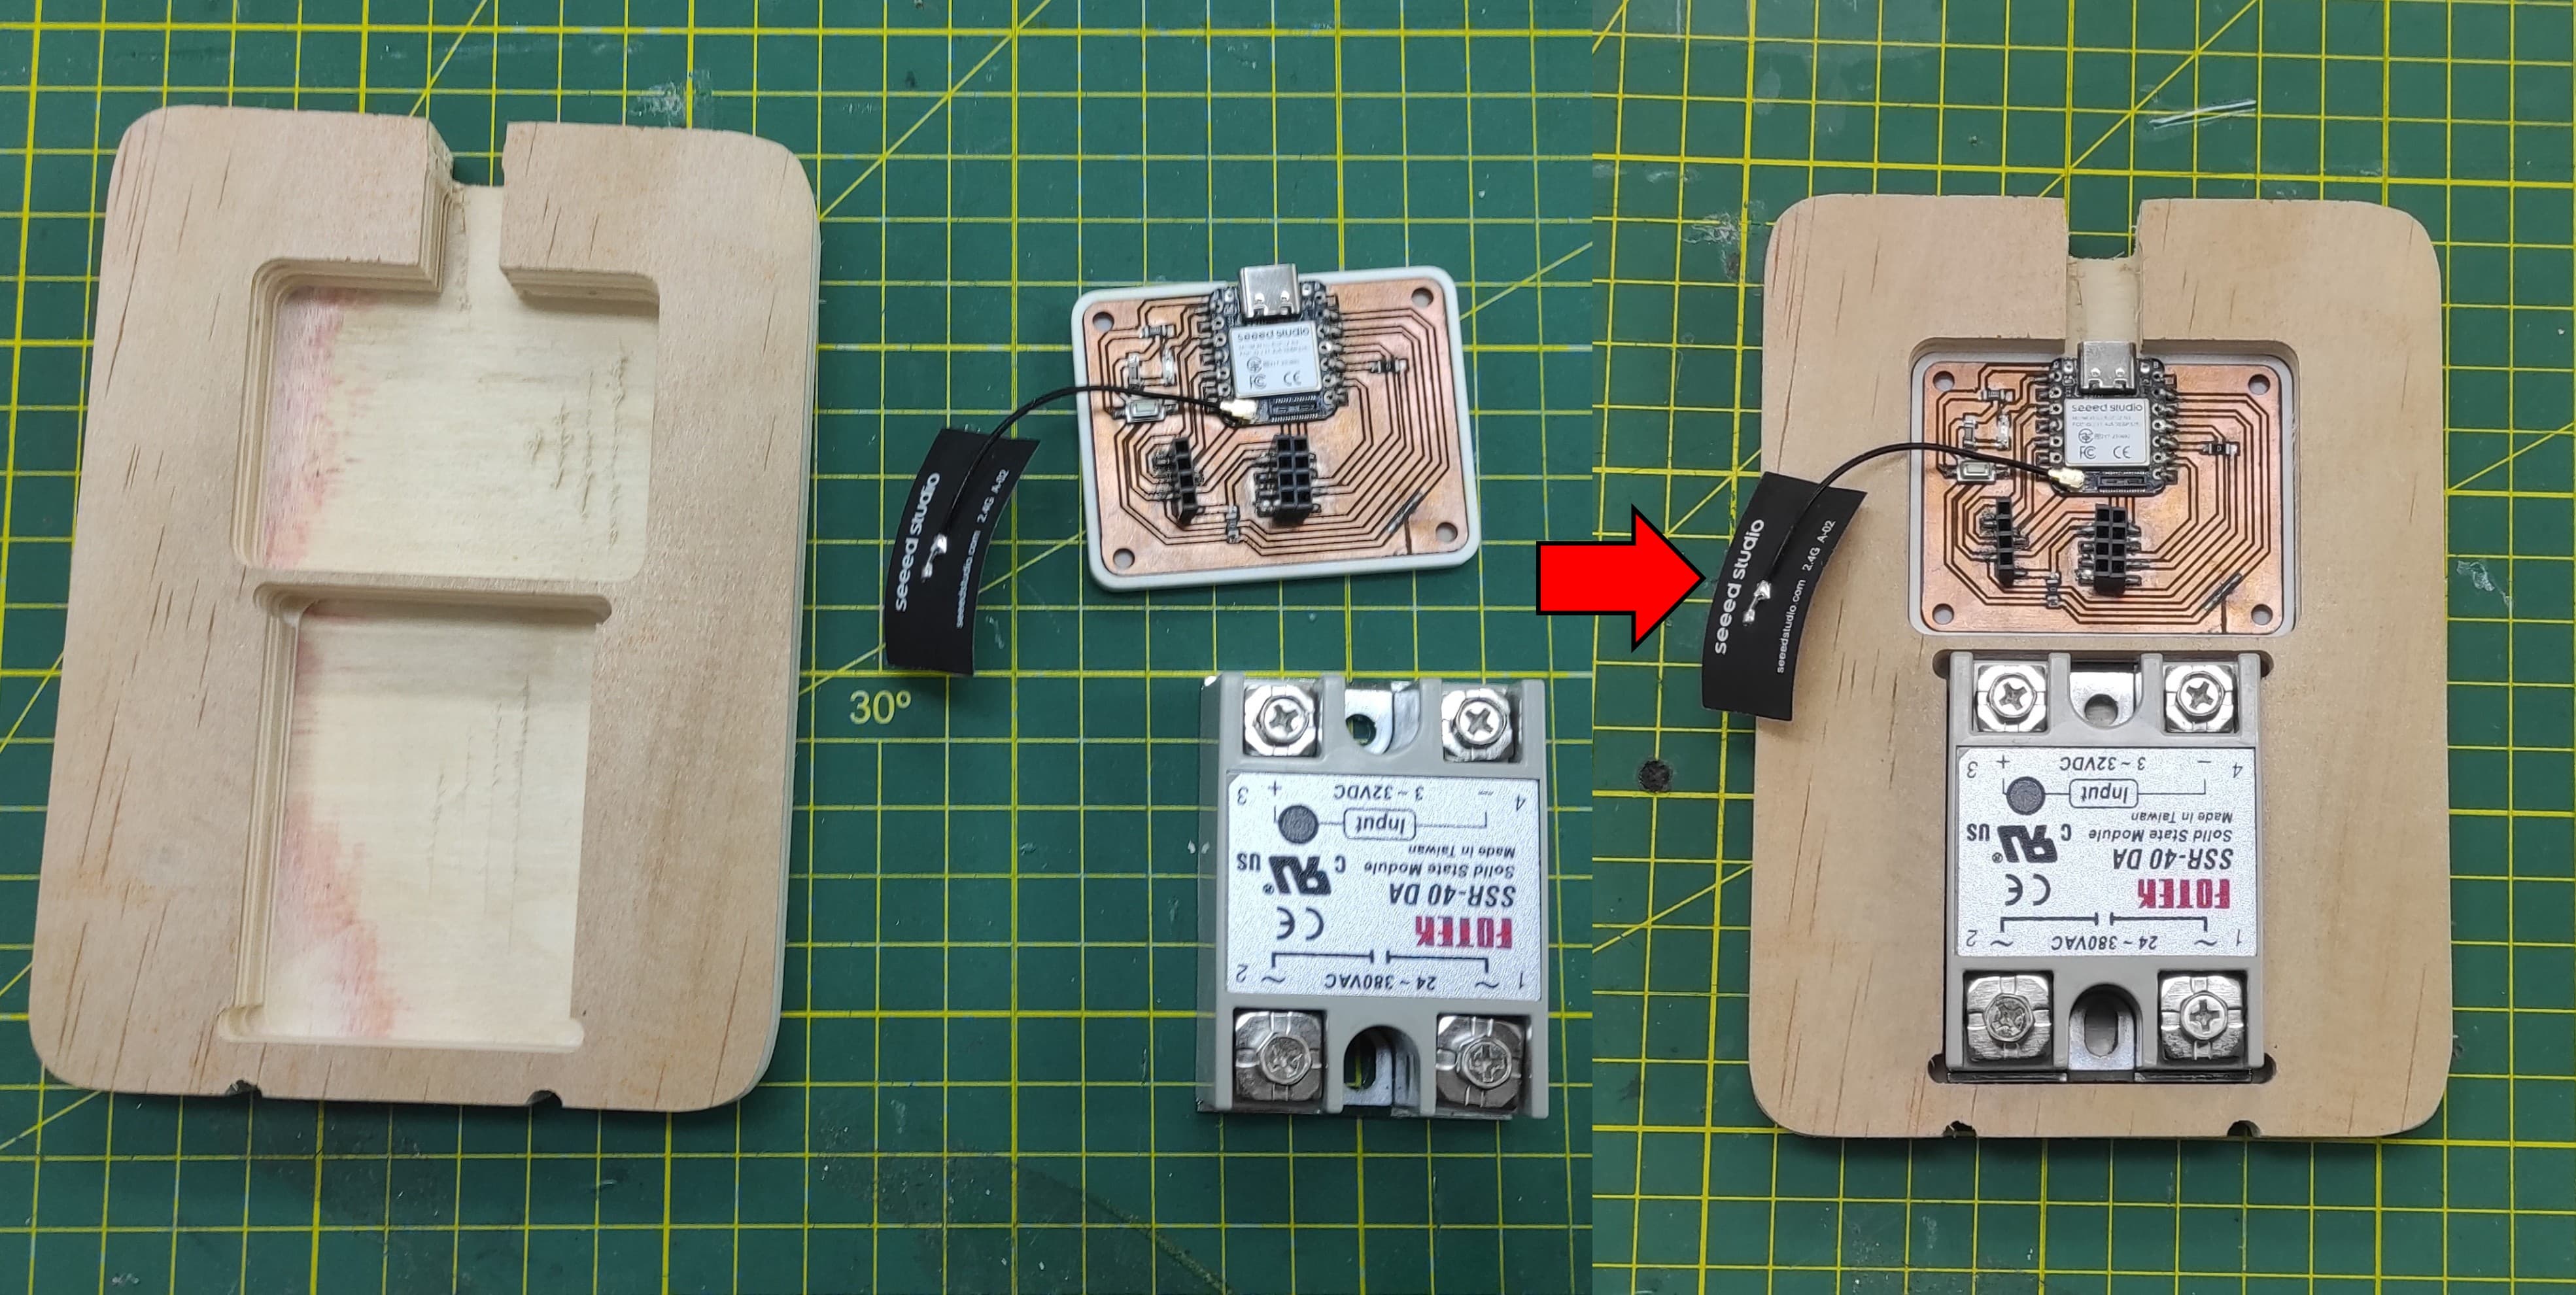
This week, for the final project, I decided to create a custom piece to securely hold the receiver PCB and the solid-state relay. I designed the part using Onshape.

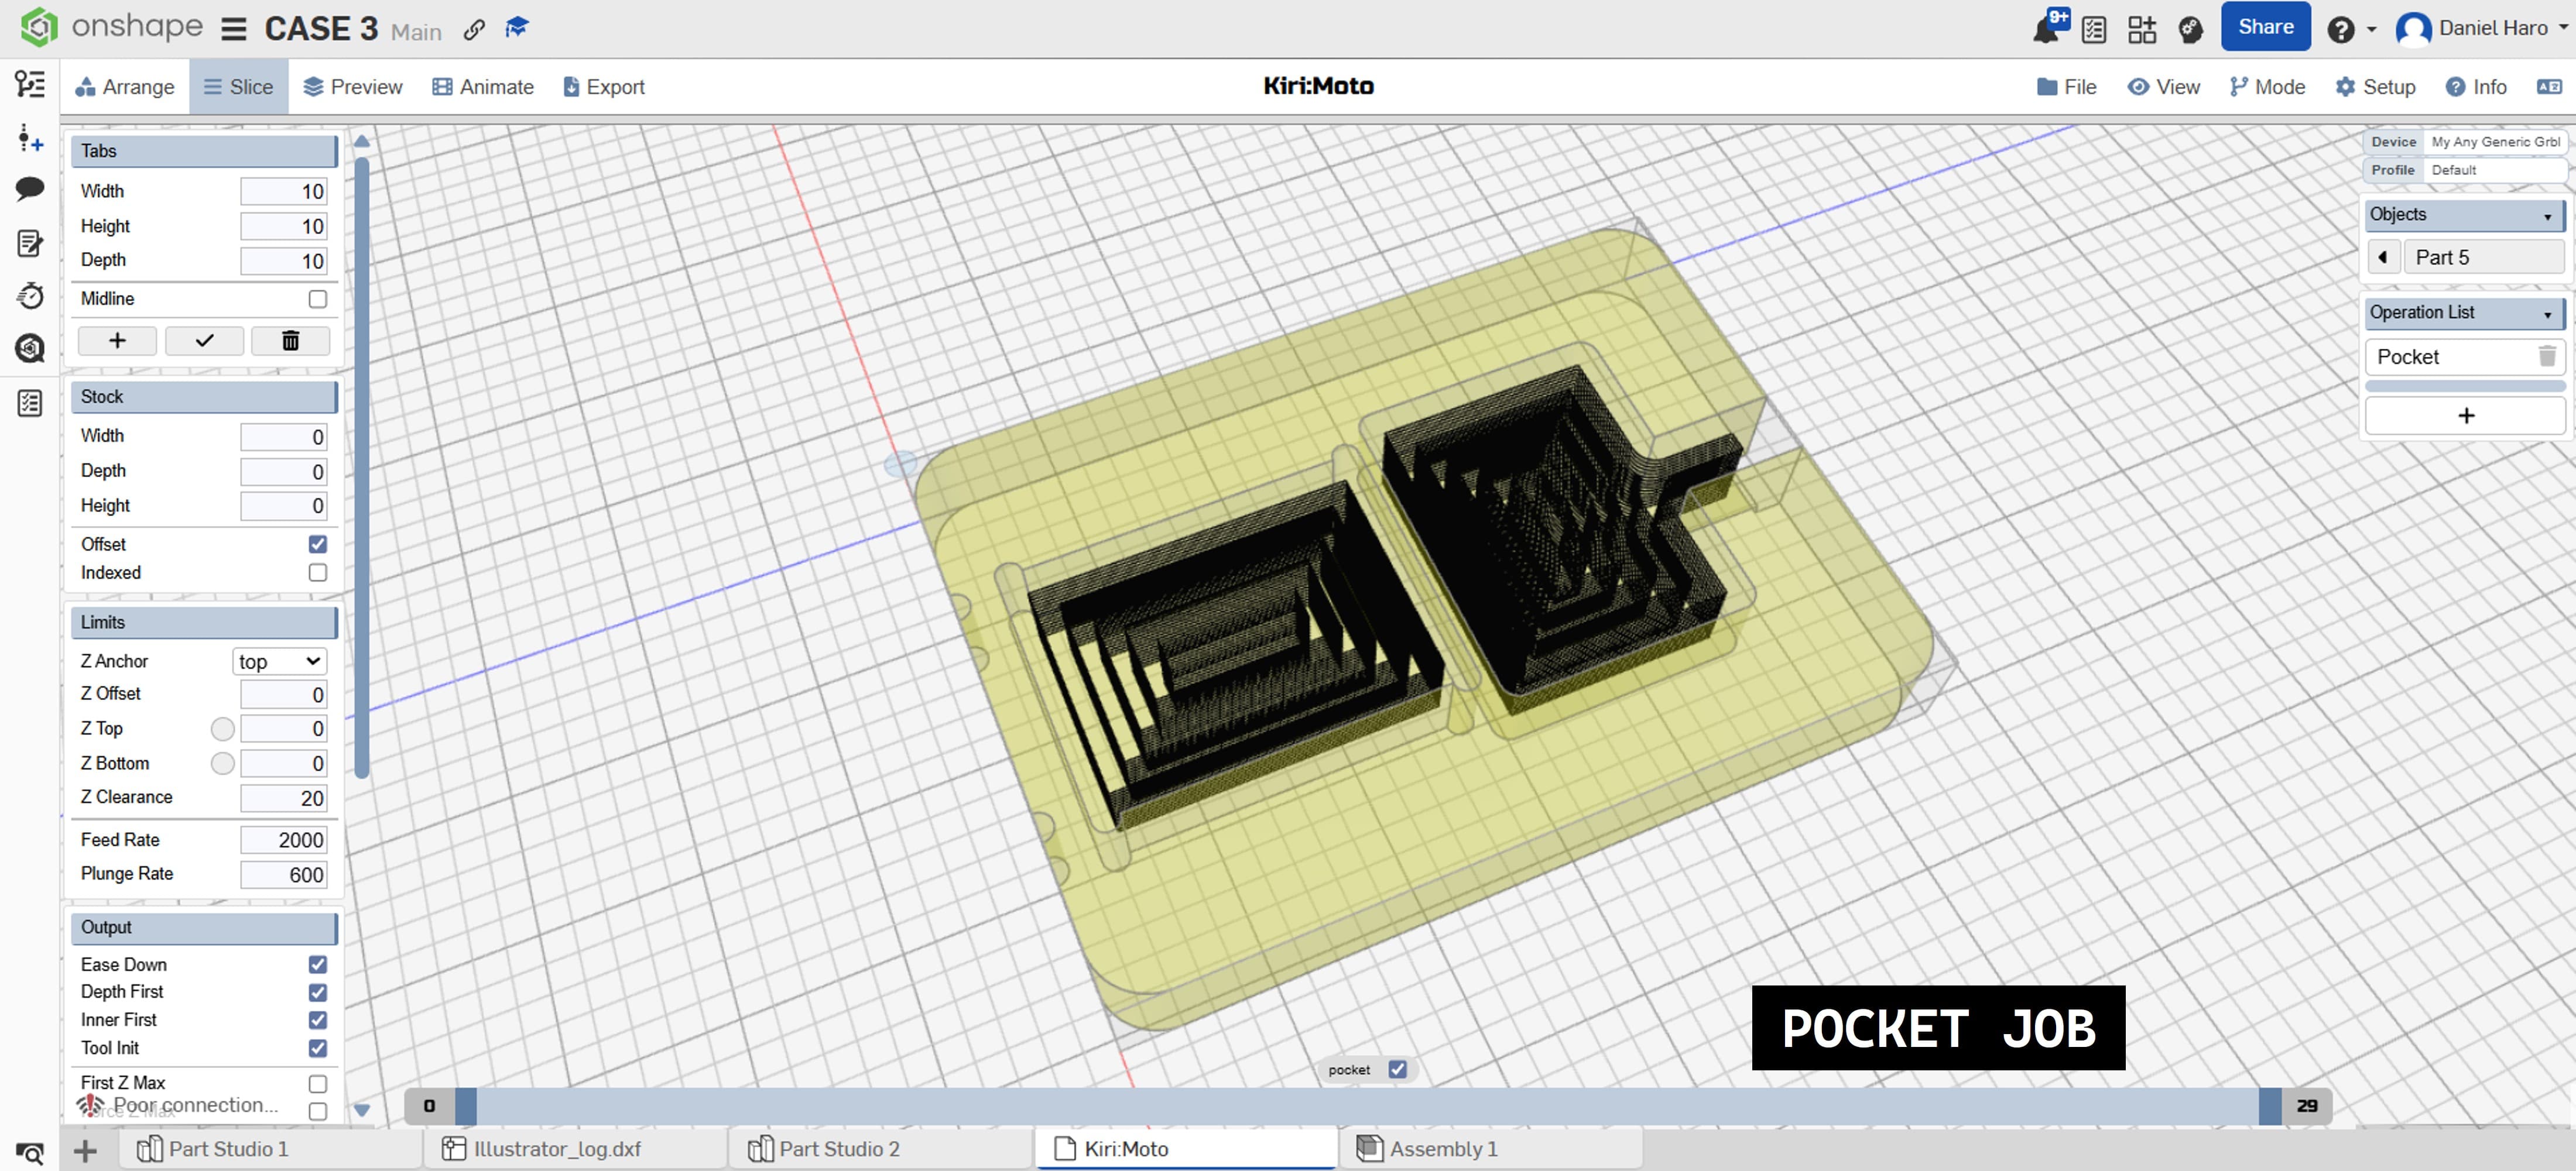
I generated the toolpaths for the pocketing and outline machining operations using the online application Kiri:Moto. I then started with the pocketing operation first.

Then, I continued with the outline machining operation.
I started the machining process following the correct sequence: first the pocketing operation, and then the outline machining operation.
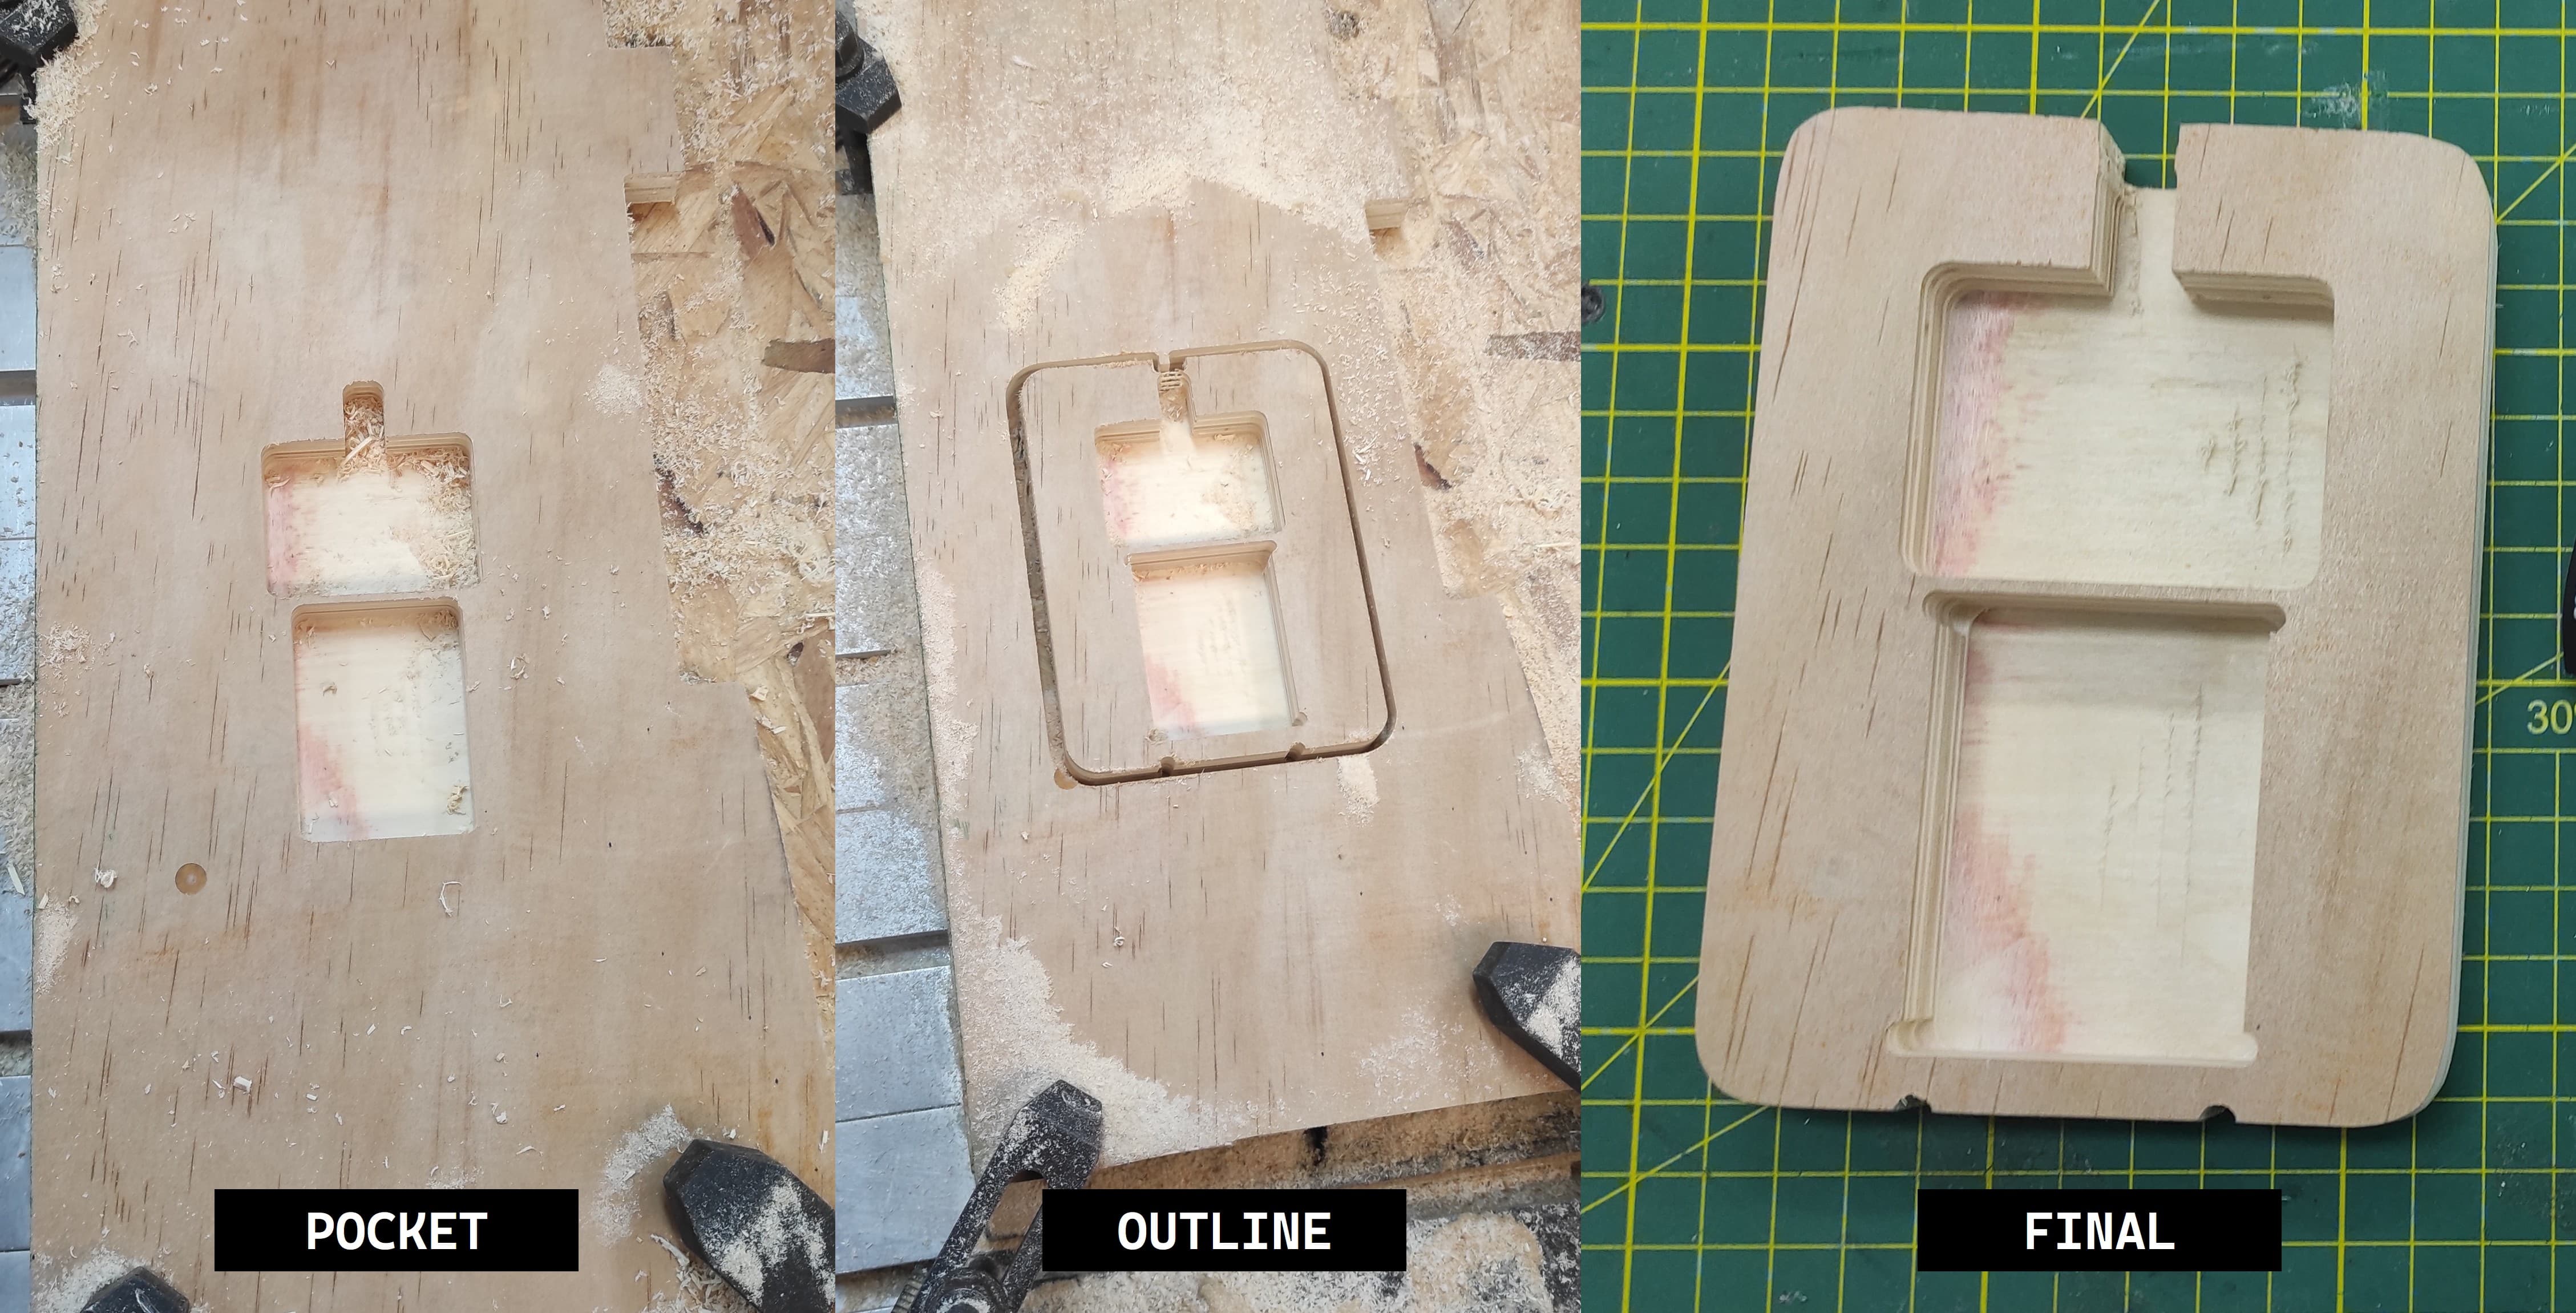
After finishing the machining process, I inspected the final part to ensure it met the required specifications. I then tested the fit of the PCB and the solid-state relay to confirm that both components fit properly and securely.
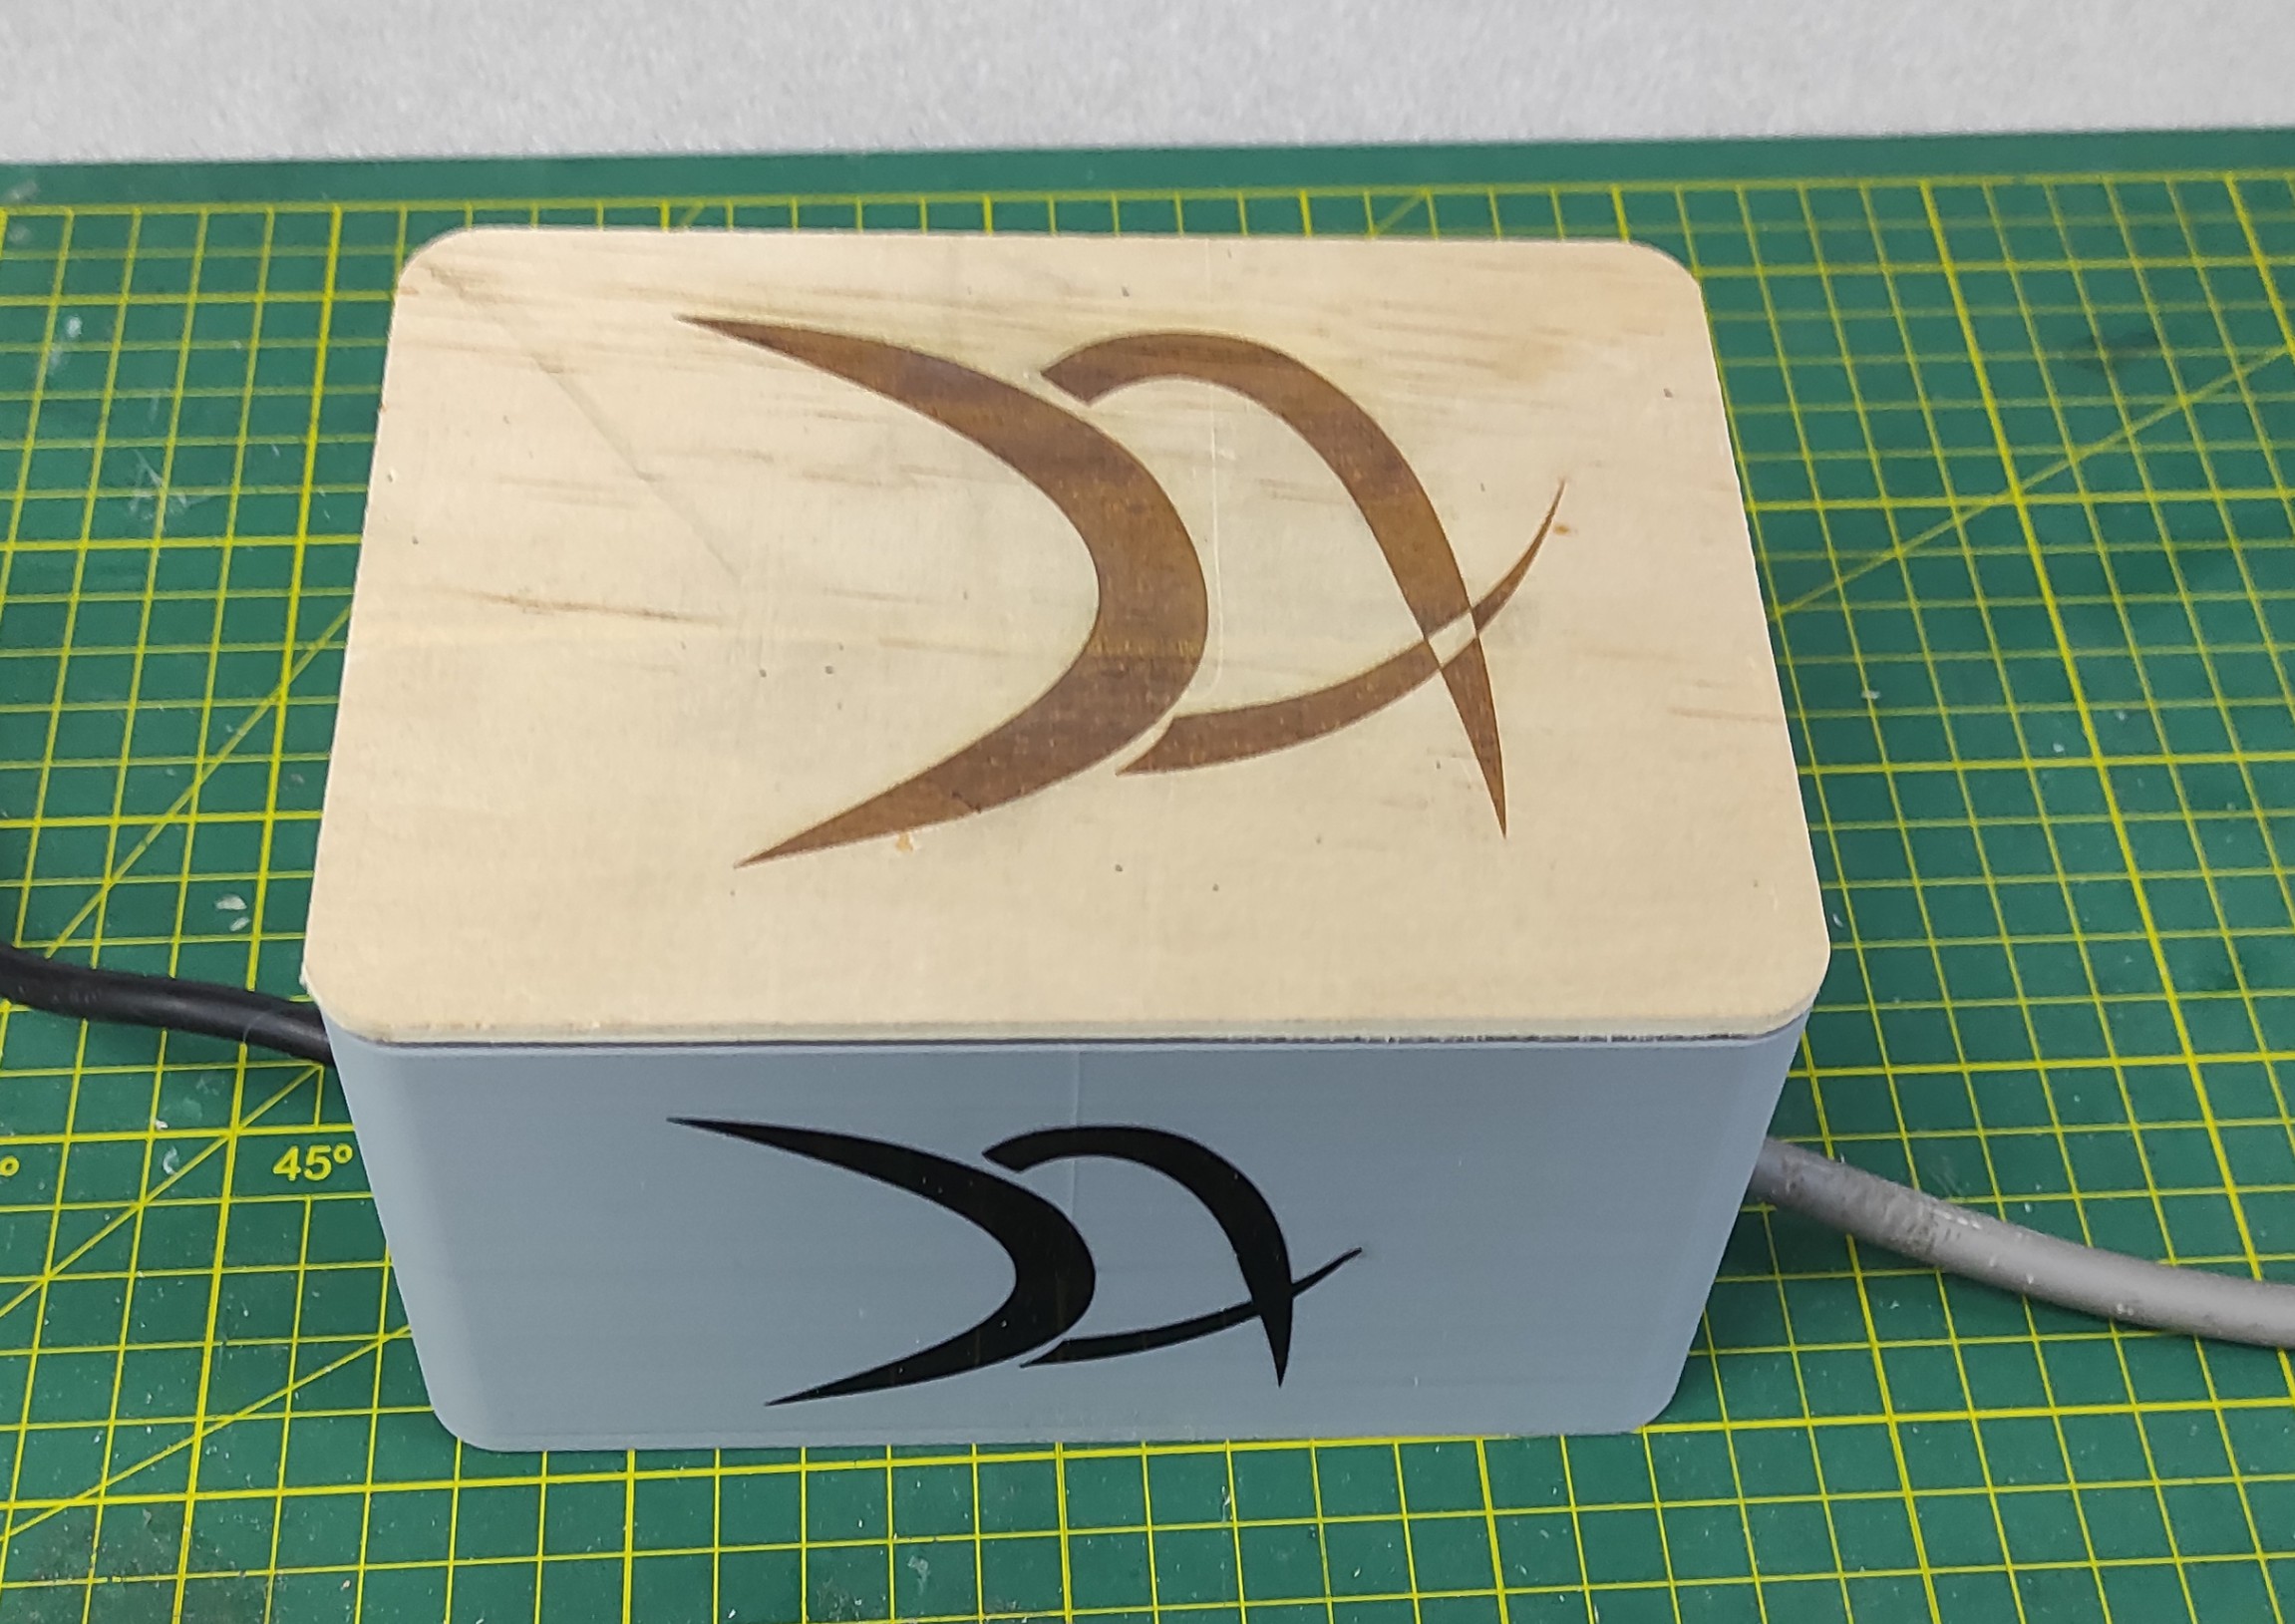
7.2 CNC Pocketing and Outline Top Cover
For the top cover of the case, I also designed a custom piece to provide protection while giving the enclosure a clean and finished appearance.
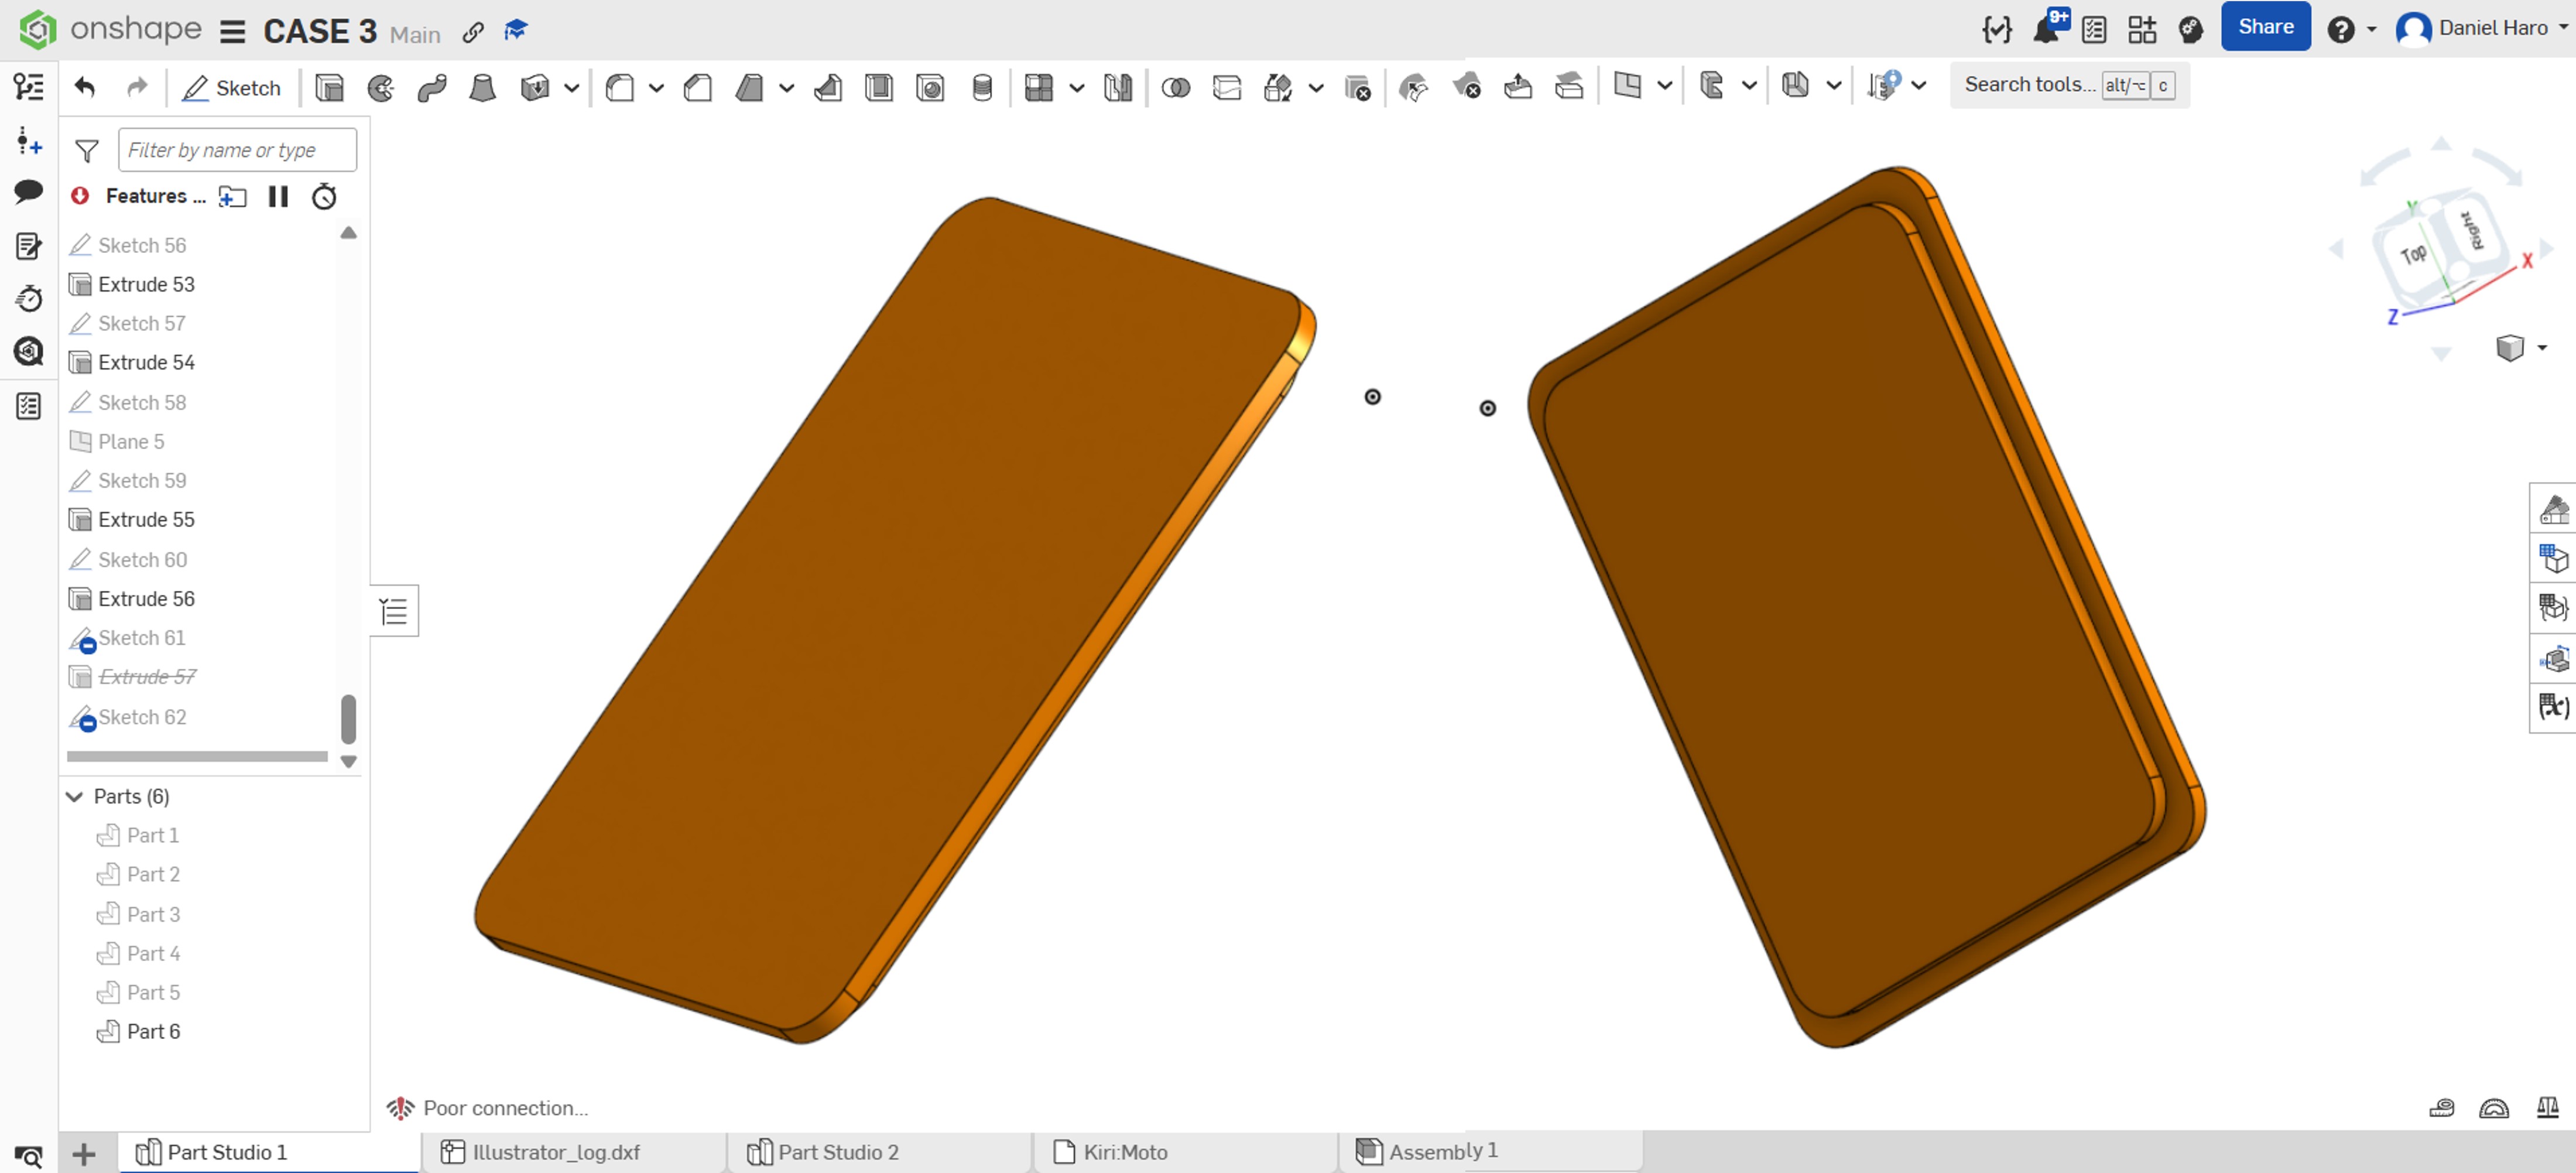

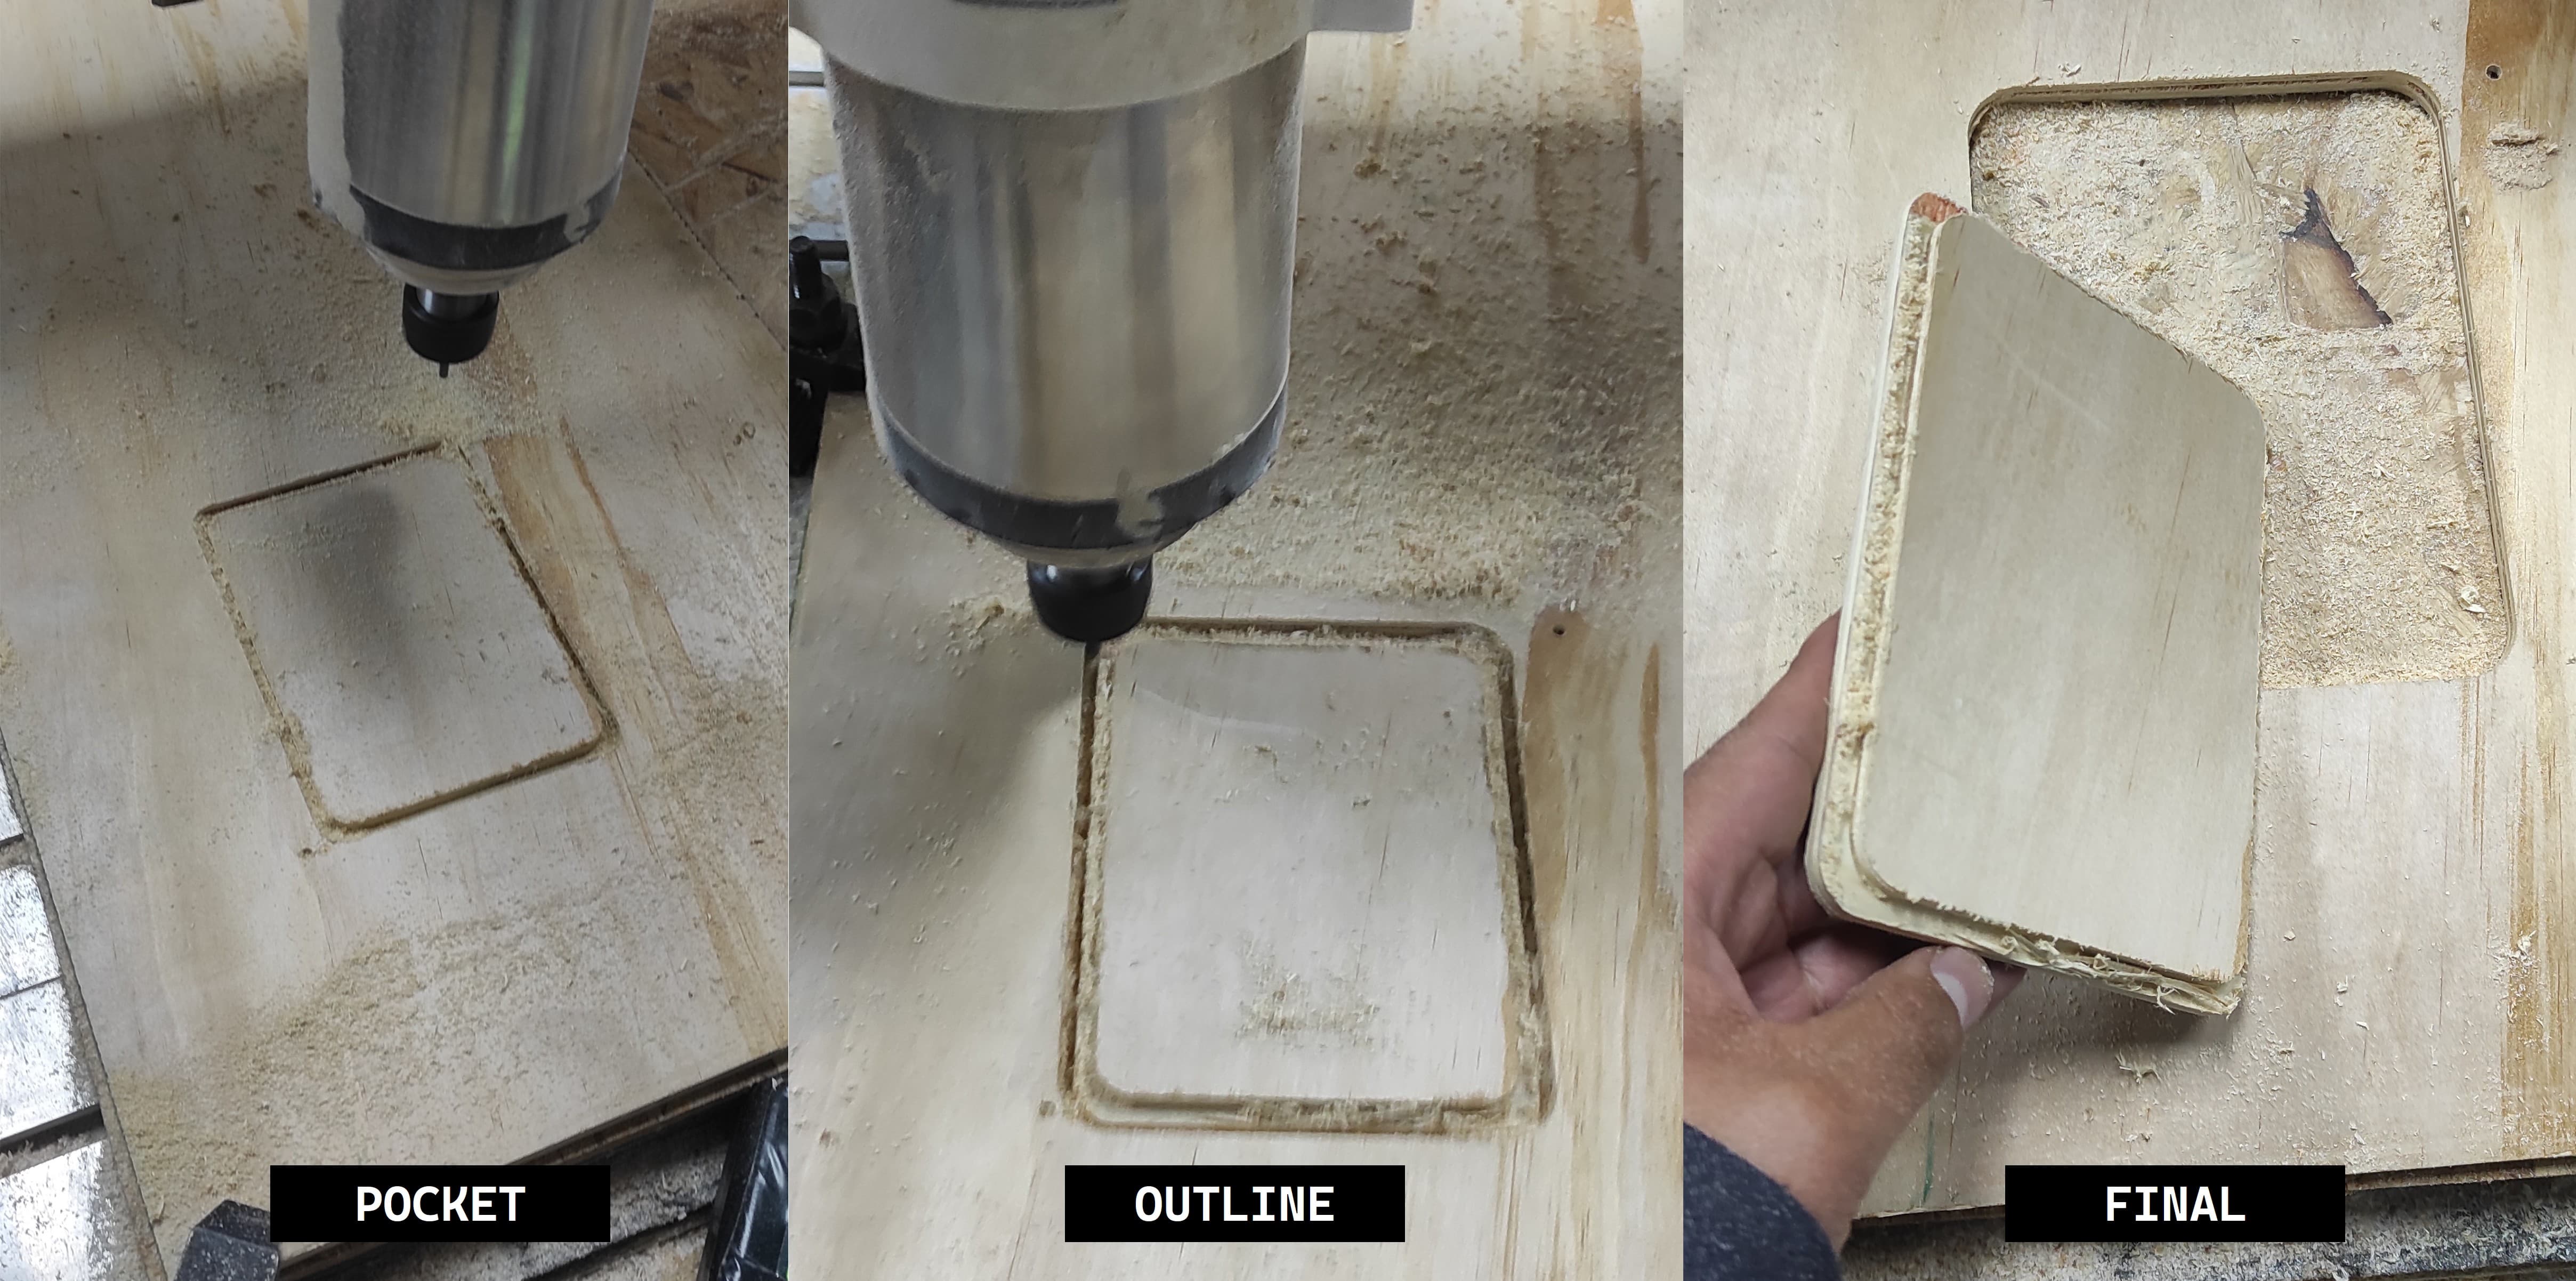
After finishing the design, I also added my logo to give the final piece a more personalized and professional appearance.
The final result will look like the image below:
7.3 Files:
Here are the files available for download.
1. 3d models: 3dmodels_stl.rar
2. G-code part 1 : pocket.rar
3. G-code part 2 : outline.rar
Week 8: Electronics Production
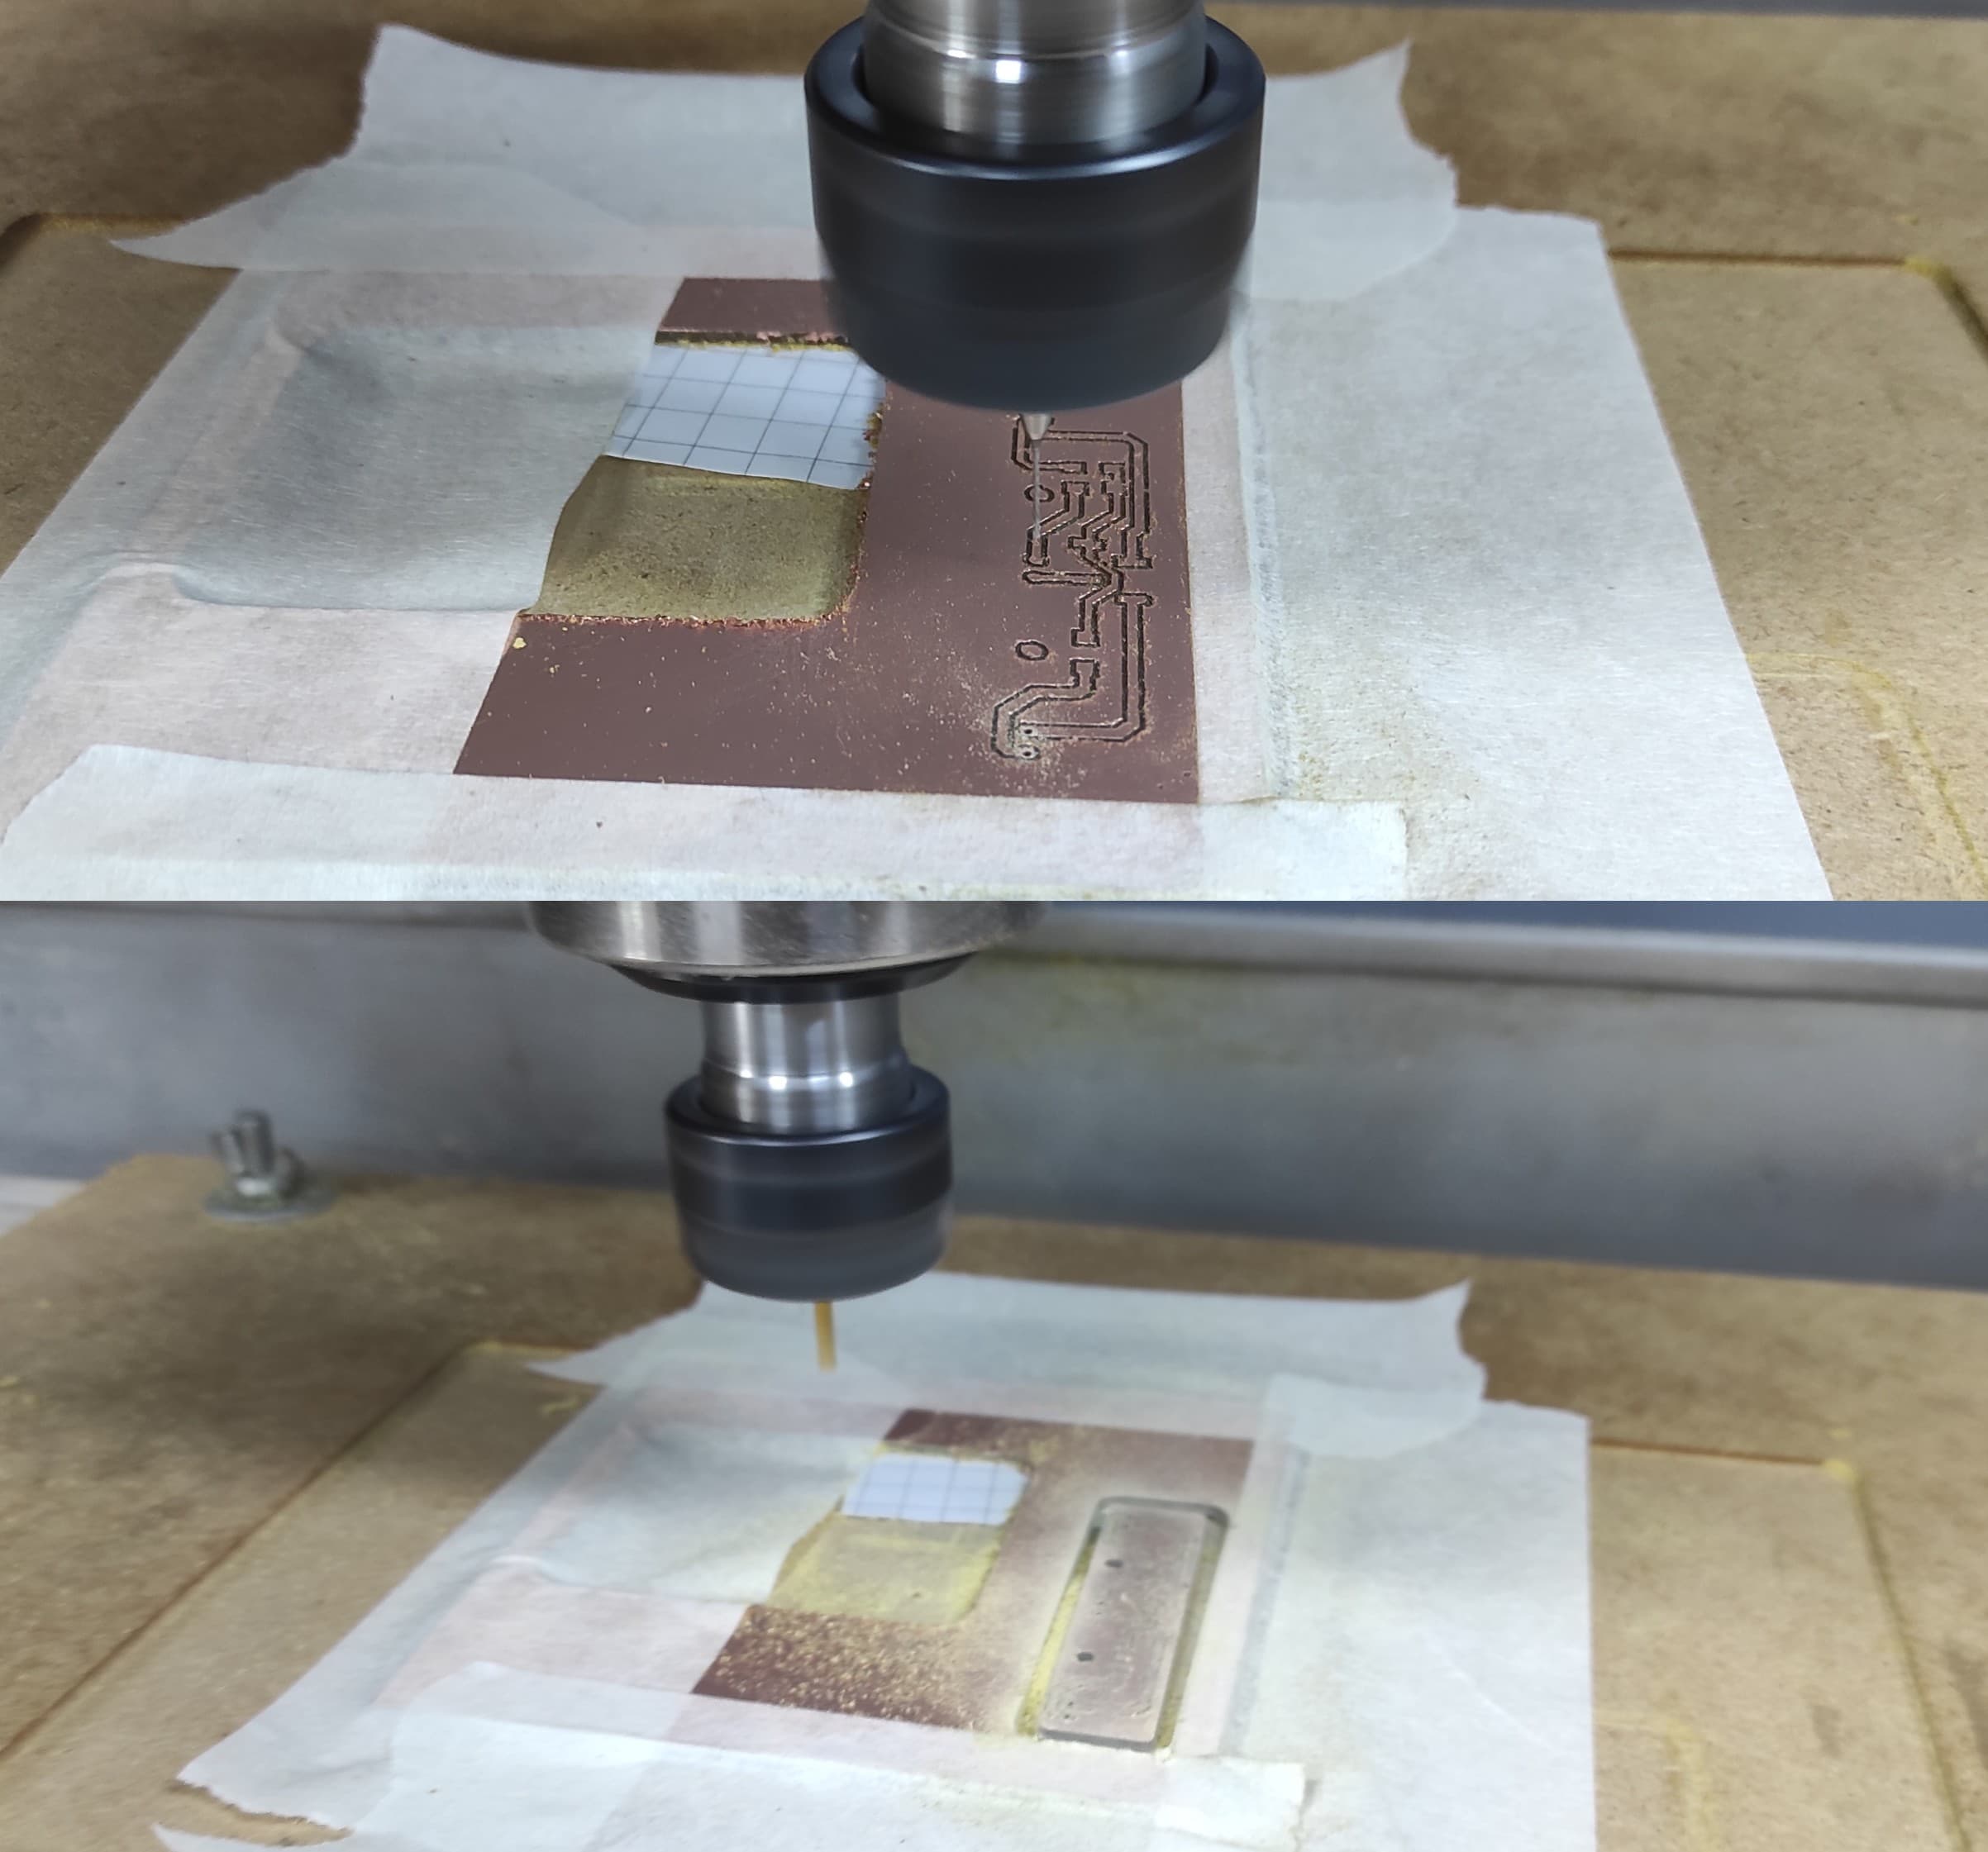
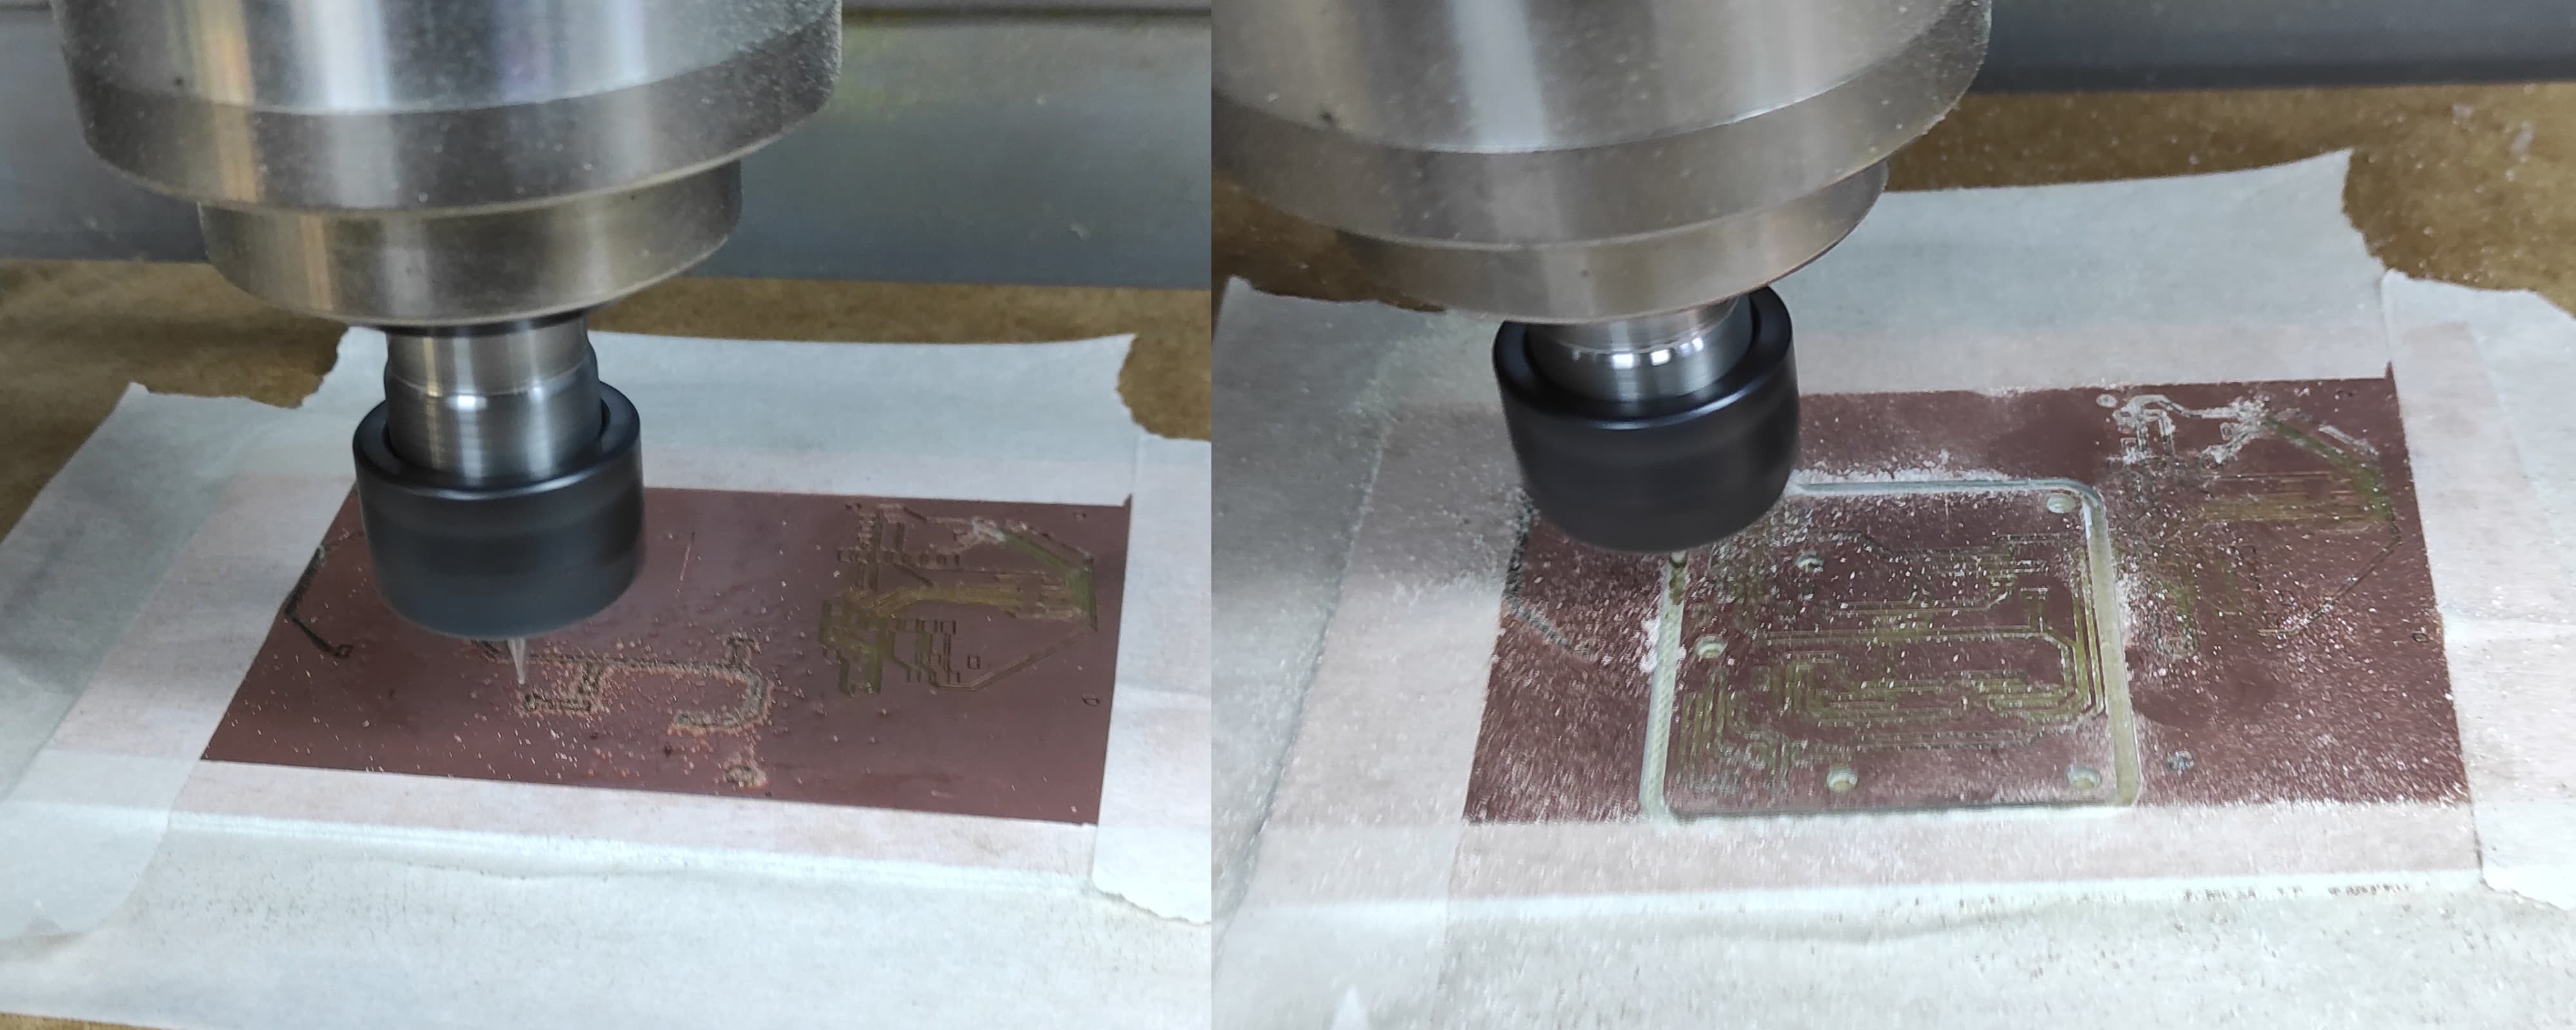
8.1 PCB Fabrication
After designing these three PCBs, I started with the fabrication process.
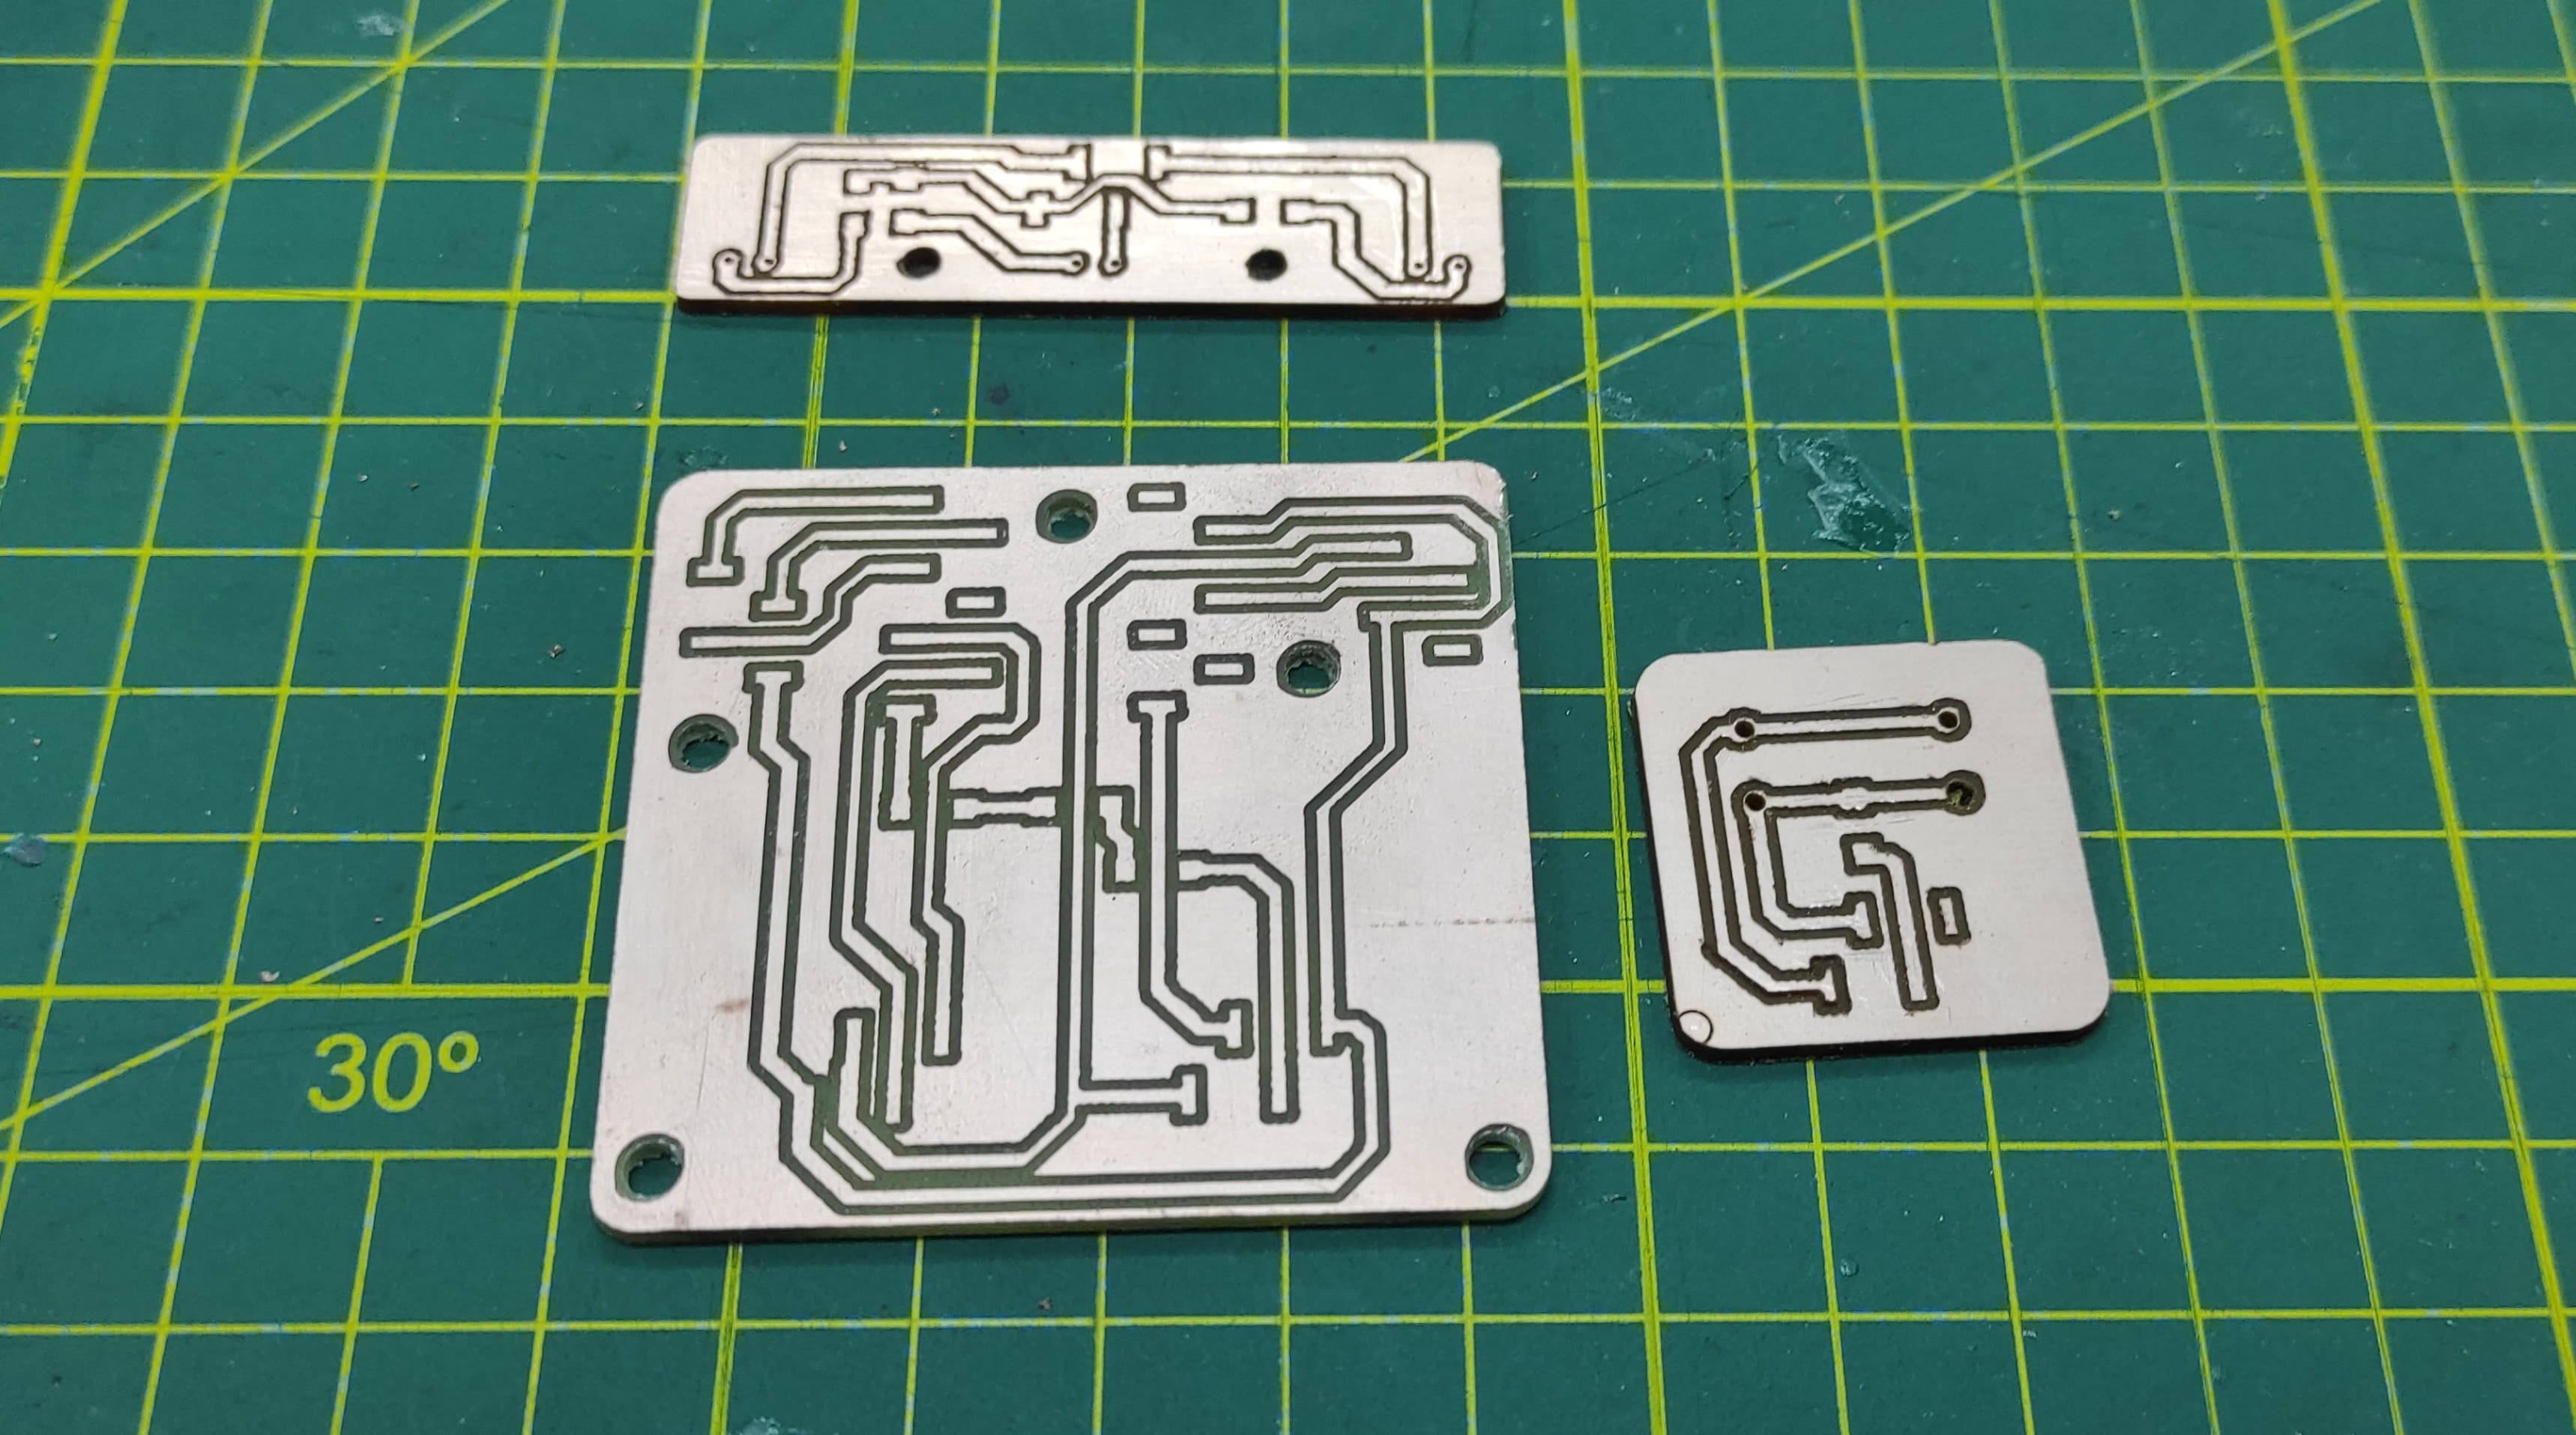
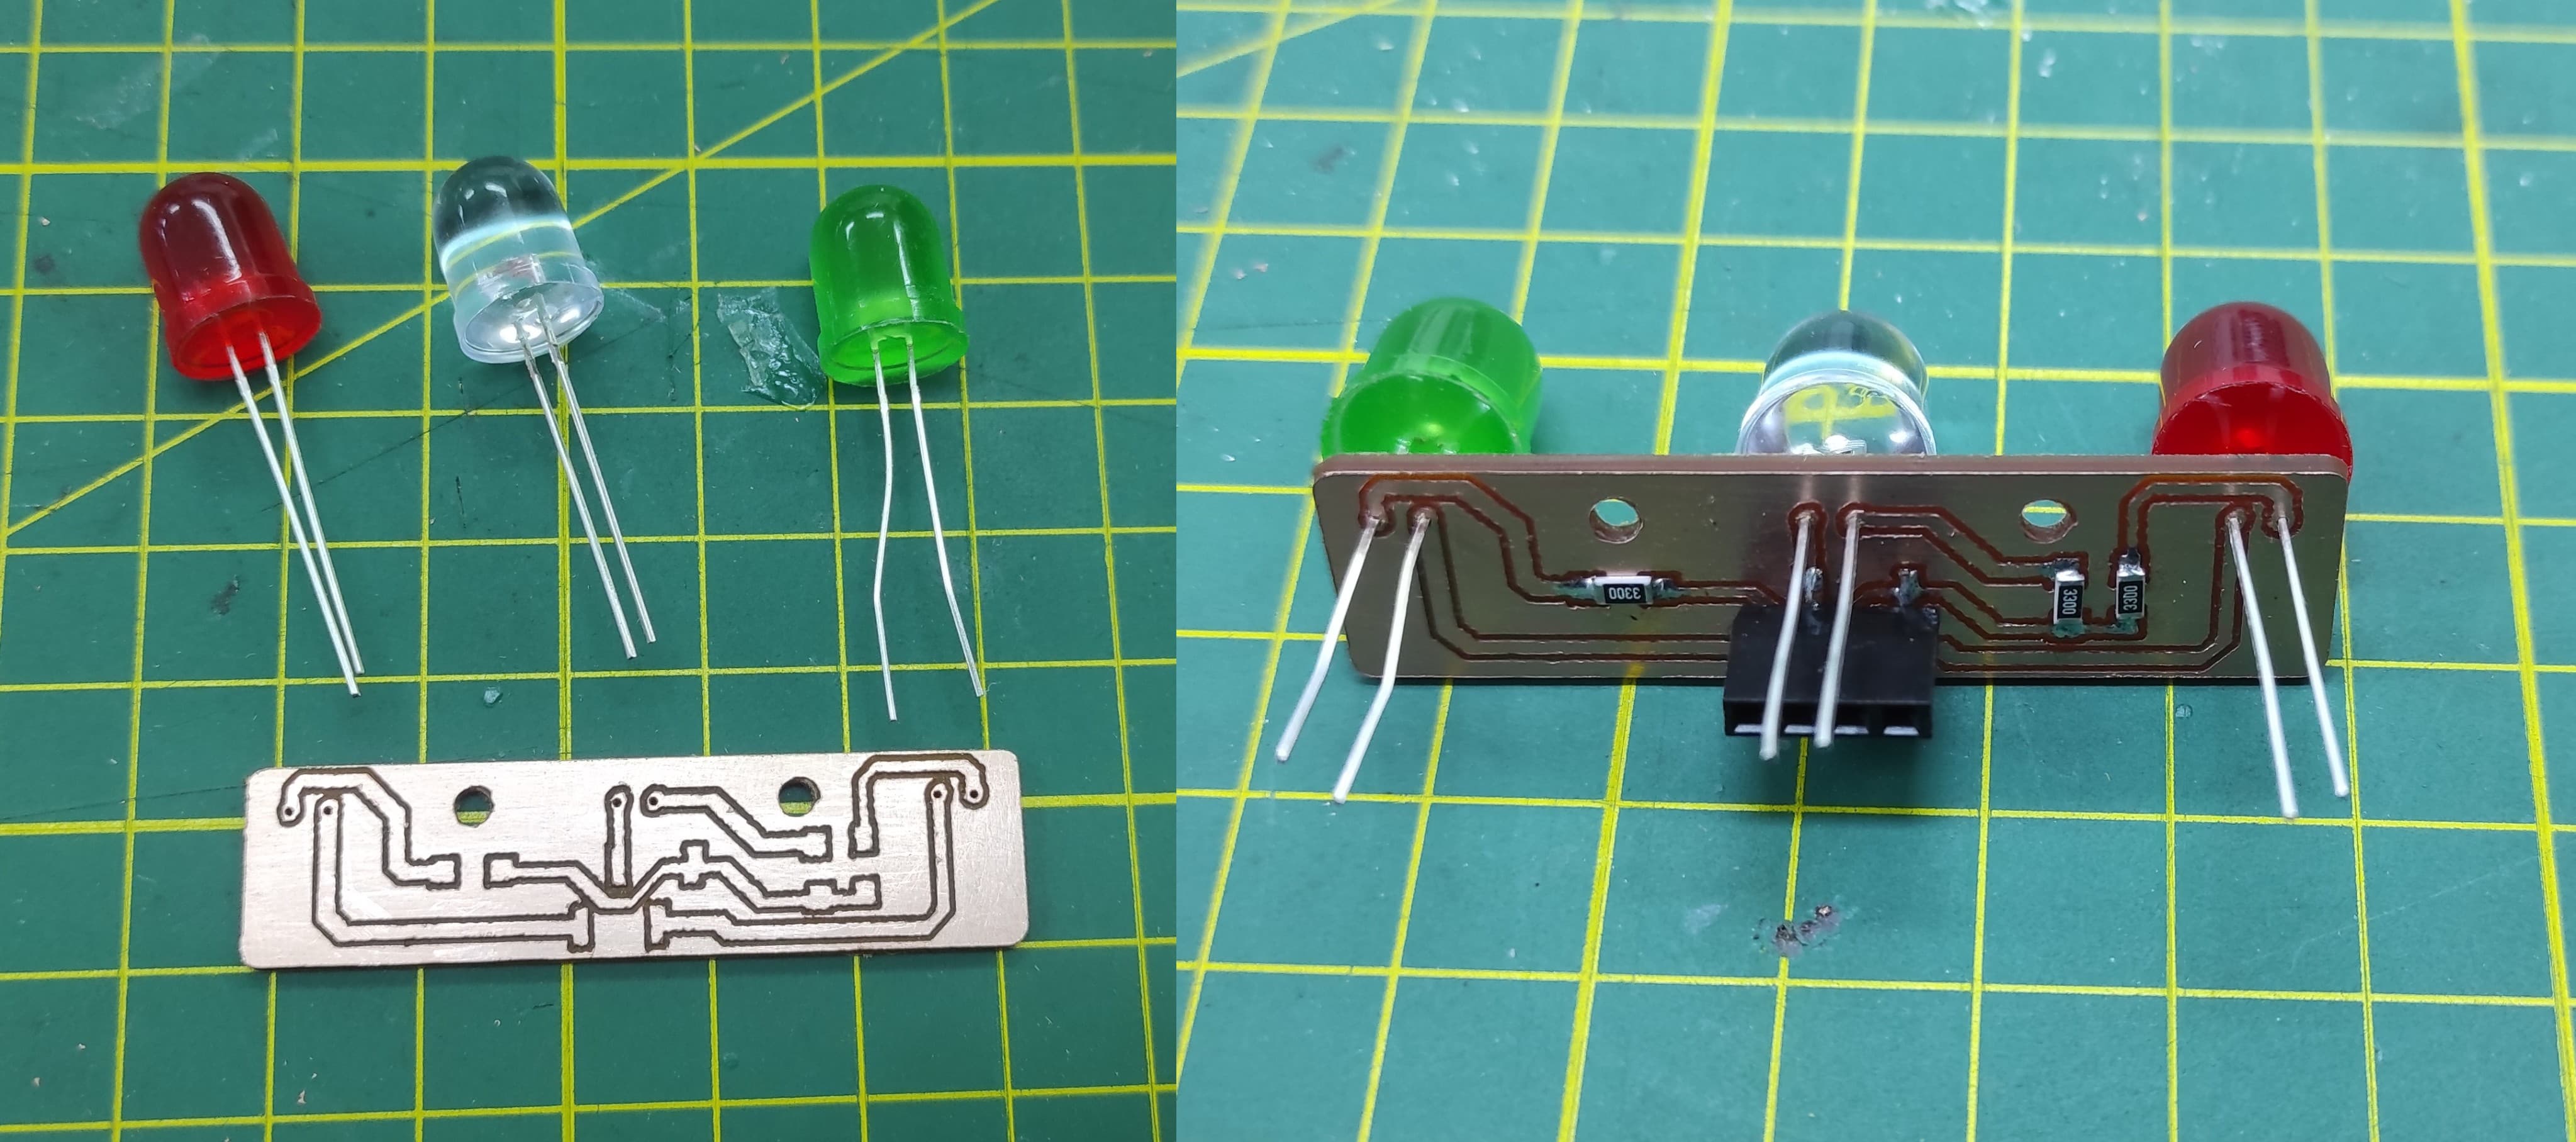
I began with the first PCB—the one that integrates the LED indicators.
After the manufacturing process, I soldered the components onto the board.
I then proceeded with the manufacturing and assembly of the second PCB.
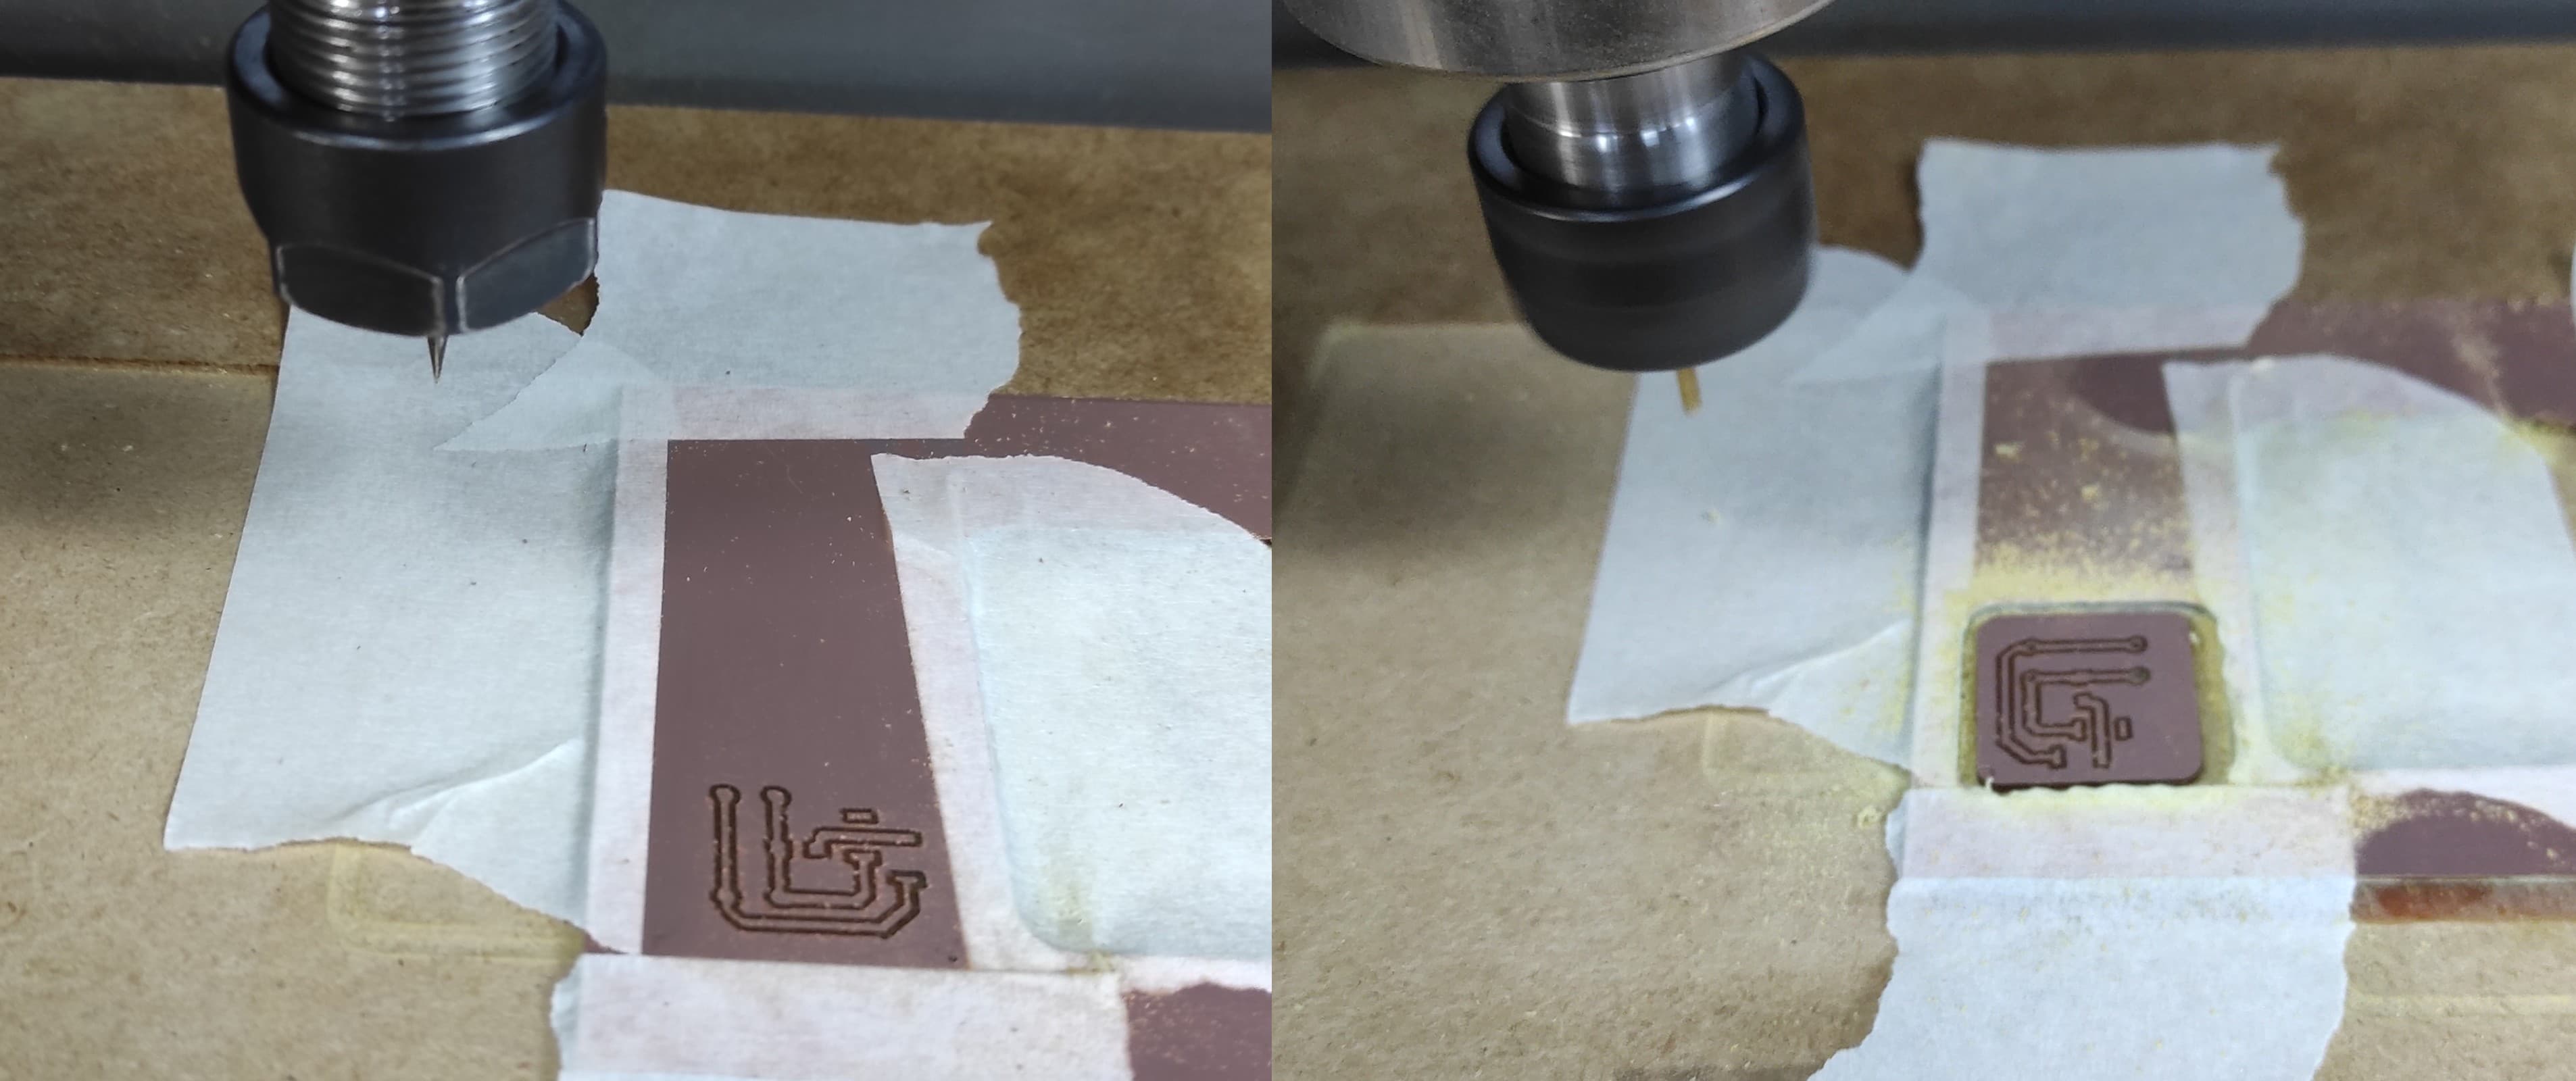
After the manufacturing process, I soldered the components onto the board.
Finally, I completed the fabrication and assembly of the third PCB as well.
8.2 Files:
Here are the files available for download.
1. G-Code PCB Leds : Gcode_pcb_leds.rar
2. G-Code PCB Button : Gcode_pcb_button.rar
3. G-Code PCB Central : Gcode_pcb_central.rar
Week 9: Input Devices
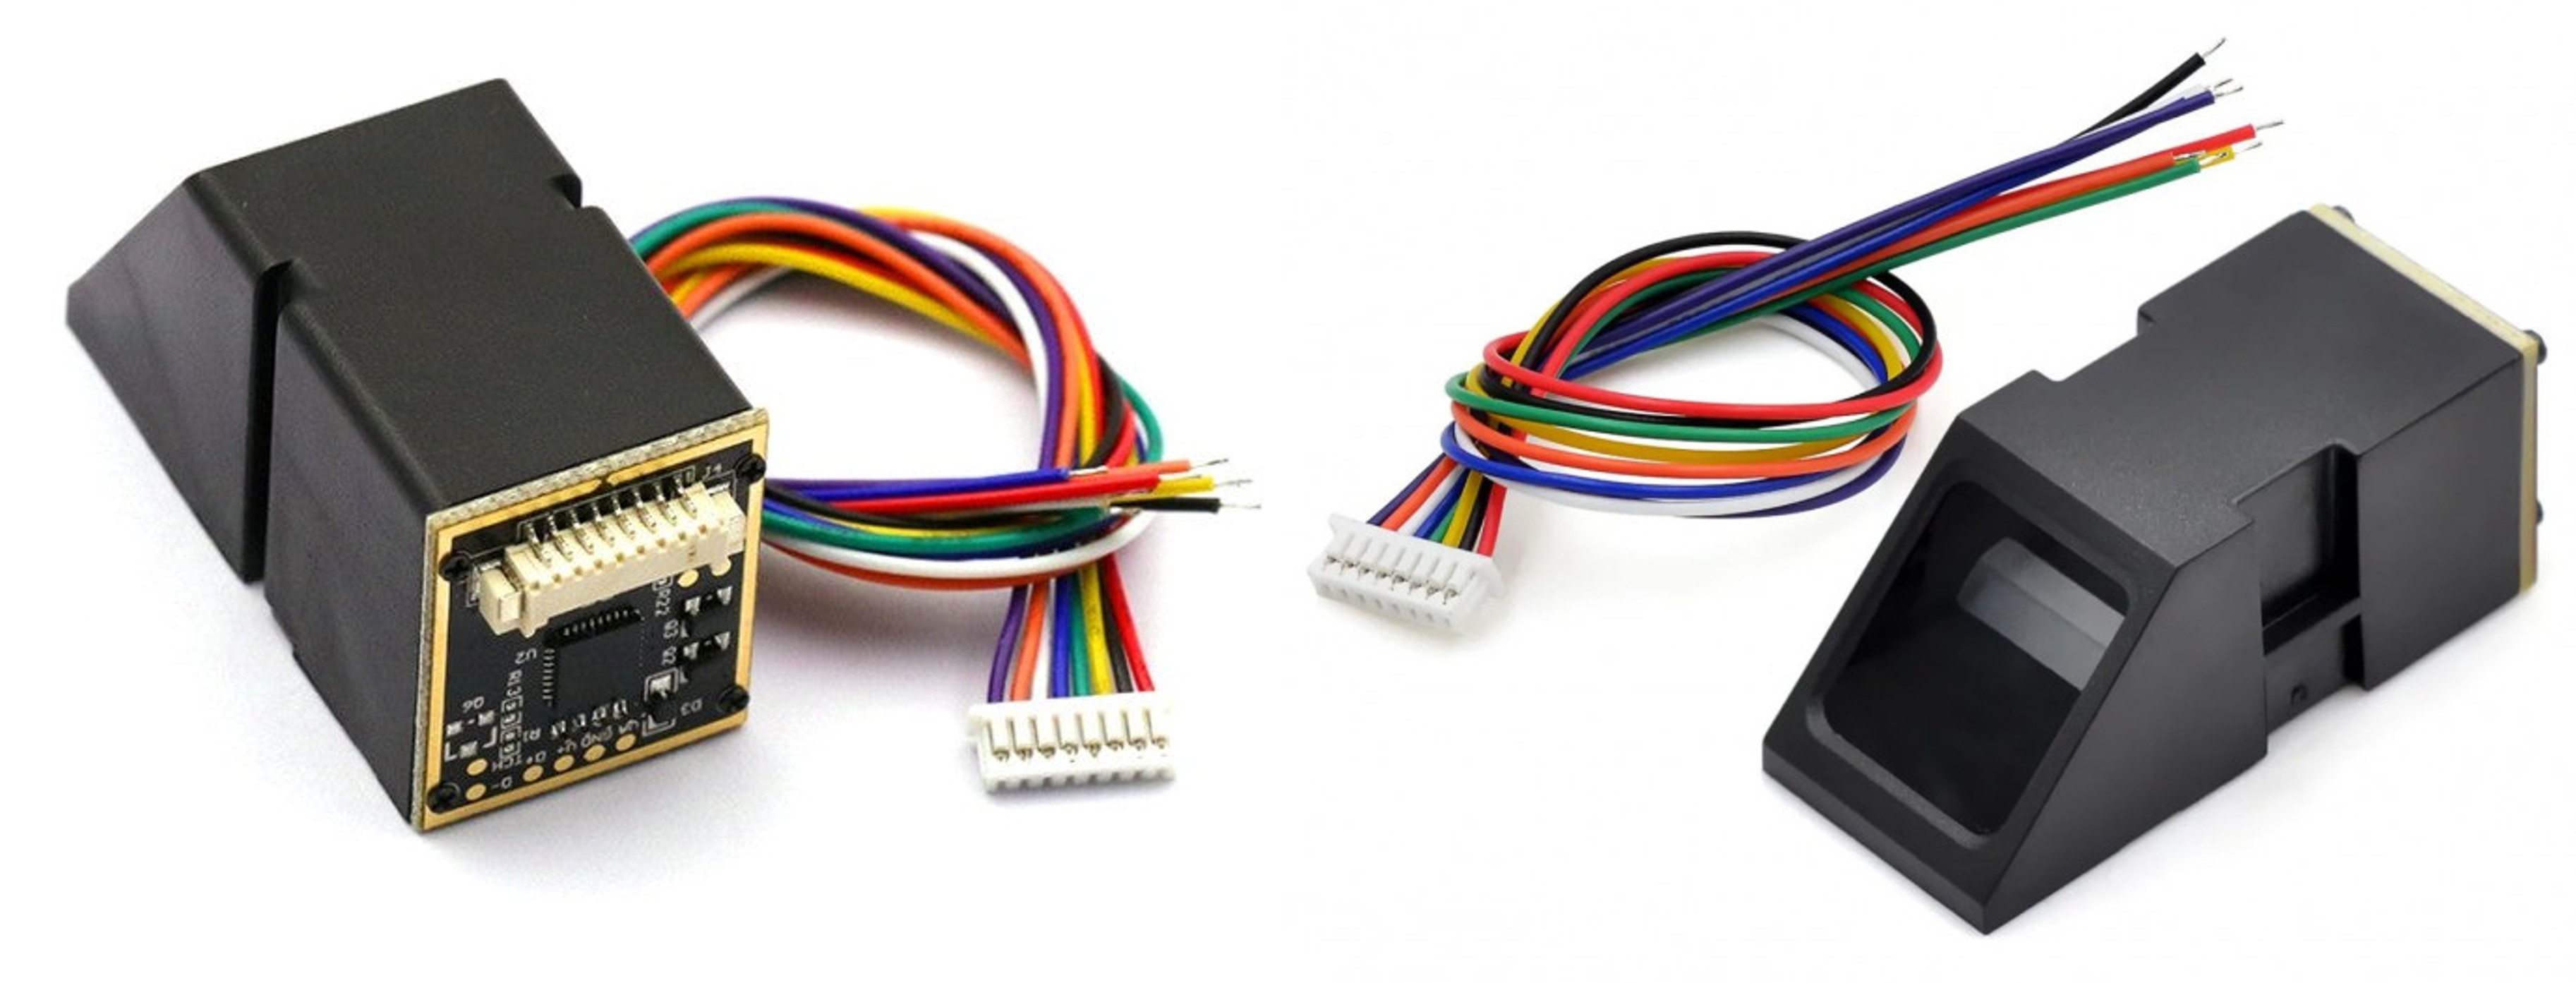
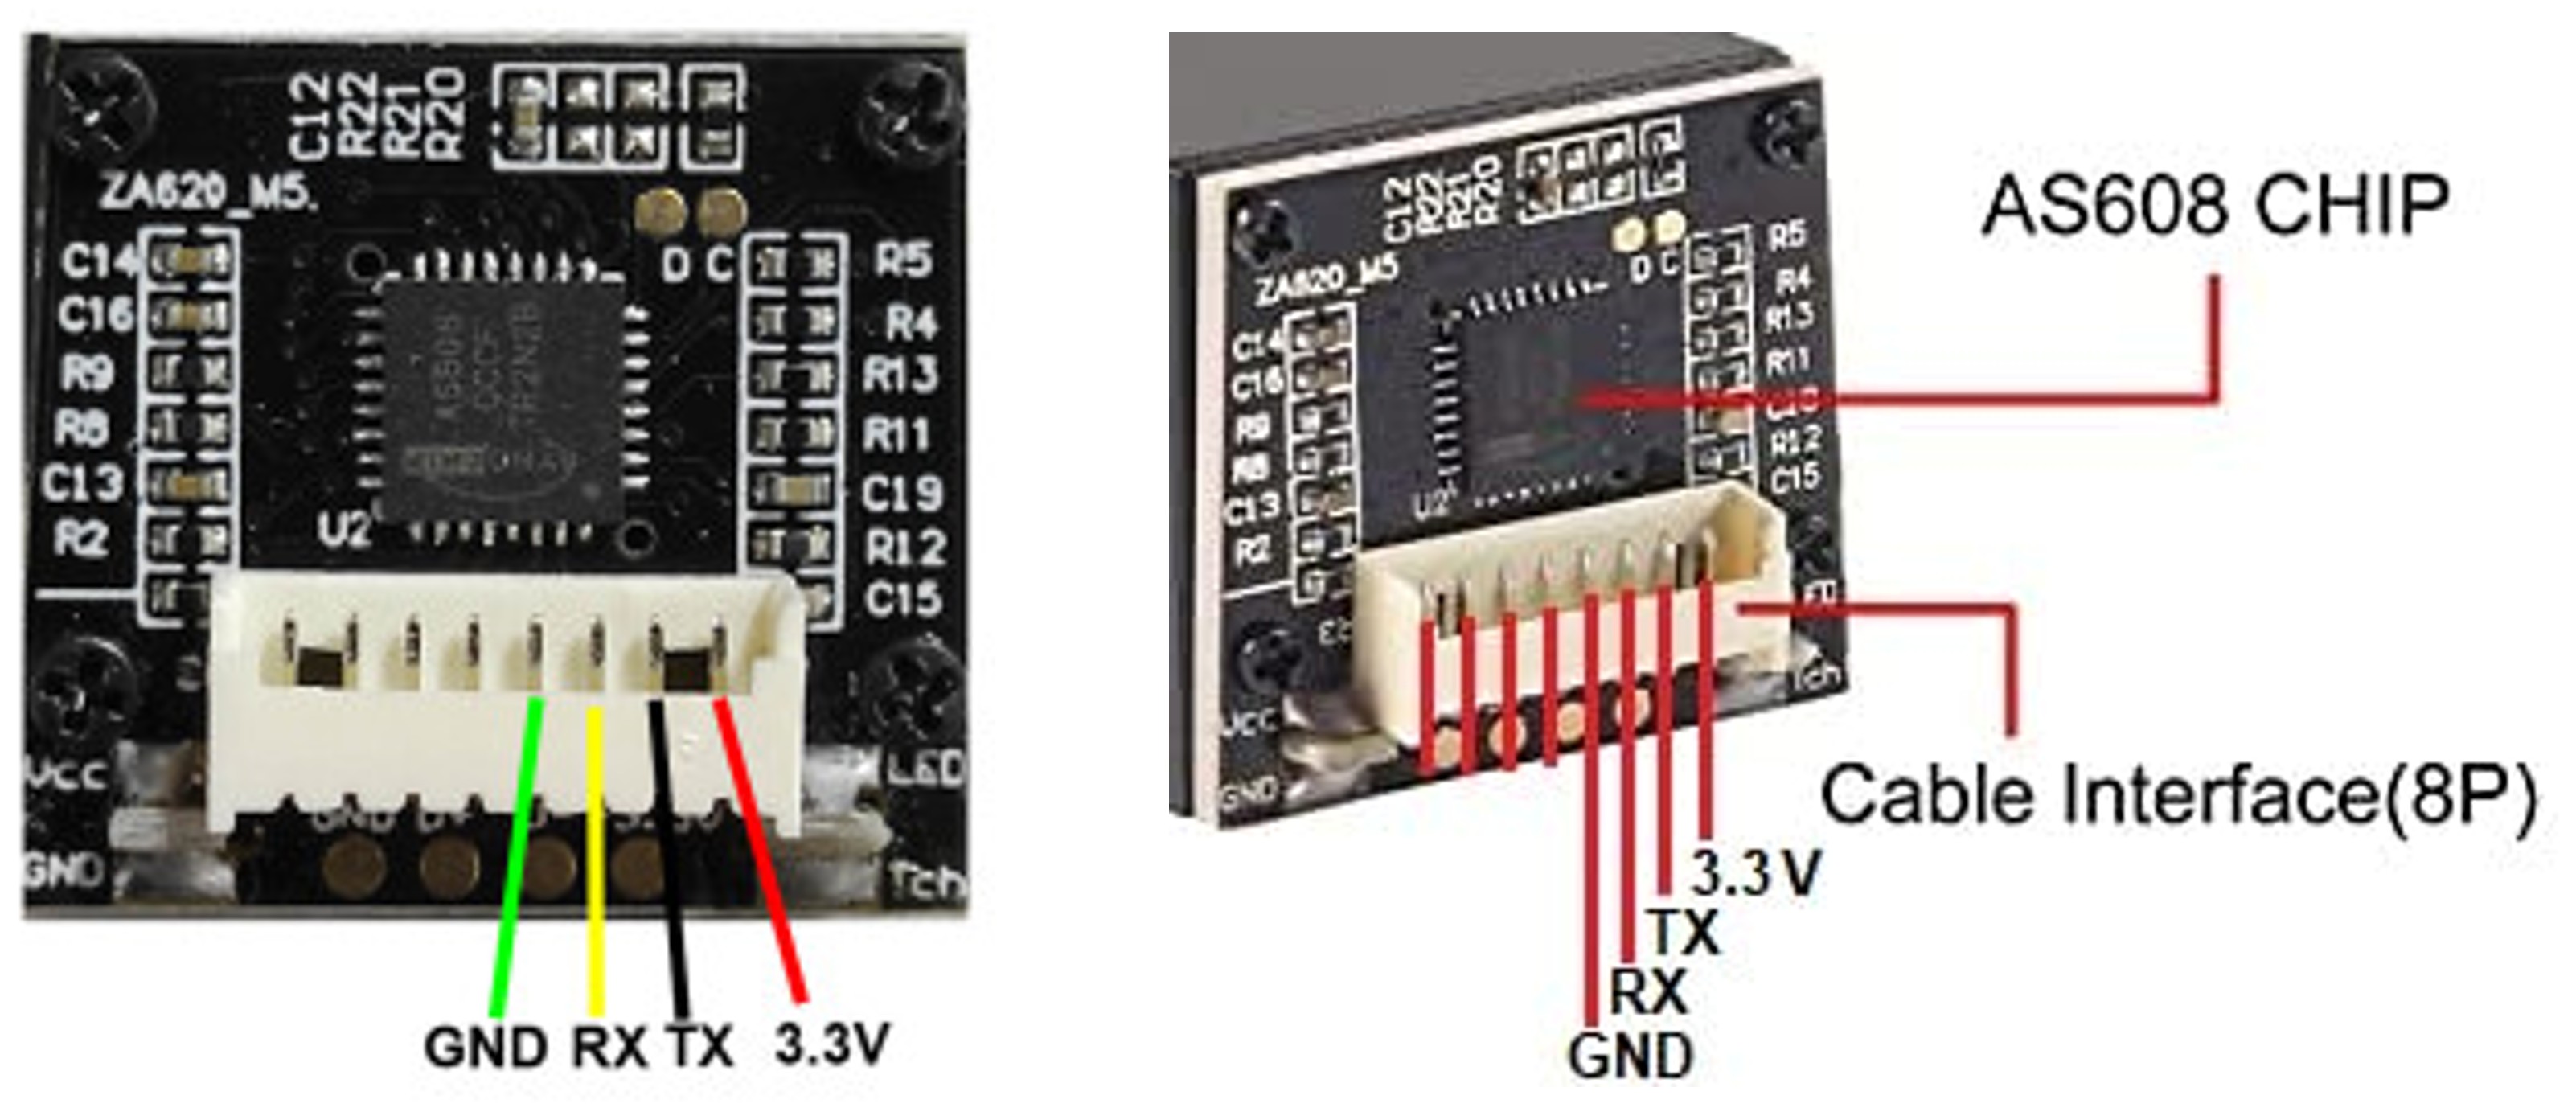
9.1 AS608 Optical Fingerprint Module JM-101
The JM-101 fingerprint module is an integrated fingerprint processing module that integrates the optical path and fingerprint processing part. It has the characteristics of small size, low power consumption and simple interface. It has high reliability, fast recognition speed, good wet and dry finger adaptability, and fingerprint search. high speed. JM-101 module communication interface is USB and UART communication interface.
9.2 Pin out - Module JM-101
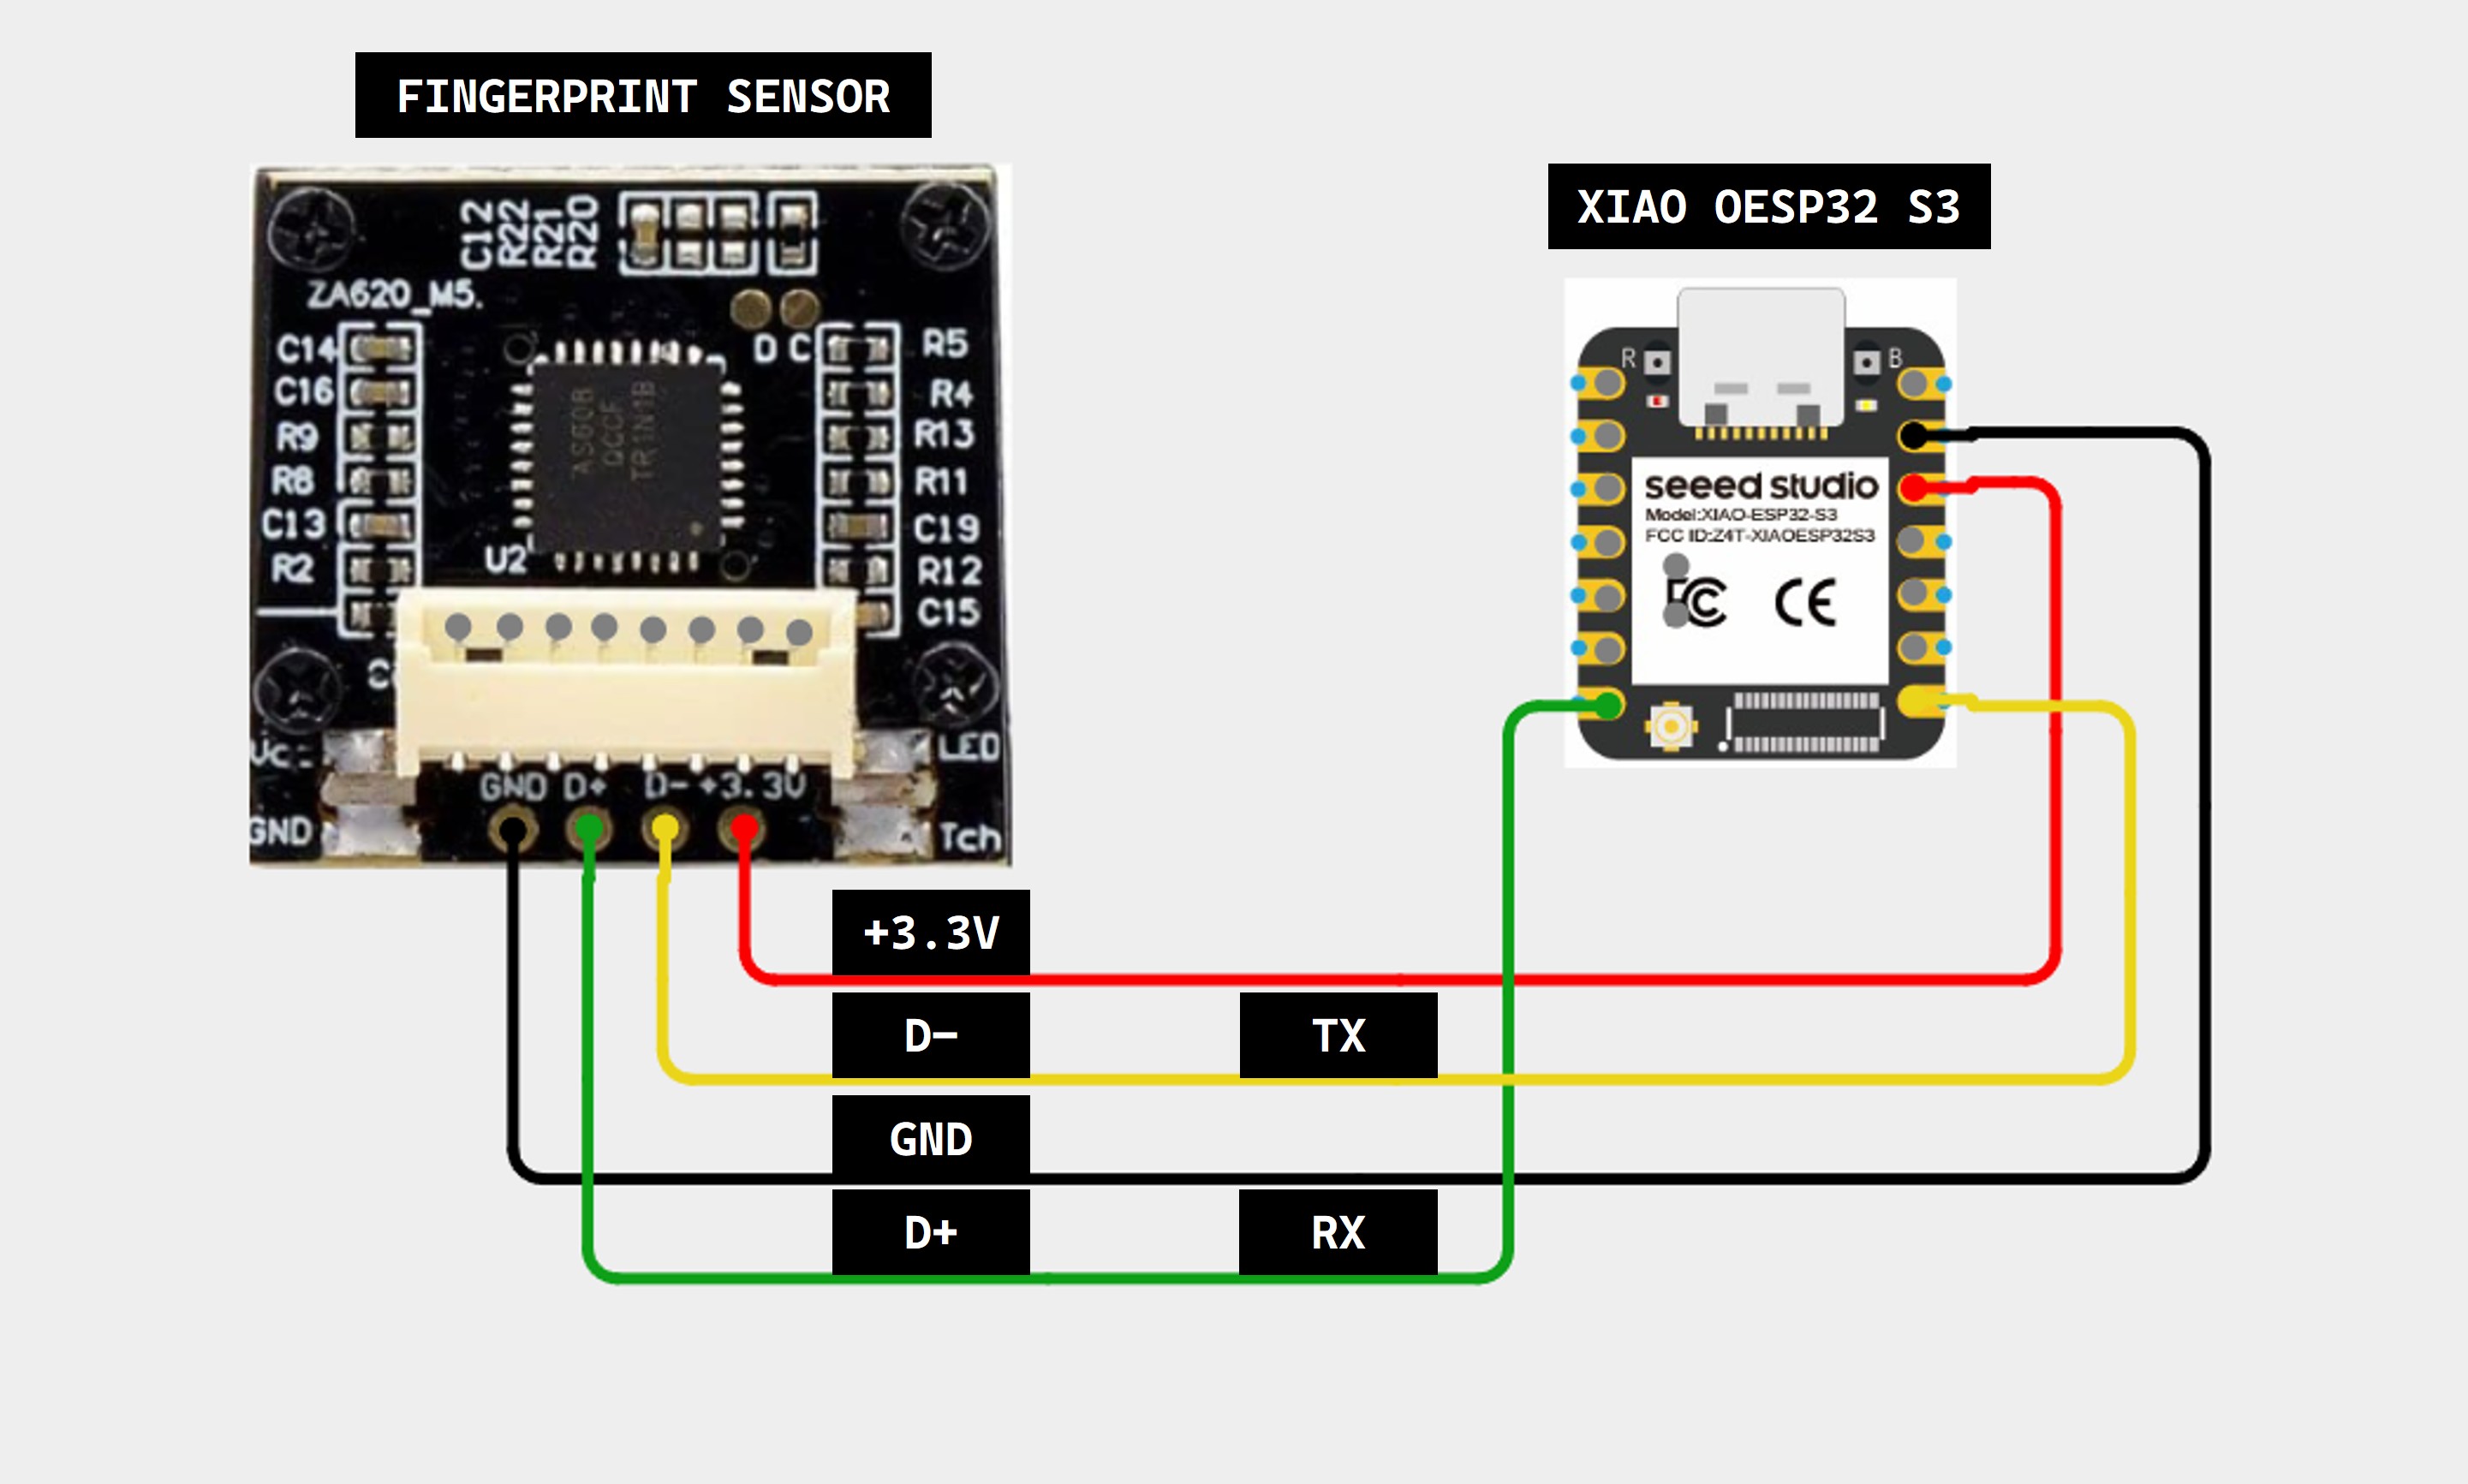
We need to connect the JM-101 module to the Xiao ESP32 S3 board as in the image given below:
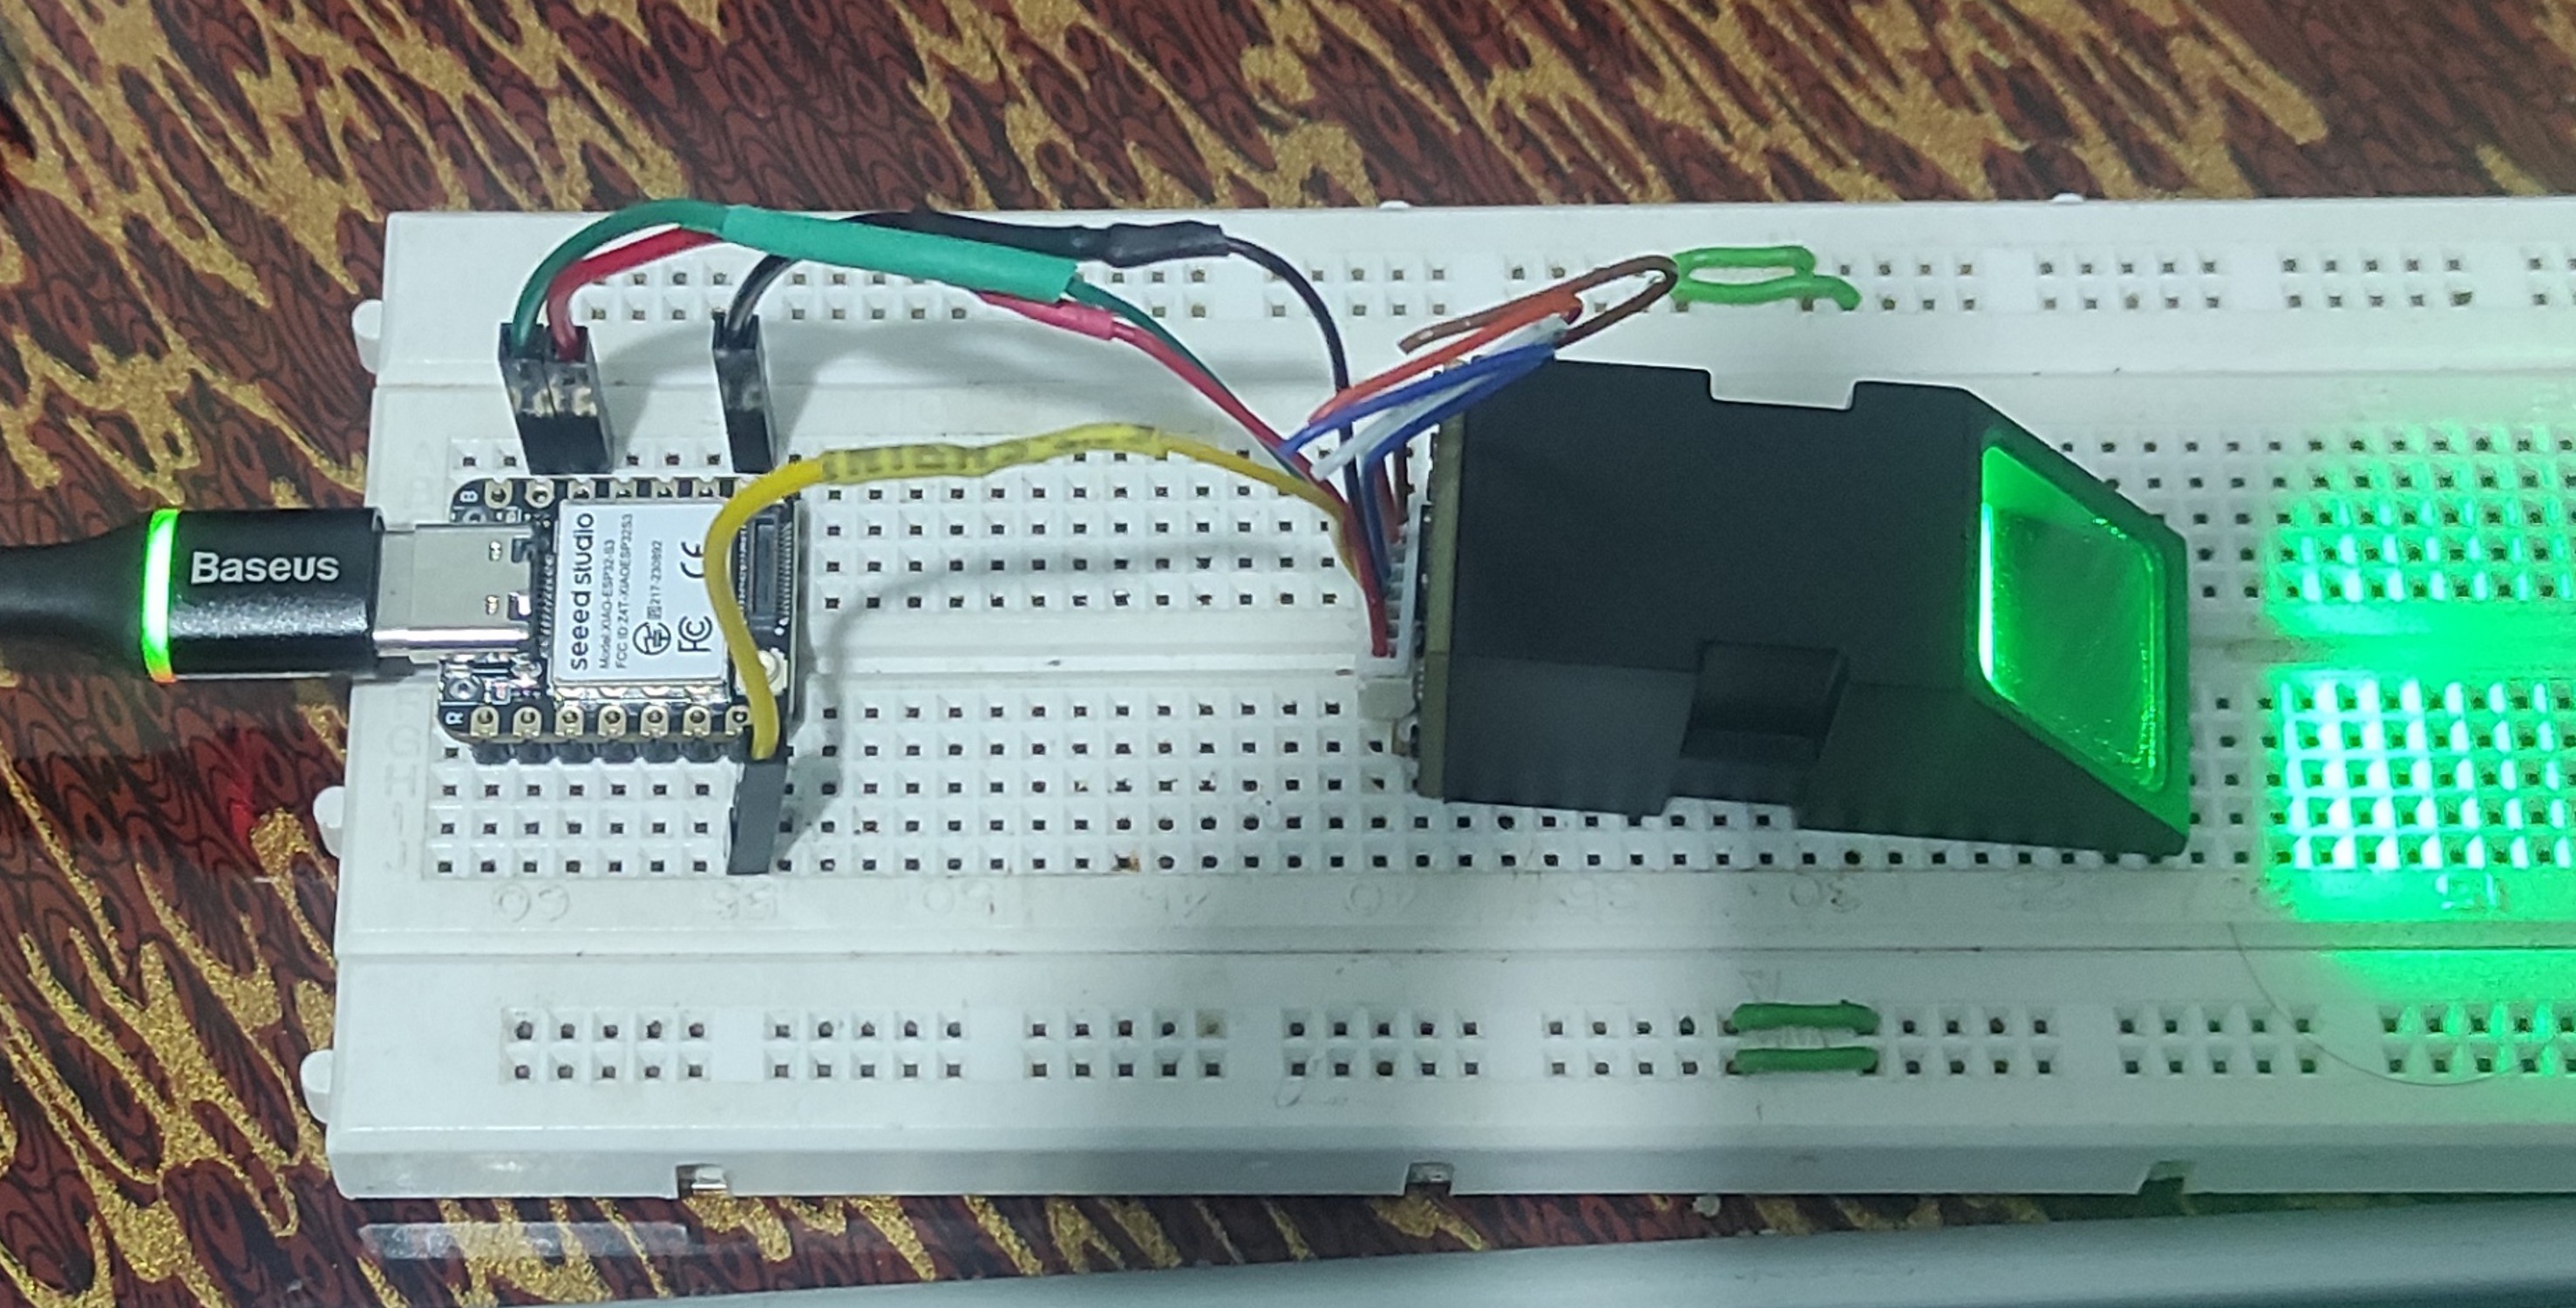
9.3 Connection JM-101 with Xiao ESP32 S3
The JM-101 module has a total of 8 pins, which are:
9.4 Saving a Fingerprint
To save a fingerprint using the AS608 Optical Fingerprint Module (commonly sold as the JM-101), we used the Adafruit Fingerprint Sensor Library to communicate with the sensor and manage fingerprint enrollment and storage.
The following code saves a fingerprint to the sensor, and the fingerprint data is stored in the sensor module’s internal memory.
    #include <Adafruit_Fingerprint.h>

    HardwareSerial mySerial(1);

    #define RX_PIN 44
    #define TX_PIN 43

    Adafruit_Fingerprint finger = Adafruit_Fingerprint(&mySerial);

    int id = 1;

    void setup()
    {
        Serial.begin(115200);
        delay(2000);

        mySerial.begin(57600, SERIAL_8N1, RX_PIN, TX_PIN);

        Serial.println("=== REGISTRO DE HUELLA ===");

        finger.begin(57600);

        if(finger.verifyPassword())
        {
            Serial.println("Sensor listo ✔");
        }
        else
        {
            Serial.println("Error sensor ❌");

            while(1);
        }

        Serial.println("Listo para registrar...");
    }

    void loop()
    {
        enrollFingerprint(id);

        while(1);
    }

    void enrollFingerprint(int id)
    {
        int p = -1;

        Serial.print("Registrando ID #");
        Serial.println(id);

        // -------- PRIMER ESCANEO --------

        Serial.println("👉 Coloca tu dedo...");

        while(p != FINGERPRINT_OK)
        {
            p = finger.getImage();
        }

        Serial.println("✔ Imagen 1 capturada");

        if(finger.image2Tz(1) != FINGERPRINT_OK)
        {
            Serial.println("❌ Error imagen 1");
            return;
        }

        // -------- RETIRAR DEDO --------

        Serial.println("✋ Retira el dedo...");

        delay(2000);

        while(finger.getImage() != FINGERPRINT_NOFINGER);

        // -------- SEGUNDO ESCANEO --------

        Serial.println("👉 Coloca el MISMO dedo otra vez...");

        p = -1;

        while(p != FINGERPRINT_OK)
        {
            p = finger.getImage();
        }

        Serial.println("✔ Imagen 2 capturada");

        if(finger.image2Tz(2) != FINGERPRINT_OK)
        {
            Serial.println("❌ Error imagen 2");
            return;
        }

        // -------- CREAR MODELO --------

        if(finger.createModel() != FINGERPRINT_OK)
        {
            Serial.println("❌ Las huellas no coinciden");
            return;
        }

        // -------- GUARDAR --------

        if(finger.storeModel(id) == FINGERPRINT_OK)
        {
            Serial.println("🎉 Huella guardada correctamente!");
        }
        else
        {
            Serial.println("❌ Error al guardar");
        }
    }
9.5. Files
Here are the files available for download.