3D scanning and printing
Group Assignment
- Test the design rules for your 3D printer(s)
- Document your work on the group work page and reflect on your individual page what you learned about characteristics of your printer(s)
Individual Assignment
- Design, document and 3D print an object (small, few cm3, limited by printer time) that could not be easily made subtractively
- 3D scan an object (and optionally print it)
Additional Learning
- Tom Dubick sent us a link to learn about tedxt to 3D printing from an article. I chose to visit Meshy AI and see if i could create a small figit toy to display for our team and teach the FTC team students about the tool.
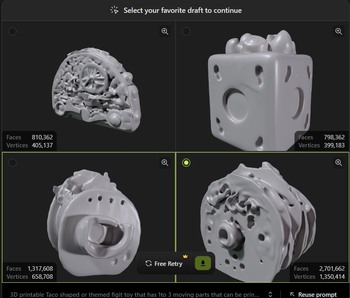
PROMPT: 3D printable Taco shaped or themed figit toy that has some moving parts that can be printed in place or snapped together. max assembled size fits in a 3-4 cm cube
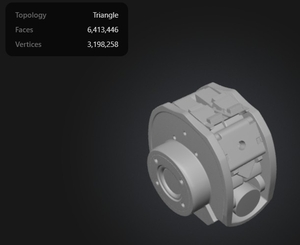
It generated a shape. I would have to bring it into fusion and do a section analysis to see if it really has moveable parts. It has millions of facets.. so maybe i should take it to blender and remesh - or see if it will let me do it here in the free version.
Hurdle - since I used the meshy 6 model - I can't download it without a paid subscription. I re-generated with Meshy 4 to see if that would give me something I could generate. I did slighly change the prompt.
PROMPT REVISION: 3D printable Taco shaped or themed figit toy that has 1to 3 moving parts that can be printed in place or snapped together. max assembled size fits in a 3-4 cm cube.
The generated models were not great (see below, so I didn't print them).
Would be impressive if it worked. At states today, I asked my Coding coach if he has a plus memberhip to chat to see what thier AI text to 3D can do. between all of us mentors we have various programs. So we will do that this summer. Hitem3 also seems to provide a free trial as well.
The Work Group
Link to our group page here The group work was good and I learned alot from my more experienced counterparts.
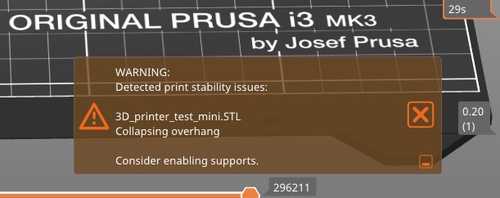
My Prusa gave me a collapse warning when I printed my tester for the group project. It didn't collapse, but it did fail in the over hang around 65 degrees.
cheatsheet of 3D printing
Overall, our bambu printers are great. I used our group work with a bit of AI to make myself a cheatsheet of 3D printing and more tests I can run on my 3D printers at home to get better results, and know my printer better. We have my daughters A-1 and my Prusa MK3s.
The Work Individual
My asset files are here. The obj scan file is not included becuase even zipped, it's 2.5MB.
3D Printing
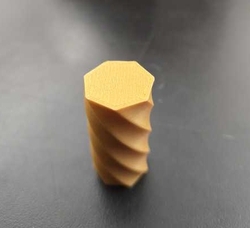
I started looking for examples of an object (small, few cm3, limited by printer time) that could not be easily made subtractively. I came across a site for Maki TANAKA which was really helpful and suggested this hinge tutorial for a hinge. A hinge would be great for my personal projects.
I followed the tutorial, but wanted to make it into a Taco shape to see if it would be a cute give away or learning for my FTC team. This was fun, but very small.
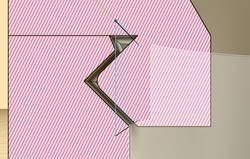
I had some issues with making the snap closure on the rounded edge, but by modifying the box size, I was able to make a better cut into the bottom.
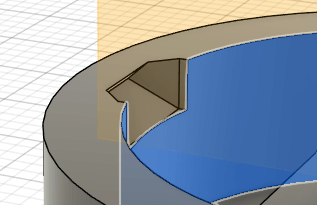
Then I learned to use the section analysis function - Awesome!!!! I used it to make the snap closure on the inside of the box and then used it at the end to check the snap closure at the end.
Once I got my box built. I started to do the work to add the joint so that I could lay it flat to be able to 3D print it. Unfortunately, the tutorial was made before fusion 360 changed the different file configurations that you could choose when starting a new project. I started my drawing in part mode and then could not make the bodies into components to move them around. From part mode, I could change to Assy mode by selecting the bodies and trying to make them components, but the two bodies were tied together as one part, so I could not get them to move independently and put in a joint.

After asking everyone in the lab, LOL, Angela Horstman showed me how to select the document settings and change it to hybrid mode which is the old mode. This allowed me to use the bodies to component.
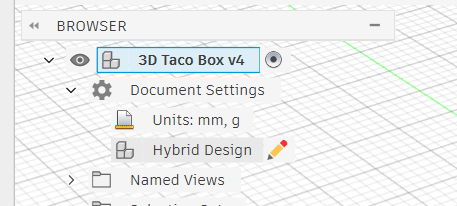
Chose the pencil by the Design type in document settings - in the original file that was in part design, and change to hybrid. Once I put it into hybrid mode, I was able to add my joint, then open it up, lay it flat, and send it to a bambu mini in the lab.
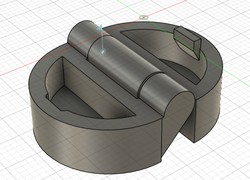
This is model has a hinge inside. It would not be able to be made by a subtractive process as the pole is printed inside the tube and they are separate pieces, but printed at the same time interlocking.
3D Printers
Any files, I need to start with getting an STL file to bring into a slicer.
Fusion 360 Right‑click the body or component you want to export Choose Save as Mesh Set Format , chose STL Click OK then Save
OnShape Right‑click the Part in the Parts list Select Export… Set Format as STL Choose Millimeters (if that is what you are using. Click OK
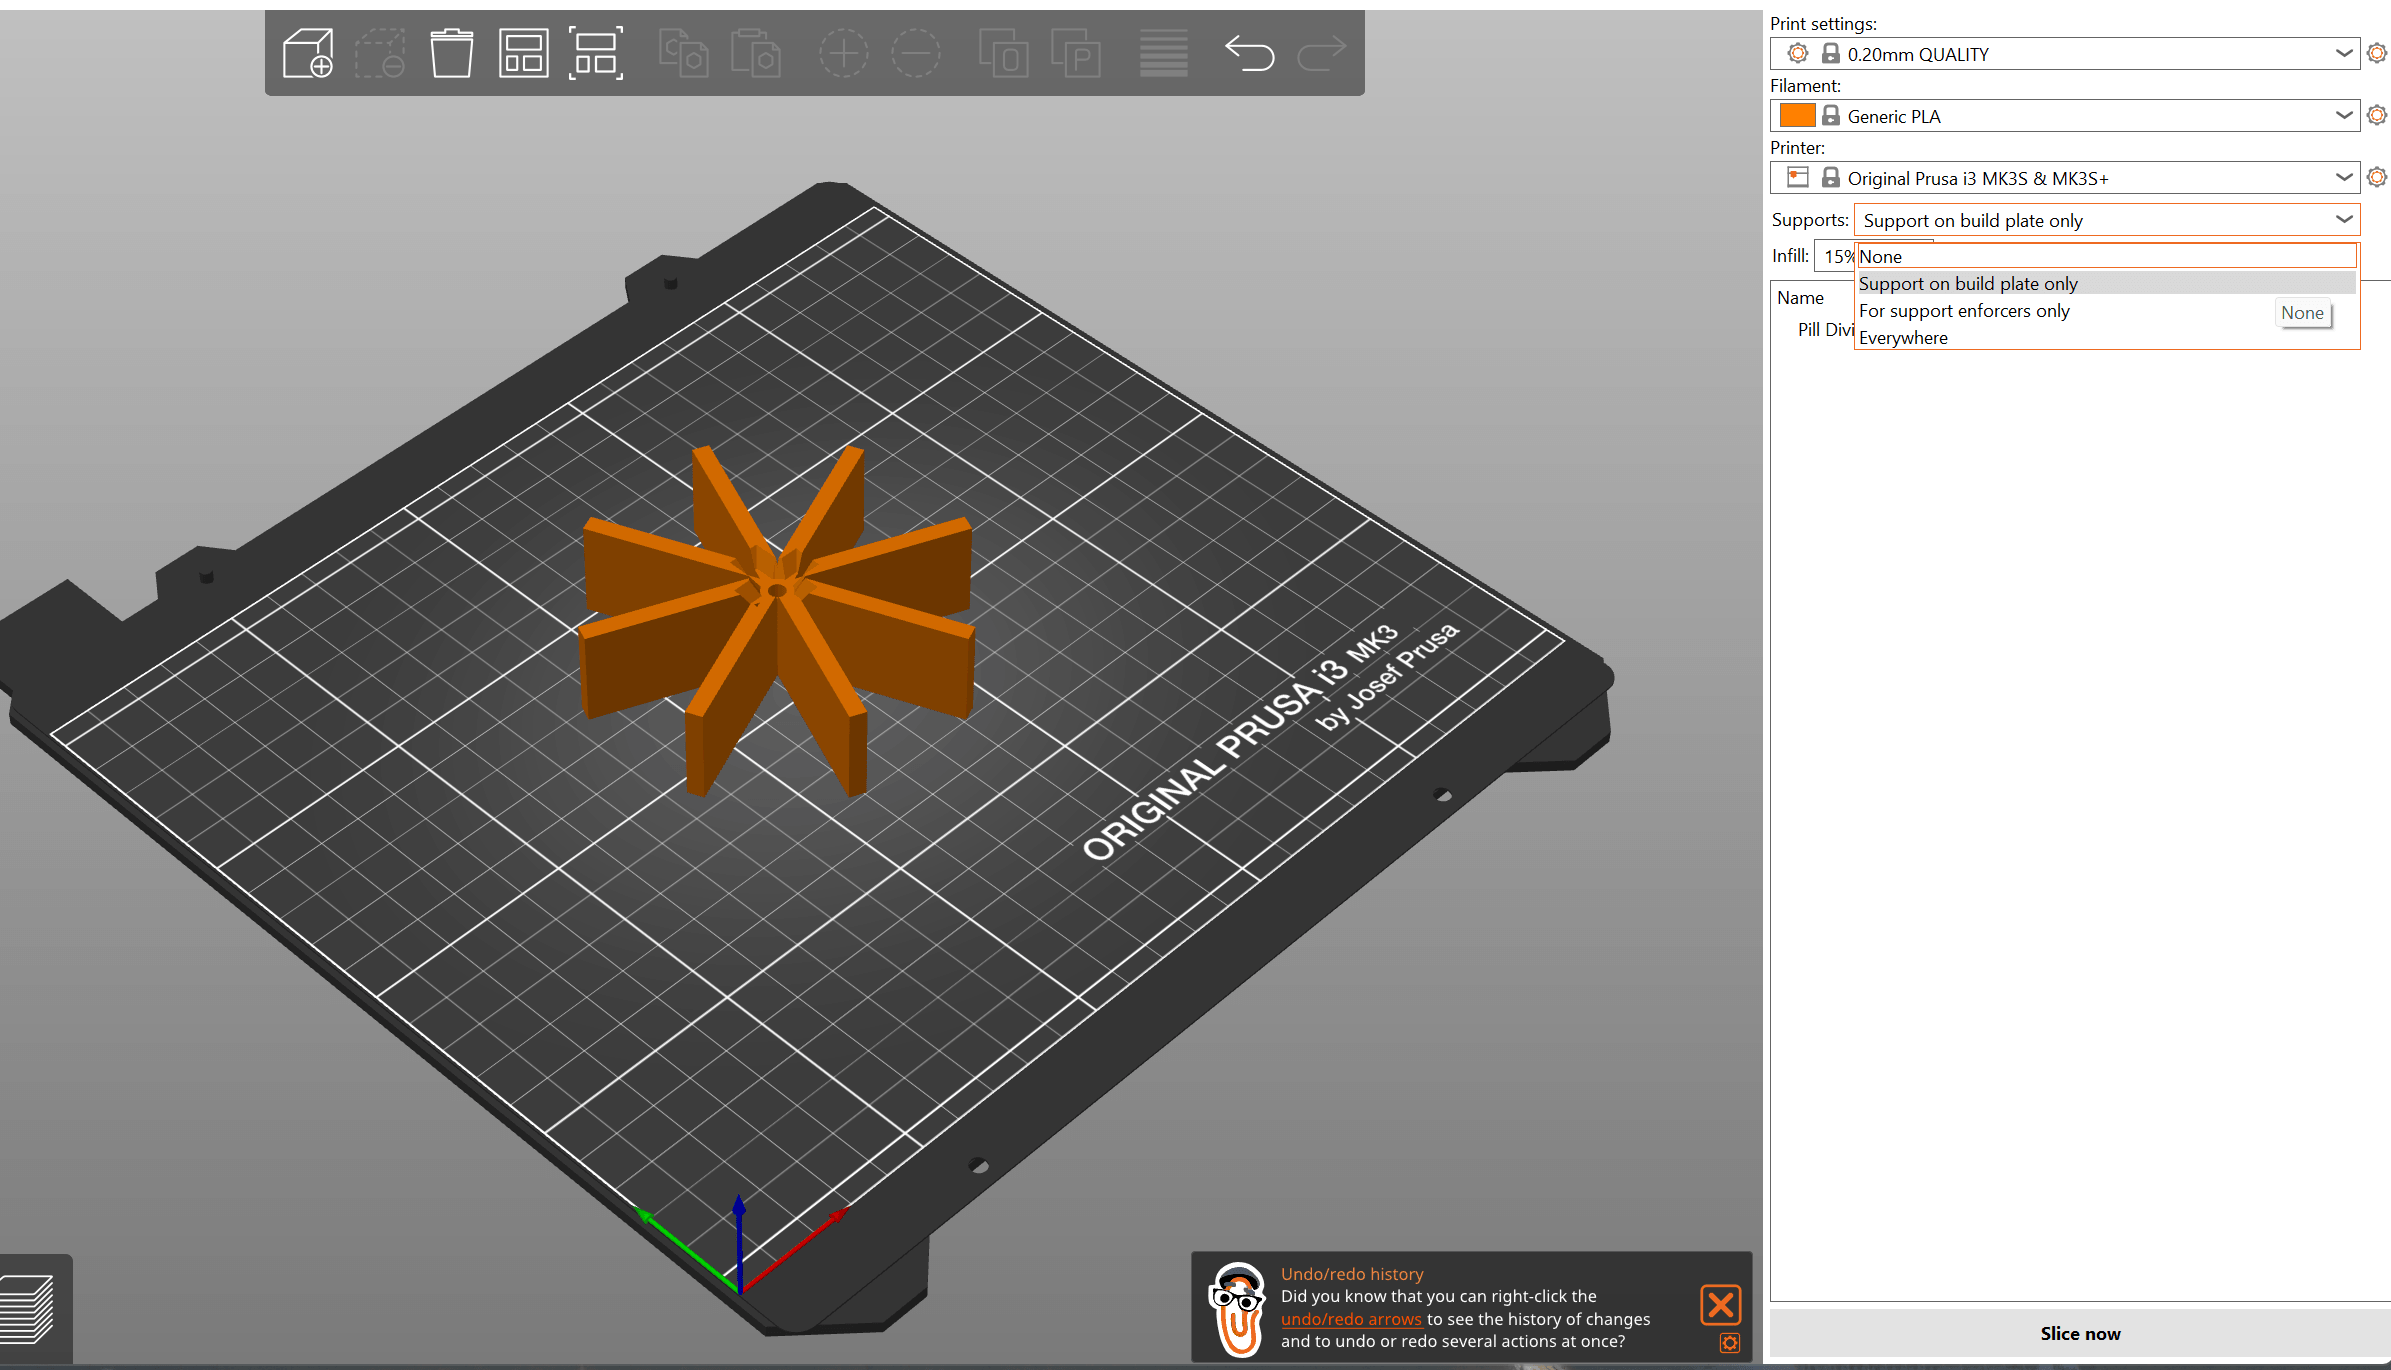
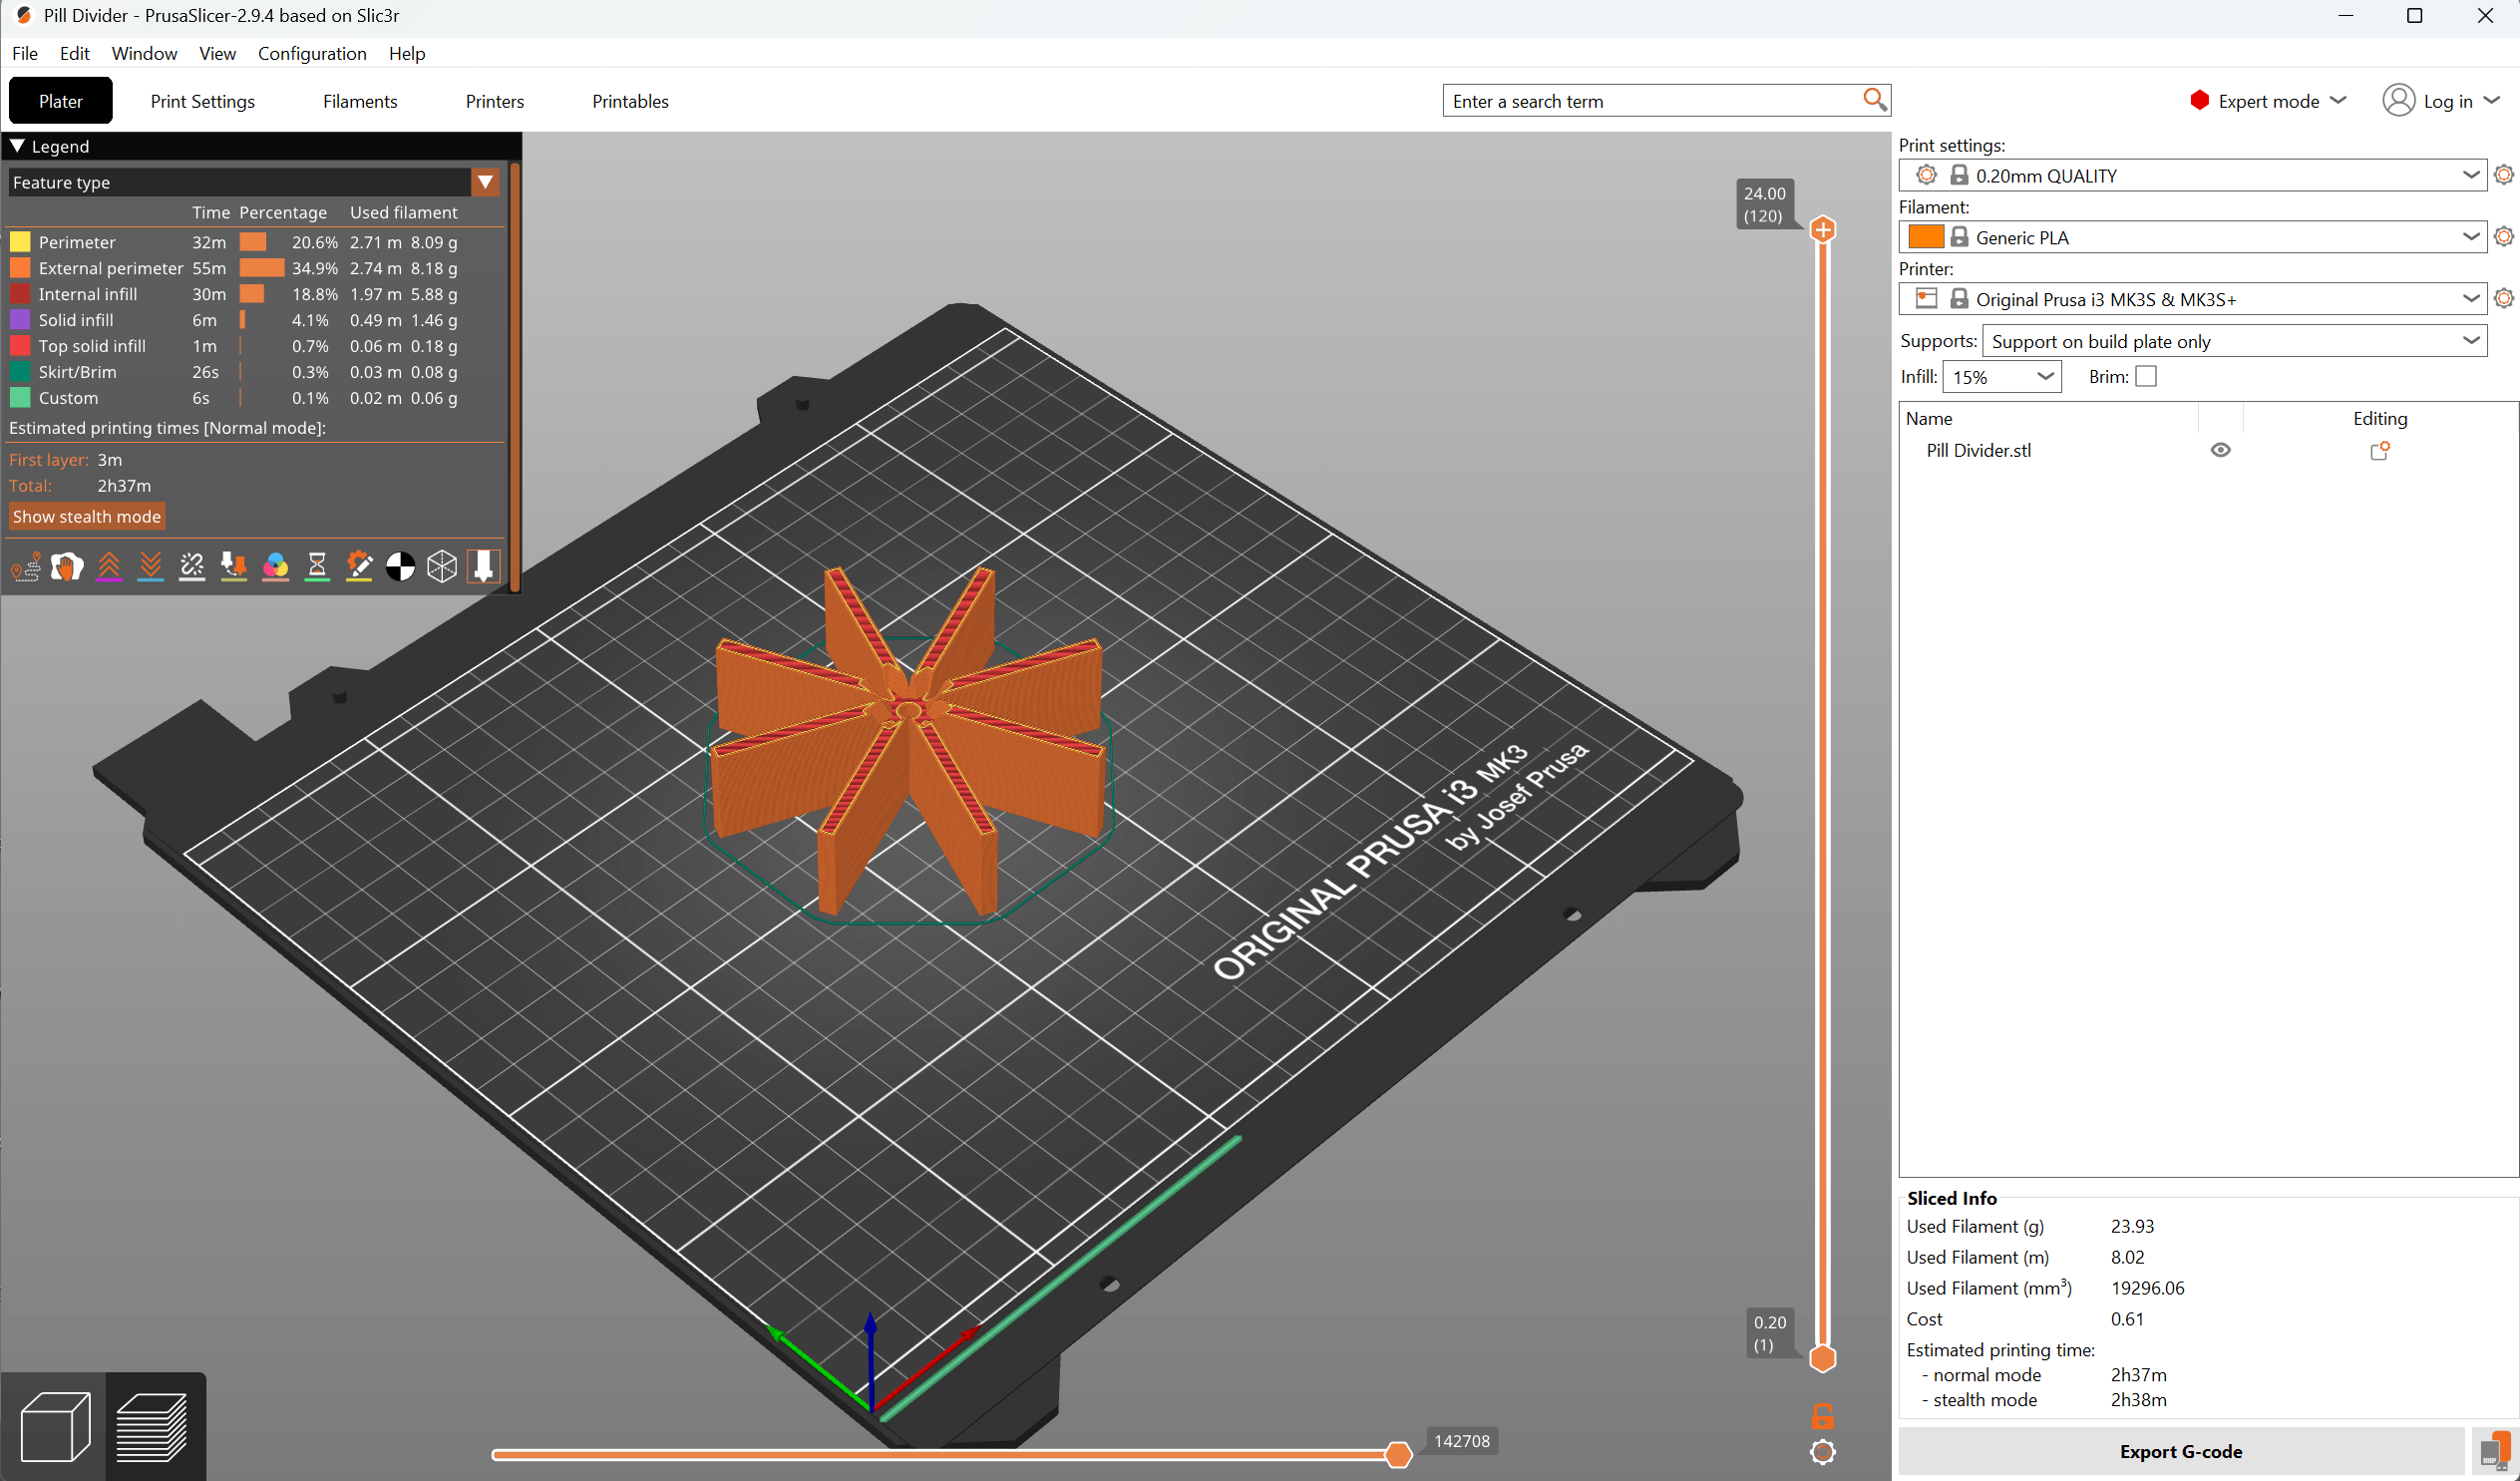
PRUSA MK3S The first printer is an older prusa mk3s. On that printer, I save the file to a mesh, as mentioned above when it's in Fusion 360, and then I bring that STL file into my prusa slicer using the file open commands. Once it's in the Prusa slicer, I use the icons at the top to lay it flat on the plate. On my prusa slicer I use the settings below to select my filament type, and print quality. If I need supports, I use the drop down to select how I want the supports.
After I slice the model, I then use the export g code to save the file to my computer.
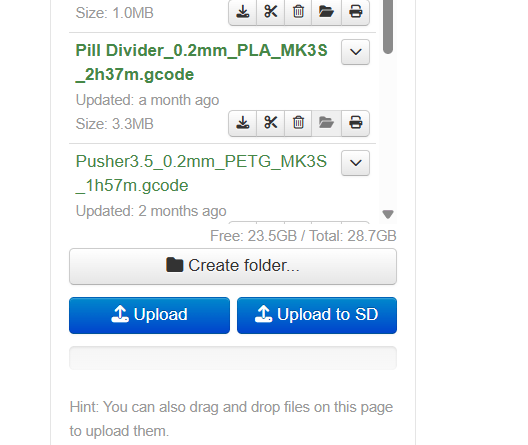
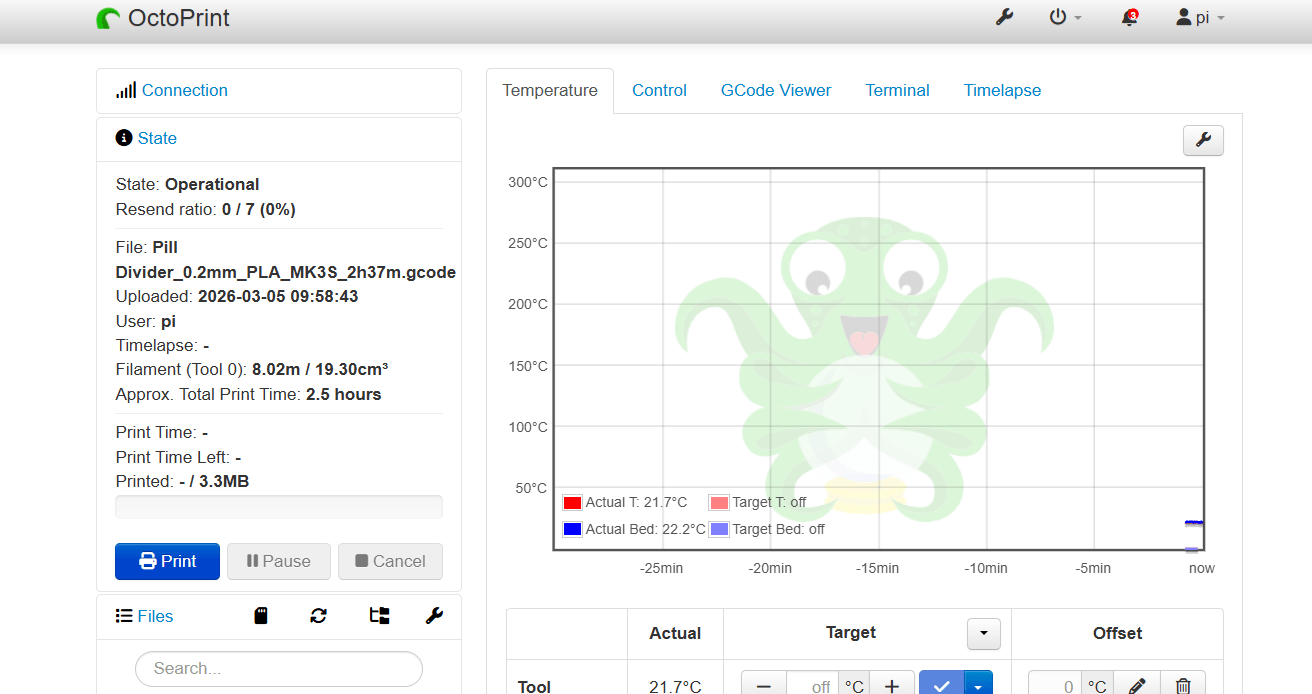
I then upload the gcode file to my octoprint.
Then send it to my prusa to be printed.
Bambu A-1 Printers at CLS
In order to avoid recreating the wheel, I asked Gemini to find me the documentation that was done on using the printers at the charlotte latin fab lab.
PROMPT: charlotte latin bambu printing work flow as documented in other fab academy site
Documentation from Charlotte Latin Fab Lab student sites Evan Park) and recent 2025 student pages outline a consistent workflow for 3D printing with Bambu Lab X1 Carbon and A1 Mini printers. [1, 2, 3]
Phase 1: Preparation in Bambu Studio 1. Import Model: Open the Bambu Studio slicer and import your .STL or .OBJ file. 2. Select Printer & Nozzle: Choose the correct machine profile (e.g., Bambu Lab X1 Carbon or A1 Mini) and ensure the nozzle size matches the hardware, typically 0.4mm. 3. Filament Selection: Configure the filament type (e.g., PLA HD or Generic PLA). 4. Orientation & Layout: Position the model to minimize overhangs or required supports. Students often recommend orienting complex parts upside down to reduce finishing work. [2, 4, 5, 6, 7, 8, 9]
Phase 2: Slicing Parameters
- Layer Height: Commonly set between 0.16mm and 0.2mm for standard projects.
- Supports: Use tree-like supports for easier removal and better surface finish.
- Infill: A standard setting documented is 15% grid.
- Slice: Select "Slice Plate" to generate the G-code and verify the print time and material usage. [4, 7, 8, 9]
Phase 3: Printing & Monitoring 1. Calibration: Ensure Bed Leveling and Flow Rate Calibration are checked before starting to prevent failures. 2. Send Job: Click "Print Plate" to send the file to the printer over the network. 3. Monitoring: Use the Bambu Handy app or the built-in camera in Bambu Studio to monitor the first layers and overall progress remotely. [9, 10, 11, 12]
Phase 4: Post-Processing
- Removal: Carefully remove the print from the flexible build plate after it has cooled.
- Support Removal: Pull off tree supports; use sandpaper if necessary to smooth rough surfaces. [4, 9]
Sources: [1] https://fabacademy.org [2] https://fabacademy.org [3] https://fabacademy.org [4] https://fabacademy.org [5] https://ms-kb.msd.unimelb.edu.au [6] https://fablab.gsd.harvard.edu [7] https://fabacademy.org [8] https://fabacademy.org [9] https://fabacademy.org [10] https://fabacademy.org [11] https://wiki.bambulab.com [12] https://bambulab.com
My Prints
I made all my prints with PLA. So the settings above are the same. So my first print was a fail in two ways. The print came in at a lare scale. I Used .3mf and some settings somewhere must have been off even though I made the model in mm and it asked me if I wanted to import in mm. So who knows.
I enabled supports in my model, but if there were any, I did not see them. Due to the small size of my part, I am not sure that it needed to make any.

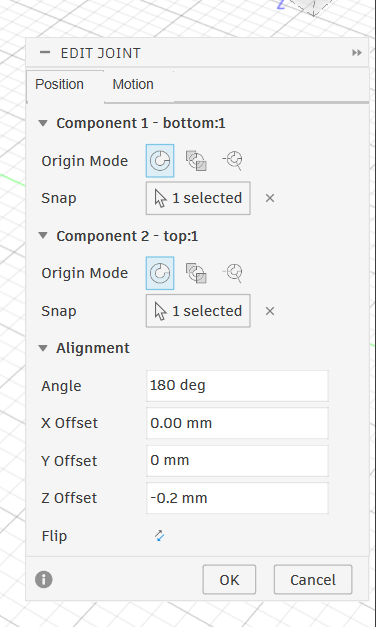
The second fail point was that I didnt use an offset in te joint so one side fused together.
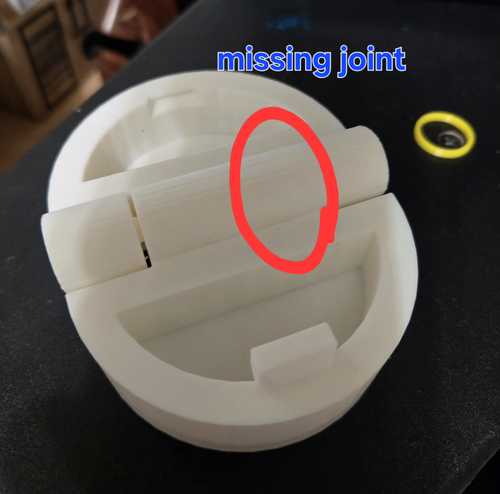
I fixed the joint in the model by adding and offset from where the revolute mate/joint was located.
Then I exported to a stl. I printed at home my daughters A-1. I get a lot of feedback about how it's so much better than my Prusa MK3s. My prusa is a bit older and a bit slower, but she has been a steadfast workhorse.
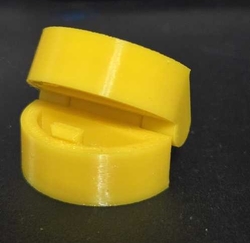
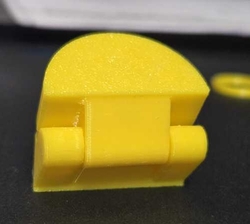
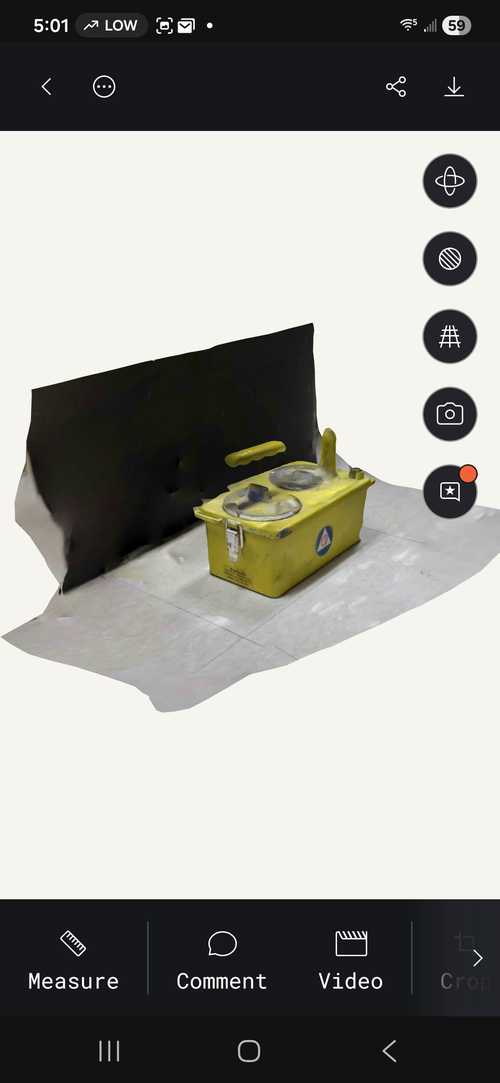
Voila.. little yellow taco box that hinges and even snaps closed. It is a little creaky which leads me to believe there could have been some suports in there that broke off but are moving around or it could be the tight fit of the hinge.
3D Scanning and Printing
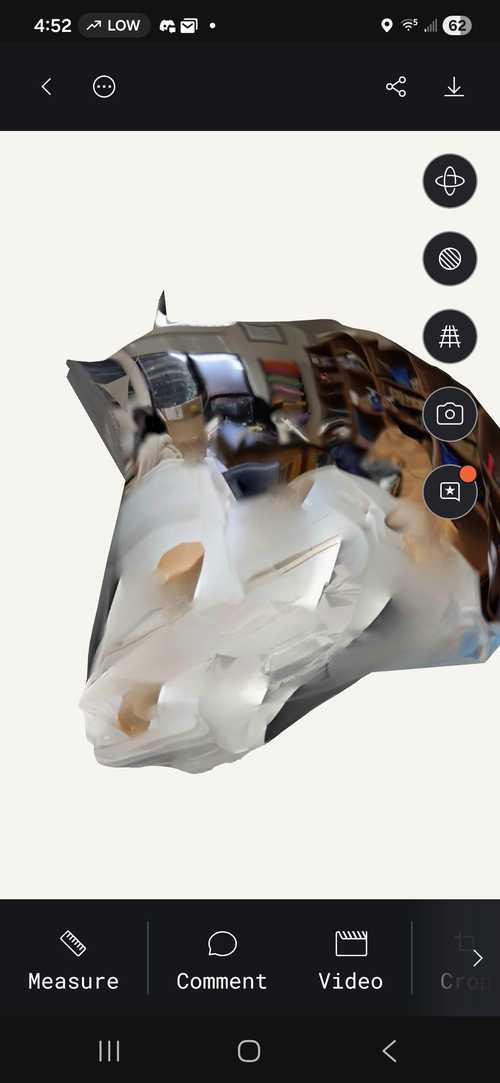
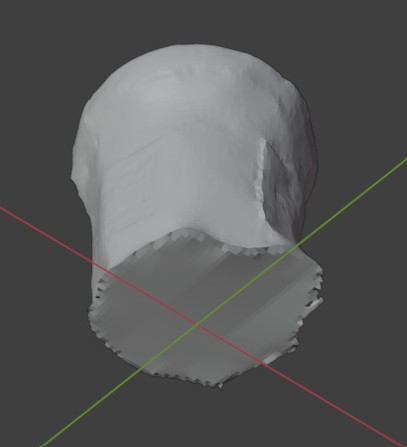
Garrett Nelson suggested that I look into Gaussian Splatting. It's how they are making and manipulating point clouds. It looks like polycam uses them. I downloaded polycam onto my phone and started scanning. I started with scanning a little 3D print piece that I found.
Scan looks NOTHING like the print...LOL
I took some pictures of it, but I didn't understand that it was continually shooting pictures once start was clicked and thought I had to turn it off and on each time as I went around.
Then I figured out that it was taking the pictures and put a gieger counter on the floor and went all around it letting the app take the pictures. I forgot to take a picture of the bottom.
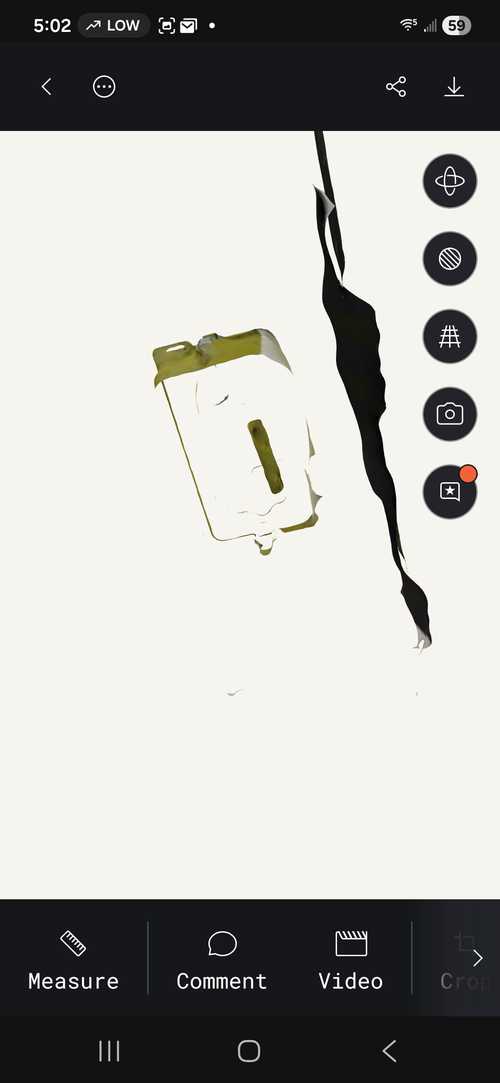
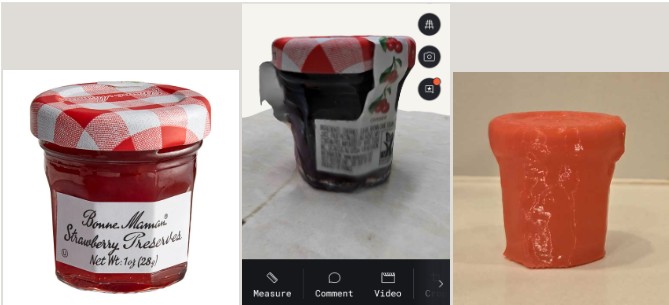
Then I wanted to scan something smaller that I could print. I scanned a JAM jar. Allowing the polycam to take the pictures, including pictures of the bottom.

Then I looked at the properties and could see that it was 52 images and 3.2 MB
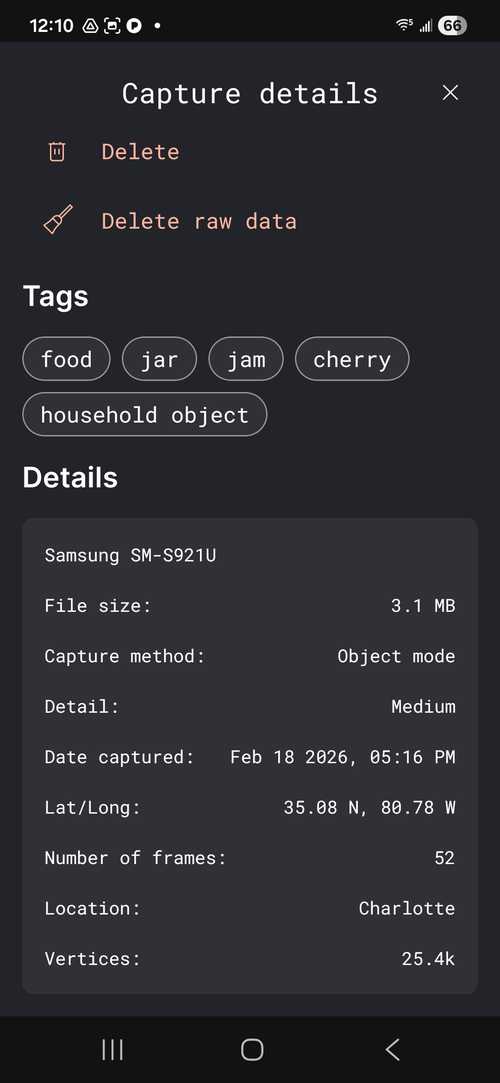
Still no bottom, although I took pictures of it.

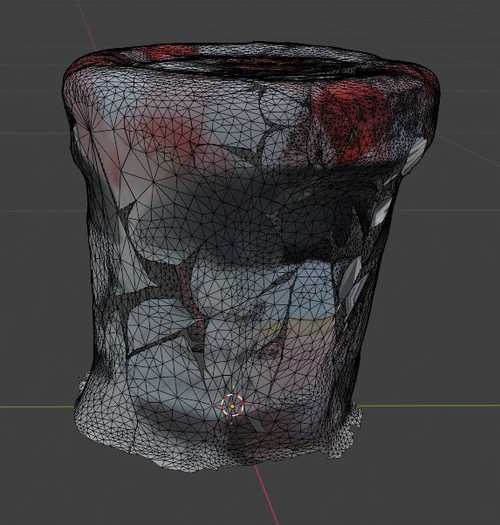
I brought the glb file it into blender and starte to play with taking off the extra tag and trying to close the bottom.
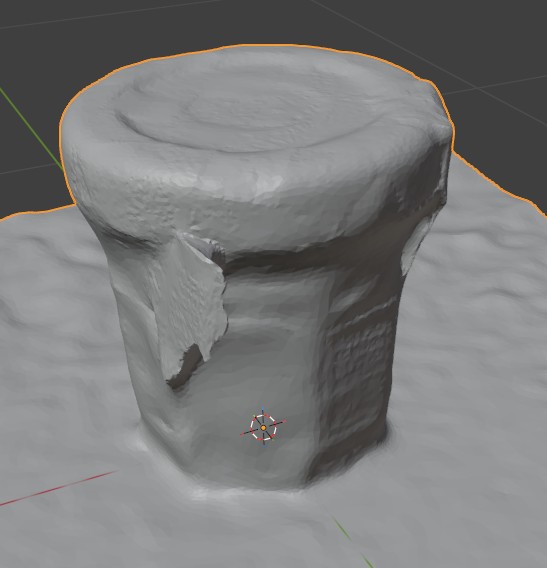
It was an amazingly good replication in the render.
I want to edit and work on filling the hold made by removing the tab and deleting the additional vertices and faces that I didn't want (the floor, stragglers..)

But after two hours of selecting faces and filling.... I decided to try something else maybe later. It was excruciating. However, I did learn a little about faces and vertices.
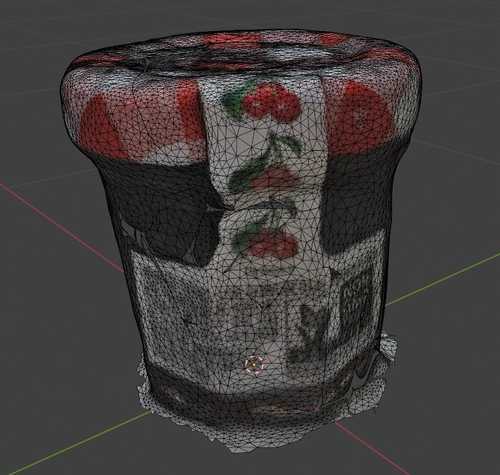
After a break, I found another youtube tutorial which helped me make the mesh into a solid. Object mode - Remesh Command & Decimate Command. This reduced the number of faces and made some triangels into polygons.
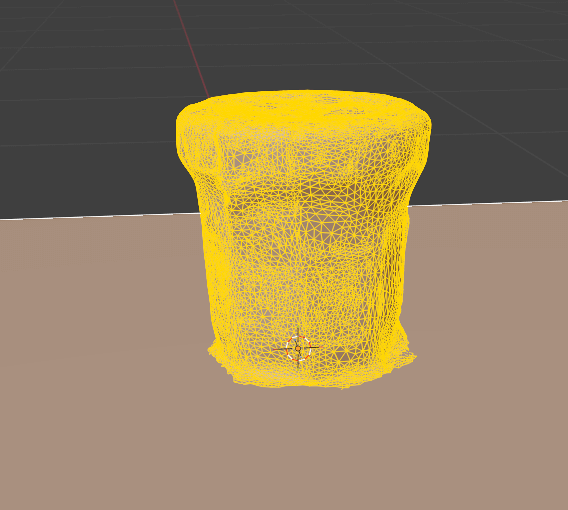
I lost quite a bit of resolution, but I could see how with practice and patience (which I didn't have anymore), one would be able to make a more accurate replica of the scan.
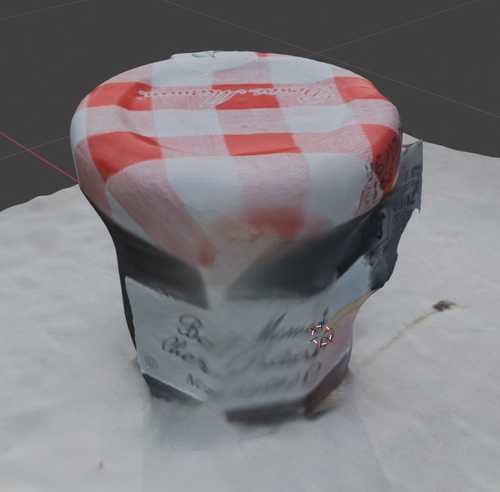
After closing the bottom. the tutorial took us into sculpt mode which was fun to play with. I used the crease sharpen and the clay thumb to manipulate the model. This would have worked better with a smooth model maybe vs a jar that has / needs sharp edges. I used flatten verices to try to work on the sides. The color scan from before in render mode has realy changed where I did the sculpting work, but the other side looks pretty good.
Now I am going to try to print. When I brought the exported stl into Bambu, the scale was wrong, and so I measured a jar and changed the height to 4 cm which seemed similar Jar at the lab.
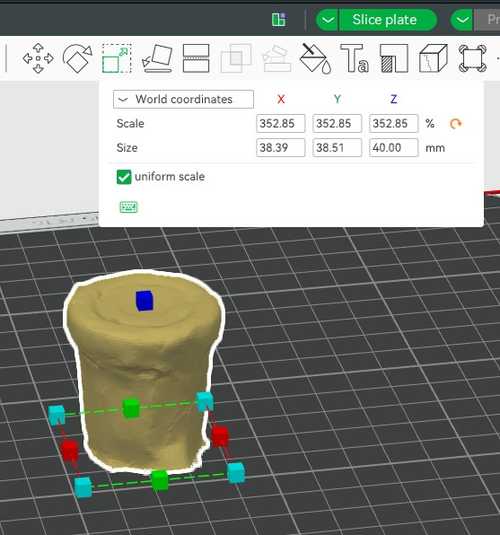
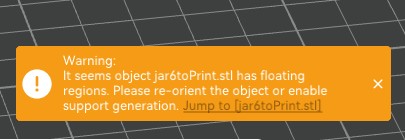
I didn't have it with me so I made an assumption that it would be the same height as my other mini jam jars. I put the infill at 5% becuase it doesn't need to be solid. I got a floating regions warning.
I was going to print anyway, but then I sliced it with supports, and it didn't seem to be that much different. So I printed with supports just in case the top rim needed supports. And voila...
This is a comparison of the jar, the scan, and the print. The 3D print looks better in person... with all red, it's hard to see where the lid starts and the contours of the print.